Last Month For Sale-A-Bration!

Sale-A-Bration Banner 2021

When Sale-A-Bration began in August, it seemed like it would go on for a long time! But now the first month is already over and we are into September! We know how fast time flies so don’t miss out! This special Stampin’ Up! promotion ends Thursday, September 30, 2021, in about 3 1/2 weeks!

In case you are new to Stampin’ Up!, you might not know what Sale-A-Bration is! Sale-A-Bration has been around since the beginning or near the beginning of Stampin’ Up, except back then it was called “Sell-A-Bration”. It really took off and has been an annual promotion ever since, one that everyone loves! However, THIS year, we are having TWO Sale-A-Brations!! We only had it starting in January before, but right now we are having the second one in 2021! And at a perfect time when we are purchasing new products anyway in the Holiday Catalog!

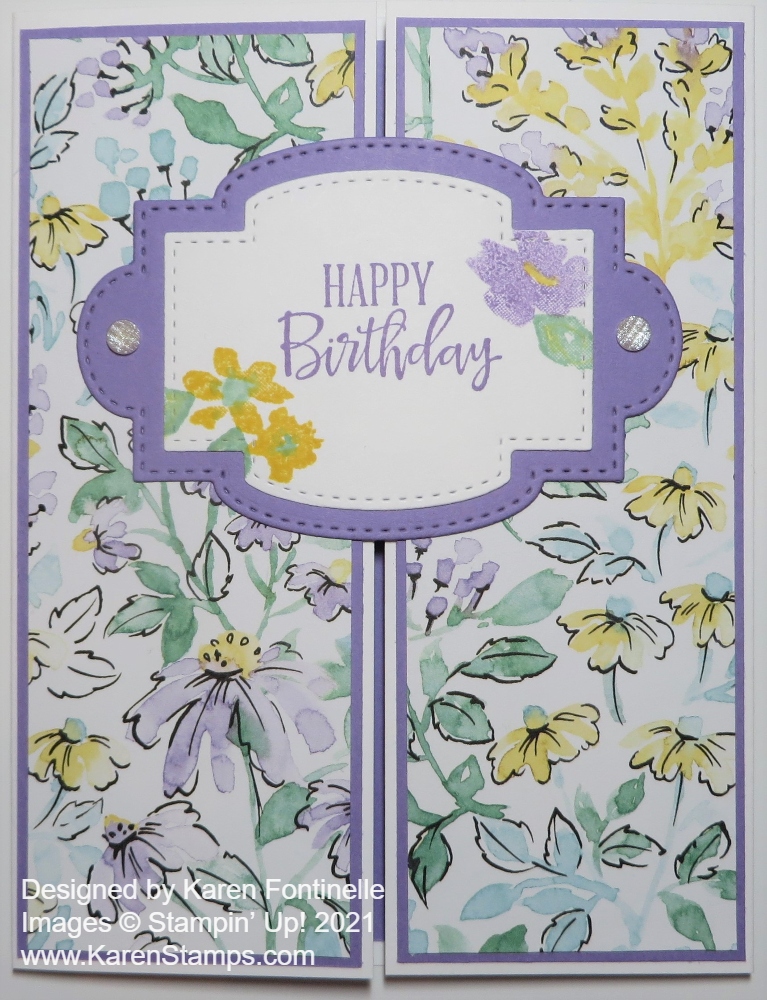
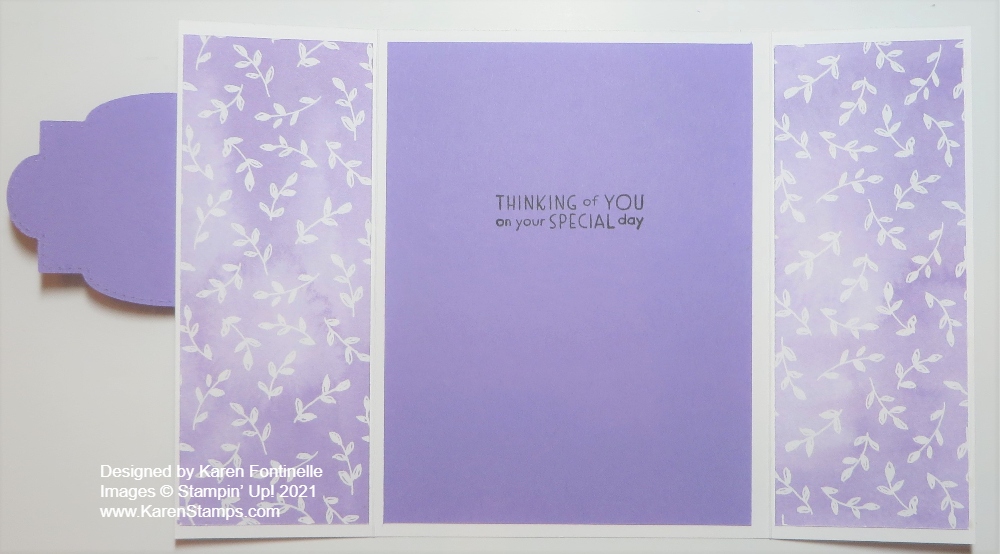
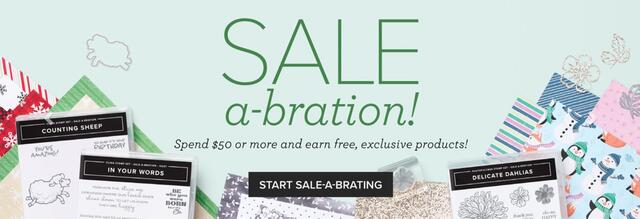
The concept of Sale-A-Bration is that when you spend $50 or more, you get to choose a FREE product in the Sale-A-Bration Brochure! And we all love FREE stamping supplies! If you spend $100 or more, you have a choice of one $100 Level product in the brochure or two $50 Level products. You will see those designations in the brochure. No limits to what you can spend and get for FREE!

TAKE A LOOK AT THE SALE-A-BRATION BROCHURE HERE!

Watch this video to learn about the Sale-A-Bration products!

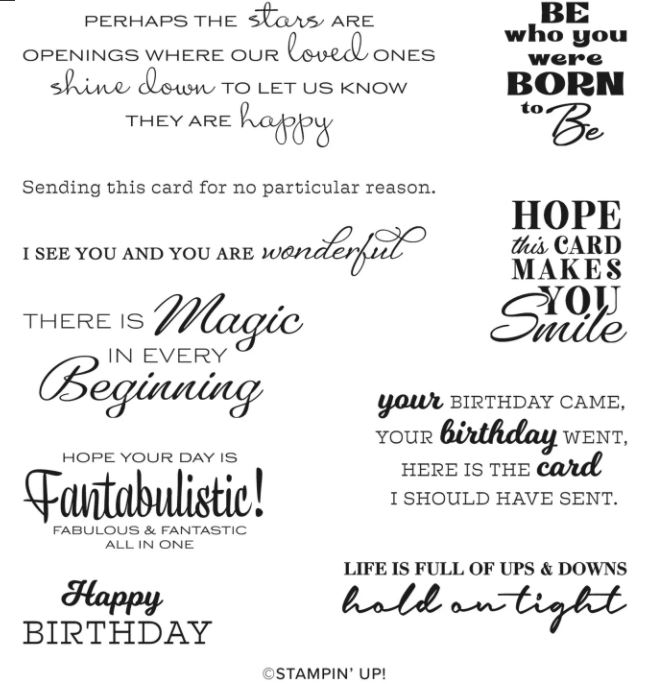
If you have a large order yourself or go in together with friends, you can choose a FREE Host stamp set, In Your Words, with a $300 order! It’s on page 17 in the Sale-A-Bration Brochure.

In Your Words SAB Host Set 2021

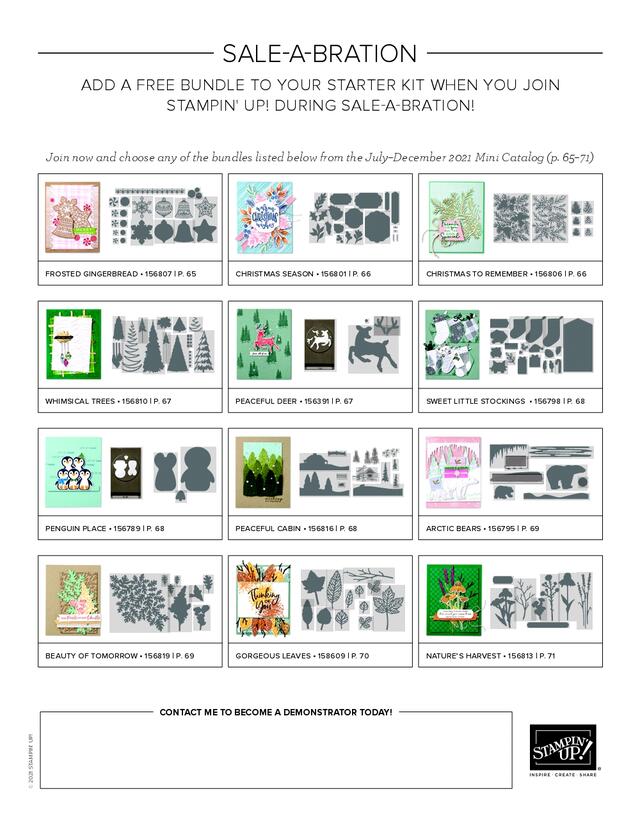
And if you would like to be a Stampin’ Up! Demonstrator and start your own stamping business, now is the time to JOIN! Read about joining Stampin’ Up! HERE on my website and let me know if you have any questions. Below, you will see the choices of a FREE BUNDLE you can add to your Starter Kit when you join during Sale-A-Bration! Click to view a clear version!

Sale-A-Bration is a fun time at Stampin’ Up! This year, it is double the fun of having a second Sale-A-Bration going on now! But it won’t last forever! Sale-A-Bration ends on September 30 and you know how time flies! Get what you want before things sell out! Enjoy the Sale-A-Bration video above!

Peaceful Prints Kraft Christmas Gift Bag

Peaceful Prints Kraft Christmas Gift Bag

One thing I always enjoy making are gift bags out of plain shopping bags like this Peaceful Prints Kraft Christmas Gift Bag. Lots of times I can use ones I get at stores, even if they have the store name printed on the front because that printing gets covered up. Just remember, it is just like making a card, maybe a larger one, that you adhere to the front of the gift bag! It’s so much fun to make a personalized bag for any occasion!

For this bag, I used the Peaceful Prints Designer Series Paper. You only have this month left to get this paper, and you can get it FREE with a $50 purchase at Stampin’ Up! during Sale-A-Bration! I tried various layers of paper and cardstock and combinations before I settled on this! Sometimes you just have to keep playing and working until it all comes together!

I used a piece of the Peaceful Prints Designer Paper for the background piece. It is 7″ x 8″ and I liked the way it matched the trees. The background paper (5″ x 6″) has little deer and tiny trees on it and is layered on Real Red Cardstock (6 1/2″ x 5 1/2″). I decided to add trees, some die cut with Christmas Tree Dies out of the Peaceful Prints paper and some out of Garden Green Cardstock. I sponged a little Garden Green Ink on the cardstock trees. I used three different tree dies to make different size trees. Some are popped up on Dimensionals and some are adhered flat on the designer paper. The deer are cut out by hand with Paper Snips from the designer paper.

The greeting had to be a little bit small to fit in the space. It is in the Frosted Gingerbread Stamp Set. It is cut out with one of the Tasteful Labels Dies and layered on a small banner die also in the set. Make some of these ahead of time and you’ll be all set for gift-wrapping during the holidays!!

SHOP STAMPIN’ UP! ONLINE HERE!

Whimsy & Wonder Traditional Christmas Card

Whimsy & Wonder Traditional Christmas Card

The Whimsy & Wonder Suite in the Stampin’ Up! Holiday Catalog uses soft pastel colors in it, but for this Whimsy & Wonder Traditional Christmas Card, I decided to just use the traditional Christmas colors of red and green!

The card base is Garden Green with a layer of Real Red Cardstock. Real Red has been my favorite color forever! If you buy a red somewhere else, like the big box craft store, you will find that their red does not compare to the perfect red of the Stampin’ Up! Real Red! I know because I bought a big package of red cardstock and envelopes when I first started stamping. When I saw how it compared to the Stampin’ Up! Real Red, I threw out the store-bought red paper!

The stamped layer is Shimmery White, my other favorite paper! It has just the slightest glimmer to it and works well with any medium, even some watercoloring. I stamped the tree from the Whimiscal Trees Stamp Set in Garden Green Ink. Old Olive would also look good. Then I overstamped it with the dots to look like little red ornaments or lights on the Christmas tree. I couldn’t resist stamping the holly and berries up in each corner of the card. I just stamped them in Garden Green and then went back in with a Blender Pen and added green ink to the leaves and red ink to the berries. Just very lightly and carefully because I didn’t want the initial stamping to smear.

The greeting is stamped from the Banner Year Stamp Set. It is stamped on Shimmery White and layered on a strip of Real Red, punched at each end with the Lovely Labels Pick a Punch. The greeting itself is popped up on Dimensionals but the Real Red punched piece is adhered directly on the card front. For some embellishment, I added the smallest Gilded Gems to each end of the red piece.

Since the tree doesn’t come with a trunk, I didn’t really like it just floating in the air, so I added a bow with the Real Red 3/8″ Sheer Ribbon. I might have preferred a really narrow ribbon but since this one is sheer, I thought it looked light enough to put in between the tree and the greeting. And since my tree needed a star at the top, I looked through my retired punches and found the right size little punch with a star and punched some Gold Foil.

The lesson here is that even though this stamp set, Whimsical Trees is “whimsical” doesn’t mean you can’t make it “traditional” with color and embellishment! Here is another card I made with the same stamped tree and the new Whimsy & Wonder Specialty Designer Series Paper in the less traditional colors. I love this card as is, but if you are looking for the red and green of Christmas, you can certainly use this tree and change up the colors. If you are looking for a more traditional Christmas card or at least a few for certain people, then try this Whimsy & Wonder Traditional Christmas Card with red and green!

Join Paper Pumpkin! Get This September Haunts & Harvest Kit!

Paper Pumpkin Sept 2021

If you are new, this is how Stampin’ Up! describes Paper Pumpkin! Think about trying it, especially this month if you like fall!

What is Paper Pumpkin? Paper Pumpkin is our monthly One-Stop Box™ that offers a unique variety of paper projects for subscribers of any skill level to enjoy! These thoughtfully themed and all-inclusive craft kits encourage Stampin’ Up! customers to explore their creativity, try new techniques, and discover their potential in papercrafting.”

This kit features three different designs for every treat box. That means whether you want to celebrate the Fall harvest or feel like getting in the Halloween mood (or a mix of both!), you can choose how you want to create your adorable treat boxes! Take your pick from crisp red apples, seasonal pumpkins, spooky jack-o-lanterns, or get creative and customize them into whatever you can imagine! 

The Haunts & Harvest Paper Pumpkin Kit contains enough supplies to create 12 treat packages which means you get to share the a-maize-ing treats with your friends and family! These treat package designs are perfect for Halloween party favors or place setting favors at a fall feast. These treat packages are the perfect way to tell your family and friends to eat, drink, and be scary!

The Haunts & Harvest Paper Pumpkin Kit not only offers the cutest giftable treat packages, it is also intended as home décor with the included wheelbarrow crafting opportunity! This month’s Paper Pumpkin box is designed with pre-traced lines and instructions to create a vintage-inspired wheelbarrow as a place to display your too-cute-to-spook treat packages.

ABOUT THE KIT

Haunts & Harvest 

  • Kit contains enough supplies to create 12 treat packages—4 each of 3 designs. The all-inclusive kit includes printed die-cut boxes, die-cut sheets, adhesive, and more!
  • Finished treat box size: 2-1/2″ x 2″
  • Includes an exclusive stamp set and a Classic Stampin’ Spot
  •  Coordinating colors: Basic Black, Pale Papaya, Poppy Parade, Pumpkin Pie, Soft Succulent

Remember, this is YOUR kit when it arrives in your mailbox in mid-September! You will be ready to start thinking about fall and fall decorating! You can make everything exactly as designed in the kit or use the supplies to make your own designs and variations! If you don’t want treat boxes, make cards out of the supplies. Change it up however you like, but I have to say, it is a treat sometimes to just open the box and not have to think about “what to make”. The plan is already there for you! There’s even a video you can watch plus the directions. It’s easy enough for everyone! If you want more than 12 treat packages, order two kits! You may be able to get a “Refill Kit” later on but those are never guaranteed. Once you are signed up as a Paper Pumpkin subscriber, you can go in the Stampin’ Up! Online Store and order any past kits or refills that are available!

I always say Paper Pumpkin is a gift you give yourself! Once a month you can count on getting a package in the mail and what is better than a box of a new stamping project and supplies!

The deadline is Friday, September 10th so sign up today so you do not forget!

JOIN PAPER PUMPKIN TODAY!

Monochromatic Shaded Summer Thank You Card

Monochromatic Shaded Summer Thank You Card

I was taking inventory of all my cardstock colors before I got an order ready for Stampin’ Up! and I came across this embossed layer in the bag with the other Pool Party Cardstock. I immediately thought that would be pretty on a simple card and this Monochromatic Shaded Summer Thank You Card turned out! Sometimes it’s your scraps that turn into something interesting!

This card has a Basic White Cardstock base, which is difficult to see in the photo. I added a Pool Party Cardstock layer to go behind the embossed layer. Another extra piece I saw with the Basic White paper was this already die-cut Scalloped Contours Die so I thought it would be perfect to use!

The floral bouquet is stamped with the Shaded Summer Stamp Set. You will find this stamp set in the Stampin’ Up! Annual Catalog on page 75. It has two pretty floral stamps and a lot of useful greetings. Another interesting thing about this stamp set is that you can earn the coordinating dies FREE during Sale-a-Bration with a $100 purchase. The die set is called the Summer Shadows Dies. Not only does it have dies to cut out the stamped flowers, but it has other flower dies, too! I didn’t even own the stamp set, but with the opportunity to get the dies free, I went ahead and ordered the Shaded Summer Stamp Set. Maybe I’ll get lucky and they will carry over the dies after Sale-A-Bration! Either way, it will be a useful combination to own.

After diecutting the flowers, I popped them up with Stampin’ Dimensionals on the die cut Scalloped Contour piece. I tied a piece of White 1/4″ Crinkled Seam Binding Ribbon around the stem of the flower piece, plus added some small, white Elegant Faceted Gems around the flower.

The greeting is in the Shaded Summer Stamp Set. As I looked at my dies to see what I would like to use, I decided on the Messages Die. You don’t have to have a whole page of stamped greetings in order to use this die that cuts out an amazing number of greetings all at one time! I just placed the little scalloped die area over my stamped greeting to see if it fit, and ran it through my Stampin’ Cut & Emboss Machine. It was perfect for this card! It fit perfectly without covering up too much of the pretty embossing on the card layer. By the way, the folder is the Ornate Floral 3D Embossing Folder. So pretty with all the little embossed flowers and leaves! I had already embossed it to use on another card but didn’t like it. Then it ended up being perfect on this card, actually inspiring the creation of this card!

Remember, if you want to keep things easy, a monochromatic card can fit the bill! I only had to stamp the floral image, not color in the flowers and leaves! Here is another monochromatic card I made a while back, that was simplest to make with just one ink color.

This is the last month for Sale-A-Bration this year! Whether you spend $50 or more to earn a FREE product in the Sale-A-Bration Brochure or spend more and get a $100 level choice, you will be sure to find something fun to spur your creativity, like this Monochromatic Shaded Summer Thank You Card.

SHOP STAMPIN’ UP! and SALE-A-BRATION ONLINE HERE!

Pretty Pumpkins Thankful Pale Papaya Card

Pretty Pumpkins Thankful Pale Papaya Card

Many times you never exactly know what you are going to end up with when you begin stamping, as I didn’t with this Pretty Pumpkins Thankful Pale Payaya Card. I knew I wanted to stamp these Pretty Pumpkins and color them with these different colors. What I didn’t know was that I would end up using this designer paper as a background layer on the card and that I would love the way it looked. The colors might not be an exact match, but I just liked it regardless!

I love the Pretty Pumpkins Stamp Set and the Detailed Pumpkin Dies! You can purchase both together in the Pretty Pumpkins Bundle and save 10%! Just add another $5.00 to your order and you will earn a FREE Sale-A-Bration product with your $50.00 purchase! Sometimes I feel I don’t need the extra expense of the die set, but in this case, there are two dies, especially the one die, that will make for really fancy and pretty pumpkins that you can’t stamp!

This card has a Pale Papaya card base. The designer paper I found in the Harvest Meadow Designer Series Paper. I hadn’t opened that package yet, but I was surprised to find this particular design in there! When I tried it out on the card, I really liked the look!

The pumpkins are stamped from the Pretty Pumpkins Stamp Set with Memento Ink and colored with Stampin’ Blends Markers. You have lots of choices of colors for your pumpkins these days, not just basic orange! I liked some of these pumpkin colors I was seeing online so I tried it out! My pumpkins are Mint Macaron, Pool Party, and Pale Papaya, using both the Light and Dark markers. The pumpkin leaves are colored with Granny Apple Green markers. Then I used the Detailed Pumpkins Die to cut out the trio.

For the background for the pumpkins, I used a scalloped rectangle die cut from the Scalloped Contours Dies. If you don’t have these dies, I highly recommend them! This die-cut is Basic White with the greeting stamped in Pale Papaya Ink It just fits on there with the pumpkins. You could stamp another color if you wanted to. This die-cut is layered on a rectangle of Pale Papaya. The pumpkins are popped up on Stampin’ Dimensionals®. For some bling, I added some In Color Jewels.

Check out THIS CARD I made previously with the Pretty Pumpkins Stamp Set and the fancy die I mentioned in the Detailed Pumpkin Dies.

This card today is actually a pretty basic card, but I think the color of the pumpkins and the designer paper in the background make it look much more than a basic designed card. This Pretty Pumpkins Bundle can be used now for fall, for Halloween, and for Thanksgiving cards and projects that you may want to make! I hope this Pretty Pumpkins Thankful Pale Payaya Card gives you some inspiration to use some different colors on a traditional card.

Pretty Pumpkins Thankful Pale Payaya Card Closeup

A Second Chance To Get the August Paper Pumpkin Kit! Don’t Miss It!

SPECIAL OFFERING FOR THE SHELLI HOPE BOX

From Stampin’ Up!:

Due to a glitch in our system, customers were unable to subscribe to Paper Pumpkin’s Shelli Hope Box between July 31– August 5. We are sorry for any inconvenience that caused, but we would like to make it up to you!

(In case you are new to Stampin’ Up! history, Shelli Gardner, along with her sister, is the CoFounder of Stampin’ Up! We always love Shelli’s creative ideas!)

From August 24 – August 31, we will be offering the Shelli Hope Box to all North American customers, regardless of subscription. (Normally you would have to have a subscription to purchase a past kit, but for this one week only, you do not, you can just buy it!!) 

The kit can be purchased through the Paper Pumpkin Refills and Past Kits section of the online store from 12:00 AM (MT) August 24 to11:59 PM (MT) August 31. If you were not able to purchase the kit, it’s available for this limited time! Shelli Hope Box refills will continue to be available to subscribers only. After this limited offering, the Shelli Hope Box full kit will only be available on the regular past kit schedule for subscribers only. 

SO… Even if you are not a subscriber now, you can order this August Paper Pumpkin Kit on your Stampin’ Up! order. What a great time to try out a Paper Pumpkin Kit without a subscription!  Mine just arrived the other day and although I haven’t gotten to make it yet, the contents look fantastic!  There is even a roll of special Blackberry Bliss ribbon included in this kit! Purchasing this kit may even help you earn a free Sale-A-Bration product!

Here is Shelli’s original video describing the August Paper Pumpkin Kit, Shelli’s Hope Box!

HOPE BOX PAPER PUMPKIN PAST KIT  #158541

Golden 50th Anniversary Card

Golden 50th Anniversary Card

This Golden 50th Anniversary Card is one I just made recently although with some retired products. I don’t usually use retired products on my blog posts, but I’m starting to find that hopefully, I will be needing some 50th wedding anniversary cards coming up in the near future so I thought maybe some of you will be, too!

One of my favorite family memories is of my grandparents’ 50th wedding anniversary and the surprise party my mother threw for them! My other grandparents didn’t make it that long so that was bittersweet. My mother wasn’t necessarily planning to do anything like a party for her parents until their next-door neighbor said she “had” to have a party for them! Relatives and friends came from out of town from all over! My grandma’s sister and her husband came ahead of time, as if they were just visiting, so she could be in place at my grandparents’ house. Another long-time family friend came from Kansas City and stayed at our house. She made really good fried chicken, I remember! The day before the party, my grandpa drove over to our house with his visiting brother-in-law to stop in! This lady had to go hide down in the basement, but then my grandpa and uncle went down in the basement for some reason so she had to hide in the bathroom and hoped they wouldn’t come in there!

On Sunday everyone showed up to surprise my grandparents at their house! It was such a fun party with relatives, friends, and neighbors! I thought my brother and I shouldn’t have to go to school on Monday because we were at this party all afternoon and evening on Sunday, but my mother sent us! Now my brother and I have some of the Golden Anniversary gifts that our grandparents received as remembrances.

Recently my sister-in-law and her husband celebrated 50 years of marriage! This is the card I sent them. You wouldn’t have to use all gold, of course, but why not?! The card base is Basic White with a layer of Basic White. Then there is a layer of Gold Foil with another layer of Basic White. The Basic White is covered by a piece of the retired Golden Garden Designer Specialty Acetate from the Spring Mini 2021 Catalog in the Fine Art Floral Suite. To the side of the acetate is a gold striped piece of designer paper from the Expressions In Ink Specialty Designer Series Paper. I covered the seam with a piece of Gold 3/8″ Shimmer Ribbon.

The numerals are made from the retired Large Numbers Framelits and cut from Gold Foil. The “50” is layered on a die cut circle of Basic White and layered on a scalloped circle of Gold Foil. That is all layered on top of a die cut from the Tasteful Labels Dies.

The “Congratulations” is embossed with Gold Embossing Powder and cut by hand to fit the gold layer. It is in the Hand-Drawn Blooms Stamp Set. I used the dies in the Banner Blooms Dies, just the banner in the bouquet, for that gold foil layer behind the greeting. Probably had to trim it by hand also!

And that’s all! Sounds complicated to write up, but if you copied it, it wouldn’t be that hard because you would already have the design. It’s pretty amazing when a couple celebrates their 50th golden wedding anniversary so they deserve a special card! Maybe you should look ahead and see if any family or friends of yours are coming up on that special milestone and think about a special card you can make, like this Golden 50th Anniversary Card!

Cute Halloween Ghost Boo Card

Cute Halloween Ghost Boo Card

My first Halloween card of the season! I love this cute pack of 6″ x 6″ paper with Halloween designs! I love the cute and whimsical Halloween styles, not the scary, dark ones. I’m hoping we can have normal trick-or-treating this year because I love handing out candy to the little ones, especially. Last year I had to block off my front door and put out a sign saying “See you next year!”

This card uses the Cute Halloween Designer Series Paper which is the 6″ x 6″ size. I just picked out the top sheet in the pack with these cute flying ghosts with their trick-or-treat bags! Isn’t that cute??!!! When I turned the paper over, I saw the design was the tiny printed “Boos”. I just had to use that on the front of the card along with the ghosts! That section started out being wider but I didn’t want to cover up much of the ghost paper.

The card base is Highland Heather with a layer of Basic Black. I played around with those two colors and Pumpkin Pie to see which ones I wanted to use and in which order. I think any other combination would also look good. I ended up with a very thin strip of the Boo paper on the left side of the card. To cover the seam and to add another color, I cut a very thin strip of Pumpkin Pie cardstock in between the two designs.

For a greeting, I got the idea to cut out the letters to spell “Boo” with the Playful Alphabet Dies. I haven’t used these dies much, but I love how they turned out on this card! I cut the letters and exclamation point out of Pumpkin Pie cardstock and layered them on one of the Tailor Made Tags Dies. You would think I shouldn’t use Highland Heather as a color for the tag because it blends into the background color of the designer paper too much, but I kind of liked that because it helped the letters stand out without detracting too much from the ghosts. I popped up the tag on Stampin’ Dimensionals® and tied on a piece of the Black & White 1/4″ Gingham Ribbon.

Sometimes you make a card and it’s just fine and you like it, and sometimes you make a card and LOVE how it turned out! That is how I feel about this Cute Halloween Ghost Boo Card and I hope it will inspire you to make some fun Halloween cards with this cute Cute Halloween paper!

SHOP STAMPIN’ UP! ONLINE HERE!

Pretty Pumpkins Gather Together Fall Card

Pretty Pumpkin Gather Together Fall Card

I just love the possibilities of this pumpkin stamp set and dies with my first attempt being this Pretty Pumpkins Gather Together Fall Card. On my first opportunity to order from the Stampin’ Up! Holiday Catalog I chose only holiday things and left fall and Halloween until later. I couldn’t wait to get my hands on this stamp set. As it is rightly named “Pretty Pumpkins” I think you will be able to make many pretty pumpkins on your fall cards and projects!

My card has a Pumpkin Pie card base and I started off planning to make it a horizontal card rather than this vertical. But I often change my mind as I go! I also started with a Basic White layer for the background. It definitely needed something and what I came up with was using my Blending Brushes to add color to the white paper! I got the idea from the bottom sample in the Holiday Catalog on page 48. The colors of ink I used were Pumpkin Pie, Crushed Curry, Granny Apple Green, and Rich Razzleberry. I only added the colors lightly, rather randomly around the white cardstock and I just LOVED those colors together! If you don’t have the Blending Brushes yet, you can use a sponge or Sponge Daubers.

As you may have guessed, the stamp set used on this card is the Pretty Pumpkins Stamp Set. If you want the Detailed Pumpkins Dies too (and yes, you do!), then purchase the Pretty Pumpkins Bundle and save 10% on the set. The sparkly pumpkin is die-cut out of the Sale-A-Bration Be Dazzling 6″ x 6″ Specialty Paper. You may think this paper looks sparkly in this photo, but I guarantee you, you will not believe how sparkly it is until you see it yourself! You can get it FREE with a $50 purchase during Sale-A-Bration through September, but don’t wait until the last minute in case they run out. Dazzling describes this paper well.

When you die-cut the Be Dazzling Paper, there is a note in the catalog that cutting glittered paper leads to dulling of the blades. I say take a chance and don’t worry too much about it. Maybe if you are going to cut the whole stack of paper with the same die, you might wear out your die. One thing I did with my pumpkin was tearing off the backing paper before die-cutting. That makes the glittered paper a little thinner and is a tip I learned a long time ago with specialty paper like this. It would also be wise to use the Adhesive Sheets on the back of the glittered paper so that the delicate design will already have adhesive on the back. Otherwise, just use teeny tiny drops of Multipurpose Liquid Glue on the back.

Now for the stamped pumpkins! I stamped the printed pumpkin with Pumpkin Pie Ink on Pumpkin Pie Cardstock. Then I used the die to cut it out. I also stamped the group of pumpkins on Pumpkin Pie but I cut them apart by hand and only used the small pumpkin. I also stamped two groups of leaves with Granny Apple Green Ink on Granny Apple Green Cardstock. After die-cutting them, I cut some of the leaves apart to make them fit how I wanted them. The greeting is stamped directly on the card in Pumpkin Pie Ink from the Pretty Pumpkins Stamp Set.

For a little bling, I also added a few 2021-23 In Color Jewels to fill in the space a little bit and add a little more sparkle! Your rhinestones and jewels don’t always have to match exactly as you can see. I doubt people pay attention to the exact color of the jewel as they do to the total look of the card with the sparkle. This Pretty Pumpkins Gather Together Fall Card has it all for fall!

SHOP STAMPIN’ UP! ONLINE HERE!

Beautifully Penned Floral Tag Card

Beautifully Penned Floral Tag Card

You won’t believe where this Beautifully Penned Floral Tag Card came from! I opened the package of Beautifully Penned Paper that I got free during Sale-A-Bration on my recent order which is all black and white in design. I saw this design with the squiggly lines and I immediately thought it looked like a fun paper to use!

My first inclination was to color in between all the lines! But that might have taken a while so I pulled out different Stampin’ Blends and just drew ON the lines in between the lines! Sometimes I used the brush tip and sometimes the bullet tip, but I think the bullet tip is a little easier. I decided it did not have to be perfect. In fact, since the curves are irregular, your hand doesn’t get into a set pattern after coloring a few lines so each one is different. This paper is only available during Sale-A-Bration through September and coordinates with the Hand-Penned Designer Series Paper in the Stampin’ Up! Annual Catalog. You will find this Beautifully Penned 12″ x 12″ Designer Series Paper on page 7 of the Sale-A-Bration Brochure.

This paper with its black and white designs is perfect for coloring using various techniques! You can color with markers, Watercolor Pencils, Blender Pen and Ink, pastels, or Blending Brushes. Or just leave it as is and have a black and white card or add a splash of color by adding some colorful flowers or other designs. Just play!

This card has a card base of Polished Pink. Black would have been interesting, too, or a layer of black on the pink under the designer paper. Or vice versa. The tag is die-cut from the Tailor Made Tags Dies. The flowers are stamped with the Color & Contour Stamp Set and cut out with the Scalloped Contours Dies. The leaves I stamped and cut out by hand. The flowers are two-step stamping but the stamps don’t line up perfectly so don’t knock yourself out trying! The tag is popped up on Stampin’ Dimensionals as is the pink flower. I had a third flower stamped and die cut but I thought the tag would be too crowded with it, so I added a Basic White layer inside the card and adhered the third flower to the inside of the card! It’s fun to decorate the inside of cards. We should really do it more often!

These are the colors I used in Stampin’ Blends markers and also the ink. These colors are in order starting from the top of the card: Poppy Parade, Daffodil Delight, Granny Apple Green, Polished Pink, Pool Party, and Flirty Flamingo.

The greeting is also in the Color & Contour Stamp Set, stamped in Polished Pink ink. And to finish the card, I added a bow tied with the Polished Pink 3/8″ Open Weave Ribbon. All of these new In Color ribbons are so pretty! I just love the style!

With every $50 you spend during Sale-A-Bration, you can choose a FREE product in the Sale-A-Bration Brochure. This Beautifully Penned Paper is available with a $50 purchase! What is better than free paper?!

What To Buy During Sale-A-Bration!

Stampin' Cut & Emboss Machine Open catalog
Images © Stampin’ Up! 2021 Stampin’ Up! Annual Catalog page 152-153
www.KarenStamps.com

What should you buy during Sale-A-Bration while you can earn a free product for every $50 you spend? If I didn’t already have one, I would surely purchase the new Stampin’ Up! Cut & Emboss Machine! It has been years ago that Stampin’ Up! came out with the Big Shot, our first die-cutting machine. I don’t know what we did before we had that! And now, we have an even better (and prettier!) machine, this Stampin’ Cut & Emboss!

There are SO many sets of dies and embossing folders, and now even some embossing folders that work as dies. It adds so much more to your cardmaking and projects. Some of the die sets even have extra little pieces that are just fun to use with your creations.

This new machine cuts even easier and better, in my opinion, than the Big Shot. It even has the convenient benefit of folding up the platform to save space during storage (if yours is ever in storage! I use mine almost every day!). The pieces that make up the “sandwich” are numbered so you know which ones to use when, depending on if you are just die-cutting or embossing.

The price for the Stampin’ Cut & Emboss Machine is $120.00. That is why I am suggesting you purchase it now during Sale-A-Bration if you have been considering it! If you add on some dies or embossing folders, to reach $150, you will be able to choose 3 FREE products in the Sale-A-Bration Brochure! Or another choice would be one product at the $100 Level and one more at the $50 Level. This is in addition to Stampin’ Rewards of 10% of your merchandise. That means another $15 or more free merchandise in any current products. This all makes this purchase a LOT more advantageous for you and the price point a lot more tolerable! It’s not a frivolous purchase, but I feel certain you will get a lot of use out of it and really step up your creative options.

Another option, for space considerations, price, or “cuteness”, is the Mini Stampin’ Cut & Emboss Machine. Why are smaller things so cute?! This small machine has a 3 1/2″ platform and will fit the smaller dies and embossing folders. The price of this machine is $60. Even with this machine, you can earn one FREE Sale-A-Bration product, although you might also want some of the dies and embossing folders to go with it and that might earn you another free Sale-A-Bration product. While I think this Mini Machine is adorable and convenient if you “travel” with your machine, whether on trips or retreats or gathering with friends to stamp, I know you will have a lot more options with the full-size machine. If you have the full-size machine, maybe you want the Mini for portability as I stated.

Sale-A-Bration runs through September 30, 2021 so you have a lot of time. However, if there are particular Sale-A-Bration items you would like to earn, there are some that may not be able to be supplied by the end of Sale-A-Bration and therefore will not be restocked once they run out. So the early bird gets the worm!

SHOP STAMPIN’ UP! ONLINE HERE!

Hand-Penned Gatefold Birthday Card

Hand-Penned Gatefold Birthday Card

Bet you can’t make a card with this Hand-Penned Designer Series Paper, like this Hand-Penned Gatefold Birthday Card, without feeling happy afterward! It’s not about making the card, it’s that designer paper that just is so pleasing to me!

Just to make things a little more interesting, I made this into a gatefold card. Instead of folding the card the normal way, you fold in both sides. The center greeting is just glued on the left side so that it can be opened!

The card base is Basic White. Cut the cardstock in half like usual – 5 1/2″ x 8 1/2″. But don’t score and fold in the middle! Score each end at 2 1/8″. The math is that you want the center of the card to be 5 1/2″ x 4 1/4″. So you divide 4 1/4″ in half, so each side “gate” will fold in to cover the center of the card. That gives you 2 1/8″ on each end. Mine somehow didn’t quite meet in the middle. Maybe I should have folded the sides in from the opposite side. You can try both ways!

For this card, I cut a Highland Heather piece of cardstock to go on the inside of the card. I made it the usual layer size, 5 1/4″ x 4″. I stamped a greeting on the inside before I adhered it to the center of the card. This greeting is from the Inspired Thoughts Stamp Set.

On the front of the card, I cut a layer of Highland Heather to go behind the Hand-Penned Designer Series Paper. Since the gate-fold panel is already pretty narrow, you have to cut the other layers pretty narrow. The Highland Heather layer is 5 3/8″ x 2″ on each gatefold panel. The designer paper is 5 1/4″ x 1 7/8″.

Now as I was putting glue on the back of this pretty floral designer paper, I also liked the Highland Heather color print on the other side. So I added that side of the designer paper to the inside panels of the card!

Hand-Penned Gatefold Birthday Card Inside

For the greeting on the front of the card, you could use a variety of shapes – circles, rectangles, squares, ovals. Use whatever you like or fits the greeting. I used these two die cuts from the Stitched So Sweetly Dies. The Happy Birthday greeting is from the Peaceful Moments Stamp Set. I stamped that in Highland Heather Ink and also stamped a few flowers and leaves in the Hand-Penned Petals Stamp Set. Layer the Basic White stamped piece on top of the Highland Heather piece. Be sure to only apply adhesive to the left side of the greeting from the middle over to the left side. Check the inside to make sure no glue is showing on the inside or it will stick to the other side of the card. I added two Elegant Faceted Gems to each side of the Highland Heather die cut.

Here is a fairly recent card I made in the gatefold style using the Expressions In Ink Designer Series Paper.

This is an easy card but the gatefold gives it a little extra pizzazz. Try your hand at making something like this Hand-Penned Gatefold Birthday Card.

SHOP STAMPIN’ UP! ONLINE HERE!

Painted Christmas Paper Christmas Cheer Card

Painted Christmas Paper Christmas Cheer Card

This Painted Christmas Paper Christmas Cheer Card uses two different designer papers, at least a tiny bit of one! You can mix and match when you are making cards and projects. Most designer papers seem to have one side that is the “star of the show” and the other side is a more generic, plainer pattern. In this case, I don’t think the paper designs were quite as clear cut, but I would say this green side with evergreen boughs is the less popular side. The other side has pinecones. I was drawn to this side that coordinates with Garden Green and opted to put a red and black plaid reindeer on the card front.

The card base is Garden Green and I added a layer of Basic White underneath the designer paper just to help it stand out a little bit. I think it makes the whole card a little brighter. The designer paper is Painted Christmas in the Holiday Catalog on page 17. That paper design just caught my eye when I saw it in the package! Lots of pretty papers in that set!

The greeting is in the Perfectly Plaid Stamp Set. I stamped it in Real Red Ink and then die cut with one of the Stitched Rectangle Dies. For a little embellishment, I added a bit of Real Red 3/8″ Double-Stitched Satin Ribbon. The greeting is popped up on Stampin’ Dimensionals®.

For some fun, I cut out one of the red and black plaid deer on the Peaceful Prints Designer Series Paper. You will find this pretty holiday paper in the Sale-A-Bration Brochure on page 8. You’ll be happy to know you can earn it FREE with a $50 Stampin’ Up! purchase. This paper even coordinates with the Peaceful Deer Bundle in the Holiday Catalog.

This is a pretty easy card to make for the holidays. If you have the Deer Builder Punch you might be able to punch out some of the deer on the Peaceful Prints Paper if it is going in the right direction. But otherwise, just cut out by hand with the Paper Snips scissors. I like to leave a tiny bit of white margin around the edge. It keeps it from being too narrow and helps it show up a little bit.

Since the card base is a little dark, put a layer of Basic White inside the card. I stamped a “Merry Christmas” greeting in Real Red Ink from the Perfectly Plaid Stamp Set and stamped one of the trees down in the corner. This way you can write a little note and sign your name inside the card without it being on dark paper.

Be sure to check out the new products for fall, Halloween, and then the holidays in the new July-December 2021 Mini Catalog (Holiday Catalog)! Get what you want the most as soon as you can so you don’t run into any backorders! And remember, that if you spend $50 or more, for every $50 that you spend, you earn a FREE product in the Sale-A-Bration Brochure! A few are free with a $100 order or you can choose two at the $50 level. Let me know if you are interested in Stampin’ Up! products and would like copies of all the current catalogs!

SHOP STAMPIN’ UP! ONLINE HERE!

Here’s the September 2021 Paper Pumpkin Kit!

Paper Pumpkin Sept 2021 Square Ad1

If you are new, this is how Stampin’ Up! describes Paper Pumpkin! Think about trying it, especially this month if you like fall!

What is Paper Pumpkin? Paper Pumpkin is our monthly One-Stop Box™ that offers a unique variety of paper projects for subscribers of any skill level to enjoy! These thoughtfully themed and all-inclusive craft kits encourage Stampin’ Up! customers to explore their creativity, try new techniques, and discover their potential in papercrafting.”

This kit features three different designs for every treat box. That means whether you want to celebrate the Fall harvest or feel like getting in the Halloween mood (or a mix of both!), you can choose how you want to create your adorable treat boxes! Take your pick from crisp red apples, seasonal pumpkins, spooky jack-o-lanterns, or get creative and customize them into whatever you can imagine! 

The Haunts & Harvest Paper Pumpkin Kit contains enough supplies to create 12 treat packages which means you get to share the a-maize-ing treats with your friends and family! These treat package designs are perfect for Halloween party favors or place setting favors at a fall feast. These treat packages are the perfect way to tell your family and friends to eat, drink, and be scary!

The Haunts & Harvest Paper Pumpkin Kit not only offers the cutest giftable treat packages, it is also intended as home décor with the included wheelbarrow crafting opportunity! This month’s Paper Pumpkin box is designed with pre-traced lines and instructions to create a vintage-inspired wheelbarrow as a place to display your too-cute-to-spook treat packages.

ABOUT THE KIT

Haunts & Harvest 

  • Kit contains enough supplies to create 12 treat packages—4 each of 3 designs. The all-inclusive kit includes printed die-cut boxes, die-cut sheets, adhesive, and more!
  • Finished treat box size: 2-1/2″ x 2″
  • Includes an exclusive stamp set and a Classic Stampin’ Spot
  •  Coordinating colors: Basic Black, Pale Papaya, Poppy Parade, Pumpkin Pie, Soft Succulent

Remember, this is YOUR kit when it arrives in your mailbox mid-September! You will be ready to start thinking about fall and fall decorating! You can make everything exactly as designed in the kit or use the supplies to make your own designs and variations! If you don’t want treat boxes, make cards out of the supplies. Change it up however you like, but I have to say, it is a treat sometimes to just open the box and not have to think about “what to make”. The plan is already there for you! There’s even a video you can watch plus the directions. It’s easy enough for everyone! If you want more than 12 treat packages, order two kits! You may be able to get a “Refill Kit” later on but those are never guaranteed. Once you are signed up as a Paper Pumpkin subscriber, you can go in the Stamin’ Up! Online Store and order any past kits or refills that are available!

I always say Paper Pumpkin is a gift you give yourself! Once a month you can count on getting a package in the mail and what is better than a box of a new stamping project and supplies!

The deadline seems like a long way off, but go ahead and sign up now and then you are all set!

JOIN PAPER PUMPKIN TODAY!