Gingerbread & Peppermint Peppermint Kisses Christmas Card

Gingerbread & Peppermint Peppermint Kisses Christmas Card

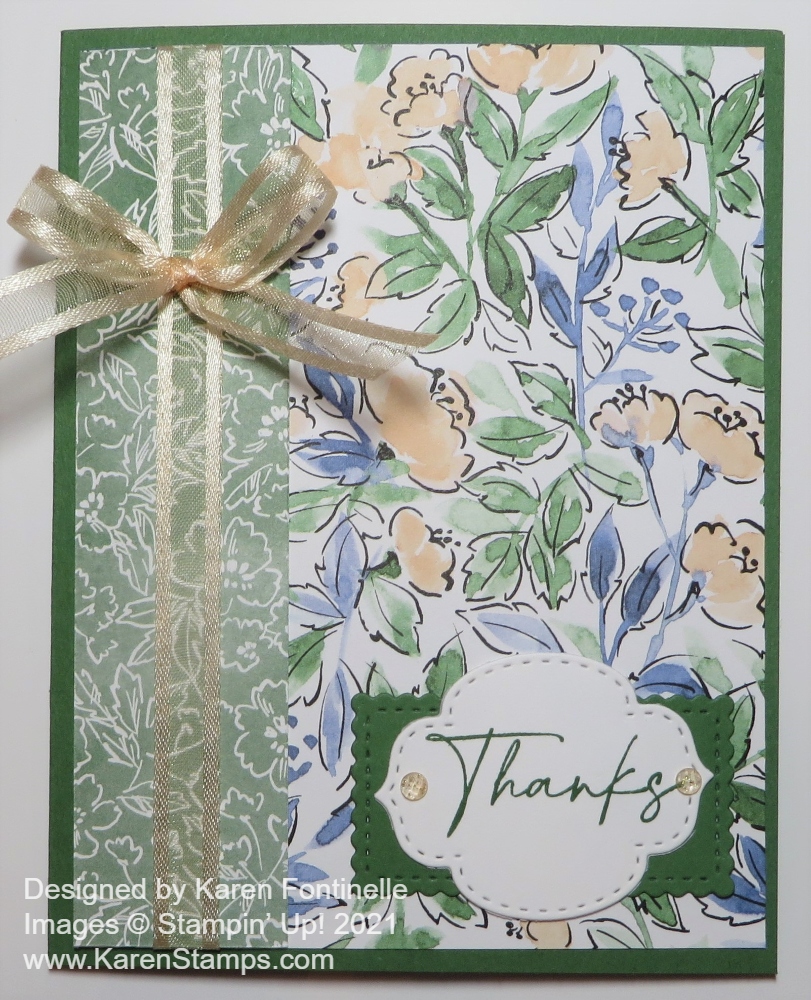
I really wanted to use this paper with the peppermint candies on it! This Gingerbread & Peppermint Peppermint Kisses Christmas Card is a very simple, easy-to-make card, and yet it turned out just fine! I’m not sure when I would use that sentiment, but it’s a cute one, especially with this paper!

The card base is Real Red and I have a layer of Basic White underneath the designer paper to help it stand out a bit. However, you wouldn’t have to use the white layer. You can just adhere the designer paper to the card base. I used the Gingerbread & Peppermint 6″ x 6″ Designer Series Paper. It has lots of fun patterns to use!

For the center of the card, I liked the next larger rectangle in the Scalloped Contours Dies but I didn’t want to cover up too much of the designer paper. So I used this rectangular die. It actually cuts slits on the sides which can either just be decorative or you could run ribbon through them or do something else creative. I chose decorative this time!

I just stamped the greeting in the middle in Real Red Ink. It is in the Frosted Gingerbread Stamp Set. There are also peppermint candy stamps so I stamped some candies on a piece of scrap Basic White and die cut them with the Gingerbread Dies. You can buy both the stamp set and dies together in the Frosted Gingerbread Bundle and save 10%. For a finishing touch, I thought I would apply Wink of Stella on the candies for some sparkle but it smeared the ink on one. I just left it so you can see even Demonstrators and long-time stampers make mistakes! It just looks like someone stuck the candy in their mouth and then decided they didn’t want it and stuck it on the card instead! LOL!

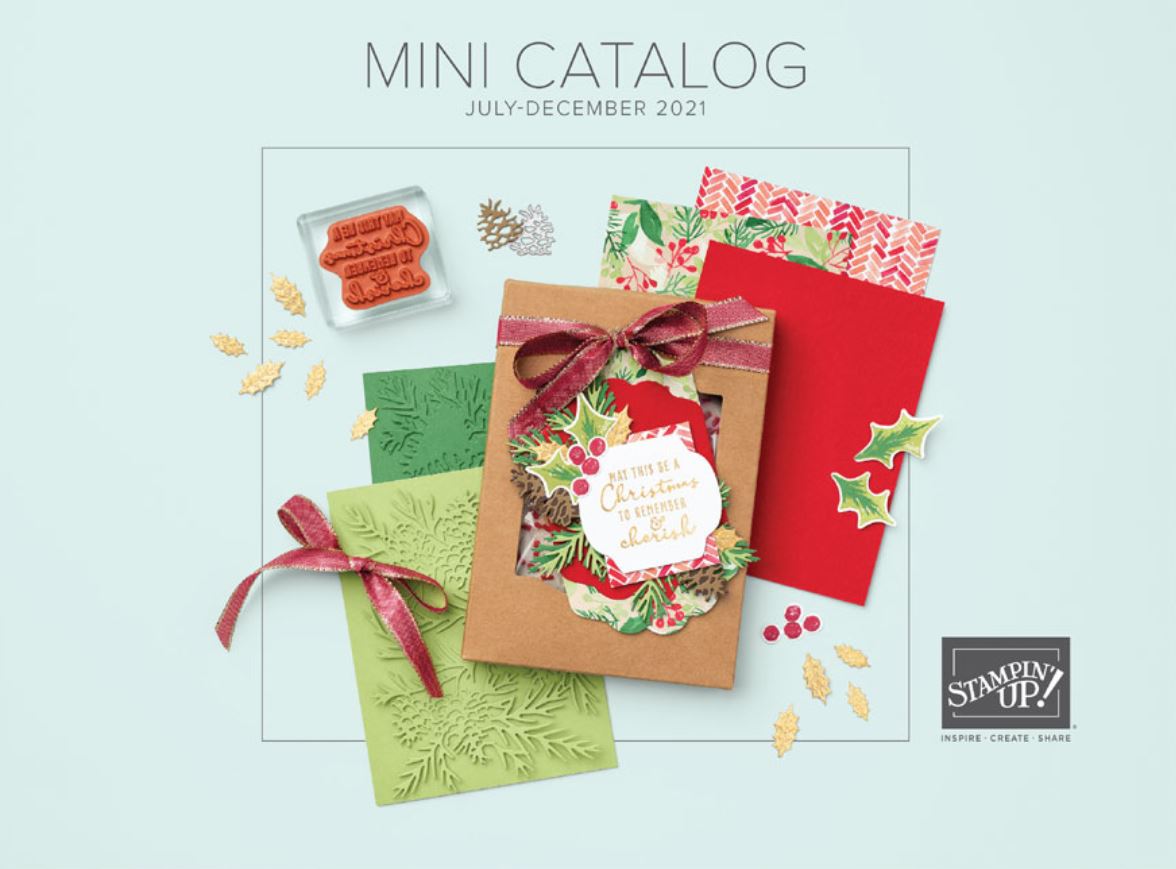
Enjoy playing around with the new Holiday Catalog stamps and other products. Remember, there is also a holiday section in the Annual Catalog, too, with some great products! When you happen upon a design and card you like that you can make in multiples easily, you will be ready to mass-produce your Christmas cards! Or you might like to make all different kinds of cards because there are so many beautiful sets and accessories! That way you don’t have to choose! You can use this same card design as I used on this Gingerbread & Peppermint Peppermint Kisses Christmas Card with other papers and stamps! Just have fun!

SHOP STAMPIN’ UP! ONLINE HERE!

It’s Sale-A-Bration (Again!) at Stampin’ Up!

Sale-A-Bration Aug Sept 2021

In case you are new to Stampin’ Up!, you might not know what Sale-A-Bration is! Sale-A-Bration has been around since the beginning or near the beginning of Stampin’ Up, except back then it was called “Sell-A-Bration”. I believe I heard it was an idea to save the company back in the beginning when things got rough, as they often do in many companies, especially small ones. It really took off and has been an annual promotion ever since, one that everyone loves! Except for THIS year, we are having TWO Sale-A-Brations!! We only had it starting in January before, but right now we are having the second one in 2021! And at a perfect time when we are purchasing new products anyway in the Holiday Catalog!

The concept of Sale-A-Bration is that when you spend $50 or more, you get to choose a FREE product in the Sale-A-Bration Brochure! And we all love FREE stamping supplies! If you spend $100 or more, you have a choice of one $100 Level product in the brochure or two $50 Level products. You will see those designations in the brochure. No limits to what you can spend and get for FREE!

TAKE A LOOK AT THE SALE-A-BRATION BROCHURE HERE!

Watch this video to learn about the Sale-A-Bration products!

If you have a large order yourself or go in together with friends, you can choose a FREE Host stamp set, In Your Words, with a $300 order! It’s on page 17 in the Sale-A-Bration Brochure.

In Your Words SAB Host Set 2021

Sale-A-Bration is a fun time at Stampin’ Up! This year, it is double the fun of having a second Sale-A-Bration going on now! But it won’t last forever! Sale-A-Bration ends on September 30 and you know how time flies! Get what you want before things sell out! Enjoy the Sale-A-Bration video!

Sweet Symmetry Thank You Notes

Sweet Symmetry Thank You Notes

When you need or think you will need, a batch of cards for a certain occasion, just take the time to make a “multitude” of cards, exactly alike or not, as I did with these Sweet Symmetry Thank You Notes. And it was certainly fun making these cards with this cute designer paper! Keep the card design rather simple and maybe even leave off the greeting until you need a card, then add whatever sentiment you need.

For these cards, I chose to use the very cute and “happy” Sweet Symmetry Designer Series Paper. I didn’t think much of this paper when the Annual Catalog first came out, but then as I saw cards that I thought were cute, I found out they had used this Sweet Symmetry Paper! So then I had to have some!

The card bases are different colors to coordinate with the designer paper. Some are Night of Navy, some are Flirty Flamingo or Calypso Coral, plus Bumblebee. Some have an extra layer of cardstock under the designer paper. I used all different patterns of the Sweet Symmetry Paper.

The greeting is the same on all the cards. I used the “Thanks” in the Biggest Wish Stamp Set. However, you could use a birthday greeting, or congratulations, or almost any greeting, small or large. You could even have a bunch of rectangles or circles cut and left blank for when you want to add an appropriate greeting to your already made card when you need one in a hurry. My greeting is die-cut with one of the Stitched Rectangle Dies.

On almost all the cards I used the Bumblebee 1/4″ Gingham Ribbon. I love this ribbon and need to order another roll or two. It’s decorative without being overwhelming, small and narrow to use easily on almost any card or project. It’s a color that goes with a lot. On one of the cards, I used the Soft Succulent Open Weave Ribbon for something different. Those In Color Open Weave Ribbons are also gorgeous ribbons to have on hand, in case you don’t have any yet!

In summary, if you want to make an assortment of cards, choose a simple design and make it over and over again. Do each step over and over. Don’t make a whole card and then make another one. Do all the cutting, then the stamping, then the gluing, then the embellishing. Whatever your order of making your card is, but do the same step over and over again. This is good to keep in mind for making Christmas cards. It really is faster as you aren’t switching out tools and supplies and you develop muscle memory of doing the same thing over and over (even on just a few cards!). The easiest is to make each card like these I made exactly the same, but once you have the design, you can also change up a few elements just for fun. I used the same package of designer paper but changed the patterns. Used mostly the same ribbon but used it in different ways. I used the same diecut greeting. Whatever you like!

Sometimes it is fun to just make simple cards that go together rather quickly and make a batch so you have a sense of accomplishment when you get finished. That’s how these Sweet Symmetry Thank You Notes came together!

SHOP STAMPIN’ UP! ONLINE HERE!

Counting Sheep Sale-A-Bration Card

Counting Sheet Sale-A-Bration Card

The stamp set and the dies used on this Counting Sheep Sale-A-Bration Card are ones that everyone can earn FREE during Sale-A-Bration at Stampin’ Up! What is Sale-A-Bration? It’s a favorite, annual promotion of Stampin’ Up! where you can earn a free Sale-A-Bration product for every $50 that you purchase. No limits! Normally Sale-A-Bration only happens once a year, in January, but this year for the first time we are having a second Sale-A-Bration now in August through September! How exciting!

During Sale-A-Bration, with a $50 purchase, you can choose this Counting Sheep Stamp Set (156591) and stamp all kinds of cute cards with these delightful sheep! If you spend another $50, you just might want to choose the Sheep Dies (156600) FREE also coordinate with the Counting Sheep Stamp Set. The dies not only cut out the sheep and the little party hat, but they also come with a fence, a flag, a balloon, clouds, and a sun! So cute, I think!! I tried to use as many things on this card to show you as I could!

I stamped all three styles of sheep with Memento Ink and then added just a tiny bit of gray color and shading on the sheep with Stampin’ Blends. I actually stamped three of each kind of sheep and die-cut them just to have a bunch of sheep ready to use! I love the fence die! I used Crumb Cake Cardstock but I also cut out some from Soft Suede.

The card base is Pool Party cardstock with a layer of Basic White. I used my Blending Brush to pick up some Pool Party Ink for the sky and Granny Apple Green for the grass. I’m still learning how to best use these Blending Brushes correctly! If you don’t have them yet, you can use Sponge Daubers or an old Stampin’ Sponge you may have. I also stamped some grass on the bottom green part.

I just placed the clouds in the sky plus the cute sun, and then played with the sheep and the fence to get them where I liked them. A couple of sheep are popped up on Stampin’ Dimensionals. The greeting is in the Counting Sheep Stamp Set. I die cut it with one of the many choices on the Messages Die. You don’t always have to stamp all the greetings and die-cut them all. Just place a scrap of paper under the one die you want to use and run it through the Stampin’ Up! Cut & Emboss Machine! To save some space, I cut a sliver off the right side of the greeting so I could slide it up against the edge of the card.

There are so many cute animal stamps in the Stampin’ Up! Annual Catalog, the Holiday Mini, and now the sheep in the Sale-A-Bration Brochure! I think these sheep are going to be a lot of fun for cardmaking and other projects, even baby cards! When you get your Stampin’ Up! order in during Sale-A-Bration I know you will have fun choosing which FREE item you want!

SHOP STAMPIN’ UP! ONLINE HERE!

Time To Sign Up for the August Paper Pumpkin Kit!

Paper Pumpkin Aug 2021 Square Ad Colorful Box

Here’s the new Paper Pumpkin Kit for August 2021 and as a big surprise, Shelli Gardner, the cofounder of Stampin’ Up! helped design and create this kit!. For those of us who have been around Stampin’ Up! for a while, Shelli has been the face of Stampin’ Up! and someone we have loved and been inspired by. If you are new to Stampin’ Up, you are probably more familiar with Shelli’s daughter, Sara Douglass, who is the CEO now. Besides the products, the Gardner family is one of the reasons we all love Stampin’ Up! So if Shelli had a hand in designing something, you can believe it will be something special! If I were you, I would sign up for this kit today! Maybe order two – one to keep and one to give away!

Paper Pumpkin is a papercrafting kit that comes to you in the mail, mid-month with a surprise project inside. We get clues about the kit, but it’s still a surprise to actually see the kit when we get it. Inside you will find all the supplies to make the cards or different project, instructions, an exclusive stamp set, an ink spot, and information on a video to watch if you like to see how it goes together. You can make the kit as designed or you can change it up or add your own extra cardstock or embellishments to make your own creations. It’s your kit when it shows up in your mailbox and you can play with it however you like!

The Hope Box is designed to be a keepsake box—keep mementos of cherished memories or reminders of what’s yet to come. Collect treats and trinkets that represent what hope means to you in your Hope Box and look inside for inspiration or share it with a friend who could use some uplifting!

What will you put in your Hope Box? Letters, song lyrics, inspiring quotes, and photographs are powerful reminders of hope and connection—and great additions to a Hope Box. For more inspiration on how to build your Hope Box, watch Shelli herself put one together in this video.

This month’s Paper Pumpkin kit includes supplies to create nine encouraging cards and coordinating envelopes in an inspiring color palette and a specially designed Hope Box!

Coordinating colors are Bermuda Bay, Blackberry Bliss, Bumblebee, Melon Mambo, Petal Pink, Pool Party, and Poppy Parade. Sounds lovely!

If you would like to find this treat in your mailbox in August, just click the link below to go to my personalized Paper Pumpkin page. You won’t have to look up my name. OR if you are putting in a Stampin’ Up! order, particularly if you are or trying to earn Stampin’ Rewards, maybe a Paper Pumpkin subscription on your order would earn you some rewards. This is called a Prepaid Subscription and just goes on your Stampin’ Up! order like any other product. You can choose various lengths, even if you are already paying a monthly subscription. Stampin’ Up! will send you a code to set up your account. No risk or obligation to continue for any length of time. You can even skip a month if you don’t have time or aren’t attracted to that particular kit. Then resume your subscription when the next month’s kit comes out.

LAST DAY TO SIGN UP TO GET THE AUGUST KIT IS TUESDAY, AUGUST 10TH!

JOIN PAPER PUMPKIN TODAY AND GET SHELLI’S KIT!

Gingerbread & Peppermint Christmas Card

Gingerbread & Peppermint Christmas Card

I wanted to play some more with the festive Gingerbread & Peppermint Paper in the Holiday Catalog and this Gingerbread & Peppermint Christmas Card is what turned out! I also wanted to try out that little decorative strip I put between the two patterns of paper. This is a pretty basic card design using designer papers and a greeting, maybe just fancied up a little bit with some diecuts.

The card base is Real Red Cardstock. I used the Gingerbread & Peppermint 6″ x 6″ Designer Series Paper. These two patterns are actually on the same sheet, just opposite sides! If the diagonal striped piece looks dirty, it’s just the splattering on the paper. I don’t know why! I die cut that middle strip with the Gingerbread Dies. They are part of the Frosted Gingerbread Bundle, if you want both the stamp set and dies and want to save 10% buying them together! I just used teeny dots of Multipurpose Liquid Glue on that strip.

The greeting is stamped in Real Red Ink on Basic White. The stamp is in the Frosted Gingerbread Stamp Set. It is die-cut with a die in the Ornate Frames Dies as is the Real Red layer. To help it all stand out a little better, I layered the greeting on a larger Basic White Layering Circles Die. And for a little bling, I added three Red Rhinestone Jewels to the greeting.

It will soon be Christmas card time so check out the new Stampin’ Up! July-December 2021 Mini Catalog for all the new stamps, dies, embellishments, and ideas and start thinking about what you would like to make! Maybe you want to make several different designs of cards so you can have fun making different ones! That’s what I like to do! That way you can use different stamp sets and supplies and see what all you can come up with….and not get tired of making a whole bunch of the same card. Whatever you like!

SHOP STAMPIN’ UP! ONLINE HERE!

Stampin’ Up! Holiday Catalog Videos!

Enjoy these videos and get a better view of these new products in the July-December 2021 Mini Catalog, otherwise known as the Holiday Mini!

View the Holiday Mini Catalog HERE!

SHOP THE HOLIDAY MINI CATALOG HERE IN THE ONLINE STORE!

Whimsical Tree Happy Holidays Card

Whimsical Tree Happy Holidays Card

This Whimsical Tree Happy Holidays Card came after I made another card for my weekly newsletter to showcase a card that could be made with this beautiful paper. Actually, that card turned out to be monochromatic! If you didn’t receive my stamping newsletter today, please sign up for my Mailing List in the red box on my blog! Then you won’t miss out!

I am in love with the Whimsy & Wonder Suite in the just-released Holiday Mini Catalog! It’s the Whimsy & Wonder Specialty Designer Series Paper that really caught my eye when I started seeing it in videos, rather than online in the catalog. We can say this about most papers, but they almost all look even better in person and this one does that! If you would like a different, soft color scheme for your Christmas cards or projects, this is the paper for you!

This card base is Mint Macaron, one of the coordinating colors of the designer paper. Then I used a layer of the foil-accented holly leaf pattern of the designer paper. It’s so pretty against that Mint Macaron cardstock! Before adhering it to the card base, I wrapped the Blushing Bride 3/8″ Frayed Grosgrain Ribbon around to the back and added a separate bow. This ribbon is so soft and pliable! You might as well get some on your order! You’ll love it!

The Whimsical Tree is stamped on Basic White with Mint Macaron ink. That piece is die-cut with a Scalloped Contours Die. I could have die cut the next larger size of the Scalloped Contours Dies, but I didn’t want to take up too much room and cover up too much of the holly leaves designer paper, so I just made a layer of Blushing Bride Cardstock slightly larger than the stamped tree piece. That whole piece is popped up on Stampin’ Dimensionals. For some extra embellishment, I added some Champagne Rhinestones on the tree and cut out two gifts from the designer paper. If you do that, feel free to cut down the packages to smaller sizes than are printed on the paper. You can make them a lot smaller if you want!

I wanted just a small greeting so I stamped “Happy Holidays” from the Poinsettia Petals Stamp Set in Mint Macaron and layered it on a small rectangle of Blushing Bride.

This card has a few steps, but nothing too difficult. Did I say how much I love the paper and the ribbon?!! I love this card! I might copy it and make some more and then I’ll have some Christmas cards ready to go in December!

Remember, the Holiday Catalog is LIVE as of yesterday PLUS there is a second Sale-A-Bration going on for two months! Spend $50 and get something free in the Sale-A-Bration Brochure! Look back on yesterday’s post for the links to the PDFs of the catalogs and shopping links. If you purchase some of the Whimsy & Wonder Suite products, you can make your own card like my Whimsical Tree Happy Holidays Card!

SHOP STAMPIN’ UP! ONLINE HERE!

Stampin’ Up! Holiday Catalog Starts Today Plus Another Sale-A-Bration!

Today begins the holiday season for Stampin’ Up! paper crafters!! The July-December 2021 Mini Catalog, otherwise known as the Holiday Mini Catalog, begins today! You’ve seen previews online, but now you can see the catalog online and actually order!

View the Holiday Mini Catalog HERE!

Sale-A-Bration Aug Sept 2021

View The Sale-A-Bration Brochure HERE!

Spend $50 or more on Stampin’ Up! products and choose something FREE from this brochure! Spend $100 and either choose two $50 items or one special $100 item! No limits!

Have fun shopping!!

Hand-Penned Floral Thanks Card

I think there is something about this paper I used on this Hand-Penned Floral Thanks Card that is just enchanting! You can’t really grasp how pretty it is until you see it in person! I know we say that all the time, but I think the catalog doesn’t do it justice. I hope you won’t pass it up! And if you order it today, August 2nd, you can get it at a 15% discount on this the LAST DAY of the Stampin’ Up! Designer Series Paper Sale! Look for the Hand-Penned Designer Series Paper.

To make this card, I used Garden Green for the card base. The sheet of paper I chose is the one on the right side of the card with the Pale Papaya flowers and blue and green leaves. The other side of that paper is the green print you see on the left side of the card! I thought both were pretty and obviously would go perfectly together for a two-paper card! That strip is cut at 1 1/4″ wide but you could make it a little wider or a little narrower if you wanted. I adhered the strip to the side with all the colors and then adhered the ribbon before adhering the whole piece to the card base. I tied the bow separately and attached it with Mini Glue Dots. This beautiful ribbon is one of the new In Color Ribbons, the Pale Papaya 3/8″ Woven Ribbon. All these In Colors ribbons are sheer and beautiful! I love all five of them!

The greeting is in the Hand-Penned Petals Stamp Set. I stamped it on Basic White in Garden Green ink. I found the Garden Green die cut rectangle in the bag with the cardstock so I just found another shape die that I could layer over it. This one in the Stitched So Sweetly Dies worked fine because the die for the Garden Green die-cut is also in that set!

That’s it! Very easy card! Be sure to look at all the papers available on the Designer Paper Sale today and save 15%!

Here is another card I made with the Hand-Penned Designer Paper, plus this one. Don’t tell me you can resist this pretty paper!

Shop Stampin’ Up! Here!

Don’t Miss Any Stampin’ Up! News!

Mailing List Mailbox

If you aren’t already on my Stamping With Karen Mailing List, consider this a personal invitation to join us! Receive my weekly newsletter every Tuesday afternoon with at least one project idea with complete instructions plus the latest Stampin’ Up! news about new catalogs, special offers, news about products, and more.

This week will be the release of the July-December 2021 Mini Catalog (I call it the Holiday Catalog!) on Tuesday, August 3rd PLUS the beginning of a second Sale-A-Bration! That is a FIRST! We have never had two Sale-A-Brations in one year! Sale-A-Bration is a period of time when, with every $50 purchase, you get to choose a FREE item in the Sale-A-Bration Brochure! No limits! If you are on my Mailing List, you will be sure to know all about this!

Also, keep up with news about the new Paper Pumpkin Kit every month and any new updates with Stampin’ Up! each week!

If you are on my blog, you will see a red sign-up box in the top right corner where you can simply put your name (or first name) and best email. If you are on your phone, you probably need to scroll way down to get to the sidebar things. OR you can go to my sign up page HERE.

You will receive an email with a link to a FREE GIFT from me, as a thank you for signing up with me!

Starting in the fall, as a thank you to my mailing list subscribers, I always send out a special email called “The 12 Weeks of Christmas” with an exclusive holiday idea for each week leading up to Christmas. You can only get these ideas if you are on my mailing list. I value my subscribers and have fun sending out these holiday ideas.

Let’s stay connected and in touch with each other over our favorite thing to talk about…..stamping with Stampin’ Up!

You are also welcome to follow me on Facebook, Twitter, Instagram, and Pinterest.

Beauty of the Earth Fall Card For a Friend

Beauty of the Earth Fall Card for a Friend

Continuing with a fall card to mitigate the summer heat (!), this Beauty of the Earth Fall Card for a Friend is easy because of the designer paper. The other day when I was making another fall card, I saw this paper in the package and wanted to use it next.

This designer paper, Beauty of the Earth Designer Series Paper, is very interesting and different. You can do so much with it. This particular sheet of paper is like a reflection, with the images strongest at the top and bottom and more white space in between. So I just cut the sheet in half at 6″ x 12″, then at 4″ wide, and then trimmed it down to 5 1/4″ long to fit on my card. You can trim off a little of the white area or a little off the bottom leafy area, depending on the look you want for your card. I trimmed off some of the white at the top. You can see on my card how the coloring fades at the top and is darker at the very bottom. Very interesting to use.

The card base is Merry Merlot. I could have chosen from a lot of colors, but I rarely use Merry Merlot so thought this was a good chance! I just adhered the designer paper to the card base and added the greeting. So easy!

Now I did make a little fancier greeting, but I could have just stamped on a rectangle and been done. The greeting is in the Beauty of Friendship Stamp Set. I stamped on Basic White with Merry Merlot ink and die cut it and a piece of Merry Merlot with dies in the Tasteful Labels Dies and layered them. Just for something different, I took two pieces of the 3/8″ Fine Art Ribbon and frayed them at the ends to put underneath the greeting. And then I couldn’t resist adding some Genial Gems to the greeting.

Here is the card I made the other day with some other paper patterns in this Beauty of the Earth DSP. It didn’t work to cool me off, but I liked it anyway, especially the red birds, just as we were seeing cardinals in our backyard!

Remember that this paper is on sale through Monday, August 2 along with eight other select papers at 15% off in the Stampin’ Up! Designer Series Paper Sale! I hope you will be inspired to make something like my Beauty of the Earth Fall Card For a Friend.

Pansy Petals Just a Note Card

Pansy Petals Just a Note Card

The Stampin’ Up! Designer Series Paper Sale has less than one week to go! This Pansy Petals Just a Note Card was made with the Pansy Petals Designer Series Paper, one of the nine select papers you can buy at a 15% discount, but only until August 2. Don’t miss out if you would like to stock up on some really pretty papers!

This card starts with a Pale Papaya Cardstock base with a layer of Pansy Petals Designer Series Paper. Really, in designing this card, I played around with some scraps I had in my package of paper. You don’t always have to stew over a card design before you start making a card. Just get out some designer paper, coordinating colors (I rewrite them on the back cardboard in black marker so I can read them instead of squinting to read the tiny print on the label!) and put different things together! Just play! Don’t be so serious and looking for perfection. Something will show up for you and it might surprise you! In fact, the center piece of designer paper, which I thought was mostly a scrap, turned out to be the inspiration for the card design! Before adhering this first layer of designer paper to the card base, I adhered a piece of the Pale Papaya & White 1/2″ Woven Ribbon around to the back.

For the center of the card, I had chosen this “scrap” piece of designer paper, the one with the dark background and a million tiny pansies all over. As I was about to put glue on the opposite side to adhere to the Calypso Coral Cardstock layer, I thought the Bumblebee-colored side would maybe be prettier on the front! So I just flipped over the idea I had and used the side that wasn’t going to show!

Next, I cut out a pretty pansy image on another piece of designer paper and popped it up on Stampin’ Dimensionals on the side of that center panel. The greeting is stamped from the Encircled in Friendship Stamp Set with Calypso Coral Ink and die cut with a Tasteful Labels Die. The card still needed a little something, so I found another small pansy and cut it out to adhere to the die cut greeting. And for a final touch, I added one of the Bumblebee Trinkets.

I think this card turned out well even being inspired by scraps! You never what you will come up with when you sit down to make a card, so just let the ideas flow even if it is a change you didn’t anticipate! That’s how this Pansy Petals Just a Note Card came about!

Beauty of the Earth Fall Trees

Beauty of the Earth Fall Trees

It is SO hot here in Houston today, I thought if I made a card with the look of fall, like this Beauty of the Earth Fall Trees card, it would cool me off! No such luck, but I still like the card! This is actually pretty much a copy of a card sample in the Stampin’ Up! Annual Catalog on page 10, showing off the Beauty of the Earth Suite of products.

Another reason for using this beautiful paper on this card was to remind you that the Stampin’ Up! Designer Series Paper Sale is going on just for this week, until August 2. If you want to stock up on papers you love or get some you don’t have yet, be sure to take advantage of the nine select papers discounted 15%. Don’t miss the Christmas paper, the Tidings of Christmas 6″ x 6″ Designer Series Paper if you would like a good Christmas paper pretty quick!

I chose Sahara Sand for the card base just because I don’t use it very much! It’s a great neutral color to use. I just have to think of it more often! The catalog sample probably uses Crumb Cake Cardstock. It’s a little darker. I cut a piece of Basic White at 4 1/4″ x 4″ for the background, although after I decided to use a piece of Cajun Craze underneath as a narrow border, I cut the Cajun Craze at 4 1/4″ x 4″ and cut the White down 1/8″ on two sides.

For the sky background on the Basic White, I used my Blending Brush with Pool Party Ink and also Balmy Blue Ink. I wanted the sky to look a little varied in color and I’m happy with the way it turned out. I didn’t want it too dark. Be sure to blend a little on scrap paper or your Grid Paper just before you apply it to the cardstock.

The two trees are diecut out of Soft Suede Cardstock with the Beautiful Trees Dies. The “leaves” on the trees are cut from two different sheets of the Beauty of the Earth Designer Series Paper. I wanted to use one that was colored leaves and one that was mostly green as if the leaves hadn’t all turned color yet. The die was great for cutting these out!

Since these trees are actually pretty large, I could see on the catalog sample that they would each hang off the side of the card. It’s a little tricky because you want to adhere the tree trunks to the sky background piece but it will also hang off that onto the bottom Sahara Sand card base. So I just saw where I wanted the tree trunk placed on the sky piece and so it would be properly placed on the Sahara Sand and glued it down only to the sky piece (which wasn’t adhered to the card base yet). Then I cut off the overhanging branches on the side. Then I added the leafy piece. Decide which tree you want overlapping the other one so you get them placed properly! This was another time I should have used the Adhesive Sheets so I didn’t have to use teeny tiny drops of Multipurpose Glue carefully on the trees! However, the leafy part has larger areas for applying glue!

I also added a stamped image of dirt or a shadow along the bottom of the card. It’s best to stamp this under each tree before you glue them down, as long as you know where you want the stamping to go. I stamped more than the catalog sample because I liked the look. I used Crumb Cake Ink.

The greeting is in the Beauty of Friendship Stamp Set and was die cut with a die in the Beautiful Trees Dies. It is popped up with Mini Stampin’ Dimensionals. You can purchase the Beauty of Friendship Bundle at a 10% discount if you want the stamp set and dies together!

And to finish off the card, I die cut the two red birds. One die cuts both birds at one time which is great! I think they are the perfect finishing touch for this card! We have some cardinals flying in our backyard. I think they have a nest in the tree in the yard behind us. One was caught in the netting around our tomato plants in the backyard, which is supposed to keep birds and squirrels away from our homegrown tomatoes! My husband lifted up the net and he eventually found his way out!

Remember to check out the Stampin’ Up! Designer Series Paper sale! You may want this paper when fall arrives so you may as well save some money while you can! The sale ends on August 2.

SHOP STAMPIN’ UP! ONLINE!

Check out the Stampin’ Up! Kits Collection!

Kits Collection Banner2

Stampin’ Up! has a new line of creative products called the Kits Collection by Stampin’ Up! Stampin’ Up! has taken the guesswork out of creativity and done the hard parts, and you get to do the fun stuff: craft! Each kit is all-inclusive and includes the predesigned projects, preprinted pieces, and even the adhesives you need to complete the projects. You also receive an acrylic block plus an ink spot, not to mention an exclusive stamp set with each kit!

There’s a wide variety of kits for all different occasions, and new kits are being added regularly. Some are called Card Kits because you make cards with them.

Others are called Crafting Kits because they might be packaging or home decor or a gift set of cards.

Some kits do not even require any stamping! Just put the pieces together for your project! It doesn’t get any easier than that!

You can shop the current selection at www.stampinup.com/kits. But hurry! Kits are available only while supplies last!

Pick the kit that’s right for you. The kits are designed for beginners so no worries if you are new to crafting. But stampers of any level can have fun with the kits too!

Watch the videos below to see how it all works, especially if you are new to papercrafting! It’s really fun and easy!

SHOP THE STAMPIN’ UP! KITS COLLECTION!