Tag Archives: Painted Christmas Designer Series Paper

Framed & Festive Painted Christmas Cards

Framed & Festive Painted Christmas Cards

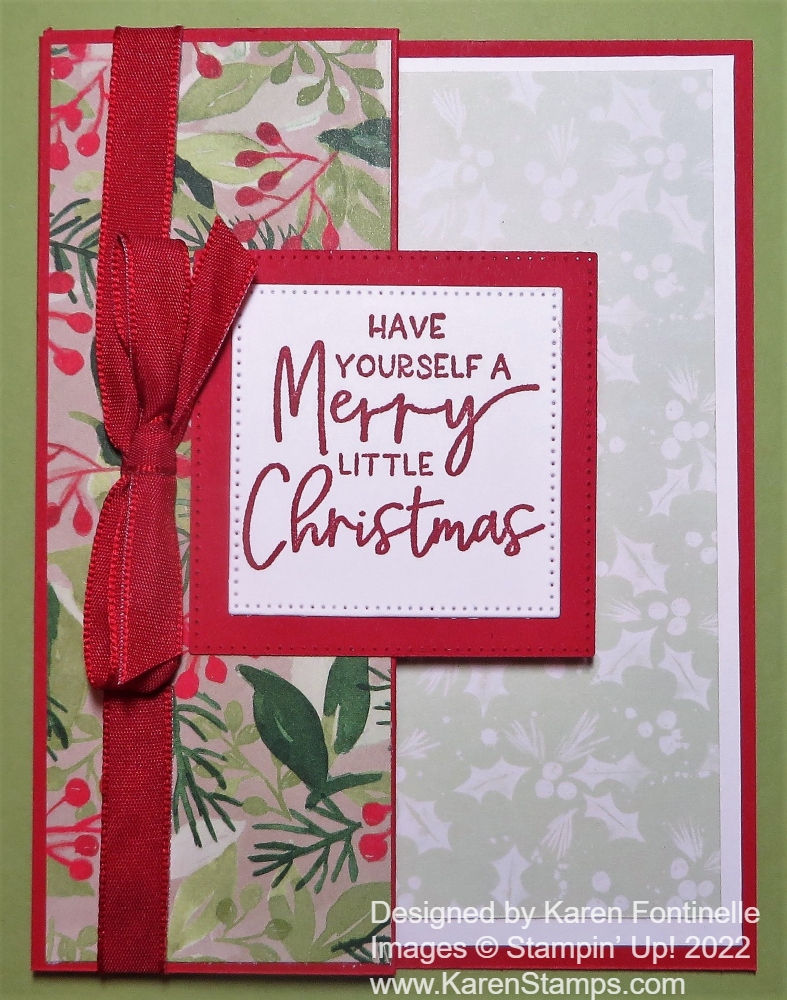
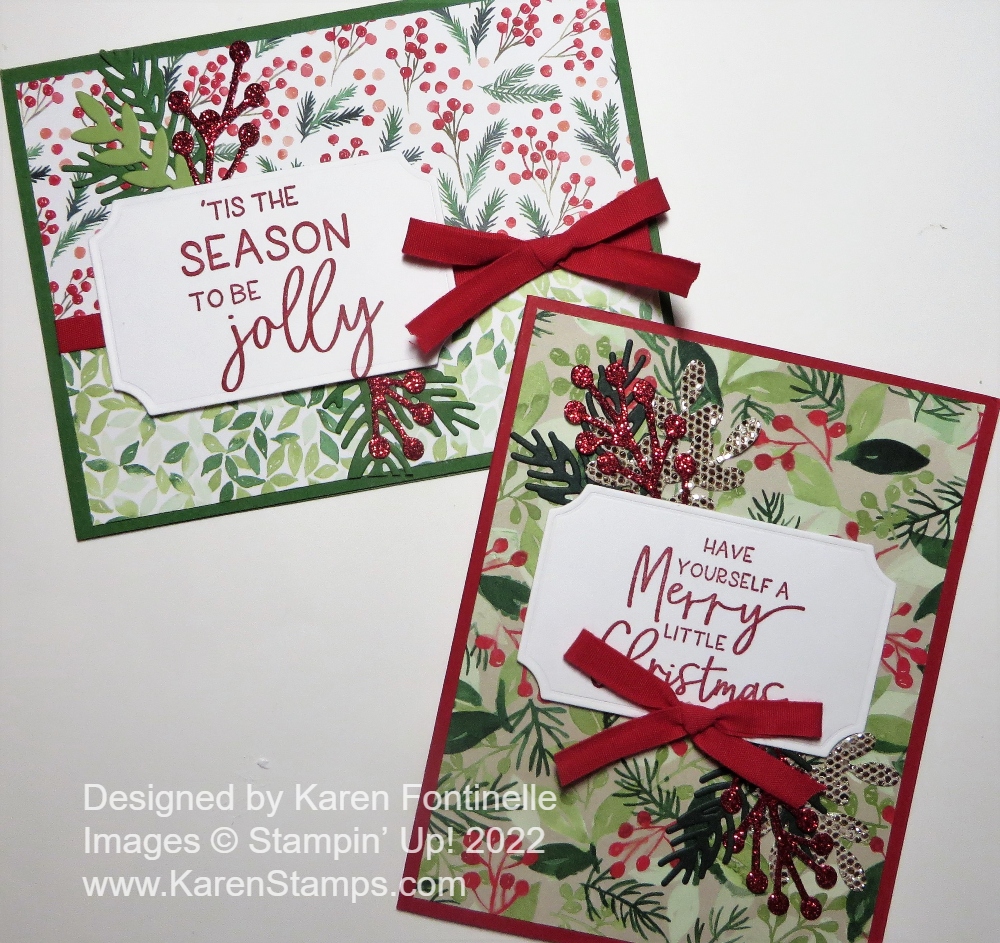
If you are looking for some more fairly easy ideas for Christmas cards, these Framed & Festive Painted Christmas Cards might be the ones. You can make yours even easier by leaving off the diecut greenery and berries. How about just designer paper, a greeting, and some ribbon?

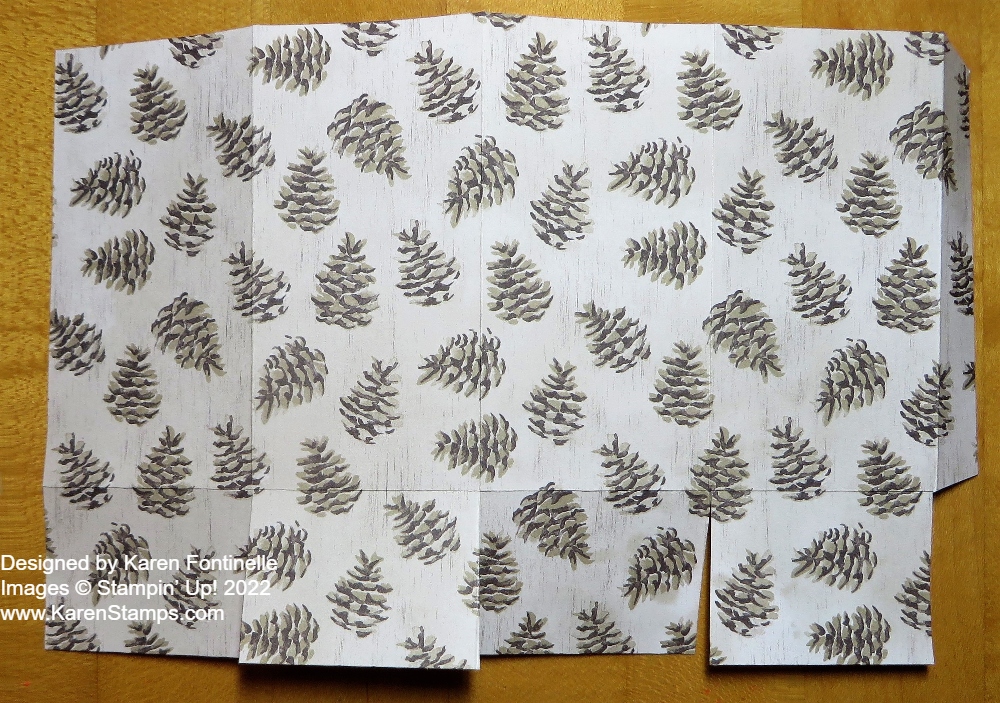
This is the Painted Christmas Designer Series Paper. It was around last year and was carried over this year which I was happy about! I still had some from last year so I was happy to have another chance to use it, and I did use it a lot. I think I only have a little bit of paper left! It is on the Last Chance Sale so you can grab some at a bargain price! I especially loved the two patterns of paper I used on these two cards.

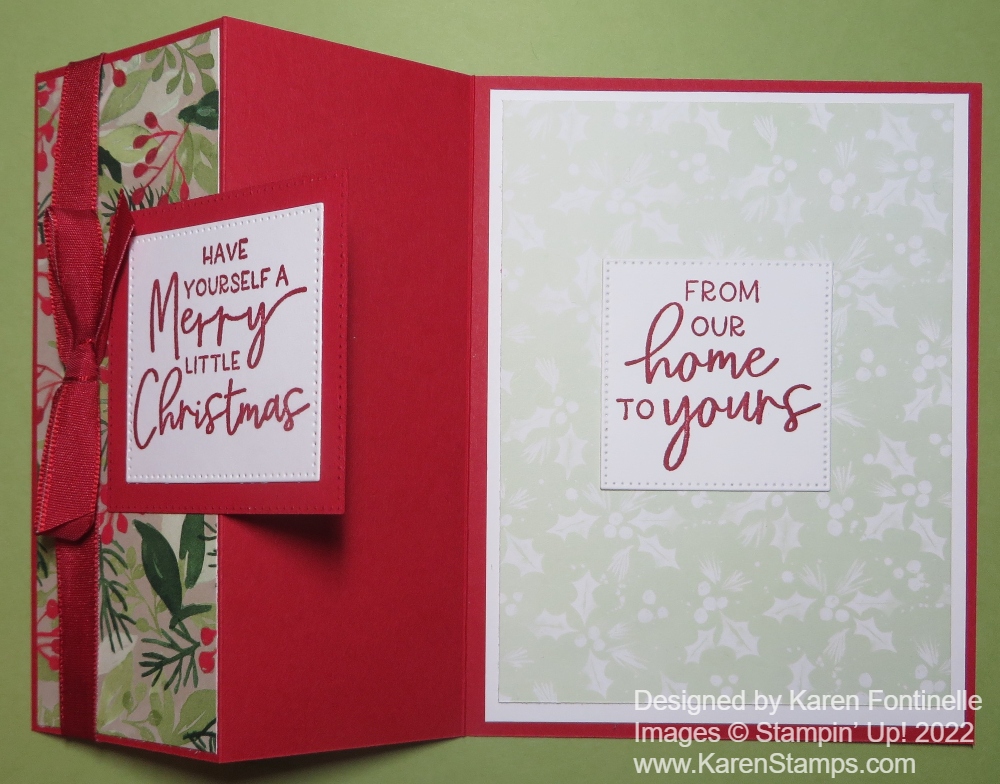
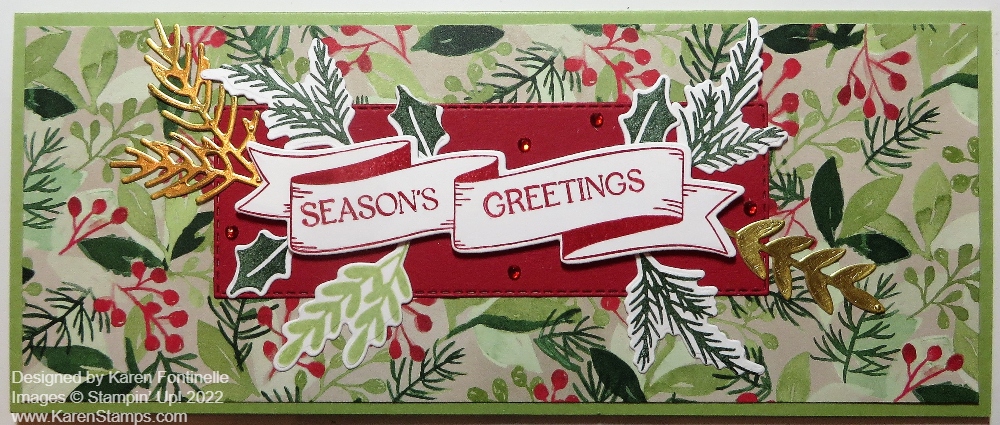
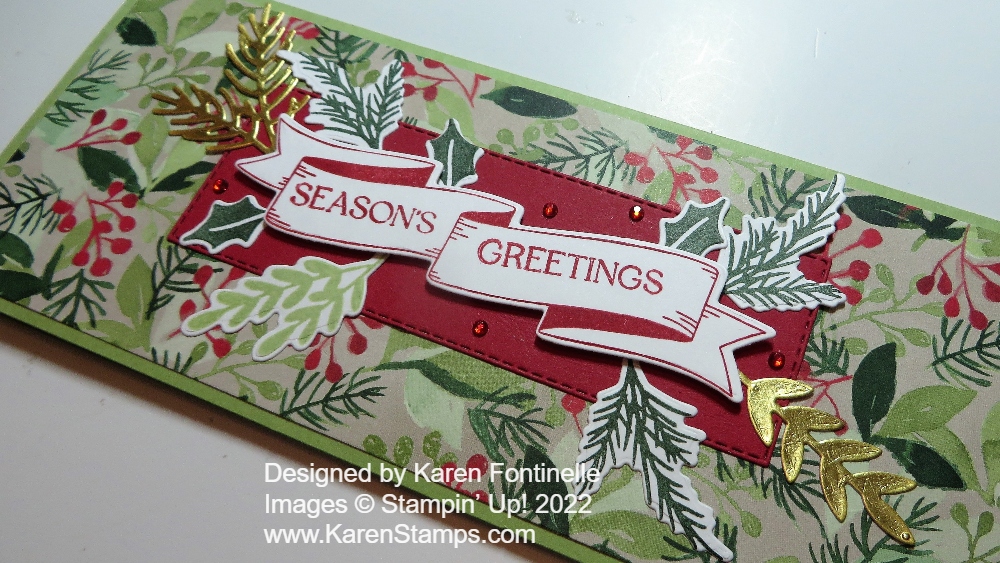
Both greetings are in the Framed & Festive Stamp Set. I loved using these this season. Stampin’ Up! released this stamp set in the Fitting Florets Collection, but this stamp set will not continue on into the Spring Mini Catalog. I loved the font of the greetings and they were ones I would actually use on my Chritsmas cards, either on the card front or maybe inside the card. If you want this stamp set, be sure to get it by January 4th.

The top card has a Garden Green card base. I had to use two patterns of designer paper because I only had this one strip with the evergreens and red berries left, not enough for a full card so I used another pattern for the bottom portion. I used this Real Red Ribbon (retired) to cover up that seam of the two papers, plus for decoration.

The greeting is stamped in Real Red ink and diecut with a one in the Painted Labels Dies. It almost looks like the die is too small for this greeting but it does actually fit.

The second card has a Real Red card base and uses a full front layer of designer paper. I just added a bow to the bottom of the greeting. The greetings are popped up on Stampin’ Dimensionals on both cards.

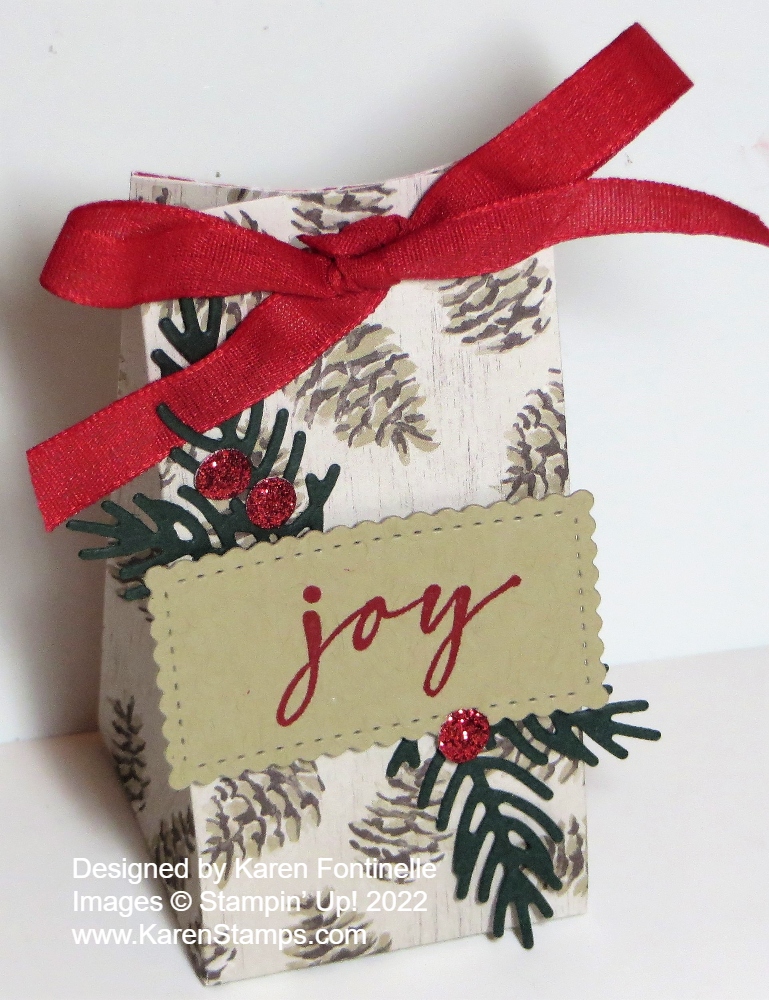
Now if you have time and energy, use whatever dies or punches you have to cut out some greenery and maybe some Red Glimmer Paper berries! I used the leafy dies in the Christmas Banner Dies and the berry die is in the Organic Beauty Dies. Just stick a few in under the greeting. On the second card, I used that really sparkly paper from the previous Sale-A-Bration! You can’t get any more sparkly than that paper!

It does take a little bit of time to die-cut that greenery and berries so if you are down to the wire (as I am!), just skip that part and make the cards without it!

Easy Painted Christmas Card

If you want to make a quick and easy Christmas card, it doesn’t get much easier than this Easy Painted Christmas Card. And it is almost time to really be making those quick and easy cards! We still have a little time yet, though! Not time to panic yet!

You can use ANY designer paper to make a card like this one. I chose Painted Christmas Designer Series Paper, one that was brought back from last year so you probably have it in your stash. If you don’t have it, beginning tomorrow, it will be 50% off in the Last Chance Sale!! This is the sale of select products that will be retired from the Holiday Mini so may be your “last chance” to get some of these products!

I used a Real Red card base and just used this generic red “baubles” pattern in the designer paper for the card front. I already had this Tailor Made Tag diecut in my Basic White package of cardstock so I used it and just stamped the greeting from the Brightest Glow Stamp Set in Real Red ink.

If you don’t have the tag dies, just cut a rectangle with your Paper Trimmer or maybe you have another die shape or punch you can use. Add some ribbon and/or some embellishments. I found these Festive Pearls in my drawer that I really hadn’t used. They are tiny and come in different colors…Cherry Cobbler, gold, silver, and Soft Succulent.

On the inside, add a Basic White layer with a stamped or handwritten greeting or message, and maybe add a strip of designer paper to the inside just for some extra decoration. There! You have a very simple card that looks just fine! The recipient will ooh and ahh over it and it only took you a minute to make! Be sure to pick easy designs when you are making multiples, especially a lot of multiples of Christmas cards!

Check out the Last Chance Sale tomorrow PLUS the Clearance Rack refresh! If you need any gifts for papercrafting friends, maybe you can pick out a few things they would like!

SHOP STAMPIN’ UP! ONLINE TOMORROW!!

Painted Christmas Z-Fold Card

Painted Christmas Z-Fold Card

If you are looking for a fairly quick Christmas card to make but still something a little special, this Painted Christmas Z-Fold Card might be the card for you! I have always thought a Z-Fold card, while easy to make, looks a little fancy. The only difference from a regular card is that you fold the front of the card back on itself.

This Christmas card starts with a Real Red card base. After cutting the cardstock at 5 1/2″ x 8 1/2″, score it at 2 1/8″ and 4 1/4″. That gives you a score line on the front of the card. After creasing the card in half as you usually do, fold on the 2 1/8″ score line, which is the center of the card front, back toward the fold. See the photo below.

Painted Christmas Z-Fold Card Open

Depending on where you want to put the designer paper on this card, or stamping, choose which patterns you want to use and where you want to adhere them. On this sample, I cut a piece of the Painted Christmas Designer Series Paper for that narrow front area at 2″ x 5 3/8″. You can make it a bit narrower and shorter if you want. You could also add a piece on the inside of the front fold. I did not on this card.

Since the inside of the card is a somewhat dark color, I added a layer of Basic White. When I saw this light green pattern of designer paper, I decided to add that as another layer that would show from the front and coordinate with the design on the front. Another choice would be to just add a narrow strip of designer paper to the right side of the inside of the card on the Real Red cardstock or on the Basic White layer if that was added.

For the greeting, I chose one from the Framed & Festive Stamp Set, a new offering in the Fitting Florets Suite. It is only available until January 4th or while supplies last. I love the font and the variety of greetings for Christmas cards and projects in this set! I stamped the greeting on Basic White with Real Red ink and diecut with one of the squares in the Stylish Shapes Dies. Then I cut out the next larger square in Real Red to be a layer for the greeting. When you adhere this to the front of the card, make sure you are only putting adhesive on half of the back so it only adheres to that folded front part of the card and not the inside too!

The “tricky” part is adding a greeting to the inside of the card. Ideally, you would like it not to show from the front of the card, so you want the greeting on the inside of the card to be completely behind the greeting on the front of the card. You could mark lightly with a pencil the area where that front greeting covers the inside so you know your boundaries. For this card, I stamped a greeting on Basic White the same size as on the front. I put adhesive on the back of that greeting and layered it face down on the back of the greeting on the front from the inside. When I had it placed properly, I folded the back of the card over so that the greeting would then adhere to the inside of the card in the correct spot. That worked pretty well, but you could use pencil marks or eyeball it!

For a finishing touch, I added some Real Red Ribbon tied around the front fold of the card. I anchored it under the bow and inside the fold with some Mini Glue Dots. You could add a Basic White panel to the back of the card if you wanted to write a note so that it wouldn’t show from the front.

This Painted Christmas Z-Fold Card is an easy one to make and the recipient will think you are a talented cardmaker! Try it today!

SHOP STAMPIN’ UP! ONLINE HERE!

Painted Christmas 2-4-6-8 Gift Bag

Painted Christmas Gift Bag

I was inspired to make something different than a card so I looked through my designer paper and this pinecone paper is what jumped out at me! I thought it would be perfect for an easy little gift bag for the holidays, like this Painted Christmas 2-4-6-8 Gift Bag. You know the holidays will be here before we know it!

There’s almost nothing easier to make than a 2-4-6-8 gift bag! And so versatile! you can leave the top open or you can pinch it closed, as I did. Make a lid if you like. All this one takes is a piece of paper – cardstock or designer series paper – cut at 5 1/2″ x 8 1/2″. I used the Painted Christmas Designer Series Paper which was around last year and has returned this year in the Holiday Mini Catalog so you may have some! Put it in your Paper Trimmer or Simply Scored board to score at 2″, 4″, 6″, and 8″. Make sure you pay attention if there is a pattern so you have the design going the right way and not upside down or something. Then turn the paper lengthwise and score at 1 1/2″ or 2″ to make the bottom flaps of the bag. You can vary the height of the bag if you make it wider than 5 1/2″. Then cut those score lines for the flaps up to the horizontal score line. Also, cut off the tiny little 1/2″ piece at the end. Check out the paper below.

Painted Christmas 2-4-6-8 Gift Bag

To assemble, crease all the score lines with a Bone Folder for a good fold, and then see how the bag is going to go together. Apply adhesive (Multipurpose Liquid Glue gives you some wiggle room to get the paper lined up but Tear & Tape or Stampin’ Seal+ is good, too!) to that narrow 1/2″ piece on the end. You don’t really have to hold the bag up in the air to adhere the other side to that 1/2″ side. Just lay it flat on the table and carefully fold over the opposite side to adhere to that 1/2″ side. Then just fold in the flaps, trying to not have seams showing on the front side of the bag. Apply some adhesive to the flaps and always stick your Bone Folder or something down inside the bag to put pressure on all those flaps and make sure they have fully adhered together. If you want the top of the bag closed AFTER you put your gift or treat inside, just pinch in on the sides and then close the top with ribbon through some punched holes, a staple, or some kind of clip. Whatever you like!

To decorate the bag, I used a little diecut rectangle out of Crumb Cake Cardstock and die-cut some evergreen branches out of Evening Evergreen Cardstock using the Christmas Banner Dies. I had a scrap of the Real Red Glimmer Paper in the 6″ x 6″ Pack so I diecut some red berries just in case I wanted to use them. The “joy” is stamped in Real Red ink from the Brightest Glow Stamp Set. You can purchase the whole Brightest Glow Bundle with the stamp set and some fancy dies, but if you just need some more or some Christmas greetings, you can just get the stamp set.

This little Painted Christmas 2-4-6-8 Gift Bag started out with some not real exciting pinecone paper and got turned into a real Christmasy bag for a small gift or treat! Time to get ready for the holidays!

Slimline Painted Christmas Banner Card

Slimline Painted Christmas Banner Card

I remembered that one of the Christmas papers in the Holiday Mini Catalog is a returning one, Painted Christmas! And I have it from last year so I was anxious to try it out again! After pulling out all the papers and some coordinating colors of cardstock, I came up with this Slimline Painted Christmas Banner Card, much to my surprise!

I say “much to my surprise” because I didn’t imagine I would be making a slimline Christmas card! But you never know what you may come up with! As it turned out, from the pieces of designer paper and scraps of cardstock, it just seemed like they would fit well as a slimline card! This is even a fairly large one that could be used if you wanted a lot of people to sign the card!

The card base is 8 1/2″ x 7″, folded in half so the width is 3 1/2″. I used Pear Pizzazz cardstock. The layer of Painted Christmas Designer Series Paper is 3 1/4″ x 8 1/4″.

For the greeting, I decided to use the Christmas Banners Stamp Set. I stamped the banner in Real Red ink, diecut it with the Christmas Banner Dies, then stamped the words. You could do all the stamping before die-cutting. The stamp set and dies can be purchased together as the Christmas Banners Bundle so you can save 10%. I thought the banner might need a background to stand out better so I used Real Red cardstock to die cut a Stitched Rectangle. You might notice it is longer than the actual die. I used that technique to partially cut the rectangle, then stop and move the die down longer, lining it up with the already cut die-cut lines. You will feel it fit in there. But don’t roll that end of the die through the Stampin’ Cut & Emboss. Start it farther down and then roll the platform past the longer end. If you try it, you will figure it out! It always takes me a minute to remember how it works, but it’s a good technique when you want a longer die.

Next, I stamped and diecut lots of the leaves and stems in the Bundle to decorate around the greeting. I even found a scrap of gold foil in my little pile so I used that for a little gleam on the card. The banner greeting is popped up on Stampin’ Dimensionals® and the stems can be slid a tiny bit underneath the banner around the sides. Just lay around with the pieces that you have and see what looks good. For a finishing touch, I added some Red Rhinestone Basic Jewels.

This card will fit into one of those long business envelopes or you can use the Slimline Envelopes in the Annual Catalog. Here is another slimline card, but much smaller, in this post. That one is 3″ x 6″ but I think that’s a good size too. Just make your cards to fit the envelope you have! We are past July 25th so it is LESS THAN five months until Christmas! I hope this Slimline Painted Christmas Banner Card offers you some inspiration for a holiday card!

SHOP STAMPIN’ UP! ONLINE HERE!

Painted Christmas 2-4-6-8 Gift Bag

Painted Christmas 2-4-6-8 Gift Bag

The time is rapidly approaching when we will need all shapes and sizes of gift bags and boxes so here is a basic, quick, and easy Painted Christmas 2-4-6-8 Gift Bag. You can vary the measurements if you need something taller or larger. But learning how to make a 2-4-6-8 box (or bag) is a basic every stamper should know!

Here’s how to score your paper. This paper is 8 1/2″ x 5 1/2″. Just score at 2″, 4″, 6″, and 8″ which leaves the narrow little 1/2″ strip on the end which will be the tab to glue the box together. Then turn the paper and score at 1 1/2″ to form the bottom flaps. Cut off that smallest little section on the 1/2″ flap and cut up on the score lines to the 1 1/2″ score line to make the flaps at the bottom.

Diagram 2-4-6-8 Box

I used Real Red Cardstock because I wanted to use designer series paper on the side panels for decoration. I used the Painted Christmas Paper to cover each panel. Since each panel is 2″ wide by 4″ long, I cut the designer paper at 1 3/4″ x 3 3/4″. It’s easiest if you adhere the DSP pieces to the bag panels while the paper is flat before assembly.

Just crease and fold all the score lines to make it easy to assemble. If you are using patterned designer series paper with a pattern, be sure to think about the direction of the paper before you score and cut.

You have the choice of leaving the top open if you like or pinch it closed like I did, pushing in on the sides to indent a little. Punch holes in the top for ribbon or use some kind of clip instead to hold the top closed.

Here is another bag I made recently in THIS POST.

Just add a tag or adhere a greeting and decorate additionally however you like!

Don’t forget today is FREE SHIPPING at Stampin’ Up! all day with a $50 minimum order!

GO SHOP!

Painted Christmas Paper Christmas Cheer Card

Painted Christmas Paper Christmas Cheer Card

This Painted Christmas Paper Christmas Cheer Card uses two different designer papers, at least a tiny bit of one! You can mix and match when you are making cards and projects. Most designer papers seem to have one side that is the “star of the show” and the other side is a more generic, plainer pattern. In this case, I don’t think the paper designs were quite as clear cut, but I would say this green side with evergreen boughs is the less popular side. The other side has pinecones. I was drawn to this side that coordinates with Garden Green and opted to put a red and black plaid reindeer on the card front.

The card base is Garden Green and I added a layer of Basic White underneath the designer paper just to help it stand out a little bit. I think it makes the whole card a little brighter. The designer paper is Painted Christmas in the Holiday Catalog on page 17. That paper design just caught my eye when I saw it in the package! Lots of pretty papers in that set!

The greeting is in the Perfectly Plaid Stamp Set. I stamped it in Real Red Ink and then die cut with one of the Stitched Rectangle Dies. For a little embellishment, I added a bit of Real Red 3/8″ Double-Stitched Satin Ribbon. The greeting is popped up on Stampin’ Dimensionals®.

For some fun, I cut out one of the red and black plaid deer on the Peaceful Prints Designer Series Paper. You will find this pretty holiday paper in the Sale-A-Bration Brochure on page 8. You’ll be happy to know you can earn it FREE with a $50 Stampin’ Up! purchase. This paper even coordinates with the Peaceful Deer Bundle in the Holiday Catalog.

This is a pretty easy card to make for the holidays. If you have the Deer Builder Punch you might be able to punch out some of the deer on the Peaceful Prints Paper if it is going in the right direction. But otherwise, just cut out by hand with the Paper Snips scissors. I like to leave a tiny bit of white margin around the edge. It keeps it from being too narrow and helps it show up a little bit.

Since the card base is a little dark, put a layer of Basic White inside the card. I stamped a “Merry Christmas” greeting in Real Red Ink from the Perfectly Plaid Stamp Set and stamped one of the trees down in the corner. This way you can write a little note and sign your name inside the card without it being on dark paper.

Be sure to check out the new products for fall, Halloween, and then the holidays in the new July-December 2021 Mini Catalog (Holiday Catalog)! Get what you want the most as soon as you can so you don’t run into any backorders! And remember, that if you spend $50 or more, for every $50 that you spend, you earn a FREE product in the Sale-A-Bration Brochure! A few are free with a $100 order or you can choose two at the $50 level. Let me know if you are interested in Stampin’ Up! products and would like copies of all the current catalogs!

SHOP STAMPIN’ UP! ONLINE HERE!