My new Stampin’ Hot Foil System arrived the other day along with a few dies, stamp sets, and foil. It took another day or two to find a block of time to try it out. I admit I was a nervous wreck checking and rechecking the directions at first, so I didn’t make a mistake and ruin the whole thing. However, even my first attempt turned out BEAUTIFUL and PERFECT. I would say it looks “professional”. And that was just my first try!
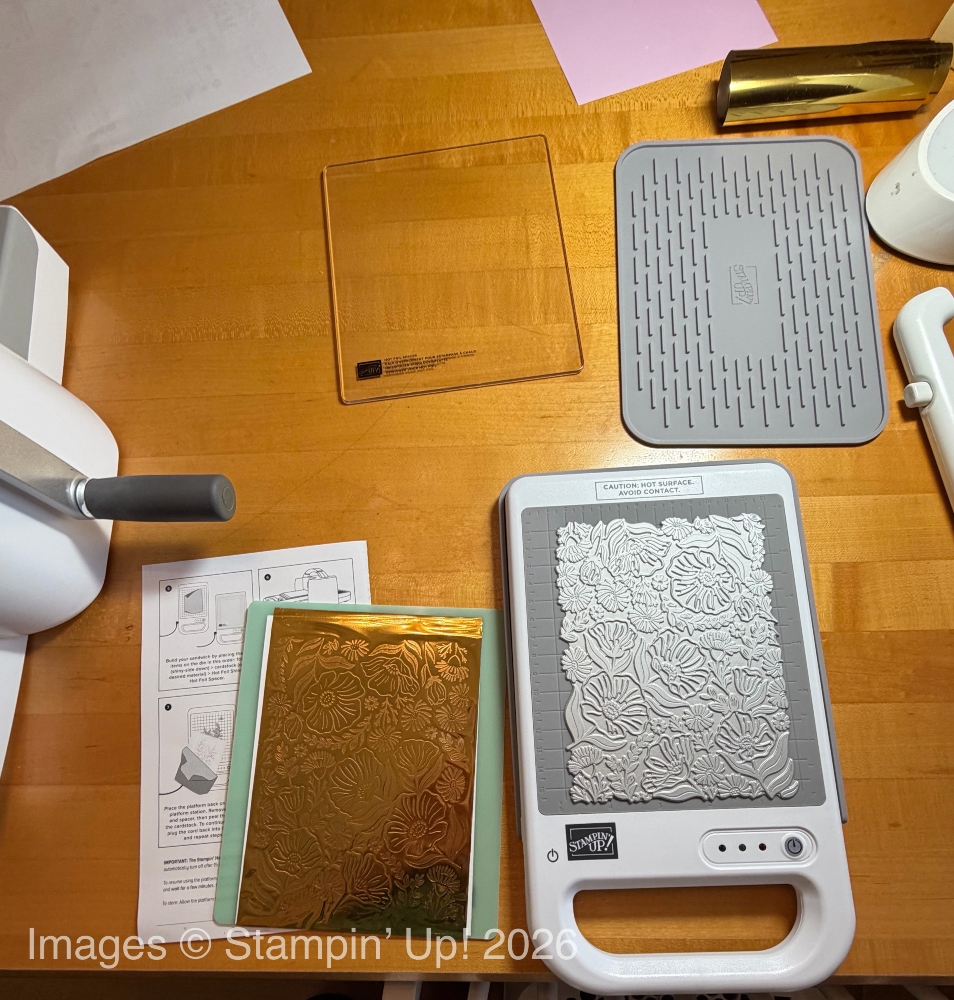
Here is my FIRST TIP!! Your system will come in a variety of boxes. When you take the power cord out of its box, be sure you also take out the little extension plug, I’ll call it. I took out the main power cord, with a big black box attached. I set up all my supplies for the hot foiling and when I went to plug in the platform, the plug did not match the outlet on the side!! I thought I would be calling Stampin’ Up! today and probably would have to send the whole thing back because obviously I got the wrong thing. I checked all the numbers on my order and the box. I knew the plug is actually magnetic, but this thing did not match at all. When I told my husband about this major problem, he looked in the box and there was a short little cord with the correct plug on the end that I needed to connect to the other big cord! My HERO!! I was thrilled that I had everything I needed and glad I had not thrown out the boxes before using the whole system! So KEEP your boxes, just in case. If anything was wrong, you would want those boxes if you had to return the system. And look for that extra little cord and plug!
The next day I got everything set up again and tried it out! Everything worked perfectly! Make sure you have the little pamphlet of instructions handy and be sure you read them. I think there is just a little learning curve on the initial set up and steps, but we will all get the hang of it quickly!
My favorite hot foil die is the Garden Silhouette Hot Foil Die. It is one big die. After foiling your paper, you can cut it down to fit your card front or whatever size you want it. I used my Paper Trimmer and it worked fine. The Paper Trimmer worked fine with cutting the piece of foil, too, but you can also use a scissors. Another tip: Save your used pieces of foil in a folder or box because there are ways to reuse them.
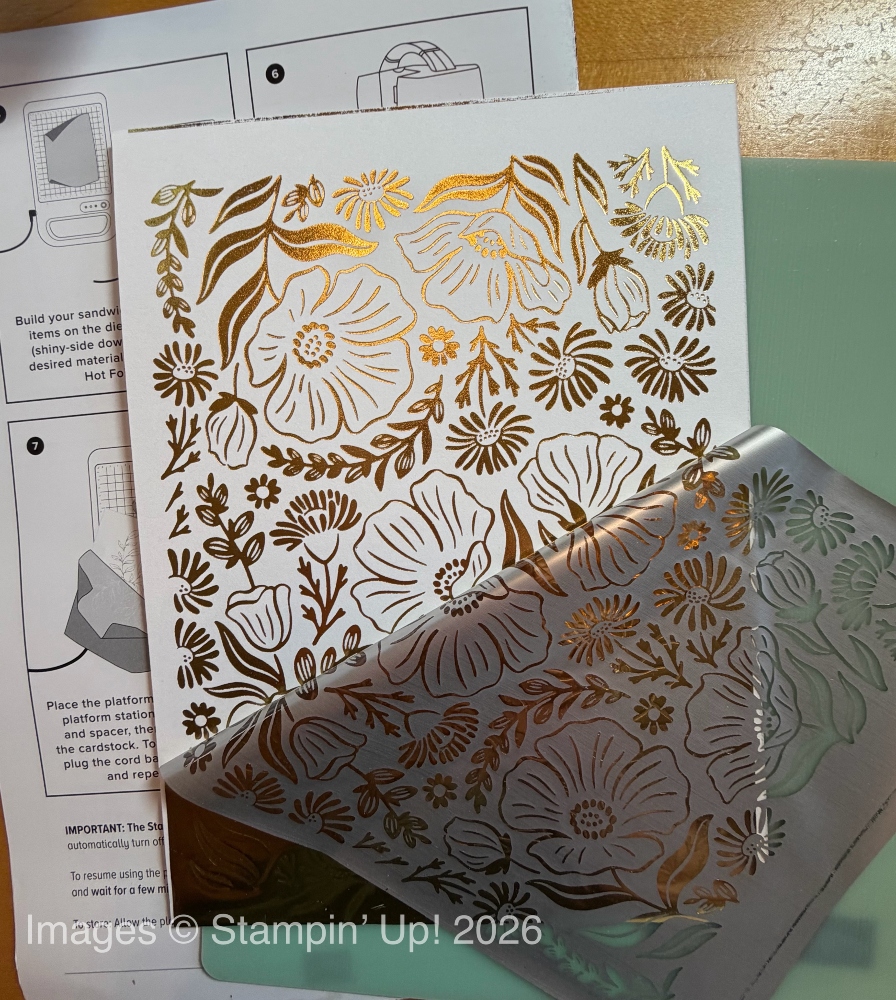
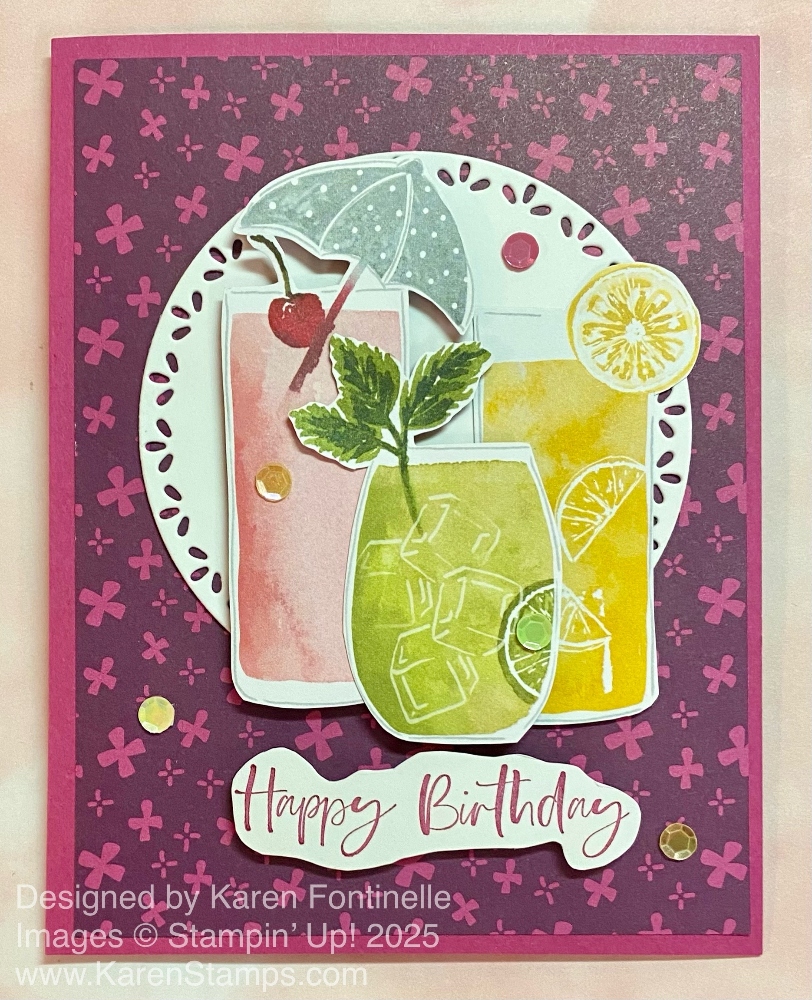
The foil on the Basic White Cardstock just looks perfect!! Below is the card I made with it. I decided to put it on a card base of Melon Mambo. The greeting is in the Scalloped Blooms Stamp Set. It is stamped in Melon Mambo ink. However, if you wanted it extra-fancy, you could dry emboss (our old method with the Heat Tool and powder) the greeting in gold. I layered it on a piece of Gold Foil. The ribbon is the Gold Striped 3/8″ Mesh Ribbon, which is currently unavailable but due back in stock the week of September 14th. You can use whatever you have. Another ribbon that is retired I believe, that looks good with this card is the White With Gold 3/8″ Ribbon in the Spring Mini on page 24. You may have that. I adhered a piece of ribbon from top to bottom wrapped around on the ends to the back of my hot foiled piece, then added a large bow separately with Mini Glue Dots on top of the ribbon.
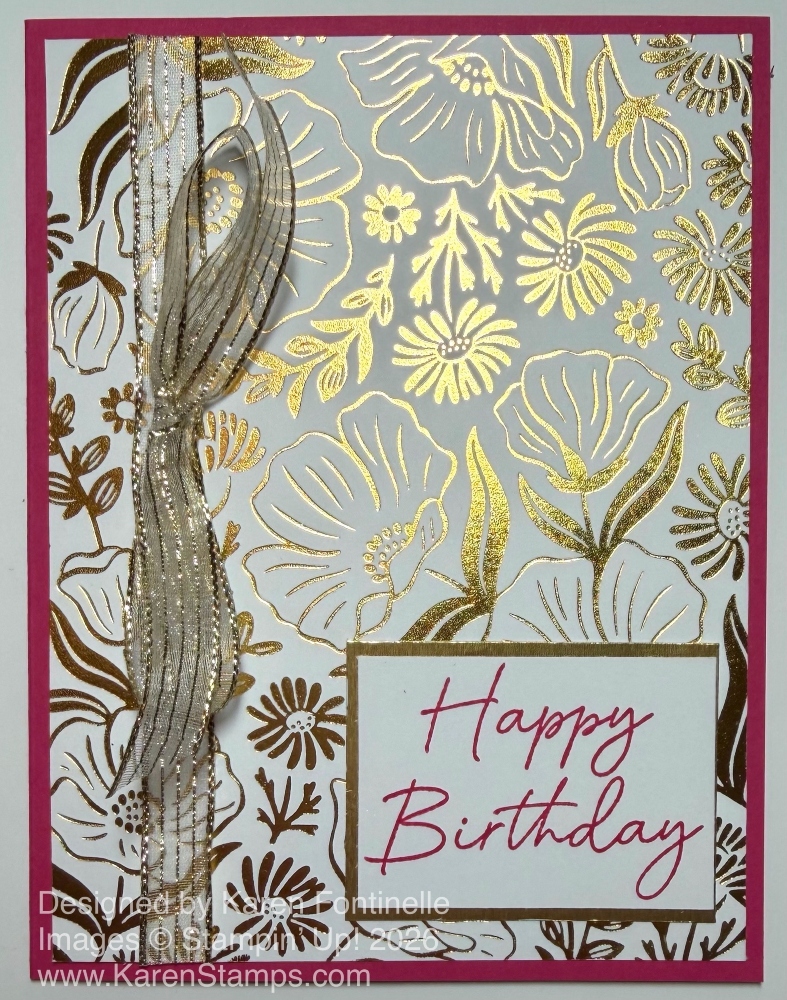
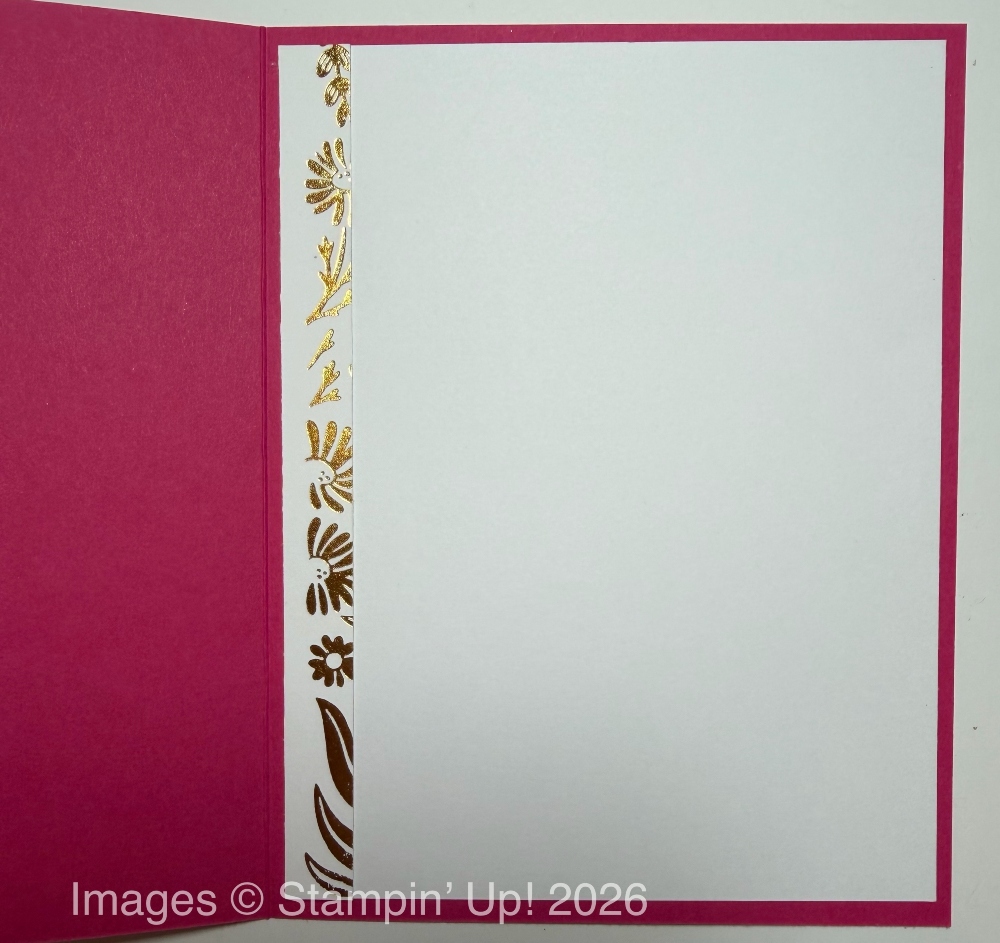
Here is the inside of the card. I added a Basic White layer on which to stamp or write a message. Along the side I added a scrap of hot foiling that I had cut off the Garden Silhouette piece to make it fit on my card front. Depending on what you cut off as scrap, you might save those pieces and maybe you can use them in some way!
I thought the Butterfly Flight Dies would be the most popular, but apparently it is the Garden Silhouette Hot Foil Die because it is “currently unavailable”. If you want this die, please put your email in the notification box when you look up that die, and Stampin’ Up! will email you when it is back in stock. Then jump on it, if you can, because sometimes a popular item sells out again as fast as it is back in stock.
If you do not want the Stampin’ Hot Foil System, do not look at any videos online of Stampin’ Up! Demonstrators and Customers enjoying their new toy! Everyone seems so thrilled, so do not watch and get taken in by all the excitement!! :). You may not be able to resist!! Don’t forget – even though it is a big investment, you will earn Rewards to use on future orders and/or you can apply any Rewards you already have to bring down the cost (a little!). You know how creative all these stampers are, so I think we are only at the beginning of what we can do with hot foil! Plus, you receive the Metallic Craft Class FREE with the purchase of the system before January 2027! You can watch it any time and as many times as you like.