Tag Archives: Cute Halloween 6" x 6" Designer Series Paper

Halloween Candy Bars

Halloween Candy Bars

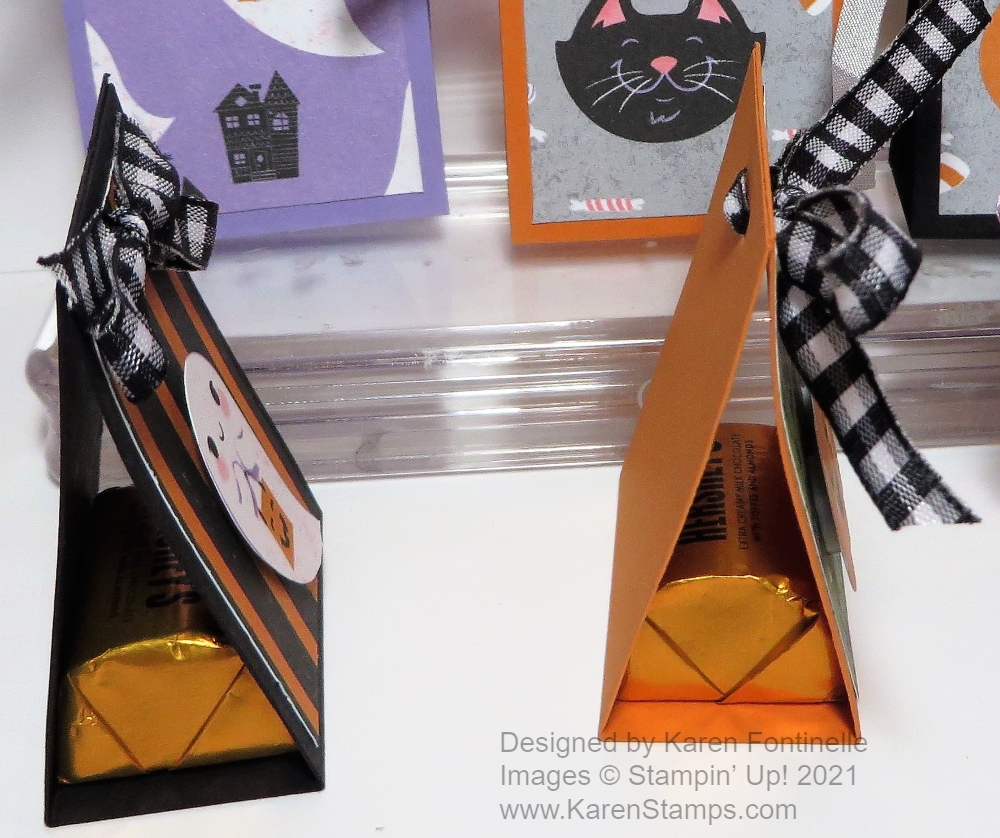
It’s the day before Halloween but if you are still looking for a Halloween treat idea, these Halloween Candy Bars are one of my favorite ideas! And it couldn’t be simpler!

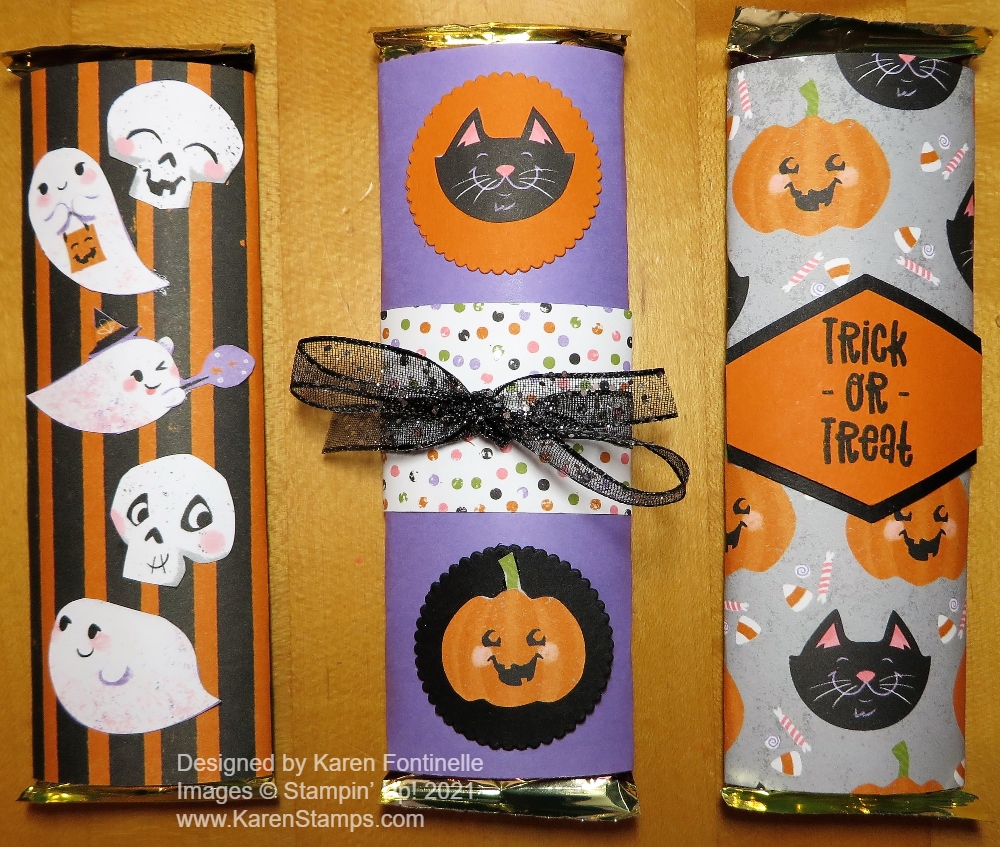
No matter what size candy bar you have, just cover it with paper and decorate! That’s it! These three are regular-size Hershey Bars that come six in a package. You could, on a very smaller scale, wrap the little Snack Size bars in paper for trick-or-treaters, keeping it very simple. And if you have one of the really big, giant chocolate bars, you can wrap that too for quite a spectacular gift! In fact, for Christmas, there is a funny poem that goes along with one of those big chocolate bars on the subject of Christmas fudge.

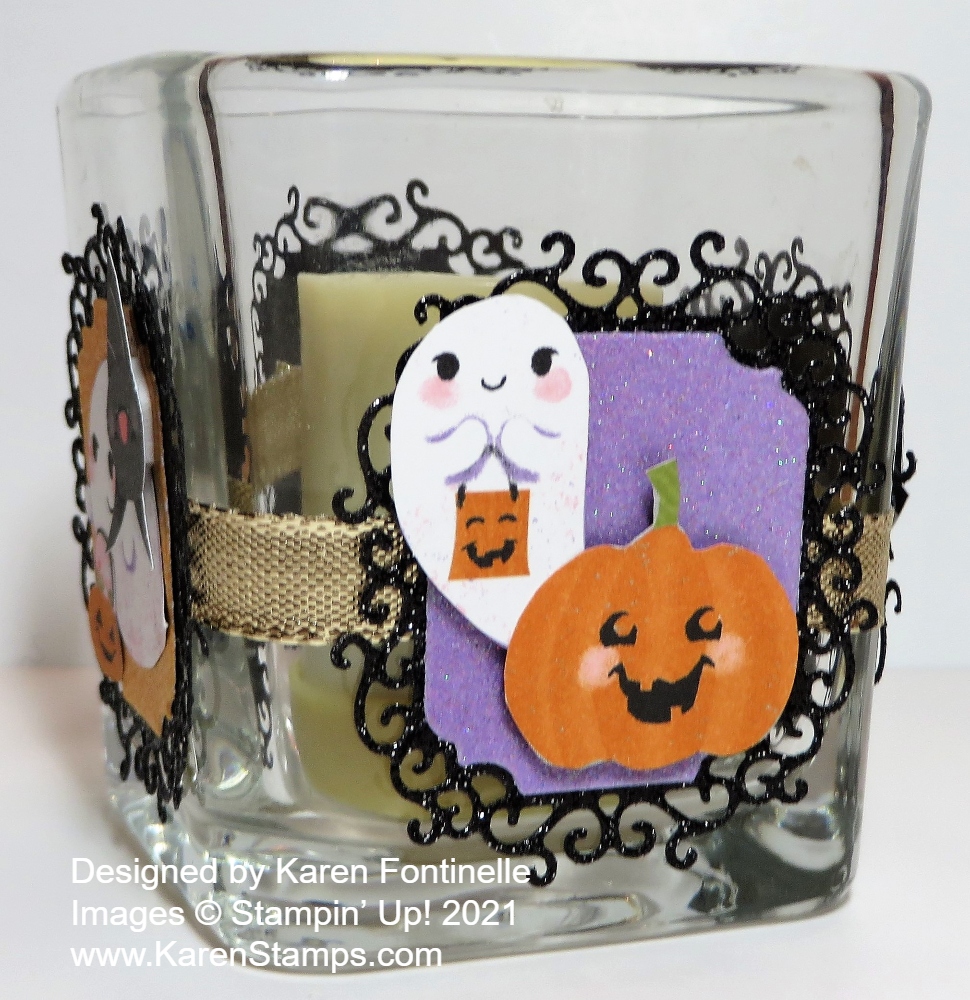
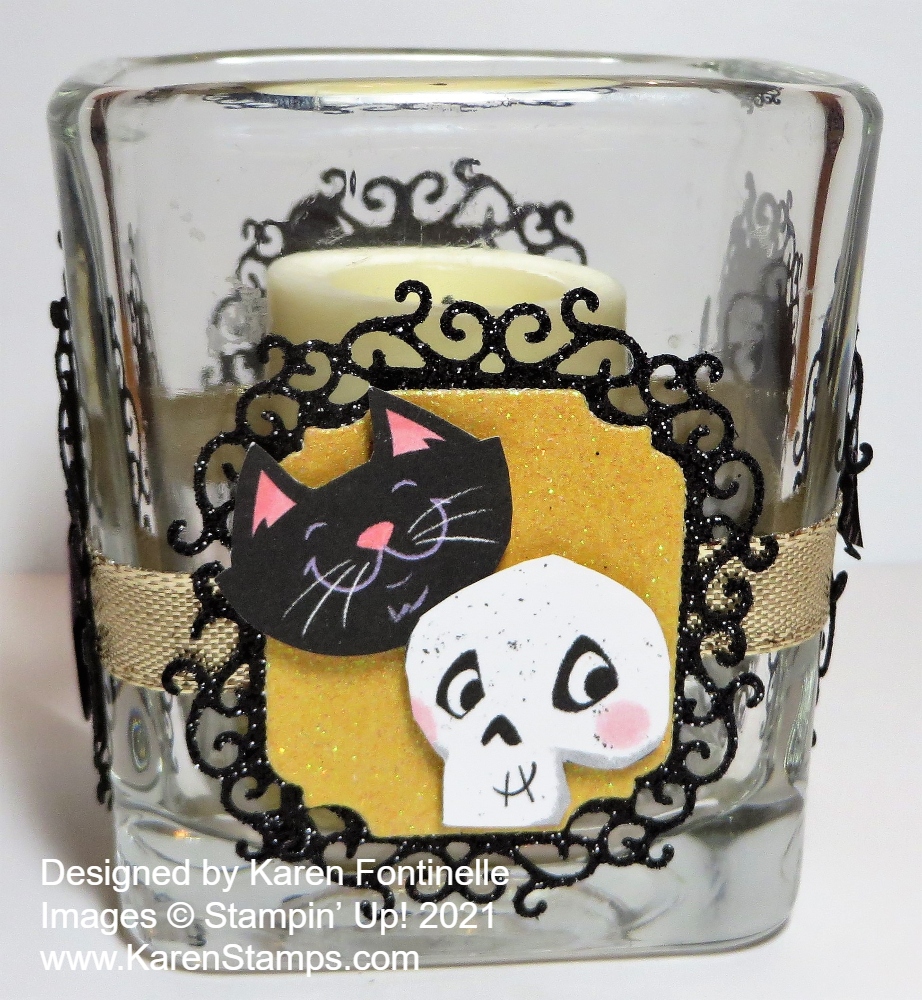
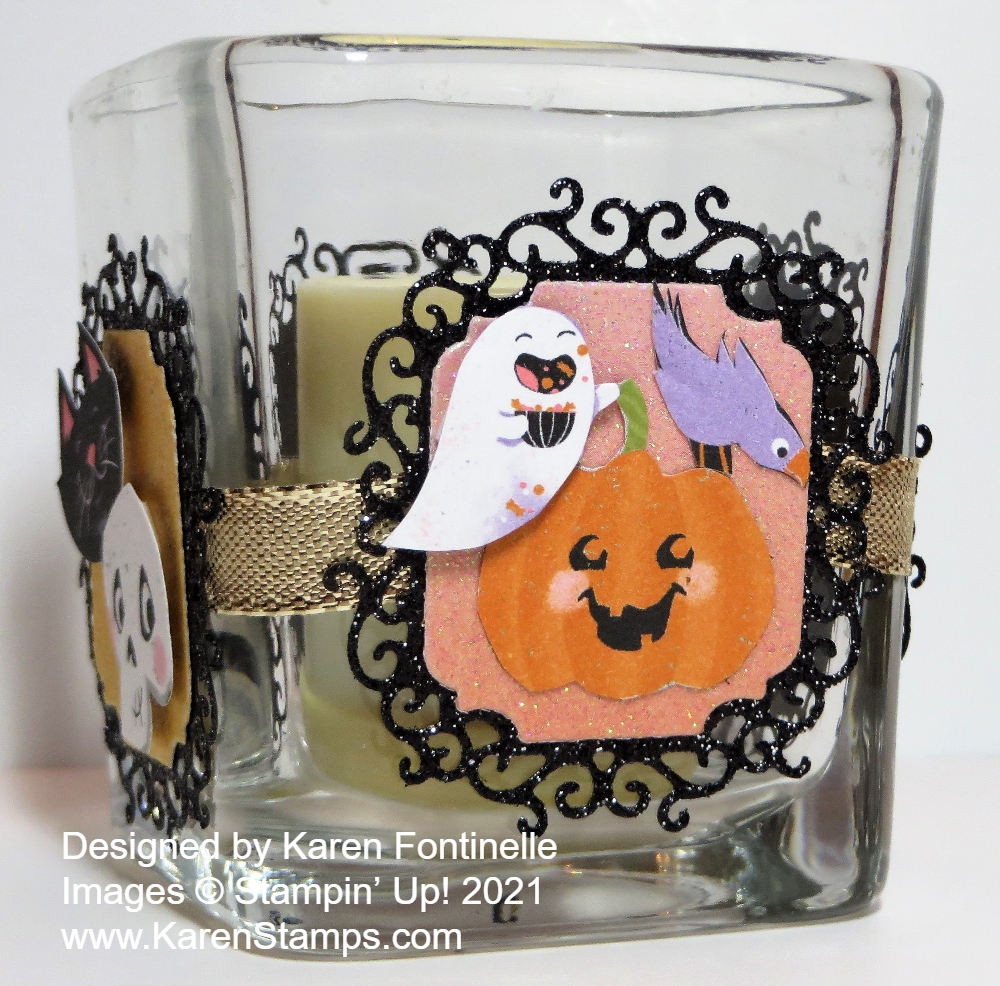
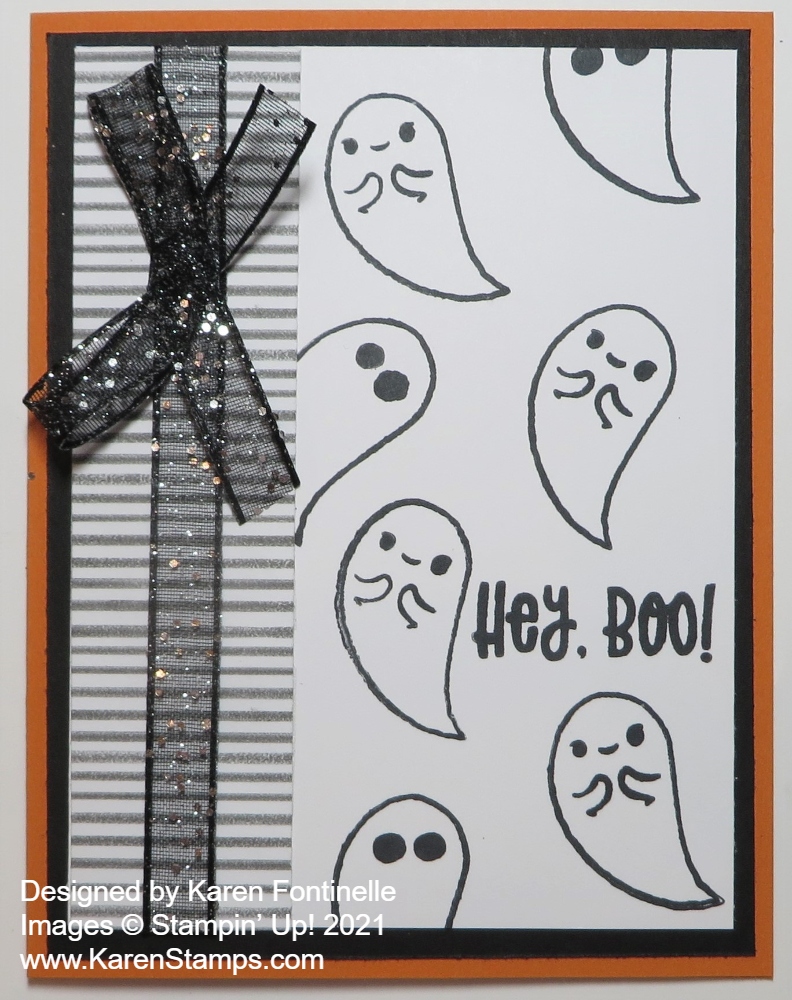
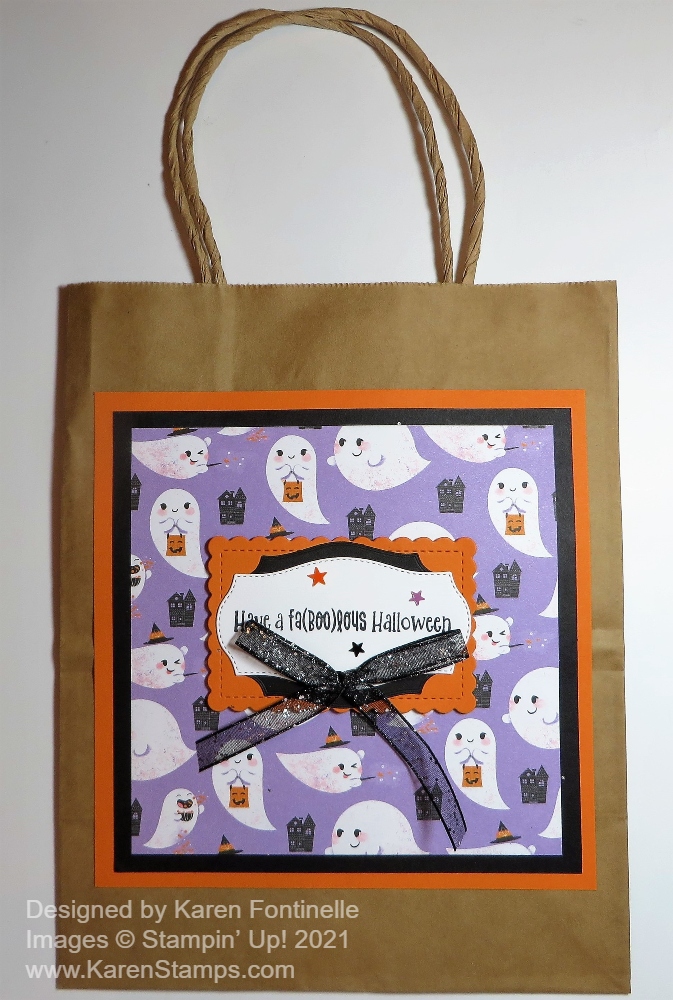
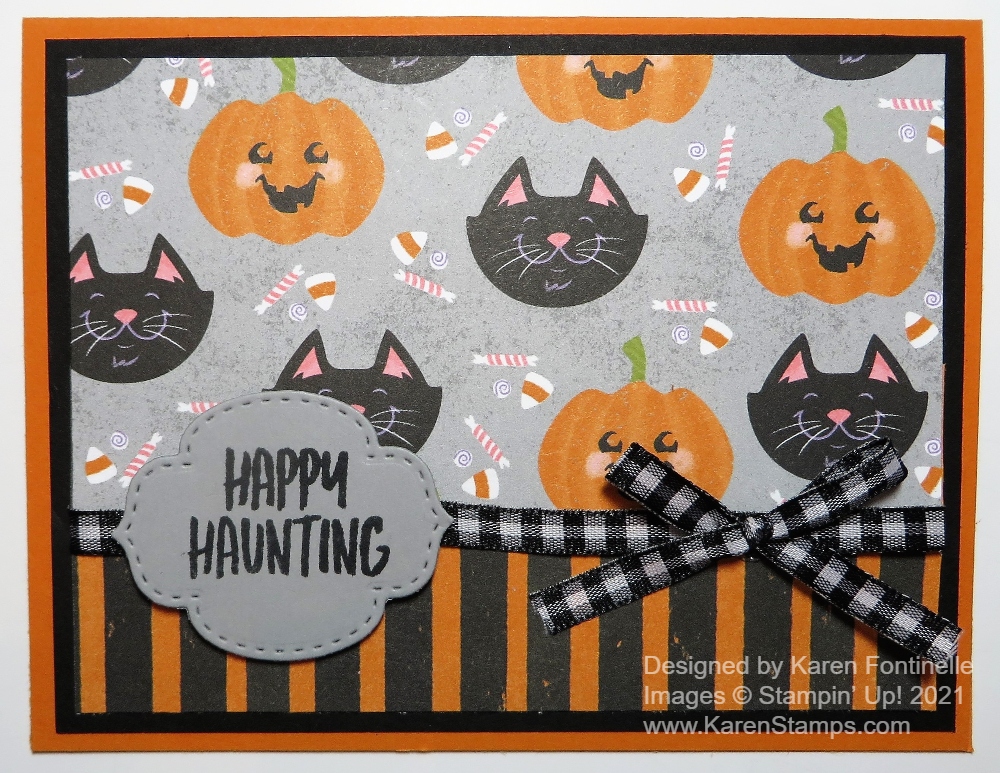
For these chocolate bars, I cut my paper at 5 1/4″ x 4 3/4″. The exact size might depend on your candy bar. You can use designer series paper or cardstock. On two of these candy bars, I used the Cute Halloween Designer Series Paper. On the first one, I just used the orange and black stripe paper and cut out ghosts and skulls from other patterns to glue on. On the third candy bar, I simply wrapped the designer paper with pumpkins and black cats around and added a greeting from the Cutest Halloween Stamp Set, and punched it out with the Tailored Tag Punch. I also punched two Basic Black pieces to layer underneath the Pumpkin Pie stamped greeting.

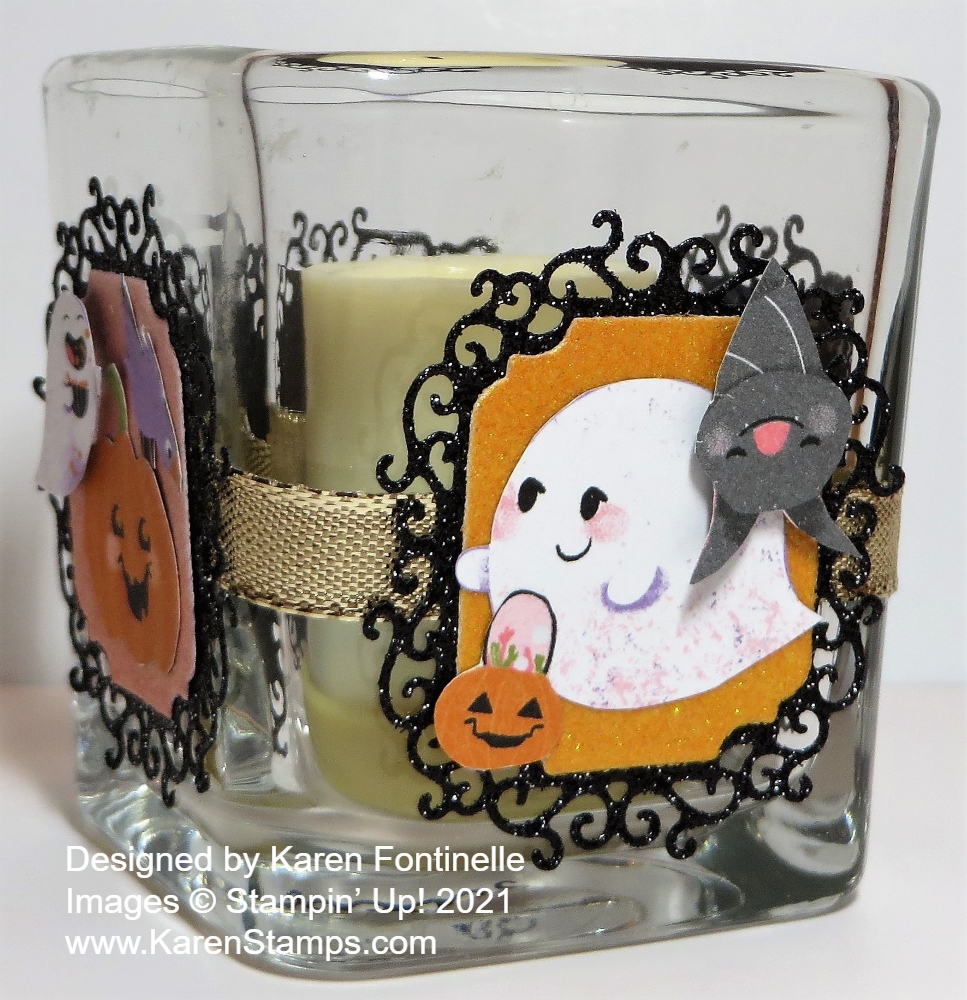
The middle candy bar is wrapped with Highland Heather Cardstock. You might want to kind of bend and soften the paper a little to make it easier to wrap around the candy bar. Just run it over a curved edge, like a table or something you have. Or just kind of loosen it up with your fingers. In the middle, I wrapped around a strip of the designer paper and tied some Black Glittered Organdy Ribbon around in a bow. Then I cut out a black cat and a pumpkin from one of the sheets of paper and layered them on a die-cut Layering Circle Die with a scalloped edge.

There was absolutely no planning involved in decorating these candy bars so you know it is easy! I just knew I was going to use the Cute Halloween DSP. If you need a last-minute Halloween treat, try decorating some candy bars with whatever you have for Halloween!

Cute Halloween Treats To Make

Cute Halloween Treats

If you want to make some quick and easy little Halloween treats either for friends or for trick-or-treaters, these Cute Halloween Treats are for you!! These were so fun to make and an easy way to use up some of your Halloween paper!

These are little things and we all know little things are so darn cute! Just cut a strip of cardstock at 1 3/4″ x 5 1/2″. Score the paper at 2 1/4″ and 3 1/4″. This makes a little space so it will sit flat and so it will hold a piece of candy inside. Those really good chocolate Nuggets work really well!

You could stamp a background on these or you could just cut a piece of designer series paper. I used my Cute Halloween 6″ x 6″ Designer Series Paper. You just need little pieces of designer paper. Mine are 1 1/2″ x 2″ to fit on the front. On a couple, I cut out a ghost and a pumpkin and popped those up on Stampin’ Dimensionals on the front of the designer paper. You can do anything you want to decorate these little treats!

Whatever candy you use inside, you might want to use a Glue Dot to hold it in place. You don’t want to use anything that would touch the candy inside so just be careful. Then punch two holes in the top and tie a ribbon through. Or you could use some other way to close them at the top like some little clip or even staple them closed.

You could also make this type of treat larger by making it wider and taller on the front and back. Just do the math and you can figure out what size you would want to make.

Once you make one or two I bet you can’t stop! They are easy and except for tying ribbon through little holes, they are quick to make!

Have some Halloween fun and make some little treats!

HAPPY HALLOWEEN!

Cutest Ghosts Halloween Trick-or-Treat Card

Cutest Ghosts Halloween Trick-or-Treat Card

The ghosts are really flocking around to get ready for Halloween on this Cutest Ghosts Halloween Trick-or-Treat Card! They look pretty friendly to me, though! I just love this stamp set, especially the cute little ghosts and the stamped eyes and arms! It’s really fun to play with making Halloween cards and projects.

I’ve done some random stamping before using only the black Memento ink, but on this card, I thought I would try using different colors. These cute ghosts and other Halloween images are in the Cutest Halloween Stamp Set. I still used Memento black ink, but I also used Pumpkin Pie and Highland Heather. I just stamped on Basic White, a smaller piece 5 1/4″ x 3″. At the bottom of the card front is a black and white striped pattern in the Cute Halloween 6″ x 6″ Designer Series Paper cut at about 5 1/4″ x 1 1/2″. I overlapped the stamped ghost piece over the striped piece. To cover the seam and help the ribbon show up better, I cut a Basic Black cardstock strip 1/2″ x 5 1/4″. Using my Grid Paper (which I can’t stamp without!), I lined up the papers so the two papers together would only measure 4 1/4″ and adhered those together carefully. Then I adhered the black strip over the seam. And then I added the Black 3/8″ Glittered Organdy Ribbon. Love this ribbon! It’s so pretty! I might not have added the bow, but as it happened, I had it tied already from another occasion when I didn’t use it and it just happened to be with the spool of ribbon. So I went ahead and used it! I adhered the bow with two Mini Glue Dots.

The greeting is a stamp in the Cutest Halloween Stamp Set. I stamped it on Basic White and die cut with a small die in the Ornate Frames Dies. The Highland Heather layer is a great matching layering die in the set. It’s always nice when there are dies you can layer in the same set!

For a little bling, I added the colored stars in the Cute Stars Adhesive-Backed Sequins. Almost forgot, I had also stamped the individual candy corn stamp in between the ghosts! I colored in the bottom tip with a Daffodil Delight Stampin’ Blend Marker. Maybe it should have been the top portion! Isn’t that a controversy about which end is which color on candy corn?? Anyway, that little candy corn was a fun thing to fill in the space in between the ghosts.

Here is another card where I stamped the ghosts only in black ink. I love this card, too, though!

Halloween is in less than a week! If you are mailing cards, get them in the mail today or tomorrow for sure! If you need other Halloween ideas, select the Halloween category on my blog in the right sidebar under Categories.

SHOP STAMPIN’ UP! ONLINE HERE!

Rainbow Glimmer Halloween Card

Rainbow Glimmer Halloween Card

I can easily promise you I had no idea this Rainbow Glimmer Halloween Card would be what I would create. I don’t even remember what I thought I was going to make! I even had a Christmas stamp set out too! But I had seen a card made with strips of this beautiful Rainbow Glimmer Paper that was a birthday card and that’s where the original idea came from to use these strips. I thought they might be perfect for a Halloween card! Other than that, I had no ideas for exactly what to do with the card! Sometimes you just have to work with colors, die cuts, maybe walk away and come back, and eventually, something will come together for you.

The card has a Basic Black card base. The strips of Rainbow Glimmer Paper are cut 1″ x 4″ with just a tiny space in between each strip. You could also have them all touching with no space. I actually cut them not just in consecutive strips or the colors might be nearly the same, which is okay if that is what you want. So I had to cut into the areas of the paper that had the colors of strips that I wanted. It might kill you to cut into a lot of different parts of the paper rather than conserve it, but hey, it’s just paper and we can buy more! Use it!!

I wanted to use the Black Glitter Paper as the center with the Halloween characters adhered to it, but I played around with the background layer and different colors. I settled on the Pumpkin Pie cardstock die cut with the circle die in the Painted Labels Dies. This looked fine, but as I worked with it, I thought it needed another layer or “something”….a little more pizzazz. I cut out another circle from Highland Heather cardstock and that looked good but of course was mostly covered up by the Pumpkin Pie circle! I tried staggering it underneath and that was good but I felt it needed another one to balance it out. So I tried Crushed Curry and once I got the three circles placed just right I was satisfied!

I cut out the ghosts, skeleton, black cat, and pumpkin from the Cute Halloween 6″ x 6″ Designer Series Paper. I love those little characters! I could have stamped them as well with the Cutest Halloween Stamp Set and used the coordinating punch, the Halloween Punch (which is currently unavailable as I write this).

The greeting is from the Cutest Halloween Stamp Set. I stamped it in Memento Ink and trimmed the ends with the Lovely Labels Pick a Punch. I was considering putting it down lower on the card, but then thought it might work better going across those circles. I liked that and then adhered the Halloween characters around where I liked them. And for a little more bling, I had to add some Cute Stars Adhesive Backed Sequins.

The card may be a little crazy, but it’s for Halloween so that’s good! If you don’t have the Rainbow Glimmer Paper, you can just use different colors of cardstock strips. Just play and you will come up with some great ideas. Use this Rainbow Glimmer Halloween Card for inspiration!

SHOP STAMPIN’ UP! ONLINE HERE!

Halloween Bouquet Jar

Halloween Bouquet Jar

While I was trying to tidy up the last of the Halloween decorations, I saw this bag of these little tiny pumpkins. I usually use them in a large tray with a candle in the center or some such way. But today when saw these little pumpkins, I got this idea!

Just recently I had purchased this Witch Hat Bouquet from @birdsnestboards on Instagram. I had it stuck in a small little vase for the time being but it didn’t seem quite right. When I got the idea to use these little pumpkins in a glass vase to hold the bouquet, I looked around for the right size vase. I found this jar in my stash and it seemed to work justs fine. I put a few pumpkins in the bottom, added the Witch Hat Bouquet, and filled in some more pumpkins to fill the jar.

To decorate the jar I just tied a Black Glittered Organdy Ribbon around the top. You can use a little Mini Glue Dot to hold it in place if you need to. To wrap around the jar, I cut two 1″ x 6″ strips of Cute Halloween 6″ x 6″ Designer Series Paper. If you kind of hold them around and see how much overlap you have, adhere two of the ends together to make one long strip. Then put some adhesive on the other end, wrap it around the jar and adhere. If you put one of the adhered ends in the center of the front of the jar, it will get covered up with the decoration and the other adhered ends will be in the back so nothing will show.

I stamped “Boo” from just part of the stamp in the Cutest Halloween Stamp Set. I chose Polished Pink Ink for the word to match the bright pink felt balls in the bouquet. Then I diecut that and layered on Black Glitter Paper and on the pink.

That’s as easy as that was for a quick vase to hold my cute Witch Hat Bouquet! Here’s a glass votive holder I just decorated the other day for Halloween. You can have so much fun decorating little home decor items like this!

SHOP STAMPIN’ UP! ONLINE HERE!

Make a Cute Halloween Votive Candle Holder

It’s always fun to decorate a glass votive holder for a special occasion such as this Cute Halloween Votive Candle Holder decorated with the Cute Halloween Designer Series Paper! I started out with a slightly different idea but as often happens, as I worked on it, my design idea changed. That’s part of the fun of stamping and creating! Just play and you will come up with an idea that pleases you!

With the shape of this votive holder, getting a little narrower at the bottom, it wasn’t so easy to just wrap a strip of paper around it. As I looked through my dies, I came up with the idea of using the Ornate Frames Dies on each side of the glass holder to decorate it. I used the Black Glitter Paper to die cut the frilly Ornate Frame. Then I used the Ombre Specialty Paper for the die-cut piece that fits inside the Ornate Frame I used. I chose four different colors or shades and put one on each side. I could have just had one on the front of the votive and that would have been fine. But I wanted to use more of the Halloween characters in the Cute Halloween Paper.

I just used my Paper Snips to cut out several ghosts, a black cat, some pumpkins, a bat, a bird, and a skull from the Cutest Halloween 6″ x 6″ Designer Paper. I used Multipurpose Liquid Glue to adhere the Ombre Paper piece inside the Black Glitter Ornate Frame. Then I adhered the Halloween characters using either that glue or Stampin’ Dimensionals®.

Before adhering anything to the glass, I wrapped around a piece of the Gold Shimmer Ribbon I only adhered it with Mini Glue Dots. Then I adhered all the Halloween pieces to each side just using a Mini Glue Dot on the top and bottom of each piece so there wouldn’t be messy glue showing inside the votive holder.

I kind of like doing the individual Halloween scenes on the side because you can still see inside the votive to see the candle. You could even make this as a gift, putting a small cello bag filled with candy inside. It’s best to use a flameless candle inside but if you use a real votive candle make sure it is small and make sure it can’t reach any paper decorations on the side.

This is just a fun little home decor or gift item that is easy and fun to make! Use your imagination and creativity to come up with something like my Cute Halloween Votive Candle Holder or change it up a bit!

Cutest Halloween Ghosts Card

Cutest Halloween Ghosts Card

This Cutest Halloween Ghosts Card is one that I like to make with some basic stamping, a bit of designer paper, and some ribbon for embellishment. Sometimes we make such fancy cards that we miss out on just stamping randomly to design a card. To celebrate October 1st, I thought a Halloween card was in order! I can’t believe it is October! What happened to August and September? I feel like September just started.

The card base is, of course, Pumpkin Pie Cardstock with a layer of Basic Black. I knew I would use Basic White Cardstock for the card front on which to stamp ghosts, but I also added a striped piece of the Cute Halloween 6″ x 6″ Designer Series Paper, which has the cutest Halloween papers in it!

Before I assembled the card, I stamped some ghosts on the Basic White Cardstock. The ghosts are in the Cutest Halloween Stamp Set. They are stamped with Memento Ink. There is the ghost outline stamp and then a little face and arms. To make some of the ghosts look different, I stamped two eyes with one little round stamp in the set on three of the ghosts! You could just draw in some dots for eyes or draw another kind of face if you wanted.

Luckily, there was just the right space and the right place to stamp the “Hey, Boo!” greeting, also in the Cutest Halloween Stamp Set. Otherwise, I would have made a little label to stamp it on and place possibly covering up part of a ghost or making it more like a tag up by the bow. I wrapped some Black 3/8″ Glittered Organdy Ribbon around the strip of designer paper and then tied a separate bow, which I then adhered with two Mini Glue Dots.

Here’s another Halloween card with randomly stamped ghosts on the front that I made four years ago!

You could even modify this idea to make an invitation to a Halloween party! Or decorate a little bag for a gift or party favor with these cute stamped ghosts!

It’s time to start making some Halloween cards to send for fun! Tomorrow the post office is supposed to slow down the mail (what??!) so make your cards soon and mail them extra early! With a little bit of luck, maybe they will arrive by Halloween! You’ll have fun making a Cutest Halloween Ghosts Card like this one!

SHOP STAMPIN’ UP!

Ghosts Halloween Gift Bag

Recently I told you about how fun I thought it was to decorate a plain kraft gift bag for a special occasion or just to have on hand and then last week I wanted a Halloween bag for a gift for a friend! This Ghosts Halloween Gift Bag was fun to make for a little gift!

All you need is a gift bag like this one with the handles in kraft or white or whatever color you can find at the craft store. Or often I use bags that I get at certain small shops or special places. Even if they have printing on the front, you can usually cover the store name and all that with your personalization. If they have printing on both sides, then do a good job on the front side and do something plain and simple on the backside just to cover the printing.

There is an infinite number of ways you can decorate these bags! Think of it as making a card front, but probably bigger. This design is not very complicated at all. I just used one 6″ x 6″ sheet of the Cute Halloween Designer Series Paper, my favorite one with all the little trick-or-treating ghosts! I layered it on a larger piece of Pumpkin Pie and then a layer of Basic Black.

On the front of the bag, I have various die cuts layered. These are the Tasteful Labels Dies and the scalloped rectangle in the Stitched So Sweetly The greeting is stamped from the Cutest Halloween Stamp Set and seemed perfect for this gift bag! Once I added the Black Glittered Organdy Ribbon tied in a bow I was happy with my project! Plus I added a few Cute Stars Adhesive-Backed Sequins.

You could use smaller bags to decorate or even lunch sacks! It’s so much fun to decorate bags for a birthday gift, congratulations, a holiday season, or whatever you need! Here is the bag I made just a few weeks ago. There are lots of ideas out there!

Start looking through your collection of bags and put the good ones you could use for decorated gift bags into your stash so you’ll have them handy or go ahead and decorate now for the holidays! You will be glad you did at the last minute when you need something gift-wrapped and you’re all out of wrapping paper and store-bought gift bags!

SHOP STAMPIN’ UP! ONLINE HERE!

Don’t forget Sale-A-Bration ends Thursday, September 30! Don’t miss out on the free products you can earn!

Cute Halloween Trick or Treat Ghosts Card

Cute Halloween Trick or Treat Ghosts Card

I just had to make another fun Halloween card, this Cute Halloween Trick or Treat Ghosts Card. I started by picking out the designer paper and played around from there! I have a trick for how I made one ghost go in a different direction from the one stamp!

This card base is Old Olive Cardstock with a layer of basic black. I chose the designer paper with the little houses and tiny moons and ghosts! This is the Cute Halloween 6″ x 6″ Designer Series Paper. So many cute patterns to choose from! I decided to make the designer paper narrower than the card front and have the ghosts floating along the edge. Then I decided to cut a decorative edge with a scallop die in the Penned Flowers Dies. Next, I selected another designer paper, the one with black dots, to go along the edge, after considering several options. This card opens from the top but it would be the same if it opened from the side.

The greeting is stamped from the Cutest Halloween Stamp Set on Basic White and then die cut with a die that fits inside the Basic Black die-cut, both of which are in the Ornate Frames Dies. I popped up the greeting on Stampin’ Dimensionals® and added two Elegant Faceted Gems.

For the ghosts, I stamped two ghost shapes in the Cutest Halloween Stamp Set on Basic White and then turned over the cardstock and stamped one ghost on the back where it didn’t overlap the ghosts stamped on the front. I also added the faces and little arms just on the ones on the front of the cardstock! So cute!! I cute out the ghosts by hand with my Paper Snips. Now you can purchase the Halloween Punch and get both the stamp set and punch in the Cutest Halloween Bundle and save 10%. So I cut out the two ghosts on the front of the white cardstock who were both facing the same direction. I cut them out with a bit of the black ink outline showing as it would if I had used the punch. Then I turned the paper over and cut out the ghost outline. But here’s the trick… after cutting out the ghost shape, I turned it over so it would be facing the opposite direction from the other two ghosts and stamped the face on it. Now, this ghost doesn’t have the black ink outline on it since I am using the unstamped side. But if you want that black ink outline, just take a black marker and run it around the ghost along the edge to get some black marking along the outline. Or, maybe it doesn’t really matter to you and you can skip that step! Out of the three ghosts, I wanted one facing the other direction.

I originally planned to adhere the ghosts right along the edge of the green designer paper, but in the end, I liked the placement you see better. I also turned the Ornate Frame die in portrait position and stamped the greeting in that direction which I think fits better than landscape position. Either way would be fine, though! Just play and see what looks good to your eye! Here is another Halloween card using the Cute Halloween DSP except with the sheet with ghosts! Order the Cute Halloween Paper on your next order so you have plenty of time to create “cute” Halloween cards and projects to send out, like this Cute Halloween Trick or Treat Ghosts Card.

Cute Halloween Happy Haunting Card

Cute Halloween Happy Haunting Card

Make this easy Cute Halloween Happy Haunting Card and send to a spooky friend for Halloween! It’s a basic card design, but as usual, the designer paper makes it extra special! If you are a Halloween lover, be sure to get this paper and make some fun cards to send for Halloween!

This cute designer paper is the Cute Halloween 6″ x 6″ Designer Series Paper. I just love all the whimsical Halloween characters plus the more generic designs to pair with them. This Cute Halloween Paper is really CUTE! I could have used just the piece of paper with the black cats and pumpkins, but then the black and orange striped paper I knew would look so cute with it, too!

The card base is Pumpkin Pie with a layer of Basic Black under the designer paper. I cut the designer paper with the cats and pumpkins at 5″ x 3″ and the striped piece at 5″ x 2″. This way there was room for the two papers to overlap so I could glue them together before adding the ribbon. If you cut them exactly to the space, then you likely should glue the designer papers to another piece of cardstock the same total side so you can tie a ribbon around the seam.

Look at your designer paper with designs like this one carefully before you cut. Look at the images on the paper and see how you can maximize those and maybe not cut through too many of them. For example, instead of cutting off 1/4″ on one side and really cutting into an image you like, maybe you can cut 1/8″ off each side instead of 1/4″ of one side. That might help you preserve more of the images on the paper. Just look and see how you can place your cuts to get the best images on your paper where you want them! Maybe cut a piece off the top of the designer paper before you cut anything else to position the images on the paper.

I used the Black & White Gingham Ribbon to tie around the seam in between the two papers. I love this ribbon! I tied the bow separately and adhered it with Mini Glue Dots.

The greeting is found in the Banner Year Stamp Set. I looked at several greetings in a couple different sets and decided on this one for size and appropriateness. I stamped this in Memento Black ink on Smokey Slate Cardstock. It is die cut with one in the Stitched So Sweetly Dies. I tried layering this greeting on various colors but decided it was fine just by itself.

I love fun and whimsical Halloween things and this Cute Halloween Paper is perfect for me! Put it on your next order so you can make a few Halloween cards or projects in plenty of time!

SHOP STAMPIN’ UP! ONLINE HERE!

Cute Halloween Ghost Boo Card

Cute Halloween Ghost Boo Card

My first Halloween card of the season! I love this cute pack of 6″ x 6″ paper with Halloween designs! I love the cute and whimsical Halloween styles, not the scary, dark ones. I’m hoping we can have normal trick-or-treating this year because I love handing out candy to the little ones, especially. Last year I had to block off my front door and put out a sign saying “See you next year!”

This card uses the Cute Halloween Designer Series Paper which is the 6″ x 6″ size. I just picked out the top sheet in the pack with these cute flying ghosts with their trick-or-treat bags! Isn’t that cute??!!! When I turned the paper over, I saw the design was the tiny printed “Boos”. I just had to use that on the front of the card along with the ghosts! That section started out being wider but I didn’t want to cover up much of the ghost paper.

The card base is Highland Heather with a layer of Basic Black. I played around with those two colors and Pumpkin Pie to see which ones I wanted to use and in which order. I think any other combination would also look good. I ended up with a very thin strip of the Boo paper on the left side of the card. To cover the seam and to add another color, I cut a very thin strip of Pumpkin Pie cardstock in between the two designs.

For a greeting, I got the idea to cut out the letters to spell “Boo” with the Playful Alphabet Dies. I haven’t used these dies much, but I love how they turned out on this card! I cut the letters and exclamation point out of Pumpkin Pie cardstock and layered them on one of the Tailor Made Tags Dies. You would think I shouldn’t use Highland Heather as a color for the tag because it blends into the background color of the designer paper too much, but I kind of liked that because it helped the letters stand out without detracting too much from the ghosts. I popped up the tag on Stampin’ Dimensionals® and tied on a piece of the Black & White 1/4″ Gingham Ribbon.

Sometimes you make a card and it’s just fine and you like it, and sometimes you make a card and LOVE how it turned out! That is how I feel about this Cute Halloween Ghost Boo Card and I hope it will inspire you to make some fun Halloween cards with this cute Cute Halloween paper!

SHOP STAMPIN’ UP! ONLINE HERE!