It’s been a couple of rough days so I think it’s time to get back to stamping. Stamping is good for the soul! Stamping, creating, sewing, painting, scrapbooking, cross-stitching, knitting, crocheting….whatever it is that you love to do and takes your mind off the rest of the world for a little while.
I made this Monochromatic Amber Autumn Acorn Card as an example of a card you could make if you wanted a quick and easy card and one that doesn’t require coloring! I love to do coloring with my Stampin’ Blends, but sometimes you might not want to take the time. And that’s okay! Look at the nice card you can make with no coloring! When I think of monochromatic I think of one color, but it can also be different shades or hues of that color, lighter or darker variations.
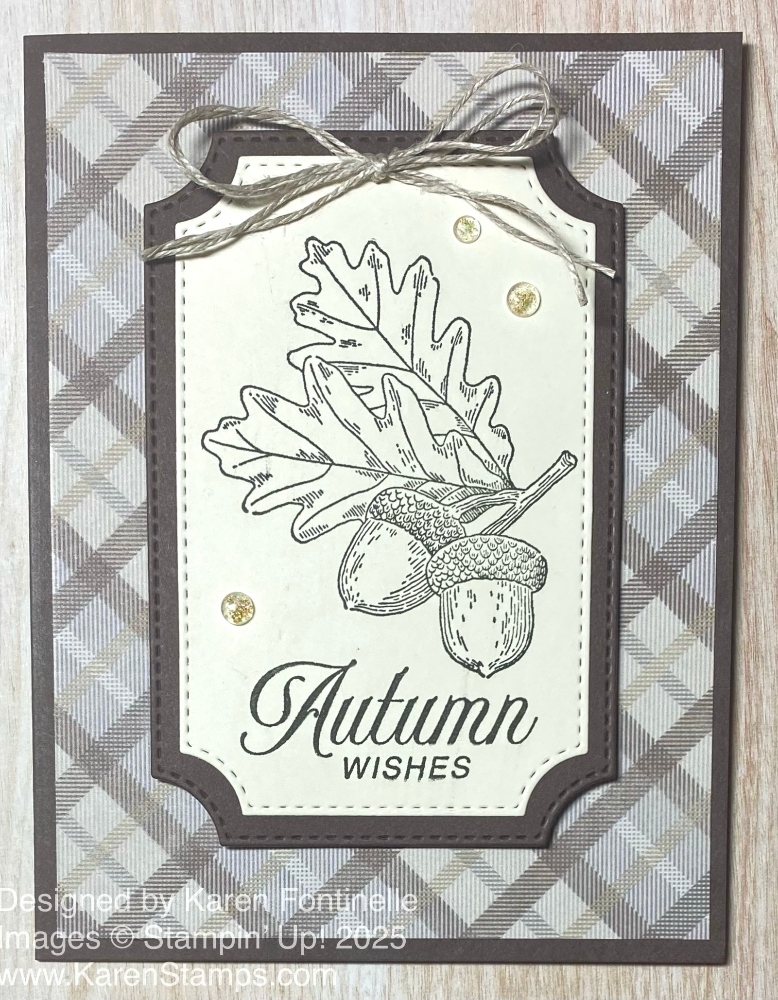
This card uses the new Amber Autumn Stamp Set. I think this is a beautiful stamp set with nice greetings. I almost wish there were more images in this same style because the artwork is so beautiful. For this card I chose the acorns and leaves image.
The card base is Early Espresso cardstock. I intended to use Pecan Pie but I saw that Early Espresso was one of the coordinating colors of the designer paper I chose. Usually I play around with a couple of colors if I’m not positive and see which one works the best. That’s how I decided to use Early Espresso. I was afraid it might be too dark for the look I wanted but I like the finished card just fine.
The layer on the card base is a brownish diagonal plaid in the Timeless Plaid 6″ x 6″ Designer Series Paper. I think this paper is great to use for fall cards. The focal point of the card is made with the new Branching Out Dies. These dies come with six nested frame dies, plus some pine branches, sprigs, even an acorn. I like the shapes of these frames and the little stitched perforations around the borders. I bought these dies for the cute frames which we always seem to need more of, especially ones we can layer in the right size, plus I can use the extra little dies as well. You can get the stamp set along with the dies in the Branching Out Bundle. After stamping the acorn and leaves on a piece of Very Vanilla cardstock with Early Espresso ink and diecuting it with one of the Branching Out Dies, I layered it on the next larger frame in Early Espresso. The whole piece is popped up on Stampin’ Up! Dimensionals.
To embellish the card I little bit, I added a bow at the top with a double piece of Linen Thread that is adhered with a couple of rolled up Mini Glue Dots. I think of Linen Thread as one of my main staples to have on hand in my stamping products because you can use it for so many projects. I also added a few of the Iridescent Foil Gems. They are very pretty with a little sparkle and completely neutral. They have been one of my favorite and most used gems since they came out.
Next I will try a card with this same stamp but not monochromatic and see how that turns out!