Tag Archives: Shimmery White Cardstock

Whimsy & Wonder Traditional Christmas Card

Whimsy & Wonder Traditional Christmas Card

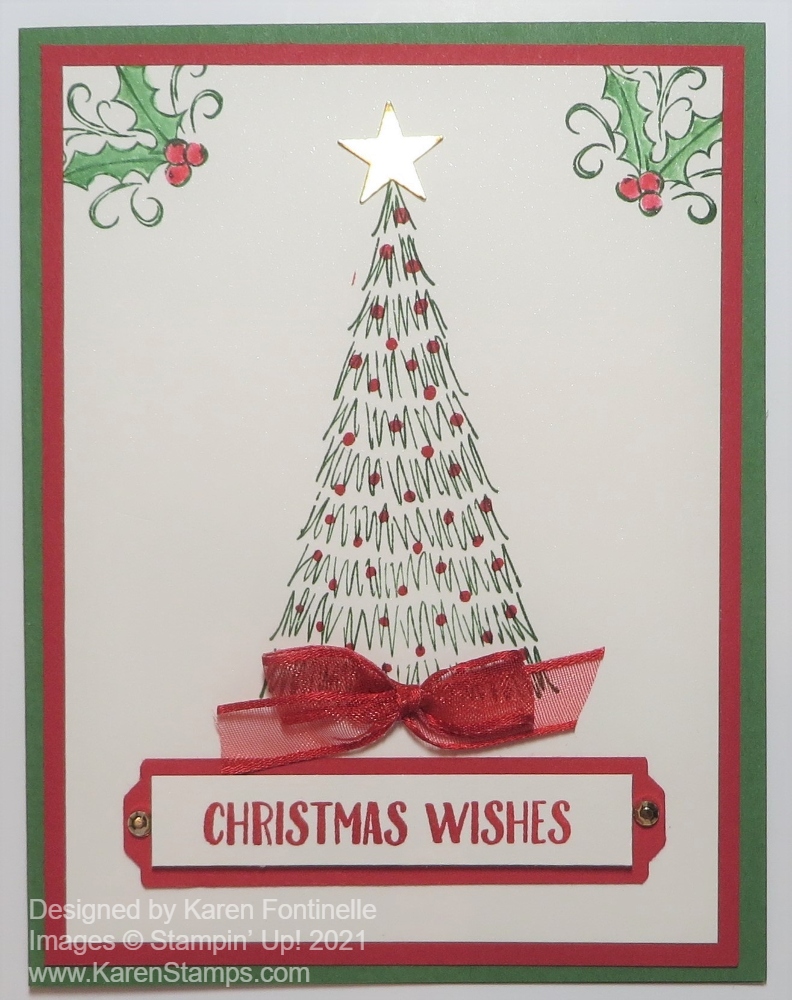
The Whimsy & Wonder Suite in the Stampin’ Up! Holiday Catalog uses soft pastel colors in it, but for this Whimsy & Wonder Traditional Christmas Card, I decided to just use the traditional Christmas colors of red and green!

The card base is Garden Green with a layer of Real Red Cardstock. Real Red has been my favorite color forever! If you buy a red somewhere else, like the big box craft store, you will find that their red does not compare to the perfect red of the Stampin’ Up! Real Red! I know because I bought a big package of red cardstock and envelopes when I first started stamping. When I saw how it compared to the Stampin’ Up! Real Red, I threw out the store-bought red paper!

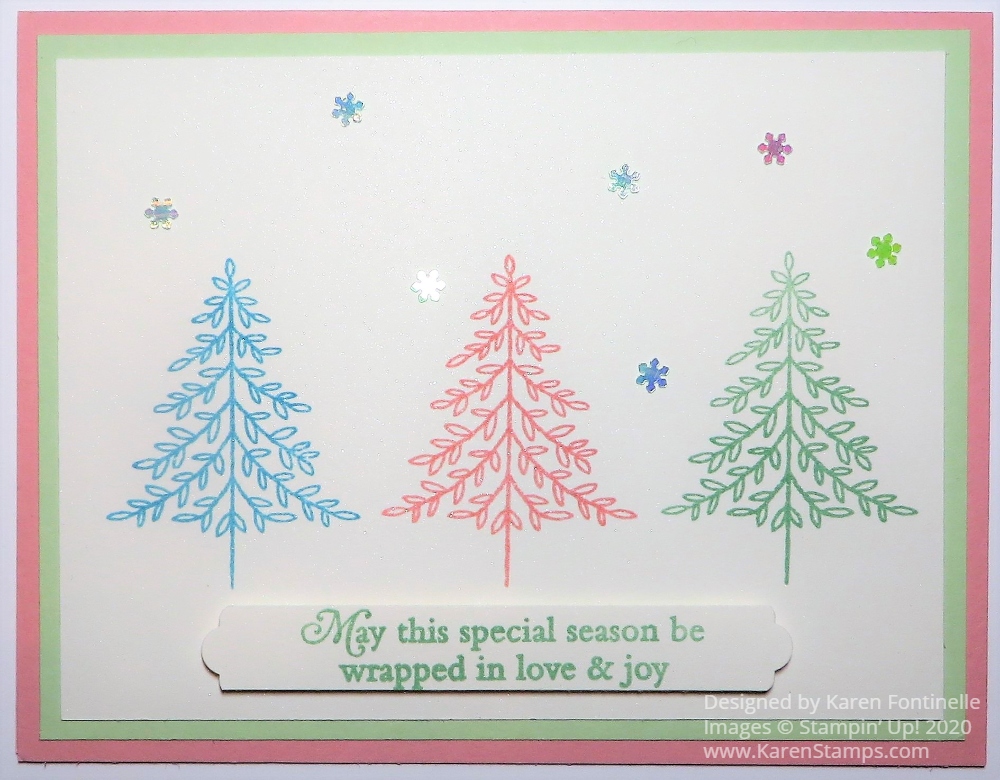
The stamped layer is Shimmery White, my other favorite paper! It has just the slightest glimmer to it and works well with any medium, even some watercoloring. I stamped the tree from the Whimiscal Trees Stamp Set in Garden Green Ink. Old Olive would also look good. Then I overstamped it with the dots to look like little red ornaments or lights on the Christmas tree. I couldn’t resist stamping the holly and berries up in each corner of the card. I just stamped them in Garden Green and then went back in with a Blender Pen and added green ink to the leaves and red ink to the berries. Just very lightly and carefully because I didn’t want the initial stamping to smear.

The greeting is stamped from the Banner Year Stamp Set. It is stamped on Shimmery White and layered on a strip of Real Red, punched at each end with the Lovely Labels Pick a Punch. The greeting itself is popped up on Dimensionals but the Real Red punched piece is adhered directly on the card front. For some embellishment, I added the smallest Gilded Gems to each end of the red piece.

Since the tree doesn’t come with a trunk, I didn’t really like it just floating in the air, so I added a bow with the Real Red 3/8″ Sheer Ribbon. I might have preferred a really narrow ribbon but since this one is sheer, I thought it looked light enough to put in between the tree and the greeting. And since my tree needed a star at the top, I looked through my retired punches and found the right size little punch with a star and punched some Gold Foil.

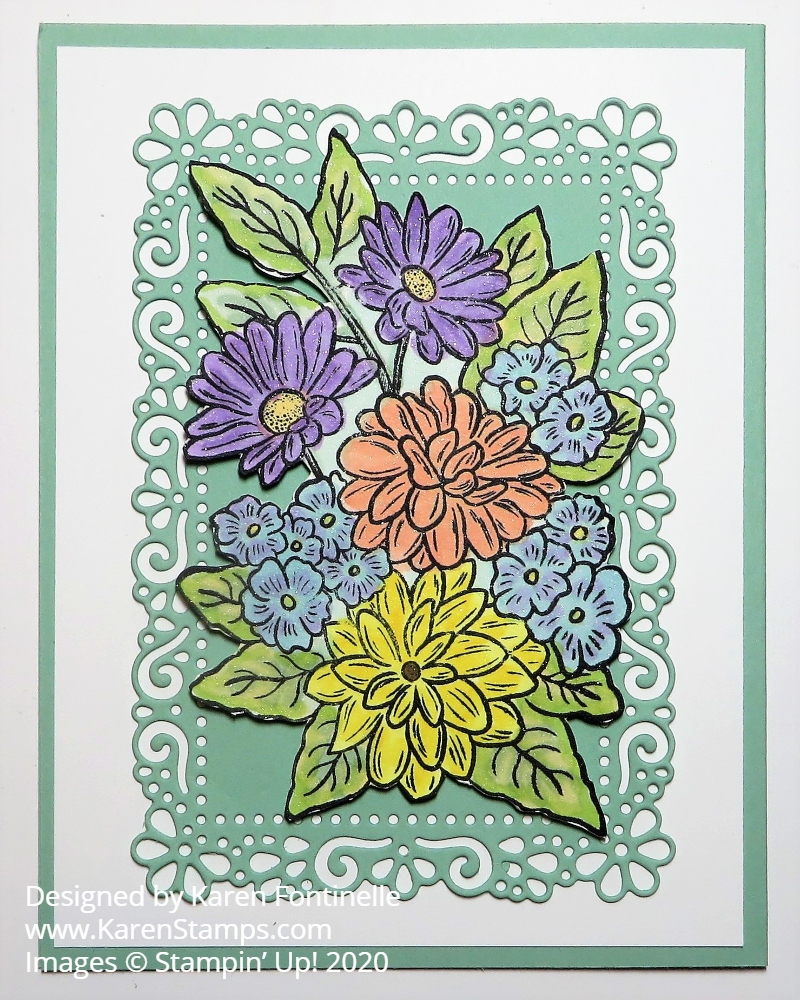
The lesson here is that even though this stamp set, Whimsical Trees is “whimsical” doesn’t mean you can’t make it “traditional” with color and embellishment! Here is another card I made with the same stamped tree and the new Whimsy & Wonder Specialty Designer Series Paper in the less traditional colors. I love this card as is, but if you are looking for the red and green of Christmas, you can certainly use this tree and change up the colors. If you are looking for a more traditional Christmas card or at least a few for certain people, then try this Whimsy & Wonder Traditional Christmas Card with red and green!

Art Gallery Floral Card For Spring

Art Gallery Floral Card For Spring

I may have missed the first day of Spring, but this Art Gallery Floral Card For Spring is for the second day of Spring! I was pleased with how this card turned out with “just stamping”. The large flower stamps in the Art Gallery Stamp Set can be used with two-step stamping which adds extra interest, texture, and dimension with the possibility of different colors on the same flower.

For this card, I used pretty bright colors, like Melon Mambo for the card base and for the first top flower. I think with the holidays and winter, I hadn’t used Melon Mambo for a long time and it’s one of my favorites. For the other flowers, I used Daffodil Delight and Highland Heather, plus Mango Melody and Melon Mambo for the smaller flowers.

When you do two-step stamping, one way to do it is to ink up your stamp and then stamp lightly on scrap paper first, then stamp the image on your cardstock. This gives a light image, over which you can then stamp the second stamp, usually a little more detailed, which then shows up darker over the light image but doesn’t fully cover it at all. Or you can do it in reverse…..stamp the detailed image first and then the lighter image. Depending on the stamp, you might even be able to stamp full strength both times if the detail shows up well enough.

With two-step stamping, you can also use two different colors on the stamp. For example, you could stamp the lighter color in yellow and then use an orange shade for the second stamp. It might produce a colorful, shaded version of a flower like you might see in nature.

In order to stamp the large stem and leaf stamp in the set now on my card with not much space in between flowers, I stamped the large flower on scrap paper and then cut it out to use as a mask. After inking up the leaf stamp, I placed the cut out mask over the flower that would get the green ink on it if not covered. Then I stamped the stem and leaf. That way, the extension of the leaf and stem gets stamped over the mask instead of ruining your stamped flower. Then remove the mask and place it on another flower. Maybe don’t ink you the whole leaf image if that works so you don’t get ink where you don’t want it.

For the greeting, I simply stamped it right on the card. I could have made it a layer, but I ended up with that small empty space at the top of the card and it seemed perfect to just put the greeting there. This greeting is also in the Art Gallery Stamp Set as are many other choices in sentiments.

While you can use Basic White or Very Vanilla for the top card layer, for a change I used Shimmery White Cardstock. This is my favorite paper because it has a subtle shimmer. It’s just beautiful! It usually doesn’t photograph because it is so subtle, but in person, you can see it. You can stamp well on it and you can watercolor on it better than Basic White. Use Shimmery White when you just want something a little more special! It’s very nice paper!

Hopefully you are feeling spring where you live! We have certainly had some beautiful spring days to be outside in Houston lately, although it has been a little chilly in the mornings. In spite of our winter storm, our grass is turning green again (maybe a lot of weeds!) and the azaleas are blooming! The bugs are back out (yuck!), especially the mosquito hawks, that like to hang around doors and fly in the house. This is the perfect weather which we have to enjoy until the very hot, humid summer arrives.

Celebrate spring by making a few light, bright, and colorful cards after the doldrums of winter! It will lift your spirits and those to whom you send the cards!

SHOP STAMPIN’ UP! ONLINE HERE!

Perfectly Plaid Pastel Trees Christmas Card

Perfectly Plaid Pastel Trees Christmas CardPerfectly Plaid Pastel Trees Christmas Card

This Perfectly Plaid Pastel Trees Christmas Card came about after seeing some Christmas cards using non-traditional colors, even pastels! I thought I would see what I could do with a pastel color scheme for my card!

The card base is Blushing Bride Cardstock with a layer of Soft Sea Foam Cardstock. I tried putting another layer of Balmy Blue but it looked like too much. I left it at just the pink and green.

The main paper I used is Shimmery White Cardstock. This is my favorite paper ever! It has just the slightest shimmer to it if you look closely. It stamps so well and even takes watercoloring better than regular Whisper White Cardstock. I just love it!

The three trees stamped on the Shimmery White are from the Perfectly Plaid Stamp Set. This stamp set was carried over from last year and I’m glad because it has so many possibilities, not to mention the Pine Tree Punch which coordinates with the trees. I could also have punched out the trees with that punch and made them a little more 3D. The trees are stamped in Blushing Bride Ink, Balmy Blue Ink, and Soft Sea Foam Ink.

The greeting is also stamped in Soft Sea Foam Ink. It is also in the Perfectly Plaid Stamp Set as are some other ones I could have used. I just stamped this on a scrap strip in my Shimmery White Cardstock and then punched the ends with the Lovely Labels Pick a Punch. It is popped up with Stampin’ Dimensionals®.

Then to add a little something extra, I added some Adhesive-Backed Snowflakes. These are little snowflake sequins that have adhesive so they are easy to place and stick on a card! No glue required!

Another thing I could have done, instead of the snowflakes, was to put some Rhinestones or perhaps the Champagne Rhinestone Basic Jewels on the trees. If I would have stamped the trees up just a little bit higher I think that would have worked. Or maybe I could have stamped some small snowflakes. So many different things you can do with stamping!

You could change the color scheme of this card and use traditional red and green colors and see how different it would look. Here is another card I made with this set, in red and green colors, and using all three styles of trees. Or as I mentioned, use the Pine Tree Punch to punch out the trees and pop them up on Dimensionals instead of the greeting. Just play until you are satisfied!

SHOP STAMPIN’ UP! ONLINE HERE!

Many Layered Blossoms Birthday Card

Many Layered Blossoms Birthday Card

This die-cut piece was already laying on my table and I was in a “red” mood so I was pleased how this Many Layered Blossoms Birthday Card came together. Real Red is one of my favorite Stampin’ Up! colors!

You won’t believe how simple this card is to make and yet it will look like you make an elegant, fancy card! That’s what die-cuts can do for you!

The card base is Shimmery White Cardstock, one of my favorite papers! It just barely has a glimmer to it, very subtle, but it is there and makes the paper look rich. It’s a must-have in your stash in my opinion! Then I added a layer of Real Red underneath another piece of Shimmery White.

I had previously used the Many Layered Blossoms Die to cut out this piece or Real Red. I think I was trying out my new Stampin’ Cut & Emboss Machine to see how it would handle a large and intricate die. So I had this stack of die cuts on my table! I just used the teeniest dots of Multipurpose Liquid Glue on the back of the blossoms and adhered it to the front of the card.

The greeting is from the Blossoms in Bloom Stamp Set. You can buy both the stamp set and the Many Layered Blossoms Dies. Then you will have it all!

I stamped the greeting in Real Red Ink on a strip of Shimmery White and snipped the banner in with the pointy part of the Tailored Tag Punch. Then I layered this on a piece of Real Red.

That’s all there is to this card! If you want a change from Halloween or holiday cards, go back to this popular stamp set and die and make a card like this Many Layered Blossoms Birthday Card.

Stamping With Forever Fern

Stamping With Forever Fern

I realized I hadn’t really used the Forever Fern Stamp Set very much yet, but when I opened the stamp case to start making a card, I realized I hadn’t even used these stamps yet! How did that happen?! I have used the Forever Greenery Designer Series Paper to make cards, but I hadn’t actually stamped with the stamp set! But now that I have, on this Stamping With Forever Fern card, I am in love!

I chose Just Jade, one of the new 2020-22 In Colors, for the card base since it is one of the coordinating colors with the designer paper. Not that I used the designer paper. The card front is Shimmery White Cardstock, a beautiful paper to use for a nice card.

Of course I wasn’t quite sure how this card would turn out if I just stamped the various ferns in the stamp set, but I just started stamping with various colors of green ink. There is something so relaxing and satisfying with stamping, applying that inked up stamp to the paper! It just feels good every time! I used Just Jade, Shady Spruce, Pear Pizzazz, Garden Green, and Soft Sea Foam. Just chose a group of greens! You can stamp over ones you have already stamped, it all looks good in the end!

The greeting is also in the stamp set. I stamped it on Shimmery White with Just Jade Ink and die cut it with the pretty circle die in the Tasteful Labels Dies. It actually looked good just like that if I would have put it on the card without layering it on something, but I did die cut a scalloped circle in the Layering Circles Dies and layered it on that. I adhered it flat on the card for a change. No embellishments either! I was so taken with how the stamping turned out, I didn’t even think about embellishments.

 This is a Distinktive stamp set (Patent pending); it has a special texture that gives added depth and dimension in a single step, creating photo-realistic images. It’s something special that Stampin’ Up! has created in some of the stamp sets. It’s really pretty!

There are also dies you can purchase to cut out the stamped images. If you want to get the Forever Flourishing Dies along with the Forever Fern Stamp Set, you can buy the Forever Fern Bundle with both and save 10%!

I do have to play more with this stamp set and Bundle. I was really pleased with this card I made with almost only stamping! Check it out if you haven’t ordered it yet. Lots of people have!

Shop Stampin’ Up! Online!

Blossoms In Bloom You Are Special Card

Blossoms In Bloom You Are Special Card

I don’t know what blossom or flower this is in this blueish color, but since it is art it can be anything, right? It all began with die-cutting some designer paper for the fuller layer underneath the outline layer but that didn’t seem to be what I was looking for. Sometimes if you original idea doesn’t work out, you just have to keep going and see what else you can come up with and that’s how this Blossoms In Bloom You Are Special Card came to be!

When you get right down to it, this card is pretty simple to make! The floral outline is die-cut with the Many Layered Blossoms Dies. The die is almost as big as the card front! If you think of it ahead of time, it would be a good idea to use the Adhesive Sheets on the cardstock before you die-cut it so that it will be like a giant sticker and you don’t have to worry about adhering it. I used teeny tiny dots of Multipurpose Liquid Glue but it is a little tedious!

The card base is Pool Party Cardstock, which I didn’t choose until I had the front of the card made! The floral die-cut is Coastal Cabana Cardstock. To add some color, I stamped the blossoms in the Blossoms In Bloom Stamp Set in Pool Party Ink.

I think if you are making a card like this you need to take a minute to think about the direction you want things to lay out in since everything is so large. Since I had the outline die cut first, I laid that down on my card front to see which leaf was going at the top and which way everything was pointing. Then I would know pretty close how to stamp the blossom image that would go underneath the die. It’s not something you can plan perfectly, but just so you get things pretty much how they are going to fit in the end.

The front layer of the card is Shimmery White Cardstock because at first, I thought I might do some watercoloring. Shimmery White Cardstock holds up better to water than Whisper White Cardstock. Plus it is the prettiest paper with its very subtle glimmer. It’s a little more toward the ivory or off-white color than pure white but you can really use it for either way.

The greeting is stamped from the Tasteful Touches Stamp Set. I used the Lovely Labels Pick A Punch which makes two different fancy ends to several sizes of paper strips. You can punch a 1/2″, 3/4″ or 1″ strip of paper. Just stick the length of cardstock way into the punch to get the fancy end. If you want to be extra careful, turn the punch over before punching and make sure the strip is all the way in and centered how you want it. Sometimes a tiny wiggle can get it off-center. I also cut a layer with the same punch with just a wider strip of paper. For a little bling, I used one Clear Epoxy Droplet. I think it was the perfect little bit of pizzazz on the card!

Don’t forget to use your July Bonus Coupons this month! You will see where to enter them on your order. I think you have to do one at a time if you have several to use. You can use all the coupons you have on one order, but you have to enter them one at a time. Before you submit your order, you will see that the coupon amount was taken off. Just remember, if you have a large order and reach Hostess rewards, when you enter your coupons that will bring down your total and you might have to add more to earn the Stampin’ Rewards.

Here is another way to use the Blossoms in Bloom Stamp Set along with the Many Layered Blossoms Dies. You can purchase the stamp set and dies. Then you will be all set to make something like my Blossoms In Bloom You Are Special Card.

Ornate Garden Floral Bouquet Card in Mint Macaron

Ornate Garden Floral Bouquet Card in Mint Macaron

This Ornate Garden Floral Bouquet Card in Mint Macaron is one that turned out a little differently than I expected. Somehow I thought there was a die to cut out the bouquet and that was my plan as I designed the card. Who knew? There is no die in the Ornate Garden Suite that cuts out the bouquet! I must have made it up in my mind! But no problem! I just grabbed my Paper Snips and cut it out by hand.

Otherwise, this is a pretty simple card. The card base is Mint Macaron, not necessarily one of my favorite colors, but I like it on this card. The floral bouquet in the Ornate Style Stamp Set is stamped on Shimmery White Cardstock in Memento Black Ink so that I could color in with Stampin’ Blends. Coloring is so relaxing during this time and Shimmery White is a great cardstock to color on! If you looked closely in person you could see just a little bit of shimmer on the paper. It’s really nice! I was trying to keep these colors a little on the softer side. I usually use different greens on the leaves and usually a touch of yellow. On the small flowers, I used a blue and a bit of purple. You can use whatever colors you like.

As I said, I assumed that there was a die for this whole bunch of flowers, but there is not! But I continued on with my idea of cutting out the flowers and then popping them up on the card with Stampin’ Dimensionals.

The beautiful layer behind the flowers is die cut with one of the Ornate Layers Dies. This die has seemed pretty easy to use to me. I usually have a few little pieces to poke out but mostly it cuts pretty well. I ran it through my die-cutting machine three times to get a good cut.

I chose not to put a greeting on the card yet or I might just leave it without one. I think the card is fancy enough to stand on its own without a greeting and then I can use it to just write a note or for any occasion.

Be sure to look at the Ornate Garden Suite and check out all the products that you can get in the whole Collection! The good thing is you can pick and choose if you do not want all the products or not all of them at once! But if you do “want it all” you can just put in the one order number for the Ornate Garden Suite Collection #154153.

SHOP STAMPIN’ UP! ONLINE!