Tag Archives: Hand-Penned Petals Stamp Set

Hand-Penned Gatefold Birthday Card

Hand-Penned Gatefold Birthday Card

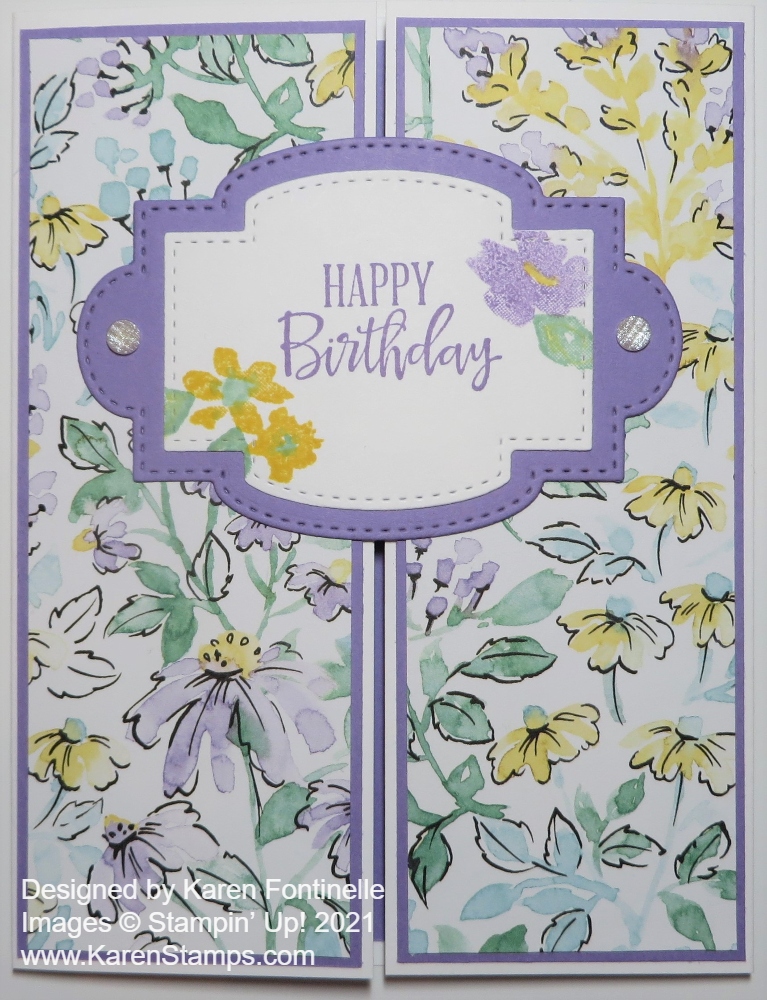
Bet you can’t make a card with this Hand-Penned Designer Series Paper, like this Hand-Penned Gatefold Birthday Card, without feeling happy afterward! It’s not about making the card, it’s that designer paper that just is so pleasing to me!

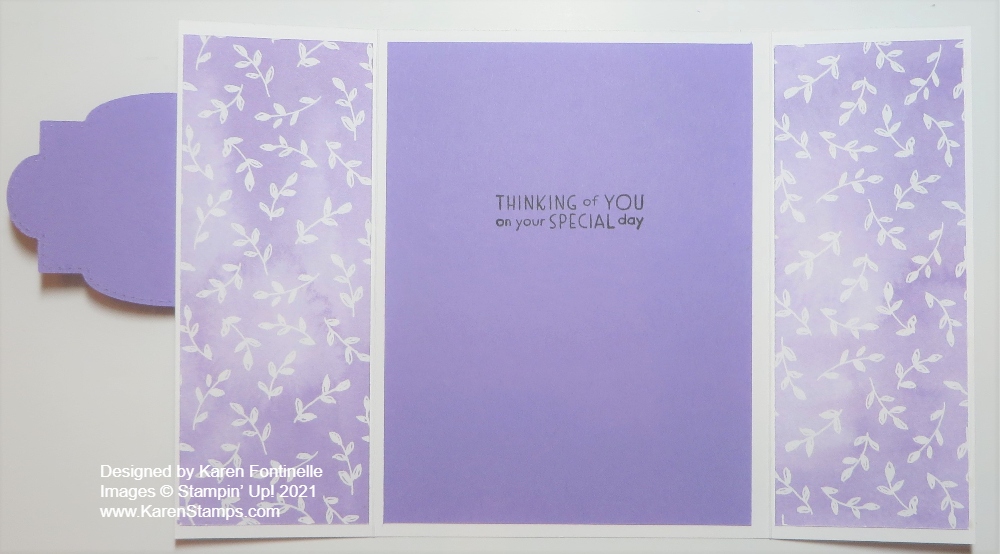
Just to make things a little more interesting, I made this into a gatefold card. Instead of folding the card the normal way, you fold in both sides. The center greeting is just glued on the left side so that it can be opened!

The card base is Basic White. Cut the cardstock in half like usual – 5 1/2″ x 8 1/2″. But don’t score and fold in the middle! Score each end at 2 1/8″. The math is that you want the center of the card to be 5 1/2″ x 4 1/4″. So you divide 4 1/4″ in half, so each side “gate” will fold in to cover the center of the card. That gives you 2 1/8″ on each end. Mine somehow didn’t quite meet in the middle. Maybe I should have folded the sides in from the opposite side. You can try both ways!

For this card, I cut a Highland Heather piece of cardstock to go on the inside of the card. I made it the usual layer size, 5 1/4″ x 4″. I stamped a greeting on the inside before I adhered it to the center of the card. This greeting is from the Inspired Thoughts Stamp Set.

On the front of the card, I cut a layer of Highland Heather to go behind the Hand-Penned Designer Series Paper. Since the gate-fold panel is already pretty narrow, you have to cut the other layers pretty narrow. The Highland Heather layer is 5 3/8″ x 2″ on each gatefold panel. The designer paper is 5 1/4″ x 1 7/8″.

Now as I was putting glue on the back of this pretty floral designer paper, I also liked the Highland Heather color print on the other side. So I added that side of the designer paper to the inside panels of the card!

Hand-Penned Gatefold Birthday Card Inside

For the greeting on the front of the card, you could use a variety of shapes – circles, rectangles, squares, ovals. Use whatever you like or fits the greeting. I used these two die cuts from the Stitched So Sweetly Dies. The Happy Birthday greeting is from the Peaceful Moments Stamp Set. I stamped that in Highland Heather Ink and also stamped a few flowers and leaves in the Hand-Penned Petals Stamp Set. Layer the Basic White stamped piece on top of the Highland Heather piece. Be sure to only apply adhesive to the left side of the greeting from the middle over to the left side. Check the inside to make sure no glue is showing on the inside or it will stick to the other side of the card. I added two Elegant Faceted Gems to each side of the Highland Heather die cut.

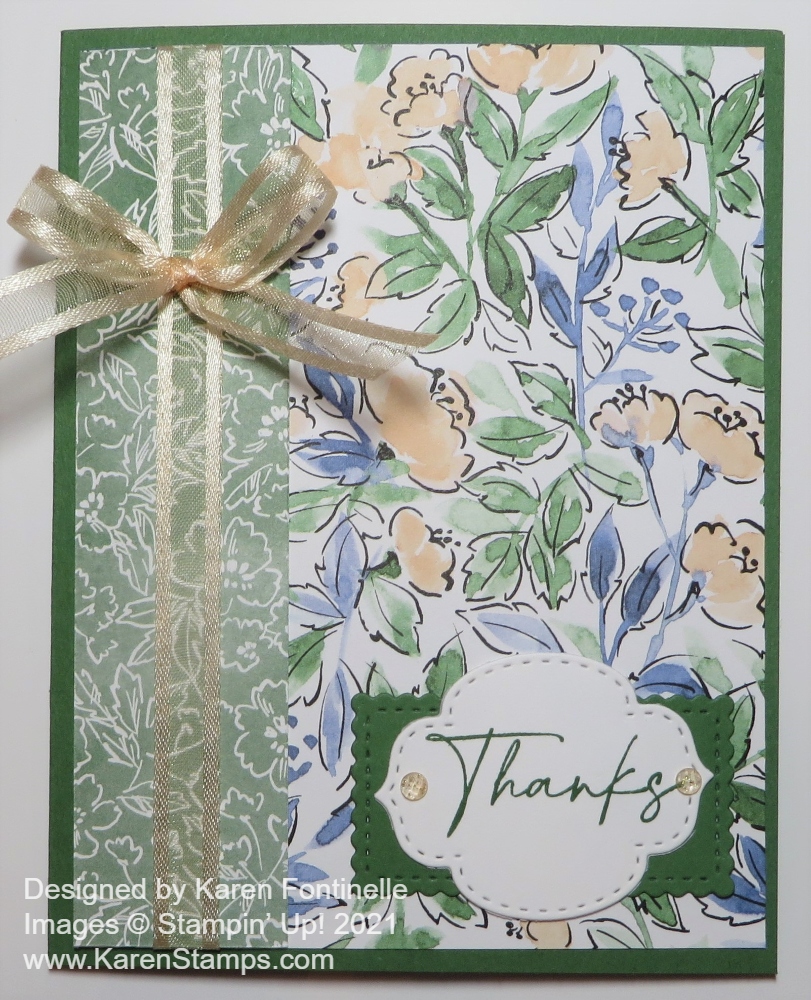
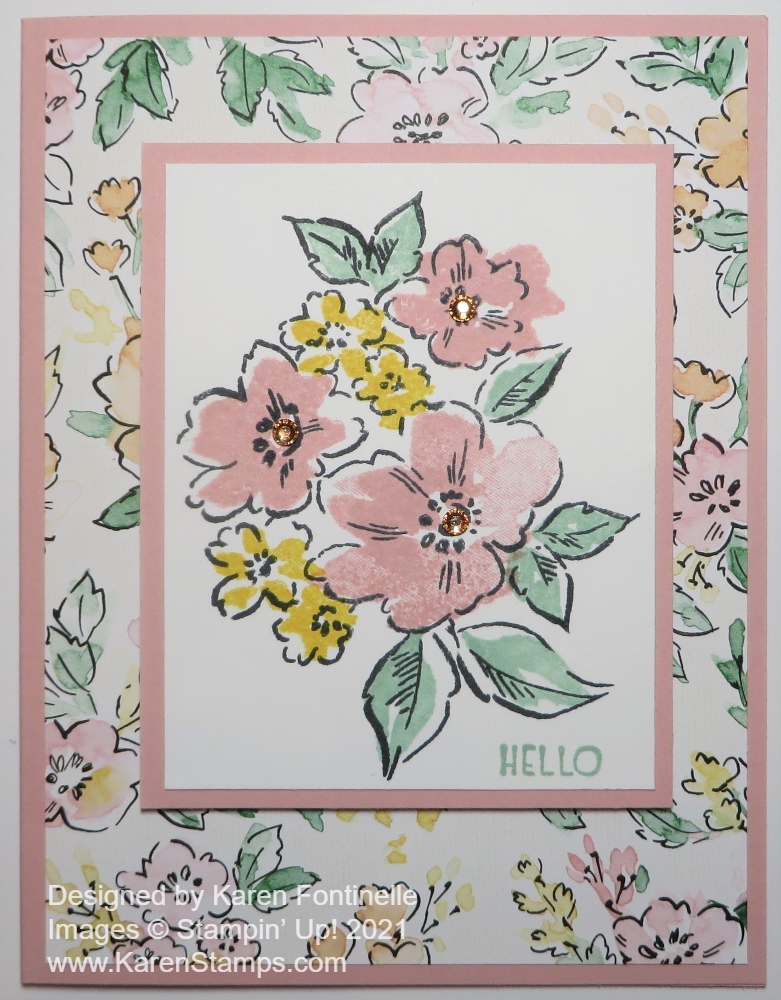
Here is a fairly recent card I made in the gatefold style using the Expressions In Ink Designer Series Paper.

This is an easy card but the gatefold gives it a little extra pizzazz. Try your hand at making something like this Hand-Penned Gatefold Birthday Card.

SHOP STAMPIN’ UP! ONLINE HERE!

Hand-Penned Floral Thanks Card

I think there is something about this paper I used on this Hand-Penned Floral Thanks Card that is just enchanting! You can’t really grasp how pretty it is until you see it in person! I know we say that all the time, but I think the catalog doesn’t do it justice. I hope you won’t pass it up! And if you order it today, August 2nd, you can get it at a 15% discount on this the LAST DAY of the Stampin’ Up! Designer Series Paper Sale! Look for the Hand-Penned Designer Series Paper.

To make this card, I used Garden Green for the card base. The sheet of paper I chose is the one on the right side of the card with the Pale Papaya flowers and blue and green leaves. The other side of that paper is the green print you see on the left side of the card! I thought both were pretty and obviously would go perfectly together for a two-paper card! That strip is cut at 1 1/4″ wide but you could make it a little wider or a little narrower if you wanted. I adhered the strip to the side with all the colors and then adhered the ribbon before adhering the whole piece to the card base. I tied the bow separately and attached it with Mini Glue Dots. This beautiful ribbon is one of the new In Color Ribbons, the Pale Papaya 3/8″ Woven Ribbon. All these In Colors ribbons are sheer and beautiful! I love all five of them!

The greeting is in the Hand-Penned Petals Stamp Set. I stamped it on Basic White in Garden Green ink. I found the Garden Green die cut rectangle in the bag with the cardstock so I just found another shape die that I could layer over it. This one in the Stitched So Sweetly Dies worked fine because the die for the Garden Green die-cut is also in that set!

That’s it! Very easy card! Be sure to look at all the papers available on the Designer Paper Sale today and save 15%!

Here is another card I made with the Hand-Penned Designer Paper, plus this one. Don’t tell me you can resist this pretty paper!

Shop Stampin’ Up! Here!

Hand-Penned Petals Monochromatic Bumblebee Card

Hand-Penned Petals Monochromatic Bumblebee Card

I didn’t have much mojo left when it was time to make a card so I knew I had to come up with something simple, and when you’re in that situation, sometimes a monochromatic card makes it all easy! This Hand-Penned Petals Monochromatic Bumblebee Card was just the perfect card to make after a busy day and evening.

The card base is Bumblebee Cardstock. Have you ever thought about how this color name is the only one that is just one word? Just “Bumblebee”. I looked through some of my designer paper for inspiration even though I was thinking about a monochromatic card. When I saw this Bumblebee-colored designer paper in the Pansy Petals Designer Series Paper, I knew what I was going to do.

I could have had just a layer of the designer paper on the card front, but I thought a bit of white underneath would help it stand out a little. For the front of the card, I stamped the floral bouquet from the Hand-Penned Petals Stamp Set in Bumblebee Ink on Basic White Cardstock, then cut it out with the Scalloped Contours Dies. These are some of the best dies we’ve ever had, in my current opinion! I love them! For an embellishment, I tied a bow out of the Bumblebee 1/4″ Gingham Ribbon. I planned to stamp a greeting on the card, but we don’t ALWAYS have to have a greeting on the front of the card! Sometimes it can just be plain and you can stamp something inside or write a note. Or add a greeting when you are ready to send the card, if you are just making cards for fun, and then decide which greeting would be appropriate.

I also thought about putting some jewel embellishments on the card to look like they matched the yellow of the Bumblebee, but I just said to myself, “Stop!” The card was fine as it was, simple but nice enough, with a small bow for an embellishment, not to mention the very nice scalloped rectangle die complete with the stitched look. It was fine and sometimes you just have to know when to stop!

The days are winding down for the January-June 2021 Mini Catalog so be sure you are looking through the catalog another few times and getting everything you want. Some things carried over to the new Annual Catalog so we don’t have to say goodbye to those products! And some retiring products are reduced in price for the Last Chance Sale so see if you can find any bargains you “need”.

SHOP STAMPIN’ UP! ONLINE HERE!

Ombre Gift Bag For a Friend

Ombre Gift Bag For a Friend

When you need a gift for a friend at the last minute, it’s nice to have something on hand to use, like this Ombre Gift Bag For a Friend. No running to the store and looking for the right kind of packaging and theme. You can make your own!

This is an Ombre Gift Bag in the new In Color Pale Papaya. The pack of 20 gift bags comes in an assortment of all the new In Colors. Just decorate however you like, a lot or a little. You can add a little gift or maybe a special treat. Fold over the top or leave it as is. The bags are 4 3/4″ x 7″ and are food safe! Just picture a big, yummy cookie in that bag!

For this Ombre Bag, I die cut Soft Succulent Cardstock with the largest Ornate Layers Die. The flowers are stamped from the Hand-Penned Petals Stamp Set. I colored in all the flowers with Stampin’ Blends Markers in Pale Papaya, Daffodil Delight, Polished Pink, Fresh Freesia and the leaves with Soft Succulent plus a tiny bit of yellow. You can add flower centers in whatever colors you like. The flowers are die-cut with the Penned Flowers Dies. Only use the outline die, not the center part, to cut out this bouquet. You can buy both the stamp set and dies together in the Hand-Penned Petals Bundle and save 10%.

I found the word “Friend” in the Daisy Lane Stamp Set and stamped it in Pale Papaya Ink. Then I die-cut it with a die in the Ornate Frames Dies. Originally, I was going to layer it on another die-cut but that made it too big and I didn’t want to detract from the flowers. I added two Genial Gems to the greeting and the Ombre Gift Bag For a Friend was finished!

Hand-Penned Petals With Soft Pastels

Hand-Penned Petals With Soft Pastels

This Hand-Penned Petals With Soft Pastels was nearly the death of me! The idea was easy enough but the execution was a mess. This wasn’t even going to be a card! I was just trying out the new coloring technique we have, but I thought it turned out okay so I went ahead and made it into a card! That was the easy part.

In the new Stampin’ Up! Annual Catalog we have the Soft Pastels Assortment! You will find these new chalk pastels on page 126 in the catalog at the bottom. You get eight colors in the box: Coastal Cabana, Daffodil Delight, Gorgeous Grape, Granny Apple Green, Mango Melody, Mossy Meadow, Night of Navy, and Poppy Parade. You can use these pastels in a variety of ways for cards and projects. Years ago Stampin’ Up! had a tin of a bunch of colors, little squares that we would pick up the chalk color with little applicators or a cotton ball. I need to refresh my memory of all the things we used to do with pastels!

To begin, I stamped this bouquet with Stazon Ink. First I tried picking up color from the end of the chalk using a Blender Pen. That worked, but on Basic White Cardstock you have to be careful not to rub too hard with any tool with water. Blender Pens barely have any moisture, but you still have to be careful. I colored in the small Daffodil Delight small flowers. Next, I used other colors and Sponge Daubers on some other flowers. I scraped some chalk dust off the side of the chalk using my open Paper Snips to get a little dab of chalk dust on an acrylic block to pick up with the Sponge Dauber. Of course you can’t color precisely with Sponge Daubers but that’s okay. With the soft look of the pastels, it gives a watercolor look to the flowers. In the end, the Basic White looked a little bare around the flowers, so I grabbed a Blending Brush and applied some Mango Melody chalk very lightly around the edges.

Hand-Penned Petals With Soft Pastels Coloring

Since Poppy Parade is one of the chalk colors, I used Poppy Parade and Granny Apple Green for the card base and the layer. But since the chalk doesn’t turn out as strong as the real colors, I think I should have chosen something different for the card base. The greeting is from the Celebrate Sunflowers Stamp Set, stamped in Poppy Parade Ink. I did cut it with a Stitched Rectangle die, but then I trimmed off the stitched edges to make it smaller to fit into the same size die cut in Poppy Parade. Otherwise, the next larger size of die cut seemed too big for this card.

Hand-Penned Petals With Soft Pastels Closeup

Of course for a final embellishment, I adhered some Genial Gems in both colors around on the card. It was fun playing with the pastels, I just had trouble assembling the card. I stuck the layers down crooked and had to redo. Then the torn paper with adhesive on it was really sticky and I couldn’t get it off my fingers easily nor pick up the other pieces off the table! Just a lot of little things were a pain making this simple card, but at least I got to play with the Soft Pastels Assortment.

Check out the Soft Pastels Assortment in the Stampin’ Up! Online Store!

Hand-Penned Petals Hello Card

Hand-Penned Petals Hello Card

I didn’t even order this Suite when Demonstrators got to preorder select new products in the Stampin’ Up! Annual Catalog. The loosely drawn floral images really didn’t appeal to me. But I started seeing cards other Demonstrators were making and then I liked everything about this Suite! This Hand-Penned Petals Hello Card is my first attempt using the stamps and paper! I love it!

This is a very easy card to make! Just stamping and paper….well, and a few rhinestones! The card base is Blushing Bride, one of the coordinating colors of the Hand-Penned Designer Series Paper. All the sheets of this paper are beautiful to use for floral cards. It reminds me of old-fashioned wallpaper! But modern! Very pretty!

I just chose one of the papers to use as a layer on the front of the card. I didn’t want to cover it up very much, so I made just a small piece of Basic White on which to stamp the bouquet in the Hand-Penned Petals Stamp Set. I stamped it in Memento Ink, fully expecting to color in the bouquet with Stampin’ Blends. But then I saw there were stamps for two-step stamping to fill in the color! They aren’t a perfect fit because that’s not the look you want, but they are fairly close. I used Blushing Bride, Daffodil Delight, and Mint Macaron Ink to stamp the flowers.

The greeting is from the Inspired Thoughts Stamp Set because I needed something small to fit just below the flowers. It is stamped in Mint Macaron Ink also. The Inspired Thoughts Stamp Set “goes with” the Inspired Thoughts Bundle which has the stamp set and Inspiring Canopy Dies. I really like this greeting stamp set but I did not purchase the dies. However, now I have seen some cute cards using those tree dies so who knows if I can hold out on not buying!

In finishing off this card, I layered the stamped bouquet piece on Blushing Bride and popped it up with Stampin’ Dimensionals®. I forgot that in the Hand-Penned Suite Collection, there are the Genial Gems. These are faceted glitter gems in Pale Papaya and Mint Macaron. Instead, I used three Champagne Rhinestone Basic Jewels for the flower centers.

You can find these beautiful products in the Stampin’ Up! Online Store HERE!