This new Stampin’ Hot Foil System from Stampin’ Up! is coming to all markets this Friday, July 10th at midnight! If you want to be one of the first to own this new system by Stampin’ Up! and if you don’t want to wait in cases it sells out, be sure to order early! This new system has been “top secret” for a little while until Stampin’ Up! had enough supplies stocked up and ready for customers to order. That day is Friday!!
What is Hot Foil? Hot foiling is a technique that uses heat and pressure to transfer metallic or colored foil onto paper, cardstock, and more. The result is a shiny, professional-looking finish, similar to what you see on luxury stationery or packaging. You can experiment with foiling on different materials to see what shines.
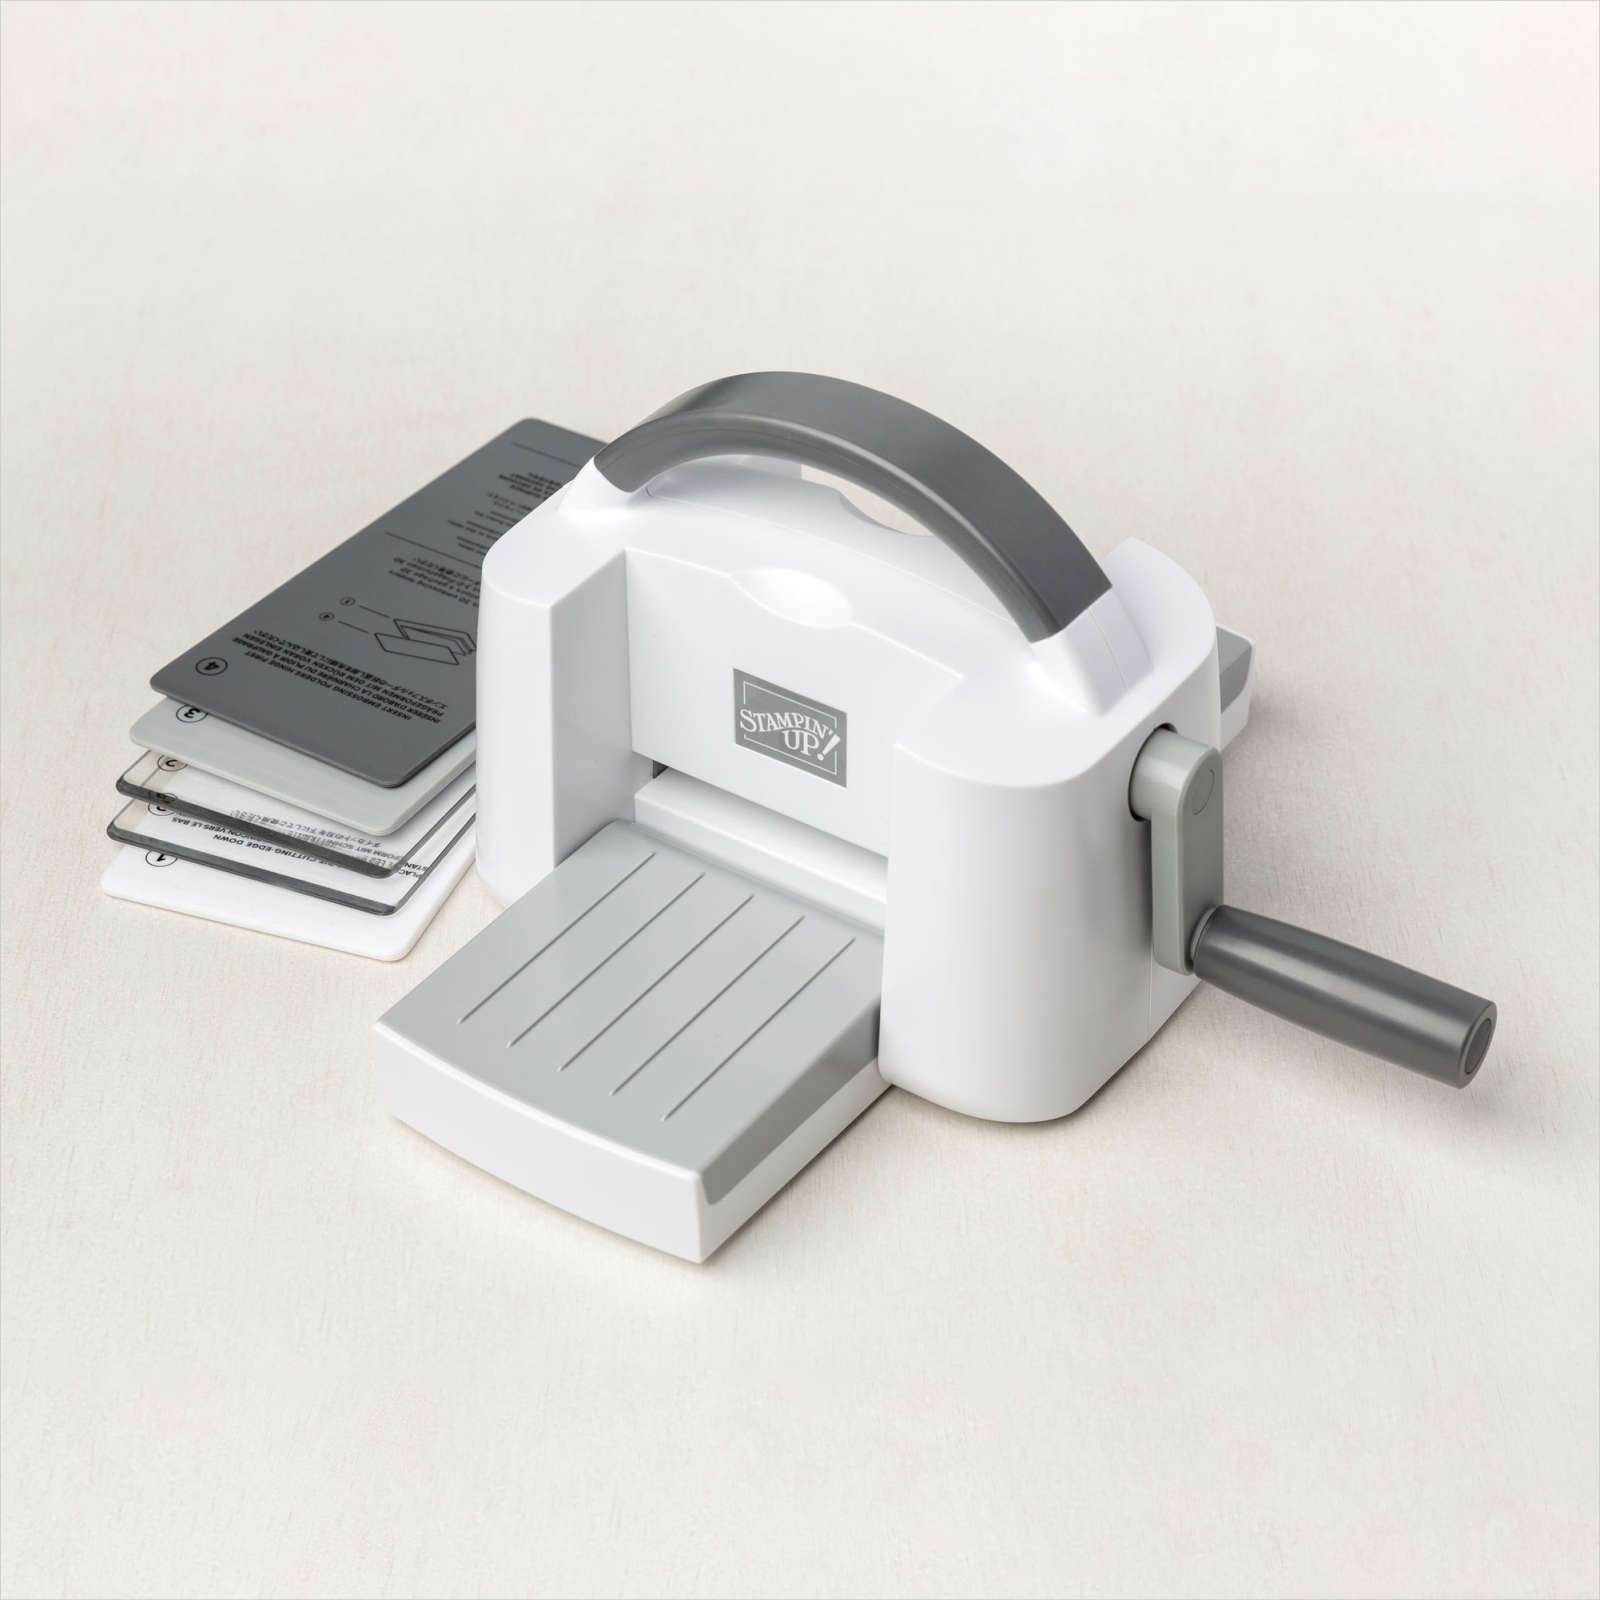
What is the Stampin’ Hot Foil System? The Hot Foil System comes with these products:
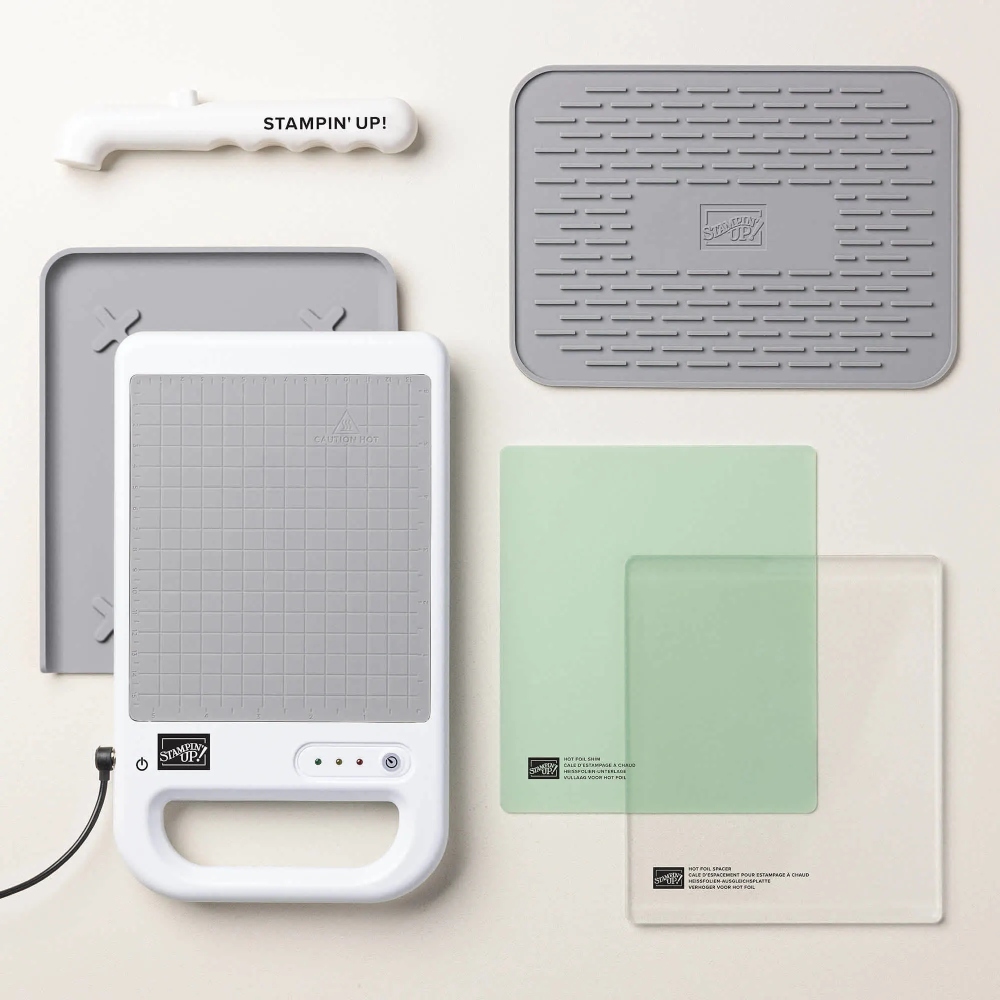
- On the left, you see the platform that heats up and the silicone mat that it sits on to protect the surface. It takes 6 minutes to heat up initially, but then stays warm while you work on your projects.
- To the right, you see the green hot foil shim and the clear hot foil spacer, two pieces you put on the hot platform as you build the sandwich.
- Above those two pieces, you see another silicone mat on which to place the hot dies.
- The white tool at the top is the magnetic pick up tool, to pick up hot dies from the platform.
You will also need the Stampin’ Cut & Emboss Machine. Stampin’ Up! is aware of many similar products out there, but you will need to use Stampin’ Up! products with this Hot Foil System for the 1-year limited warranty because they know these products work with the system.
Purchase the Stampin’ Hot Foil System and receive the virtual Metallic Magic Craft Class (a $30 value) FREE until January 4, 2027. You will also need to purchase the Stampin’ Hot Foil Rolls and Hot Foil dies to complete the hot foil process. The Foil and Dies are sold separately.
Stampin’ Hot Foil System and Craft Class (170009) $160.00
Available in my Stampin’ Up! Online Store on Friday, July 10, 2026!
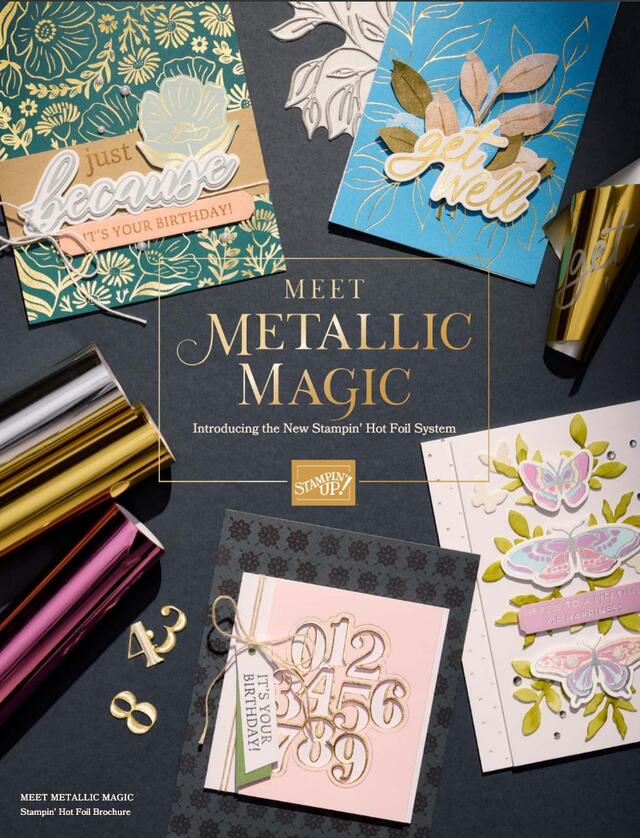
Page through the brochure above to learn all about the new Stampin’ Hot Foil System! Just click!
Things to Know:
- You can foil on a variety of products such as cardstock (Two-Tone and White Willow are recommended), designer series paper, Stampin’ Up! Vellum, window sheets, and pearlized specialty paper. Porous or textured papers may give inconsistent results.
- The cutting dies we already have are not designed to be used with hot foiling, and you can’t die cut using foiling dies. They are different and you may risk damaging the dies and the system.
- Go slow when running the foil sandwich through the Cut & Emboss Machine.
- Use any Rewards you have to purchase the Hot Foil System and/or earn Rewards when you purchase the system and the other products like dies and foil rolls. That helps with the expense!
I think this covers a lot of information, but we will all learn a lot more as more people get this foiling system in their hands and begin using it, just like when new catalogs come out and we see what everyone is doing with the new stamps and products! It will be a fun adventure, I’m sure. Maybe a bit of a learning curve, but the ladies in the video say we will catch on quickly after just a couple of tries!
More to come, but check out the brochure above (you can print it out if you like) and see that you think!