Tag Archives: Lovely Labels Pick a Punch

Rainbow Glimmer Halloween Card

Rainbow Glimmer Halloween Card

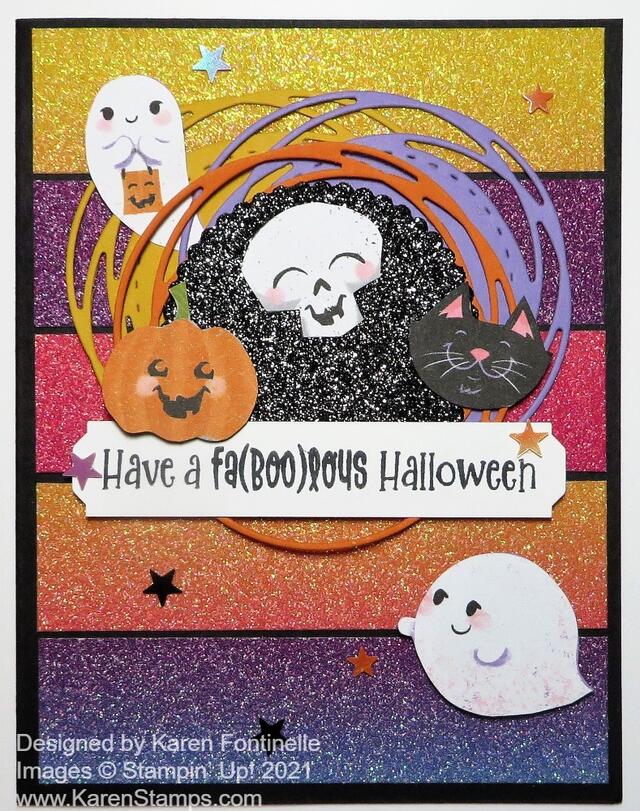
I can easily promise you I had no idea this Rainbow Glimmer Halloween Card would be what I would create. I don’t even remember what I thought I was going to make! I even had a Christmas stamp set out too! But I had seen a card made with strips of this beautiful Rainbow Glimmer Paper that was a birthday card and that’s where the original idea came from to use these strips. I thought they might be perfect for a Halloween card! Other than that, I had no ideas for exactly what to do with the card! Sometimes you just have to work with colors, die cuts, maybe walk away and come back, and eventually, something will come together for you.

The card has a Basic Black card base. The strips of Rainbow Glimmer Paper are cut 1″ x 4″ with just a tiny space in between each strip. You could also have them all touching with no space. I actually cut them not just in consecutive strips or the colors might be nearly the same, which is okay if that is what you want. So I had to cut into the areas of the paper that had the colors of strips that I wanted. It might kill you to cut into a lot of different parts of the paper rather than conserve it, but hey, it’s just paper and we can buy more! Use it!!

I wanted to use the Black Glitter Paper as the center with the Halloween characters adhered to it, but I played around with the background layer and different colors. I settled on the Pumpkin Pie cardstock die cut with the circle die in the Painted Labels Dies. This looked fine, but as I worked with it, I thought it needed another layer or “something”….a little more pizzazz. I cut out another circle from Highland Heather cardstock and that looked good but of course was mostly covered up by the Pumpkin Pie circle! I tried staggering it underneath and that was good but I felt it needed another one to balance it out. So I tried Crushed Curry and once I got the three circles placed just right I was satisfied!

I cut out the ghosts, skeleton, black cat, and pumpkin from the Cute Halloween 6″ x 6″ Designer Series Paper. I love those little characters! I could have stamped them as well with the Cutest Halloween Stamp Set and used the coordinating punch, the Halloween Punch (which is currently unavailable as I write this).

The greeting is from the Cutest Halloween Stamp Set. I stamped it in Memento Ink and trimmed the ends with the Lovely Labels Pick a Punch. I was considering putting it down lower on the card, but then thought it might work better going across those circles. I liked that and then adhered the Halloween characters around where I liked them. And for a little more bling, I had to add some Cute Stars Adhesive Backed Sequins.

The card may be a little crazy, but it’s for Halloween so that’s good! If you don’t have the Rainbow Glimmer Paper, you can just use different colors of cardstock strips. Just play and you will come up with some great ideas. Use this Rainbow Glimmer Halloween Card for inspiration!

SHOP STAMPIN’ UP! ONLINE HERE!

Whimsy & Wonder Traditional Christmas Card

Whimsy & Wonder Traditional Christmas Card

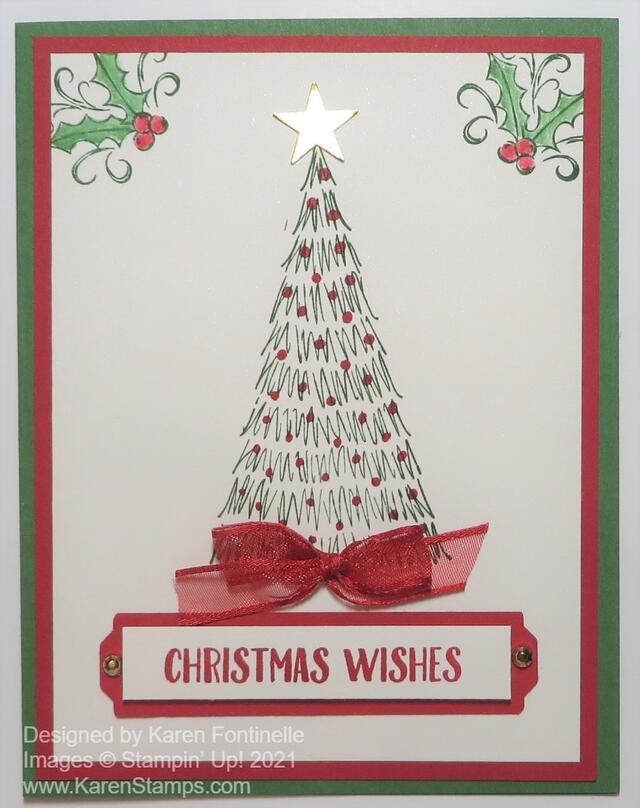
The Whimsy & Wonder Suite in the Stampin’ Up! Holiday Catalog uses soft pastel colors in it, but for this Whimsy & Wonder Traditional Christmas Card, I decided to just use the traditional Christmas colors of red and green!

The card base is Garden Green with a layer of Real Red Cardstock. Real Red has been my favorite color forever! If you buy a red somewhere else, like the big box craft store, you will find that their red does not compare to the perfect red of the Stampin’ Up! Real Red! I know because I bought a big package of red cardstock and envelopes when I first started stamping. When I saw how it compared to the Stampin’ Up! Real Red, I threw out the store-bought red paper!

The stamped layer is Shimmery White, my other favorite paper! It has just the slightest glimmer to it and works well with any medium, even some watercoloring. I stamped the tree from the Whimiscal Trees Stamp Set in Garden Green Ink. Old Olive would also look good. Then I overstamped it with the dots to look like little red ornaments or lights on the Christmas tree. I couldn’t resist stamping the holly and berries up in each corner of the card. I just stamped them in Garden Green and then went back in with a Blender Pen and added green ink to the leaves and red ink to the berries. Just very lightly and carefully because I didn’t want the initial stamping to smear.

The greeting is stamped from the Banner Year Stamp Set. It is stamped on Shimmery White and layered on a strip of Real Red, punched at each end with the Lovely Labels Pick a Punch. The greeting itself is popped up on Dimensionals but the Real Red punched piece is adhered directly on the card front. For some embellishment, I added the smallest Gilded Gems to each end of the red piece.

Since the tree doesn’t come with a trunk, I didn’t really like it just floating in the air, so I added a bow with the Real Red 3/8″ Sheer Ribbon. I might have preferred a really narrow ribbon but since this one is sheer, I thought it looked light enough to put in between the tree and the greeting. And since my tree needed a star at the top, I looked through my retired punches and found the right size little punch with a star and punched some Gold Foil.

The lesson here is that even though this stamp set, Whimsical Trees is “whimsical” doesn’t mean you can’t make it “traditional” with color and embellishment! Here is another card I made with the same stamped tree and the new Whimsy & Wonder Specialty Designer Series Paper in the less traditional colors. I love this card as is, but if you are looking for the red and green of Christmas, you can certainly use this tree and change up the colors. If you are looking for a more traditional Christmas card or at least a few for certain people, then try this Whimsy & Wonder Traditional Christmas Card with red and green!

Don’t Miss the Lovely You Bundle!

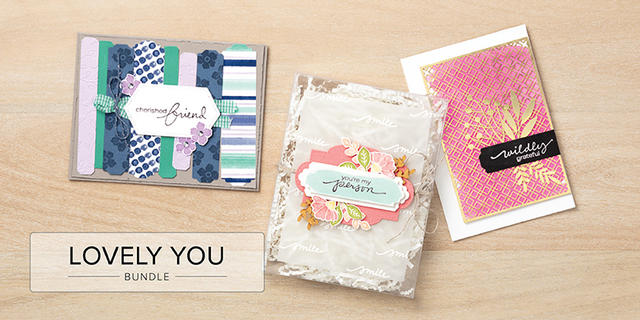
Lovely You Bundle Photo

The separate pieces of this Lovely You Bundle are not retiring but don’t miss getting the Bundle and saving 10% while you can! I think this is one of those stamp sets that we kind of take for granted – nothing flashy about it but it has some good, basic stamps in it and lovely greetings that you can use in many ways. You can often do more with the smaller stamp images than the big dramatic ones. Of course we love them all!

Right now you can purchase the stamp set and coordinating punch for the greetings together in the Lovely You Bundle at a discount of 10%. From May 4th on you will be able to purchase the Lovely You Stamp Set and the Lovely Labels Pick a Punch separately in the new Stampin’ Up! Annual Catalog but they will have to be purchased separately at full price.

The greetings can be used on many cards in their lovely font and the small images can be used on simple card designs, stamped randomly as a background on a card (which I think is really fun to do!) or just added to fill in some space when you need just a little something. I have used the punch many times for greetings when I wanted not a plain edge but a little bit of a design. The punch can handle different widths of cardstock giving you a little variation.

Here’s a card I made almost a year ago. I love stamping a background like this! You can see even small images can be used in many ways!

Lovely You Floral Stamped Card For a Friend

Be sure to check your stash and see if you “need” the Lovely You Bundle before the Bundle itself retires on May 3. Might as well save 10% on the price of both the stamp set and the punch if you can!

SHOP STAMPIN’ UP! ONLINE HERE!

Flower & Field All-Occasion Card

Flower & Field All-Occasion Card

This Flower & Field All-Occasion Card was supposed to look exactly like a sample in the Sale-A-Bration Brochure, but this shows what can happen when you start copying something! Sometimes you change things a little or a lot!

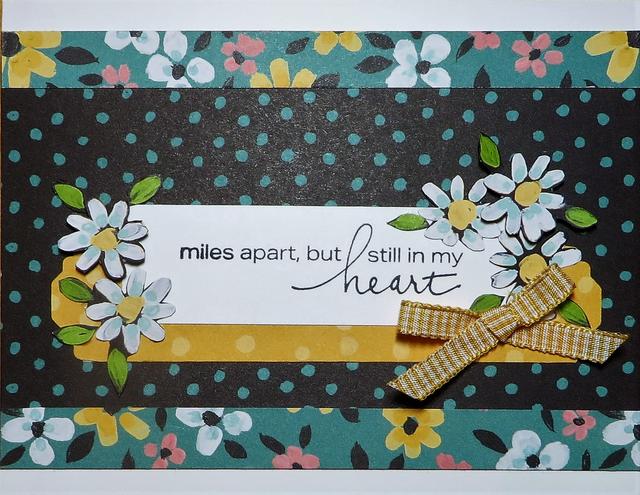
I wanted to make a card with the Flower & Field Designer Series Paper and looked in the Sale-A-Bration Brochure for ideas. Right away the card in the bottom right of page 11 caught my eye. But when I looked through the package of paper, this black background with the Just Jade polka dots is the one that caught my eye!

As I toyed with maybe adding strips of Just Jade Cardstock as a layer under the top and bottom of the polka dot piece, somehow I came up with strips of this flowered pattern instead. I fiddled with the paper sizes until I had about 1 /4″ top and bottom margins on the Basic White Cardstock card base.

The greeting is stamped from the Lovely You Stamp Set. I wanted a greeting that was long in length. I used the same Bumblebee yellow polka dot scrap of designer paper that the brochure sample used to layer underneath the greeting. I used the Lovely Labels Pick a Punch to punch each end of the yellow polka dot layer.

Then for fun, unless you hate cutting with scissors, I cut out several white daisies from another pattern of the Flower & Field Designer Paper to adhere around the greeting. It was a little tedious, but not too bad! You can even consider cutting with Paper Snips relaxing! I popped up a couple of the daisies with Stampin’ Dimensionals.

For a finishing touch, I added a bow of Bumblebee 1/4″ Gingham Ribbon. You could also add some rhinestones or gem embellishments of any kind.

I absolutely love this Flower & Field Paper! If you do too, you can get it FREE during Sale-A-Bration with a $50 Stampin’ Up! purchase. But you have to hurry, because Sunday, February 28 is the last day of Sale-A-Bration! You don’t want to miss out on FREE products!

SHOP STAMPIN’ UP! ONLINE HERE!

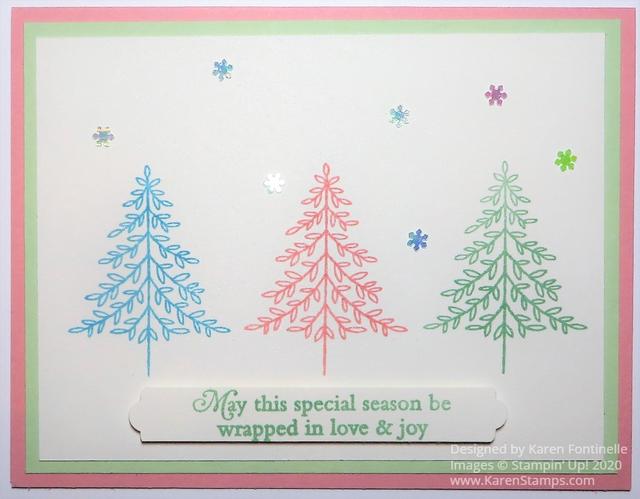
Perfectly Plaid Pastel Trees Christmas Card

Perfectly Plaid Pastel Trees Christmas CardPerfectly Plaid Pastel Trees Christmas Card

This Perfectly Plaid Pastel Trees Christmas Card came about after seeing some Christmas cards using non-traditional colors, even pastels! I thought I would see what I could do with a pastel color scheme for my card!

The card base is Blushing Bride Cardstock with a layer of Soft Sea Foam Cardstock. I tried putting another layer of Balmy Blue but it looked like too much. I left it at just the pink and green.

The main paper I used is Shimmery White Cardstock. This is my favorite paper ever! It has just the slightest shimmer to it if you look closely. It stamps so well and even takes watercoloring better than regular Whisper White Cardstock. I just love it!

The three trees stamped on the Shimmery White are from the Perfectly Plaid Stamp Set. This stamp set was carried over from last year and I’m glad because it has so many possibilities, not to mention the Pine Tree Punch which coordinates with the trees. I could also have punched out the trees with that punch and made them a little more 3D. The trees are stamped in Blushing Bride Ink, Balmy Blue Ink, and Soft Sea Foam Ink.

The greeting is also stamped in Soft Sea Foam Ink. It is also in the Perfectly Plaid Stamp Set as are some other ones I could have used. I just stamped this on a scrap strip in my Shimmery White Cardstock and then punched the ends with the Lovely Labels Pick a Punch. It is popped up with Stampin’ Dimensionals®.

Then to add a little something extra, I added some Adhesive-Backed Snowflakes. These are little snowflake sequins that have adhesive so they are easy to place and stick on a card! No glue required!

Another thing I could have done, instead of the snowflakes, was to put some Rhinestones or perhaps the Champagne Rhinestone Basic Jewels on the trees. If I would have stamped the trees up just a little bit higher I think that would have worked. Or maybe I could have stamped some small snowflakes. So many different things you can do with stamping!

You could change the color scheme of this card and use traditional red and green colors and see how different it would look. Here is another card I made with this set, in red and green colors, and using all three styles of trees. Or as I mentioned, use the Pine Tree Punch to punch out the trees and pop them up on Dimensionals instead of the greeting. Just play until you are satisfied!

SHOP STAMPIN’ UP! ONLINE HERE!

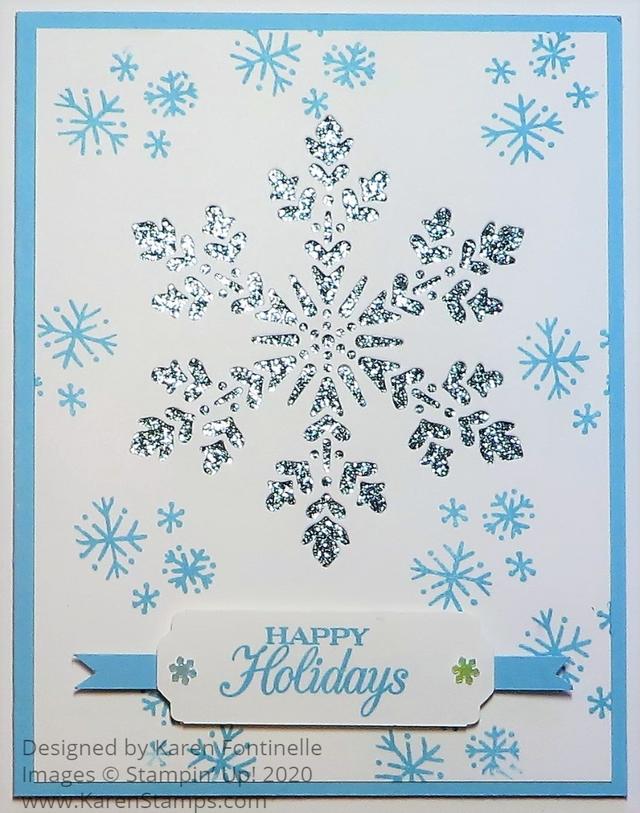
So Many Snowflakes Die-Cut Holiday Card

So Many Snowflakes Die-Cut Holiday Card

Use the So Many Snowflakes Die to make this So Many Snowflakes Die-Cut Holiday Card and let the sparkles show through the snowflake! I realized I hadn’t used my glimmer paper enough so I tried it out on this card with the see-through die-cut negative.

The card base is Balmy Blue with a layer of Whisper White. I die cut the largest snowflake from the So Many Snowflakes Dies in the Whisper White. Since I didn’t purchase the Snowflake Wishes Stamp Set (even Demonstrators can’t have everything!), I used some snowflakes in the Snowman Season Stamp Set to stamp some random snowflakes in Balmy Blue Ink on the front of the card.

For the sparkle under the die-cut, I adhered a piece of Balmy Blue Glimmer Paper. It’s always difficult to photograph sparkle and shine, but it looks very pretty under there! Then this Whisper White layer with the Balmy Blue Glimmer Paper underneath adhered to the Balmy Blue Cardstock card base.

The greeting is from the Poinsettia Petals Stamp Set. It is stamped in Balmy Blue Ink and punched with the Lovely Labels Pick A Punch. I simply cut a little strip of Balmy Blue Cardstock to layer underneath the greeting to help it stand out a little and popped it up with Stampin’ Dimensionals®. For a final touch, I added two Adhesive-Backed Snowflakes. These are so fun to play with and easy to use with the adhesive already on them!

I think this would actually be an easy Christmas card to duplicate if you wanted several to send. It involves the die-cutting and punching the greeting, but you could make a simpler greeting by cutting a rectangle or using another die rather than the punch. Do it assembly-line fashion like I described yesterday in my blog post!

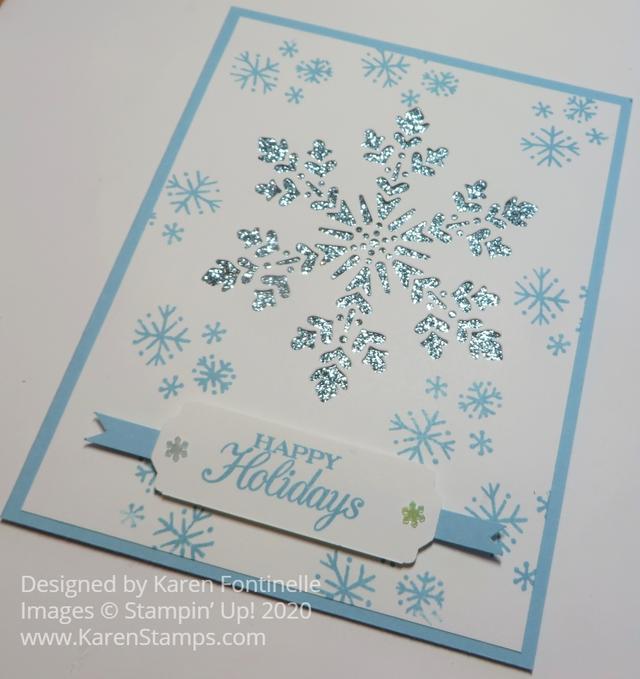
So Many Snowflakes Die-Cut Holiday Card Closeup

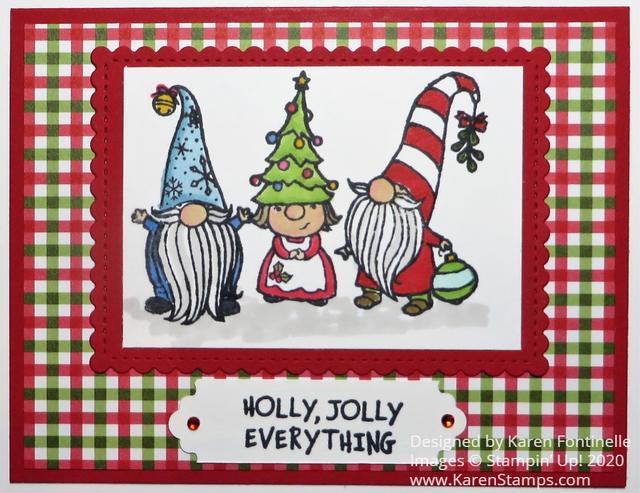
Gnome For The Holidays 3 Gnomes Christmas Card

Gnome For The Holidays 3 Gnomes Christmas Card

This little gnome stamp set is just too cute so I made a Gnome For The Holidays 3 Gnomes Christmas Card. All three gnomes have come together to send holiday wishes on this card!

To make this card, I stamped each gnome in the Gnome For the Holidays Stamp Set side by side. Even though they are cling stamps, you can stamp them close together and likely not overlap them. The gnomes are stamped in Memento Ink because I knew I would use my Stampin’ Blends to color them in. I stamped them on a large scrap of Whisper White, not exactly knowing how I would die-cut them to put them on the front of the card.

After looking through my dies and the large size I needed to fit in all the gnomes, I decided to just cut the paper into a rectangle that would fit inside the Stitched So Sweetly scalloped rectangle die that I could use as a layer. Then I looked through the Heartwarming Hugs Designer Series Paper to see what paper I wanted to use with the gnomes. I really liked this red and green plaid!

The card base is Real Red with the Heartwarming Hugs DSP layer and then the gnomes focal point on top of that. I decided not to pop up anything but you could.

After adhering all the layers together, I stamped the greeting, also from the Gnome For the Holidays Stamp Set. I cut the strip down to 3/4″ wide and used the Lovely Labels Pick a Punch to punch each end of the greeting. Then I added a Red Rhinestone Basic Jewel to each end for a little “bling”!

You likely will want to put a Whisper White layer inside the card unless you want to stamp on the Real Red cardstock base. You could stamp one gnome or the house on this Whisper White piece or adhere a strip of the matching designer paper along the bottom edge.

If you like coloring and wanted to make a few more of these Gnome For The Holidays 3 Gnomes Christmas Cards, you could make this card pretty easily (except for lots of coloring!). Always plan to make multiple cards of the same design assembly-line fashion because it goes faster that way!

You will find the Gnome For the Holidays Stamp Set in the August-December 2020 Mini Catalog on page 23. It’s a simple little stamp set and has fun greetings. Here is a link to the first gnome Christmas card I made! I really like the little Christmas lights on the gnome house! So cute!

Be sure to use your July Bonus Coupons by August 31 on your Stampin’ Up! order!

SHOP STAMPIN’ UP! ONLINE HERE!

Snowman Season in Plaid Tidings Christmas Card

Snowman Season in Plaid Tidings

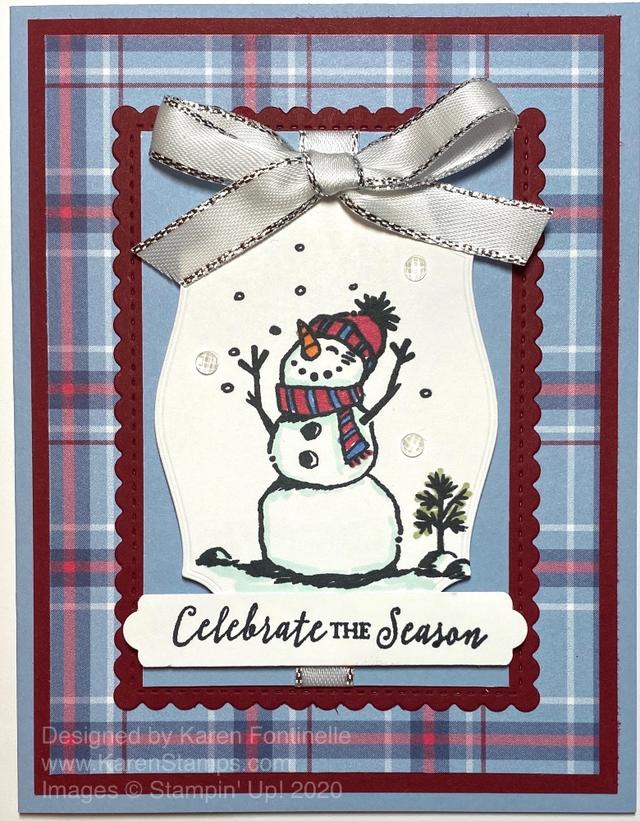
I had almost forgotten that this snowman stamp set from last year was still current this year, so when I came across the Snowman Season Stamp Set I knew I had to make this Snowman Season in Plaid Tidings Christmas Card.

You will find this Snowman Season Stamp Set in the Stampin’ Up! Annual Catalog. It was a favorite stamp set from last year – the cute snowmen and also the Snowman Builder Punch. You can’t but feel happy when you stamp with these snowmen in this set!

First I chose the plaid pattern I liked in the Plaid Tidings 6″ x 6″ Designer Series Paper. Then I chose the Seaside Spray Cardstock with a layer of Cherry Cobbler.

The snowman is stamped on a Tasteful Labels Die in Memento Ink. I colored with Stampin’ Blends but you could also use other coloring methods, like maybe Watercolor Pencils. I die-cut a stitched scalloped rectangle in the Stitched So Sweetly Dies out of Cherry Cobbler, but it seemed like too big an area behind the snowman. I decided to add a rectangle of Seaside Spray that would fit inside the stitched die and that solved the problem.

Before adhering the snowman pieces, I adhered a piece of Silver 3/8″ Metallic-Edge Ribbon from top to bottom of the Seaside Spray layer. Then the snowman die piece was popped up on Stampin’ Dimensionals®. I tied a separate bow and adhered it to the top with Mini Glue Dots.

The greetings in the Snowman Season Stamp Set were a little too big, so I used one from the Itty Bitty Christmas Stamp Set. I simply stamped it on a narrow scrap of Whisper White and used the new Lovely Labels Pick a Punch to punch each end of the greeting. It is popped up with Dimensionals on each end so that it is the same level as the snowman piece. For a little bling, I could have used Snowflake Sequins around the snowman, but instead, I used the Elegant Faceted Gems in three spots to resemble snowflakes.

It was fun to find this stamp set from the Holiday Catalog last year and make something updated with it this year! Here is a link to a card I made last year with the set and the Snowman Builder Punch. Choose stamp sets and papers that bring you joy for making your holiday and Christmas cards so it will be a fun endeavor! This Snowman Season in Plaid Tidings Christmas Card will make you happy all day long while you make multiples, perhaps, of this card!

SHOP STAMPIN’ UP! ONLINE HERE!

Remember to use your Bonus Coupons during August if you earned some in July!

Snowflake Splendor Merry Christmas Card

Snowflake Splendor Merry Christmas Card

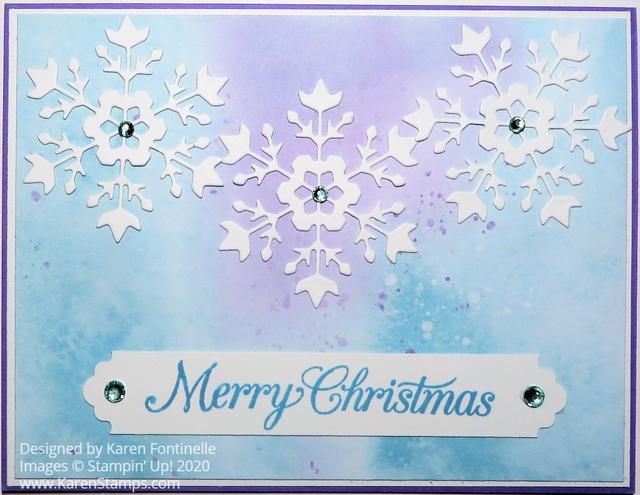
I couldn’t help but carry on with the snowflake theme with this Snowflake Splendor Merry Christmas Card. When I made the snowflake die cuts in the card from yesterday’s post, I had these three beautiful snowflakes I could use on another card.

It might look like I watercolored the background of this card, but it is actually the Snowflake Splendor Designer Series Paper. I chose a portion of the paper that had the colors of blue and also the purple. It’s really a beautiful background and not quite the traditional Christmas colors.

The card base is Highland Heather Cardstock with another layer of Whisper White to help set off the designer paper. These are just 1/16″ margins rather than 1/8″ because I needed the width of the card for the three snowflakes. The snowflakes are die cut with the So Many Snowflakes Dies.

I adhered the three snowflakes to the designer paper with tiny dots of Multipurpose Liquid Glue. The greeting is stamped from the Poinsettia Petals Stamp Set. Then I used the Lovely Labels Pick A Punch to punch each end of the stamped strip. This punch is like two punches in one so it is really fun to use! After I insert the strip, I turn the punch over to make sure the strip is fully inserted and that it is centered. You don’t really have to be this precise, but if I think of it, I like to double-check before punching.

I could have popped up the greeting, but since I thought I would probably put an embellishment at each end, I didn’t want it to be too thick for mailing. I used the lightest color, Coastal Cabana, in the Holiday Rhinestone Basic Jewels in the center of each snowflake and larger ones at each end of the greeting strip.

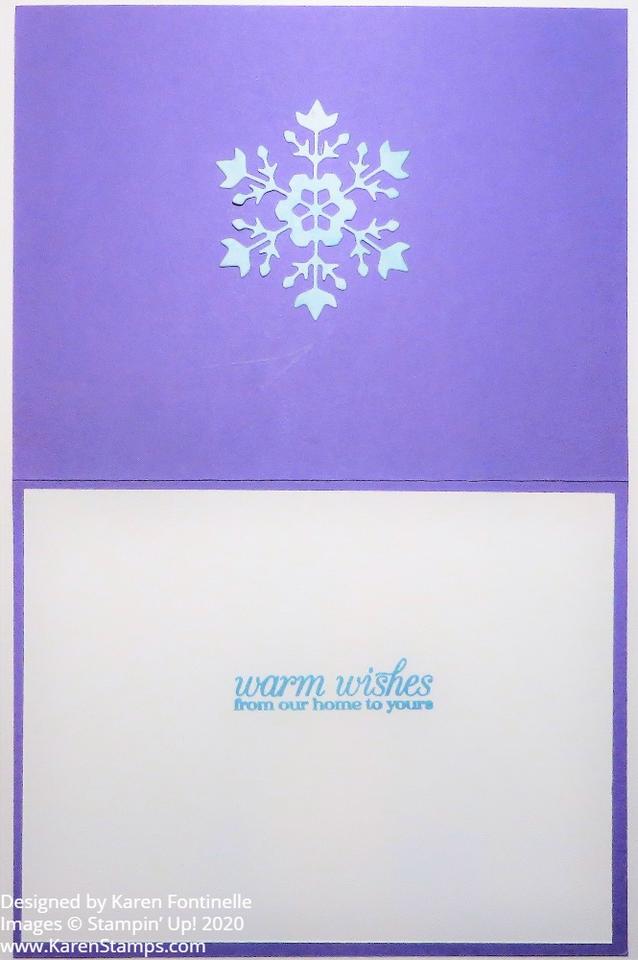
For the inside of the card, I added a Whisper White layer and stamped a greeting from the Poinsettia Petals Stamp Set. I had also die cut a snowflake, the same as the ones on the front of the card, out of a scrap of the same designer paper, but I thought it took up too much room on the inside Whisper White layer, so I adhered it to the inside of the back of the card front.

That’s all there is to this pretty card! It’s really just the die-cut snowflakes and the watercolor look of the designer paper. If you would like to make this Snowflake Splendor Merry Christmas Card, just visit the Stampin’ Up! Online Store!

Blossoms In Bloom You Are Special Card

Blossoms In Bloom You Are Special Card

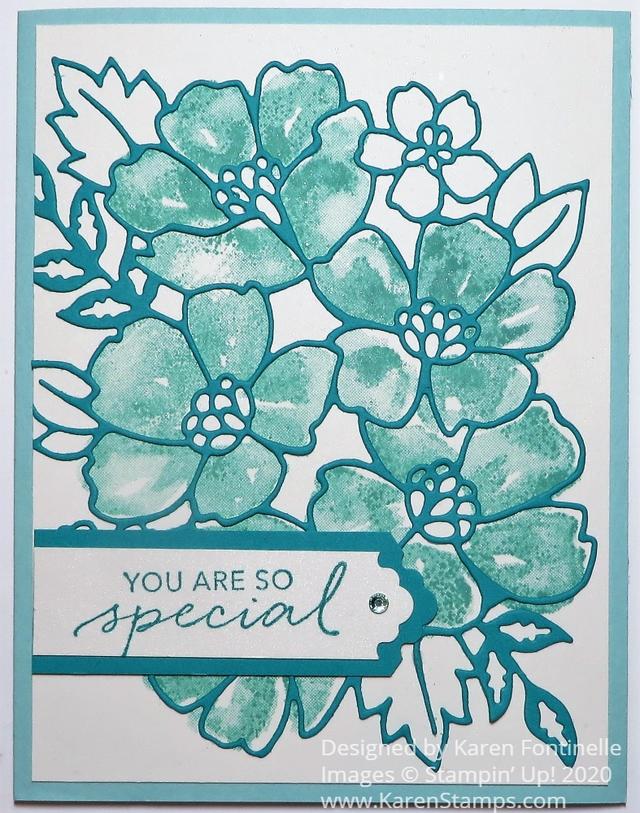
I don’t know what blossom or flower this is in this blueish color, but since it is art it can be anything, right? It all began with die-cutting some designer paper for the fuller layer underneath the outline layer but that didn’t seem to be what I was looking for. Sometimes if you original idea doesn’t work out, you just have to keep going and see what else you can come up with and that’s how this Blossoms In Bloom You Are Special Card came to be!

When you get right down to it, this card is pretty simple to make! The floral outline is die-cut with the Many Layered Blossoms Dies. The die is almost as big as the card front! If you think of it ahead of time, it would be a good idea to use the Adhesive Sheets on the cardstock before you die-cut it so that it will be like a giant sticker and you don’t have to worry about adhering it. I used teeny tiny dots of Multipurpose Liquid Glue but it is a little tedious!

The card base is Pool Party Cardstock, which I didn’t choose until I had the front of the card made! The floral die-cut is Coastal Cabana Cardstock. To add some color, I stamped the blossoms in the Blossoms In Bloom Stamp Set in Pool Party Ink.

I think if you are making a card like this you need to take a minute to think about the direction you want things to lay out in since everything is so large. Since I had the outline die cut first, I laid that down on my card front to see which leaf was going at the top and which way everything was pointing. Then I would know pretty close how to stamp the blossom image that would go underneath the die. It’s not something you can plan perfectly, but just so you get things pretty much how they are going to fit in the end.

The front layer of the card is Shimmery White Cardstock because at first, I thought I might do some watercoloring. Shimmery White Cardstock holds up better to water than Whisper White Cardstock. Plus it is the prettiest paper with its very subtle glimmer. It’s a little more toward the ivory or off-white color than pure white but you can really use it for either way.

The greeting is stamped from the Tasteful Touches Stamp Set. I used the Lovely Labels Pick A Punch which makes two different fancy ends to several sizes of paper strips. You can punch a 1/2″, 3/4″ or 1″ strip of paper. Just stick the length of cardstock way into the punch to get the fancy end. If you want to be extra careful, turn the punch over before punching and make sure the strip is all the way in and centered how you want it. Sometimes a tiny wiggle can get it off-center. I also cut a layer with the same punch with just a wider strip of paper. For a little bling, I used one Clear Epoxy Droplet. I think it was the perfect little bit of pizzazz on the card!

Don’t forget to use your July Bonus Coupons this month! You will see where to enter them on your order. I think you have to do one at a time if you have several to use. You can use all the coupons you have on one order, but you have to enter them one at a time. Before you submit your order, you will see that the coupon amount was taken off. Just remember, if you have a large order and reach Hostess rewards, when you enter your coupons that will bring down your total and you might have to add more to earn the Stampin’ Rewards.

Here is another way to use the Blossoms in Bloom Stamp Set along with the Many Layered Blossoms Dies. You can purchase the stamp set and dies. Then you will be all set to make something like my Blossoms In Bloom You Are Special Card.

Lovely You Floral Stamped Card For a Friend

Lovely You Floral Stamped Card For a Friend

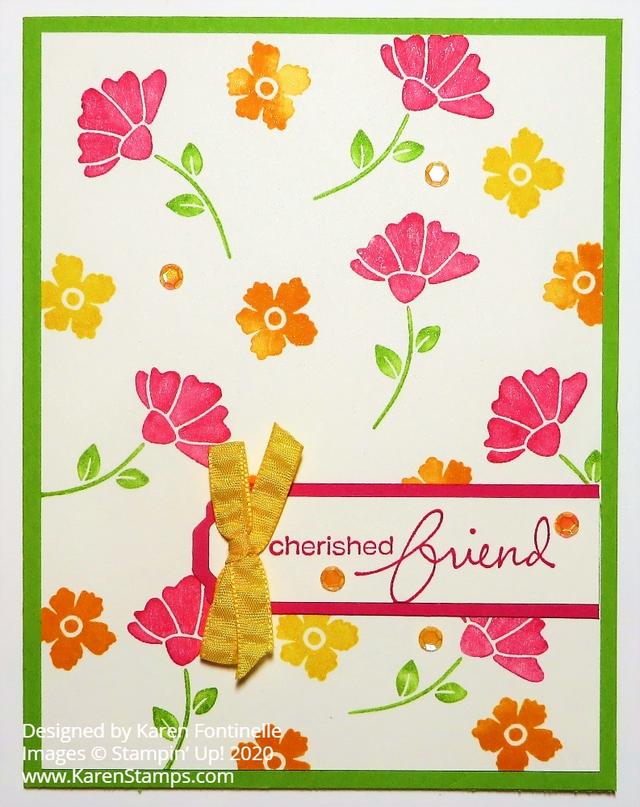
One of my favorite things to do in stamping is to stamp….randomly all over the paper! That repetitive stamping just feels good for the soul! This card didn’t entirely have that feel because I colored the main flower stamp with markers before stamping, so it wasn’t ink pad….stamp….ink pad….stamp. It was color the flower, color the stem, huff (breathe) on it, stamp and repeat! But the little flowers were stamped from the ink pad!

The card base is Granny Apple Green and I used Shimmery White Cardstock for the card front. Shimmery White is my all-time favorite cardstock! It has that shimmer that you can barely see but when you do see it, it is very pretty and subtle. It stands up to watercolor better than regular Whisper White, too.

The floral stamping is done with the Lovely You Stamp Set. You might think that this stamp set is all about the pretty greetings, but as you can see, you can use the flowers as well as the leaves and stems in the set to make cards.

The large flowers and stems are colored with Stampin’ Write markers instead of ink. This is the technique that is good to use when you want different colors on one stamp. I colored the flower with Melon Mambo and the stem with Granny Apple Green. Be sure you huff or breathe on the stamp to moisten the ink before stamping. Using markers gives just a little lighter look to the image.

Next I stamped just a few Daffodil Delight little flowers. Maybe I didn’t clean off my stamp very well or else my Mango Melody ink pad was a little off somehow because I got mostly multi-colored flowers instead of solid Mango! I really liked that accidental shading, though!!

I did have to remind myself to “stop” once I thought I was liking the look of all the stamping. It’s always tempting to keep going, but sometimes you have to know when to stop!

The greeting is stamped from the Lovely You Stamp Set also. A good variety of sentiments to choose from in such a pretty font! I stamped it on a 3/4″ strip of Shimmery White Cardstock and used the new Lovely Labels Pick A Punch to punch one end. Then I cut a 1″ strip of Melon Mambo Cardstock to be the layer under the greeting. If the 1″ wide strip doesn’t fit well in the punch, just trim it down a hair to get it to fit.

Since I didn’t have Melon Mambo ribbon which would have been my first choice, I used the Daffodil Delight 1/4″ Ruched Ribbon to tie a very small bow to put on the greeting. I even moved it in a little bit off the very edge so maybe you can still see the decorative end from the punch! I just used a Mini Glue Dot to adhere the bow.

And then I wanted just a tiny bit more, so I adhered a few sequins! These are the Artistry Blooms Sequins which are great because they already have adhesive on the back! They come in four colors so don’t think the color on the top of the package is the only one. I just used the smallest sequins on the card to just add a little sparkle with out taking away from the flowers.

You can purchase the Lovely You Bundle which includes the stamp set and the new punch! I’m liking the punch so you should check it out! Not everything has to be super fancy so try out some basic stamping like I did on this Lovely You Floral Stamped Card For a Friend.

SHOP STAMPIN’ UP! ONLINE HERE!

Tasteful Touches Flowers Card

Tasteful Touches Flowers Card

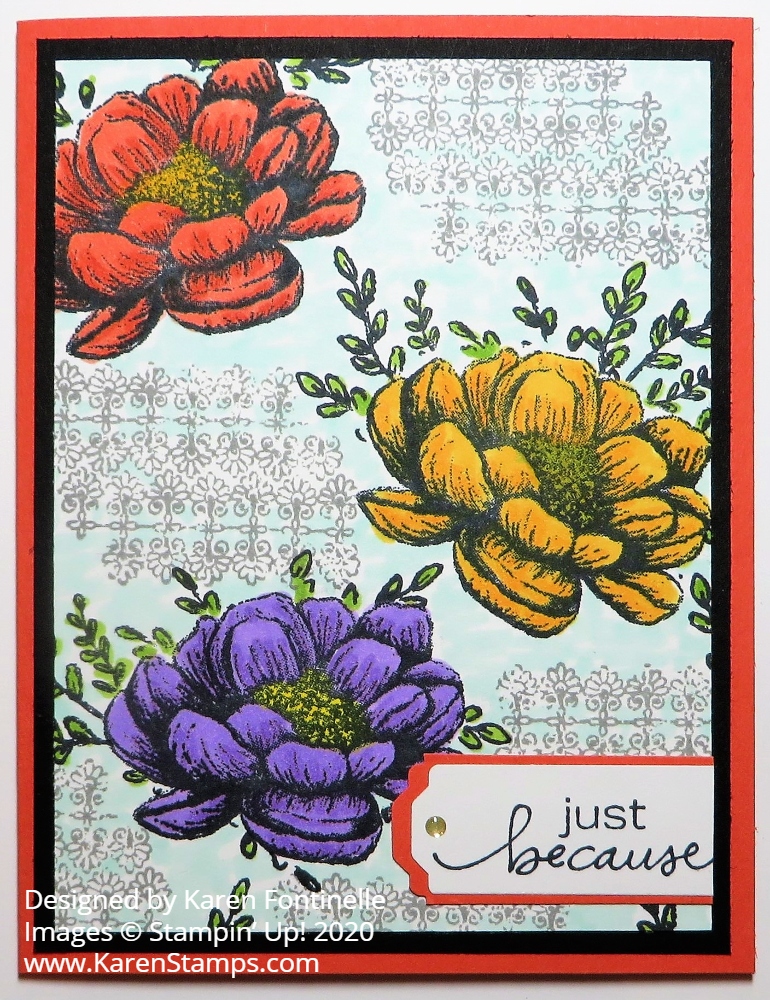
I had the idea for this Tasteful Touches Flowers Card but didn’t know if it would really turn out. If I even have an idea before I start making a card, it often changes as it goes. Usually I just think I’m going to use a certain stamp set or certain designer paper and go from there.

In looking at this Tasteful Touches Stamp Set I thought about stamping three (or maybe more) flowers randomly on the card front and use that flowery design stamp off to the side of the flowers. I thought it would maybe make it look a little antique.

Three flowers stamped with Memento Ink seemed to fit just fine and then I stamped the flowery grid stamp a few more times around the flowers and off the page in a few areas. I colored the first flower with Calypso Coral Stampin’ Blend markers, but then I decided to color each flower differently. The second flower is colored with Mango Melody and the third with Highland Heather. I just love coloring with my Stampin’ Blends markers! They are alcohol markers so the light and dark shades or even other colors together blend. Just color lightly with them to preserve the brush tips. Really all you need is gentle coloring and not necessarily perfect. Sometimes leaving tiny bits of white space makes it look more realistic.

I also made a “mask” by stamping a flower on a sticky note, making sure part of the flower was stamped over the adhesive on the other side to hold the mask in place when I used it. I stamped the flower and then cut it out with Paper Snips. You can even cut the tiniest bit inside the lines when you are doing masking. Then just stick the mask flower over the stamped flower and then stamp something else over it, like the leaves I did from the same Tasteful Touches Stamp Set. This protects the stamped flower but allows the leaf stamping to show outside the flower image. If you had a tiny leaf stamp that fit outside the flower, then you wouldn’t have to cover the flower. But this is a large sprig of leaves so if you just stamped it, you would be stamping over the flower and that wouldn’t look good!

After coloring the flowers and the tiny leaves with my Stampin’ Blends, I wasn’t sure about leaving the background white. It would have been fine, but my love of coloring with the Blends kept me coloring!! I used Light Pool Party to just kind of scribble in the white space, without trying to be heavy-handed or perfect. Pool Party is a good color for this because it is light enough that the omitted white spaces don’t show up strongly. You might think it would be a big job to color all that space, but since I was just kind of scribbling and not worrying about perfection it went very quickly. I even colored in between some of the tiny flowers in that grid to make it all fit in together.

I’m probably the least satisfied with the greeting. The card was really pretty enough to leave it plain without a greeting and sometimes, like on this card, it’s a little difficult to find the space for a greeting! This greeting is from the Lovely You Stamp Set, with lots of greetings and a pretty font. I punched the one end with the new Lovely Labels Pick a Punch and even made a layer with a slightly wider strip of cardstock. You can use three widths of paper in this punch – 1″, 3/4″, and 1/2″. At the last minute,

I added a small Gold Glimmer Enamel Dot to the greeting for just a little something to finish it off without taking away from the rest of the card.

So there is a card that takes a little bit of time for coloring, but is also one of the best ways to relax and de-stress, I find! There are lots of creative possibilities with these two stamp sets! I hope you will be inspired to create a card or project using this Tasteful Touches Flowers Card.

Shop Stampin’ Up! Online HERE!