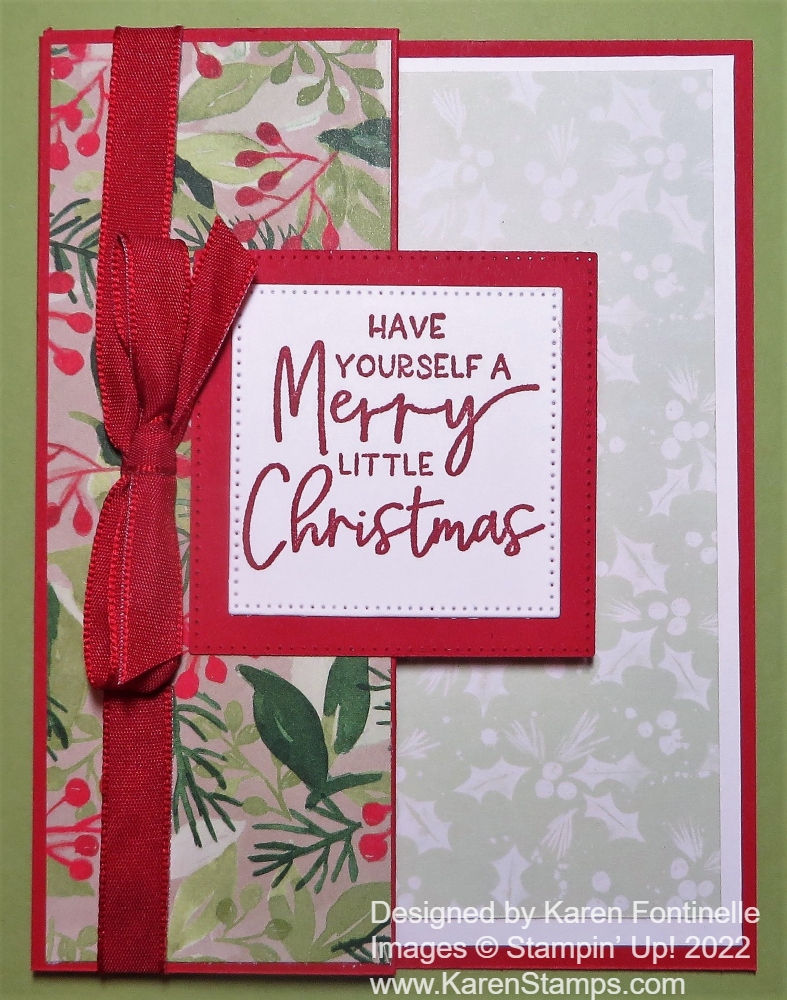
This Splash of Sparkles Z-Fold Birthday Card is made with some of the happiest paper we have ever had! Wait until you see it in person! That’s how I felt the first time I made a card with this paper – it made me feel happy! The colors, the foil accents, the splashes of colors in all different designs – it’s just wonderful paper to have fun with! You will want to put the Splash of Sparkles Designer Series Paper on your next order!
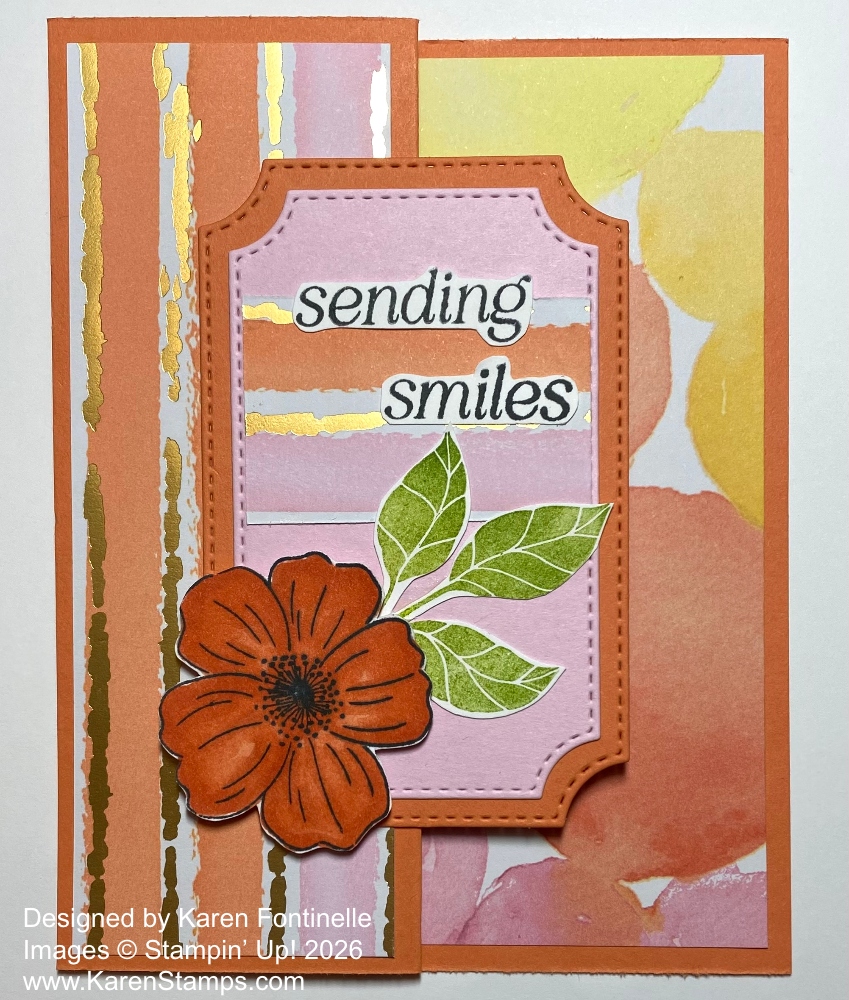
I made a Z-Fold card because it shows off more of the beautiful paper in the Splash of Sparkles pack. A Z-Fold card is easy to make. It just requires one extra fold. Make the usual card base of 5 1/2″ x 4 1/4″ for the front. Then fold the front of the card in half, back toward the fold which is at 2 1/8″. Score first to make it easier to fold. This card base is made with Timid Tiger cardstock, one of the newest In Colors.
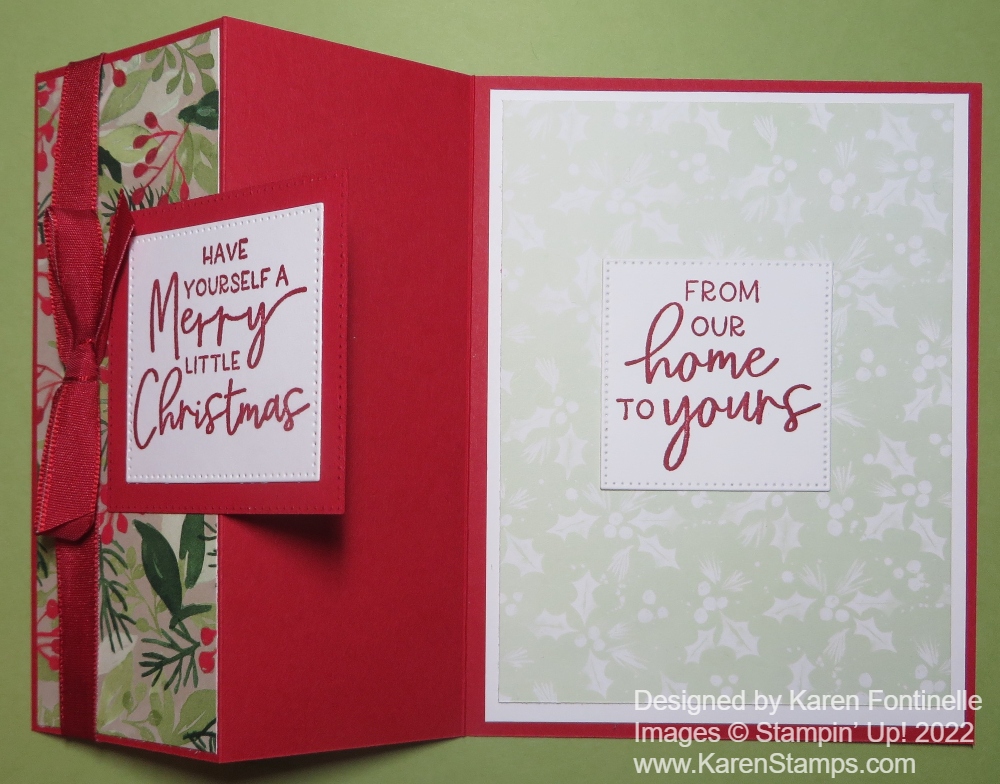
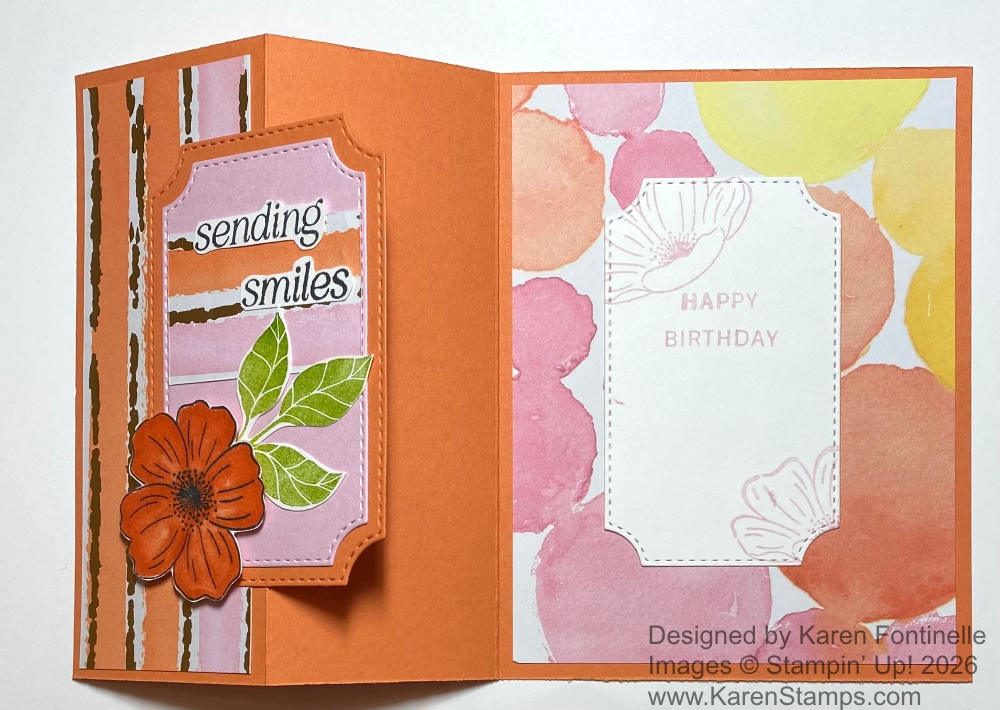
To decorate the card I cut a strip of the orange, pink, and gold striped pattern at 1 7/8″ x 5 1/4″. For the inside of the card I used the pattern with the big watercolor circles, choosing the portion that had the orangish and pinkish colored circles so it would coordinate with the paper on the front.
For the front of the card, I diecut a piece of Timid Tiger with one of the Branching Out Dies and the next smaller one in Bubble Bath pink. For the inside of the card, I diecut another piece of Bubble Bath in the same smaller size so that it would fit behind that layered panel on the front of the card.
The flower, leaves, and sentiment are stamped with the Lovely Arrangements Stamp Set. The flower is stamped in Memento ink and colored in with the Timid Tiger Combo of Stampin’ Blends. The leaves are stamped with Granny Apple Green ink on Basic White. I cut both out by hand. The greeting is stamped in Memento Ink, also on Basic White. For space reasons, I cut the words apart and carefully cut around each one.
To assemble the card, layer the Bubble Bath cardstock diecut panel on the Timid Tiger panel. When you have the card folded into the Z-shape, adhere the designer paper on the narrow front panel and the other pattern inside the card. See where the center of that panel is so that it can be lined up right on the Z-fold. Only put glue or adhesive on the one side so that the other side will not be stuck to the inside of the card! I had a scrap of the striped paper, so I adhered that as a background for the words to the front panel. The flower is popped up on Stampin’ Dimensionals and the leaves are glued flat to the card.
If you want to stamp a greeting or images on the inside panel, do so before you adhere it inside the card, just in case. I stamped Happy Birthday and a couple of the other flower in the stamp set. Line it up inside the card with the front panel, put adhesive on the back of it, and then fold the back side of the card over to adhere the greeting panel to the inside of the card so that it lines up with the front panel and will not be sticking out when the card is closed. You will understand when you do it!
Here are the two sides of the Splash of Sparkles Designer Series Papers:
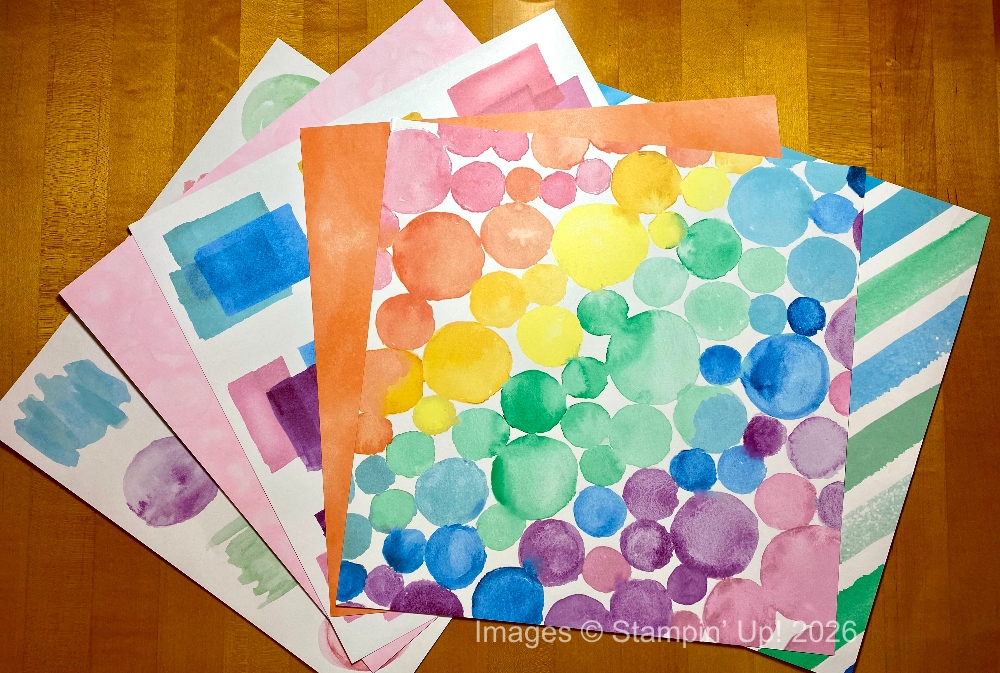
Aren’t those such bright and fun colors? And even better in person!
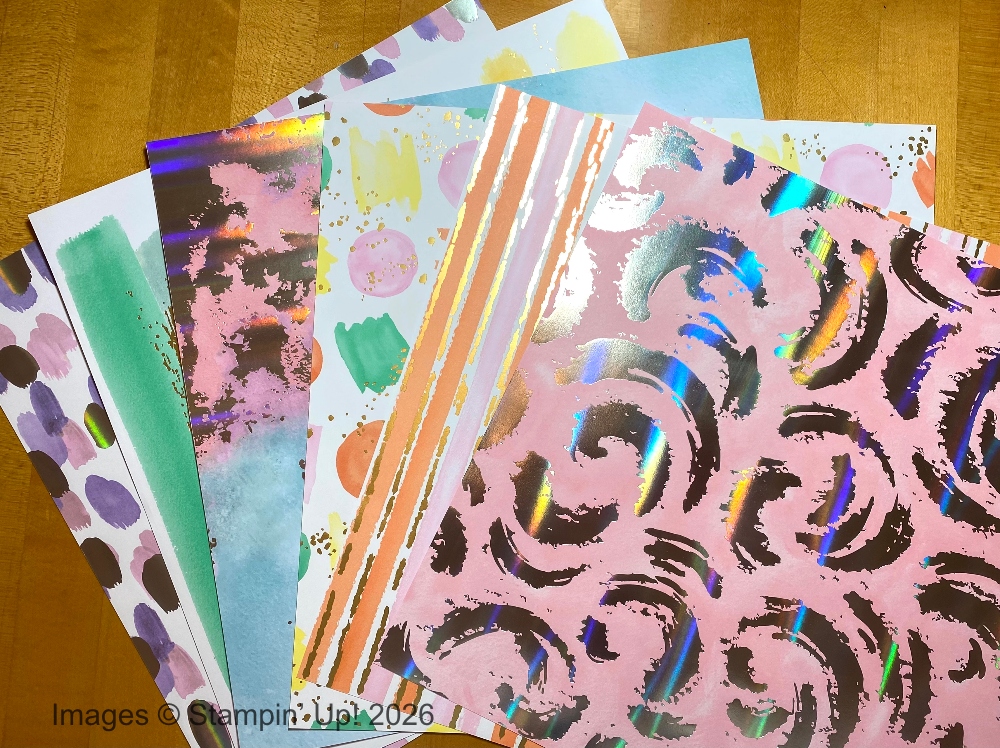
And one side has gold and iridescent foil for some real pizzazz! Think about birthday cards, any happy occasion, maybe even party invitations!
SHOP STAMPIN’ UP! ONLINE HERE!
Remember, it is Bonus Days through Feb. 2nd! Earn a $5 coupon to spend in February with every $50 amount you spend on products!