
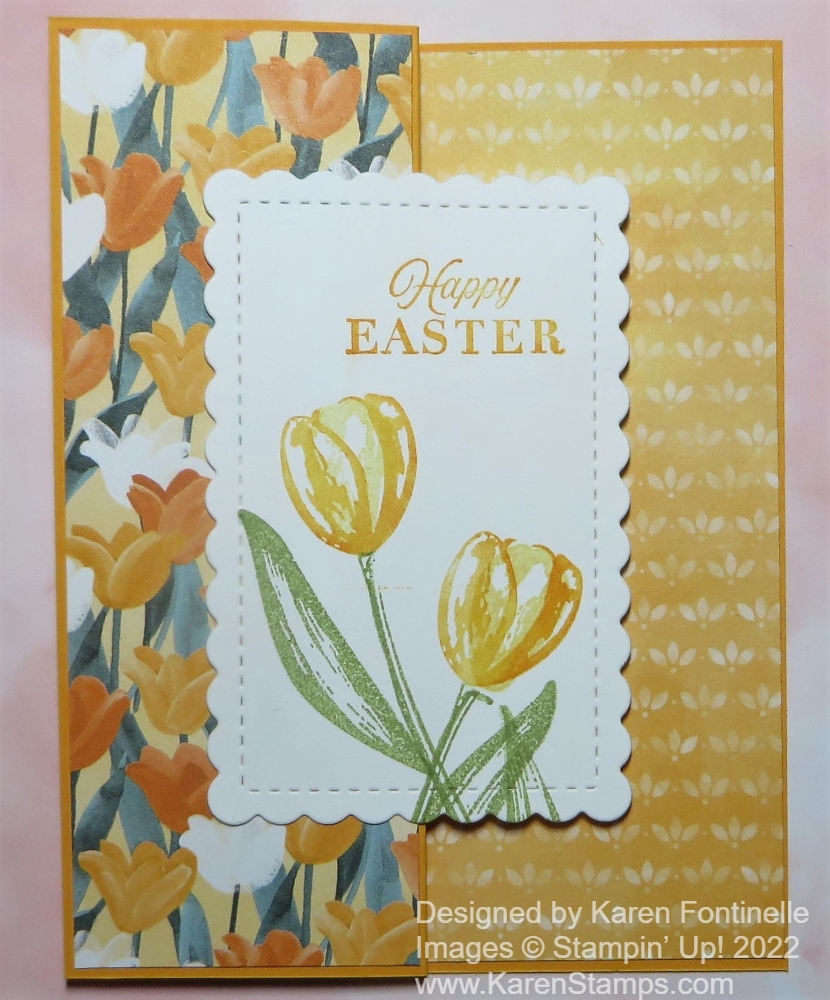
The Flowering Fields Designer Series Paper has so many pretty sheets in it! It’s pretty difficult to choose which one to work with! This day, this page with the yellowish tulips is the one that spoke to me! This is just a simple Flowering Fields Z-Fold Easter Card with the designer paper and a little stamping making a bright card for spring.
The card base is Mango Melody, one of the coordinating colors in the designer paper. To make the Z-Fold, just score the front of the card in half, at 2 1/8″ and fold back on itself. It’s really easy and the recipient will think you made an extra-special card! The tulip designer paper on the front panel is cut at 5 3/8″ x 2″. The opposite side of the tulip paper is the one I adhered inside the card. It is cut at 4 1/8″ x 5 3/8″. You could also use the normal layer sizes of 1/4″ margins instead of 1/8″.
Here is a similar card from a year ago that can give you another idea.
On Basic White cardstock I stamped a couple of tulips with the Flowering Tulips Stamp Set. This was two-step stamping using So Saffron and Mango Melody inks for the flowers and Pear Pizzazz for the stems and leaves. After stamping on the Basic White, it was die cut with one of the Scalloped Contours Dies to make this scalloped rectangle. I situated the die so that the flowers would be down lower on the die cut to leave room for a greeting. I found the “”Happy Easter” greeting in the Celebrating You Stamp Set in the Spring Mini Catalog. It is stamped in Mango Melody ink. This piece was then adhered to the front of the card, right on the fold. Be sure to only put adhesive on half of the piece and the other side shouldn’t have any adhesive on it so it doesn’t stick to the inside of the card.
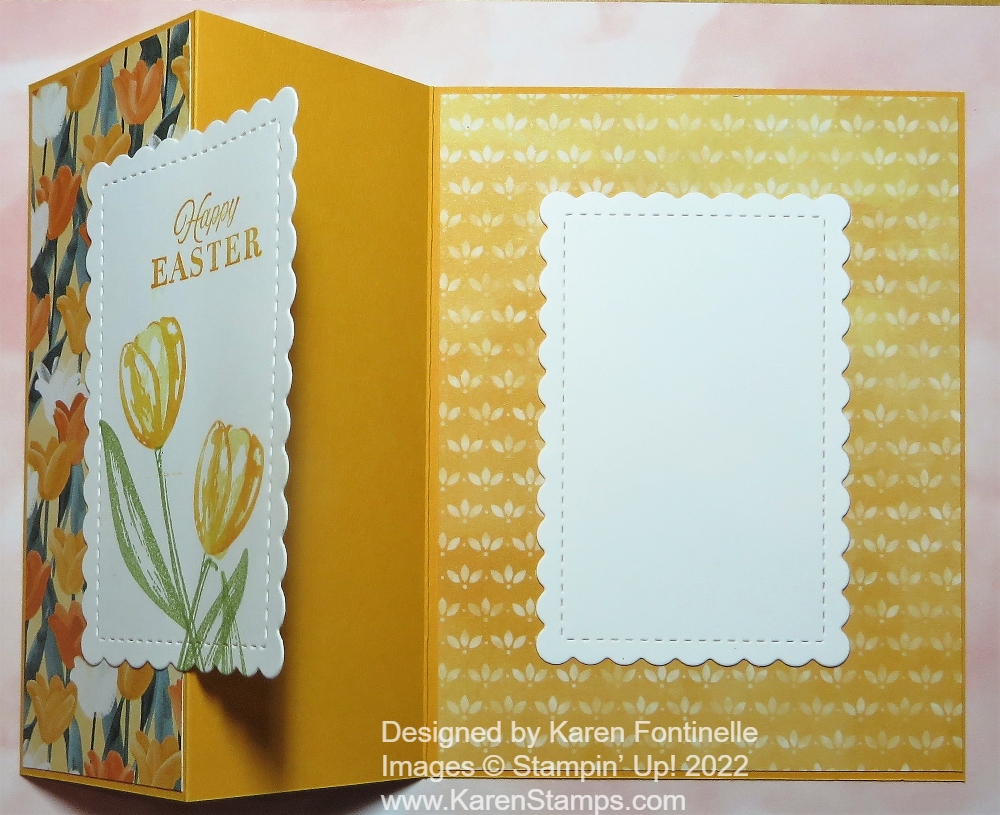
For the inside of the card, I die cut another Basic White piece the exact size of the scalloped rectangle on the front of the card. I made sure that it was perfectly placed behind the front piece so that it wouldn’t show underneath from the front. To do this I put adhesive on the back of the scalloped rectangle and then held it perfectly behind and against the front rectangle. Then I folded the back of the card over so that the rectangle would then adhere to the inside of the card. It worked! You’ll understand when you actually do it. Now a message can be stamped on the inside of the card or a note written and it won’t be sticking out from the front of the card!
I always say these Z-Fold cards look like something really special but they are easy to make! No one has to know! I hope you will feel inspired with this Flowering Fields Z-Fold Easter Card and make your own, even with different paper and theme! Try it!
Shop the Stampin’ Up! January-June 2022 Spring Mini Catalog!