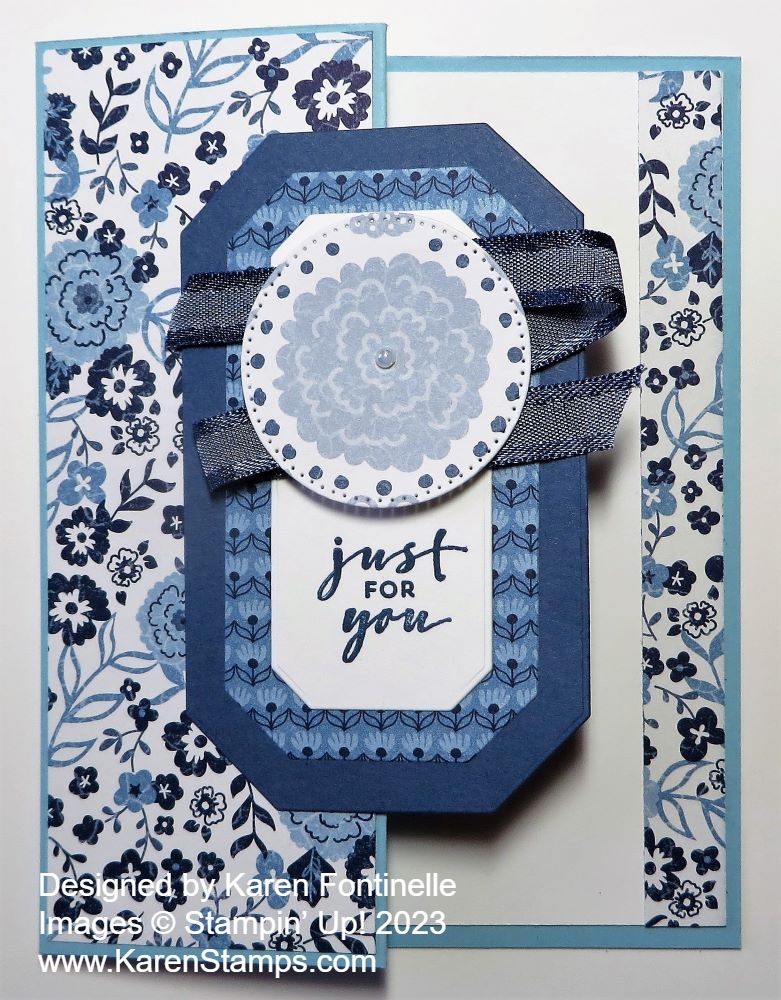
This Countryside Inn Z-Fold Card uses both the paper and the dies in the Countryside Inn Suite Collection, and the Z-Fold design just kicks it up a notch! I like to make Z-Fold cards because they are so easy and look like you really make something extra special!
The Countryside Inn Designer Series Paper has four colors of blue and white. For this card base, I chose Balmy Blue cardstock. To make the z-fold, make the card base as usual so that the front measures 5 1/2″ x 4 1/4″. On the front of the card, you will score down the center at 2 1/8″. Then fold the right edge of the card front back on itself. If you look down from the top, you will see the card base is in the shape of a Z. So basically, fold the front half of the card, back on itself.
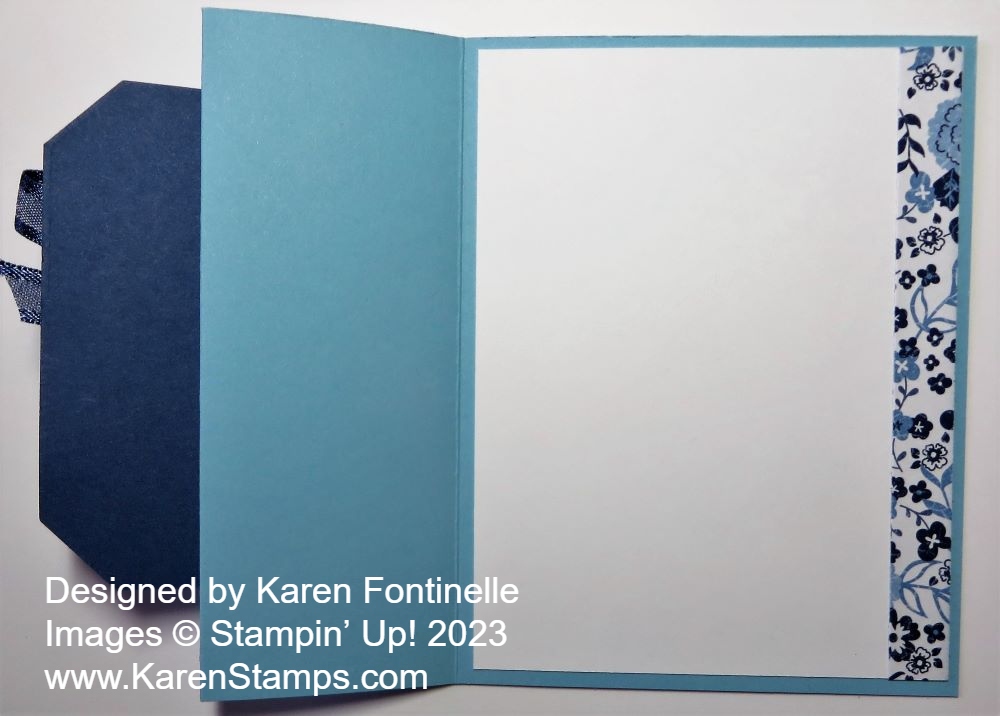
To add designer paper (or a stamped design) to that folded back left side of the card front, cut the paper at 2″ x 5 3/8″. That gives that narrow margin. If you want the usual margin, cut the designer paper at 1 7/8″ x 5 1/4″. The inside is Basic White with a strip of the same designer paper along the edge.
To decorate the card, I used the Countryside Corners Dies. I cut the larger piece out of Misty Moonlight cardstock, but you could use Night of Navy or Boho Blue. The next layer is cut out of a different pattern of the same designer paper. For the center, I diecut a piece of Basic White.
For the center piece, the trick was to find a greeting that would fit a vertical piece like I had. However, I could have also stamped a greeting that would just go horizontally across the white center. The greeting is in the Charming Sentiments Stamp Set and is stamped in Misty Moonlight ink.
To decorate the top, I used a die in the Stylish Shapes Dies to cut out the big flower in another pattern of the Countryside Inn DSP. To jazz it up a little, I added the Night of Navy 3/8″ Bordered Ribbon back and forth behind it and popped it up on Stampin’ Dimensionals. I also added a tiny little pearl.
To adhere this center piece to the card, remember to only put adhesive on the left half that will be glued to the Z-Fold. Try to center it as much as possible. Then if you want to stamp a greeting on the inside of the card, try to hide it behind this piece.
Here is what the inside of the card looks like.
The Countryside Inn Designer Paper and all the papers on pages 130-132 in the new Annual Catalog are discounted by 15% during the month of June! Don’t let that sale slip by! You can search online under “Specials” on the top greenish bar.