Tag Archives: Trimming the Town Designer Series Paper

Trimming the Town Wreath Christmas Card

Trimming the Town Wreath Christmas Card

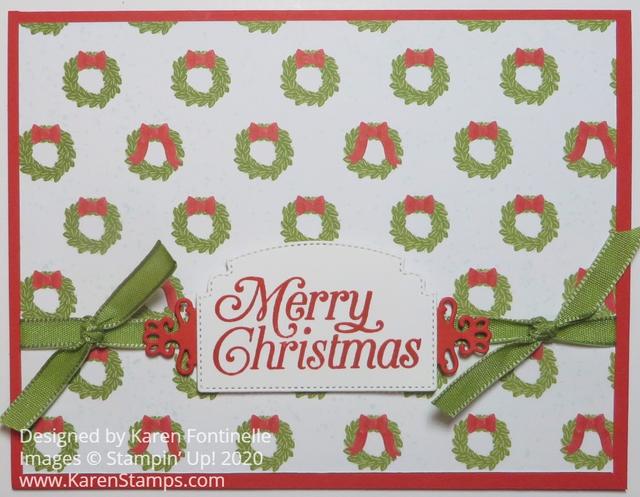
Make this Trimming the Town Wreath Christmas Card for a pretty quick and easy Christmas card. In fact, you can make it even easier than mine if you only use one die cut or no die cuts!

This is just a card with a piece of designer paper and a greeting plus a little ribbon. It’s a very simple design. The card base is Poppy Parade with a layer of designer paper from the Trimming the Town Designer Series Paper. You will find this cute wreath print on the back of the paper with all the holiday phrases. It’s often tough to know which side of the paper to use and tough to cut into it, especially when you like both sides!

Before adhering the designer paper to the card base, I adhered the strip of ribbon around the designer paper (just adhere the ends on the back, no need to go all the way around and waste a couple of inches of ribbon!). This ribbon is in the Ornate Garden Combo Pack.

The greeting is stamped in Poppy Parade Ink on Whisper White and die cut. The greeting is in the Perfectly Plaid Stamp Set. The die cut is part of the Ornate Frames Dies. To layer it on something, I cut out the narrow die with the fancy ends in the same set, but cut it in half so that I could place each piece at each end of the greeting. That die cut in Poppy Parade was adhered to the greeting and then popped up on Stampin’ Dimensionals. I also added two knots of ribbon on each side.

That’s all there is to this card. You could simply cut a rectangle out of Whisper White and a larger rectangle out of Poppy Parade with your Paper Trimmer and not do the die-cutting is you were making a lot of Christmas cards like this one.

Have fun trying out new card designs with different designer papers and greetings!

SHOP STAMPIN’ UP! ONLINE HERE!

Trimming the Town Scene Christmas Card

Trimming the Town Scene Christmas Card

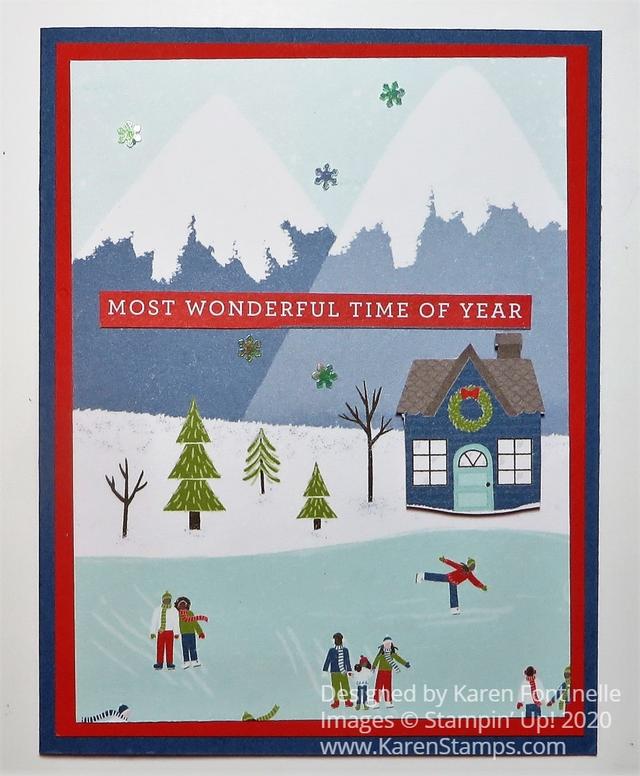
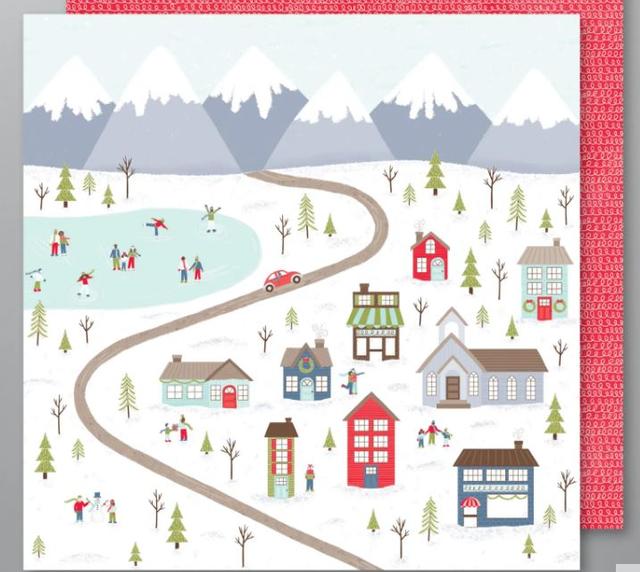
It might kill you to cut into this 12″ x 12″ paper with this snowy mountain scene, but if you do, you can make an easy Christmas card like this Trimming the Town Scene Christmas Card. The whole paper could also be used for a scrapbook page or even a framed piece that you could add some extra pieces to.

For this card, I cut out a top portion of the Trimming the Town Designer Series Paper so I could get the mountains in the scenery. I could have stopped there, really, but I also cut out a house on another piece of designer paper and popped that up on Dimensionals on the front of the card.

Trimming the Town DSP Scene

For a greeting, I cut out the words on another sheet of the Trimming the Town Designer Paper that has Christmas greetings of all sorts in many languages! That’s an easy way to put a greeting on your card!

For the card base, used Misty Moonlight Cardstock with a layer of Poppy Parade. Poppy Parade is the coordinating color with this Trimming The Town Designer Series Paper. I have also used Real Red, though, also. On the inside of the card I would put a layer of Whisper White on which to stamp or write my greeting since the Misty Moonlight is a dark color.

If you want to make some quick and easy Christmas or winter cards and you don’t have any other use for this large paper, you can certainly cut it up and use it for cards. Maybe add some houses or images from other pages to embellish your scene. It’s really fun to play with! Plus I added some Adhesive-backed Snowflake Sequins to the card.

Stampin’ Up! recommends ordering anything you want by Christmas by December 10th. We are already being warned on the news that shipping this holiday season may be delayed so I suggest ordering anything you want for your Christmas card assembly soon!

Here’s another card I made earlier using the Trimming The Town Designer Paper on which I made my own little scene!

If you have this designer paper, see if you can bring yourself to cut into this paper and make some cards like my Trimming the Town Scene Christmas Card.

SHOP STAMPIN’ UP! ONLINE!

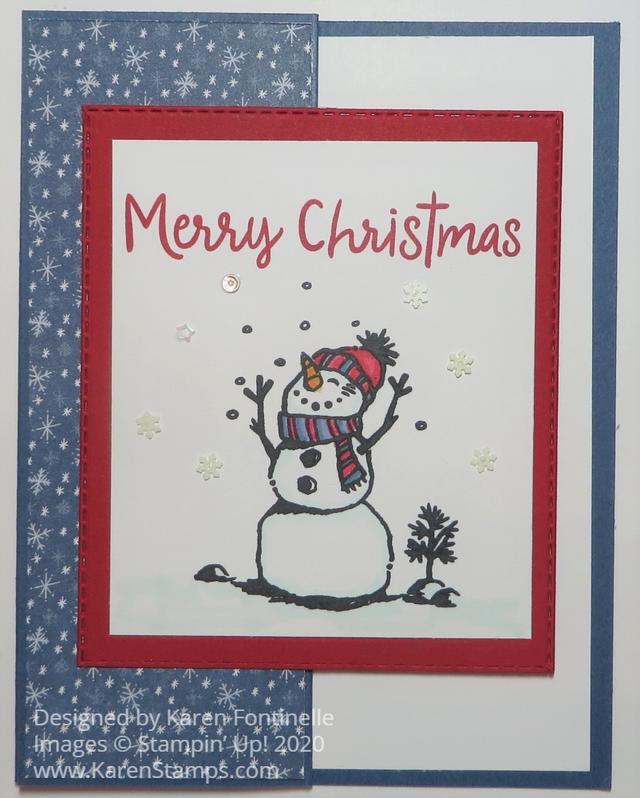
Snowman Z-Fold Merry Christmas Card

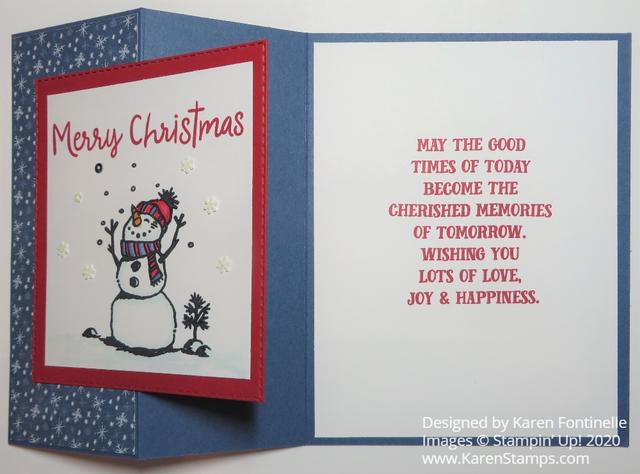
Snowman Z-Fold Merry Christmas Card Open

I was in a snowman mood when I made this Snowman Z-Fold Merry Christmas Card. I started off looking at the Trimming The Town Designer Series Paper and when I saw this snowflake print, I thought it would go well with one of the snowmen in the Snowman Season Stamp Set! Sometimes you get inspired with a card idea just by looking through your designer paper.

I decided to make a Z-Fold card. It’s something VERY easy and looks extra special. All you have to do is make a card base the usual way, then fold the front back on itself in half. So cut the cardstock like usual at 8 1/2″ x 5 1/2″. Score at 2 1/8″ and 4 1/4″. If the front of the card is 4 1/4″ wide, then you want to score that in half which would be 2 1/8″ to fold half of the front back to make that z-fold. It’s easy!

The card base is Misty Moonlight cardstock with a snowflake piece of Trimming the Town DSP. I cut it at 2″ x 5 3/8″. I could also have made it 1 7/8″ x 5 1/4″ for a slightly wider margin that would have matched the Whisper White inside layer.

The snowman is stamped in Black Memento Ink on Whisper White with the greeting, in the same stamp set, stamped in Real Red Ink. That piece is cut 3″ x 3 1/2″. It is layered on a piece of Real Red Cardstock die cut with a special technique using the Rectangle Stitched Dies. I cut out the rectangle, then moved the die so that it would make the rectangle shorter.

The snowman is colored the little bit it needs with Stampin’ Blends in Real Red, Misty Moonlight, and Pumpkin Pie with a tiny bit of Pool Party as shading on the snow. Then I adhered a few Snowflake Sequins around the snowman. The Take Your Pick tool is really handy for picking up and placing sequins on teeny tiny drops of Multipurpose Liquid Glue.

When adhering the snowman panel to the front of the z-fold, but sure to only put adhesive on the portion of the back of the snowman that will be adhered to the z-fold. You want to make sure that the panel you add to a z-fold card will cover any message inside so sometimes you have to play with positioning a little bit. The message I stamped inside this card is from the Tag Buffet Stamp Set.

Click HERE to see another z-fold card I made recently!

This really was an easy card and if you follow my design and directions, it will be even easier and faster for you to make a card like this Snowman Z-Fold Merry Christmas Card!

Snowman Z-Fold Merry Christmas Card

Easy Trimming the Town Christmas Card

Easy Trimming the Town Christmas Card

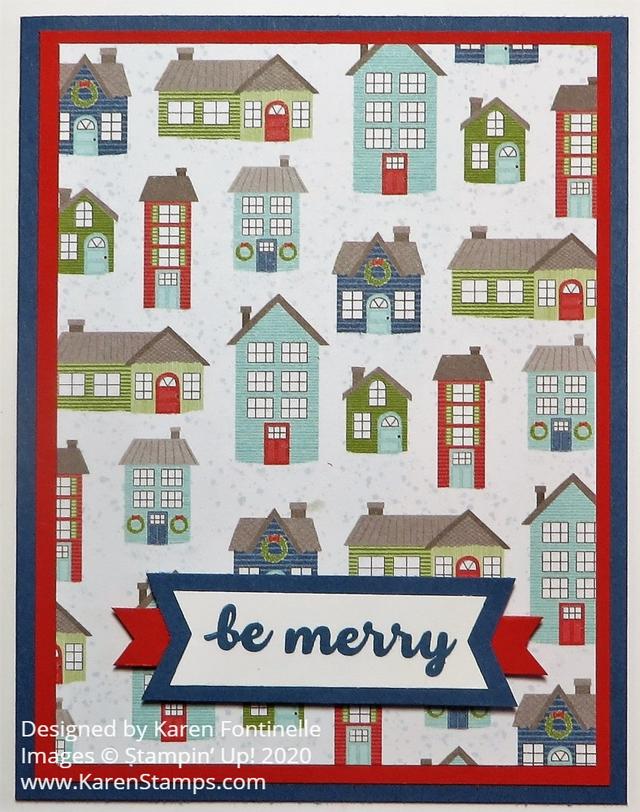
Don’t forget about the Designer Paper Sale going on this month (which is just about over) at Stampin’ Up! and the paper on this Easy Trimming the Town Christmas Card is one that is on sale, just in time for the holidays! This particular card is one that is about as simple as they get yet is colorful and festive and will spread holiday cheer!

The card base is Misty Moonlight, one of our In Colors, with a layer of Poppy Parade. I originally thought the red color on this paper was Real Red, but it is actually Poppy Parade. Not that you can’t use Real Red because I did on this other card I made!

I just cut a layer of the Trimming the Town Designer Series Paper with the smaller buildings on it. It is bright and colorful and makes a “happy” holiday card! Then all I had to do was add a greeting!

The greeting is from the Banner Year Stamp Set. This is a set that you might overlook but I have gotten a lot of use out of it with its many greetings and cute little images. I stamped it in Misty Moonlight Ink on Whisper White Cardstock and layered on a piece of Misty Moonlight Cardstock. I used the Banners Pick a Punch to punch the banner ends. If you don’t have the punch, just eyeball it and cut with Paper Snips. To help the greeting stand out, I layered a piece of Poppy Parade underneath and popped it all up on Stampin’ Dimensionals®.

The designer paper already had snowflakes printed on it, but you could add some Adhesive-Backed Snowflakes or some other sequins or gems if you wanted to jazz up the card a little bit more.

Just add a layer of Whisper White inside the card since the Misty Moonlight card base is a dark color. Maybe cut out one of the little buildings or add a strip of the designer paper or stamp a Christmas greeting inside if you like.

Be sure to check out the Designer Series Paper Sale, going on now in the Stampin’ Up! Online Store, only until October 31!

Designer Paper Sale 2020 Banner

Trimming the Town Christmas Wishes Card

Trimming the Town Christmas Wishes Card

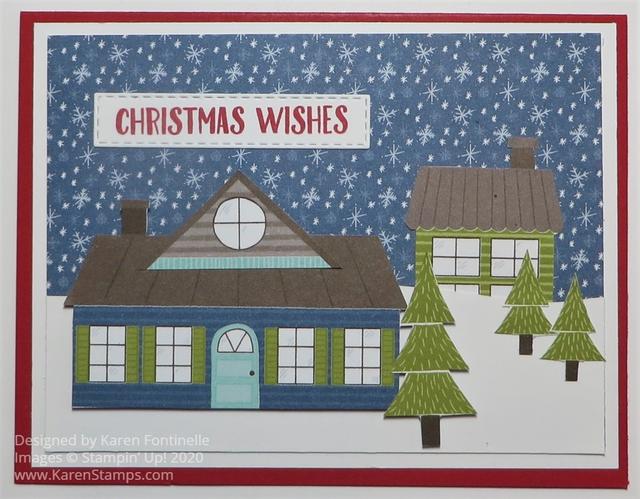
If you would like to have some fun with designer paper and card design like this Trimming the Town Christmas Wishes Card, this designer paper is for you! If you like, you can feel like a kid playing with paper and scissors and building a little town or landscape!

During the Stampin’ Up! Designer Series Paper Sale this month, I couldn’t resist purchasing this Trimming the Town Designer Series Paper. I also purchased the stamp set, but for this card, I only used the paper except for the greeting. I simply took one of the papers that had the larger houses and buildings printed on it and cut out some of the images with Paper Snips.

The large house on the front of my card I actually “remodeled”! The basic house was printed on the paper but as I tried to conserve as much of the paper as I could while cutting into it, I noticed that at the very bottom of the paper was a partial building and it was this roof piece with the round window, so I cut that roof piece out and adhered it to the top of my large house! The other little building on my card was also at the bottom of the page so I cut that out and stuck it behind the snow as it looked like the lower part of the image could have been cut off being placed at the bottom edge of the paper.

The card base is Real Red. The actual coordinating color with the paper is Poppy Parade, but I think the Real Red worked just fine on this card. Besides, I love Real Red! I put a layer of Whisper White underneath the Trimming the Town DSP with the snowy sky pattern. What a perfect paper to use as a background on a card or project! I covered the bottom portion of this designer paper with a piece of Whisper White to look like snow. I cut this the size I wanted to fit and then just added a little curviness to the top, just freehand although there are some dies that could do the same for you.

I just placed the two buildings and trees where I wanted them on the card and popped up the larger house with Stampin’ Dimensionals® as well as the large tree. If I had cut out some smaller buildings, I could have played a little more with the landscape. There is so much design potential with this designer paper as well as if you used the Coming Home Bundle (stamp set and dies).

One of the papers in the Trimming the Town package, is a full sheet of a winter scene that you could actually frame as is for a home decor piece, or use as a scrapbook page background or cut out various sections. It’s really a fun package of designer paper for the holidays!

The greeting I used on this card is from the Banner Year Stamp Set. I stamped it in Real Red ink and die cut with one of the Rectangle Stitched Dies. I think it is a perfect fit on this card.

Don’t miss out on the Designer Series Paper Sale going on until October 31 in the Stampin’ Up! Store! There is a good choice of select papers and Trimming the Town is one of them 15% off! I think you will enjoy using this paper as I did on this Trimming the Town Christmas Wishes Card.

SHOP STAMPIN’ UP! ONLINE HERE!