Tag Archives: stampin up

Mini Curvy Keepsake Halloween Boxes

Mini Curvy Keepsake Halloween Boxes

These Mini Curvy Keepsake Halloween Boxes are so easy and fun to make! We’re already through the first week in October so Halloween is approaching! It’s time to make some fun treat boxes or use them just as Halloween decorations!

The main thing you need is the Mini Curvy Keepsake Box Die to make these treat boxes. There is the one main die to make these boxes and then quite a few smaller dies for miscellaneous things plus tags. Just lay the die diagonally on a 6″ x 6″ piece of cardstock and it will fit. This die scores the lines where you need to fold.

If you want to make some Halloween treat boxes like mine, do the decorating first before you assemble the box. You might partially assemble the box by creasing all the score lines and see how the box will go together and decide which side you want to be the front of your project. The first time I used this die I had trouble getting the sides to fit over the handles. I found it useful to crease those handles on the score line first, then push down on them as you fit the side slits over them.

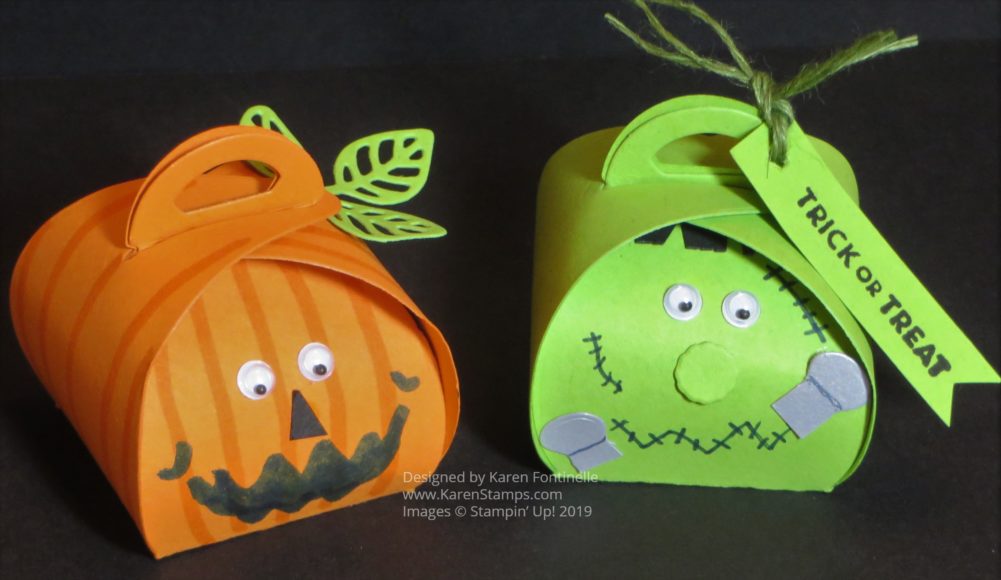
To make the Pumpkin Mini Curvy Keepsake Box, I just drew Pumpkin Pie Stampin’ Write Marker lines on all four sides of the box. For the nose, I just snipped a piece of Basic Black cardstock. The mouth, as you can tell, I just drew on myself with a Stampin’ Write Basic Black Marker. It is not a good mouth AT ALL, but I thought I would leave it so you can see a Demonstrator doesn’t do things perfectly either!

If you have the Harvest Hellos Stamp Set, you could stamp the pumpkin face on the box instead. However, you might like adding Googly eyes to your pumpkin. I just used some retired Stampin’ Up! eyes I already had, but you can purchase the cute colored Assorted Googly Eyes in the Holiday Catalog. I also just die cut a leaf and adhered it to the top of the pumpkin box. Any kind of leaf will do and you could also add a greeting if you liked.

For the Frankenstein Mini Curvy Keepsake Box, you can draw or make the face however you like. Look through your dies and see what little pieces you could use to embellish the face. I also added googly eyes to Frankie. You can’t see it, but I cut a piece of Basic Black Cardstock to resemble his bangs, but I made it too short and you can’t really see it on the box tucked up under the top. I just added a greeting that I made into a tag and tied it on with a double piece of the Mossy Meadow Linen Thread in the Magnolia Lane Ribbon Combo Pack. The greeting is stamped from the Itty Bitty Greetings Stamp Set (a must-have, I think!).

There are SO many creatures and critters and boxes and things you can make with these Mini Curvy Keepsake Box Dies, even ideas from back in the day when we had the larger ones. Use them for treats or small gifts for Halloween, Thanksgiving, Christmas, birthdays (like this one), Valentine’s Day…..well, all the holidays and most occasions that you can think of! But I really like these Mini Curvy Keepsake Halloween Boxes!
Shop the Stampin’ Up! Online Store!

World Card Making Day 2019

World Card Making Day 2019

Today is the annual World Card Making Day 2019 which those of us in the cardmaking business like to celebrate! Take some time today to make a card, any kind you want! Then, the real trick is to mail the card next week! Lots of times we make cards for fun or because we saw a cute idea and then we don’t get around to mailing our cards to someone! Don’t let your beautiful artwork go to waste! Send those cards!

Next week Stampin’ Up! has a goal of sending 50,000 cards from Demonstrators and Customers, so if you send a card let me know and I will put it in the count with Stampin’ Up! Apparently, it will be the first annual World Card Sending Week! (Isn’t every day and every week some “holiday”?!)

If you are ever stumped for a card idea, copy yourself! That’s right! Just look back at some of the cards you have made and make another version! Change the paper, the colors, the embellishments or the greeting! Use one of your own good ideas!

Here is a card I made for my niece’s birthday. I realized I hadn’t used my Magnolia Lane Designer Paper in awhile. Instead of coming up with a new design, I just made another card like one I’d made before. I just changed the greeting and the embellishments a little bit.

Magnolia Lane Birthday Card

This card uses Petal Pink Cardstock for the card base with a striped layer from the Magnolia Lane Designer Series Paper. I think this paper is one of the most beautiful Stampin’ Up! has ever had. Even the large flower and leaves are cut out from one of the sheets in the package! The flower is layered on a circle of Vellum Cardstock.

The greeting is stamped in Mossy Meadow Ink from the Itty Bitty Birthdays Stamp Set. Then it was die-cut with the Stitched Nested Labels Dies. I used a piece of Braided Linen Trim across the strip of designer paper. On the greeting, I added three Heart Epoxy Droplets. And to the area with the large magnolia, I added three Basic Adhesive-Backed Sequins.

Magnolia Lane Birthday Card closeup

I just thought I would remind all of us, myself included, that it is okay to copy ourselves! Sometimes we search and search for an idea and the best one might be one right under our noses!

Take some time on World Card Making Day to make a card for someone or anyone and then send it next week during World Card SENDING Week!

A Card For National Taco Day

Taco Day Card

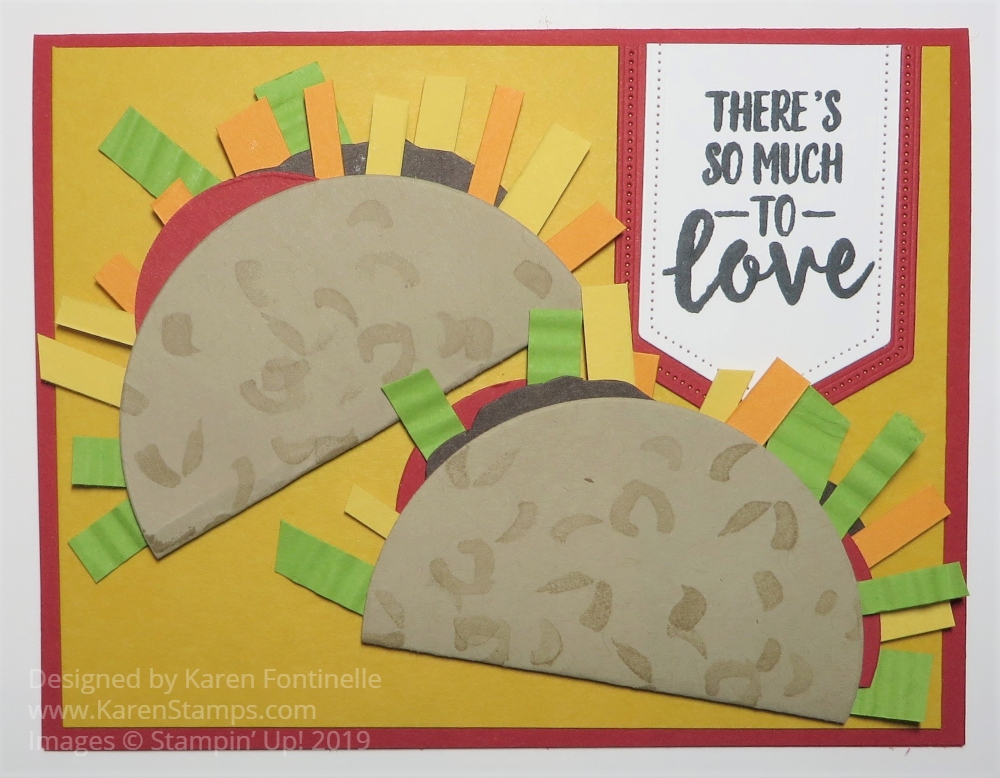
As you can see, I think you can make a card for just about any occasion in the world, even a card for National Taco Day, October 4! When I heard about National Taco Day, I wondered what kind of card I could make. Our family is a big fan of Mexican food or Tex-Mex as it is mostly known here in Houston, Texas.

We’ve had a favorite Mexican restaurant here for almost 40 years! When we came here on our house-hunting trip, some friends who had already been transferred here took us to this little hole-in-the-wall Mexican restaurant nearby. I was not thrilled, admittedly, because we were on an expense account and could have been eating at a finer restaurant! I really don’t remember if I liked the food or not or how that came about. I remember the friend telling us that people stood in line for a table to eat here. This was proven another night later as we drove past and saw, indeed, a line of people out the door IN THE RAIN waiting for a table! Crazy, I thought! After we moved here though, we became addicted to Mexican food, especially at this place and still can barely go a few weeks without eating Mexican somewhere. There are more choices now, more expensive ones, and we go to those places but we always return to our first Mexican restaurant, which has in recent years built a much larger restaurant that is still always packed. And 99.9% of the time I get the Cheese Enchiladas!

This card may make you hungry! It was really pretty easy to make. The card base is Real Red with a layer of Crushed Curry Cardstock, some bright Mexican colors. To make the tacos, I started with two Crumb Cake large die-cut circles, each folded in half, one not quite in half so it would look larger. I stamped the outsides with a stamp from Abstract Impressions Stamp Set (an odd choice, right?). I just wanted something that would look like a little texture.

For the taco “ingredients”, I just cut some Early Espresso curvy pieces to look like taco meat, some Real Red circles cut into smaller pieces for tomato pieces and yellow and orange strips for shredded cheese. For the lettuce, I cut strips of Granny Apple Green Cardstock crimped with my Crimper, but you can also just smoosh them up in your hands so make them look like lettuce. I put Stampin’ Dimensionals inside each taco to pop up the outer shell a little bit.

The greeting, strangely enough, is also from the Abstract Impressions Stamp Set. After wondering what I would put for a greeting on the card, this greeting in this stamp set popped out at me and I thought I could just omit the words “About You”. I stamped and layered it on die-cut pieces from the Stitched Nested Labels Dies.

Now it is time to go have some tacos! Here is a list I came across of where you can get free tacos or some special offer. Or you can make this easy, crazy, fun card for National Taco Day!

How To Take a Feels Like Frost Plain Christmas Card To an Embellished Card

Feels Like Frost Plain Christmas Card

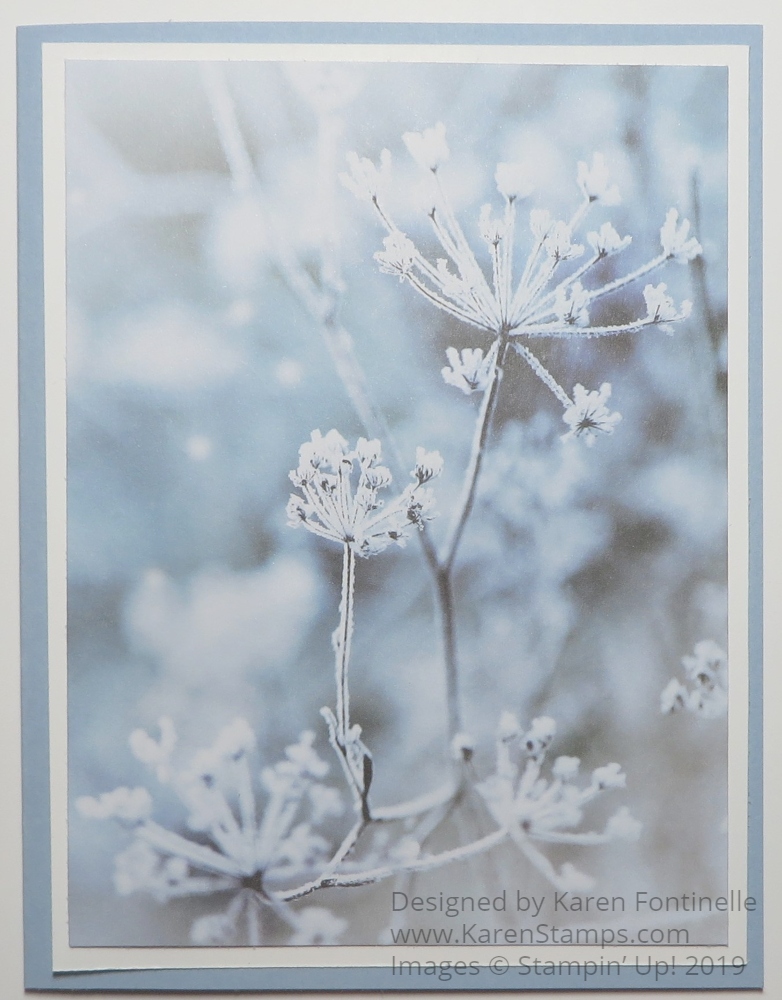
While I thought I could do without this beautiful wintery designer paper, I found that I could not and started working on a card. Just layering the designer paper I chose on the card base I thought looked simple and beautiful enough, especially if you were just sending a personal note. Since the card was so pretty as is, I thought about taking it step by step from a plain Christmas card to an embellished Christmas card and showing you the steps.

As you can see, the first card was just a card base of Seaside Spray Cardstock with a layer of Whisper White under the Feels Like Frost Specialty 6″ x 6″ Designer Series Paper. I think the white helps the designer paper stand out even better. I just thought the card looked so elegant enough with just the designer paper that it barely needed anything else! I could see this paper being used to make a series of note cards or regular size cards for Christmas cards, holiday cards, or just cards for winter. Often when we have someone of a different religion who is not celebrating Christmas, we like to have a more generic card to send them during our holiday.

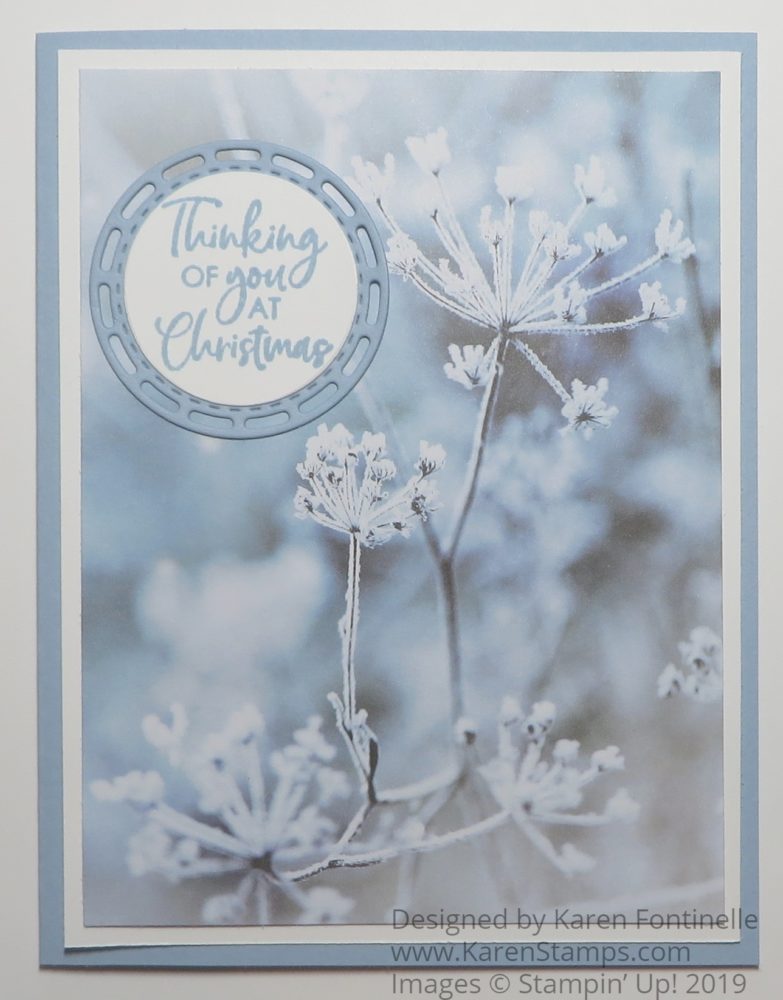
Feels Like Frost Christmas Card With Greeting

To step up the first card, I added a holiday greeting to this plain card. Since there was kind of an open area on the designer paper, I put the greeting in the upper corner. The greeting is in the Itty Bitty Christmas Stamp Set and is stamped with Seaside Spray Ink, one of the newest In Colors. I die cut it with one of the small circle dies in the Layering Circles Dies. I looked through my dies a little bit and decided to use this cute circle layer in the Stitched Labels Dies.

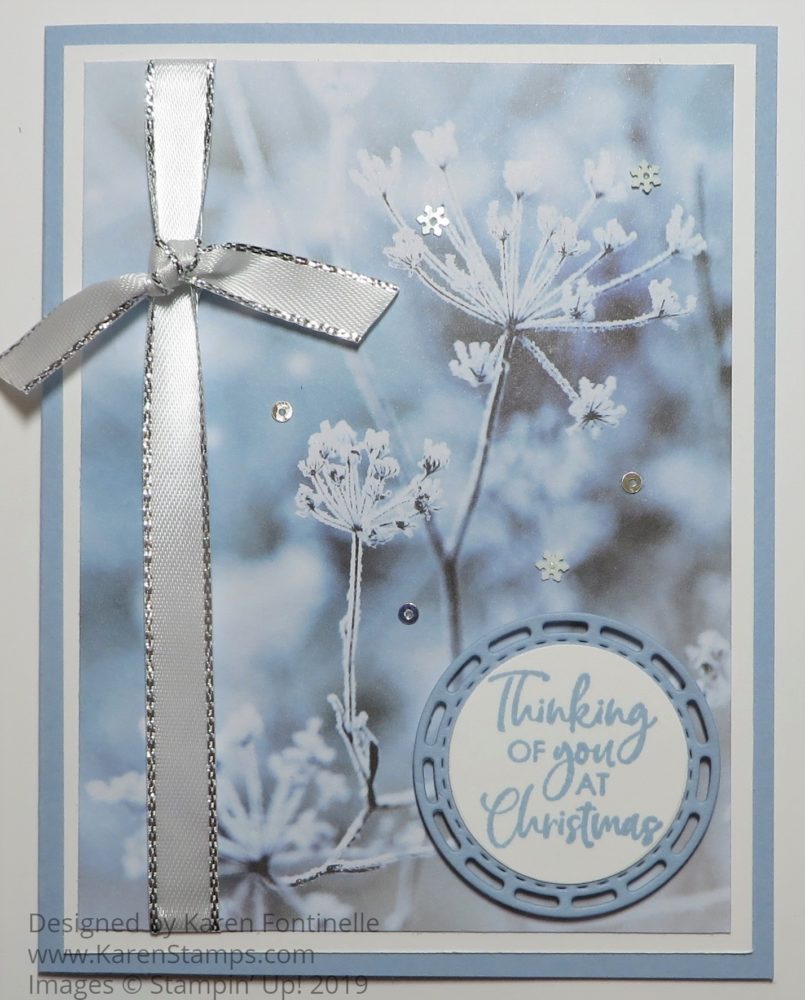
Feels Like Frost Embellished Christmas Card

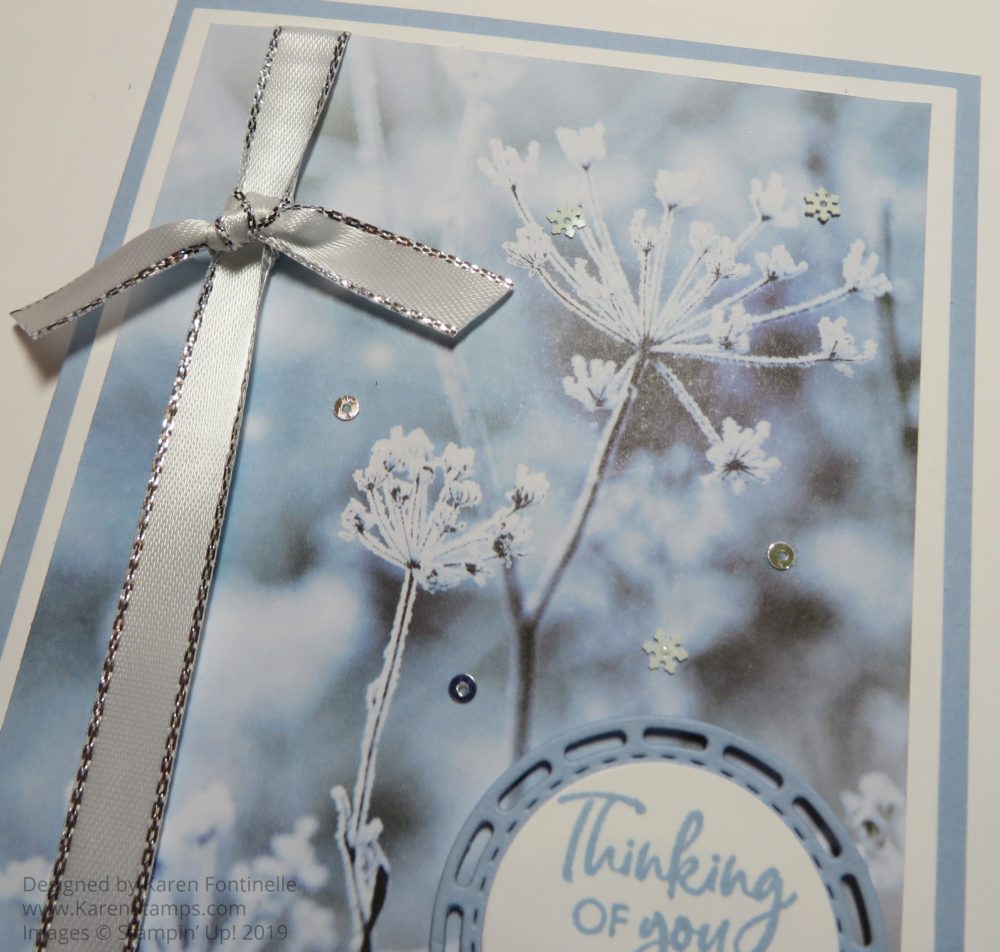
Next, to step up the card, even more, I added the Silver 3/8″ Metallic-Edge Ribbon. I moved the greeting down to the lower corner of the card And for a little bling, I added the teeny tiny Snowflake Sequins to the card, three of the tiny silver ones and three of the snowflake ones. I just used the tiniest dot of Multipurpose Liquid Glue to adhere the sequins with the help (and I do mean HELP) of the Take Your Pick Tool. This is a great tool, no matter which end of the tool you use. I have used the pokey end and also the spatula for scooping up jewels off the sheet and applying to the project and today the sticky end for picking up and placing the sequins. Otherwise, you would go crazy without it, so put one on your next order!

Feels Like Frost Embellished Card Closeup

Check out this beautiful paper in the Stampin’ Up! Holiday Catalog and in the Online Store. Even though the photographic wintery images are beautiful, wait until you flip the paper over to the other side with the silver foil images! (As I write this, I see this paper and matching ribbon are backordered. The Feels Like Frost will be back in stock next week and the ribbon at the end of October.) (I must have gotten the last ones!)

If you are unsure about making a card, just start with something very simple like I did with just the designer paper. Then see what greeting you might want to add. Next see if you have some ribbon or jewels you want to add or a layer for the greeting, whatever it is. Sometimes it is good to stop before you overdo it! And sometimes it is good to jazz it up a bit! Anyway, check out the steps I took to take this plain Christmas card to an embellished Christmas card.

Paper Pumpkin September 2019 Kit Halloween Treat Boxes

Paper Pumpkin Sept 2019 Kit Halloween Treat Boxes

I had so much fun making up this Paper Pumpkin September 2019 Kit with Halloween Treat Boxes yesterday while watching the Houston Texans lose another football game that they didn’t need to lose. It was good I had a distraction! I really enjoyed making this kit and not just because it was a Halloween theme!

Paper Pumpkin is a monthly papercrafting kit made by Stampin’ Up! that comes to you in the mail when you subscribe. You may think you do not want to be committed to a “subscription” but there really is no pressure or risk to a Paper Pumpkin subscription. You can go into your account at any time before the 10th of any month and “skip” a month or two if you like. If you want to cancel, just cancel. I consider it a gift to myself each month to receive this special box in my mailbox!

The presentation of the kit is wonderful, too! They don’t just throw all the materials in the box. All the materials are packaged up and wrapped in tissue paper just like a gift. There is also an exclusive stamp set and small ink spot. I think one of my favorite parts about the Paper Pumpkin Kit is opening it up and laying out all the materials provided in the kit! I love to see all the pieces I have been given!

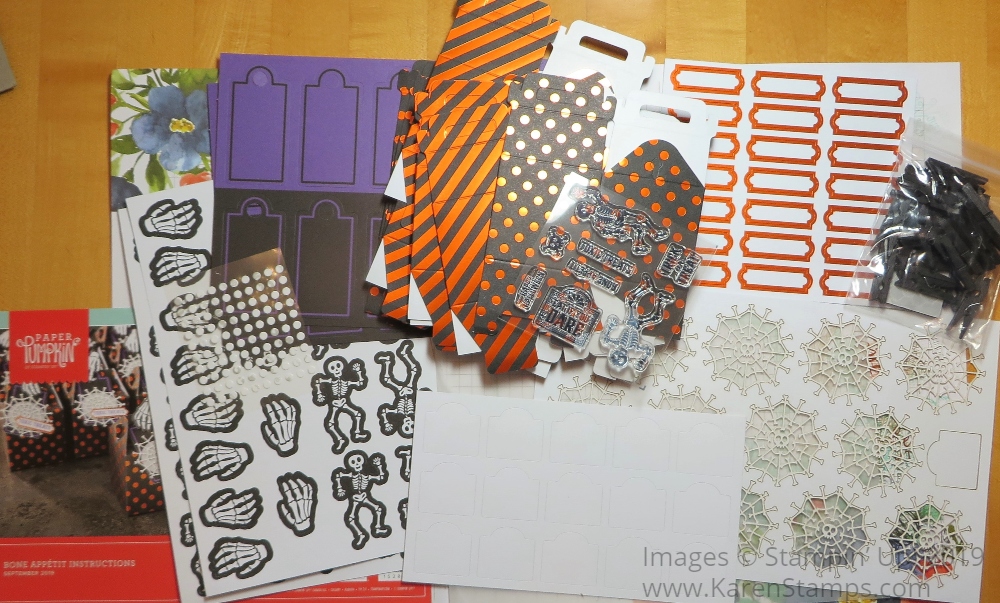
Paper Pumpkin Sept 2019 Kit Contents

In this September Kit you can see the pamphlet with directions (there is also a helpful video online for each kit), the stamp set, the treat boxes, the various tags, the embellishments for the boxes, the bag of little black clothespins, the adhesive dots and even some black mini dimensionals to pop up some of the pieces.

I didn’t close up all my boxes yet, just some to see what they would look like and to show you in this blog post. I don’t want to have to undo all of them when I actually put candy or treats inside closer to Halloween! I got 20 boxes to make in this kit. I made 16 and am deciding if I want to make some alternative projects instead of all the boxes! Obviously it is your kit so you can use the materials however you like in any month! Sometimes I do half and half….make half as designed and make some other projects that I see online for something different!
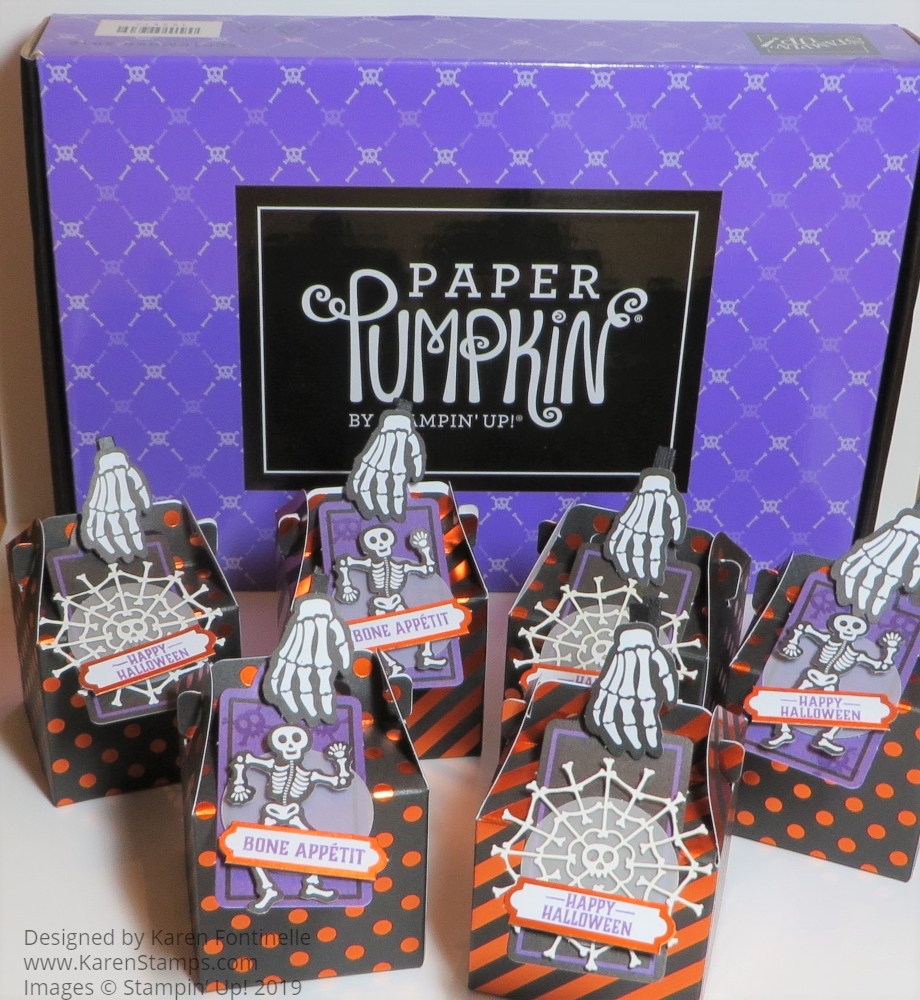
Paper Pumpkin Halloween Treat Boxes

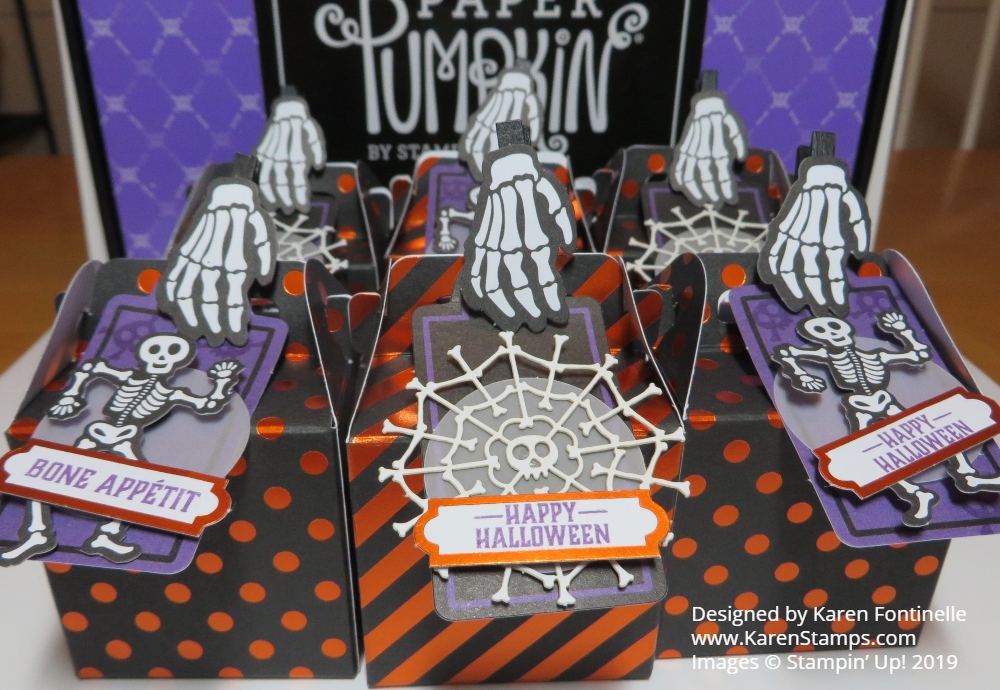
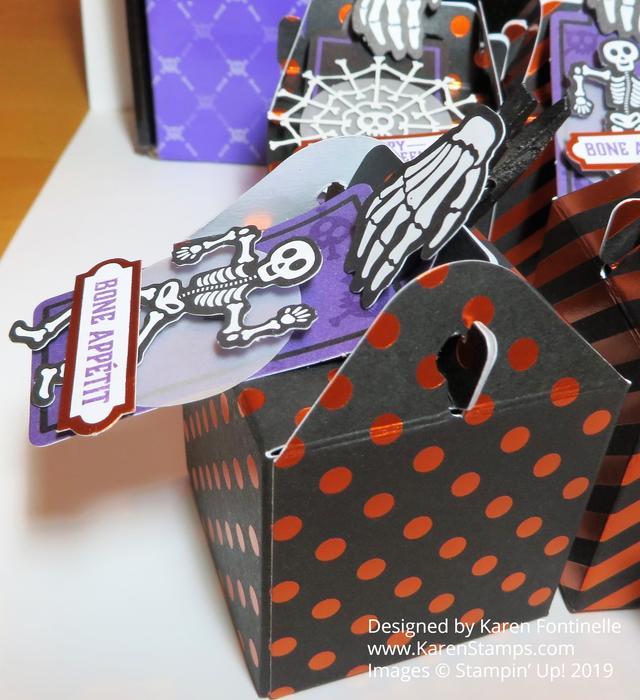
Here is a closeup of some of the boxes so you can see the decorated Halloween tags that are then clipped onto the handle of the box with a small black clothespin! The skeleton hand is adhered to the front of the clothespin with the glue dots. Such a cute project! Maybe you can see the clothespin clipped to the top of the box in this side view below.

Paper Pumpkin Sept 2019 Halloween Treat Box Closure

If you are interested in trying Paper Pumpkin, it is just the right time because the next two month’s kits will coordinate for the holidays! The October 2019 Kit will be 10 cards and the November Kit will be 24 holiday-themed gift tags of 4 various sizes and designs. Sounds like fun to me! I can guarantee you will be glad to have 10 extra cards, even if you are making some on your own, just in case! I know I always have a few more people I want to send cards to. And we all will need gift tags!

Paper Pumpkin Winter Wonders 2019

The cost of each monthly kit is $22 plus tax but that includes shipping. In your first kit, you will receive an acrylic block made for Paper Pumpkin with which to mount the stamps. In all the kits you will receive an exclusive stamp set, an ink spot, adhesives, and all the materials to make the project, whatever it is! No need to design something yourself or order supplies you don’t have……it’s all in the box! Just open and craft! And of course, you will have the stamp set and ink spot to use in the future. In fact, the ink spots are great to use with the Stamparatus!

October is coming up tomorrow and the important date to remember is October 10th! And then November 10th, if you don’t subscribe in October! But I suggest subscribing by October 10th so you receive both kits and will be ready for Christmas! Do it today so you don’t forget!

JOIN PAPER PUMPKIN HERE!

Monster Bash Halloween Clear Tiny Treat Box

Monster Bash Halloween Clear Tiny Treat Box

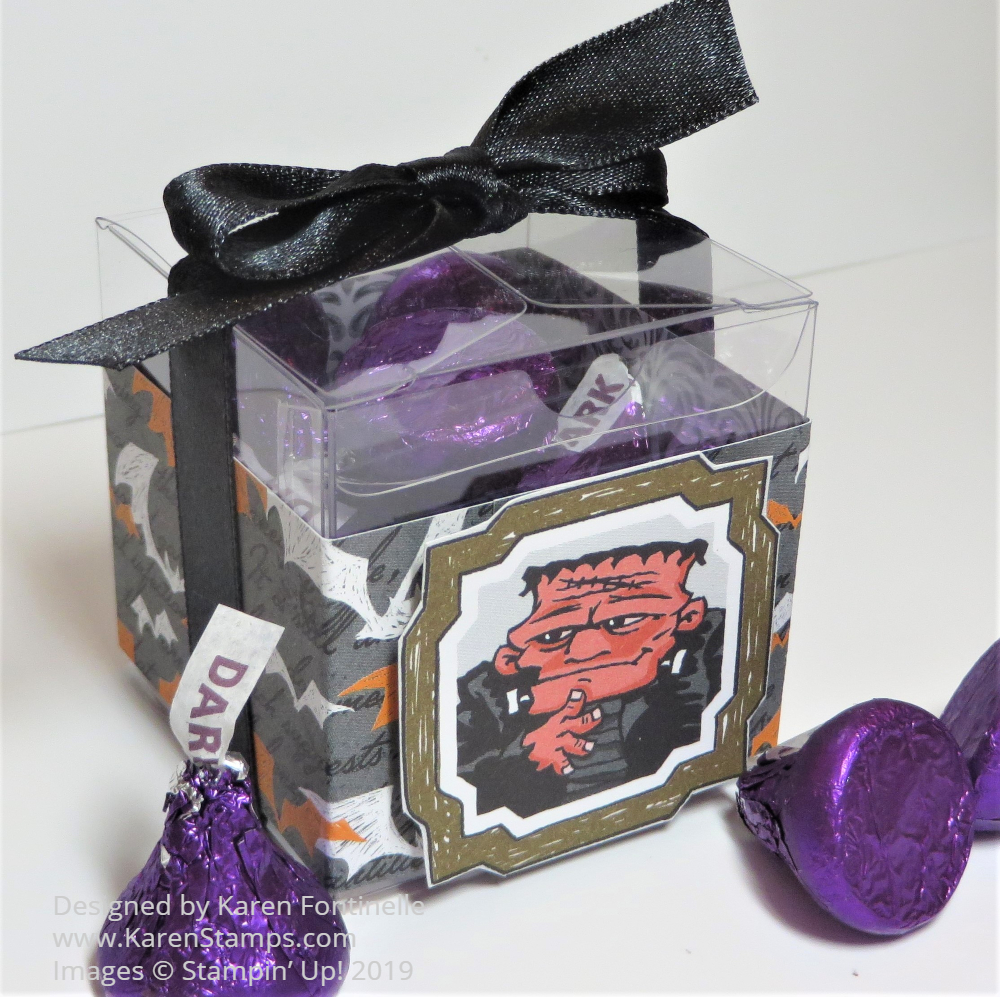
Make this Monster Bash Halloween Clear Tiny Treat Box so quickly and easily for all your Halloween ghosts and goblins! It’s practically October and you know that means it’s time to think about fun Halloween treat packaging!

This treat might be something more for family, friends, co-workers or other people, more than random trick-or-treaters since you will be using the Clear Tiny Treat Boxes. I always keep a package of these on hand for small treats or gifts. They are so easy to use and so versatile, not to mention they store flat. Just take off the bit of plastic wrap on them that protects the surface and crease the scored lines to form the treat box.

For this Halloween treat, I simply wrapped a strip, about 1 3/4″ wide, of the Monster Bash Designer Series Paper around the box. It will be longer than you need but just wrap around the box, creasing fairly lightly at each corner. Then take the paper off, trim the end to overlap the front edge just a little bit (since the decoration is going to hide where the paper overlaps) and use a Bone Folder to crease those score lines you created, keeping them straight along the edge of the strip of paper. Now put the paper back around the box and use a little adhesive to join the overlapping ends.

For this box, I wanted to just keep it super simple. I just cut out one of the Halloween character images from the Monster Bash paper with my Paper Snips and adhered him to the front of the box with two Stampin’ Dimensionals. I could have die cut a layer, maybe one of the Ornate Frames, to mount him on, but I was making it quick and easy!

After putting my candy inside (you could add some paper shred if you didn’t want so much room for candy!), I tied a Basic Black Satin Ribbon around the top to make sure the lid stays closed. The recipient can easily untie the bow to get to the candy!

Here’s another example in this post of a Halloween treat box from last year using the Clear Tiny Treat Box.

Another option would be to wrap the designer paper around the box across the top and decorate the top of the box, then wrap the ribbon around the sides of the box. Or just put some decoration on top of the box.

These would be cute party favors at a Halloween party and easy to make! The boxes are clear acetate and food safe so you don’t have to worry! And with the cute Monster Bash Designer Series Paper, you have no limit on decorating options for your treats! Try the Monster Bash Halloween Clear Tiny Treat Box for some Halloween fun!

Shop the Stampin’ Up! Holiday Catalog Here!

Purple Posy Ink Is Back & More!

In Color Ink Pads 2019-21

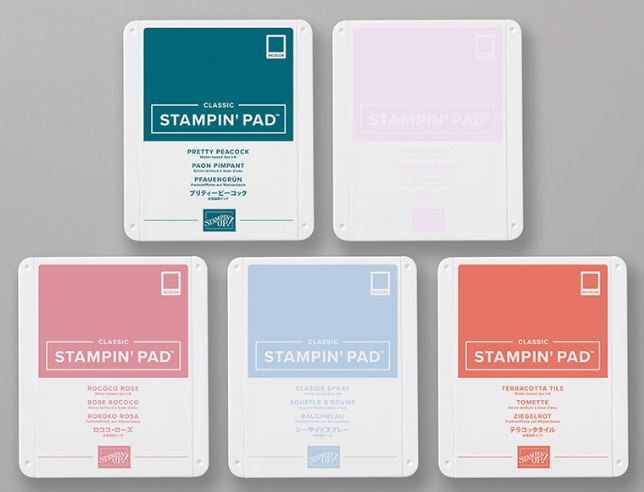
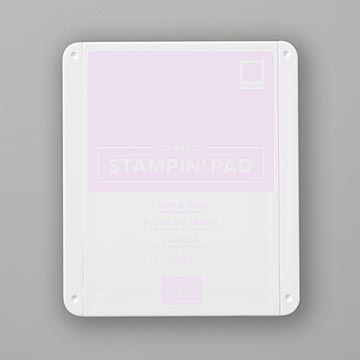
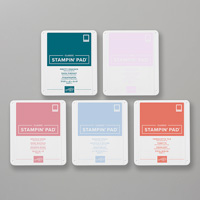
The In Color 2019-2021 Classic Stampin’ Pad Assortment is complete! After a problem with the ink quality of the Purple Posy Ink, the ink pad is back and joining the other new In Colors!

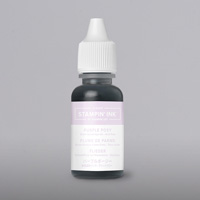
Stampin’ Up! is excited to announce that Purple Posy Classic Stampin’ Pads and Purple Posy Classic Stampin’ Ink Refills are available to order. You may now also purchase the 2019–2021 In Color Classic Stampin’ Pads (includes all five of the 2019–2021 In Colors).

ALSO:

These remaining 3D embossing folders are now available to order in the new style:

The new Paper Trimmer IS COMING…..eventually! I think we are getting closer, but no, we Demonstrators do not have a date yet.

Same for a new die-cutting machine…..Stampin’ Up! is working on it and getting closer but no word yet and probably nothing real soon. I’m pretty sure the Paper Trimmer will be out first. Keep your fingers crossed that they get these necessary products out to us sooner rather than later!

Over The Moon Masculine Birthday Card

Over The Moon Masculine Birthday Card

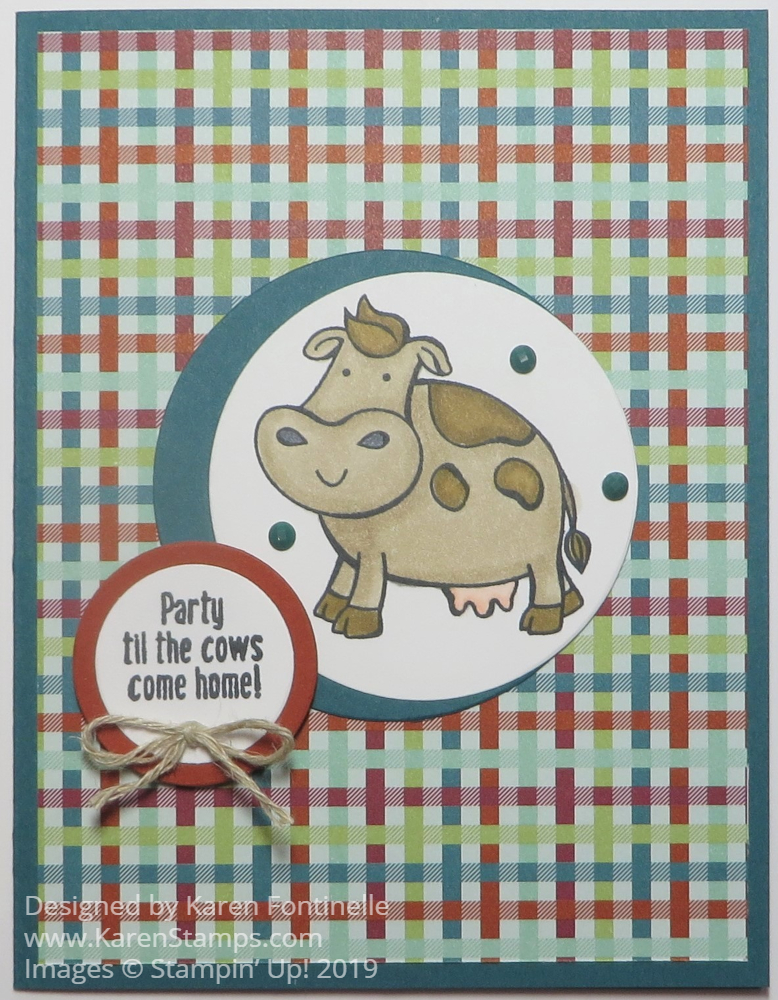
Often times we rack our brains to think of a good masculine card, I don’t know why! I guess more stamps and papers are geared toward women so we find ourselves at a loss when we have to make a card for our husband, son, grandfather, uncle, etc. It took me a while of looking online to come up with this idea, the Over The Moon Masculine Birthday Card, for my brother’s birthday. Not that he has anything to do with cows, but the Over The Moon Stamp Set is so cute I wanted to use it for a whimsical birthday card!

The card base is Pretty Peacock with a plaid design in the Come to Gather Designer Series Paper. The cow is stamped in Memento Ink and colored in with Stampin’ Blends markers. Have I ever said before how much I LOVE coloring with these markers??! I love coloring with these markers! I find it very relaxing! Coloring is good therapy!

After the cow was stamped, I die cut it with a circle in the Layering Circles Dies. Then I cut a slightly larger circle in Pretty Peacock and layered the cow on top of that but not centered. I saw that idea somewhere online and thought I would try it for something different.

I thought the greeting in the set was perfect for a birthday so I stamped and die cut that and layered on a circle of Cajun Craze. I found a little scrap of Linen Thread and tied a small bow for the greeting and stuck it on with a smooshed up Mini Glue Dot. And for a finishing touch, I added three
2019-2021 In Color Faceted Dots in Pretty Peacock.

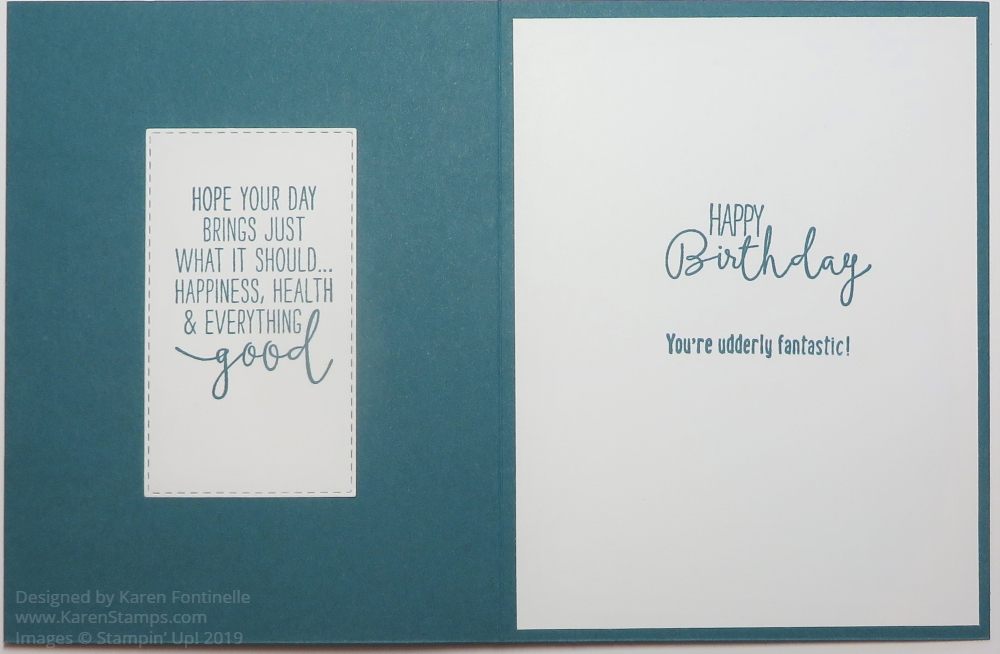
Here is how I stamped and decorated the inside of the card.

Over The Moon Masculine Birthday Card Inside

The greetings are from the Special Celebrations Stamp Set and you can guess which one is from the Over The Moon Stamp Set with the cows! Since I wanted to use the long greeting but not fill up the inside of the card, I opted to stamp it and then die cut it with the Stitched Rectangles Dies so I could add it to the inside front cover of the card.

The Over The Moon Stamp Set was one I did not think I needed until I saw some cards made with it. I think it is fun making cards with this stamp set. It’s probably a good idea to have at least one “funny” stamp set in our collection! Check it out in the Stampin’ Up! Online Store!

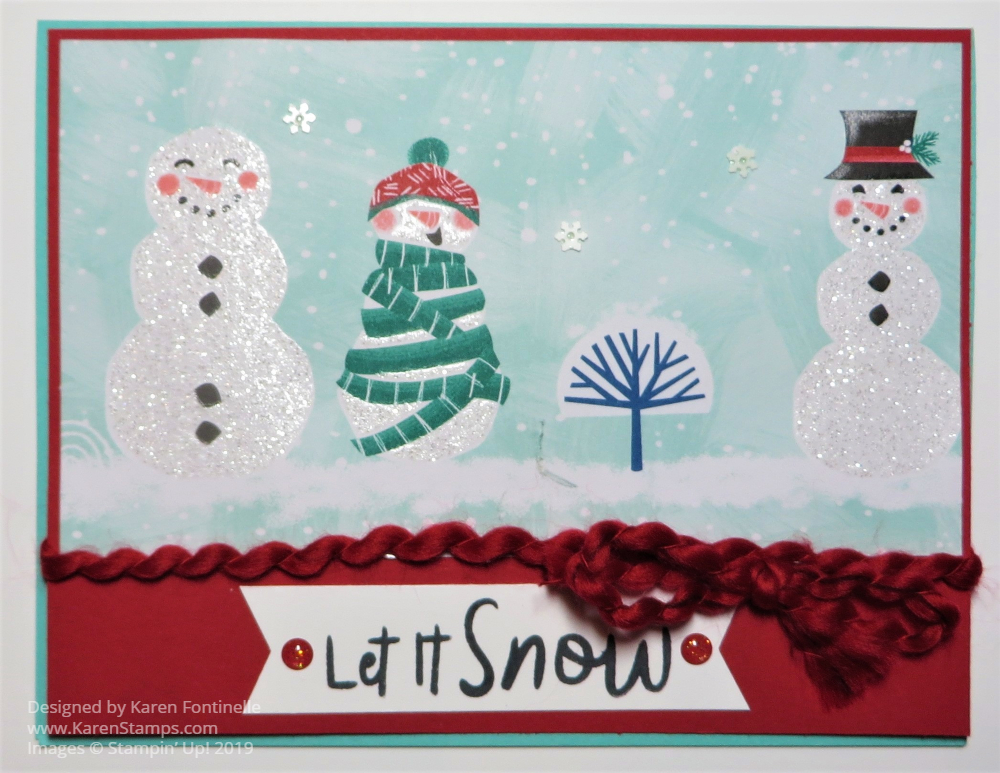
Let It Snow Designer Paper Christmas Card

Let It Snow Designer Paper Christmas Card

Someone said three months from today it will be Christmas so you might want to start thinking about what Christmas cards you want to make, like maybe this Let It Snow Designer Paper Christmas Card. I would add, besides being three months until Christmas Day, I would add that in three months from today, it will all be over with! The cards made and mailed (hopefully!), the presents bought, wrapped and possibly given, church services attended, Christmas cookies baked (usually not until after at my house!), parties attended, Christmas meals planned and eaten, except for Christmas Day dinner. SO….we have way less than 3 months to work on all our craft projects and cards to send and give!

To help you out a little bit, beginning next Wednesday, one week from today, we are going to start the “12 Weeks of Christmas” email campaign! Every week for 12 weeks I am going to be sending you a FREE holiday project that you can use to make your holidays easier and more festive! Please note, however, the only people who are going to receive these FREE projects are the people who are on my Mailing List. If you are NOT on my mailing list, you will not receive these special holiday emails.

To get on my email list, just fill in the red box in the upper right corner of my blog or you can sign up below:

Subscribe to My Mailing List! 

Exclusive Projects

Stampin’ Up! News & Updates

FREE Welcome Gift!

Name: 

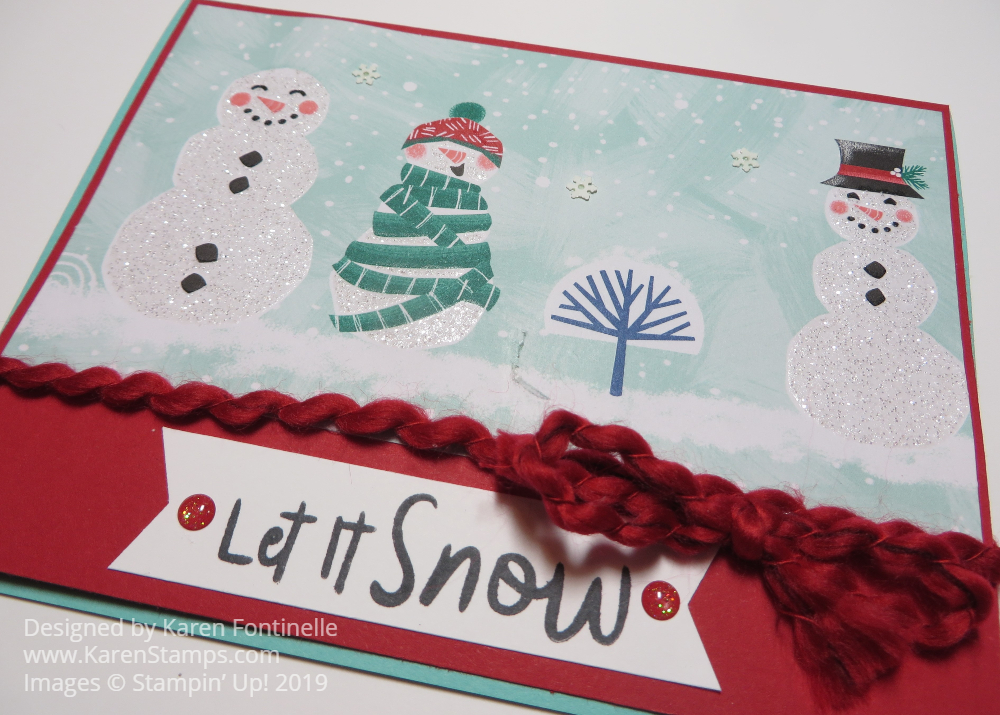
For this card, I used a card base of Pool Party with a layer of Real Red Cardstock. Laid over the top of the Real Red Cardstock, is a piece of the Let It Snow Specialty Designer Series Paper. It will almost kill you, but you can cut the designer paper sheet with the glittery snowman appropriately so that you get the snowmen that you choose on the paper. If this does kill you to whack your beautiful paper up this way, you might want to order extra!

The ribbon wrapped around the card (to hide the seam of the designer paper on the Real Red is the Real Red 1/8″ Curly Ribbon. It is fun to use on cards, of course, but you might like to order extra to use as real wrapping ribbon on your Christmas packages!

The greeting is one from the Snowman Season Stamp Set. It is stamped in Memento Black. The banner ends are punched with the Tag Punch. And finally, I added some red stick-on dots from the Toile Tidings Glitter Enamel Dots. And finally, I added only about three snowflake sequins from the Snowflake Sequins. When you get right down to it, this Let It Snow Designer Paper Christmas Card is pretty easy to make!

Remember to sign up for my regular mailing list in the top right of this blog, if you are not already on my mailing list, in order to receive these fun holiday emails starting next week! The holidays are coming fast!

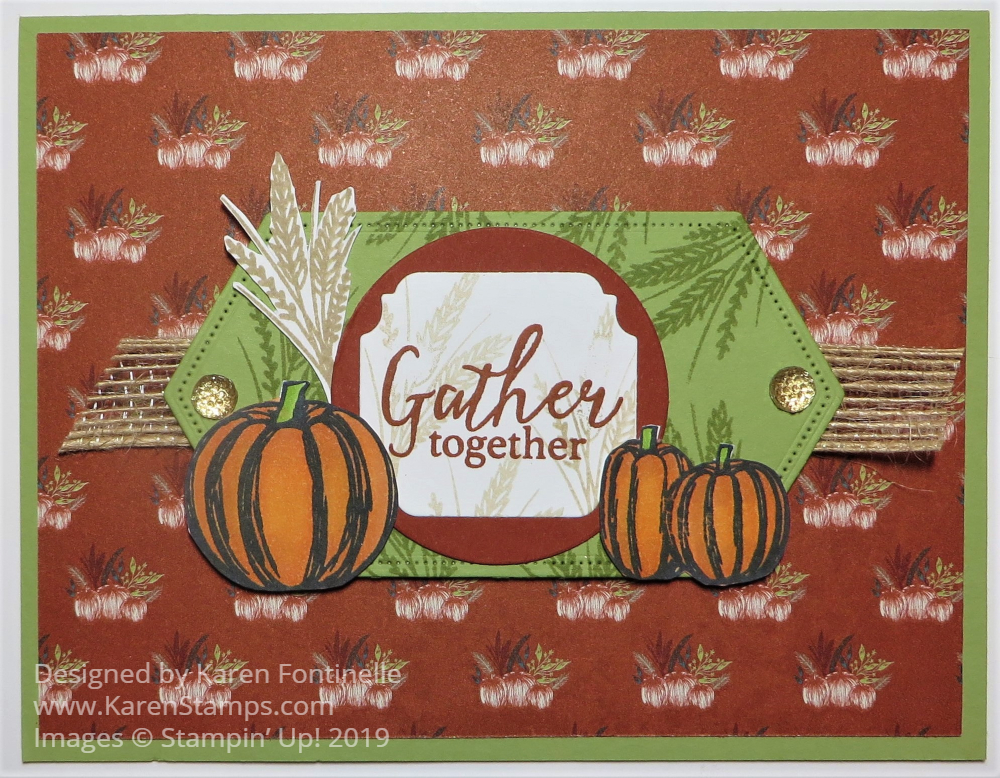
Gather Together Fall Card on the First Day of Fall

Gather Together Fall Card on the First Day of Fall

I’m celebrating today with this Gather Together Fall Card on the First Day of Fall even though in Houston, Texas we are a LONG way from it feeling like fall! If only!! Maybe someday before Christmas the weather will cool off so that we can walk outside and feel comfortable! But being able to make cards and projects with stamps, ink, and paper to express the feeling of fall does help a little bit!

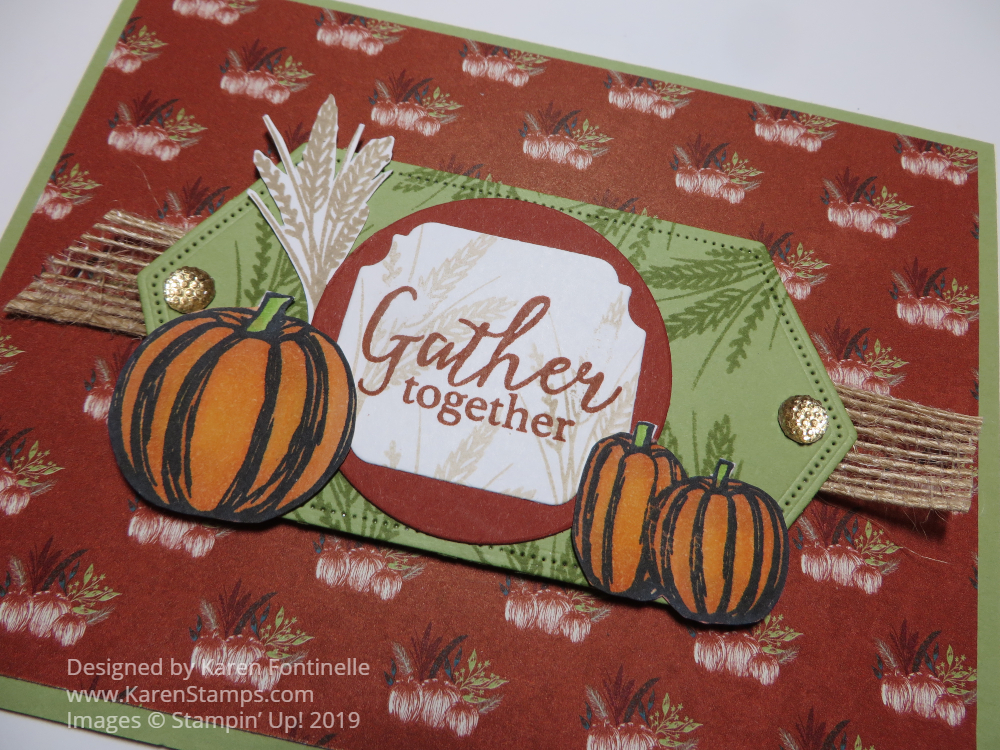
This card starts with a base of Pear Pizzazz Cardstock with a layer of designer paper in the Come To Gather Designer Series Paper Package. This print has tiny little pumpkins with wheat and grass in the background with a Cajun Craze colored background.

I began with the greeting in the Gather Together Stamp Set. I stamped the greeting with Cajun Craze Ink and then die cut it with one of the dies in the Ornate Frames Dies. I layered it on a die cut circle of Cajun Craze to help it stand out a bit more. For the background I die cut a piece from the Stitched Nested Labels Dies in Pear Pizzazz and stamped some wheat randomly for some interest in the background. I adhered two pieces of 5/8″ Burlap Ribbon to each end of this piece. The pumpkins are stamped and colored with Stampin’ Blends and then cut out with Paper Snips (you can also purchase the Gathered Leaves Dies). I also stamped the wheat in Crumb Cake In and cut it out by hand as well. This whole focal point of the card is popped up on Stampin’ Dimensionals®.

Gather Together Fall Card First Day of Fall

That’s all there is to this card. It made me feel cooler just making it! LOL! This would be a great card to send for a Thanksgiving greeting or even just a card to mail during the autumn season!

Check out all these products in the Stampin’ Up! Holiday Catalog in the Stampin’ Up! Online Store!

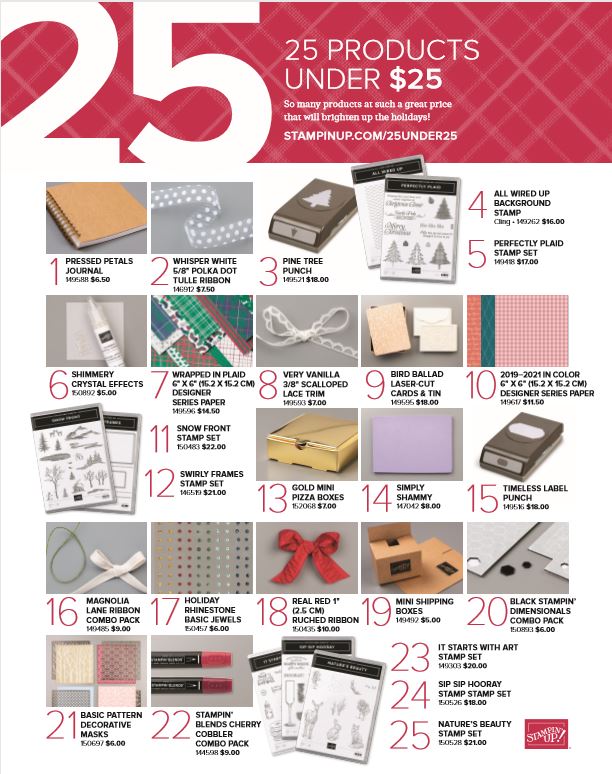
25 Products in the Holiday Catalog Under $25!

Holiday Catalog 25 Products Under $25 Flyer

We may want almost everything in the Stampin’ Up! Holiday Catalog but most of us cannot afford to buy everything, not even Demonstrators! But here is a flyer with 25 Holiday Catalog products that are priced under $25. This may help you out if you are trying to watch your budget.

I know we probably say this every year, that THIS Holiday Catalog is the best we’ve ever had, but maybe it is because this year and every year it is TRUE! It is all subjective, of course, but I think it is because almost everyone just loves the holidays beginning in the fall and going through New Year’s. We are always excited to get the new Holiday Catalog when it comes out and ready to start all our craft projects and cards as soon as possible!

If you are interested in making holiday cards and projects with Stampin’ Up! products and are looking for a Demonstrator to assist you, I would be happy to send you a catalog or answer any questions you may have. Just send me your contact information and I can mail a complimentary Holiday Catalog to you. Also, remember you can look at the Holiday Catalog AND Annual Stampin’ Up! Catalog online HERE.

Have Fun Shopping At Stampin’ Up! Online!

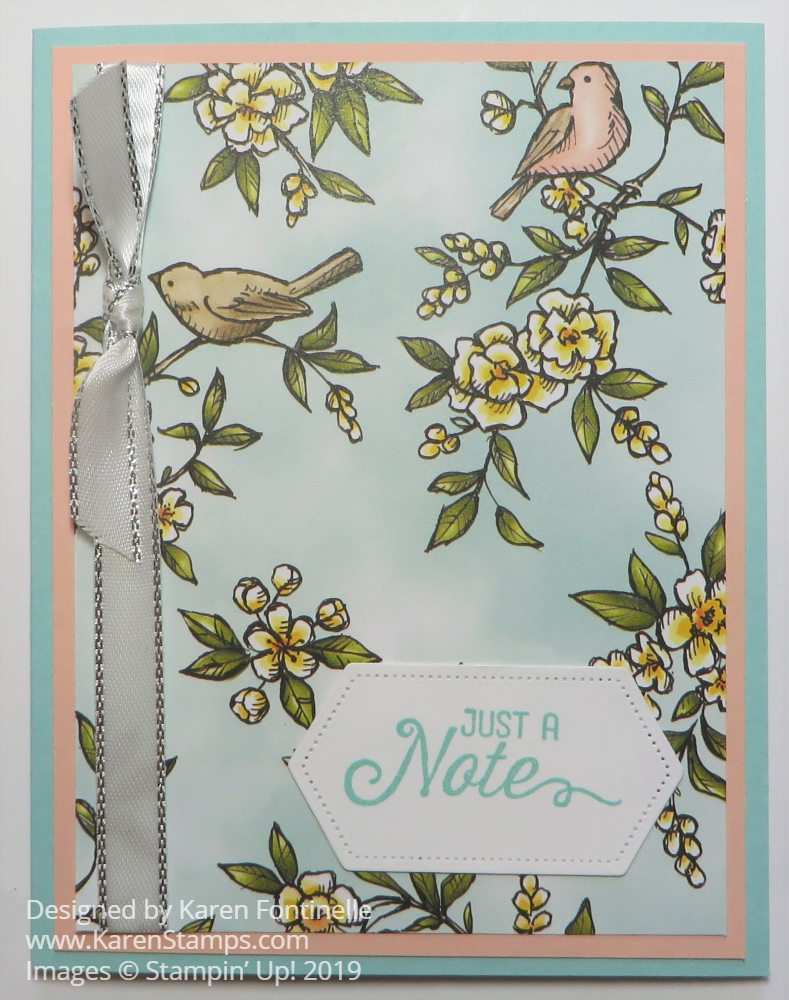
Bird Ballad Just A Note Card

Bird Ballad Just A Note Card

Yesterday I was making a few cards much like this one for various occasions and I realized I had not photographed any of them, but I DID mail them! So I just made one more, this Bird Ballad Just A Note Card slightly different from the others and took a photo for my blog post!

You just can’t get away from the beauty of this Bird Ballad Designer Series Paper! I think it’s the watercolored look of the paper that catches my eye. In fact, it was designed with watercoloring so that we could use our Stampin’ Blends alcohol markers to duplicate the look with our stamping with the Free As A Bird Stamp Set. I think several of these designs are the prettiest we have ever had.

This card is so easy to make, even for beginners. The card base is Pool Party Cardstock with a layer of Petal Pink Cardstock. Then the designer paper is layered on as the top layer but first, the Silver 3/8″ Metallic-Edge Ribbon was adhered on the back of the designer paper. Then I just tied a knot onto the ribbon, but you could tie a bow and adhere it with some Mini Glue Dots.

The greeting is stamped with Pool Party Ink on Whisper White Cardstock, then die cut with the Stitched Nested Label Dies. You can purchase these fun label dies along with the Free As a Bird Stamp Set in the Free As a Bird Bundle and save 10%. The greeting is from the Flourishing Phrases Stamp Set (one of my favorites!).

This pretty Bird Ballad Designer Series Paper is one of the select papers on the Buy 3, Get 1 Free Designer Paper Sale by Stampin’ Up! There are only 10 days left to take advantage of the sale! When you order, put in the 3 designer papers that you want, and when you add the 4th paper, you will see that it is FREE! This offer ends September 30.

Shop Stampin’ Up! Online HERE!

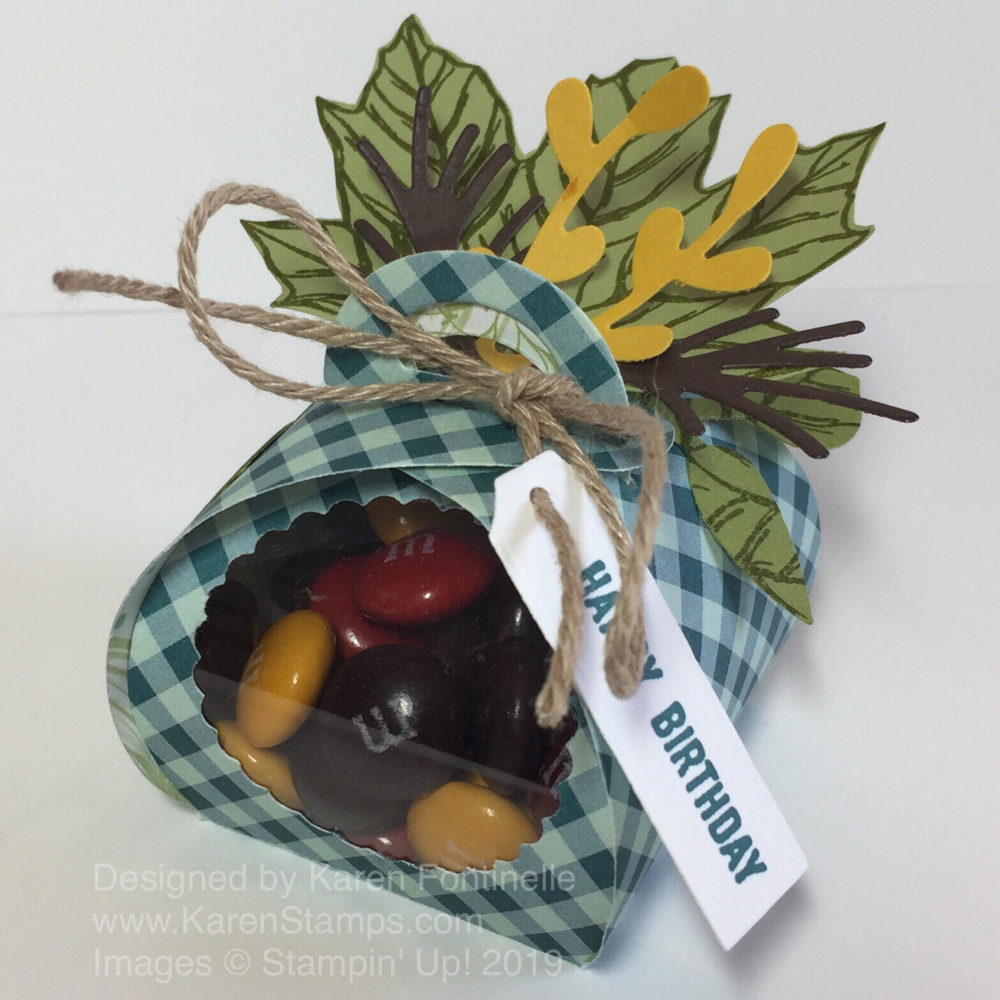
Mini Curvy Keepsake Box For A Fall Birthday

Mini Curvy Keepsake Box Fall Birthday

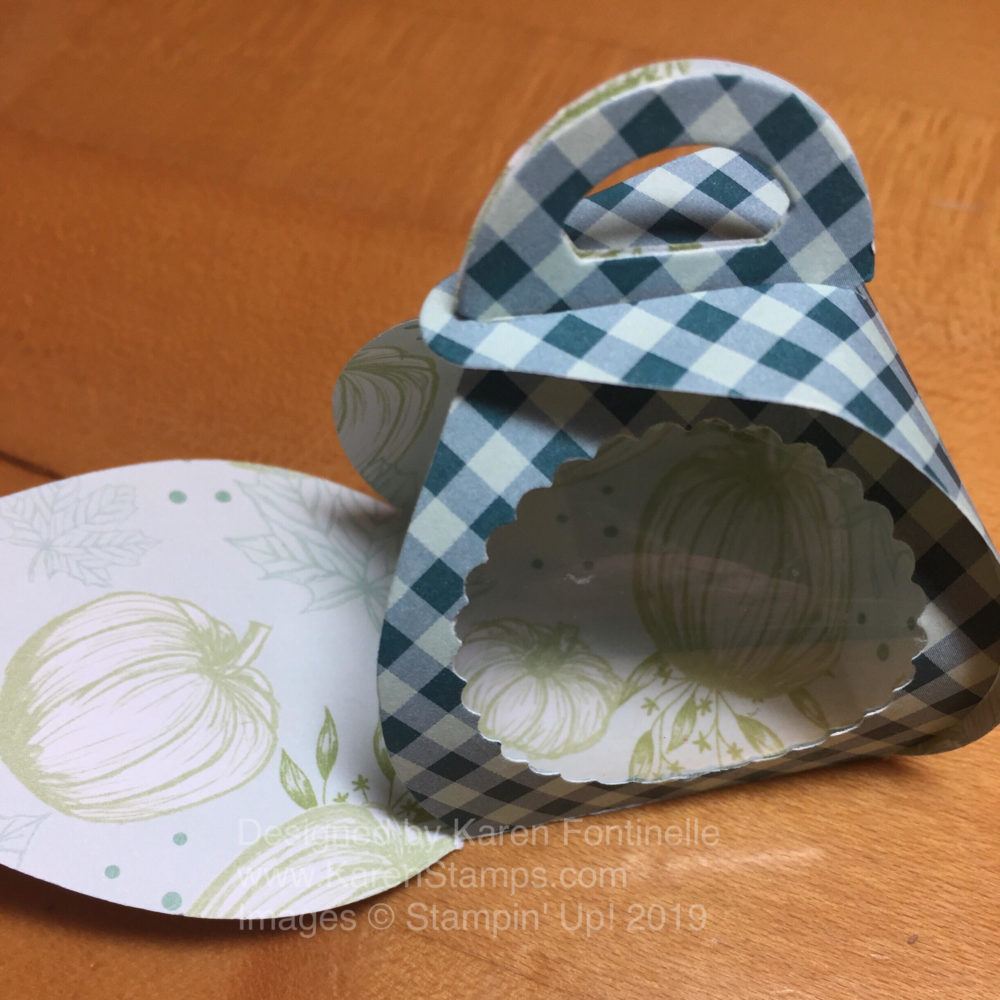
Yesterday was my husband’s birthday so instead of a card, I decided to make this Mini Curvy Keepsake Box For A Fall Birthday. I was looking online for ideas, thinking of something birthday-ish or fall-ish and I saw this idea of making a window in the box so you can see the candy or treat inside! I thought that looked pretty cute so that is the main idea I went with!

Instead of cardstock, I used a piece of the Come To Gather Designer Series Paper. I wanted something that would look good on the outside as well as the inside. The inside doesn’t really matter, but if you are making a fall box, you probably don’t want to use a Christmas paper with a generic pattern for the outside and some Christmasy pattern on the inside of your fall box! Depending on the pattern, pay attention to the direction of your paper. Think about which way the design will go on the outside of the box and maybe even the inside of the box.

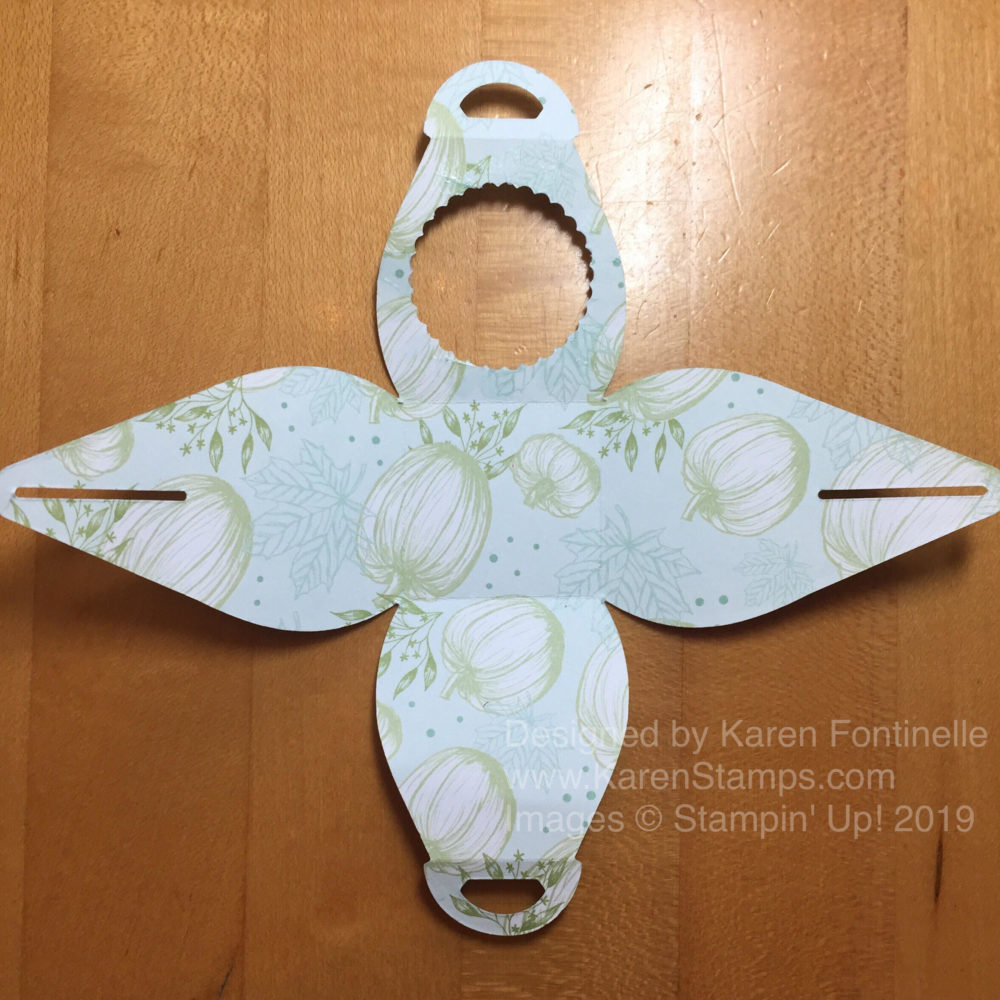
What you need for this Mini Curvy Keepsakes Box Die is a piece of 6″ x 6″ paper. Then lay the die down with the points diagonally on the paper. If you put any point straight up on the paper, it will not fit.

Mini Curvy Keepsake Box Fall Birthday Die Cut

After die-cutting the box piece and creasing the score lines and folding, I decided on which panel I was going to put the little window. Ultimately I decided on the 1 3/8″ Scallop Circle Punch for the punched hole. Since the area was so small and narrow, I actually die cut a piece of window sheet for one panel and then trimmed that down by hand to fit the area. I just used Snail Adhesive in tiny bits around the hole to hold the window sheet in place.

Mini Curvy Keepsake Box Fall Birthday Window

I just recently made my first box with my daughter on vacation and I couldn’t figure out how to hook the top together! Luckily a video provided the answer! As you are trying to fit the side pieces with the long slits over the “handles”, PRESS DOWN! That lowers the handles, provides the curve to the box and allows the slit pieces to fit over the handles and hold everything in place! Very easy but I didn’t know to do that until I watched a video!

In order to put the candy in the box, I assembled the box except for one side. Then I could put the candy in and fill it up.

Mini Curvy Keepsake Box Fall Birthday Open

Then all was left was to decorate the box! I stamped some leaves with the Gather Together Stamp Set, die-cut some brown stems with a little die in the Mini Curvy Keepsake Box Dies, and punched some stems with the Sprig Punch out of Crushed Curry for some color. I also punched some Old Olive leaves with the Leaf Punch. Then I over-stamped those leaves with the large leaf stamp in the Gather Together Stamp Set.

My birthday greeting is stamped with Pretty Peacock Ink and a stamp from the Itty Bitty Greetings Stamp Set. Then I just die cut the greeting with a die from the Ornate Frames Dies and tied the box handles together with a piece of Crumb Cake Nature’s Twine. I just poked the twine through the hole on my greeting tag and pulled the tag up to the box.

I didn’t initially order these dies to make these Mini Curvy Keepsake Boxes but I’m glad I did as there is a LOT you can do with them! Check them out in the Stampin’ Up! Holiday Catalog!

SHOP STAMPIN’ UP! ONLINE!

Paper Pumpkin Winter Wonders 2019 Holiday Kits

Paper Pumpkin Winter Wonders 2019

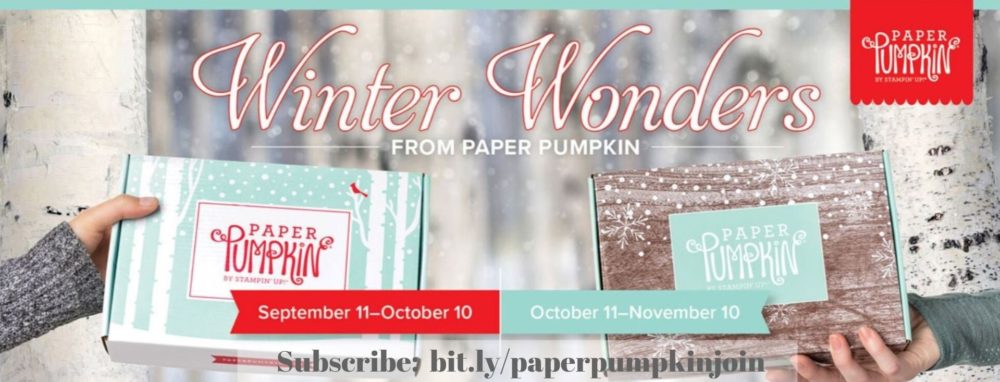
If you enjoy holiday craft projects, especially ones that come in a special edition box in perfect packaging, delivered straight to your mailbox for you to open up and begin crafting immediately, then you probably will love to get these October and November Paper Pumpkin Winter Wonders 2019 Holiday Kits.

The October and November Paper Pumpkin Kits are coordinating, back-to-back kits to help you with your holiday giving. Everyone loves the holiday kits and they are useful as well as fun!

October Kit

Kit details: Makes 10 cards and envelopes
Card size: 4 1/4″ x 5-1/2″ (10.8 x 14 cm)
Envelope size: 4-1/2″ x 5-3/4″ (11.4 x 14.6 cm)
Coordinating colors: Early Espresso, Pool Party, Poppy Parade, and Shaded Spruce

November Kit

Kit details: Makes 24 holiday-themed gift tags of 4 various sizes and designs.
Coordinating colors: Early Espresso, Pool Party, Poppy Parade, and Shaded Spruce

The October and November kits coordinate; however, each kit is all-inclusive and can stand alone.

How great would that be to know you will have a pre-planned kit to make 10 Christmas cards to send, even if you are a regular cardmaker and have some other card designs you want to make for Christmas. I like to make many different designs of cards that I send out for Christmas!

This also means that by the end of October, you surely will have at least ten cards made for the holidays so that is ten less that you will have to rush to make at the last minute!

Then in November, you will get the second kit with designs and supplies to make tags for gifts. If you don’t need tags, use them to make more cards if you like! But usually, we always need more tags! I know I have run out to the store at the last minute in past years for MORE tags for presents!

To get one or both of these kits (with no obligation to continue your subscription, but you probably will want to!), just sign up HERE at my Paper Pumpkin website! Just remember the deadline is October 10th to get the October kit, and if you don’t subscribe then, the deadline for the November kit will be November 10th. Save yourself the effort of remembering and just subscribe NOW!

Another option is to purchase a subscription on your Stampin’ Up! order in the Online Store! This may help you reach $150 or more on your order and thus get Stampin’ Rewards! You will get an email from Stampin’ Up! telling you how to set up your Paper Pumpkin account and a code to use to register your prepaid kits. It’s easy. Decide which method works best for you. Even if you have a subscription to Paper Pumpkin, you can add a subscription to your Stampin’ Up! order, use those prepaid kits in your account, and then it will revert back to your monthly subscription. Choose whichever option is better for you!

JOIN PAPER PUMPKIN TODAY!

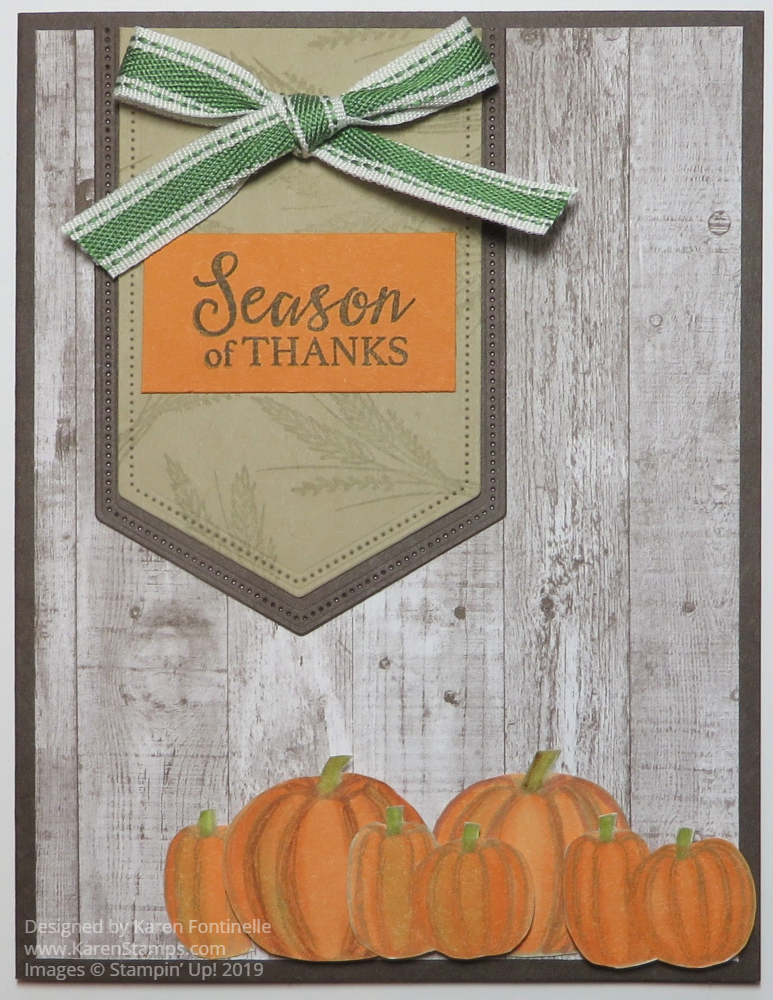
Gather Together Pumpkin Card

Gather Together Pumpkin Card

Sometimes I just get out some paper and stamps and have no idea where the stamping will lead and what will turn out, but today this Gather Together Pumpkin Card is what came out of some stamping, coloring, and paper cutting!

Who doesn’t love pumpkins, especially as fall is approaching?! Nothing says fall, and eventually Halloween, like pumpkins! These pumpkin stamps are in the Gather Together Stamp Set in the Holiday Catalog. I decided to stamp the pumpkins with Sahara Sand Ink so there wouldn’t be the bold, black lines of Memento Ink that I would normally use. I did go ahead and used Stampin’ Blends to color in the pumpkins and it seemed to work okay. I started with the Pumpkin Pie Light and Dark colors but added a bit of Light Cajun Craze for some contrast. The stems I first colored with a bit of Soft Suede Blends, but I also tried to add just a bit of Old Olive green and a bit of the Light on the pumpkins. Some pumpkins are popped up with Stampin’ Dimensionals.®

There is a set of dies that go with this stamp set, Gathered Leaves Dies. I haven’t purchased these yet, but they would be great for making the embossed leaves. I wish I would have ordered them! Since I don’t have the dies, I just hand cut the pumpkins with my Paper Snips. You can, however, save 10% if you purchase the Gather Together Stamp Set and the Gathered Leaves Dies in a Bundle, the Gather Together Bundle.

The card base is Early Espresso Card Stock with a layer of the wood grain pattern in the Come To Gather Designer Series Paper. For the banner with the greeting, I die cut a piece of Sahara Sand Cardstock with the Stitched Nested Labels Dies and just cut off the top to line up with the top of the card. The Sahara Sand is layered on a die-cut of Early Espresso. The greeting is just cut to fit on the banner. By the way, the banner was first stamped with the wheat-looking stamp for a little something in the background.

Once I got the banner made with the greeting and then added the Garden Green 3/8″ Double-Stitched Ribbon tied in a bow, that’s when I was satisfied with what I was creating! Sometimes it just takes playing around and then having that “moment” when you know you have something you like. You will find this pretty ribbon in the Toile Tidings Suite, but there is no reason why you can’t use it for fall and Halloween.

There is so much to like about the Come To Gather Suite. You can make cards for fall, Thanksgiving, and even maybe Halloween! Such pretty colors in the designer paper and even some wooden elements, the Tags & Feathers Elements, that you can use for stamping or embellishing. Think of many creative projects you can use with these products as well, some pretty home decor and other things. Fall is such a great time of year! I will be glad when it feels like fall in Houston, Texas!

SHOP STAMPIN’ UP! ONLINE FOR THE COME TO GATHER SUITE!

***Check out the “refreshed” Clearance Rack today!***