Tag Archives: Halloween

Last Minute Past Halloween Ideas!

If you are still looking for last-minute Halloween ideas, here are a few from past years! You can update with our newer products or maybe you still have some of these older products from years past! Whatever you like! Click the title above the photo to go to that blog post for directions. Don’t miss the last idea at the bottom of the post – a new one I had to stick in because it’s so fun! I usually make one of these every year! Save that paper towel roll!

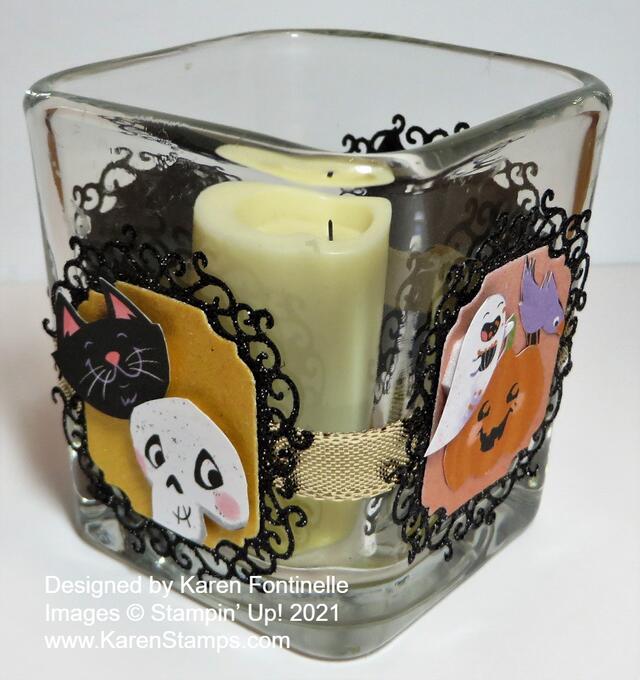
Make a Cute Halloween Votive Candle Holder

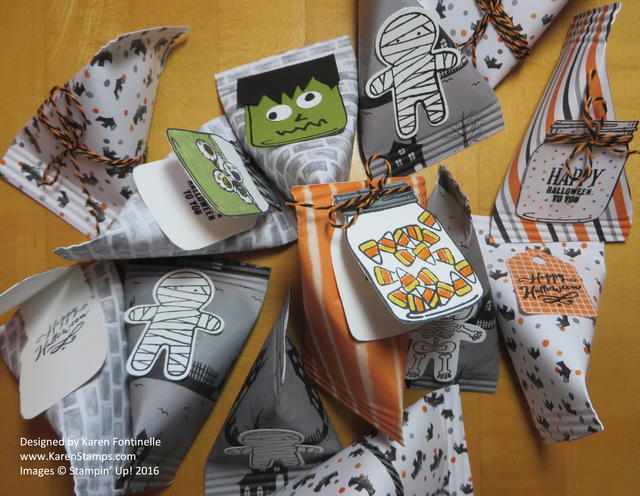
Make Easy Sour Cream Containers for Halloween Treats

Make Easy Sour Cream Containers for Halloween Treats

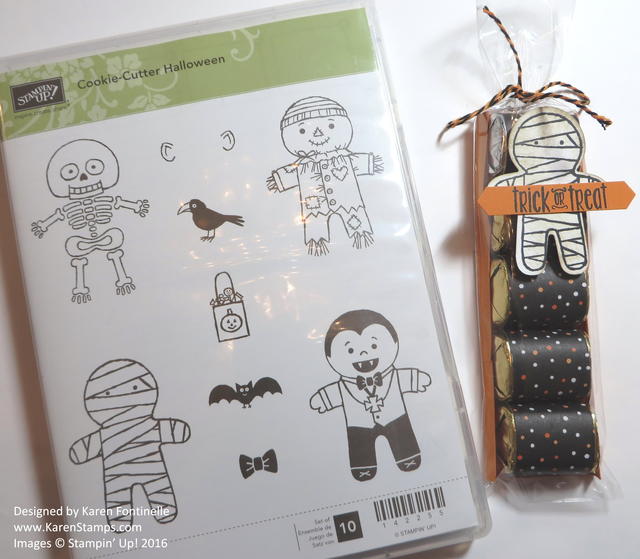
Halloween Chocolate Candy Treat Bag

Halloween Chocolate Candy Treat Bag

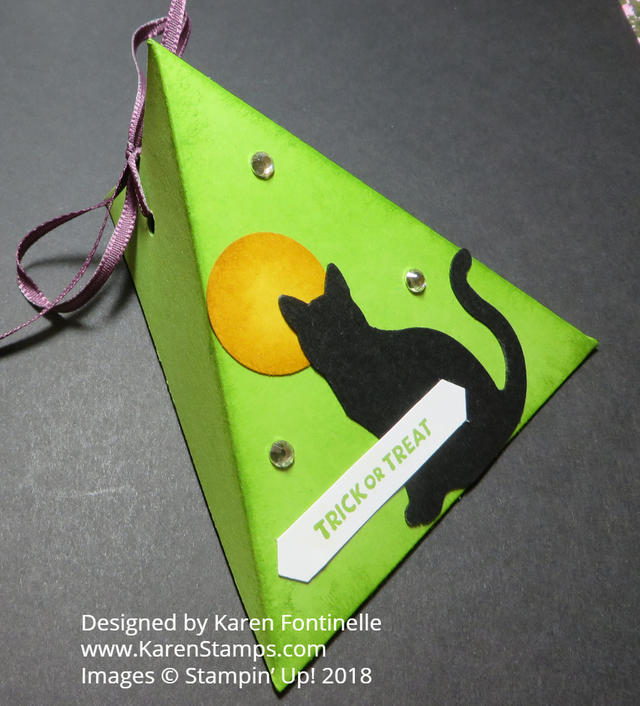
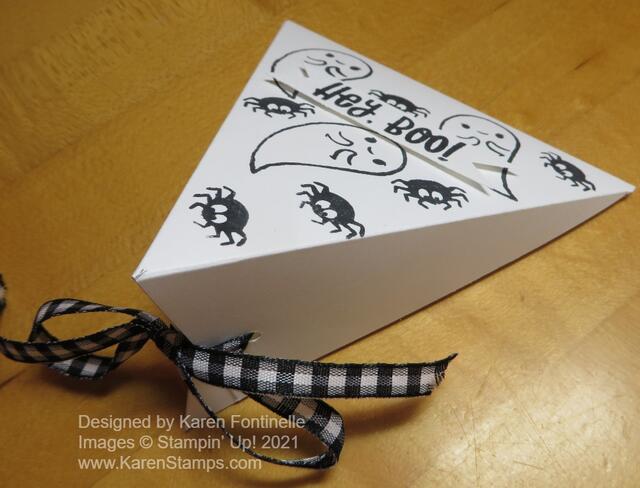
Triangle Treat Box For Halloween

Triangle Treat Box For Halloween

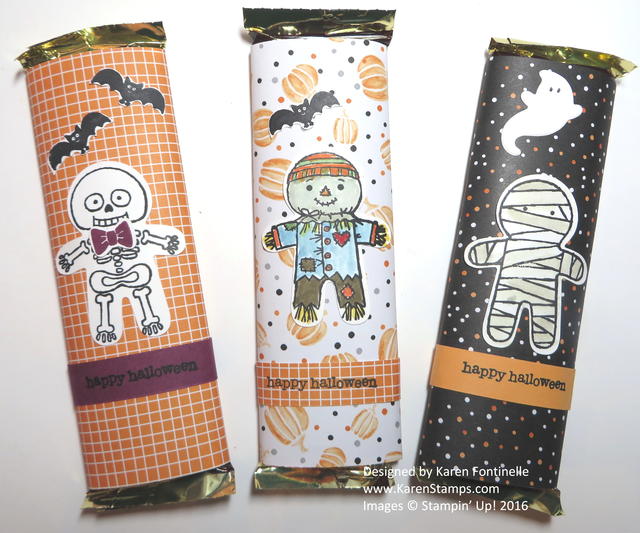
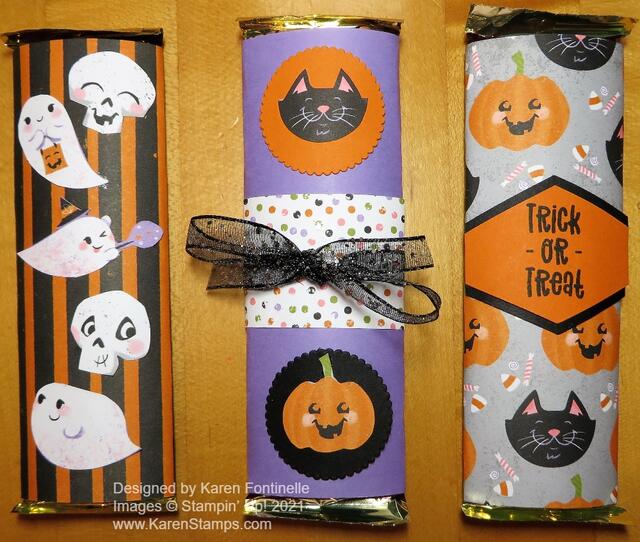
Halloween Night Candy Bars

Halloween Night Candy Bars

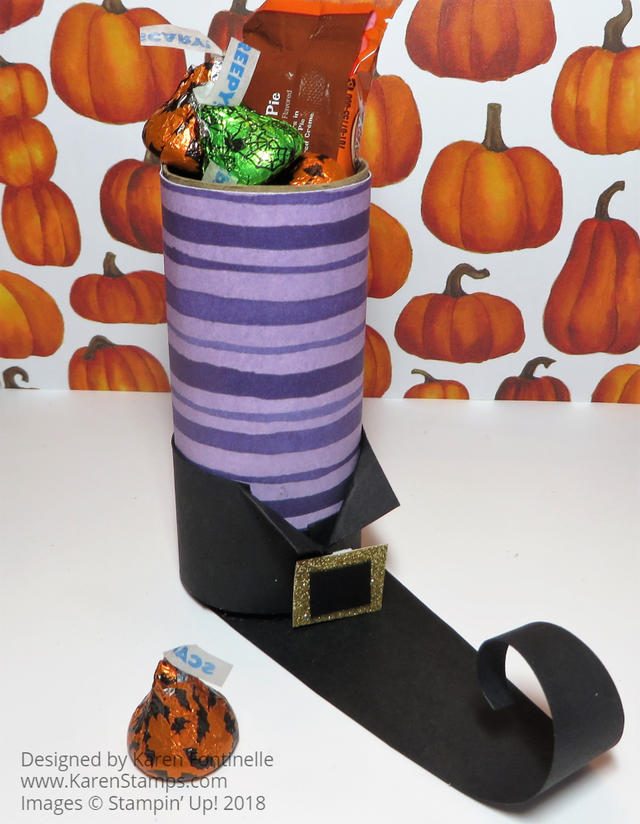
Witch’s Boots

Here’s an updated idea I made this year but I’ve made lots of these in the past!
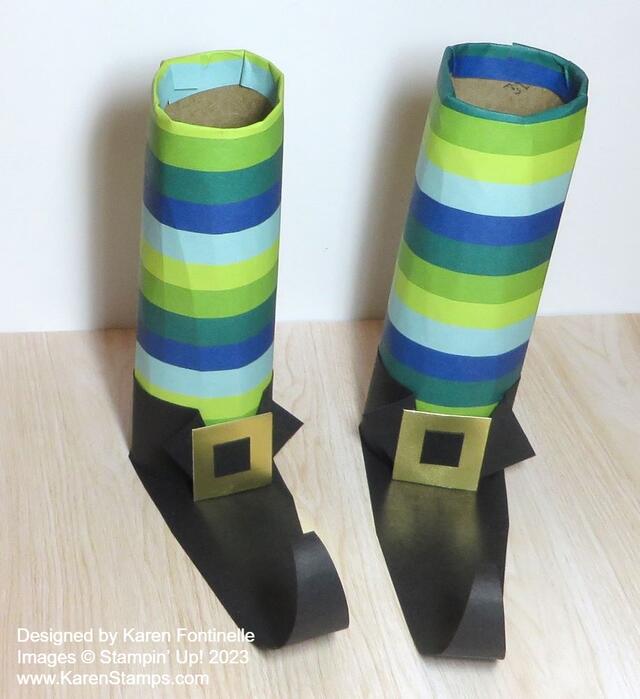
I didn’t stuff any candy in there yet but I will! The Witch’s Boots are made with a paper towel roll cut in half. Wrap the roll in designer paper or cardstock. I used the Merry Bold & Bright Designer Paper, the pattern with the stripes that look like socks! Yes, you can use Christmas paper for a Halloween project!

Take a piece of Basic Black Cardstock however high you would like it to be to wrap around the bottom of the roll to start making the “boot”. Cut it so the ends meet in the center of the front of the boot and then you can fold back the top corners. Make it tall enough to add the buckle, especially if you want a big one.

Cut a piece of Basic Black in a long triangle to make the bottom of the boot. You want it to be as wide as the roll but you can trim around it to make it rounded in the back. You can cut it longer than you want and then curl up the toe with just a pencil or something however you like it.

You can make a cheater buckle by just adhering a square of black in the center of a square of Gold Foil. Then put some candy in a cello bag or add it to the “boot” as is. Just have fun with this idea

I hope these ideas are helpful and fun for you! Each one of these is my favorite thing that I love to make! (Maybe, especially, decorating these large candy bars??!!!)

Have fun and be safe on Halloween Night!

Them Bones Halloween Treat Bag

Them Bones Halloween Treat Bag

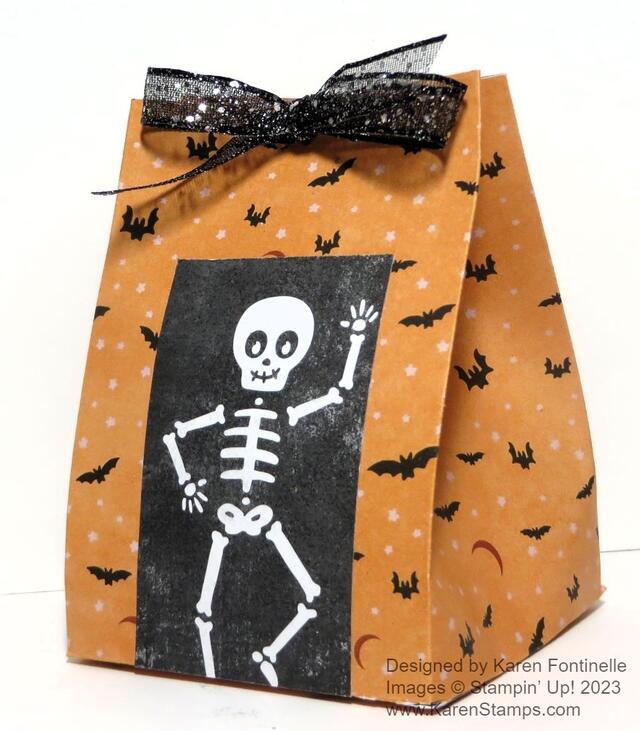
Here is a quick and easy candy or treat holder you can make! It’s the Them Bones Halloween Treat Bag and you can copy this exactly or make it and decorate it however you like! It only took a few minutes to make!

Start with a piece of cardstock or designer paper that is 12″ x 6″. Keep in mind that 2″ of that will be the bottom flaps, so if you want your treat bag taller, you need to add more height so maybe you would want to cut the paper 12″ x 8″. I used the batty pattern in the Them Bones Designer Series Paper in the Stampin’ Up! Holiday Catalog.

Using the Paper Trimmer or Scoring Tool you will score the paper so it can be folded into the bag shape. Pay attention if your paper has a pattern so you don’t end up with it upside down! Place the paper vertically so you can score the bottom flaps at 2″. Then turn the paper so the 12″ length goes across the top, horizontally. Score at 1″ 3 3/4″, 6 1/2″, and 9 1/4″.

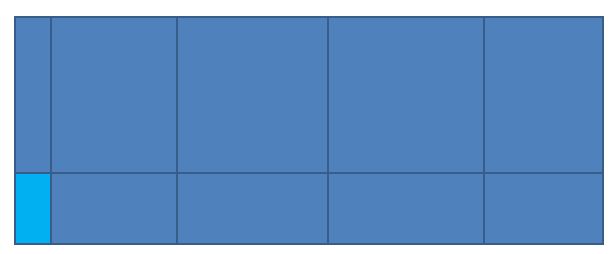
Box Diagram

Crease and fold all the score lines and use a Bone Folder to get a sharp crease. Cut out the small section at the bottom as you see in the diagram above (the light blue area). Cut up on all the bottom score lines for the flaps just up to the 2″ score line.

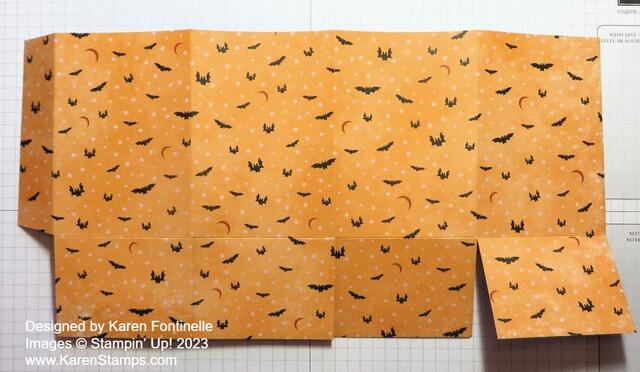
Them Bones Treat Bag Scored

You can pretty well see from my paper above how it is scored, creased, and the bottom flaps cut apart. If you flipped the designer paper over, you would put adhesive on that narrow strip on one side and it adheres to the straight side on the other end of the paper.

Fold everything to form into the treat bag. Make sure you see how it all goes together before you start glueing! Add some strong Seal+ or Tear n Tape on that narrow section above the cut off piece. Then just fold the other end over flat on the table so it all lines up. This is easier than trying to hold it in your hands! Next, glue the bottom flaps together. Push your Bone Folder or something down inside the bag so you can push those bottom flaps together after they have been adhered to get a strong bond.

Before you decorate the bag, look and see where the paper is adhered together to form the bag shape so that you can put that in the back so it’s not so visible. Then decorate the front of the bag however you like. I cut out a rectangle with a skeleton on it that fit perfectly on the front of the bag. You could add a greeting or some jewels. I decided I liked it as is.

With this pattern, you can leave the top of the bag open if you like. Before adhering anything, you could even fold the top edge of the bag down if you wanted to show the inside design of the paper. I didn’t want my bag to be much shorter than it is so I didn’t do that. But if you want to put your treat inside and then close it up, you can add some kind of clip or punch two holes in the top with a punch and put a ribbon through. I used this Black Glittered Organdy Ribbon (retired) but the gingham ribbons we sell now would be cute also. To close the top of this bag, just push in the sides and work with it until you get the top edges even and the sides and bottom how you want them.

As I said before, you could use any paper and decorations to make these little bags for any occasions to hold treats or a small gift! Once you get the hang of making these little bags and boxes with your stamping supplies, you will open up another way to be creative!

SHOP STAMPIN’ UP! ONLINE HERE!

Them Bones Skeleton Happy Halloween Card

Them Bones Skeleton Happy Halloween Card

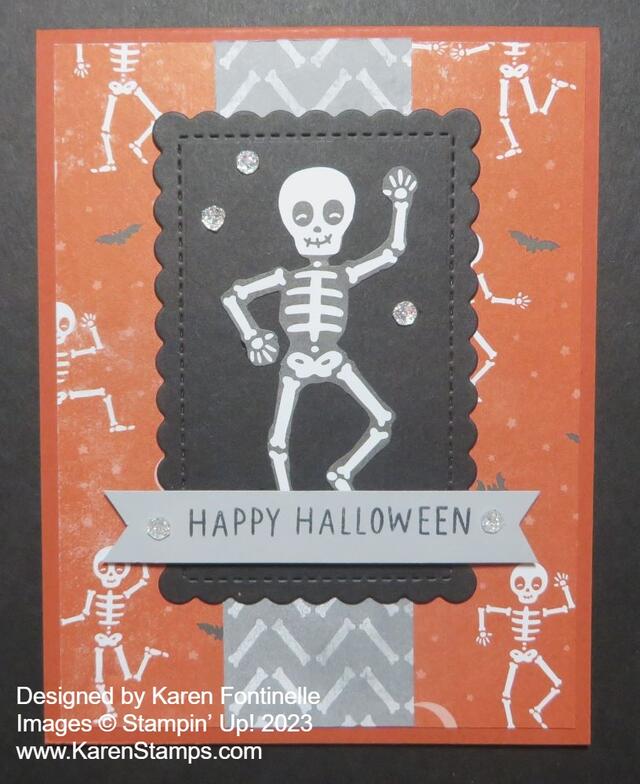
Here’s a fun Halloween card, the Them Bones Skeleton Happy Halloween Card, that I came up with playing around with the Them Bones Designer Series Paper. This paper has cute skeletons to use one way or another on Halloween projects. There is even the paper I used that has a design made of bones!

The card base is made with Cajun Craze cardstock. I cut it at 4 1/4″ x 11″ and scored at 5 1/2″ with the fold at the top. Then I added a layer of the Them Bones Paper with a bunch of little skeletons dancing around!

I cut a 1 3/4″ x 5 1/4″ strip of designer paper with the bones pattern to use somewhere on the card, likely on the side. But I tried it down the center of the card, and I liked that. By chance, there was already a black cardstock scalloped rectangle just the right size, cut with the Scalloped Contours Dies, in my package of cardstock so I just used it!

Since I don’t own the Bag of Bones Dies in the Them Bones Suite, I simply cut out the skeleton from another piece of the Them Bones Designer Paper with my Paper Snips. If you hate fussy cutting, then you need the dies and there are lots of fun dies to use in this set!

The greeting is stamped on Smoky Slate cardstock with Memento Black ink. The greeting is from the Paper Pumpkin Kit from September 2022 that happened to be lying on my table. I liked the one line that I could stamp on a narrow strip with flagged ends to pop up over the bottom of the skeleton’s legs. There is also a “Happy Halloween” greeting in the Pick of the Patch Stamp Set.

I added some Adhesive-Backed Glitter Sequins in white around the skeleton and on the ends of the greeting banner. You’ll find these in the Beary Christmas Suite but you can use them in lots of places, not just Christmas.

This card design could also be used on the front of a treat bag for Halloween or even as part of a scrapbook page. There are so many options with this Them Bones Designer Series Paper in the Holiday Mini Catalog! I think it was backordered recently but it is back in stock as I write this so grab it soon if you would like it!

SHOP STAMPIN’ UP! ONLINE HERE!

Them Bones Easy Halloween Card

Them Bones Easy Halloween Card

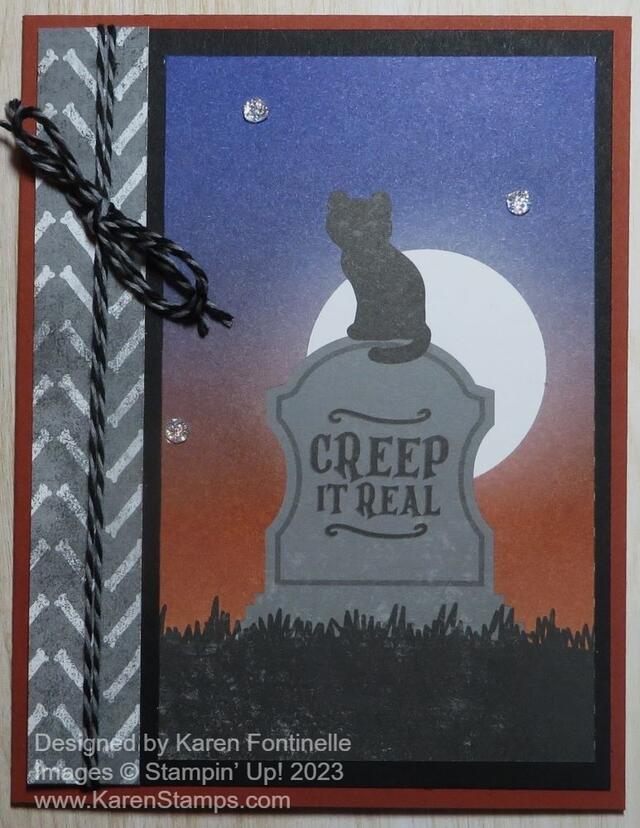
If it is September, then we who love Halloween start thinking ahead! If you want to send out a Halloween card or two you probably want some easy ideas, like this Them Bones Easy Halloween Card.

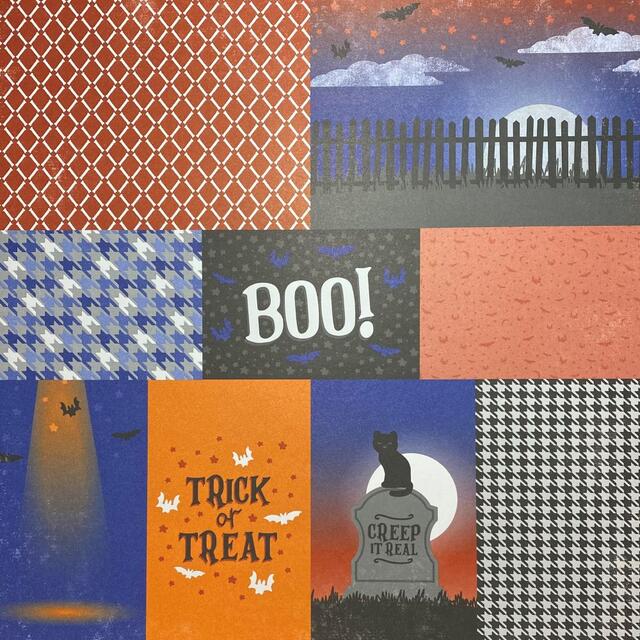
Two of the sheets in the pack of Them Bones Designer Series Paper (162215) have different Halloween scenes printed on smaller panels. You can cut these apart and use them for cards or other projects. My card today is one of those panels. You can see the paper below. You can see that this card came from the panel on the bottom row.

When you cut these panels apart, as you can probably tell by looking at the paper, they aren’t all a standard size. You will have to work with the panel a little if you put it on a card to maybe add a layer underneath or add a little something to the side. This panel that I cut off the big sheet of paper measures 3″ x 4 7/8″ so I had to work with that a little.

The card base is Cajun Craze with a layer of Basic Black. Then I cut a strip of paper from another pattern in the Them Bones Designer Paper. One side has all these bones in a herringbone pattern and the other side is orange with small skeletons and bats. I cut a strip 5 1/4″ x 3/4″ to fill up that space since the main image is narrow.

I wanted some ribbon or twine to tie around the bones paper and I ended up pulling out some retired Halloween Night Baker’s Twine, maybe from quite a few years ago! It was perfect! It was black and gray. If you have this twine, the other roll is orange and black. Plain black twine would be fine, too. If you need some twine, you can purchase the Baker’s Twine Essentials Pack with five colors – black, white, Gray Granite, Crumb Cake, and Very Vanilla. That will cover you for most anything! I just chose to use something I already had that went well with the card.

For a little embellishing, I added three Adhesive-Backed Glitter Sequins (162029) on page 23 in the Holiday Mini Catalog. You want to get these for sure! Even though they are on a Christmas page, you can see you can even use them for Halloween! I thought they looked like little stars in the sky or even something spooky!

If you like Halloween, you will enjoy the Them Bones Suite Collection in the Holiday Mini! Be sure to notice the Glow-in-the-Dark Bats & Ghosts and the Glow-In-the-Dark 6″ x 6″ Specialty Paper if you want to make some diecuts of skeletons of anything!

The September-December 2023 Mini Catalog, or Holiday Mini, goes live on Wednesday, September 6th! Be sure to get some of the things you really, really want as soon as you can because no telling what will be super popular early on when the catalog comes out!

SHOP STAMPIN’ UP! ONLINE HERE!

Them Bones Halloween Card

Them Bones Halloween Card

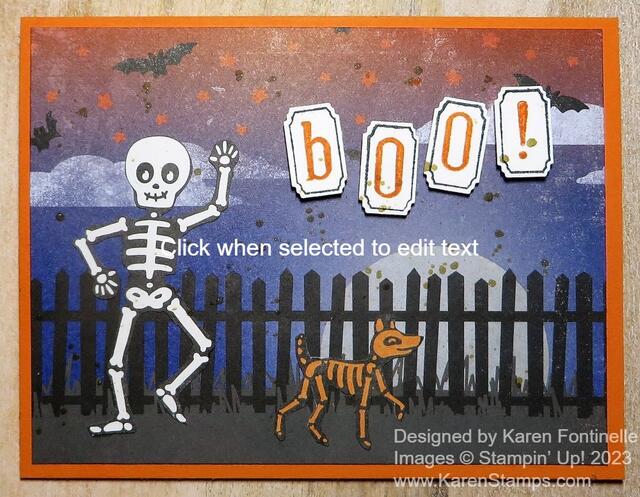
It may be the middle of August, but here is my first Halloween card for the season, Them Bones Halloween Card. It was so fun to make a Halloween card, especially with this paper! It’s the Them Bones Designer Series Paper and is coming in the Holiday Mini Catalog on September 6th!

This designer series paper has all sorts of Halloween patterns and colors in it! You can choose from skeletons, bats, gravestones/mausoleums?, Halloween words, and all sorts of other generic patterns you can use on non-Halloween projects.

For this card, I used this sheet of paper that has all the different patterns on this one paper! The Fresh As a Daisy Designer Series Paper had the same thing, which was fun to use. Here is a photo of the whole sheet of paper.

You can see this sheet has all kinds of interesting designs to use on your card or another project. I chose the top right corner image. It has to be trimmed a little to fit on the Pumpkin Pie card base. Then I cut out one of the many skeletons on another sheet of paper plus one of the skeleton dogs to decorate my card.

There is a Bundle of the Bag of Bones Stamp Set and Bag of Bones Dies. If you have the dies, you can diecut some of the skeletons and animals and other images, stamped and printed on the paper. But I just used my Paper Snips for a little detailed cutting to cut out this skeleton from the designer paper and the dog skeleton. I used tiny bits of Multipurpose Liquid Glue to adhere them to the card front to create a little scene.

For the greeting, after looking through my current stamp sets, I got the idea to use the Alphabest Stamp Set and Best Label Punch. I stamped the little outline in black ink and then the letters in Pumpkin Pie ink to spell “boo!” Then I punched out those letters with the Best Label Punch. They are popped up on Stampin’ Dimensionals.

For a finishing touch, I tried to splatter some Wink of Stella around on the card. I used Gold (retired) but I don’t think it showed up well enough.

When you are ready to order some products for Halloween, if you like whimsical and spooky, try the Them Bones Designer Series Paper and maybe the Bag of Bones Bundle with the stamp set and dies. You can also purchase Glow in the Dark 6″ x 6″ Specialty Paper or Glow in the Dark adhesive bats and ghosts to decorate your cards and projects!

SHOP THE HOLIDAY MINI SEPTEMBER 6!

Last Minute Halloween Treat Ideas!

These Halloween treat ideas may be from years past, but they still work! Use your current paper and things or use your old retired things you are hoarding! 🙂 The trick or treaters won’t care!

Halloween Candy Bars

This is one of my favorite ideas and simple enough to do. Just wrap a chocolate bar in designer paper! Maybe add some ribbon or a tag if you are making it for someone special. You can use any size of candy bar!

Triangle Halloween Treat Box WIth Ghosts

These triangle boxes are so easy to make and I have made them for lots of occasions! Read my blog post HERE with directions.

Cute Halloween Treats

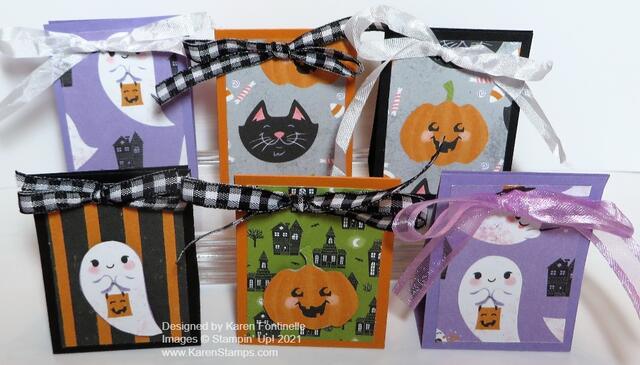
I always love making treats with chocolate nuggets! Just cut a strip of cardstock at 1 3/4″ x 5 1/2″. Score the paper at 2 1/4″ and 3 1/4″. This makes a little space so it will sit flat and so it will hold a nugget inside. OR just cover nuggets with strips of designer paper and put in a bag or box! A 1″ x 3″ strip should do it!

Witch's Boot with Candy

This witch’s book has been quite a favorite! Save a toilet paper roll or a paper towel roll and cut it down, wrap with designer paper, and add the triangular boot bottom! It’s easier than it looks. Directions on this blog post HERE.

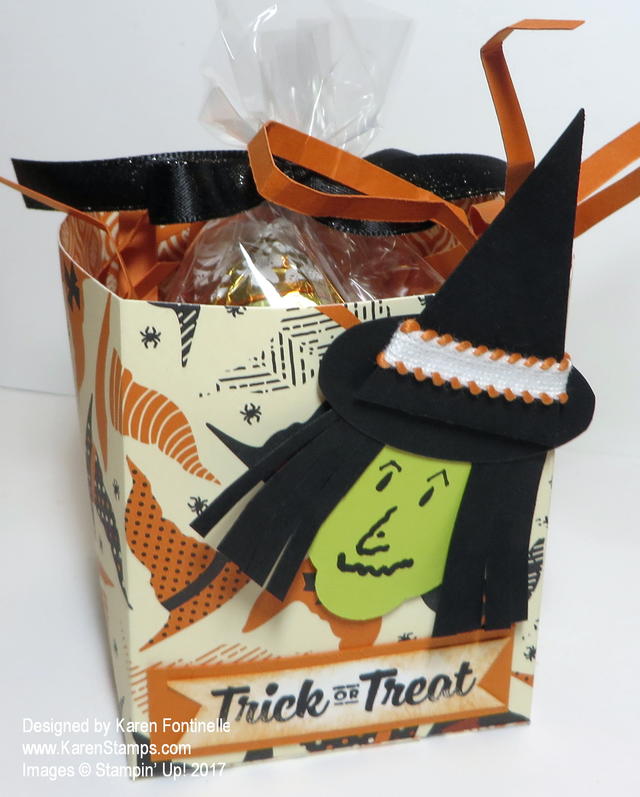
Halloween Witch Trick or Treat Candy Treat Box

Nothing wrong with just making a little box or bag out of designer paper or cardstock and decorating it for Halloween! This one is from five years ago but you can update it easily! Read the blog post HERE.

Those are just a few ideas to spark your creativity for parties or trick or treaters Monday night! Have fun!

Witch’s Boot Halloween Treat Holder

Witch's Boot Halloween Treat Holder

One easy and fun treat holder to make for Halloween, or even just for a decoration is this Witch’s Boot Halloween Treat Holder. I have made different ones other years, but this year, with Halloween pumpkins appearing in “trendy” colors other than the usual orange, I thought maybe this year’s witch’s boot could also be in non-traditional colors.

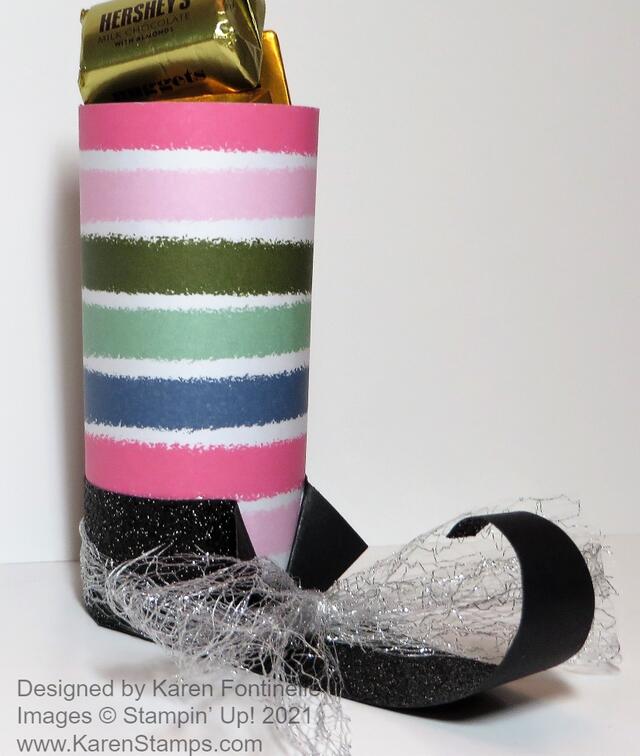
Is it okay to use Christmas paper to make a witch’s boot treat??! Why not? Really, you can use lots of different paper patterns. You don’t have to have “Halloween” paper! Look through your paper and see what appeals to you. I used the Whimsy & Wonder Specialty Designer Series Paper, the striped pattern, for the witch’s sock! Why not have something colorful?! Just measure your toilet paper roll or paper towel roll to see what size to cut your paper to wrap around the tube. Then see how much you need to wrap around the tube adding on about 1/2″ or so overlap to adhesive. My paper was about 4″ wide and about 6 1/2″ around the paper tube.

For the actual “boot”, I used a piece of Black Glitter Paper but you can also just use Basic Black Cardstock. Just cut a strip of black that will be wide enough at the back for the paper roll to fit on and then the front will angle to a point. You can make it as long as you would like. You can use the Paper Trimmer or just cut it by eyeballing. You will need to cut around the edges of the back where the paper roll is so it curves with the paper roll. On the front, you can roll the tip of the boot around a pencil or other stick if you want it to roll up.

Also, cut a strip of Black Glitter Paper as narrow or tall as you would like for the top part of the shoe. This will adhere around the bottom of the paper roll. If you want, you can fold back the ends of the strip in the front for the opening of the shoe. I also tied around a piece of the Metallic Mesh Ribbon and tied it in a bow.

When you have the witch’s boot make how you like it, grab some candy or treats and fill up the boot or put the candy in a small cello bag and insert in the boot, tied at the top with a coordinating ribbon, maybe even a tag. Here is one I made a few years ago, maybe the first one, and here is another one more recently.

It’s Halloween and it’s all fun! Make a Witch’s Boot Halloween Treat Holder for yourself, a gift, or maybe a bunch for the kids when they come trick-or-treating this year!

SHOP STAMPIN’ UP!

Halloween Ghosts Boo Card

Halloween Ghosts Boo Card

It’s time to make some fun Halloween cards like this Halloween Ghosts Boo Card! While I can’t believe it is October already, the time is here to enjoy the preparations for all the upcoming holidays, including fall and Halloween! Several houses have their Halloween decorations up already which I enjoy going for our walks around the neighborhood every day. I love the fun part of Halloween and hope to get more Halloween cards and treats made soon! Remember, if you are mailing Halloween cards to anyone, better send them extra early since the mail has been “slowed”.

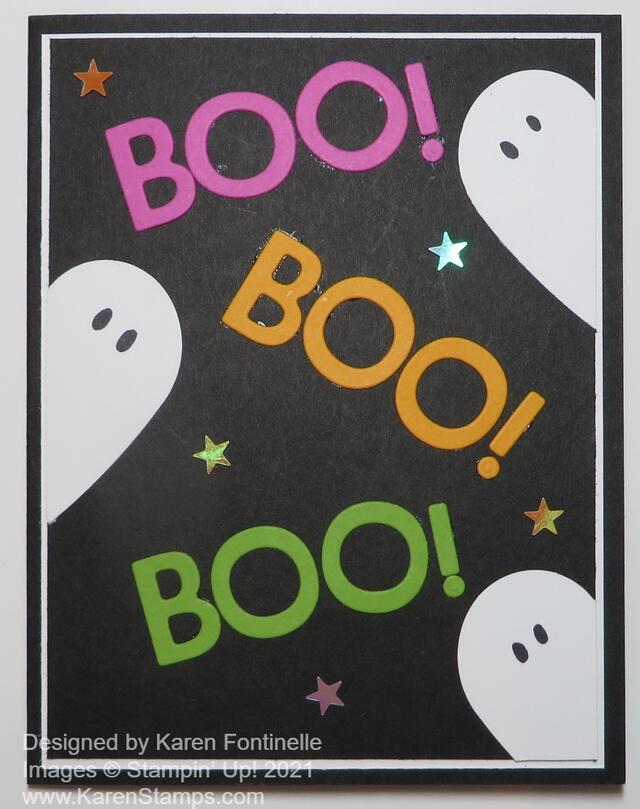
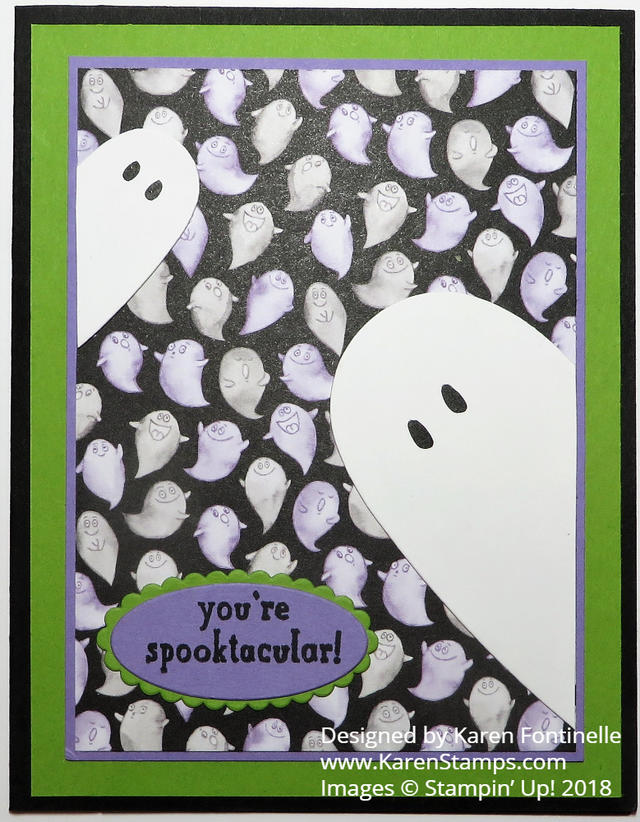
This card has a Basic Black base with a layer of Basic White with just a thin margin. The front of the card is Basic Black so that my colorful words and ghosts would stand out. I’m not sure where I got the inspiration for this card, maybe from myself when I made THIS CARD. I loved how the “BOO” turned out on that card and maybe that’s what made me think of the idea for this card!

The words are spelled out with the cute letters die cut with the Playful Alphabet Dies. This is a die set I haven’t used very much but I should! It’s really very useful and different to use on cards and projects. The font of the letters is just fun, I think. I used some bright colors to stand out against the black, like Granny Apple Green, Mango Melody, and Magenta Madness. There are other colors you can use that work just as well. Just experiment and see which colors you like the best! There is an exclamation point in that die set as well and I think it goes well with these words.

The ghosts have a little story, which you may have heard before and will likely hear again! Just before I signed up to be a Demonstrator, I was visiting my friend in St. Louis and went with her to her team meeting. There were lots of displays of cards, of course, and one had ghosts like on this card. Do you know how I made them? They are hearts cut in half! I used the plain heart punch in the Heart Punch Pack but you could use any punches or heart dies that you have. Then just cut the heart in half from the bottom point up! When I saw that at this meeting, I was completely taken by that creative idea! Then you can adhere them to the sides of the card as if they are peeking in! I just drew on the black eyes with a black marker. You could punch tiny circles or use googlie eyes! So fun!

As a finishing touch, I added some Cute Stars Adhesive-Backed Sequins. I wish they were in more colors, but these worked okay. I love it when these embellishments come with adhesive on the back rather than using a tiny drop of glue!

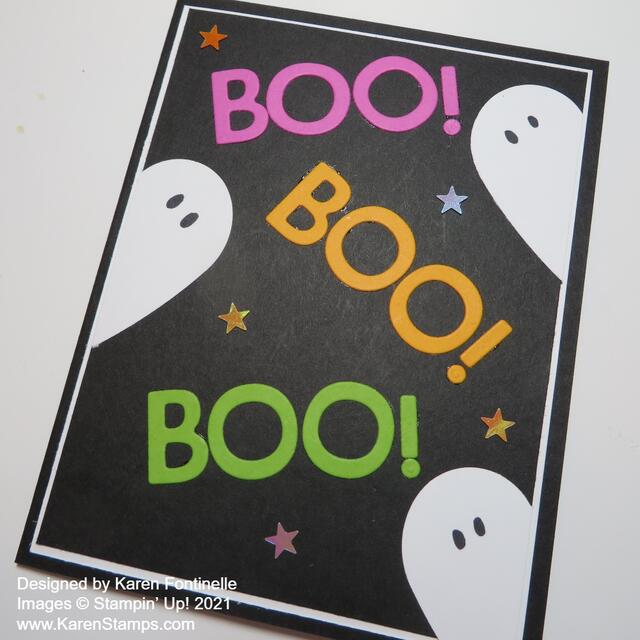
Halloween Ghosts Boo Card angle

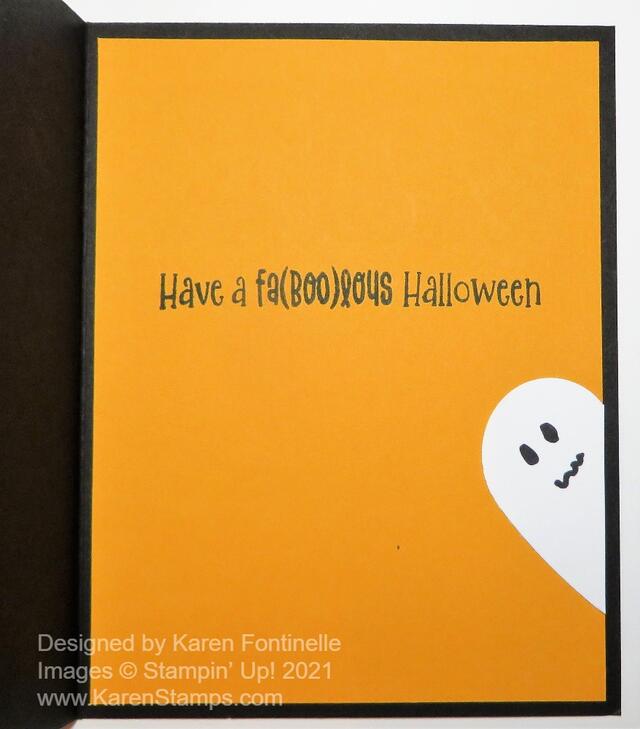
Since the card base is Basic Black, unless you are going to use white embossing for a message inside or a white gel pen, you need to add a layer of a light color, usually Basic White, to the inside of the card. This time I thought I would use a different color since it’s a Halloween card after all. I used the same Mango Melody I used for one of the words. The greeting is stamped from the Cutest Halloween Stamp Set. And since I had an extra half of a heart, I made a ghost peeking around the corner on the inside of the card as well!

Halloween Ghosts Boo Card Inside

This is one of those cards I REALLY enjoyed making and REALLY like how it turned out if I do say so myself! LOL! Actually, you could make this as just a card front and maybe put it in a little frame and use it for a home decoration! Those tiered trays are all the rage on Instagram with people putting an abundance of small decorations on them for each holiday! You could make your own decoration with a card like this! I might try that myself now that I thought of it!

This is the best time of year with fall weather, fall decorations, and anticipation of all the upcoming holidays! Get your supplies out and start stamping! If you need some supplies, just go shopping at my Stampin’ Up! Online Store HERE! And TOMORROW, October 6, new items will be added to the Stampin’ Up! Clearance Rack!! The early bird gets the worm!

Cutest Halloween Ghosts Card

Cutest Halloween Ghosts Card

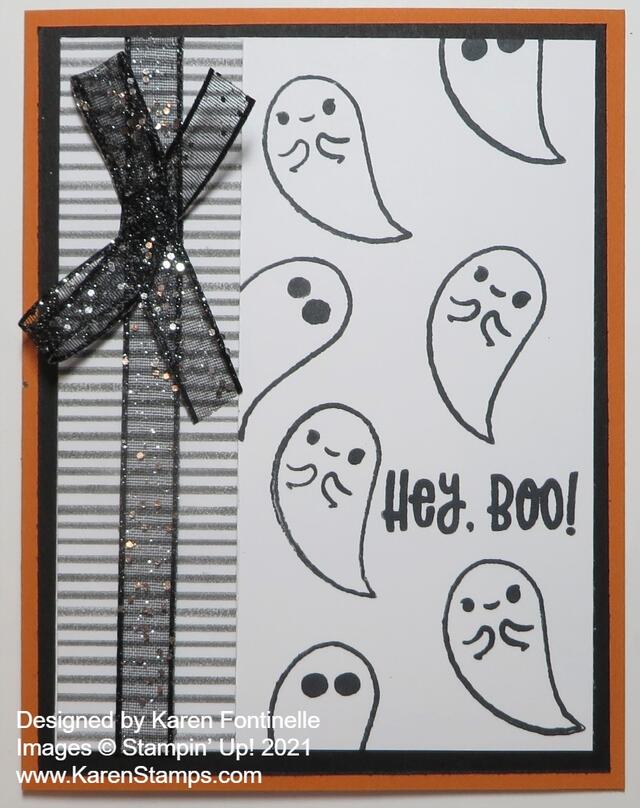
This Cutest Halloween Ghosts Card is one that I like to make with some basic stamping, a bit of designer paper, and some ribbon for embellishment. Sometimes we make such fancy cards that we miss out on just stamping randomly to design a card. To celebrate October 1st, I thought a Halloween card was in order! I can’t believe it is October! What happened to August and September? I feel like September just started.

The card base is, of course, Pumpkin Pie Cardstock with a layer of Basic Black. I knew I would use Basic White Cardstock for the card front on which to stamp ghosts, but I also added a striped piece of the Cute Halloween 6″ x 6″ Designer Series Paper, which has the cutest Halloween papers in it!

Before I assembled the card, I stamped some ghosts on the Basic White Cardstock. The ghosts are in the Cutest Halloween Stamp Set. They are stamped with Memento Ink. There is the ghost outline stamp and then a little face and arms. To make some of the ghosts look different, I stamped two eyes with one little round stamp in the set on three of the ghosts! You could just draw in some dots for eyes or draw another kind of face if you wanted.

Luckily, there was just the right space and the right place to stamp the “Hey, Boo!” greeting, also in the Cutest Halloween Stamp Set. Otherwise, I would have made a little label to stamp it on and place possibly covering up part of a ghost or making it more like a tag up by the bow. I wrapped some Black 3/8″ Glittered Organdy Ribbon around the strip of designer paper and then tied a separate bow, which I then adhered with two Mini Glue Dots.

Here’s another Halloween card with randomly stamped ghosts on the front that I made four years ago!

You could even modify this idea to make an invitation to a Halloween party! Or decorate a little bag for a gift or party favor with these cute stamped ghosts!

It’s time to start making some Halloween cards to send for fun! Tomorrow the post office is supposed to slow down the mail (what??!) so make your cards soon and mail them extra early! With a little bit of luck, maybe they will arrive by Halloween! You’ll have fun making a Cutest Halloween Ghosts Card like this one!

SHOP STAMPIN’ UP!

All the Halloween Things

All the Halloween Things

Happy Halloween!

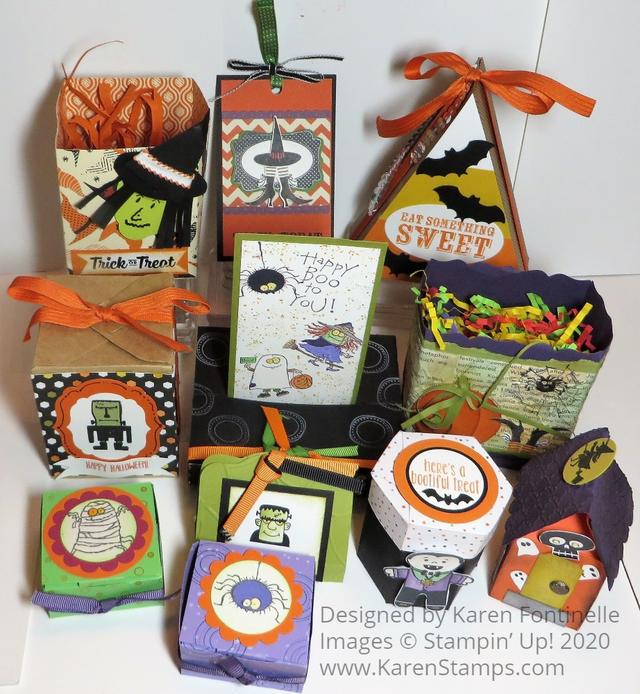
Today is the day! It’s Halloween! I pulled out a bunch of Halloween projects I have saved from past years. Some I use for decorations in my house! Some I keep for future ideas!

If you are going trick-or-treating tonight or having them come to your house, be safe and be careful.

Don’t forget to change your clocks back to Standard Time tonight before you go to bed (or in the morning!). It’s Fall Back time! We get an extra hour of sleep!

Also, don’t forget today is the LAST DAY for the Stampin’ Up! Designer Series Paper Sale! Pick up some papers you will want to use for your Christmas cards or holiday projects! Save 15%!

See you in November!!

Coming Home Haunted House Halloween Card

Coming Home Haunted House Halloween Card

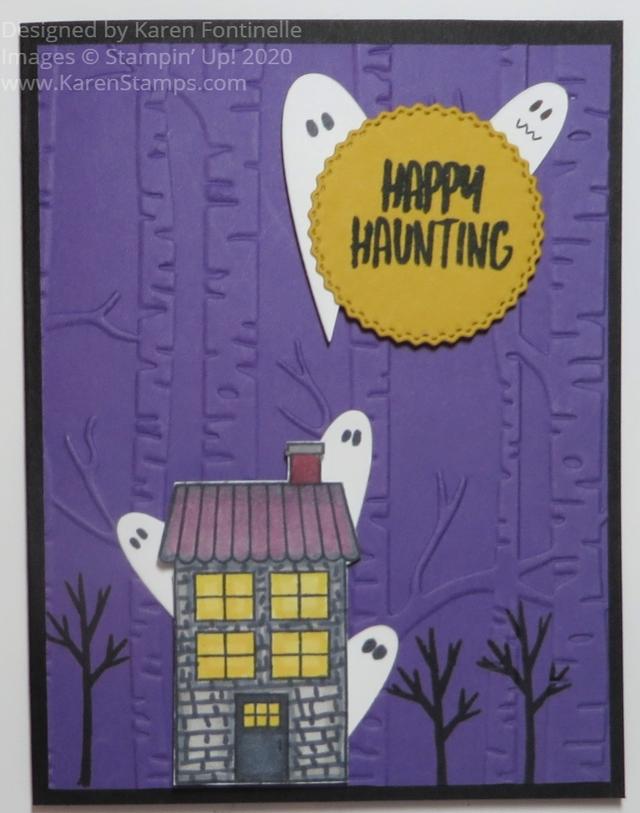
This Coming Home Haunted House Halloween Card was so fun to create! I didn’t know what it was going to be until I made it! I had seen the idea online of making Halloween houses out of what we are mostly using as Christmas houses and I thought that was so clever that I had to use that idea.

To get this card started I stamped one house in the Coming Home Stamp Set on Whisper White and then colored it in with various colors of Stampin’ Blends markers. You can use whatever colors you like. I wanted my house to look haunted so I chose some light and dark gray colors for the house with a couple different yellows for the windows. I wanted to roof to look a little spooky so I used a purple on it along with grays and black. The chimney is part Cherry Cobbler. Then to make it look even more run-down, I drew lines with the pointy end of the Basic Black Blends marker to resemble shingles or bricks on the house. That’s not what the stamp looks like.

The card base is Basic Black with a layer of Gorgeous Grape. As I looked through my embossing folders, I found this Woodland Embossing Folder and used that. Originally I thought just any kind of small background folder for some texture would be fine, but when I found this one with the trees, thought it was perfect for Halloween spookiness.

After I had stamped the haunted house, I cut it out with Paper Snips and originally thought I would adhere it to a die-cut circle or rectangle to be the focal point of the card, but then I decided I could just place it at the bottom of the card and it could look like it was out in the woods. I also carefully stamped some trees in Memento Black in the Coming Home Stamp Set in between the embossed trees. I got lucky that I didn’t mess up the embossing!

The greeting is from the Banner Year Stamp Set. I have gotten a lot of use out of this stamp set even though it is one you might overlook. I like the variety of greetings and small images. I stamped it on Crushed Curry Cardstock and then used a die-cut in the Tasteful Labels Dies. I love the look of that circle die with the fancy edge. I popped that up with Stampin’ Dimensionals® and placed some ghosts behind it.

To make all my ghosts, I die cut the smallest plain hearts in the Be Mine Stitched Dies and cut them in half. You can read about why I make ghosts like that HERE in this recent post. The haunted house had to have some ghosts, too! I colored on some eyes on the ghosts with a marker.

And that’s it for my Coming Home Haunted House Halloween Card which was so fun to make! Halloween is Saturday so time is running out to enjoy creating for this fun holiday!

Fun Halloween Projects From the Past!

Halloween Night Candy Bars

Halloween Decorated Candy Bars

I think one fun treat project is to cover candy bars with designer paper or cardstock and then decorate. It doesn’t matter if you have Halloween paper or not, you probably have something that will work. If not, stamp some cardstock.

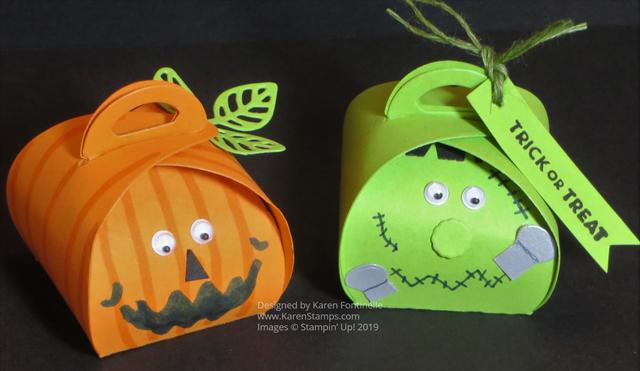
Mini Curvy Keepsake Halloween Boxes

Mini Curvy Keepsake Halloween Character Boxes

It’s so fun to use the Mini Curvy Keepsakes Box Die to make all kinds of treat box characters, like this Jack-o-Lantern and Frankenstein. You’ll find all kinds of examples on the internet for ideas!

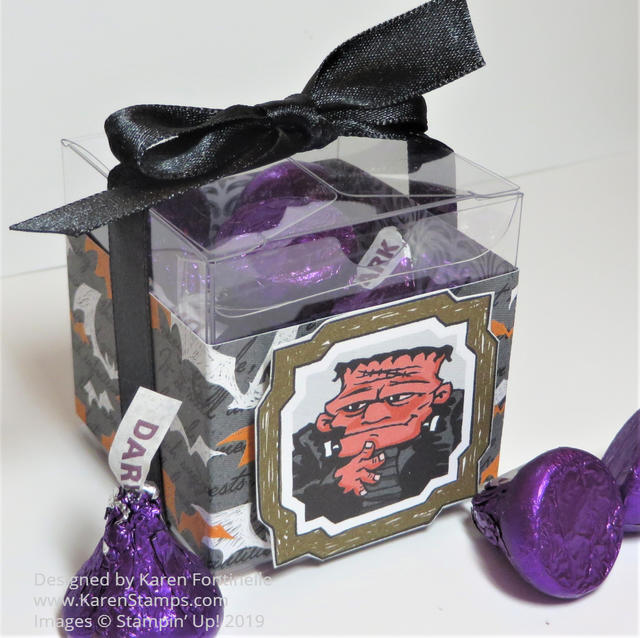
Monster Bash Halloween Clear Tiny Treat Box

Monster Bash Halloween Clear Tiny Treat Box

I continue to say having these Clear Tiny Treat Boxes on hand makes it so easy when you want to make a little treat, gift box, or party favor. Just decorate in any number of ways, with designer paper, ribbon, stamping, whatever you like for the occasion.

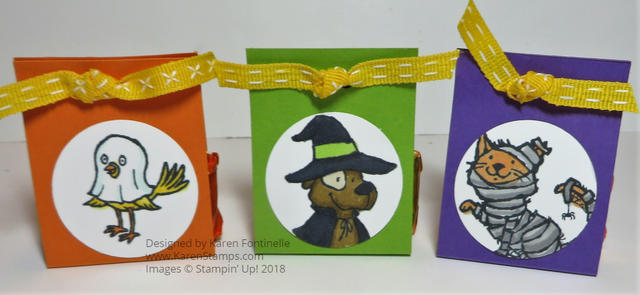
Easy Halloween Trick or Tweet Candy Treats

Easy Halloween Trick or Tweet Candy Treats

If you want to make a special, but easy, treat wrapper for Halloween, just cut a strip of cardstock and score for the bottom to fit the candy and decorate the front with a funny Halloween character or design!

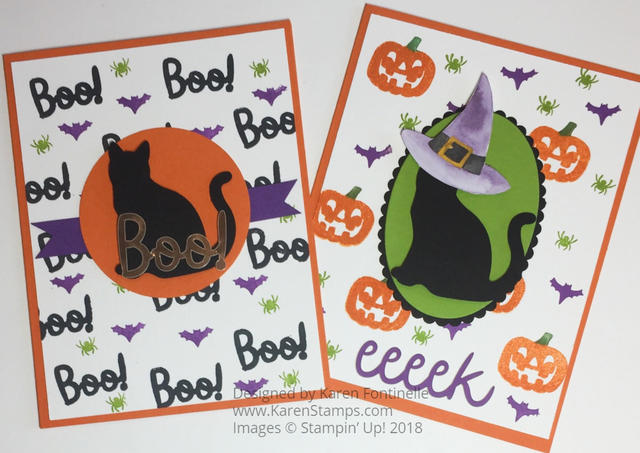
Black Cat Halloween Cards

Black Cat Halloween Cards

If you want to make Halloween cards but don’t have Halloween paper, make your own “designer paper” by stamping all over. Start with the largest stamp as you stamp randomly around on your paper, then progress through the smaller stamps you are using to fill in the space. It’s really fun! The Cat Punch makes this card so easy!

Triangle Treat Box For Halloween

Triangle Treat Box For Halloween

I’ve always thought these Triangle Treat Boxes were so easy to make and turn into a great treat box. You can vary the size easily. Just follow the directions in this post, linked in the title. Once you make one, you will have it down!

Halloween Card With Ghosts

A Quick and Easy Halloween Card With Ghosts

One of my favorite things of all in stamping is making ghosts out of hearts cut in half! You’ve got to try it!! Here’s an easy card with ghosts and some fun Halloween paper in the background. But you could also just use Basic Black maybe with a few “Boos” written in the background or embossed.

I hope these past Halloween ideas have gotten your creativity going if you are making some last-minute Halloween projects! I hate to see Halloween come to an end because it’s so much fun to make Halloween projects and cards!

Happy Halloween!

Paper Pumpkin Alternate Halloween Cards

Paper Pumpkin Alternate Halloween Cards

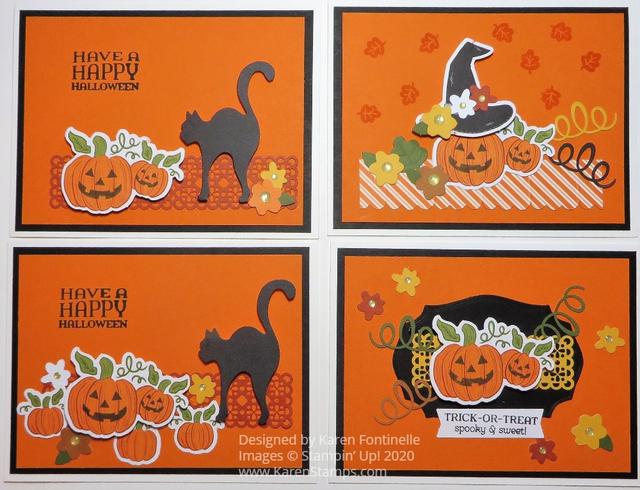
It’s not too late to make Halloween cards and certainly not too late to make Paper Pumpkin Alternate Halloween Cards if you got a September 2020 Paper Pumpkin Kit! The kit was designed to make a whole slew of treat holders, which are cute, but if you don’t need or like a Paper Pumpkin projects you can always just use the materials to make whatever you want! No Paper Pumpkin Police will show up at your door asking why you didn’t make the intended project!

This particular Paper Pumpkin kit has a BUNCH of extra pieces in it. I made several of the treat holders as seen in this post. I usually like to make at least some of the kit as designed, so in this case, I made several of the treat holders and then went to work making some Halloween cards, as many subscribers did. After I made some cards, I wanted even more! And it was so fun to play with all the extra pieces of die cuts and cute stamps in the exclusive stamp set that came in the kit!

Here are some more cards I made with extra pieces in the kit.

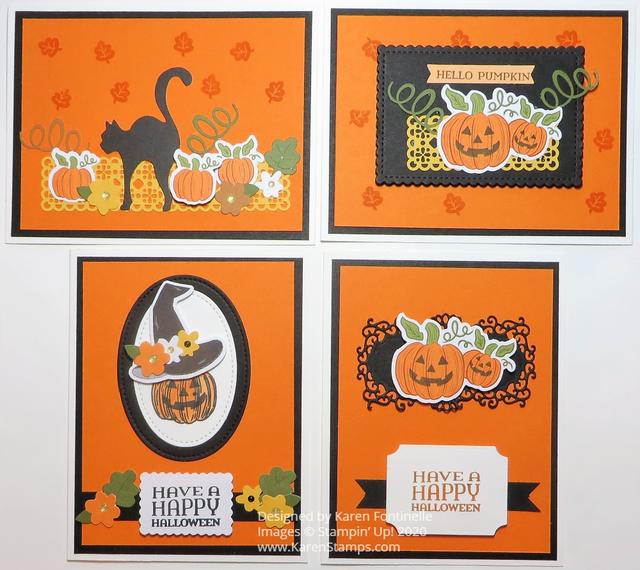
Paper Pumpkin Alternate Halloween Cards 2

Sometimes I start out looking on Pinterest or online somewhere for ideas (there are always plenty of alternate ideas for every Paper Pumpkin Kit) and often change up the design or make up my own design as my creativity starts flowing after getting some ideas to get started!

In some cases here, I used my own Stampin’ Up! dies to make focal points so you can do whatever you like. It was a fun time making a bunch of cards with so many materials to choose from!

It’s not too late to make some Halloween cards to send or give to friends or family or make some treats for the trick-or-treaters. Even if you don’t have the September Paper Pumpkin Kit, you can get ideas and use whatever stamps and products you already have.

And if you aren’t already a Paper Pumpkin subscriber, you might want to try out the upcoming November Kit by subscribing by November 10th. Kits ship out a couple days after day so it won’t be long! No risk, no obligation if you don’t care to continue your subscription at any time. Or you can skip a month by just going into your account before the 10th of any month.

JOIN PAPER PUMPKIN HERE!

Paper Pumpkin Jolly Gingerbread Kit Nov 2020

Looks so cute, doesn’t it?! We always need something extra for the holidays, so subscribe to Paper Pumpkin for November and try it out. Or if you used to be a subscriber, just reactivate your account to get this kit!

Now go make some last-minute Halloween cards!

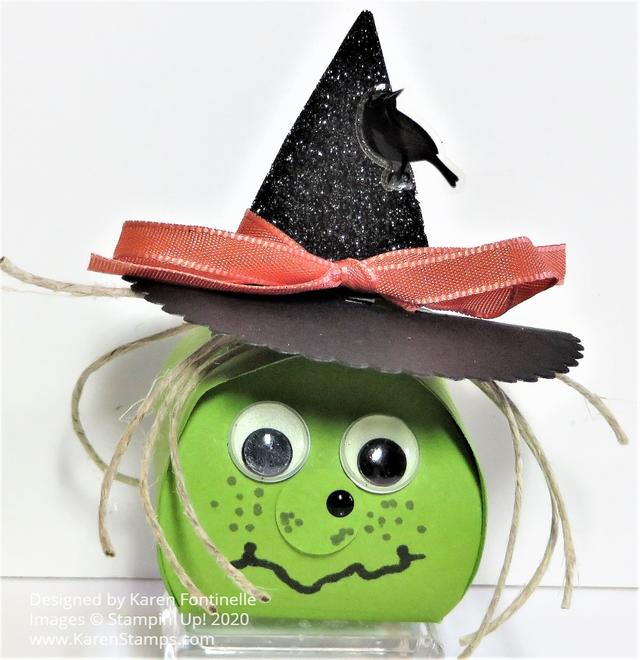
Mini Curvy Keepsake Box Halloween Witch

Mini Curvy Keepsake Box Halloween Witch

I think with all the shiny new products, which are great, we have forgotten about products we already have which are perfect for this upcoming holiday season, fall, and Halloween like this Mini Curvy Keepsake Box Halloween Witch. You can make all kinds of little gift boxes and even characters using this Mini Curvy Keepsakes Box Dies. So much opportunity for creativity!

This little Mini Curvy Keepsake Box is so easy to make, no matter what else you are going to do to it! Just die cut the one piece and fold on the score lines. Your box will come together quite well! After scoring and creasing the fold lines, it might be good to kind of press down on the sides to kind of get that curve going a little bit. Then hold the two handles together and slip the two sides with slots right over the handles. Then decorate the box however you like.

For the Halloween witch, I used a piece of Granny Apple Green Cardstock. I assembled the box and then added the witch features. I had a bag of googlie eyes so I opted to use two of those. You could just use circles of black and white cardstock. The witch’s nose is from the 1/2″ Circle Punch (retired, sadly) but if you don’t have the punch you can just cut one by hand or find a punch in your stash that will work. I had some black dots so I put one on her nose for a wart! I just drew in the mouth and freckles with the Basic Black Stampin’ Blend using the tip end, not the brush end.

For the hair, I just grabbed some twine I had, thinking it was Linen Thread but I think it was some natural colored twine I had from something. I just cut a few strands, tied them together in the middle with another piece and adhered them to the witch’s head! You could do cardstock strips, yarn, shredded paper, other ribbon or string you have.

The witch’s hat I sort of copied from one I’d seen on Pinterest or somewhere. You could use the old Tree Punch we used to have but I used the Pine Tree Punch which is current. I punched out two trees. I didn’t want the shaggy edges that make it look like a tree so I just cut along the two sides and cut those edges off so that I had a perfect triangle. I used Black Glimmer Paper because I had some scraps which the punch fit, but not the hat base. For that, I just happened to find this large scalloped circle already cut out and just went with that. Cut a slit in the center of the hat base in which you will insert the triangle top of the hat. I took the two trees and adhered them together with Glue Dots near the top. You want to keep most of the bottom open so you can slide it over the box handles. Then fold the tree trunk up facing the tree, on each side, and use Mini Glue Dots to adhere those trunks to the hat base after inserting through that slit. That way the tree is attached to the hat base but it can still be placed over the box handles.

For a little embellishment, I tied on a Terracotta Tile ribbon and stuck on a little plastic Halloween blackbird sticker I had in my stash. You can just barely see it against the black witch’s hat.

That’s all there is to it! You could make a ghost out of white paper, a scarecrow, Frankenstein, some other monster, or a pumpkin! All with this one die and that’s just for Halloween! Have fun playing with the Mini Curvy Keepsake Die and see what you can make with it!

SHOP STAMPIN’ UP! ONLINE!

Fun Halloween Treat Boxes

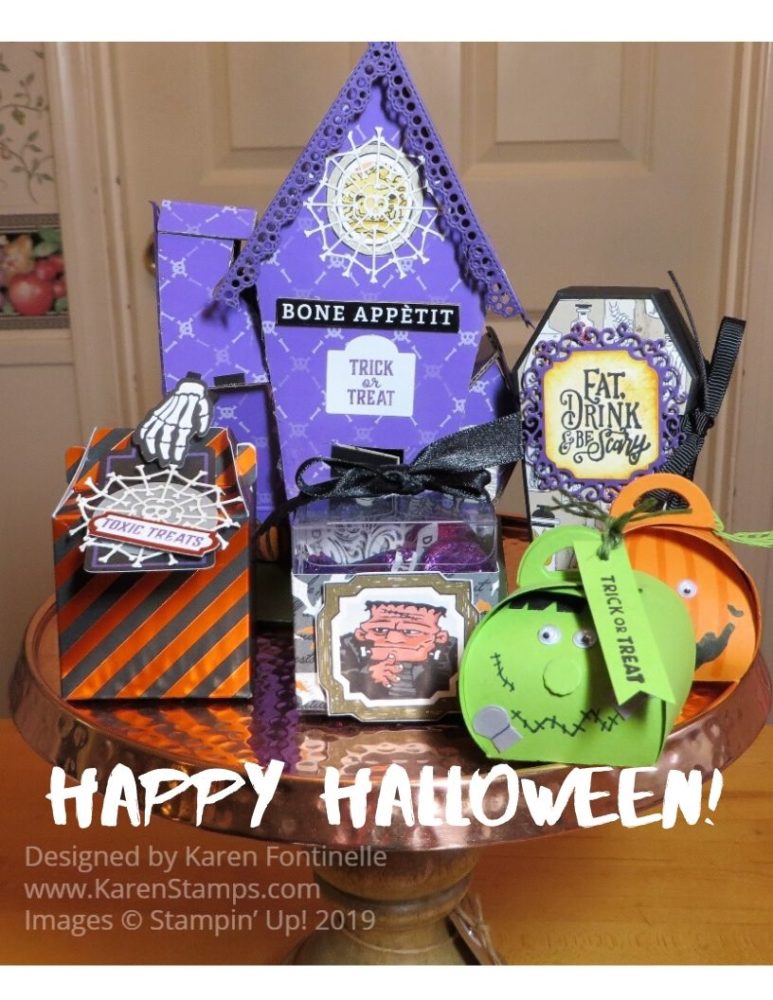
Happy Halloween Projects

Today is the big day for kids and also moms with little kids in school! Usually there is a run on Halloween cupcakes at the grocery store for the school parties! To celebrate, I put a few of my recent Halloween projects on this cute little cake stand my friend gave me the other day! The Clear Tiny Treat Box is easy to decorate and the Mini Curvy Keepsake Boxes are really cute. There are so many fun things to make for Halloween, just not enough time!

Halloween is such a fun holiday and one we all probably remember from our childhood – what costumes we wore, what kind of candy we got, school parties! I’m still good friends with a mom I met at my youngest son’s kindergarten class Halloween party!

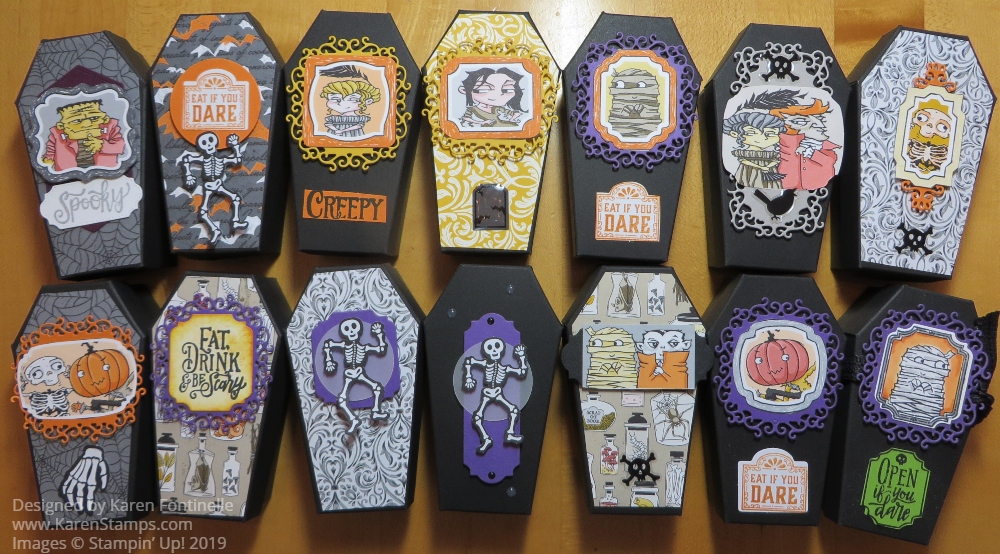
These Coffin Treat Boxes were really fun this year, I thought! They were easy to put together and almost any way you decorated them they looked great! I used the Monster Bash Designer Series Paper and also the Spooktacular Bash Stamp Set, plus some leftover pieces from the September Paper Pumpkin Kit.

Coffin Treat Boxes Decorated For Halloween

After I took the photo I tied ribbon around them to hold the lid on after I put candy inside. The top decoration I popped up on two dimensionals at the top and bottom so there would be space in between to slide a ribbon. Here is a post for the first Coffin Treat Box I made and how to assemble it.

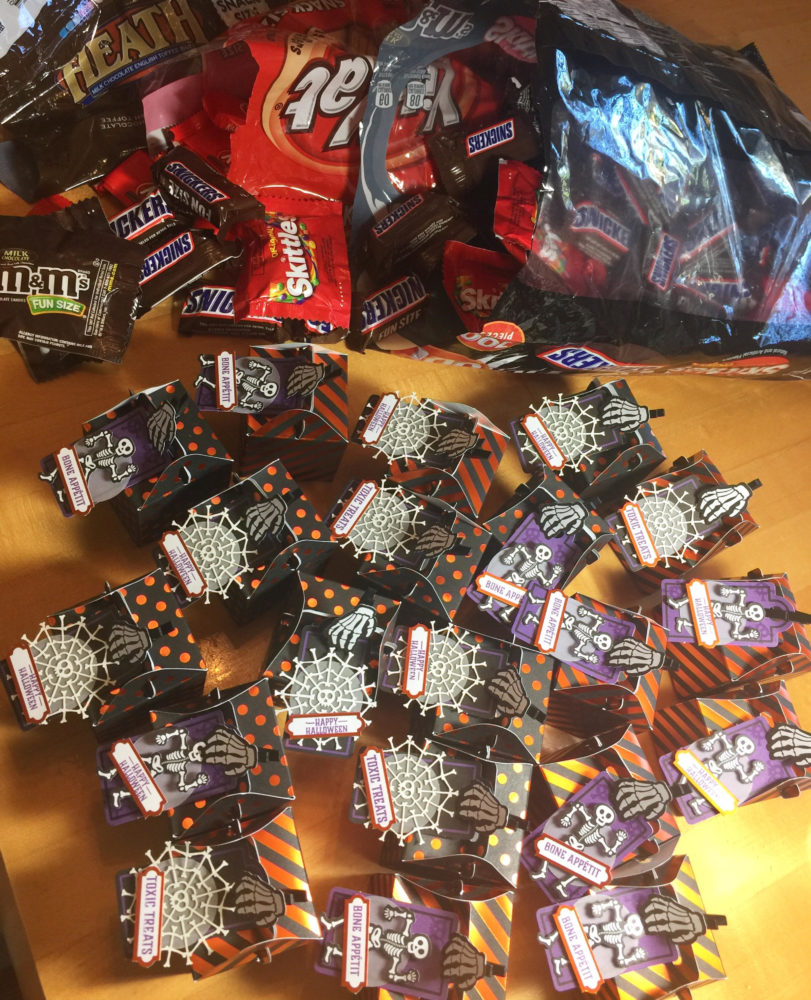
And then the other fun Halloween project was making these treat boxes with the September Paper Pumpkin Kit! “Craft supplies” (chocolate!) being put to proper use!

Paper Pumpkin treat boxes

Even though Halloween will be over after today, if there is anything in the Monster Bash Suite you loved and want more of for next year you can still order it!

Have a safe and fun Halloween Night! Don’t let the goblins get you!