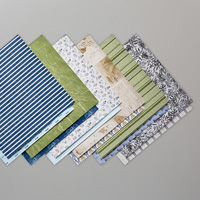
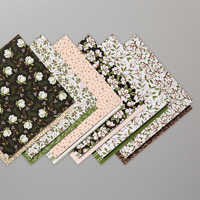
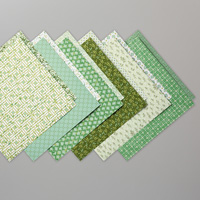
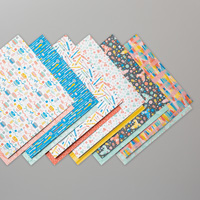
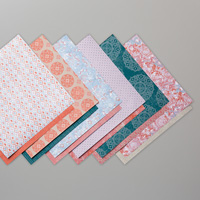
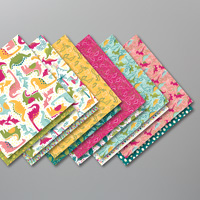
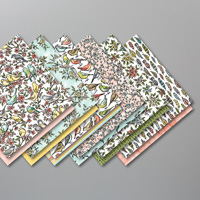
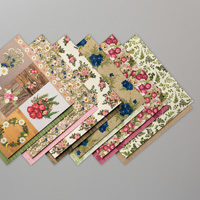
We all love gorgeous Designer Series Paper, so by popular demand, Stampin’ Up! has brought back the Designer Series Paper Sale! But the month is half over already, so be sure to check which designer papers you NEED for your stash!
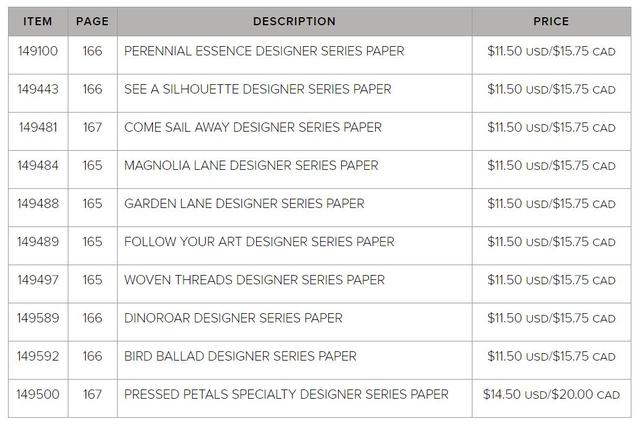
Only these select papers are on the sale! Put in the three packages of designer paper you want, then add the 4th package you want FREE.
Only Designer Series Papers listed in the table above qualify for this promotion. You may mix and match papers from any of the listed papers.
There is no limit to how many times you can buy three packages of Designer Series Paper, and get one free (the 4th) during this sale.
In the online store, if a customer orders four packages of the same qualifying Designer Series Paper, they will need to enter three together and then order the fourth free item separately.
Designer Series Paper ordered as part of a Starter Kit does not qualify for this sale.
Designer Series Paper ordered with Stampin’ Rewards does not qualify for this sale.
How to order: Put three papers (all the same or different) in your order, then choose the 4th package from the selection for your FREE one. You can even make the most expensive one the free one! My favorites are Magnolia Lane and Bird Ballad! Be sure to get those…or MORE of those!
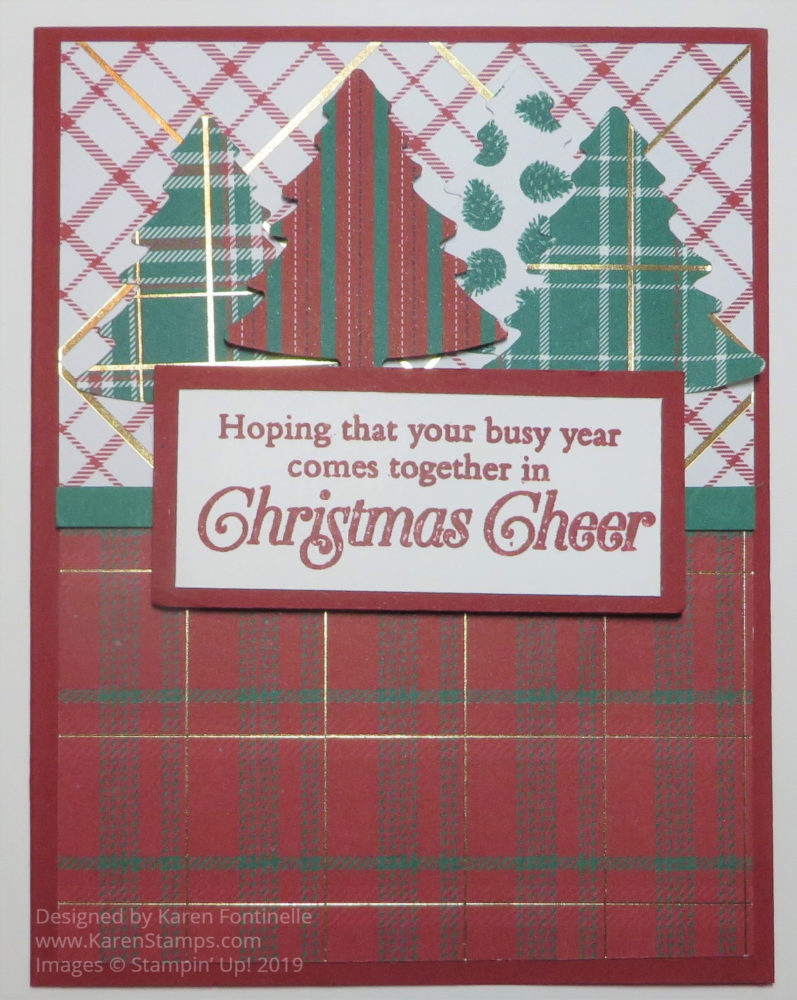
Here is an easy Christmas card I made during a short stamping session with my daughter while visiting her in California, the Wrapped In Plaid Christmas Trees Card. I brought some projects along in the hopes that a couple of her friends could join us, but it ended up being just us! Of course, when you are on vacation, there is never enough time so we didn’t get to make everything we wanted to.
While she was working on another card using this plaid paper and the tree punch, I somewhat copied this card from a sample in the Holiday Catalog on page 12. The card base is Cherry Cobbler. The greeting is stamped from the Perfectly Plaid Stamp Set in Cherry Cobbler Ink and then layered on a piece of Cherry Cobbler Cardstock.
For the background of the card, I chose two designs from the Perfectly Plaid 6″ x 6″ Specialty Designer Series Paper. They overlap just a bit and I put a thin strip of Shaded Spruce Cardstock across the line where the two papers overlap.
The four Christmas trees are punched out easily with the Pine Tree Punch, new in the Holiday Catalog. I just chose patterns from the designer paper that I thought would stand out from the background. I could have also added a few embellishments, like the Holiday Rhinestone Basic Jewels on page 58.
If you use this dark cardstock for your card base, you probably want to put a piece of Whisper White Cardstock inside the card, perhaps stamping first, or writing a personal note later. Stamp a greeting or stamp just a small image somewhere on the inside of the card.
Really, with the Pine Tree Punch and the Perfectly Plaid Paper, this is a pretty easy card to make. You could change it up by only putting the designer paper on the bottom half of the card, allowing the punched trees to stand out more against a solid color background. Just play with the elements and see what you come up with! Use a ribbon around the seam between the two patterns of plaid paper.
Have fun thinking up creative ideas using the new products in the Holiday Catalog!
Stampin’ Up! has been busy updating our Demonstrator websites, where you do your ordering, and making them more secure, for one thing.
But in some cases, you may have received some kind of security alert instead of going to the website. To ensure you have the best experience, the next time you visit my site, please make sure not to include “www.” at the front of the URL. Or you can simply click the following link and save it as a favorite so you don’t have to think about it: karenfontinelle.stampinup.net
If you forget and do include “www.” at the front, it’s possible you will see an error telling you the site may not be secure. That’s not true; in fact, it’s more secure than it was before the update! That “www.” is the problem.
Hope you check it out soon! (Just don’t type “www.”)
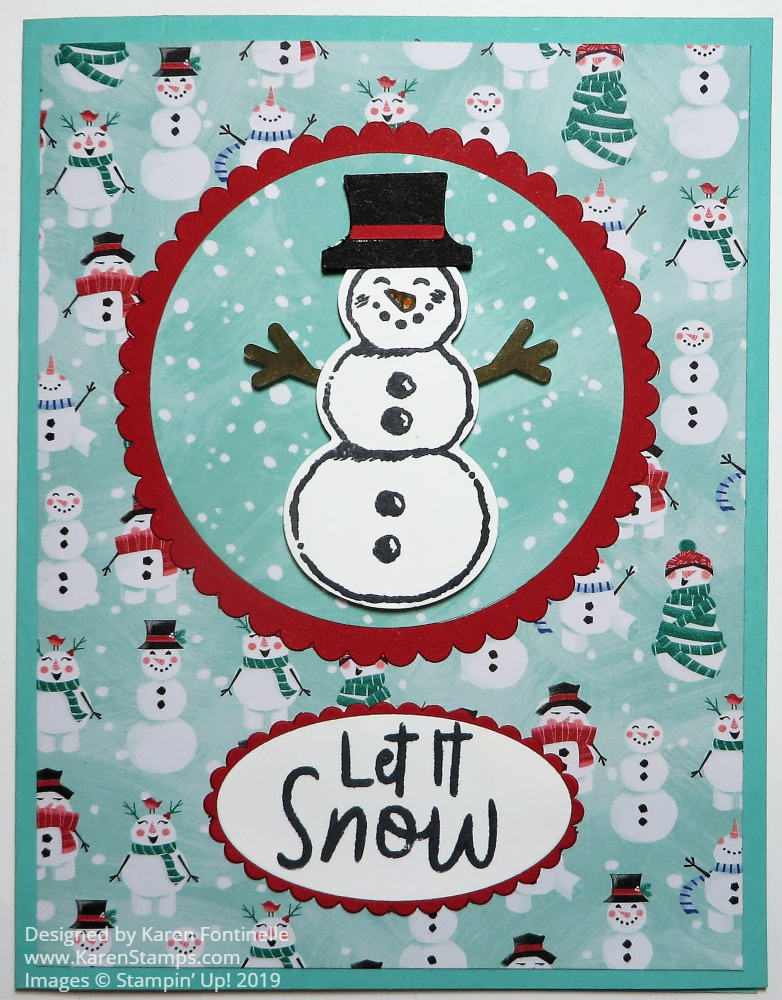
This Let It Snow Die-Cut Snowman Christmas Card will be a fun card to send at Christmas time! It uses fun designer paper plus a cute snowman stamp set. There are so many possibilities with the Let It Snow Suite for making cards and projects for winter and Christmas! You will find it all, of course, in the Stampin’ Up! Holiday Catalog!
This card starts with a Coastal Cabana card base. The designer paper is the Let It Snow Specialty Designer Series Paper. This package of paper has glittery snowmen on some of the patterns. The paper used on this card doesn’t have the glitter, but it is a design of an assortment of mini snowmen! It makes a great background for a snowman card without taking away attention from the main snowman.
The main snowman is stamped with the Snowman Season Stamp Set and then punched with the Snowman Builder Punch. With this punch, you can make the snowman body, the arms, the hat, and the carrot nose! You can even purchase the Snowman Season Stamp Set and the Snowman Builder Punch together in the Snowman Season Bundle and save 10%! After building this snowman with the punch, I popped him up with Stampin’ Dimensionals. He is then layered on a flip side of designer paper and layered on a large scalloped circle die cut.
The greeting is stamped from the Snowman Season Stamp Set and layered on a scalloped oval die cut. You can see another card HERE that also uses the punched snowman.
That’s all there is to this card! Stamp a holiday greeting inside or write a personal note and the card is ready to go!
Also, don’t forget about the Designer Series Paper Sale going on now at Stampin’ Up!. Select papers – Buy 3, Get the 4th package FREE!
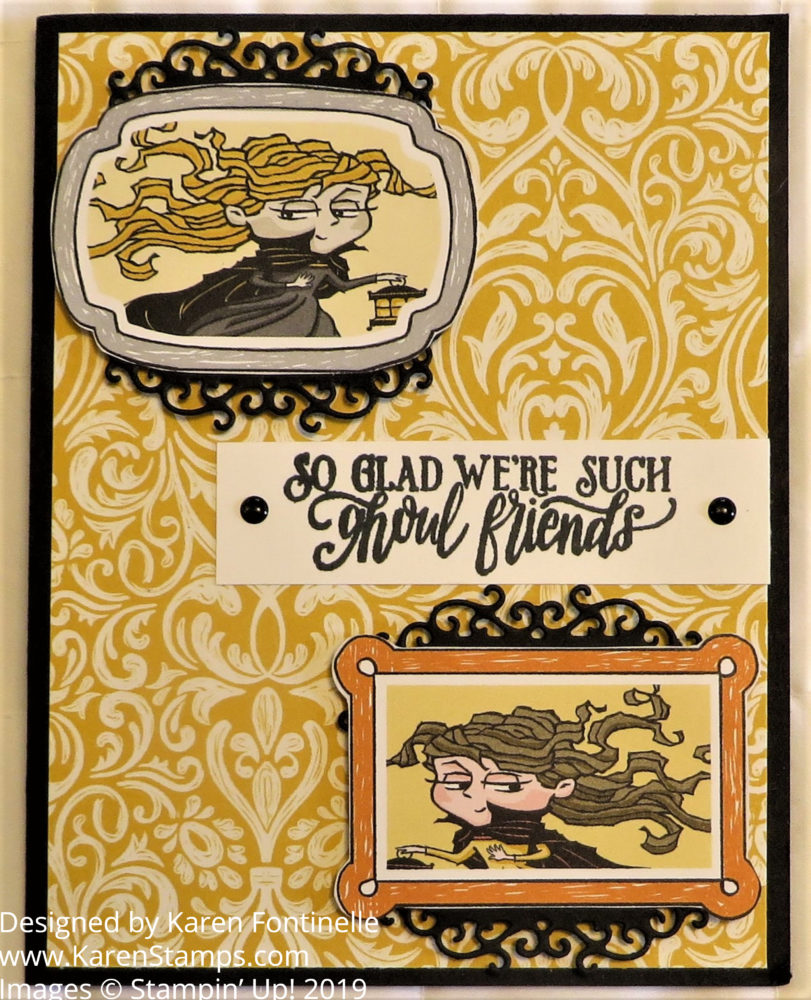
It’s the Monster Bash Spooktacular Bash Halloween Card for ghouls and goblins! Halloween is so much fun for making cards, treats, and other projects! I especially love the fun, whimsical Halloween things and this card has them! What a cute sentiment to send someone with these two ghouls on this card!
This card starts with a card base of Basic Black Cardstock with a layer of a generic design on the backside of a Halloween paper for the card layer. This paper is the Monster Bash Designer Series Paper which is full of fun Halloween characters and themes. You can cut out many of the images and use them on your projects rather than just using the full paper. For this card, I chose two of the “ghouls” and then layered them on the Ornate Frames Dies.
Although these Ornate Frames Dies are in the Holiday Catalog, in the Halloween suite, these are great frames to use on many types of cards, not just Halloween! I hope Stampin’ Up! will keep them around past the Holiday Catalog! You can layer them under many things.
The sentiment is stamped with the Spooktacular Bash Stamp Set. Talk about a cute Halloween stamp set with these fun monsters and cute greetings to use on your Halloween cards and projects! You can actually purchase the Spooktacular Bash Stamp Set and the Ornate Frames Dies in a Bundle together and save 10%!
And for a little extra pizzazz, get the Monster Bash Enamel Shapesand use them on your projects! These are adhesive-backed enamel tombstones, skulls, crows, and dots. On this card, I used two of the dots on the greeting piece. Just imagine the fun things you can do with the other shapes!
Here is how I usedthe designer paper for just a decorative strip on the side of a different card and then the Ornate Frames and monster from the DSP. If you like Halloween, you will have all kinds of fun with this Monster Bash Suite in the Stampin’ Up! Holiday Catalog!
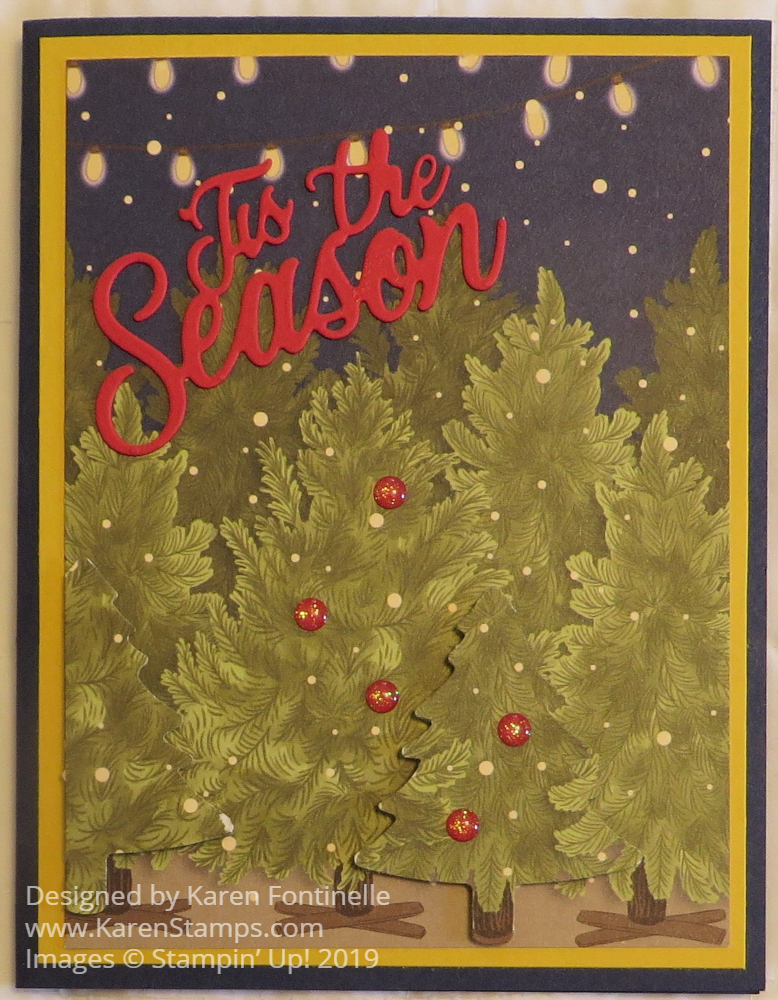
I named this card Night Before Christmas At the Christmas Tree Lot because that is what it looks like to me! Well, I guess it’s not just what it looks like to me, I think that’s what it is! I first thought it looked like all the trees were die-cut, so that’s how I got the idea for this card, but then I realized it’s just how good the paper is designed that they look that way! However, I did sacrifice some other paper to punch out a couple of trees to give it a 3D effect!
This card is made with the Night Before Christmas 6″ x 6″ Designer Series Paper. I just fell in love with this whole package of paper when I first saw it in the Holiday Catalog for its vintage look! The card base is Night of Navy, one of the coordinating colors with a layer of Crushed Curry. I thought it brought out the strings of lights over the Christmas trees. For the 3D trees, I was going to cut some out by hand but I decided to use the Pine Tree Punch, just to punch out some greenery from the larger trees in the paper. I popped those up on Stampin’ Dimensionals®.
I couldn’t find a good place for a stamped greeting, so I thought of using the die cut one from the Jolly Season Dies, part of the Holly Jolly Christmas Bundle. I used Real Red Cardstock and just adhered it with tiny drops of Multipurpose Liquid Glue. Of course, I had to have a little more bling, so I adhered some Toile Tidings Glitter Enamel Dots to the fronts of two of the trees like little red ornaments!
If you like this paper, you will also probably like the card I made in THIS POST using a different pattern of paper and the Santa in the Holly Jolly Christmas Stamp Set. All of these holiday products you will find in the Night Before Christmas Suite in the Holiday Catalog!
Grab some popcorn and a soda or some chocolate and enjoy!
Honestly, it will take you a while to really absorb all the products in the Holiday Catalog! Everyone seems to miss seeing something…..EVEN Shelli Gardner in a video hadn’t noticed the Coffin Treat Boxes! (If you like Halloween you should get those, even if you like more whimsical Halloween themes, but these are cute and easy to put together. Then you can decorate however you like!)
You will find this darling snowman stamp set and really fun designer paper in the Holiday Catalog plus the teeny tiny snowflakes in theSnowflake Sequins package. They are really for theSnow Globe Shaker Domes, but I couldn’t resist using a few with my Happy Snowman Christmas Card! I used the teeny tiniest dot of Multipurpose Liquid Glue and used the Take Your Pick Tool to place the sequins. They are really tiny!
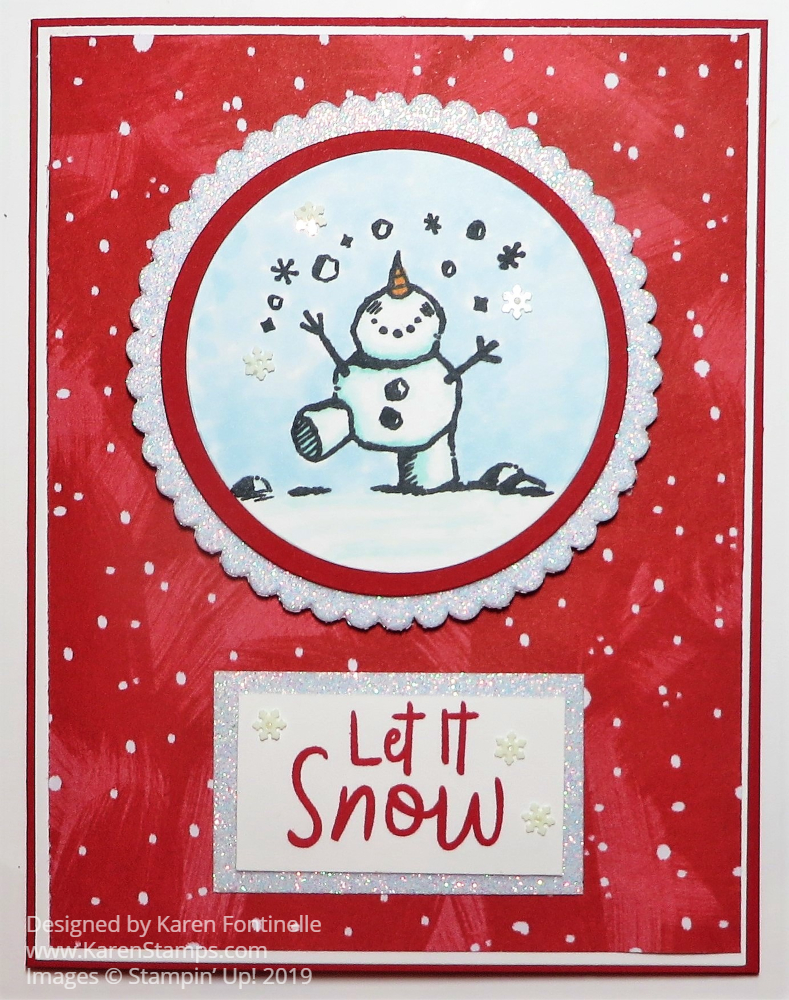
The card base is Real Red (which I am super happy to be using with these cards and the Let It Snow Paper) and has a layer of this red pattern of Let It Snow Designer Series Paper. I hate to tell you that on the other side are glimmery snowmen that I hated to cut through and put glue on!!! Oh my!! But it had to be done if I wanted to use this red paper with white snowflakes. Of course, you could use this pattern at any time because the white dots don’t have to be snowflakes! Just to help this red stand out, I put a layer of Whisper White underneath it. Now if you don’t tell anybody, you can die cut the circle that the snowman is stamped on out of the Whisper White before you assemble the card. No one will ever see it or know!
After I die cut that circle out of the Whisper White layer, I stamped a snowman from the Snowman Season Stamp Set on it in Memento Ink. Then I could add just a tiny bit of icy shadows on the snowman and snow with my Stampin’ Blends and lightly color in the winter sky. This circle is layered on a Real Red larger circle, die-cut with the Layering Circle Dies and that is layered on a scalloped circle from the same set out of Sparkle Glimmer Paper.
The greeting is in the snowman set and stamped in Real Red Ink. I also layered this on a piece of the Sparkle Glimmer Paper. Just for fun, I added three tiny snowflake sequins to the greeting, too.
That’s it. Pretty easy card to make once you have the idea and the Sparkle Glimmer Paper adds a little pizzazz! The inside of the card has another one of the greetings stamped in red, plus “Merry Christmas” as well as some snowflakes stamped at the top, all on a layer of Whisper White since the red card base would be a little difficult on which to stamp a sentiment or write a note. It’s easy to decorate a layer inside your card with some stamping or a piece or strip of designer paper! And don’t forget the outside of the envelope!
Just as this snowman is excited, I’m sure you are excited to start shopping with the Holiday Catalog! You can combine your Holiday Catalog order with the Designer Series Paper Sale! And don’t forget about the Clearance Rack if you want to pick up some bargains!
Only these select papers are on the sale! Put in the three packages of designer paper you want, then add the 4th package you want FREE.
Only Designer Series Papers listed in the table above qualify for this promotion. You may mix and match papers from any of the listed papers.
There is no limit to how many times you can buy three packages of Designer Series Paper, and get one free (the 4th) during this sale.
In the online store, if a customer orders four packages of the same qualifying Designer Series Paper, they will need to enter three together and then order the fourth free item separately.
Designer Series Paper ordered as part of a Starter Kit does not qualify for this sale.
Designer Series Paper ordered with Stampin’ Rewards does not qualify for this sale.
Not to mention, the Stampin’ Up! Holiday Catalog also starts tomorrow so you can order everything together! Remember, only those papers listed are in the sale!
How to order: Put three papers (all the same or different) in your order, then choose the 4th package from the selection for your FREE one. You can even make the most expensive one the free one! My favorites are Magnolia Lane and Bird Ballad! Be sure to get those…or MORE of those!
We often say, “Stamping is therapy” and it certainly is, like with this Path of Petals Thank You Card and many other cards! Sometimes you just need to stop and sit down and stamp.
It’s been such a busy week and everywhere I went traffic, traffic, traffic! I think everybody is in town with all the schools back in session so no one is on vacation anymore. Everybody is home and going to work and on the roads! Not to mention construction everywhere which causes backups and slowdowns! I think I need to allow an hour to get anywhere I go just to keep the drive less stressful! I don’t know when it’s been quite like this in all the years I have lived here.
So what is the best thing to do to alleviate a little stress?? Stamp, of course! This card uses the Pressed Petals Specialty Designer Series Paper and stamping with the Path of Petals Stamp Set. Although I have used the Pressed Petals DSP on lots of cards, I had difficulty stamping the flowers and leaves with this stamp set so this is the first time I actually used the flowers and stems! Here is a card I made with a piece of the Pressed Petals Designer Paper. I love these dark-colored flowers so much!
The card base is Mossy Meadow, one of the coordinating colors of the Pressed Petals Designer Paper. I started with the design with the leaves and ferns (I guess!), although originally I had the top and bottom designs reversed. This is actually the same paper, the leaves on one side and the cloth-looking design on the other.
The die-cut piece going across the front of the card is from the Flourish Dies using Merry Merlot Cardstock. I like to have something, usually ribbon, where I have two different patterns of paper coming together. It just finishes off that edge nicely. But this time I thought of using some kind of border die or something and finally, I found this one. It is a little bit fancy but doesn’t overwhelm the card. The secret is that the piece is not long enough to reach all the way across the card. But since part of the die-cut was going underneath the stamped piece, I was able to cut it, leaving a space underneath the stamping making the ends reach to each side of the card, and no one will be the wiser!
Maybe you won’t have trouble stamping the flowers, but just in case, this is what I found out. I think it was easier to stamp the flower stems and leaves first. I stamped these in Pear Pizzazz Ink. Next, I stamped the flowers in Merry Merlot Ink. I think you will have to move the stamp around until you feel like the flower blossoms are fitting with the stems. Past stamps we have had had a notch on each of the stamps that were to be stamped in the same direction so you could tell how to line them up. These stamps do not, so you just have to line them up as best you can. I could not get the other leafy stamp to line up correctly, so I just stopped with what I had as you see on the card.
For a little pizzazz on the stamping, I used the Clear Wink of Stella Glitter Brush to brush on a little Merry Merlot ink from the ink pad onto each flower, trying to keep it fairly light, which also added a bit of glimmer. Then I did the same with the leaves with the Pear Pizzazz ink. As much trouble as these stamps were to line up, I really liked the stamped image after adding a little bit of color and the glimmer from the Wink of Stella brush!
The greeting is from the same stamp set. It is stamped on Very Vanilla Cardstock in Merry Merlot Ink and then punched out with the Classic Label Punch. However, I snipped off the pointy ends of the punched piece to just make it plain. I could have layered it on a piece of Merry Merlot but I liked it just adhered to the card by itself.
So there you have it! A little stress relief from the demands of the week and a simple card design that you could vary in many different ways!
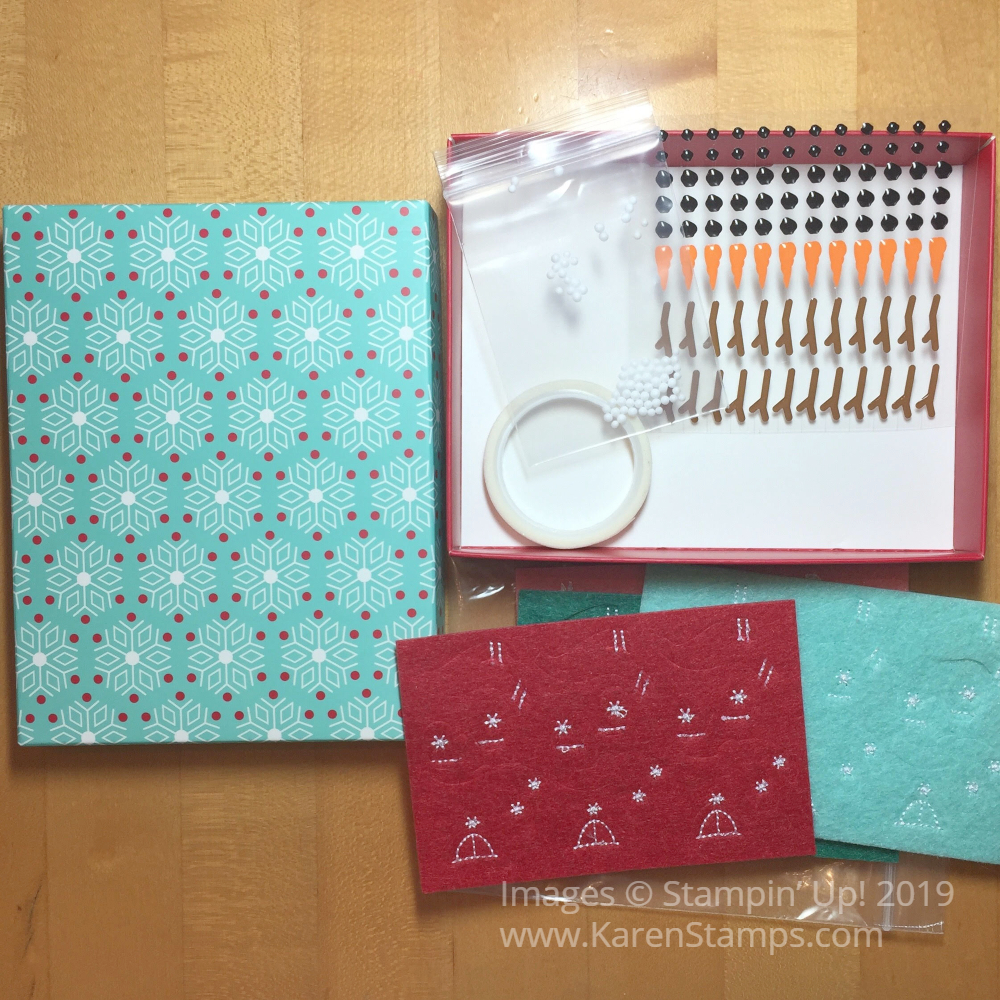
If you like cute things, you have to put the Let It Snow Embellishment Kit on your Holiday Catalog order! The catalog goes live September 4, 2019 which is right around the corner!
The box itself is cute, in Coastal Cabana, Real Red, and Whisper White colors. Presentation is everything, as they say! You can reuse the box after you use the contents!
And inside the box, you will ooh and aah when you open the lid!
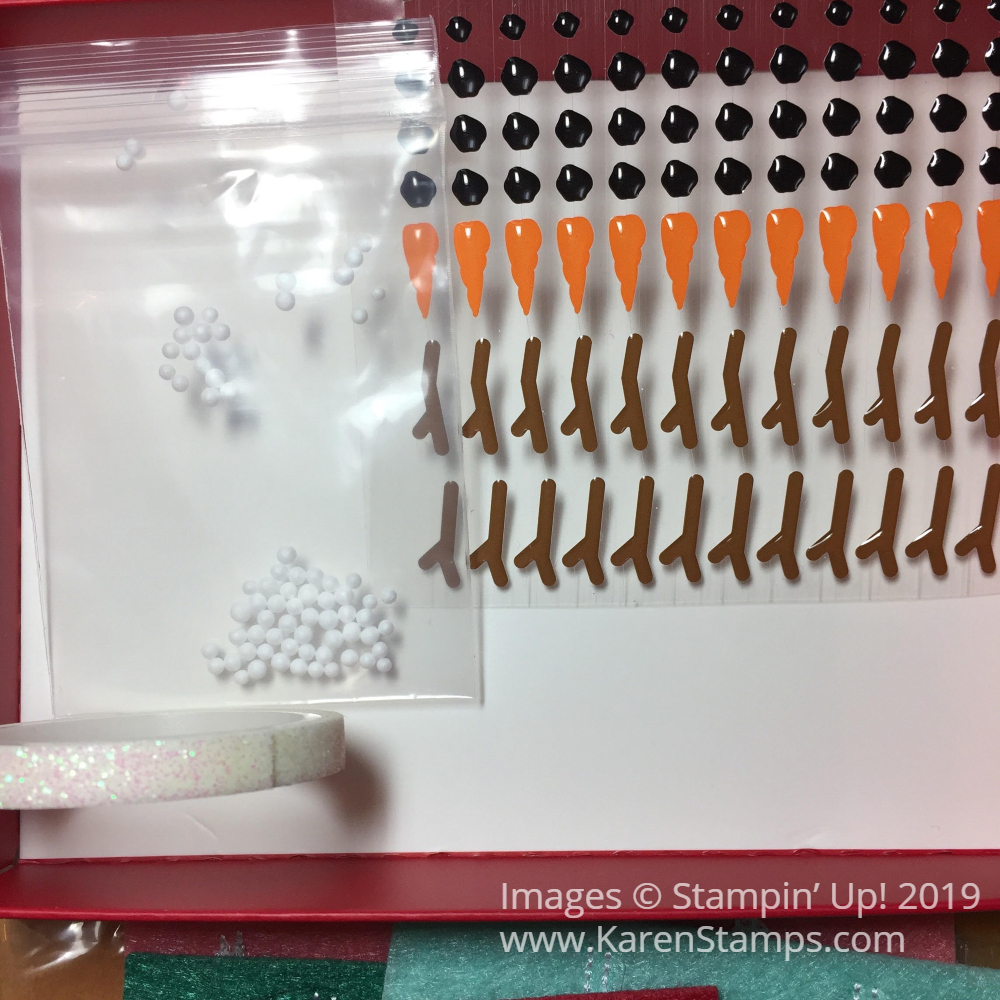
Just look!!! Darling little enamel pieces every snowman needs – stick arms, a carrot nose, and pieces of coal for buttons and eyes! Just your typical snowman!
Along with the enamel pieces are teeny tiny snowballs!! They are really tiny! I made a card with the snowballs and I used the tiniest drop of Multipurpose Liquid Glue (or if you aren’t sure you are going to get a tiny drop out of the bottle, put a drop or two on scrap paper and then pick up a tiny drop with a toothpick or something to place the glue on your paper where you want the snowball to stick) and then used my Take Your Pick Tool with the sticky putty end to pick up and place the snowball. I will say that they are so tiny they are a little difficult to handle.
There is also a roll of 1/4″ glimmery washi tape. You can use this in many ways. Washi tape is so much fun!
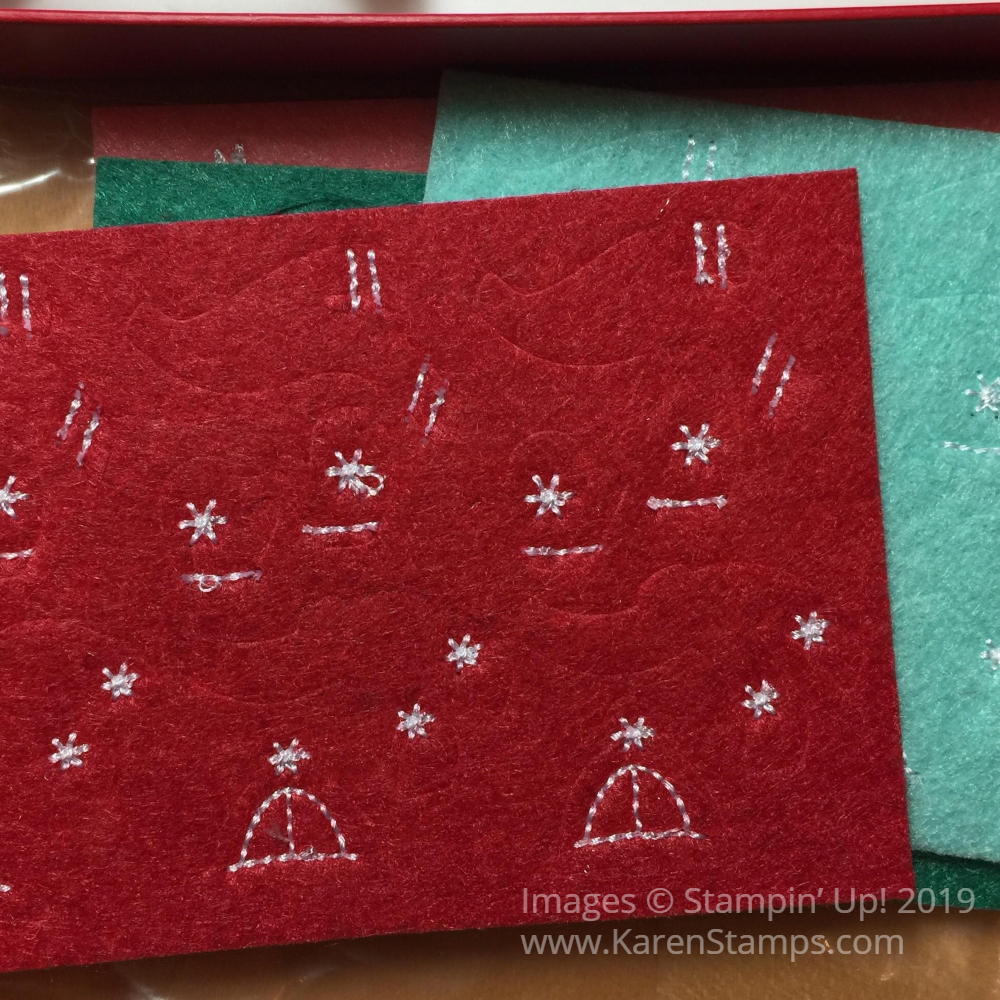
Then there are these die-cut stitched felt pieces that you can use for snowman caps, scarves, and mittens! Use these pieces on your snowmen just by pressing out of the felt piece and using a bit of glue on the back to adhere to your snowmen!
Stamp a snowman with the Snowman Season Stamp Set and add these pieces to dress him up or make your own snowman and decorate with these pieces. No matter what it will be fun to use these pieces in the Let It Snow Embellishment Kit!
It’s only four months until Christmas Day (yikes!) so jump on the Holiday Catalog when it goes live! Check out the Let It Snow Embellishment Kit and see if it is something you want to put on your Wish List so you don’t miss out!
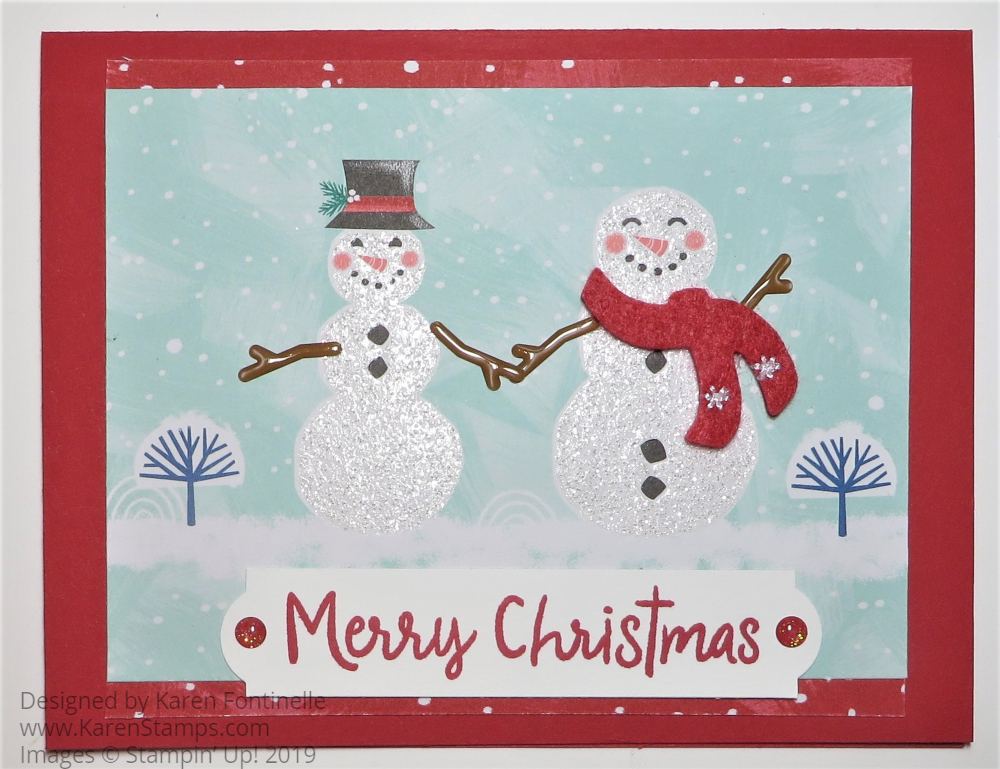
There are so many ways to play with the Let It Snow Suite in the Holiday Catalog that it was pretty easy to come up with this Let It Snow Snowman Christmas Card.
Let’s start with the Let It Snow Specialty Designer Series Paper! On my first preorder, I took it off my order because I had too much. As soon as I saw a sample of the paper in a card online, I was just sick that I hadn’t ordered it! I originally hadn’t realized that the paper has glittery images on it. Once I saw it in that card sample I had to have it as soon as I could order again! Remember, any time the paper name has the word “Specialty” in it, it means there is something special about that paper, like foil accents or in this case, glitter! The other side of the paper has generic designs you can use any time, so even if you don’t use up all the snow-themed paper, you can turn it over and still have occasions to use the paper!
I decided to choose the paper with the snowmen in rows, so I cut out just this pair. From the scrap, I turned the paper over and there was this cute red design with white dots. It can look like snow or just dotted paper. I cut just two strips from it to add to the top and bottom of the snowmen paper.
An interesting product in the Let It Snow Suite is the Let It Snow Embellishment Kit. If you want to stamp snowmen, you can use pieces in this kit (and cute box!) to finish off your snowman with stick arms and other facial features, plus felt scarves, caps, and mittens to add, plus tiny snowballs and washi tape. I added arms to my two snowmen and a scarf to the lady snowman.
The greeting is stamped in Real Red Ink from the Snowman Season Stamp Set. To get the fancy ends on the strip of Whisper White cardstock, I stuck each end of the strip into the side of the Everyday Label Punch. And for a little bling, I added two red Toile Tidings Glitter Enamel Dots (from the Toile Tidings Suite).
Be sure to add a layer inside any cards that have a dark card base or where you would like to stamp a greeting or write a personal note.
This was a pretty easy card because the Specialty Designer Series Paper does most of the work on this Let It Snow Snowman Christmas Card. Check out the whole suite when the catalog goes live September 4th!
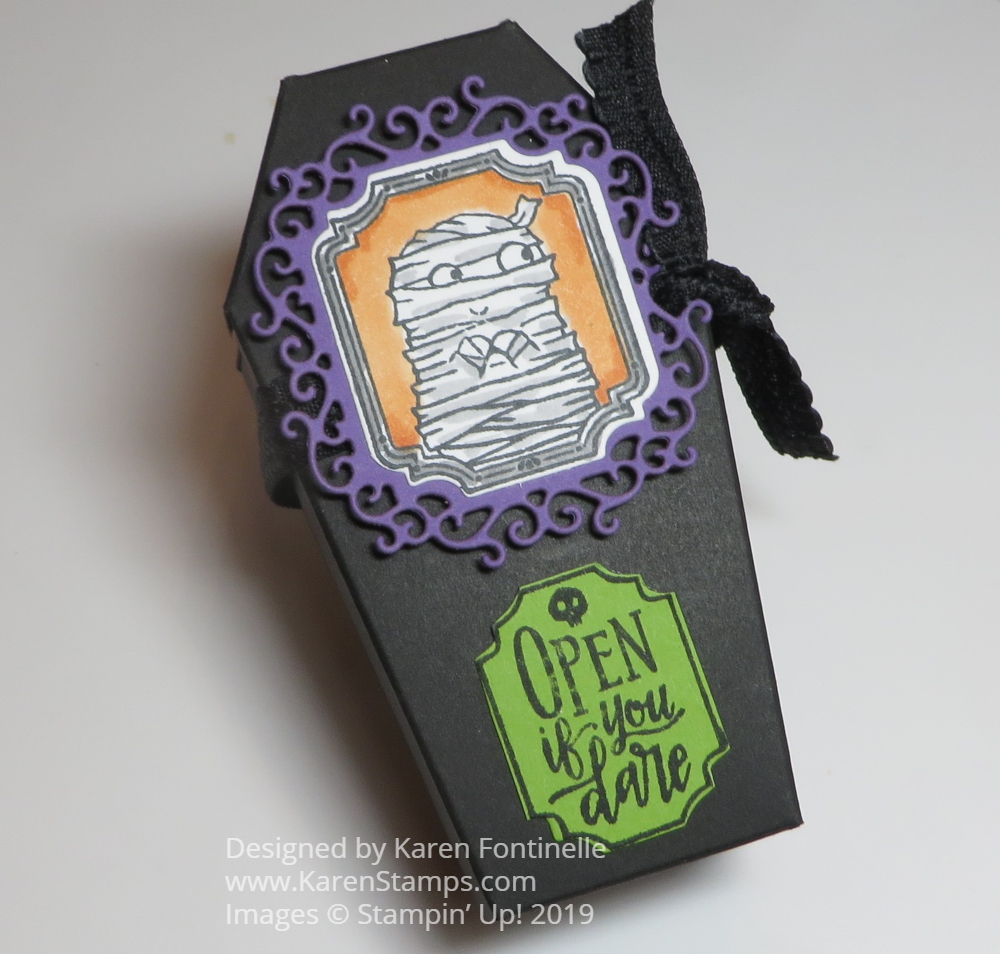
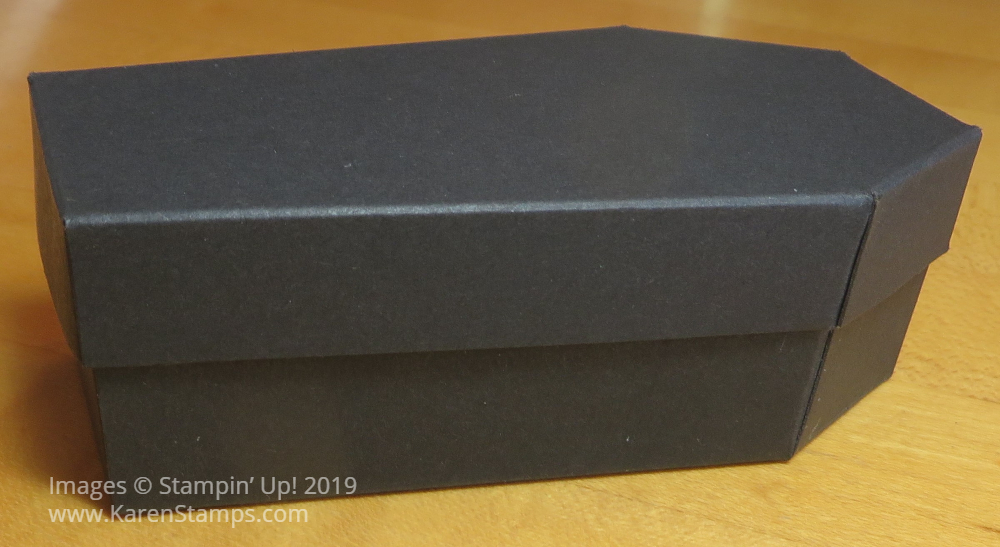
This Coffin Treat Box with the Monster Mash Suite is sure to be a hit if you choose these boxes for Halloween treats! I think they are going to be a hit product in the Stampin’ Up! Holiday Catalog! I’ve already seen Demonstrators use all the Coffin Treat Boxes to make a wreath! How do these people think of these things??!
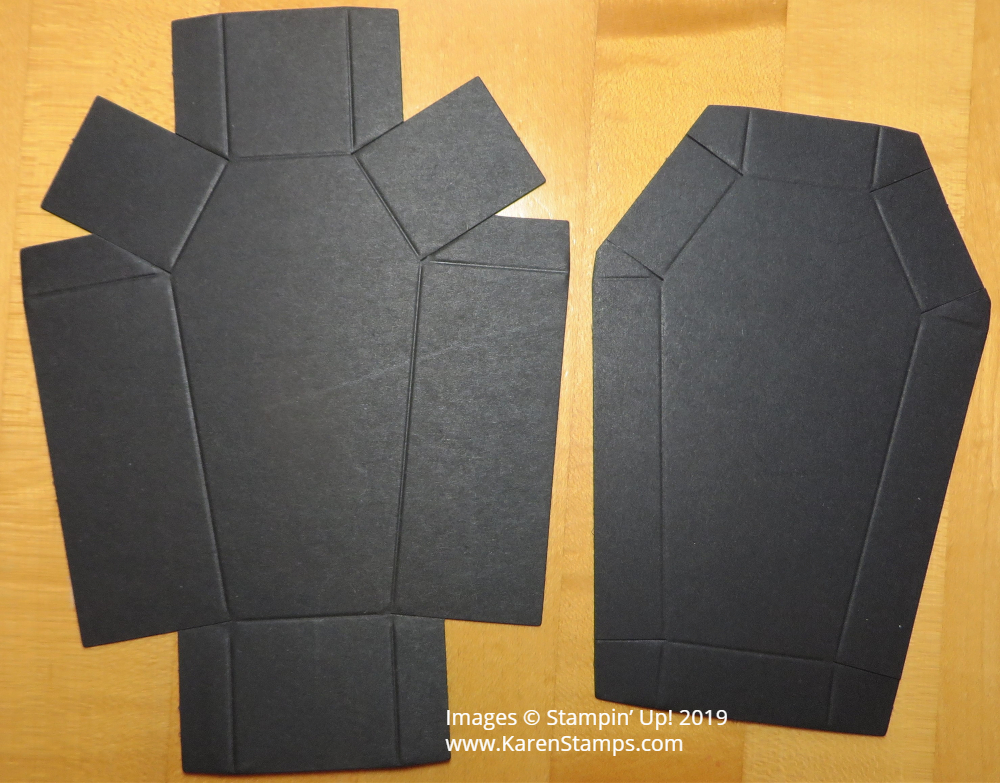
The Coffin Treat Boxes come 12 boxes and 12 lids in a package and are food safe so you can feel comfortable putting candy or a treat inside. They come flat, but already die cut and scored so all you have to do is add adhesive and assemble. Then the fun begins!
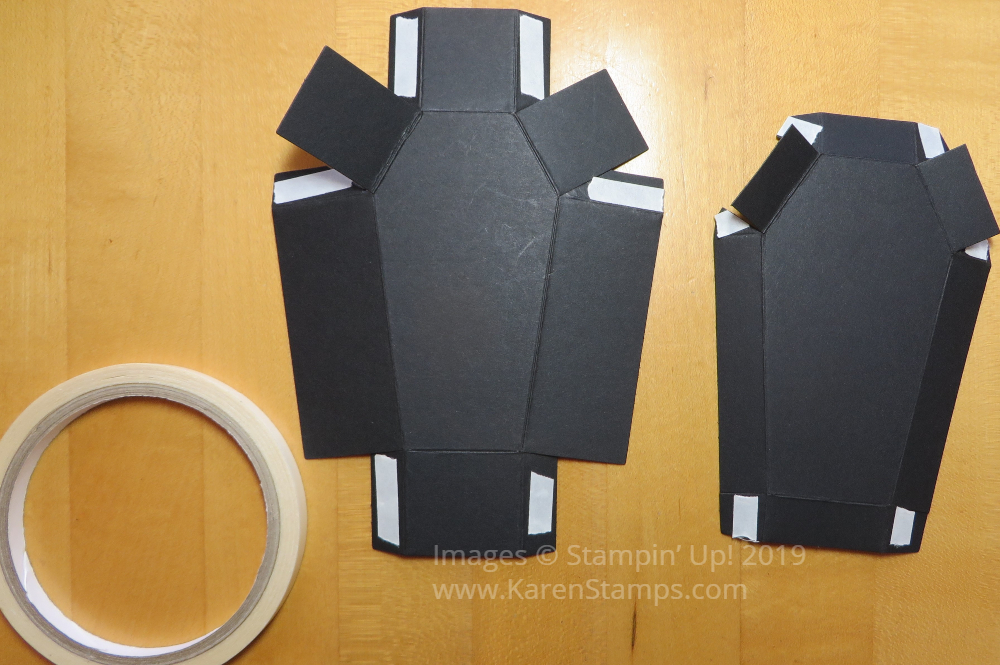
Once you fold and crease the score lines, you will easily see how the box will go together. This is how I added Tear & Tape Adhesive to the flaps, some pretty small!
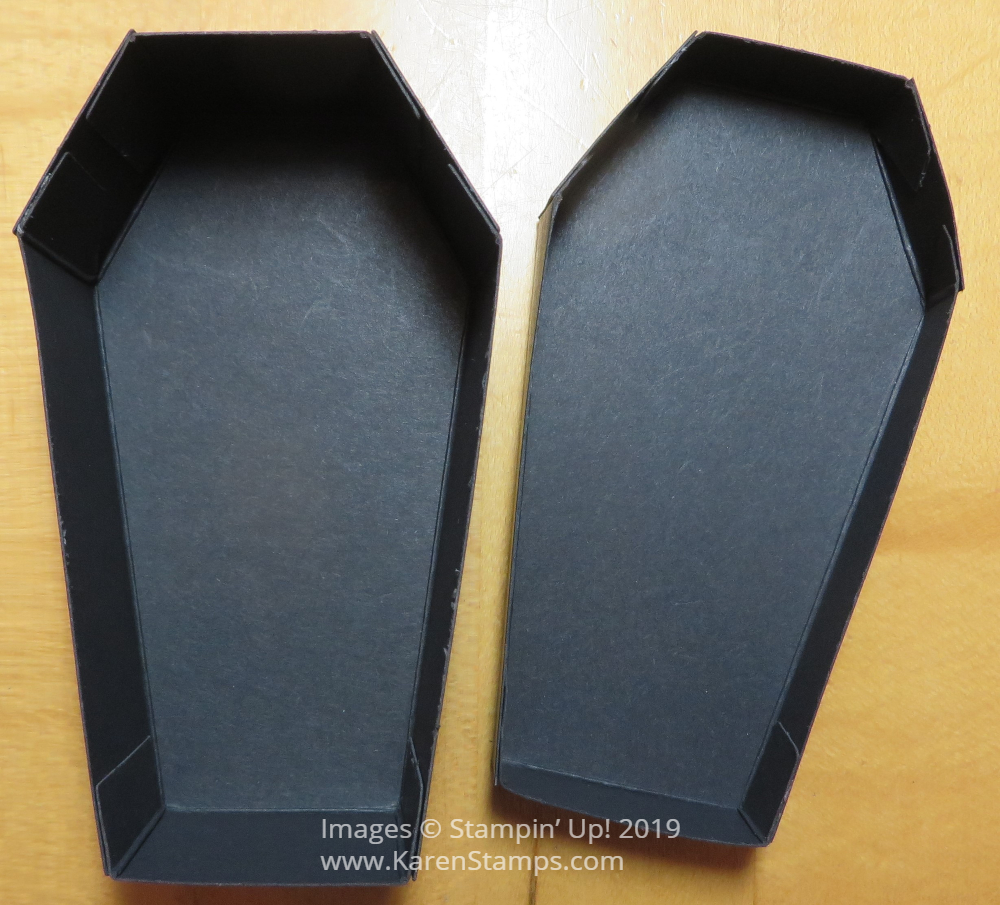
Once the box is assembled, you can go crazy decorating it for Halloween! There are so many ideas with the Monster Mash Suite products! I think the Monster Mash Designer Series Paper and the Ornate Frames Dies are a must! The Ornate Frames Dies can be used for lots of occasions, not just Halloween.
To decorate my Coffin Treat Box, I stamped the mummy from the Spooktacular Bash Stamp Set on Whisper White and used some Stampin’ Blends just for a little color. The mummy is then layered on one of the Ornate Frames in Gorgeous Grape Cardstock. I LOVE this die! It is popped up on Stampin’ Dimensionals.
The little Halloween greeting is stamped in Memento Black Ink on Granny Apple Green Cardstock and then die cut with another one of the Ornate Frames Dies. It is just glued on to the coffin treat box lid. To finish it off, I tied a piece of Basic Black 3/8″ Scalloped Edge Ribbon around the coffin by sliding it under the popped up mummy piece.
It was so fun to make a decorate this Coffin Treat Box with Monster Mash products so I know you will also want these Coffin Treat Boxes to make your own creations for Halloween treats!
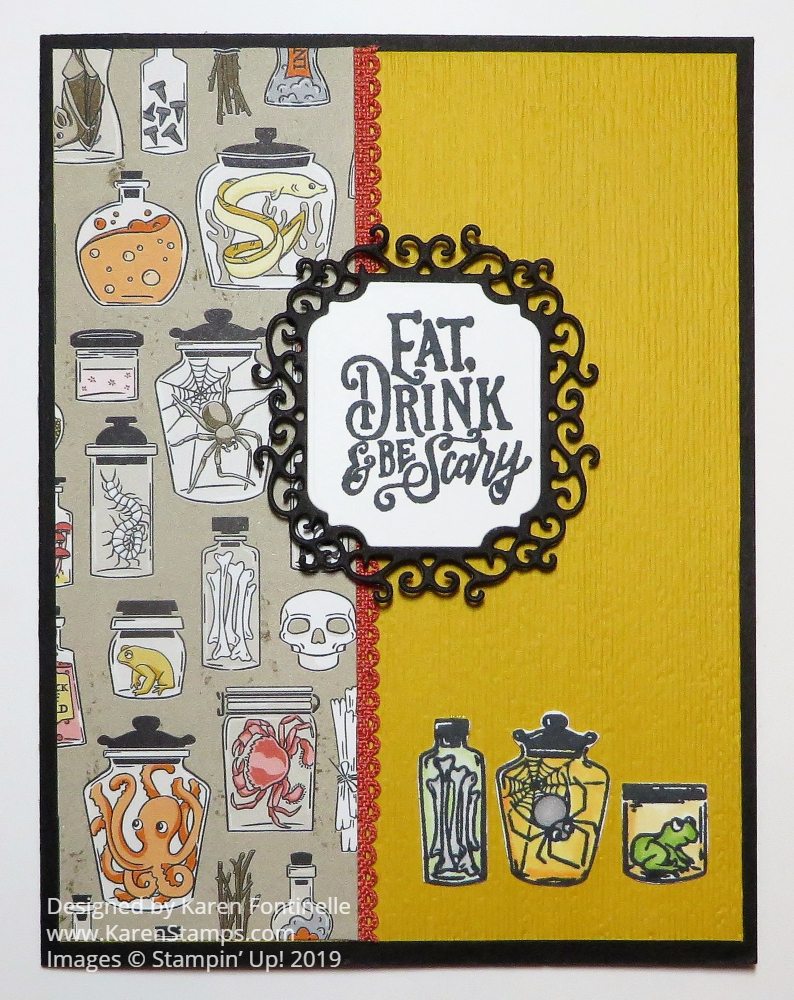
A Monster Bash Halloween Card for my first Halloween card of the holiday crafting season! The Monster Bash Suite in the upcoming Holiday Catalog from Stampin’ Up! will get your creative juices flowing if you are into Halloween! And I am!!
It doesn’t take long to come up with a multitude of ideas for cards and projects using the Monster Bash Designer Series Paper. There are so many things you can do with this paper! Use a piece of the paper as-is for a layer on a card or cut out some of the images and use those on cards and projects. Of course with Halloween, we always think about treat boxes and you can have lots of fun making those for kids or parties with products in this suite!
To make this card I started with a card base of Basic Black with a layer of Crushed Curry. I thought it looked too plain so I used the Subtle Embossing Folder to just give the Crushed Curry Cardstock a little texture. Then there is the strip of Monster Bash Designer Series Paper.
Here is the secret of the bit of ribbon along the edge of the designer paper! It is the Terracotta Tile 1/2″ Scalloped Linen Ribbon, but I cut it in half lengthwise so I could use just that one side of the scallop for a bit of color along the designer paper!
The greeting is stamped from the Spooktacular Bash Stamp Set in Memento Ink and die cut with a shape from the Ornate Frames Dies. I also die cut one of the frames in Basic Black to frame the greeting. These dies are great because they are not just for Halloween! Even if you aren’t a fan of Halloween, these frames would be fun to have for die-cutting on non-Halloween projects!
For a little extra, I stamped the jars in the Spooktacular Bash Stamp Set and colored them with Stampin’ Blends. Then I just cut them out with Paper Snips and adhered them to the bottom of the card.
It won’t be long now! Just a couple weeks until you can begin ordering from the Holiday Catalog on September 4th! I am warning you now, your Wish List will be a difficult one because you will want almost everything in the catalog! And you know how seeing samples goes…..once you see something cute, then you will want to make that and will have to order that product(s)! You won’t be able to help yourself!
If you like Halloween, you may want to start with the Halloween stamping products like the Monster Bash Suite so you can make a fun card like my Monster Bash Halloween Card!
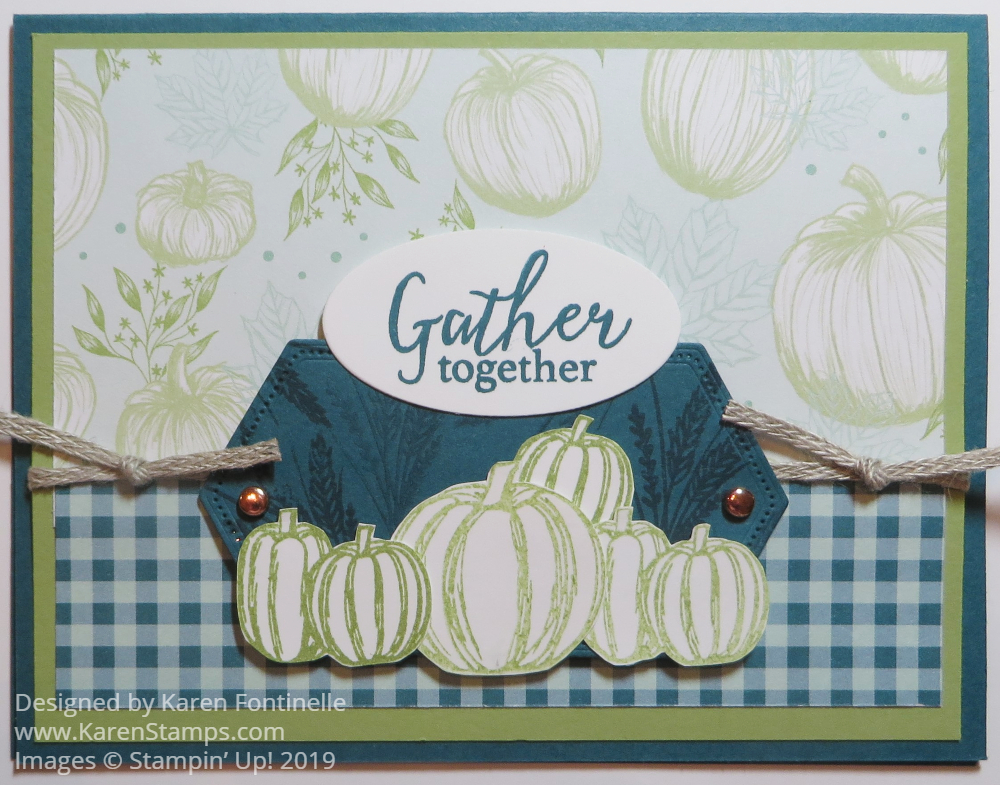
I thought if I made this Gather Together Pumpkin Card For Fall it would cool me off from the very hot summer temperatures in Houston, Texas. It did bring a rainstorm which knocked a few degrees off the temperature! I love these new colors for fall, something modern and different!
This card uses the very pretty Come To Gather Designer Series Paper. I can’t wait to use all of the other designs in the package, especially the bright, modern plaid. For this card, I began with a card base of Pretty Peacock Cardstock and a layer of Pear Pizzazz. Then I chose the designer paper with the whitish pumpkins. On the opposite side was the Pretty Peacock gingham check design which I also liked so I cut a strip, turned it over and used it at the bottom of the card. To cover up the seam from the two papers, I just placed some 3/16″ Braided Linen Trim around the card.
I didn’t purchase the Gathered Leaves Dies in the Suite (because even Demonstrators can’t buy everything!) so I just stamped the pumpkins on Whisper White Cardstock with Pear Pizzazz Ink. Some I stamped with full ink and some I stamped off first and then stamped for a lighter shade with less ink. After stamping the pumpkins, I just cut them out with my Paper Snips, which as easy enough.
To make the pumpkins stand out on the card, I wanted some kind of background. I decided to try this piece die cut from the Stitched Nested Labels Dies in Pretty Peacock. To add a little interest I stamped in Pretty Peacock ink the wheat image from the Gather Together Stamp Set. Then I added two small copper brads from the Metallic Brads. It seems like years ago brads were a really big deal for embellishments, but I don’t think they are used or talked about as much these days. But I thought they seemed like the perfect little bling to add on this card! I poked a hole first with the sharp pointy end of the Take Your Pick Tool with the paper on the Stampin’ Pierce Mat, then inserted the brad into each hole. You can flatten the brads well by pushing down on the top of the brad with something heavier, like an acrylic block or the wide part of your scissors or whatever is handy.
This label piece is placed a little lower on the card because I didn’t want to cover up all the pumpkins printed on the designer paper! Then the cut out pumpkins are placed a little lower on the label so as not to cover up the stamping on the label! This whole piece is then popped up on Stampin’ Dimensionals.
The next dilemma was how to add a greeting without covering up too much of the card! I used the greeting from the Gather Together Stamp Set, stamped in Pretty Peacock and die cut with a Layering Oval Die. I ended up, as you can see, adding it right to the top of the die-cut label, overlapping a bit. It is a little different, but I think it turned out okay. In order to make it even with the Pretty Peacock label, I put dimensionals just under the top part of the greeting so it would be the same height as the label.
It was fun making a fall card even though I didn’t get to put on a sweater! It is still plenty hot, but at least this card gives the promise of fall! I just love the thought of fall colors and pumpkins and everything that goes with that theme! When you receive your Stampin’ Up! Holiday Catalog and begin to place your order(s)….and believe me, there will be orderS, plural!…..you will want to choose some of the fall-themed stamp sets and papers for a change of seasons or Thanksgiving or use some of the generic colors just for a switch in colors for your cards and projects.
Pumpkins, these days, seem to come in all colors and textures so you can be very creative! Here is a post from last year with traditional orange pumpkins but with a bright green polka dot background, but you could use the same design to make a card with these new 2019 colors! I saw some beautiful fabric pumpkins on Instagram the other day, some even embroidered, all different kinds of fabrics, not just orange. Yet they all look appropriate for fall and into Thanksgiving. So don’t be afraid to try some non-traditional colors in your pumpkins and fall cards like this Gather Together Pumpkin Card For Fall.