
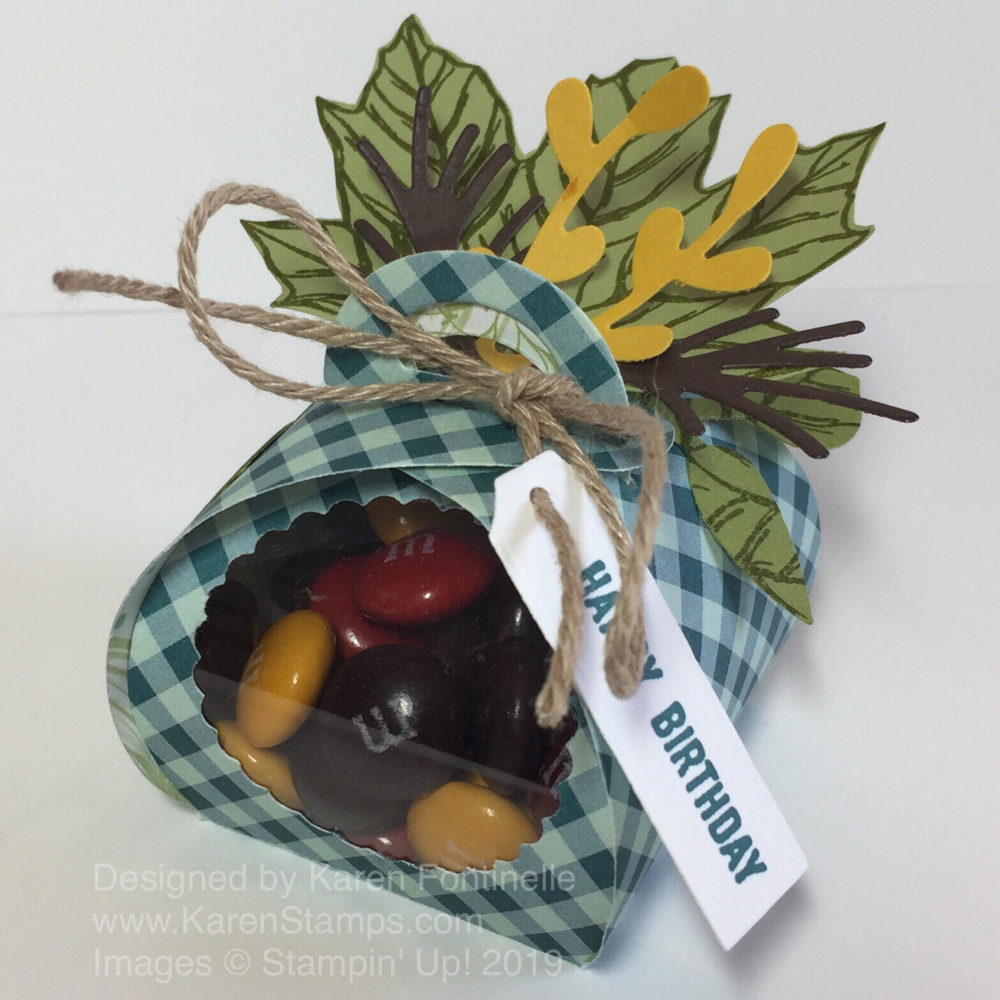
Yesterday was my husband’s birthday so instead of a card, I decided to make this Mini Curvy Keepsake Box For A Fall Birthday. I was looking online for ideas, thinking of something birthday-ish or fall-ish and I saw this idea of making a window in the box so you can see the candy or treat inside! I thought that looked pretty cute so that is the main idea I went with!
Instead of cardstock, I used a piece of the Come To Gather Designer Series Paper. I wanted something that would look good on the outside as well as the inside. The inside doesn’t really matter, but if you are making a fall box, you probably don’t want to use a Christmas paper with a generic pattern for the outside and some Christmasy pattern on the inside of your fall box! Depending on the pattern, pay attention to the direction of your paper. Think about which way the design will go on the outside of the box and maybe even the inside of the box.
What you need for this Mini Curvy Keepsakes Box Die is a piece of 6″ x 6″ paper. Then lay the die down with the points diagonally on the paper. If you put any point straight up on the paper, it will not fit.
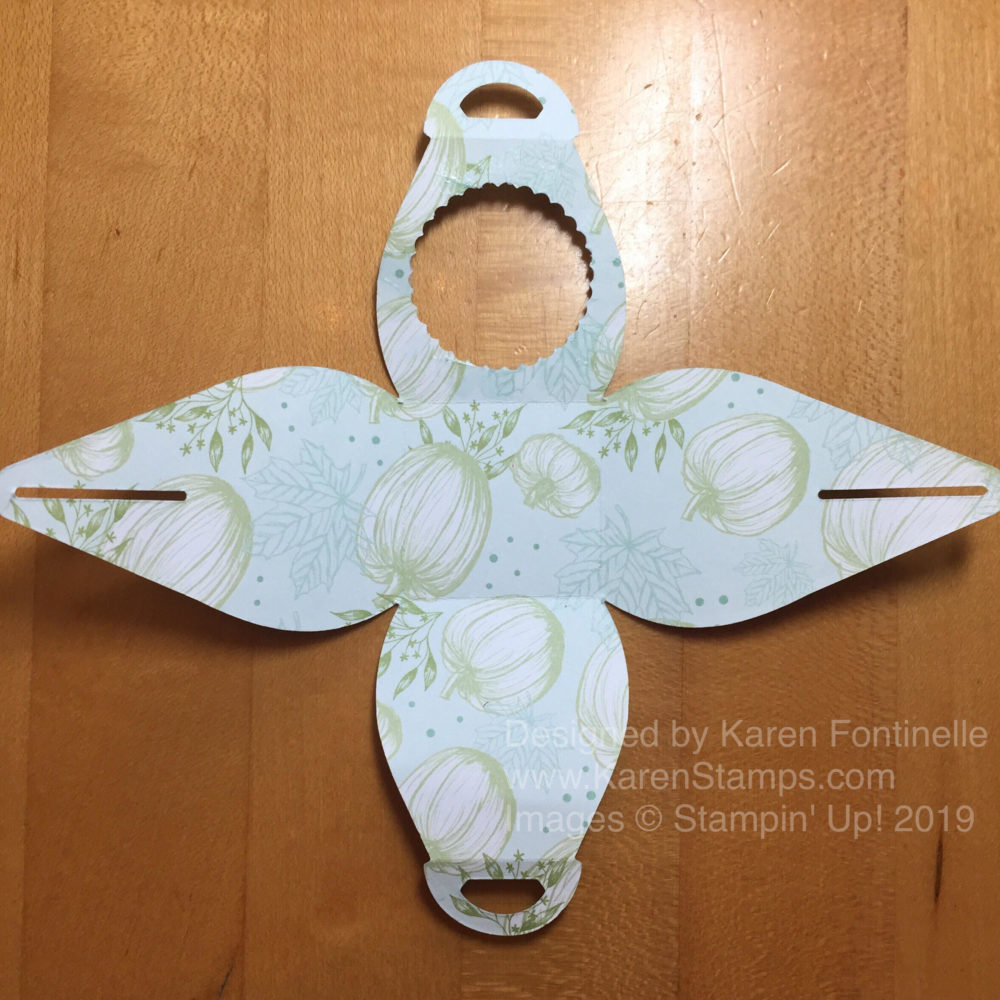
After die-cutting the box piece and creasing the score lines and folding, I decided on which panel I was going to put the little window. Ultimately I decided on the 1 3/8″ Scallop Circle Punch for the punched hole. Since the area was so small and narrow, I actually die cut a piece of window sheet for one panel and then trimmed that down by hand to fit the area. I just used Snail Adhesive in tiny bits around the hole to hold the window sheet in place.

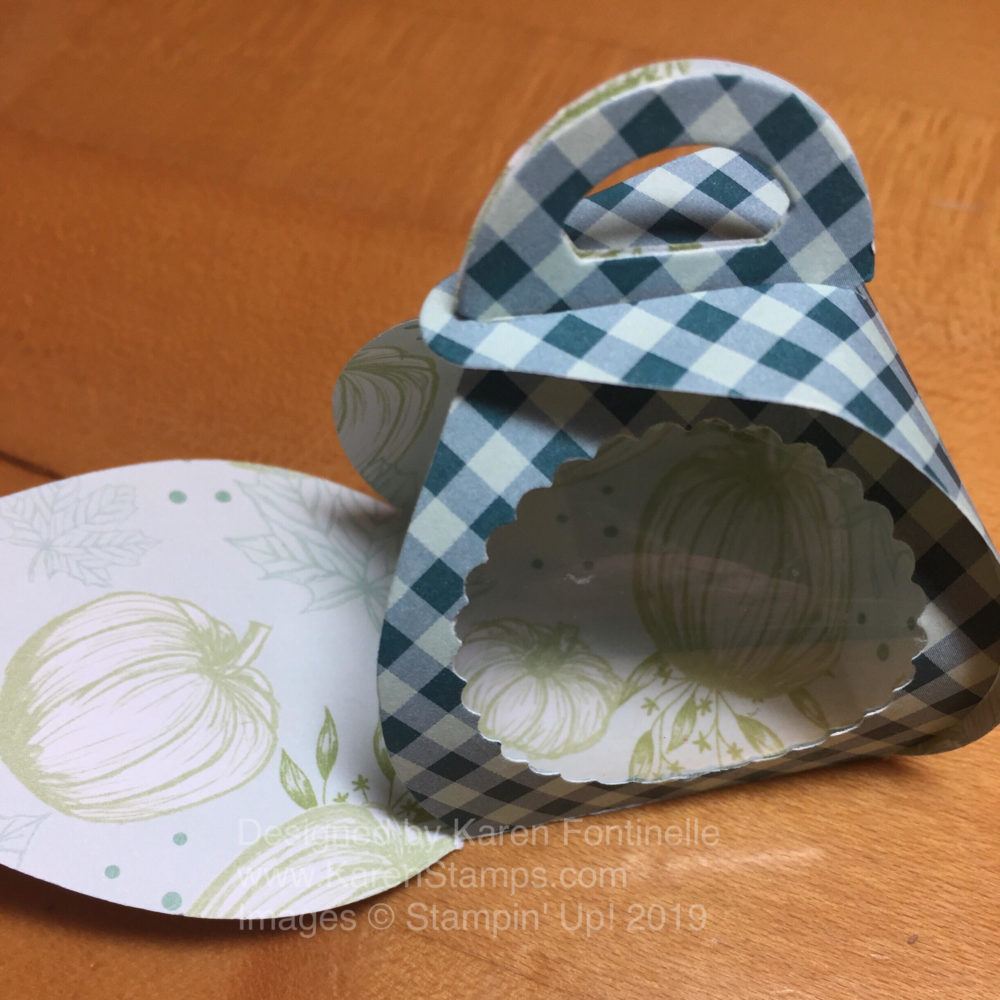
I just recently made my first box with my daughter on vacation and I couldn’t figure out how to hook the top together! Luckily a video provided the answer! As you are trying to fit the side pieces with the long slits over the “handles”, PRESS DOWN! That lowers the handles, provides the curve to the box and allows the slit pieces to fit over the handles and hold everything in place! Very easy but I didn’t know to do that until I watched a video!
In order to put the candy in the box, I assembled the box except for one side. Then I could put the candy in and fill it up.
Then all was left was to decorate the box! I stamped some leaves with the Gather Together Stamp Set, die-cut some brown stems with a little die in the Mini Curvy Keepsake Box Dies, and punched some stems with the Sprig Punch out of Crushed Curry for some color. I also punched some Old Olive leaves with the Leaf Punch. Then I over-stamped those leaves with the large leaf stamp in the Gather Together Stamp Set.
My birthday greeting is stamped with Pretty Peacock Ink and a stamp from the Itty Bitty Greetings Stamp Set. Then I just die cut the greeting with a die from the Ornate Frames Dies and tied the box handles together with a piece of Crumb Cake Nature’s Twine. I just poked the twine through the hole on my greeting tag and pulled the tag up to the box.
I didn’t initially order these dies to make these Mini Curvy Keepsake Boxes but I’m glad I did as there is a LOT you can do with them! Check them out in the Stampin’ Up! Holiday Catalog!