Category Archives: Houston TX

Paper Pumpkin and the Annular Eclipse 2023

Eclipse 2023 Paper Pumpkin Box

Yesterday was an exciting morning in Texas and many other places and surprisingly, Paper Pumpkin helped us see the Eclipse 2023. We had beautiful, perfect weather (after a long, very hot summer!) with clear blue skies. If you had rain or clouds you probably didn’t get to see it.

This was an annular eclipse where the moon blocks the view of the sun from the earth. In a total eclipse, the moon entirely blocks the sun. In this annular eclipse the moon is farther away from the earth so it appears smaller and when it blocks the sun, it doesn’t completely cover the sun which leaves a “ring of fire” around the edge. We didn’t see that here in Houston, but we had about 85% coverage. We could have driven a few hours farther southwest and had better coverage.

Of course we all know you shouldn’t look directly at the sun during an eclipse. We didn’t have the special glasses so we had to use other methods to see the eclipse. First of all, the easiest thing is to look at the sidewalk at the shadows of the leaves from the trees. You can very clearly see the shape of the eclipse.

Eclipse 2023 sidewalk

As time went on there were more and more shadow, in the street, up to our front porch, everywhere! Probably our favorite one was the shadows on the front of the house and the roof.

Eclipse 2023 House

Then my husband was playing around out on the patio in the backyard. I had been working on finishing up some old Paper Pumpkin kits so I had some empty boxes on the dryer inside the box door ready to go out in the recycle bin. My husband grabbed one and did the old pinhole trick of punched a small hole in the box and focusing it on a box on the ground. I realized he was using a Paper Pumpkin box so I got the idea to post it on my blog!

Eclipse 2023 Paper Pumpkin Box

Then he also brought out my mother’s old colander that I still use and that made a fantastic artistic pattern!

Eclipse 2023 Colander

I think this is really cool! Of course, the photo isn’t as sharp as it was seeing it in person but you get the idea!

Eclipse 2023 Colander Art

That was our exciting morning of tracking the eclipse from around 10:30 am to the maximum eclipse around noon, and then ending around 1:30 pm. Besides viewing the eclipse, it was fun to see other neighbors outside and get to chat with them! Usually we are inside our airconditioned houses, but as I said the weather yesterday was perfect for being outside!

So next time there is an eclipse, grab an empty Paper Pumpkin box and let it help you see the shapes of the eclipse without endangering your eyes!

Get your Paper Pumpkin box HERE with a fun papercrafting project inside. All the materials you need are included except scissors. No risk, no obligation! Try it out for at least one month and see if you enjoy it! It’s fun to get a Paper Pumpkin Kit in your mailbox once a month!

Here is the November Paper Pumpkin Kit! Make treat boxes for the holidays! Or use the materials to design your own projects! Sign up by November 10th!

Paper Pumpkin November 2023 Sq Ad2

Go Astros Baseball Card

In case you haven’t heard, the Houston Astros have made it to the World Series and the first game is tonight in Houston!! Woohoo!!! When you are a stamper and cardmaker, you make cards to celebrate all kinds of occasions so I made this Go Astros Baseball Card. It’s fun to make something different that is not our usual cardmaking occasions.

This card has just a Basic White card base, then a layer of one of the In Colors, Starry Sky. For the main top layer I used Pumpkin Pie, cut a little smaller than usual to allow more of the blue to show on the card front. Then I stamped it randomly with some little stars in the Alphabest Stamp Set. I only recently purchased this stamp set, maybe during the stamp sale. Even though I’ve had lots of alphabet stamp sets in the past, I was seeing some cute samples online using this stamp set.

There is also a small punch that goes with this Alphabest Stamp Set that makes it particularly appealing! It’s the Best Label Punch. The punched image is only 1/4″ x 3/4″ so you can see that it is quite small. But it is really fun to use with this alphabet stamp set. I’m looking forward to playing with this stamp set and punch a lot more and seeing what other ideas I come up with and checking out some ideas online!

For the baseball, I simply die cut a circle out of Basic White and drew on the lines with a Real Red Stampin’ Write Marker. If you want the curved lines to be shaped well, just use the scrap from the die cut and use that curve as a guide on the baseball to draw the curved lines.

The letters are all stamped on Basic White with Starry Sky ink, using the outline first. Then I went back and stamped the letters inside and punched out. It’s really fun using that little punch! Then I just adhered the letters in a haphazard fashion so I didn’t have to worry about anything being lined up and perfectly straight! It makes it more fun this way, too!

You could also pop up the baseball and/or the letters with Stampin’ Dimensionals, but I just glued mine down flat on the card.

The Houston Astros have been in playoffs and World Series before. I even got to go to a game with a friend who had tickets! One of the thrills of my life to walk into the stadium for a World Series game (although they lost that game!)! Also a thrill to have a one-up on my son-in-law who is a huge baseball fan who hadn’t been to a World Series game at that point, but now he has been with the Dodgers!

Here is another baseball card I made to celebrate the Astros, even using another alphabet stamp set several years back! If you have an alphabet stamp set, you can do a lot of things with it when you don’t have the proper greeting. But you can also use words like “Celebrate” or “Hooray” and others when you don’t have a baseball or World Series stamp or name of the team! Stars, in stamps or dies, are always great to use!

When you have unusual occasions like the Houston Astros being in the World Series, see what kind of card you can make with what supplies you have as I did with this Go Astros Baseball Card!

GO ASTROS!!

Best Witches Haunt It Halloween Card

Best Witches Haunt It Halloween Card

This Best Witches Haunt It Halloween Card is the first Halloween card of the season! It’s a little early, considering it is over 100 degrees these days here in Houston! I have to say some Halloweens here haven’t been all that much cooler either by October 31st! But weather aside, I wanted to try in my new Halloween stamp set, Best Witches and I was in the mood to color!

You’ll find the Best Witches Stamp Set in the July-December 2022 Mini Catalog or Holiday Catalog, as I like to call it (and type it!) on page 55. The stamp set has two cute witches, a toad, some stars, and some cute sayings! It’s just my kind of Halloween set!

To make this card, I used Granny Apple Green cardstock for the card base. Then I added a piece of Black & White Designs Designer Series Paper to the bottom half of the card. These will be fun papers to use for Halloween or any time. You can leave them black and white or you could color the white parts of the papers.

I stamped the witch in Memento Black and colored her in with Stampin’ Blends. I just chose whatever colors I wanted with no planning so just play and choose whatever colors you are in the mood for. I think I used Smoky Slate and Gray Granite on the witch’s hat, Daffodil Delight for the gold buckle, Fresh Freesia for the hat band, but Highland Heather for her dress. Her face is Ivory with a little pink blush on her cheeks, Petal Pink. Then I cut out the witch by hand with Paper Snips You wouldn’t have to but that was my original idea when I wasn’t quite sure what the background was going to be.

Stampin’ Up! says July is Watercolor Month so I thought I would do a little watercolor background on which to layer the witch. Since I was using Basic White which can’t handle very much water at all, I watercolored VERY lightly. I used the wide Water Painter to pick up just a little bit of ink in the lid of the ink pad with minimal water and just brushed across the paper very lightly. I used Daffodil Delight, Pumpkin Pie, and Gorgeous Grape. You can barely see it but, as I said, I didn’t want much water on the paper which could make the paper pill and look messy. Then I stamped with the small stars stamp in the Best Witches Stamp Set, in Daffodil Delight, on the background. I had also stamped at the top half of the Granny Apple Green with Granny Apple Green ink so that it would just be very light in the background to add a little interest and match the stars on the designer paper.

The Basic White paper was die cut with one of the Stitched Rectangle Dies. The witch is adhered flat on the paper although you could use Stampin’ Dimensionals to pop her up if you wanted to. The greeting is stamped in Memento Black and then cut apart just for fun. I think this would be a fun card to send to a girlfriend for Halloween! I love it! And for a finishing touch, I couldn’t resist adding a bow of Fresh Freesia ribbon in the corner. My other thought was to use Iridescent Rhinestone Jewels for a little sparkle but I did the ribbon for something different.

I love Halloween and I had so much fun making this card! It may barely be the middle of summer but you know time flies so if you enjoy Halloween, don’t hesitate to get an early start on fall. If you are having summer heat like we are, maybe making a fall or holiday card will cool you off! Certainly staying inside in the air-conditioning and stamping will keep you cool! I hope this Best Witches Haunt It Halloween Card will inspire you to think ahead a little bit to the fun days coming up!

SHOP THE HOLIDAY CATALOG ONLINE HERE!

Baseball Fans Need the Hey Sports Fan Suite!

Hey Sports Fan Suite

Here’s something for baseball fans everywhere, the Hey Sports Fan Suite, in the Stampin’ Up! January – June 2022 Spring Mini Catalog. Baseball season is beginning, whether for professional teams or Little League and everything in between! I wish this Suite had been around many years ago when my boys were little and every Saturday (and more) was a baseball game! Maybe you just know someone who is a big baseball fan. How they would enjoy receiving a baseball card or project made just for them with the contents of this Suite!

Part of the Hey Sports Fan Suite is a Bundle – the Your Biggest Fan Stamp Set and the coordinating dies, Sports Events Dies. You save 10% by buying the Your Biggest Fan Bundle rather than the stamp set and dies separately. You receive the same discount purchasing the Suite, as far as the Bundle goes, entering the product number for the Hey Sports Fan Suite (157896) just saves you the time of entering each product in the whole Suite separately (assuming you want everything!).

The Suite comes with the Bundle, the Fan Baker’s Twine, Resin Stars, and the Hey Sports Fan 12″ x 12″ Designer Series Paper. The designer paper will be good for cardmaking but also scrapbooking. Perhaps if your kids played ball a few years back but you never got to those scrapbook pages, get the paper now and you’ll be inspired to make some of those scrapbook pages. Or use the paper as a background to frame some baseball photos or act as a mat. The Resin Stars can be used for other projects, not related to baseball, as can be the twine, so you might want to pick those up even if you are not into baseball. You might even find uses for the stamps and dies not related to baseball. Just the shapes can be used for many other sports or activities. Just think outside the box.

With spring and summer comes baseball. The sound of a baseball game on the radio or TV always takes me back to my childhood, maybe a lazy Sunday afternoon listening to or watching the baseball game. Growing up in St. Louis my family was Cardinal fans. I remember going to my first baseball game with my Girl Scout troop and in junior high, we could earn free baseball tickets if we got good grades! I can see my grandpa listening to the game on his big transistor radio. One time, as his eyesight was failing, he asked a family friend, who was a really big baseball fan, if he would take him to a Cardinal game along with that man’s kids and my brother and me. My grandpa paid for good seats for all of us so he could see better. When my husband and I and our baby got transferred to Houston, one of the first fun things we wanted to do was go to an Astros game at the Astrodome! I remember even dressing up a little bit, to sit in the bleachers, because “it was the Astrodome!” I remember being on a tour of the Astrodome when it was new when my family made a trip to Houston to visit friends who had moved here. It was impressive! And when the Astros played in the World Series several years ago, I got to go to a game with a friend, the only time in my life I’ve had “connections”! It was the thrill of a lifetime to walk into that stadium knowing I was at the World Series!

Be sure to check out the Hey Sports Fan Suite or the individual products in the Spring Mini on pages 68-69.

Beauty of Friendship Fall Trees Card

Beauty of Friendship Fall Trees

Last night we were out for a walk and the sky inspired me to make this Beauty of Friendship Fall Trees Card. We can’t really see the pretty sunsets very well because we aren’t up high enough and our neighborhood now has lots of big trees in the way. But last night as we were walking back to the house the silhouettes of the trees against the bits of the orange-ish sky we could see in between the trees was really pretty.

I knew that kind of a “sunset” card would likely turn into a Halloween card, but actually I think being a fall card is just perfect! The greeting is in the Banner Year Stamp Set. The full saying is, “Happy Fall, y’all!” but because of space I just cut off the last word and lined it up with the edge of the front layer of the card. I think it also covered up an ink smudge! And I added a bow with Linen Thread.

The card base is Garden Green. The card layer is Basic White. I used my Blending Brushes to add ink to the Basic White. I would say just pull out a bunch of ink pads you think you might want to use! I started with the sky with a light Balmy Blue but added a bit of Smoky Slate gray. Next I added some yellow below the sky. I used some Crushed Curry as well as Mango Melody. For the grass I used Pear Pizzazz, but then stamped with the little “mound” stamp in the Beauty of Friendship Stamp Set. It could be used for grass or dirt or just a little something when you need some texture or something extra. Some I stamped directly, using Mossy Meadow Ink and some I stamped off. I got a little carried away with the stamping and didn’t notice my block had ink on it and I was getting some smudges everywhere!! But there’s always a way to doctor things up a little bit with more stamping or more color or covering up or something! I decided the orangish sky needed to be a deeper color because when we were out walking it was getting darker outside quickly so I added some Pumpkin Pie ink. There are no right colors and layers, etc. just play and experiment. Just keep going and you’ll get to where you want to be.

I was almost afraid to stamp on my beautiful sunset background and indeed, I did mess up the first tree I stamped! Luckily, I was able to stamp the second tree to covered up some of the branches that didn’t come out! I stamped some green leaves from the stamp set over those two small trees. I used Early Espresso Ink.

However, the large tree is die cut with the Beautiful Trees Dies out of Early Espresso Cardstock. I thought about using Basic Black but used the brown color. I didn’t try to add any leaves to this tree because I wanted the sky to show through (even though leaves are not falling here yet in Houston!).

Of course this fallish looking card just screamed for some pumpkins here in October! I stamped just the smallest pumpkin from Pretty Pumpkins with Memento Ink, cut them out, and colored with Stampin’ Blends. I glued two down directly on the card and one is popped up on Stampin’ Dimensionls®.

To cover up a smudge or two and just because who doesn’t love adding some gems to a card, I added three of the smallest Elegant Faceted Gems in pearlescent white. The other colors in the package are Clear and Petal Pink. I thought about just using one of the largest ones to look a little like the moon coming up, but you know, you can’t resist adding gems once you start so it had to be three!

Here’s a tip: Before cutting out something intricate like the die-cut tree, add Adhesive Sheets to the back of the cardstock so you already have adhesive on the back and don’t have to add tiny dots of Multipurpose Liquid Glue to the back! It never occurs to me until right before I go to adhere it!

You can use a card like this all this month and through November for fall, Halloween, and Thanksgiving! I hope you will get out your Blending Brushes or Stamping Sponge piece and make your own sunset, like on this Beauty of Friendship Fall Trees Card.

Art Gallery Floral Card For Spring

Art Gallery Floral Card For Spring

I may have missed the first day of Spring, but this Art Gallery Floral Card For Spring is for the second day of Spring! I was pleased with how this card turned out with “just stamping”. The large flower stamps in the Art Gallery Stamp Set can be used with two-step stamping which adds extra interest, texture, and dimension with the possibility of different colors on the same flower.

For this card, I used pretty bright colors, like Melon Mambo for the card base and for the first top flower. I think with the holidays and winter, I hadn’t used Melon Mambo for a long time and it’s one of my favorites. For the other flowers, I used Daffodil Delight and Highland Heather, plus Mango Melody and Melon Mambo for the smaller flowers.

When you do two-step stamping, one way to do it is to ink up your stamp and then stamp lightly on scrap paper first, then stamp the image on your cardstock. This gives a light image, over which you can then stamp the second stamp, usually a little more detailed, which then shows up darker over the light image but doesn’t fully cover it at all. Or you can do it in reverse…..stamp the detailed image first and then the lighter image. Depending on the stamp, you might even be able to stamp full strength both times if the detail shows up well enough.

With two-step stamping, you can also use two different colors on the stamp. For example, you could stamp the lighter color in yellow and then use an orange shade for the second stamp. It might produce a colorful, shaded version of a flower like you might see in nature.

In order to stamp the large stem and leaf stamp in the set now on my card with not much space in between flowers, I stamped the large flower on scrap paper and then cut it out to use as a mask. After inking up the leaf stamp, I placed the cut out mask over the flower that would get the green ink on it if not covered. Then I stamped the stem and leaf. That way, the extension of the leaf and stem gets stamped over the mask instead of ruining your stamped flower. Then remove the mask and place it on another flower. Maybe don’t ink you the whole leaf image if that works so you don’t get ink where you don’t want it.

For the greeting, I simply stamped it right on the card. I could have made it a layer, but I ended up with that small empty space at the top of the card and it seemed perfect to just put the greeting there. This greeting is also in the Art Gallery Stamp Set as are many other choices in sentiments.

While you can use Basic White or Very Vanilla for the top card layer, for a change I used Shimmery White Cardstock. This is my favorite paper because it has a subtle shimmer. It’s just beautiful! It usually doesn’t photograph because it is so subtle, but in person, you can see it. You can stamp well on it and you can watercolor on it better than Basic White. Use Shimmery White when you just want something a little more special! It’s very nice paper!

Hopefully you are feeling spring where you live! We have certainly had some beautiful spring days to be outside in Houston lately, although it has been a little chilly in the mornings. In spite of our winter storm, our grass is turning green again (maybe a lot of weeds!) and the azaleas are blooming! The bugs are back out (yuck!), especially the mosquito hawks, that like to hang around doors and fly in the house. This is the perfect weather which we have to enjoy until the very hot, humid summer arrives.

Celebrate spring by making a few light, bright, and colorful cards after the doldrums of winter! It will lift your spirits and those to whom you send the cards!

SHOP STAMPIN’ UP! ONLINE HERE!

Winter Weather in Texas

If you have been keeping up with the news about Texas this week and the terrible winter weather we are having here, we have been in pretty good shape at our house. Other houses in our neighborhood have not been as lucky. Our power stayed on until last night just as we finished dinner but came back on in four hours!! Thank goodness! The temperature was also just above freezing so not as miserable as it has been for many people.

When I was wishing I could have some hot water for tea or hot chocolate, I wondered if I still had a fondue pot that was a wedding gift many years ago and I found it! We even had sterno so I was able to heat up a small amount of water in the fondue pot very quickly (to my husband’s surprise!). Just as I got half a cup of hot chocolate made, the power came back on.

Yesterday morning we had “precipitation” but lucky for us, our temperatures were above freezing so we just got rain. Areas north of us weren’t as lucky I’m sure. We did have sleet for a moment that we noticed. While thinking about the rain coming down and wondering if we could put out containers to capture the water, my husband said there was a lot of water running down the valleys on the roof. So I emptied some plastic storage containers and found others plus buckets and we placed those around the front side and back of the house. Then my husband would go out and check them, dump the water in the containers into a bucket and bring it to the door for me. I would then dump the water into our bathtub which was just partially filled with water and we filled that up for water for flushing the toilet! When you don’t have water or water pressure, you need to pour water into the toilet and it takes a lot! A couple of gallons! So you would use up bottled water pretty fast. So that was a great idea and we got a lot of water we wouldn’t have otherwise. And who knows how much we will need.

While we are used to prepping for hurricane season, I think this winter weather has made a lot of us think about preparing for a different kind of season. It may not happen like this again in years and years. Just like before a hurricane, I made sure all the dishes were washed in the dishwasher, that all the clothes were laundered, I knew we had a lot of bottled water, we had just gotten groceries. For hurricanes, we always make sure the gas tanks are full in the car because if the power is out, you can’t pump gas at the gas station and they aren’t opened. This storm, people were sitting out in their running cars to warm themselves up if they didn’t have power. People were standing in long lines yesterday to get their propane tanks replaced or refilled because that’s the only way you could cook. In hurricane season you can evacuate or you can likely leave or get a hotel room if your power goes out, but here, at least the first couple of days/nights the streets were too icy to be driving. People stood in line at the grocery stores when they opened to get food and especially bottled water. So overall we just didn’t imagine we would need the preparation we all know about for hurricanes.

The temperature is a couple of degrees above freezing today and next week it should be 70! How can that be?! Eventually, this will be in the past, although lots of people all over Texas are going to be needing plumbers and all kinds of help. And while we are concentrating on Texas, I know there is bad weather all over the country. I think 2020 just doesn’t want to let go! Another really cold hard freeze is predicted tonight and then things should improve. Stay warm, wherever you are!

Houston Winter Storm 2021

Houston Winter Storm Feb 14-15 2021

This may not look like much to those of you farther north, but this is pretty rare for Houston, Texas, especially these really cold temperatures in this Houston Winter Storm 2021. We were warned for a couple of days that this was coming and to get prepared. I just kind of went by my hurricane preparations! Luckily we had just gotten a regular grocery order so we have plenty of food. Filled some pitchers and other containers with water, even though we have plenty of bottled water, just in case. Batteries, phones charged, tablets charged, etc. So far our power is still on, but lots of people do not have it which would be miserable.

The sleet didn’t start at my house until after dinner, in the dark, so we didn’t get to “see” it, but we could hear it. I was constantly running to the front or back door to see if it was snowing yet! Later on during the night it actually snowed but it was mostly over by the time I got up this morning. I did catch the last little band of snowflakes, so I can say that I DID SEE it snow! Too bad it all didn’t come in the daylight!

It’s bitter cold for here, 18 degrees! I know it is colder other places but this is really low for Houston. And it will get colder tonight into tomorrow, so even though we have some sunshine today, they say we won’t have melting. Surprisingly, there are barely any cars on the highways, but luckily it is a holiday so I’m sure that is keeping more people home.

Houston Winter Storm 2021 BBQ grill
Houston Winter Storm 2021 across the street

If there wasn’t ice underneath that snow, I would be out there playing in it! I may be old enough for Covid vaccines, but I’m still a child at heart!! But don’t want broken bones either, so I’ll just look from my door!! I can’t even go across the street to take a photo of our house!

And of course, if it is snowing, it really calls for baking chocolate chip cookies!!

It’s supposed to stay below freezing and get colder tonight. We’ve got a bit of sun but I guess it’s not going to do much! Good day for staying in and stamping!

I’m sure yesterday being Valentine’s Day had something to do with this winter storm! How many floods and hurricanes have we had on holidays the last few years?? And I guess with today being President’s Day, that just made it doubly worse!

If you are having winter weather (and most everyone is!), stay inside if you can, stay warm, stay healthy, and be careful!

Arrange a Wreath Happy Birthday Card

Arrange a Wreath Happy Birthday Card

I got several very nice cards for my birthday a couple of weeks ago and this Arrange a Wreath Happy Birthday Card was made by my dear, long-time friend who got me into Stampin’ Up! in the first place!

I still remember stopping by her house when we were in town to go to a wedding shower and her taking just a few minutes to show me some projects she had made at a party by this company called Stampin’ Up! that I had never heard of. I barely knew anything about rubber stamping and had not been successful in my stamping attempts with stamps from the craft store, but her projects were so cute!! She had just received her Starter Kit but hadn’t opened it yet and we didn’t have time that day anyway. When I went back later in the summer for our friend’s wedding, I got to spend time stamping with her and fell in love with it! I didn’t really want to go anywhere else or do anything else, just stay at her house and stamp or look at the cards and things she had made. A few months later, I think, I signed up to be a Demonstrator.

This card was made with the Arrange a Wreath Stamp Set and Wreath Builder Dies. You can purchase both together in a Bundle and save 10%. I have seen some really cute cards made with this Bundle so I just might have to purchase it myself someday!

The card base is Sahara Sand with a layer of designer paper. You could choose something from the In Good Taste Designer Series Paper that might look similar. The wreath is die cut with the Wreath Builder Die out of Old Olive Cardstock. Then you can diecut some flowers from the set in any colors you like to decorate the wreath She used some enamel dots for the flower centers. I think the little Happy Birthday sign hanging from he wreath is so cute!

Obviously you can use this wreath for LOTS of occasions and all the seasons of the year, making this a very versatile stamp set. I love this card!

The latest reports about Hurricane Laura are that Houston is “out of the cone” so we should just have minimal effects, maybe some bands of rain and some gusty winds. The storm will go in around the Texas-Louisiana border which is certainly bad for those people. I just hope our power stays on! We’ve been lucky through many storms but you never know when your power might go out seemingly for no reason! We were making hurricane preparations anyway when it looked like it was coming directly here, so we have batteries and candles and lanterns and a ton of chocolate chip cookies I baked last night!

Take a look at the Arrange a Wreath Bundle for your next Stampin’ Up! order. You’ll find it in the Stampin’ Up! Annual Catalog on page 127 with the dies on page 173. Don’t forget to use your Bonus Coupons from July by August 31 when they expire.

SHOP STAMPIN’ UP! ONLINE TODAY!

New Holiday Catalog Today and New Online Store!

August-December 2020 Holiday Mini Catalog
Click to View the Catalog PDF Online!

Big day at Stampin’ Up! The August-December 2020 Mini Catalog is LIVE with all kinds of fall and holiday seasonal products that I am sure you will love! Click the link or the catalog photo to view all the pages of the catalog!

SHOP the Holiday Catalog!

AND…..

We have a new look to the Stampin’ Up! Online Store today!

SHOP The New Online Store!

Click the link above and it should take you to the Home Page of the Stampin’ Up! Online Store! Please check to see that my name, as your Demonstrator, shows up at the top on the left side. If not, you will have an opportunity to choose me as your Demonstrator before you place your order. After that, my name should come up as your Demonstrator.

I can’t wait to hear how you like it! Just take some time to play around in the new website! You can even click a tab on the side and leave Feedback for Stampin’ Up! if you have problems or simply want to leave a comment, good or bad.

If your computer normally remembers your password, it likely will not log you in to your account because it is a new website. If you KNOW your password, just type it in manually along with your email. If you do not remember or know your password, that’s okay! Just click on the “Forgot Your Password” link and an email will be sent to you to reset your password. If it doesn’t seem to show up, check your Spam folder.

BONUS COUPONS! Remember, starting today you can use your Bonus Coupons you may have earned in July! You will see where to add them on your order page. If you have more than one, you can use all of them or you can use only one or whatever you want. Just remember they expire August 31.

Coupon codes will now be entered one at a time in the Coupon Code section of the Order Summary window (by entering it into the field and clicking “apply”).

If you have a large order and reach $150 or more and earn Stampin’ Rewards, remember that using the coupons will reduce your total so you will need to have $150 or more total AFTER coupons are added in. Let me know if you have questions.

HAVE FUN SHOPPING AND PLAYING!

Coming Soon! Tomorrow! New Look to the Online Store!

Coming Soon Announcement

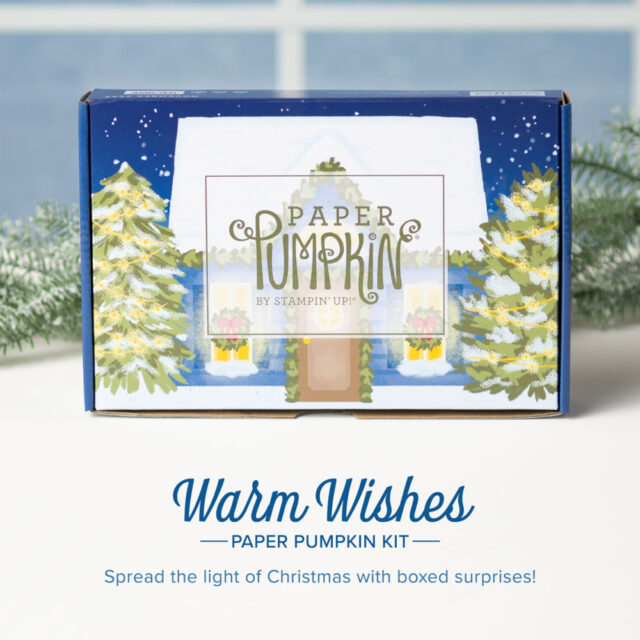
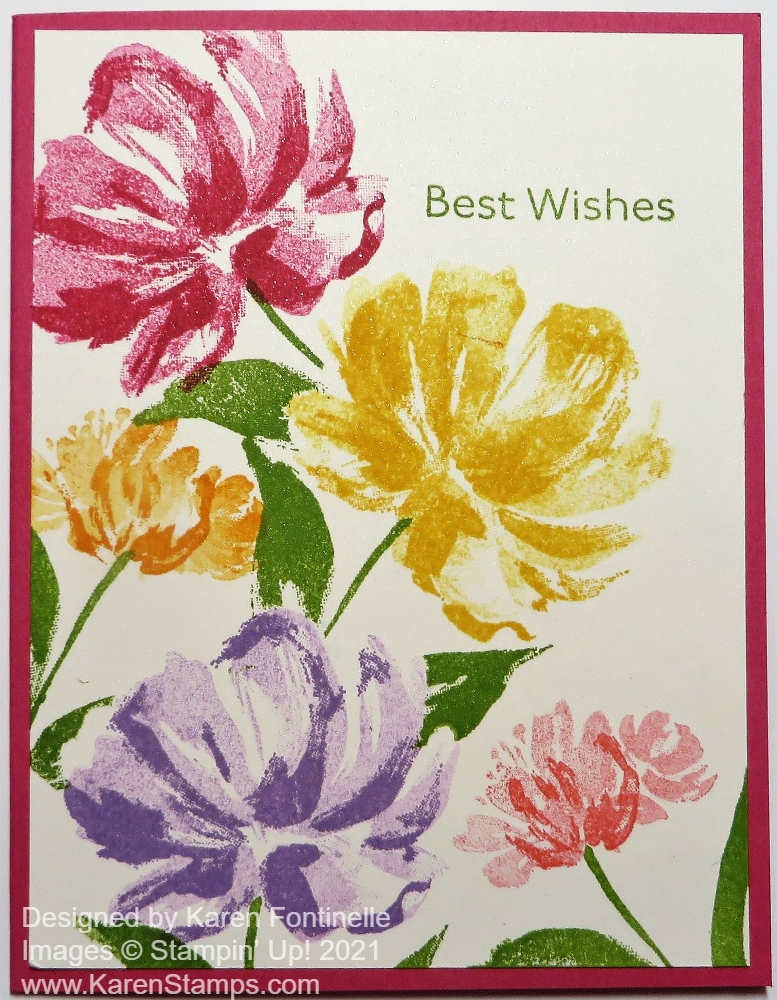
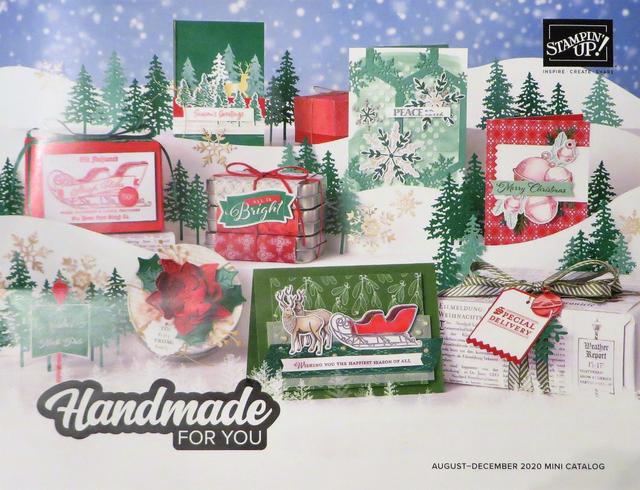
We all know that tomorrow, August 4, 2020 is the first day of the new August-December 2020 Mini Catalog for the holidays, but it will also be the first day of the new Stampin’ Up! Online Store! Yes, the Online Store is getting a makeover and from what I have seen of it, I think you will be pleased! When you log in tomorrow to shop the new holiday mini after 7 AM Mountain Time (that’s 8 AM Central Time, 9 AM Eastern Time, and 6 AM Pacific Time) you will see the new look!

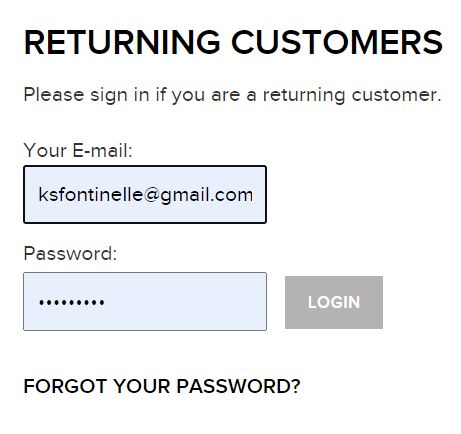
Your assignment for today, to get ready for the new Online Store website, is to either make sure you have your password written down or that you know it, OR click on the “Forgot My Password”. The first time you log into your Online Store account on the new website, the website won’t “remember” your password so you will have to enter it yourself. If you don’t KNOW what it is or have it written down in a super secret location, just click on the FORGOT YOUR PASSWORD link and follow the steps to get a new password. If you don’t receive the email soon after, check your SPAM folder in case it went there!

SU Change Password

As you can see in the photo below, my password is encrypted so if I didn’t have it written down I might not remember exactly what it is. Since the store will essentially be a new website, you have to sign in yourself the first time. You will have to type in your password yourself.

If you are doing this today, Aug. 3rd, you CAN also sign into your account as it is today, then click on “My Account” in the upper right corner. Scroll down a tiny bit to MY ACCOUNT, then click on the tab for EMAIL/PASSWORD and change it in there. Be sure to click to SAVE changes! Then WRITE DOWN YOUR PASSWORD. The first time you log in to the new store you will have to put in your password yourself so you have to know what it is. If you need help, let me know!

IF you have bookmarked the Online Store, your bookmark might not work tomorrow (or maybe it will?).

If you have previously chosen me as your Demonstrator, I think it still should show me as your Demonstrator. If not, you have an opportunity to choose me as your Demonstrator. Or if you clicked on a product link on my blog to my Online Store, it should show me as your Demonstrator. In any case, you might want to check that you see my name on your Store page.

If you are new to shopping online at Stampin’ Up, during the ordering process you will have a chance to choose a Demonstrator. You can look up a name or search by location. Here is my name: Karen Fontinelle #54345 Houston, TX

If you just want to check out as a Guest, Stampin’ Up! will assign a Demonstrator near your location just for that one order, as all orders go through a Demonstrator, but I think you can choose if you want any further contact from that Demonstrator or not.

There are some great new features coming in the new Online Store! Product photos will be bigger, you can sort in various categories, like color or price, you can mark Favorites, you can even have a Wish List that you could share with someone! I think it will be pretty intuitive and I think we will like it!

The main hurdle will be knowing your password in order to sign in since it will be a new website and your browser will not recognize it like it does most websites you frequent. Just so you remember to do it and save yourself the hassle later, either check what your current password is so you can log in or click on the Forgot Password button and then change it. This also might be a good time while you are in your account, to make sure your address is up-to-date as I can not go into your online account to change any of your information and you don’t want your order going to the wrong location!

You are welcome to call Stampin’ Up! as well if you need help. 1-800-STAMP-UP You probably should expect phone lines to be jammed tomorrow, however, with the new website and new catalog!!

ALSO….BONUS DAYS!! TODAY, August 3rd, is actually the LAST DAY to order and receive $5 bonus coupons to use in August. I may have said July 31 was the last day but then I remembered it did run through August 3rd! For every $50 you spend during Bonus Days, you will receive a $5 Bonus Coupon to spend on an order in August.

The new Holiday Catalog, the August-December Mini, begins tomorrow so get your list ready!! If you are new and interested in Stampin’ Up! products and would like a complimentary catalog (or even the Annual Catalog as well), I would be happy to be your Demonstrator and send copies to you! Just send your contact information to me at Karen@Karenstamps.com.

I hope you are as excited for tomorrow as I am! The Holiday Catalog is jam-packed with products! The link to that catalog will go up tomorrow plus, of course, you will see the products in the new Online Store!

Let me know if you have any questions about the new Online Store or Holiday Catalog! Thanks for shopping with me!

Highland Heather Sunflower Thank You Card

Highland Heather Sunflower Thank You Card

This started out not to be a card! I was going to stamp a sunflower and die cut it and decorate a glass votive candle holder. The sunflower was going to be a little large for that project and when I laid it down on the table I thought it would look pretty on a card. That is how this Highland Heather Sunflower Thank You Card came to be! Don’t be afraid t change your mind from your original idea!

I decided to make my sunflower a different color than yellow, so I happened to choose Highland Heather for the color. I stamped the largest sunflower in the Celebrate Sunflowers Stamp Set in Highland Heather Ink. I die cut that sunflower, as well as the outline, with the Sunflowers Dies also out of Highland Heather Cardstock. I didn’t know if this would be enough contrast or not, but I liked it. I added the die-cut center out of Bumblebee cardstock.

The leaves are stamped in Granny Apple Green Ink on the same color cardstock, then die cut. The leafy stems are cut out of Garden Green Cardstock. The sunflower is popped up on Stampin’ Dimensionals and then I slid the leaves partially underneath. The greeting is also in the stamp set and is stamped in Highland Heather ink. The card base is Highland Heather.

In spite of not planning to even make this card, I was really pleased with it and may even copy myself and make some more, maybe in different colors! We are artists and can be creative with whatever we make!

The sunflower’s name comes from its tendency to face toward the sun. I didn’t even think of any symbolism about the sunflower, but I’ve read that it can symbolize adoration and loyalty. And it may mean something a little different across other cultures. Apparently it is an easy plant to grow because it is heat and drought tolerant and grows in the summer. If heat is good for sunflowers, I could be growing sunflowers filling my whole backyard because it is so hot here in Houston!!

I also stamped a Whisper White layer for inside the card with the smaller sunflower in the set just with Highland Heather Ink. That makes it easier to stamp or write a message inside the card on white instead of purple. While I had the stamp and ink out, I also stamped a corner of the envelope to make it pretty as well! Hopefully the envelope will not get separated from the card and I’ll remember to use it!

If you like sunflowers, this is a popular stamp set so check it out in the Online Store. And if you like the Sunflower Dies as well, you can buy both the stamp set and dies in the Celebrate Sunflowers Bundle at a 10% discount.

SHOP STAMPIN’ UP! ONLINE HERE!

Highland Heather Sunflower Thank You Card

Last Day! Two Stampin’ Up! Offers!

Last day for Annual Catalog Kickoff Celebration!

Today, June 30th, is the last day to take advantage of the great offer of an EXTRA $25 in Stampin’ Rewards with an order of $250 or more! If you have a long list for the new Stampin’ Up! Catalog, you might want to take advantage of this offer today! To begin with, you would earn $25 in regular Stampin’ Rewards with a $250 order and then you would get to spend an extra $25 on top of that! So with a $250 order or more, you get to choose $50 in free merchandise right away on your Stampin’ Rewards!

You can collect orders from some friends to get a large enough order, or think ahead to the holidays! Maybe there is a card kit or craft supplies that anyone can use like ribbon, scissors, adhesive, or notecards that you can give as a gift! And don’t forget to shop the Clearance Rack if you need a little more to add!

SHOP HERE!

And also……

Pick a Free Bundle Promo June 2020 Recruit
Click for Information!

If you have thought about becoming a Stampin’ Up! Demonstrator and starting your own business, today is the last day to take advantage of the Pick a Free Bundle Promotion! Any day is a good day to join Stampin’ Up! but if you want a little extra in your Starter Kit, do it today!

Check out the Stampin’ Up! Bundles HERE!

To become a Stampin’ Up! Demonstrator, you simply purchase the Starter Kit for $99, but you choose $125 worth of product to put in it! You also receive catalogs and business supplies and a Paper Pumpkin Kit. And today you will also choose a Bundle for your kit!

Click HERE to read about joining and then feel free to ask me any questions! If you would like to sign up under a Demonstrator local to you, click on “Find a Demonstrator” in the top black bar. Otherwise, I can help you from afar!

Don’t Miss Out On My Weekly Emails!

Email Newsletter

The new Stampin’ Up! Catalog is less than a month away from going live on June 3rd so there is no better time than NOW to stay in the loop and find out the latest from Stampin’ Up! To do that, sign up for my Stamping With Karen Mailing List and get an email every Tuesday with any Stampin’ Up! updates and also stamping ideas from me!

If you are on my blog, you will see a red sign-up box in the top left corner where you can simply put your name (or first name) and best email. If you are on your phone, you probably need to scroll way down to get to the sidebar things. OR you can go to my sign up page HERE.

Be sure to check your email for your FREE GIFT from me for signing up!

I send out a weekly email every Tuesday afternoon with the latest Stampin’ Up! news and offers plus stamping ideas with a supply list and directions. Even if you never make the project, maybe just seeing ideas will do your crafty heart good! I know it does mine! I’m all about the ideas!!

See you on Tuesday!