Tag Archives: Mini Curvy Keepsake Box Dies

Christmas Mini Curvy Keepsake Boxes

Christmas Mini Curvy Keepsake Boxes

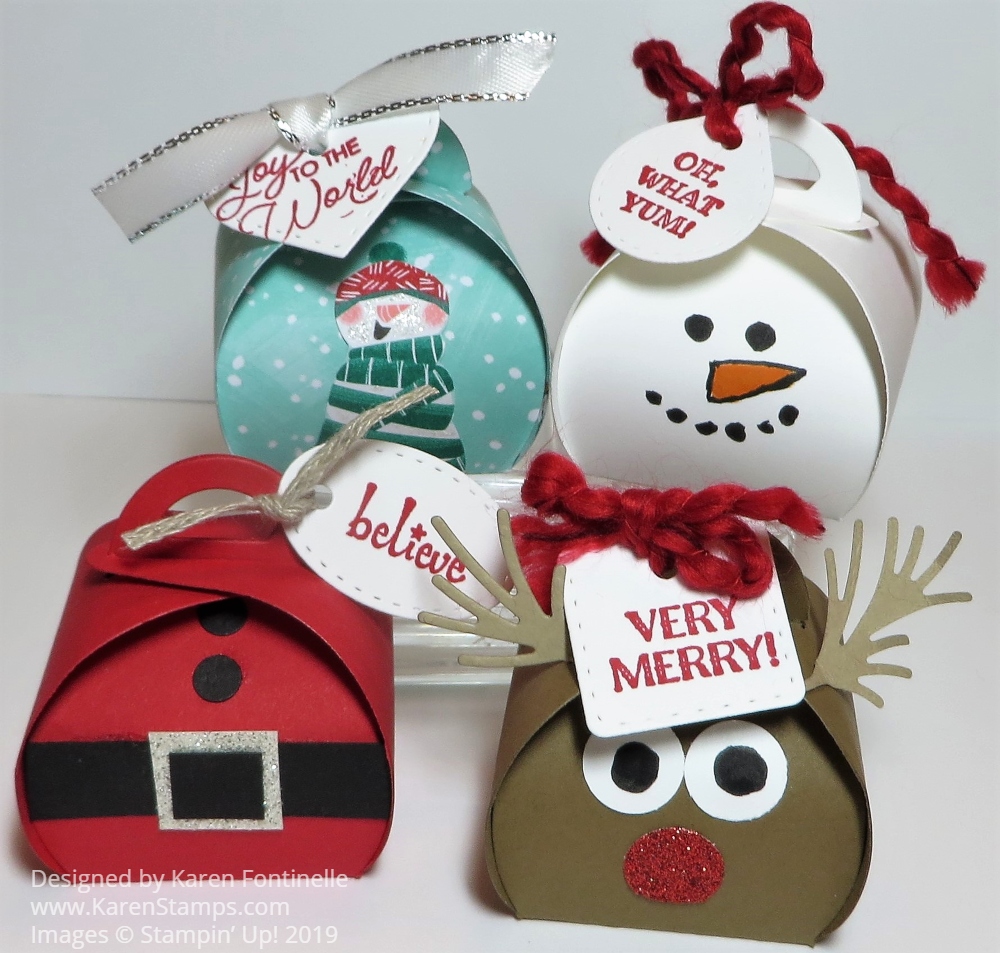
I thought it would be fun to just make some of these Christmas Mini Curvy Keepsake Boxes to have on hand for the holidays – now that the holidays are upon us!! These are just easy boxes that you have probably seen online, nothing too creative, but cute nonetheless!

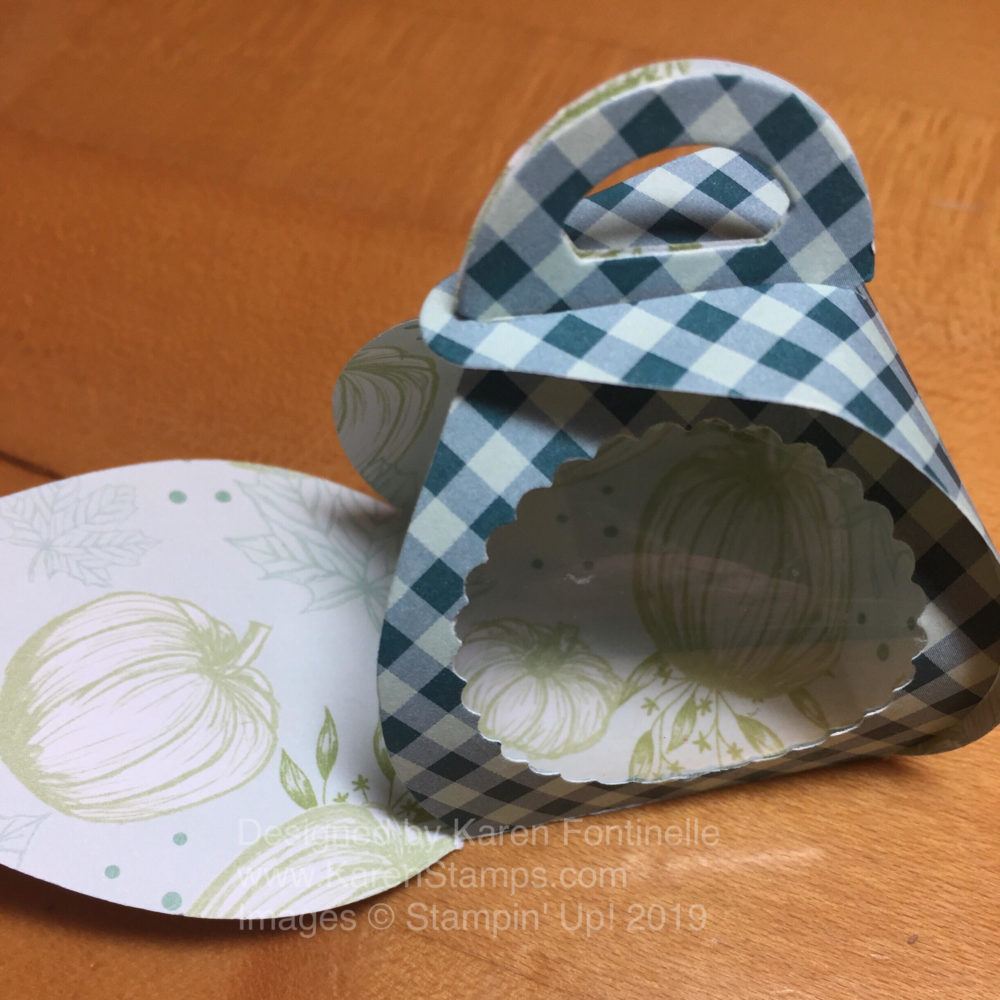
All you need to make these and other cute creations is the Mini Curvy Keepsake Box Dies. The one big die cuts out the box and then you also have little tags and other pieces you can use. Very creative people make the most creative characters and designs with these boxes!

Snowman Face Mini Curvy Keepsake Box

This easy snowman is made with Whisper White Cardstock and I just drew on his face with Stampin’ Write Markers. You could alternately punch out pieces for his eyes, nose, and mouth but for me, it was easiest to draw. I used the greeting from the Itty Bitty Christmas Stamp Set. The Real Red Curly Ribbon makes a cute way to tie on the tag and add a little something to the snowman.

Santa Outfit Mini Curvy Keepsake Box

This little Santa box is easy to make with Real Red Cardstock and a bit of Basic Black scrap and Silver Glimmer Paper. Use a hole punch for a couple of buttons on Santa’s suit. To make the belt, just adhere a narrow strip of black cardstock. Add on a square of Silver Glimmer Paper and then adhere a smaller square of Basic Black on top of the glimmer paper to make it look like the belt going through the buckle! The greeting is tied on with a piece of Braided Linen.

Snowman Mini Curvy Keepsake Box

This keepsake box uses a piece of the Let It Snow Specialty Designer Series Paper with a snowman from another piece of the paper that is cut out and adhered to the side of the box. If the recipient opens up the box, they will find the cute inside pattern of lots of little snowmen. The only trouble with prints and this die is you would have to make sure the patterns and designs are going in the direction that you want. The greeting is stamped from Itty Bitty Christmas and tied on with a bit of the Silver 3/8″ Metallic-Edge Ribbon.

Rudolph the Reindeer Mini Curvy Keepsake Box

This cute little reindeer can be made various ways. He is made out of Soft Suede Cardstock for his body and a lighter color for the antlers, Crumb Cake. Of course you must you Red Glimmer Paper for Rudolph’s nose. The eyes are punched out and the black pupils colored in with a black marker. The antlers are glued on by bending back the stem of the die-cut piece and just glued on the top of the box. The tag, stamped with a greeting from Itty Bitty Christmas, is tied on with the Real Red Curly Ribbon.

As you can see, you can do a lot with these dies, much more really than these samples. But once you start making things with this box die, you can almost not stop!

if you don’t own the Mini Curvy Keepsake Box Dies, you might want to check them out in the Online Store. You can put a small gift or treat inside. Their little size makes them especially cute!

SHOP STAMPIN’ UP! ONLINE HERE!

Mini Curvy Keepsake Turkey Box Treats For Thanksgiving

Mini Curvy Keepsake Turkey Box Treats For Thanksgiving

At least these three turkeys are done for Thanksgiving (but not the real one!). These Mini Curvy Keepsake Turkey Box Treats For Thanksgiving are quick and easy to make and you could make any number of variations. There are so many cute little things you can make for lots of occasions with the Mini Curvy Keepsake Box Dies!

I always think these take two pieces to make but they do not…..just one die cut! You just need a piece of cardstock 6″ wide and turn the die so the points of the die-cut “point” to the corners of the cardstock, not straight up and down, and the die will fit. I used Crumb Cake Cardstock but Soft Suede would be another good choice for the turkey.

To make the tail feathers, I just used the oval tag die-cut in the package of the Mini Curvy Keepsake Box Dies. It does have a little hole in the tag, but I just put that at the base of the feather and it’s not seen. I started to glue the feathers right onto the body but then I thought to punch a 1 1/2″ Circle of Crumb Cake Cardstock and adhere the two rows of feathers on to that and then that onto the turkey body. You could also use colored leaves die cuts or even just strips of cardstock in various colors.

For the turkey face, I just used some stick-on googley eyes and cut a little turkey beak out of Crushed Curry. For the wattle, I punched out a sprig from the Leaf Punch and then cut off the leaves and used those for the turkey wattle. Just use and do whatever you think up or have on hand!

Don’t forget to put a little treat inside! I also tied on a piece of Lovely Lipstick 1/8″ Grosgrain Ribbon partly to hold the box closed for sure and mostly just for another little something to jazz up the turkey box!

You could make one for each of your guests at Thanksgiving and place them at their seat at the table. Or even put a little strip with the guest’s name on it at the bottom of the front of the turkey for a place card. I used to always love to make place cards for the table when I was a little girl!

If you are hosting Thanksgiving dinner, make a fun little treat or favor like these Mini Curvy Keepsake Turkey Box Treats For Thanksgiving or take a few for your hostess!

Have a Happy Thanksgiving!

Mini Curvy Keepsake Halloween Boxes

Mini Curvy Keepsake Halloween Boxes

These Mini Curvy Keepsake Halloween Boxes are so easy and fun to make! We’re already through the first week in October so Halloween is approaching! It’s time to make some fun treat boxes or use them just as Halloween decorations!

The main thing you need is the Mini Curvy Keepsake Box Die to make these treat boxes. There is the one main die to make these boxes and then quite a few smaller dies for miscellaneous things plus tags. Just lay the die diagonally on a 6″ x 6″ piece of cardstock and it will fit. This die scores the lines where you need to fold.

If you want to make some Halloween treat boxes like mine, do the decorating first before you assemble the box. You might partially assemble the box by creasing all the score lines and see how the box will go together and decide which side you want to be the front of your project. The first time I used this die I had trouble getting the sides to fit over the handles. I found it useful to crease those handles on the score line first, then push down on them as you fit the side slits over them.

To make the Pumpkin Mini Curvy Keepsake Box, I just drew Pumpkin Pie Stampin’ Write Marker lines on all four sides of the box. For the nose, I just snipped a piece of Basic Black cardstock. The mouth, as you can tell, I just drew on myself with a Stampin’ Write Basic Black Marker. It is not a good mouth AT ALL, but I thought I would leave it so you can see a Demonstrator doesn’t do things perfectly either!

If you have the Harvest Hellos Stamp Set, you could stamp the pumpkin face on the box instead. However, you might like adding Googly eyes to your pumpkin. I just used some retired Stampin’ Up! eyes I already had, but you can purchase the cute colored Assorted Googly Eyes in the Holiday Catalog. I also just die cut a leaf and adhered it to the top of the pumpkin box. Any kind of leaf will do and you could also add a greeting if you liked.

For the Frankenstein Mini Curvy Keepsake Box, you can draw or make the face however you like. Look through your dies and see what little pieces you could use to embellish the face. I also added googly eyes to Frankie. You can’t see it, but I cut a piece of Basic Black Cardstock to resemble his bangs, but I made it too short and you can’t really see it on the box tucked up under the top. I just added a greeting that I made into a tag and tied it on with a double piece of the Mossy Meadow Linen Thread in the Magnolia Lane Ribbon Combo Pack. The greeting is stamped from the Itty Bitty Greetings Stamp Set (a must-have, I think!).

There are SO many creatures and critters and boxes and things you can make with these Mini Curvy Keepsake Box Dies, even ideas from back in the day when we had the larger ones. Use them for treats or small gifts for Halloween, Thanksgiving, Christmas, birthdays (like this one), Valentine’s Day…..well, all the holidays and most occasions that you can think of! But I really like these Mini Curvy Keepsake Halloween Boxes!

Shop the Stampin’ Up! Online Store!

Fun Stampin’ Up! Videos After the Houston Floods!

Yesterday was a very wet day in Houston – actually, the third wet day in a row in Houston, which you probably heard about on the news. On Tuesday there was a tropical depression in the Gulf of Mexico which got named Imelda pretty quickly, which I did not take as a good sign that they named a storm! That means it reached certain criteria and that usually isn’t good!

We knew we would get rain, but we needed rain, so at least for the first day it would be good. It all would depend on where you lived and where this storm went how much rain anyone would get. Unfortunately, even the first day coastal towns and towns east of Houston got a lot of rain and flooding. The second day Houston thought the storm had moved on and we dodged a bullet….but then we got big storms late in the day from the heat. Then yesterday, or even the night before for lots of people, the city of Houston itself got plenty of rain, flooding highways and roads and houses. You saw all the pictures on TV. It’s a terrible situation but one we have seen often in all the years we have lived here. We’ve just been lucky, so far, that we haven’t been stranded somewhere on the road or had water get in the house. When Houston gets too much rain, this happens, and often it is difficult to predict or these storms have a mind of their own, no matter how hard the weather people work to get it right.

So for today, let’s just relax and watch some Stampin’ Up! videos for Holiday Catalog products!

You saw the fall birthday box I made for my husband for his birthday instead of a card yesterday in THIS POST.  There are SO MANY ideas for these Mini Curvy Treat Dies Boxes, you won’t believe the cute ideas creative people come up with! I made one Halloween pumpkin one with my daughter but have to make some more here at home.

A great addition to our stamping supplies, I think, are these So Many Stars stamps and dies in the Holiday Catalog.  You can purchase the So Many Stars Bundle and save 10%, which includes the So Many Stars Stamp Set and the Stitched Stars Dies.  Stars are not at all just for Christmas!  You can use them for any celebratory occasion like birthdays, graduations, and many more.  The stars I have had in the past I have used a lot.

Be sure to notice the Mercury Glass Designer Acetate in the Holiday Catalog on page 33 at the bottom.  You could easily overlook it. See in this video how they die cut the acetate and then layer it on a white background. I think this Mercury Glass is very interesting to use for lots of projects!  Certainly something very different that we haven’t had before!

Enjoy your day and set aside some Holiday Catalog reading and browsing time for your pleasure and inspiration!

Mini Curvy Keepsake Box For A Fall Birthday

Mini Curvy Keepsake Box Fall Birthday

Yesterday was my husband’s birthday so instead of a card, I decided to make this Mini Curvy Keepsake Box For A Fall Birthday. I was looking online for ideas, thinking of something birthday-ish or fall-ish and I saw this idea of making a window in the box so you can see the candy or treat inside! I thought that looked pretty cute so that is the main idea I went with!

Instead of cardstock, I used a piece of the Come To Gather Designer Series Paper. I wanted something that would look good on the outside as well as the inside. The inside doesn’t really matter, but if you are making a fall box, you probably don’t want to use a Christmas paper with a generic pattern for the outside and some Christmasy pattern on the inside of your fall box! Depending on the pattern, pay attention to the direction of your paper. Think about which way the design will go on the outside of the box and maybe even the inside of the box.

What you need for this Mini Curvy Keepsakes Box Die is a piece of 6″ x 6″ paper. Then lay the die down with the points diagonally on the paper. If you put any point straight up on the paper, it will not fit.

Mini Curvy Keepsake Box Fall Birthday Die Cut

After die-cutting the box piece and creasing the score lines and folding, I decided on which panel I was going to put the little window. Ultimately I decided on the 1 3/8″ Scallop Circle Punch for the punched hole. Since the area was so small and narrow, I actually die cut a piece of window sheet for one panel and then trimmed that down by hand to fit the area. I just used Snail Adhesive in tiny bits around the hole to hold the window sheet in place.

Mini Curvy Keepsake Box Fall Birthday Window

I just recently made my first box with my daughter on vacation and I couldn’t figure out how to hook the top together! Luckily a video provided the answer! As you are trying to fit the side pieces with the long slits over the “handles”, PRESS DOWN! That lowers the handles, provides the curve to the box and allows the slit pieces to fit over the handles and hold everything in place! Very easy but I didn’t know to do that until I watched a video!

In order to put the candy in the box, I assembled the box except for one side. Then I could put the candy in and fill it up.

Mini Curvy Keepsake Box Fall Birthday Open

Then all was left was to decorate the box! I stamped some leaves with the Gather Together Stamp Set, die-cut some brown stems with a little die in the Mini Curvy Keepsake Box Dies, and punched some stems with the Sprig Punch out of Crushed Curry for some color. I also punched some Old Olive leaves with the Leaf Punch. Then I over-stamped those leaves with the large leaf stamp in the Gather Together Stamp Set.

My birthday greeting is stamped with Pretty Peacock Ink and a stamp from the Itty Bitty Greetings Stamp Set. Then I just die cut the greeting with a die from the Ornate Frames Dies and tied the box handles together with a piece of Crumb Cake Nature’s Twine. I just poked the twine through the hole on my greeting tag and pulled the tag up to the box.

I didn’t initially order these dies to make these Mini Curvy Keepsake Boxes but I’m glad I did as there is a LOT you can do with them! Check them out in the Stampin’ Up! Holiday Catalog!

SHOP STAMPIN’ UP! ONLINE!