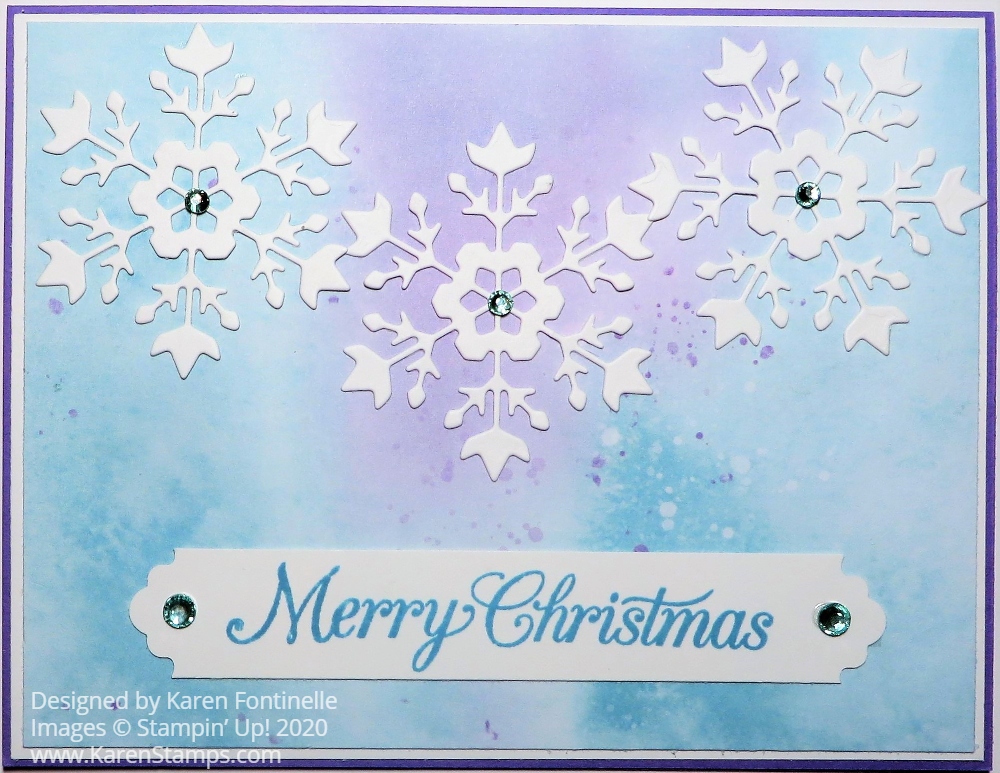
I couldn’t help but carry on with the snowflake theme with this Snowflake Splendor Merry Christmas Card. When I made the snowflake die cuts in the card from yesterday’s post, I had these three beautiful snowflakes I could use on another card.
It might look like I watercolored the background of this card, but it is actually the Snowflake Splendor Designer Series Paper. I chose a portion of the paper that had the colors of blue and also the purple. It’s really a beautiful background and not quite the traditional Christmas colors.
The card base is Highland Heather Cardstock with another layer of Whisper White to help set off the designer paper. These are just 1/16″ margins rather than 1/8″ because I needed the width of the card for the three snowflakes. The snowflakes are die cut with the So Many Snowflakes Dies.
I adhered the three snowflakes to the designer paper with tiny dots of Multipurpose Liquid Glue. The greeting is stamped from the Poinsettia Petals Stamp Set. Then I used the Lovely Labels Pick A Punch to punch each end of the stamped strip. This punch is like two punches in one so it is really fun to use! After I insert the strip, I turn the punch over to make sure the strip is fully inserted and that it is centered. You don’t really have to be this precise, but if I think of it, I like to double-check before punching.
I could have popped up the greeting, but since I thought I would probably put an embellishment at each end, I didn’t want it to be too thick for mailing. I used the lightest color, Coastal Cabana, in the Holiday Rhinestone Basic Jewels in the center of each snowflake and larger ones at each end of the greeting strip.
For the inside of the card, I added a Whisper White layer and stamped a greeting from the Poinsettia Petals Stamp Set. I had also die cut a snowflake, the same as the ones on the front of the card, out of a scrap of the same designer paper, but I thought it took up too much room on the inside Whisper White layer, so I adhered it to the inside of the back of the card front.
That’s all there is to this pretty card! It’s really just the die-cut snowflakes and the watercolor look of the designer paper. If you would like to make this Snowflake Splendor Merry Christmas Card, just visit the Stampin’ Up! Online Store!
Brand new designer paper, dies, ribbon, and even a new die-cutting machine to make this Snowflake Splendor With Many Snowflakes Dies card for the holidays! Actually, I am hoping the snowflakes will cool me off in this very hot Houston weather!
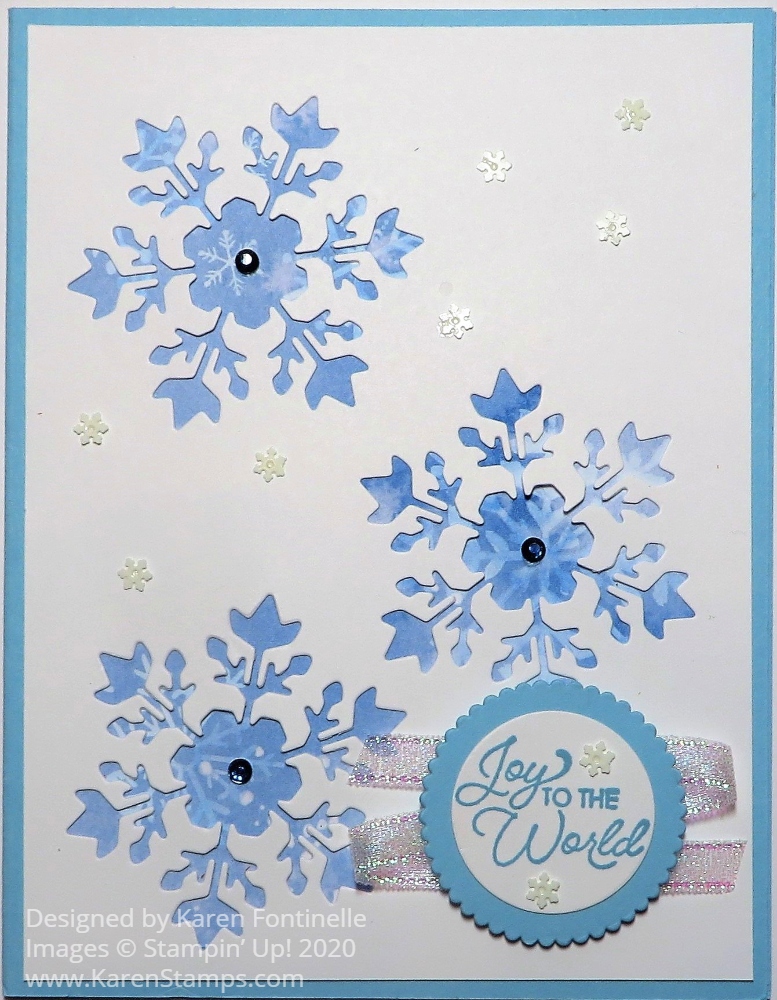
This card is actually pretty simple! The card base is Balmy Blue Cardstock and I used the new Snowflake Splendor Designer Series Paper as a layer underneath the die-cut snowflakes. The snowflakes are die-cut out of Whisper White Cardstock (Shimmery White Cardstock would be really pretty, too!) using the So Many Snowflakes Dies. As a bonus, I now have three beautifully die-cut snowflakes to use on another card or project!
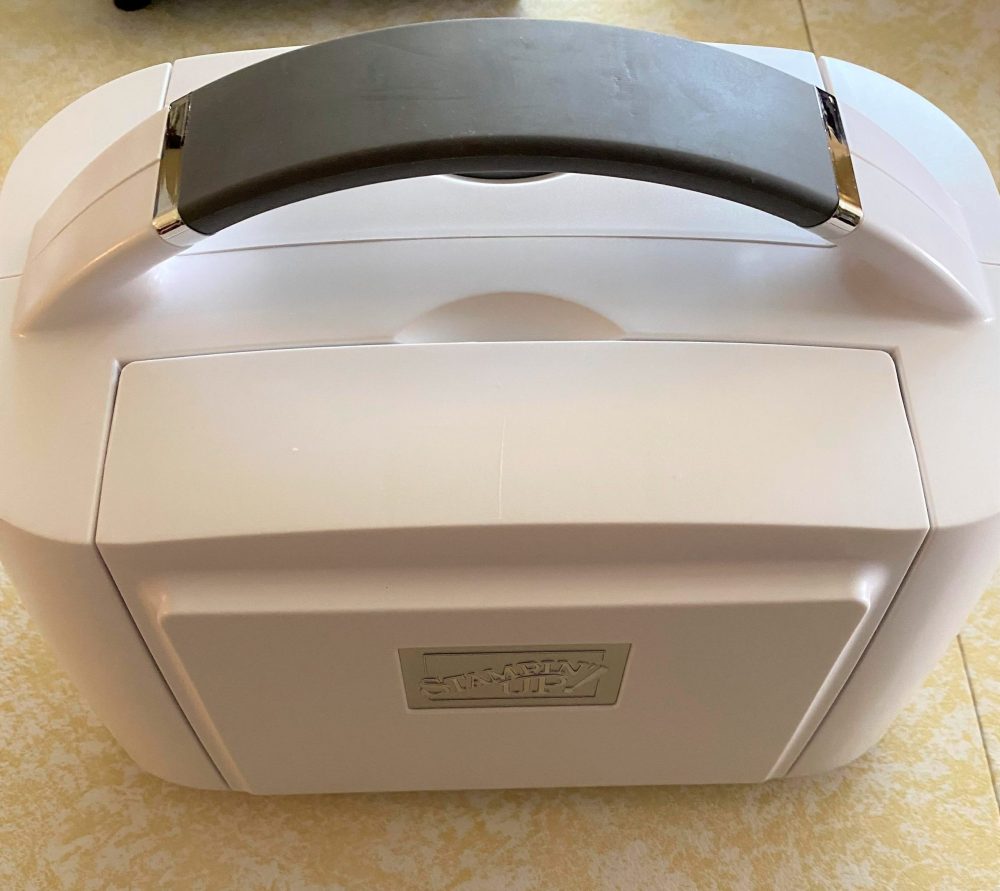
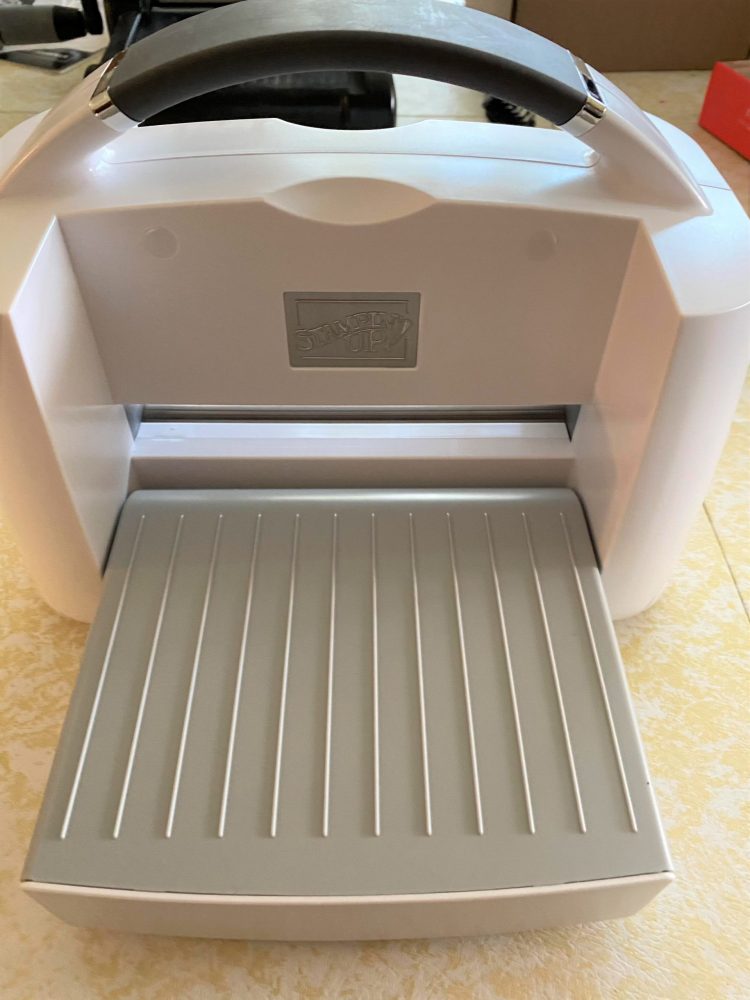
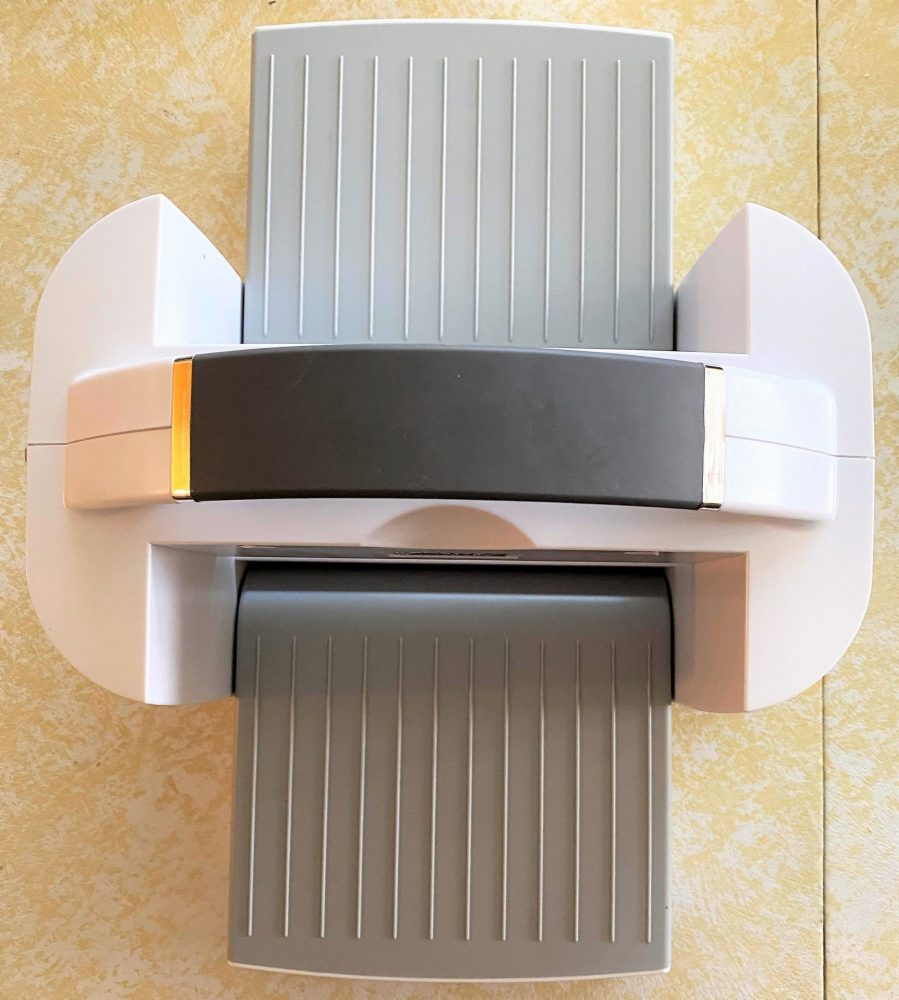
The new Stampin’ Cut & Emboss Machine, pictured in the Stampin’ Up! Annual Catalog is almost available! It will be available to customers on September 1, which is coming up soon! It IS available for preorder for Demonstrators (which is always a good reason to sign up!), but only the large machine. The cute Mini is not available and we don’t have a date yet. Mine just arrived and I’ve only played with it a little bit! I will post some quick photos I took of it, but I didn’t have the handle attached to it yet!
The Stampin’ Cut & Emboss comes separately from any order you also placed with it, in a box of its own, very well packed. There are some instructions and I encourage you to read them. The handle assembly instructions are just drawings, as most manuals are these days, but there is important information in the written information just inside the cover. Please read it so you don’t void your warranty and keep it handy. Be sure to save the little wrench that comes with the machine you need to attach the handle because you may need it in the future possibly.
The machine itself is gorgeous, especially the silver embossed Stampin’ Up! logos! It’s so nice the way the platform folds up on each side for storage or just to take up less space wherever you have it. Since mine is always out on the dining room table, this might neaten things up a bit!
The platform and plates are numbered and have directions printed on the platform for the sandwiches to use for dies, thinner embossing folders and the 3D embossing folders. That is so great! Before you start, though, take a good look at your beautiful, new clean clear plates with no marks on them yet!! Just admire the beauty before they get messed up with die-cutting marks! LOL!
I found the machine to work very well and did I mention how pretty it is?! My Big Shot is still working but is ten years old and has been overhauled once by my husband a few years ago so I wonder how much longer until it konks out. I will certainly keep it as it may work for many more years, but I did have to have the new one!!
But back to the card! I die-cut the three snowflakes and then tried various designer papers underneath to see what I liked. If you want to be real persnickety, you can see if you can line up any snowflake designs underneath your die-cuts. I kind of did that and drew a pencil line around the Whisper White die-cut layer on to the designer paper and cut it out by hand, but even that wasn’t perfect so I don’t know that I would bother with that again.
The greeting is stamped in Balmy Blue Ink and die cut, as well as the Balmy Blue Cardstock layer, with the Layering Circles Dies. I was trying to make the whole greeting as small as possible to avoid covering up my die-cut snowflakes, so if you were making this same card, you might try to plan ahead with the greeting and try to arrange your dies so you have the space available that you want for your greeting. It doesn’t hurt, though, if a tiny corner of the snowflake is covered. The greeting is from the Itty Bitty Christmas Stamp Set.
Since I had just received the Snowflake Splendor 1/4″ Ribbon, I wanted to use it and just zig-zagged it behind the greeting before adhering with Stampin’ Dimensionals. The ribbon is a little stiff and is making the greeting pop up so I probably need to work on that a little bit!
For some bling I added some Holiday Rhinestone Basic Jewels in Night of Navy to the center of each snowflake. You could use other things, too. Then I added a few Snowflake Sequins randomly on the card front and on the greeting. The Take Your Pick is handy for picking up these tiny snowflake sequins and placing them on the teeny tiny dot of Multipurpose Liquid Glue. I hope this Snowflake Splendor With Many Snowflakes Dies card has cooled you off from the summer heat and gotten you in the mood for holiday cardmaking!
Shop Stampin’ Up! Online in the New Store! Make sure you see my name as your Demonstrator since this is a new site. If you have questions, just let me know!
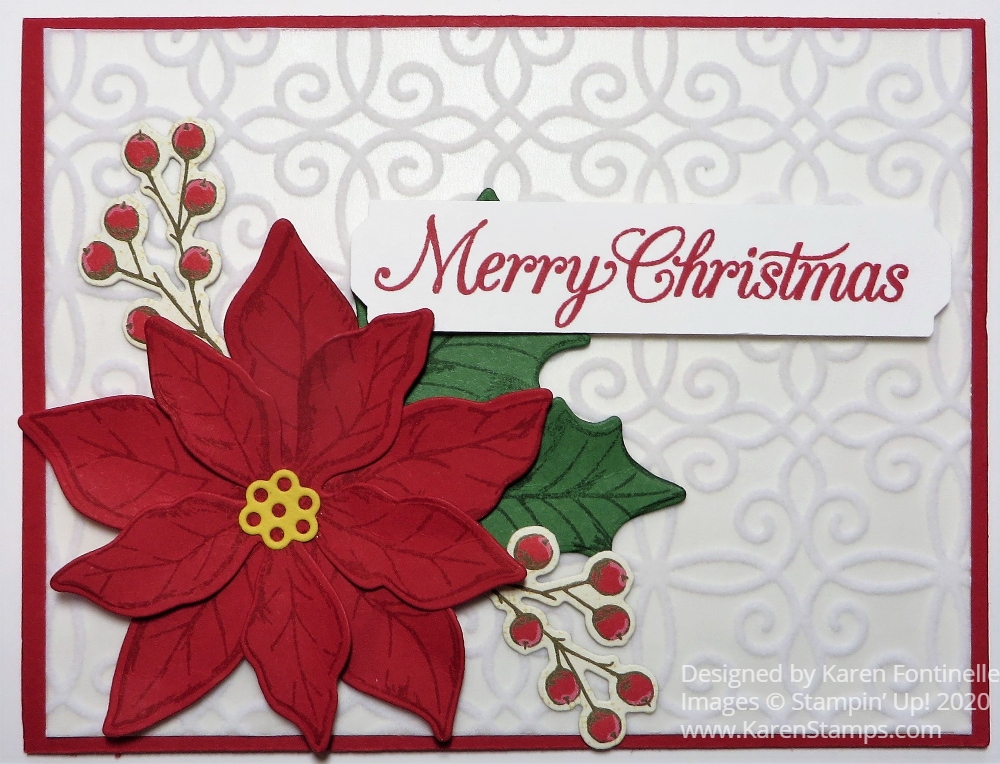
I finally had some time to play and make this Poinsettia Petals Merry Christmas Card. Not knowing exactly what I would ultimately need, I stamped extra flowers of two sizes, many leaves of two sizes, and the yellow flower centers. This worked out well because I was able to make two cards, slightly different, and I already had the pieces stamped and cut out.
If you like poinsettias during the holidays, this whole Poinsettia Place Suite is for you! The papers, stamps and dies in this suite just provide so many opportunities for cardmaking and creativity!
To make this card, I used a Real Red card base. Real Red has always been my favorite Stampin’ Up! color. You will not find a more perfect “red” color anywhere! I’m still not happy that they moved it out of the Brights Family and put it in the Regals!
I was going to put a Whisper White layer on the card base, but then I decided to add the beautiful Plush Poinsettia Specialty Paper on top of the Whisper White. This Plush Poinsettia Paper is just gorgeous! It has very pretty flocked designs on six sheets, 2 each of 3 designs.
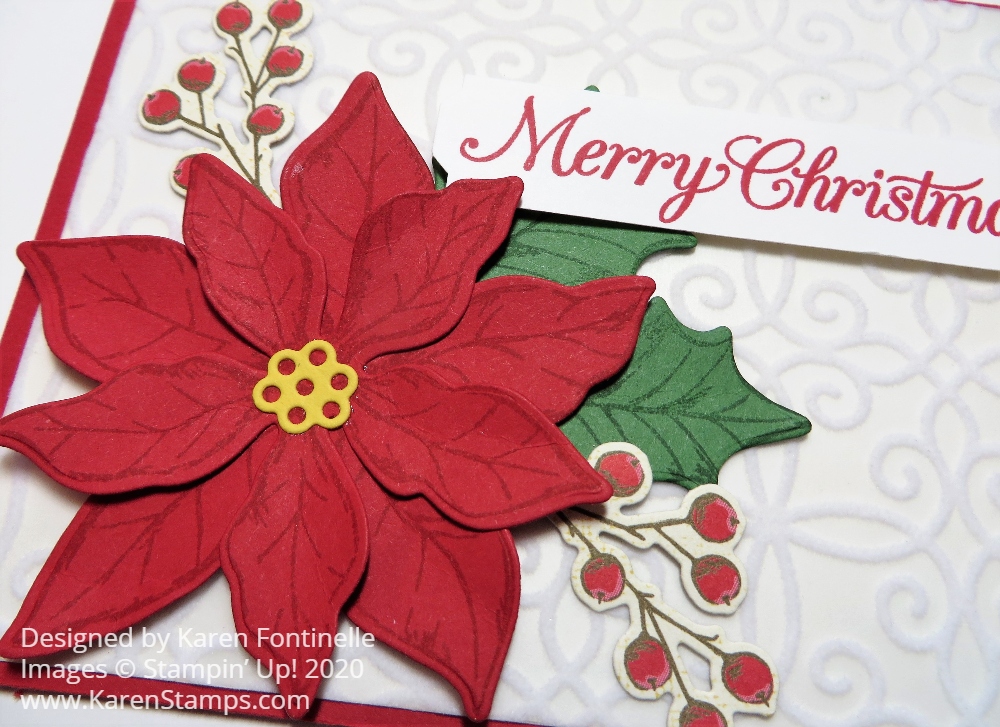
Next I assembled my poinsettia stamped with the Poinsettia Petals Stamp Set in Real Red Ink on Real Red Cardstock. I used the largest flower for the bottom layer and the next smaller one for the top. On the bottom flower, I tried out the embossing piece for the leaves in the Poinsettia Dies. The flower center is Daffodil Delight Cardstock. Before I glued the poinsettia petals together I kind of folded the petals a little bit and worked them with my fingers a little bit just to make them stand up a little bit and not be completely flat. Same with the Garden Green leaves, also die cut.
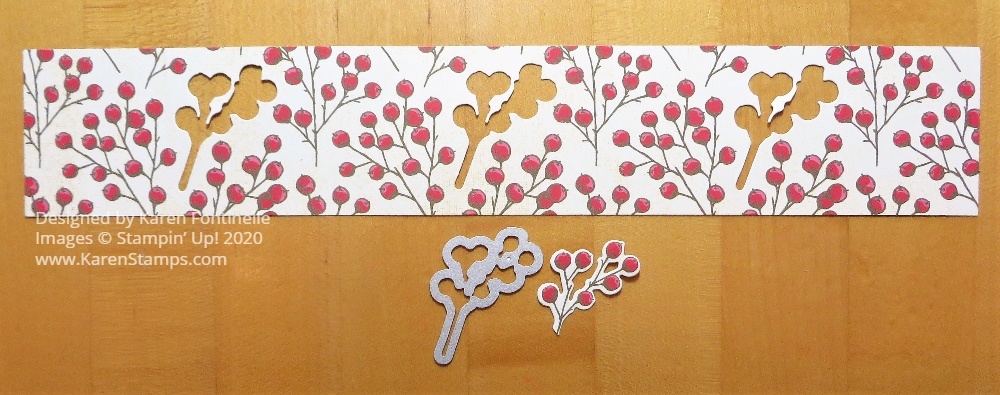
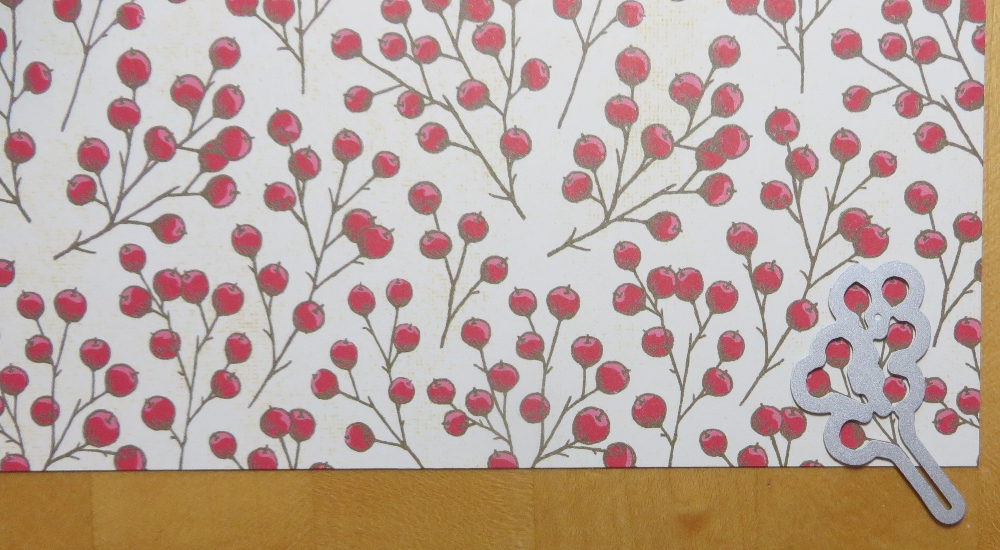
In the catalog, I saw that on one of the card samples the poinsettias had little red berry sprigs stuck out the sides of the flower. I noticed there was a die for them and I discovered it matches up with certain sprigs on the one patterned designer paper in the Poinsettia Place Designer Series Paper. I actually cut a strip of the designer paper all the way across and was able to die-cut three of the sprigs out of the strip. When you study the paper, you will find the exact sprigs that fit in the die and you will see how they repeat across the 12″ x 12″ paper. See the photos below.
Here you can see how I found one with a partial sprig that I could still die-cut and use on the corner of this paper so that was handy!
See how the die fits the sprig in the lower right corner of the paper.
After die-cutting the cute sprigs, I just stuck a couple under the flower.
The greeting is also in the Poinsettia Petals Stamp Set. I happened to pull out a 3/4″ wide strip of Whisper White Cardstock and stamped the greeting in Real Red Ink. Then I used the new Lovely Labels Pick A Punch. I tried ideas for a green layer under the greeting, but decided I liked it as it was.
You can purchase the Poinsettia Petals Stamp Set and Poinsettia Dies in the Poinsettia Petals Bundle and save 10%! That discount is also included in the price of the Suite if you decide to get the whole thing. Or you can order whichever products you would like individually.
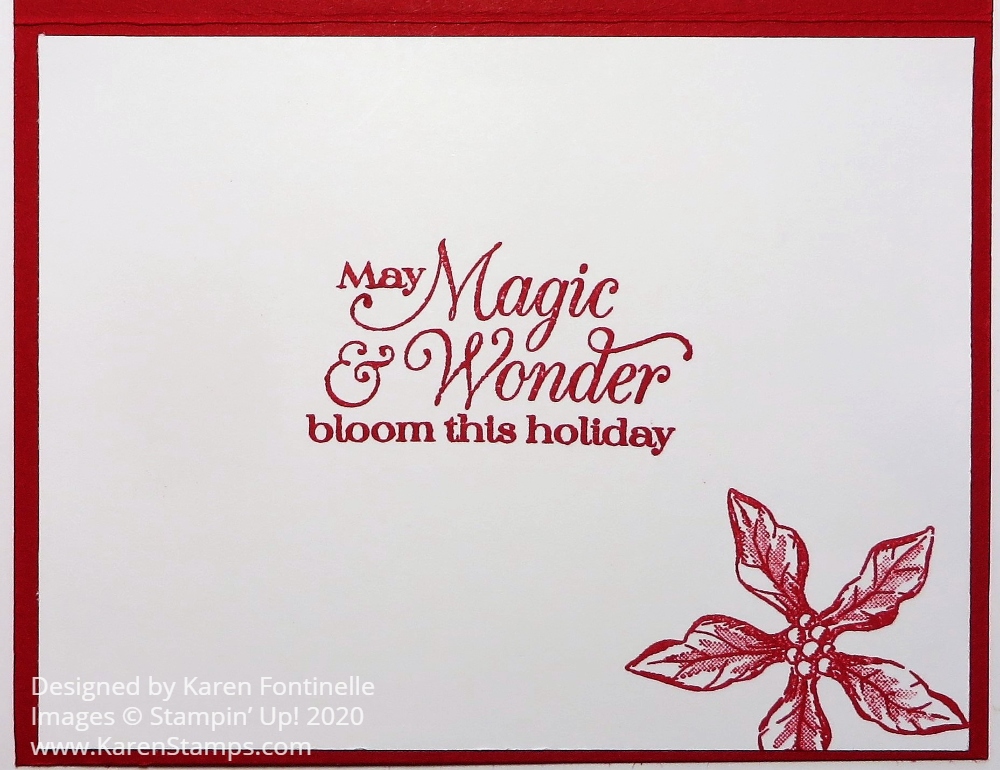
And for the inside of the card, add a Whisper White layer for a greeting or personal note. This greeting is also in the stamp set and I stamped the smallest poinsettia in the corner.
Nothing says Christmas like poinsettias, so if you like them, get an early start on your poinsettia cards and projects this year. Use my Poinsettia Petals Merry Christmas Card for your inspiration or I’m sure you will come up with many of your own ideas!
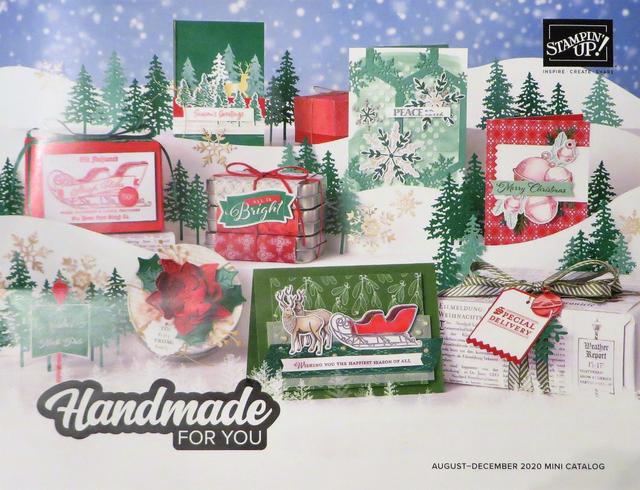
Big day at Stampin’ Up! The August-December 2020 Mini Catalog is LIVE with all kinds of fall and holiday seasonal products that I am sure you will love! Click the link or the catalog photo to view all the pages of the catalog!
Click the link above and it should take you to the Home Page of the Stampin’ Up! Online Store! Please check to see that my name, as your Demonstrator, shows up at the top on the left side. If not, you will have an opportunity to choose me as your Demonstrator before you place your order. After that, my name should come up as your Demonstrator.
I can’t wait to hear how you like it! Just take some time to play around in the new website! You can even click a tab on the side and leave Feedback for Stampin’ Up! if you have problems or simply want to leave a comment, good or bad.
If your computer normally remembers your password, it likely will not log you in to your account because it is a new website. If you KNOW your password, just type it in manually along with your email. If you do not remember or know your password, that’s okay! Just click on the “Forgot Your Password” link and an email will be sent to you to reset your password. If it doesn’t seem to show up, check your Spam folder.
BONUS COUPONS! Remember, starting today you can use your Bonus Coupons you may have earned in July! You will see where to add them on your order page. If you have more than one, you can use all of them or you can use only one or whatever you want. Just remember they expire August 31.
Coupon codes will now be entered one at a time in the Coupon Code section of the Order Summary window (by entering it into the field and clicking “apply”).
If you have a large order and reach $150 or more and earn Stampin’ Rewards, remember that using the coupons will reduce your total so you will need to have $150 or more total AFTER coupons are added in. Let me know if you have questions.
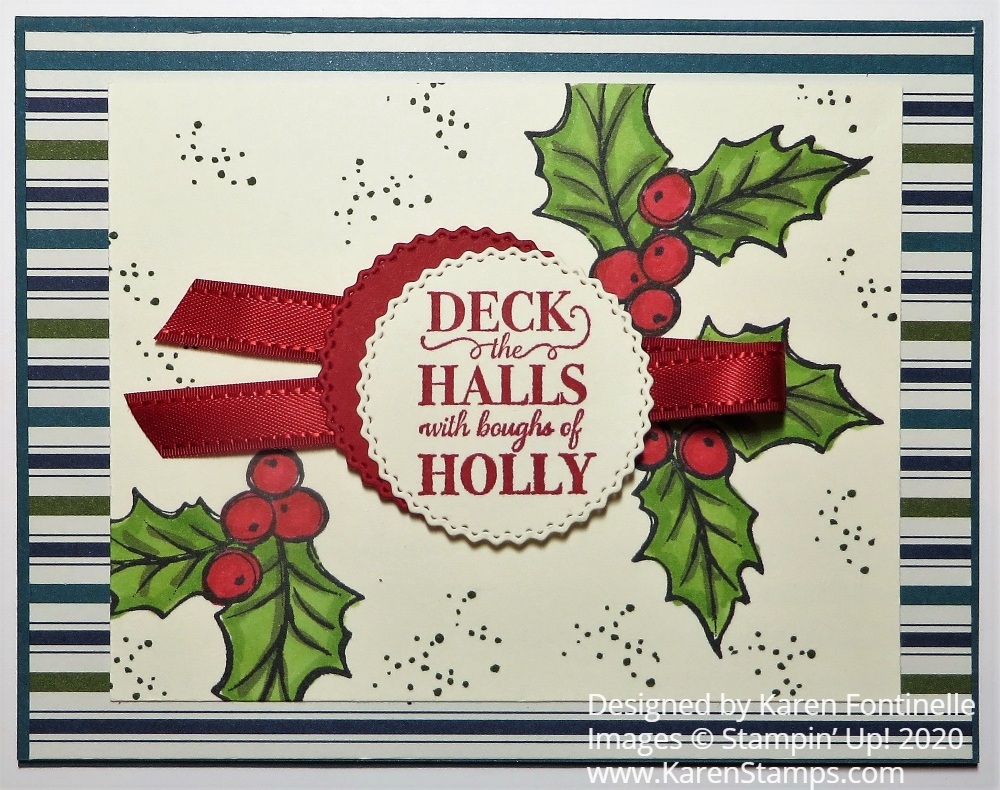
If the designer paper on this card looks familiar, it’s because it was in the Holiday Mini Catalog last year! This paper and the stamp set was carried over as were a few other products from last year into the upcoming August-December 2020 Mini Catalog. I had too many ideas in my head with too many new things and couldn’t think of a single card to make so I looked at the new holiday catalog and “got inspiration” for this Christmas Gleaming Deck the Halls Holly Card on page 19. And then I changed it up a little bit!
The card base is Pretty Peacock, one of the 2019-2021 In Colors. Then I used this striped pattern of the beautiful Brightly Gleaming Specialty Designer Series Paper (150429) for the card layer. I only left a 1/8″ margin around the edge of the card.
The focal point of the card is this Very Vanilla layer stamped with images from the Christmas Gleaming Stamp Set, also on page 19. I stamped the holly leaves in Memento Ink and colored them with Stampin’ Blends markers. I used Granny Apple Green with a touch of Daffodil Delight first on the leaves and a little bit of Mossy Meadow to draw over the leaf veins. The berries are Real Red, of course!
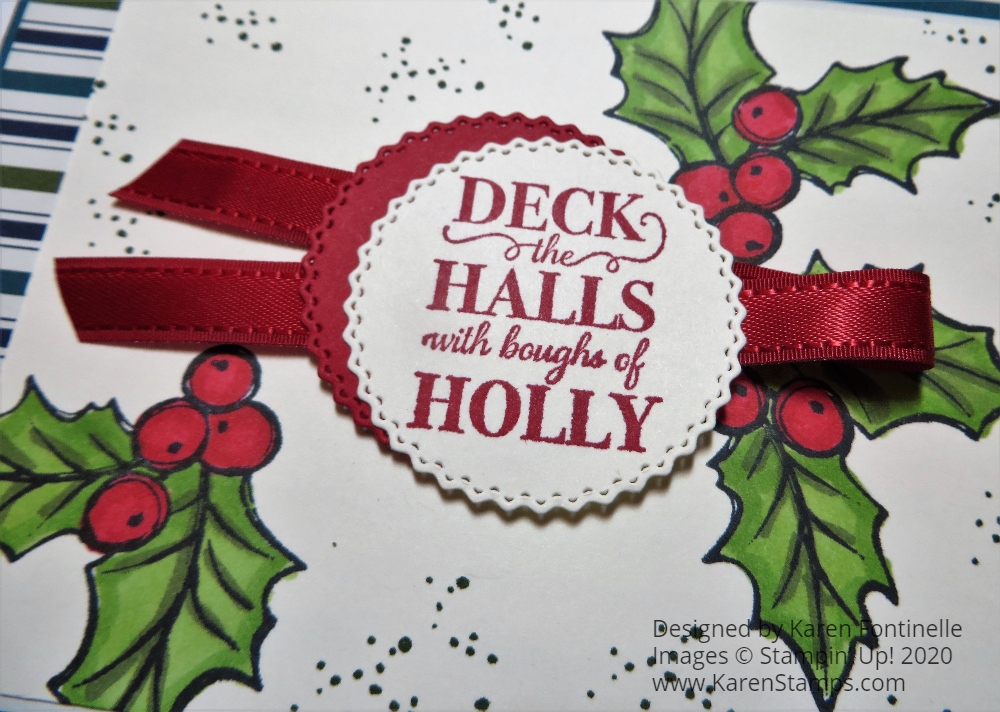
The greeting is stamped in Real Red Ink and die cut with the Tasteful Labels Dies. I loved the circle die in this set. After it cuts out the circle with the pretty edge, there is also a pretty edge left on the paper you cut the circle out of. I cut out another circle out of Real Red to layer behind the greeting, off center since it is the same size as the greeting.
Before I adhered the greeting to the Very Vanilla panel, I thought it needed a little something more so I used the stamp with tiny dots and stamped that randomly in Mossy Meadow. I added a piece of Real Red 3/8″ Double-Stitched Satin Ribbon folded over so it sticks out behind both sides of the greeting and layer. I popped up this greeting with Stampin’ Dimensionals®. I think it would also be fun to spritz the card with Champagne Mist Glimmer Paint in a Spritzer. I might try that if I make some more of this design!
After you get your new Holiday Catalog products and you make a Christmas card you really like, you might want to make maybe 5 cards and then you’ll have five cards made real easily and you can still make multiples of other designs! I usually like to make several different designs of cards!
On the inside of the card you will want to put a Very Vanilla layer since the card itself is a dark color. You can stamp a greeting for the inside of the card or use a strip of the designer paper or stamp one of the ornaments from the stamp set. You could also stamp an ornament on the envelope while you have everything out!
Don’t forget to use the wonderful Stampin’ Up! catalogs for inspiration! Copy exactly or change it up if you get a slightly different idea.
The August-December 2020 Mini Catalog (otherwise known as the Holiday Mini!) goes live Tuesday, August 4th! If you don’t have a copy you will be able to view it online on that day or just see all the products in the Online Store! If you already have this designer paper and stamp set from last year, you can duplicate this Christmas Gleaming Deck the Halls Holly Card right now!
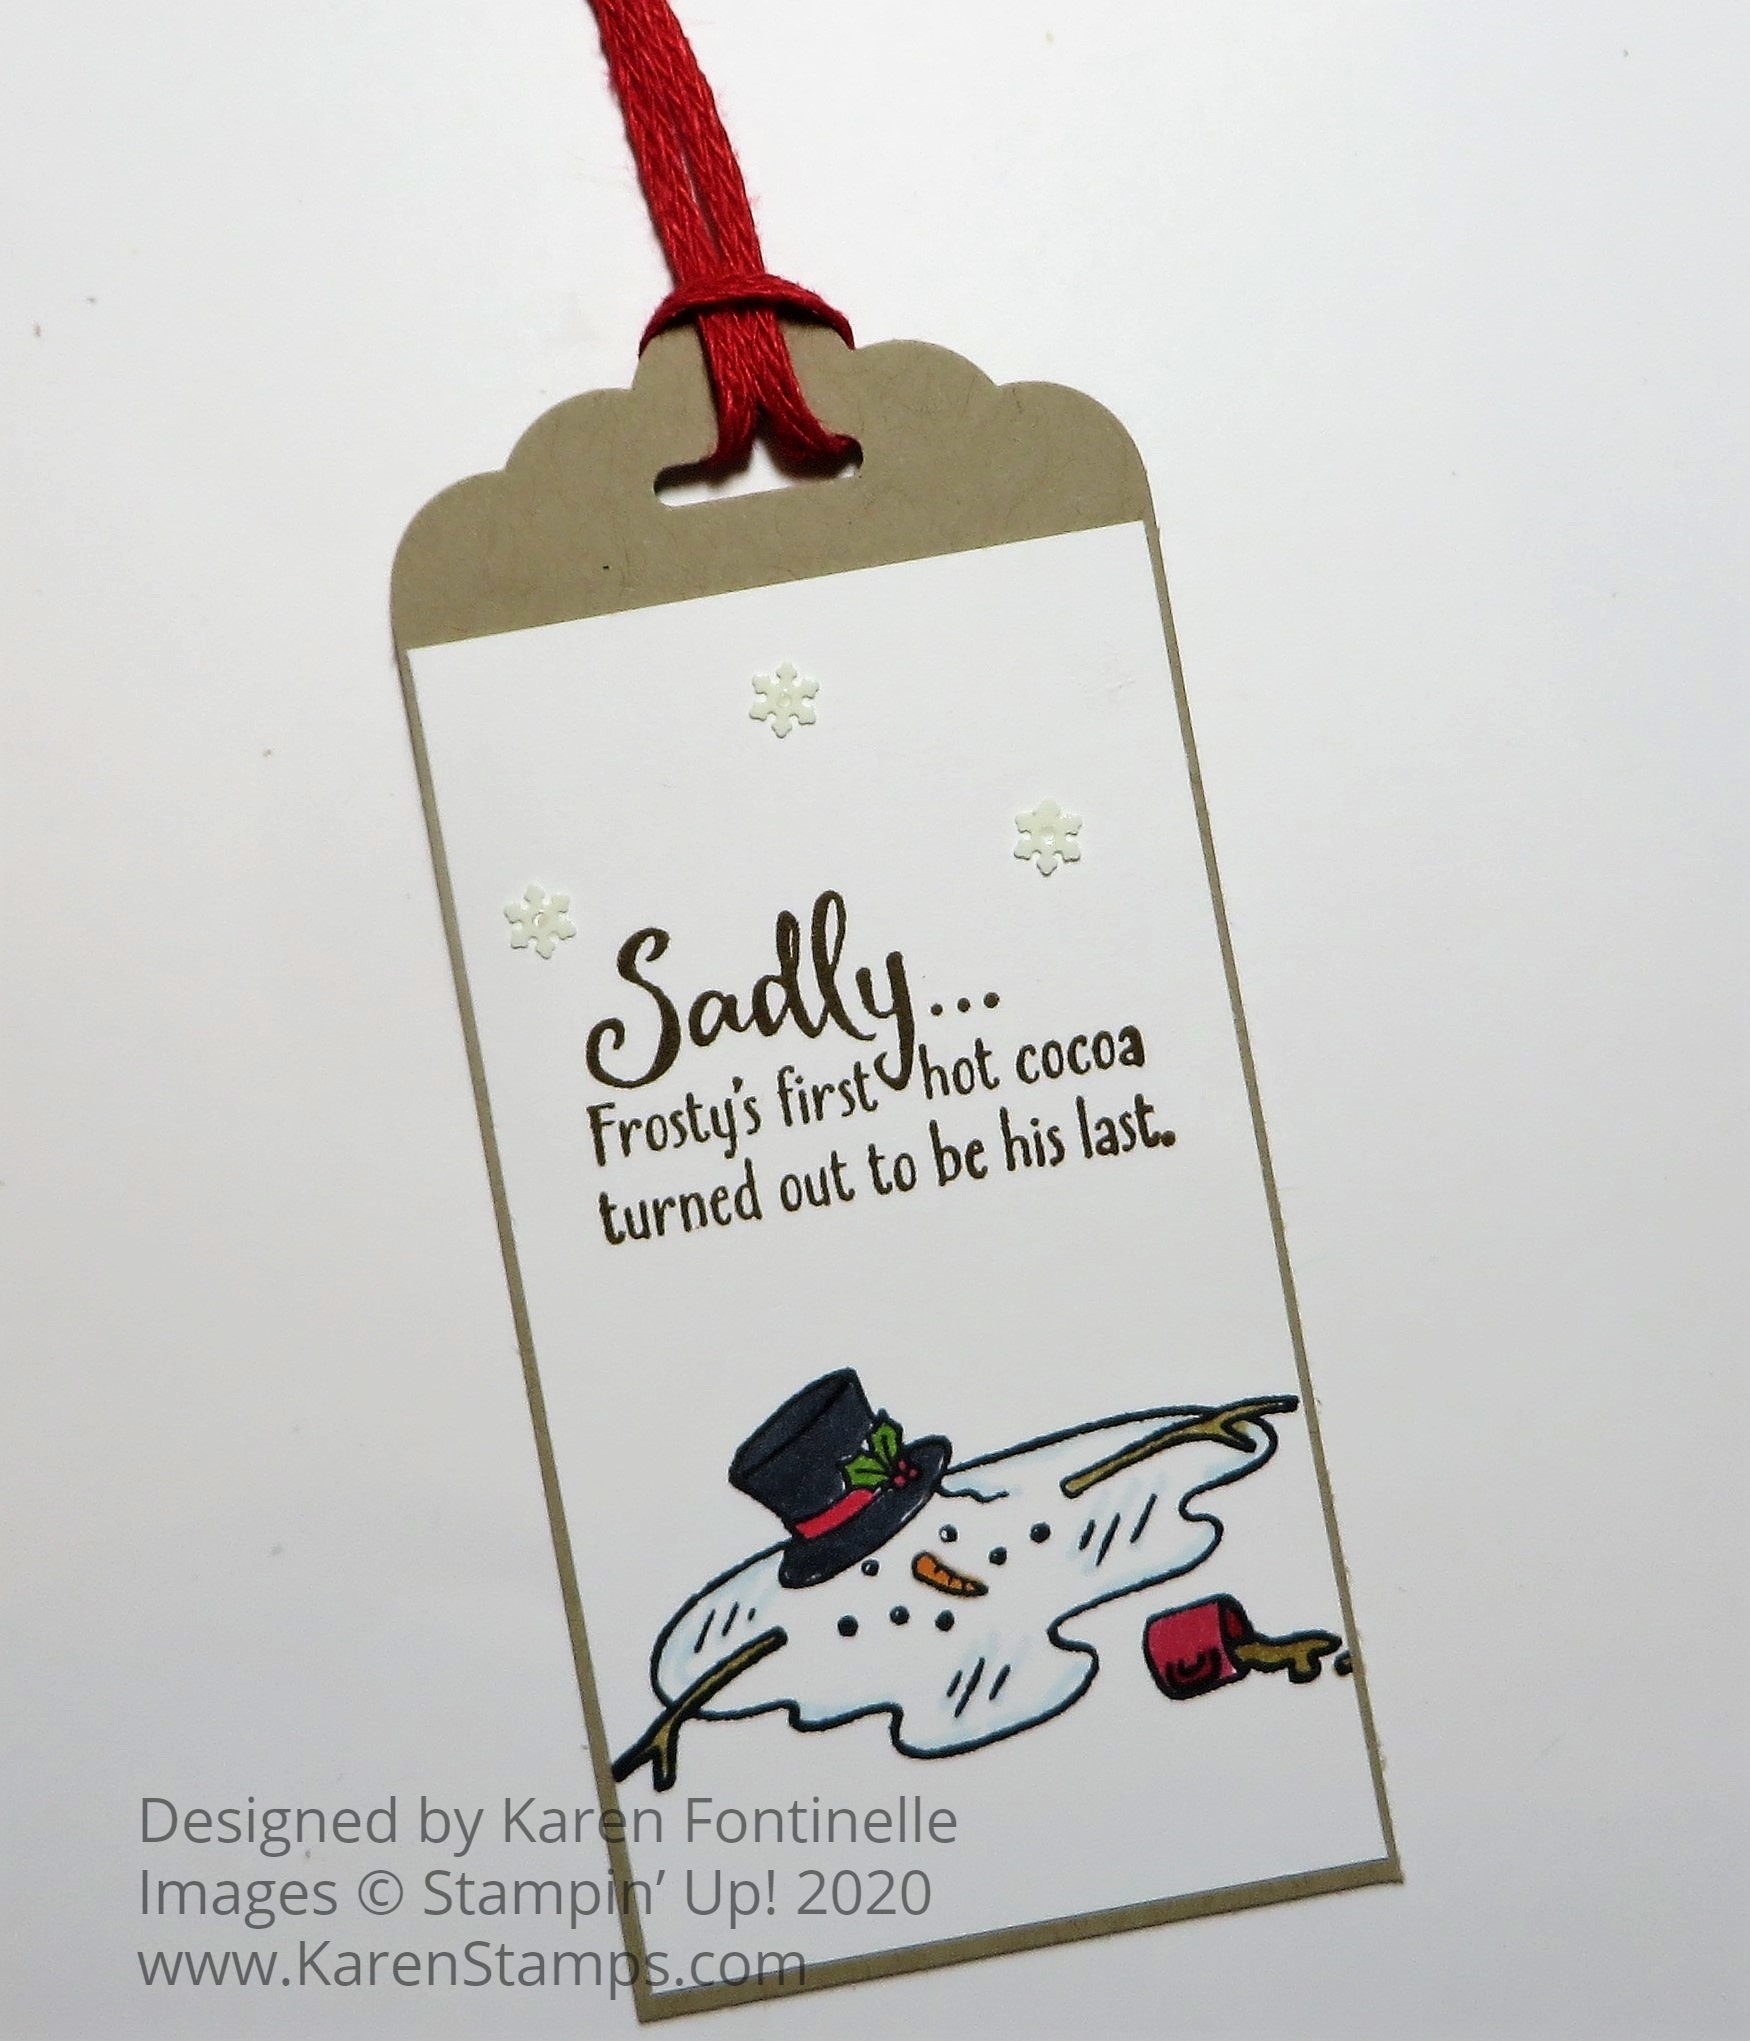
There is a fun stamp set in the August-December 2020 Mini Catalog that I just had to order and enjoyed making this Frosty the Snowman Christmas Tag for you. I think a lot of people might overlook this stamp set just paging through the catalog. I certainly did until I noticed it in a video. When I went back and looked at it closely, I saw it had funny and cute sayings for the holidays. There was even a saying I had seen at a craft show years ago, wrote down, and still have on a small piece of paper in my stash! So how could I resist this stamp set?!
Just to give you a sneak peek before the mini catalog goes live on Tuesday, August 4th, I made this little tag with one of the funny sayings from the Don’t Stop Believin’ Stamp Set (153332). It would also make a cute card, of course!
The tag is made of Crumb Cake Cardstock since we are talking about hot cocoa. The top is punched with the Scalloped Tag Topper Punch. The Frosty the Snowman image is stamped on Whisper White Cardstock along with the saying. I colored the melted snowman with just a few Stampin’ Blends in the tiny spaces. For a little extra, I added some Snowflake Sequins (150443) with tiny dots of Multipurpose Liquid Glue. You may remember the Snowflake Sequins from last year’s Holiday Catalog and if you already have them from last year you are ahead of the game. It’s great that they are returning to this year’s holiday catalog because you can re-stock for this year’s fun projects!
August 4th is coming soon, next week! In the meantime, I want to remind you that we are in the last few days of July Bonus Days! With every $50 you spend on a Stampin’ Up! order until July 31, you will receive by email a coupon code to spend in August. These will significantly help with the cost of your holiday order in August! Stock up in July on some essentials or new products from the Annual Catalog and then you’ll have coupons to spend in August! The Holiday Catalog is jam-packed with products and a few returning favorites from last year.
I just got some more copies of the Holiday Catalog so if you are in need of either the Stampin’ Up! Annual Catalog and/or the August-December 2020 Mini Catalog (Holiday Mini), send me your contact information if you are interested in being a Stampin’ Up! customer and I’ll mail you complimentary copies.
Perhaps this Frosty the Snowman Christmas Tag will tickle your funny bone a little and also cause you to look closely at all the stamp sets in the catalog because you never know what you might find!
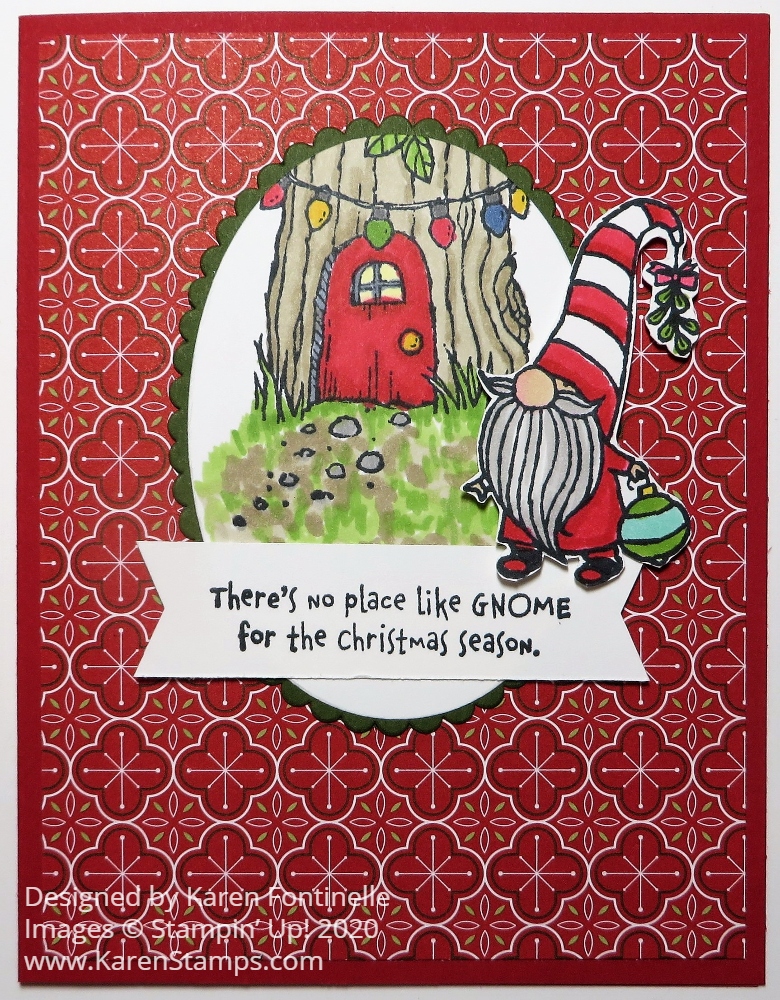
I just got my Holiday Catalog pre-order late Saturday night (love that UPS now delivers on Saturday!) so I chose this gnome stamp set for my first project with my new things, Gnome For the Holidays Christmas Card.
I never was really into gnomes and not sure I am now exactly, until last Christmas when I started following a craft lady, @thelittlegreenbean, on Instagram, who was making stuffed gnomes. Even then I wasn’t into gnomes, but I liked her and finally could resist no longer and bought myself one of her gnomes. Then another time I went back and bought two more for Christmas gifts, plus later, one for Valentine’s Day! So when I saw this gnome stamp set in the new August-December 2020 Mini Catalog (the Holiday Mini!) I decided to get it, maybe because I especially liked the little gnome house with the Christmas lights!
I also loved this Heartwarming Hugs Designer Series Paper from what I could see of it online. It belongs in a suite but it just has generic Christmasy designs in red, white, and green Christmas colors so you can use it for all kinds of cards. It doesn’t have a theme, except Christmas! And some of the papers are really generic so you could use it any time of the year.
The card base is Real Red with a layer of the top paper that was in my Heartwarming Hugs package! See what I mean about the paper….even this page you could use on a birthday card or all-occasion card!
I stamped the gnome house with Memento Ink and die cut with a Layering Ovals diewith the house stamped near the top because the house is not completely drawn in at the top. Then I used Mossy Meadow are a layer underneath with one of the scalloped oval dies.
The cute little gnome is stamped and cut out by hand just because I wanted him separate and popped up on Stampin’ Dimensionals®. Of course, I colored in everything with Stampin’ Blends, my favorite method of coloring!
You can use whatever colors you like. I primarily used Real Red, Crumb Cake, Granny Apple Green, gray, Daffodil Delight, Ivory, and some others.
The greeting comes in the set and I punched it out with the newBanners Pick a Punch. This is a punch that you don’t “have” to have really, but I wanted the Banner Year Stamp Set that is in the Banner Bundle, so I figured I might as well get it!
There are some really big, beautiful suites in the holiday catalog, but sometimes it is fun to look for the stamp sets that probably won’t get as much attention. The holiday catalog is coming on Tuesday, August 4th! I think this gnome stamp set is going to be a popular one because gnomes seem to be “in” these days! I hope you enjoy my little gnome and gnome house on my Gnome For the Holidays Card!
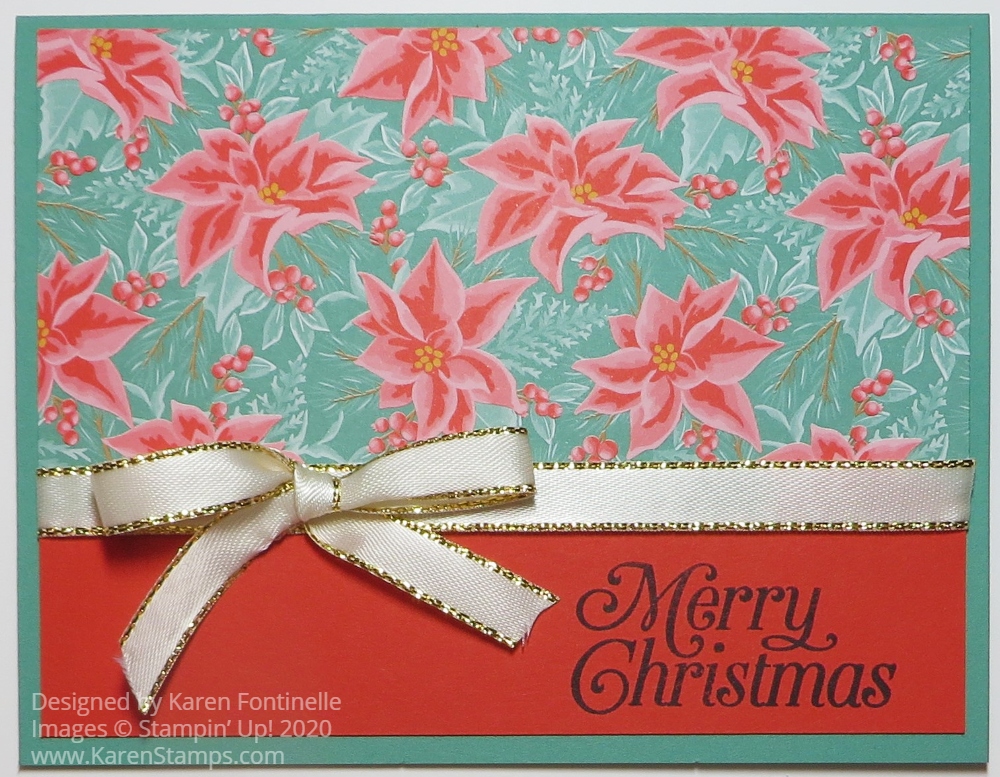
It’s never too early to start on Christmas cards and this one is the first of the season! It’s easy to get started on holiday cards like this Christmas Card With Flowers For Every Season with this poinsettia paper pattern and Christmas stamp sets in the Annual Catalog.
It’s amazing that the Flowers For Every Season 6″ x 6″ Designer Series Paper has a holiday pattern of poinsettias in the package! Just three days ago was 6 months until Christmas Day so I should have made this card for that day!
The card base is Just Jade, one of the new In Colors and one that coordinates with this designer paper. There is a layer of Poppy Parade with a piece of designer paper covering just part of the Poppy Parade. The designer paper layer is 5 1/4″ x 2 3/4″.
Before adhering the designer paper and Poppy Parade layer to the card base, I added a strip of Gold 3/8″ Metallic-Edge Ribbon around the edge of the designer paper.
The greeting stamped on the Poppy Parade at the bottom is from the Perfectly Plaid Stamp Set in the Annual Catalog. You could stamp this on another piece of cardstock and layer it or even heat emboss it in gold, but I went for the simple method!
After adhering the layer to the Just Jade, I tied a bow with the ribbon and adhered it with Mini Glue Dots to the ribbon. You could also put it in the center of the card
This is just a very simple card to get started on the holidays! It’s quick and easy and you can make several cards with the four sheets of this paper in the package.
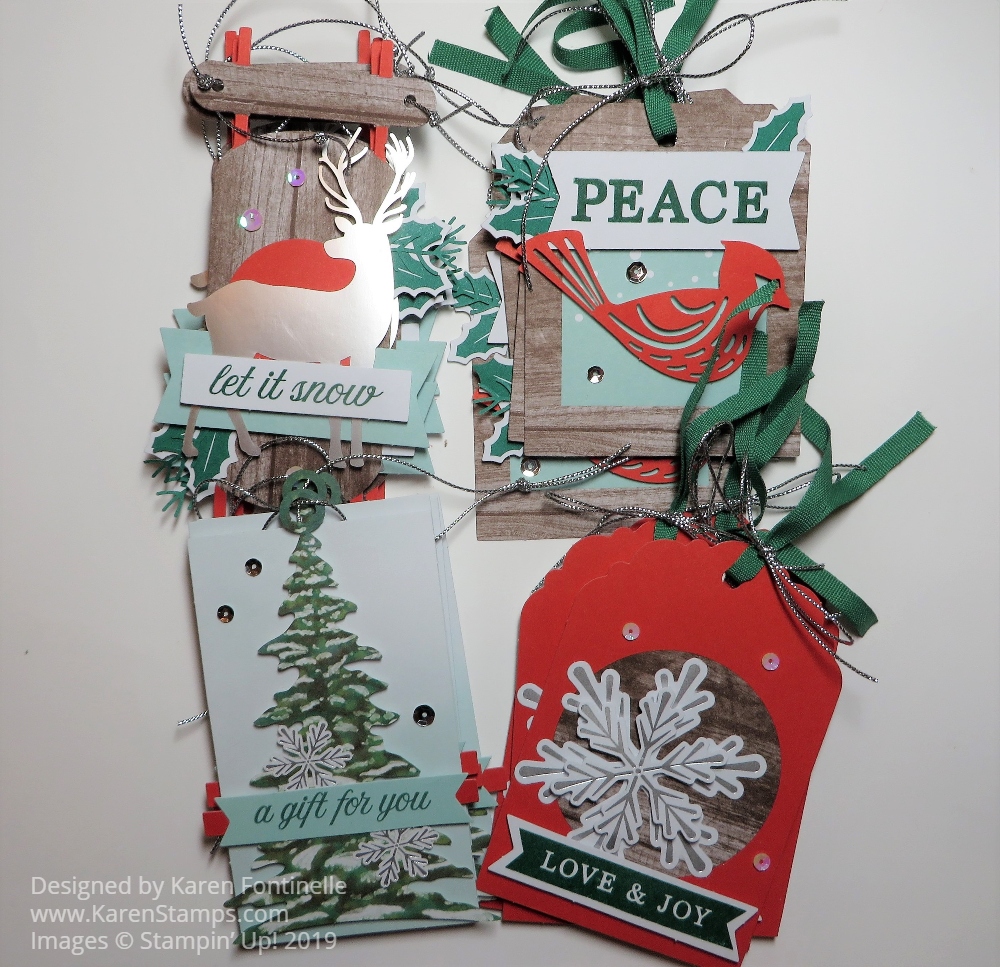
It’s okay to make Paper Pumpkin Christmas Tags AFTER Christmas! These are from the November 2019 Paper Pumpkin Kit and I just didn’t get to them before Christmas.
These are cute Christmas tags, which I could have used during gift-wrapping time! At least I’ll have a head start for next Christmas! These turned out so cute when I got them all put together. There were six of each of four designs of tags in the kit. Some people made cards out of the elements in the kit. Once you get the kit, you can do whatever you like with the supplies!
There are always projects I didn’t get to do before Christmas and when things calm down after Christmas it seems like a good time to go ahead and work on them! In some cases, I might even have “late” Christmas gifts that I put off because I won’t see the people until after the holidays anyway! Yes, I have two friends who usually don’t have time for our gift exchange until after the holidays (or even WAY after the holidays!) but we don’t care. It’s all about the getting together, not the timing! So whatever the reason, perhaps you also do Christmas projects after the holidays!
If you would like to get a head-start on a Paper Pumpkin subscription, today is the first day to subscribe for the February 2020 Paper Pumpkin Kit! The first hints are that it is about birthday cards! And we all like to stock up on birthday cards at the beginning of the year! You can even purchase a Prepaid Paper Pumpkin Subscription in the Online Store along with your regular order, perhaps boosting your order to get more FREE Sale-A-Bration items or bump you up to Hostess Rewards. Or just join by the month.
Are you still playing with Christmas projects you didn’t have time to do earlier? Or even getting a head start on Christmas cards for next year? It’s okay and from experience, I can tell you it’s a good idea to make Christmas tags any time of year!
By now you have probably used up most of your fun Let It Snow Specialty Designer Series Paper unless you are a paper hoarder! And we all want to hoard this fun paper with the glittery snowmen on it. However, if you did actually cut up the sheets with the snowmen, you know it required drastic steps, perhaps destroying parts of the snowmen design. I know you didn’t throw away a bit of the scraps, so look through them now and see what you can make! You might still be able to salvage some snowmen!
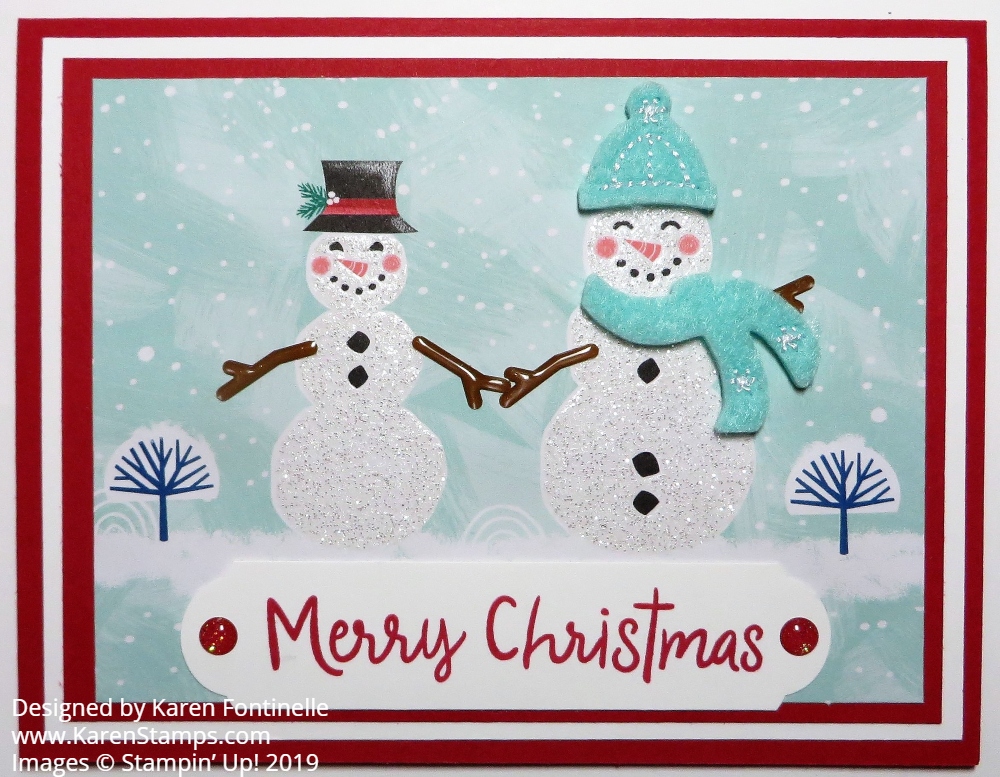
On this first card, I had a smallish piece of designer paper with the two snowpeople on it. I just added extra layers so it would make a full card. And I jazzed up the snowmen by adding some stick arms and a scarf and hat. These pieces were from the Let It Snow Embellishment Kit. Don’t forget to use the cardstock cheat trick by punching out or die-cutting some pieces from the center of the cardstock that is going to be covered up anyway. No one will ever know!
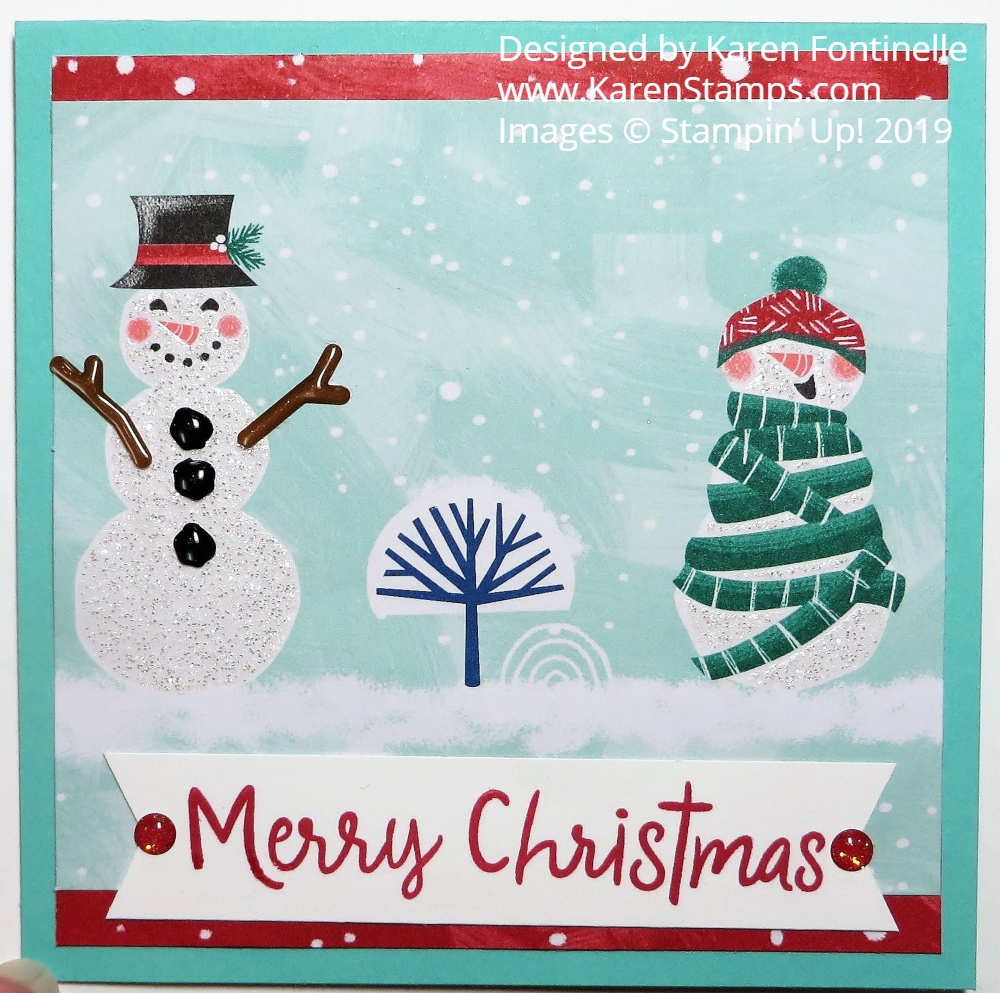
On this card, I was able to save these two snowpeople and just made a smaller card! Make a 4 1/4′ x 4 1/4″ card or 4″ x 4″ size, whatever the piece of designer paper will fit best. On this one, just a little designer paper at the top and bottom of the snowman paper was enough to set off the focal point snowmen. Once you add a greeting and embellish the card a little bit you will have a great card even with a smaller piece of designer paper than you might have used.
Remember, sometimes the opposite side of the paper can be used long after the holidays. Often, we aren’t as familiar with the other side of the paper as we are of the well-known image.
If you have really small pieces of this Let It Snow Designer Paper, remember, you can make tags for gifts! Usually we run out before all the packages are wrapped, so it’s a good idea to make extra tags! Especially if you haven’t started wrapping packages yet1
Have fun making your last minute holiday cards, tags, and treats!
Here is a card I mostly copied from one I found online except I think she die-cut all the holly leaves and adhered them to the card. I simply stamped them randomly on the card front and colored them in on my Christmas Gleaming Holly Leaves Christmas Card.
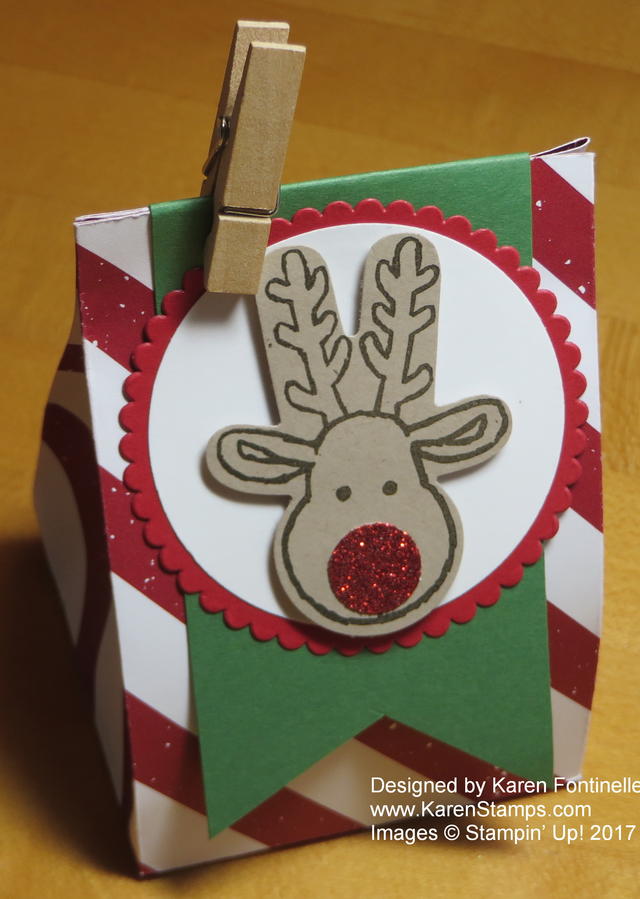
The card base is Garden Green although you could also use Cherry Cobbler as the sample I saw did. I used Shimmery White Cardstock, one of my favorite papers. I think you can kind of see the shimmer in the photo a little bit on the colored areas. Even in person, you can barely see it, but it is there! It’s also the next best paper on which to watercolor if you don’t have real watercolor paper.
I stamped the holly leaves and berries in Memento Ink and colored in with Stampin’ Blends. It takes a little time to color even only using green and red. I used two shades of green to give a subtle bit of variation in the leaves.
There is a stamp in the Christmas Gleaming Stamp Set that makes those little dots. I stamped some of those around in Garden Green just to fill in the space a little bit around the leaves. I didn’t want to stamp too many holly leaves because then I’d have to color them in!
The greeting from the same stamp set is stamped in Cherry Cobbler Ink and die cut with a Layering Circle Die and Scalloped Circle Die in the same set.
The ribbon is the Cherry Cobbler Diagonal Stripe Ribbon (no longer available). The greeting is then popped up over the ribbon using Stampin’ Dimensionals.
This is a relatively easy card to make except for the coloring taking a little bit of time. But coloring is relaxing and therapeutic!
Have fun finishing up your Christmas cards, if you are still working on them!
Little houses seem to be trendy this Christmas from what I have seen in the stores and on social media. Mostly the houses are wooden blocks and then painted with one embellishment on the front like a wreath or a heart or something. So here are my Little Wooden Decorated House Blocks that I made one evening and, if I do say so myself, I think they turned out pretty well! At least everything is still stuck on so that is good!
When I was at Hobby Lobby I came across these wooden house blocks although they were painted (printed?) on the front with a word like “Joy” and a painted wreath. I should have taken a “before” photo! When I saw them, I thought why not cover the front with designer paper and then add a wreath or something.
I didn’t know “how” I was supposed to do this project so I started with ModPodge, but I think mine was so old and stinky when I came back to the block the paper was all discolored. I was able to rip it off and wiped off the block and started over. I sanded the fronts of the blocks just a little bit and then just used our Multipurpose Liquid Glue to adhere the paper to the block.
I looked through my designer papers and chose what I thought would work. I used the Toile Tidings Designer Series Paper, the Wrapped in Plaid 6″ x 6″ Specialty Designer Series Paper, and the Let It Snow Specialty Designer Series Paper (sold out). I laid the side of the paper I wanted to show face down on the table. I spread out the glue all over the front of the block (I think a foam brush works well and then you can just throw it away) and then laid the block face down on the paper. Sometimes I lined it up with the edges at the bottom and one side and sometimes I didn’t. After the glue had dried, I used an exacto knife to trim away the excess paper. Just cut off the large excess with scissors first to make trimming easier. If you still have slight edges to trim off, try a sanding block or very fine sandpaper or a nail file to sand the edges. You can even do more sanding for that distressed look along the edges.
You can either buy some tiny wreaths at the craft store or get some greenery that you can twist into a wreath. I also bought a little bag of red berries and twisted those around the greenery. Once I had the wreath made, I adhered each one to a house with hot glue. Then I used some retired twine with a sparkly red thread in it to tie a bow and adhered that with the Multipurpose Liquid Glue. You have to hold it on for a second or you could use hot glue.
On one house I put the bottom blob of hot glue in the wrong place for the bottom of the wreath so that it showed through the center of the wreath. Then I remembered I had these little Christmas trinkets from Stampin’ Up! from a year or two ago, so I held the hot glue gun on the blog of excess glue to soften it and stuck on the gingerbread man! “There are no mistakes in stamping!” It was so cute I added a trinket to each wreath!
I ended up adding just a bit of white acrylic paint on the house sides but you might not need to unless you have the raw wood. For the back, I ended up adding Real Red Cardstock just like I did the designer paper. I guess I could have just painted that area too.
Finally, the roof just begged for some snow, so I used my Shimmery Crystal Effects as the adhesive and sprinkled on some Ice Stampin’ Glitter (not available). I didn’t cover the roof fully but just did some swirls all around.
I think these will be cute for gifts and holiday decorations! You could probably even use some generic design of paper and then have different things to hang on the front of the house for different seasons or occasions so you can change them out.
Almost every year I have been making one variation or another of a Rudolph gift bag so here is my Easy Rudolph the Red-Nose Reindeer Gift Bag! Usually, I have decorated a kraft shopping bag like in this popular post HERE. Another year I made a smaller 2-4-6-8 bag to look like Rudolph HERE.
This is a similar bag, but a little larger that you make with half a sheet of 12″ x 12″ paper. It’s good to have at least the assortments of each color family of 12″ x 12″ paper on hand because even if we don’t use this size paper real often, sometimes you need a large piece for a project.
Start with a 6″ x 12″ piece of Soft Suede Cardstock or whatever color of brown that you like. Score at 4″, 5 3/4″, 9 3/4″, and 11 1/2″. Turn the paper so the short edge is at the top and score at 1 3/4″. This will make the bottom flaps of the bag. Cut those short bottom tabs up to the 1 3/4″ score line. Cut off the little 1/2″ tab on the bottom. Fold on all the score lines and crease well with the Bone Folder. Adhere the tab on the end to the other side to assemble the bag. Then adhere the flaps on the bottom. I used the Tear & Tape Adhesive. (There’s a piece of white cardstock underneath just for the photo.)
Before you completely assemble the box, fold on all the score lines and SEE how it is going to go together. See which area will be the front. I found it was easier to glue on the pieces while the bag was still flat, but either way works since it is so simple!
I used a 2″ Circle Punch for the Red Glimmer Nose, a 1″ Circle Punch for the white part of the eyes and a 3/4″ Circle Punch (retired) for the black. You can use whatever punches or dies you have according to what sizes and look you want your Rudolph to have! Just glue them on to make your reindeer’s face.
For the antlers I used the Sprig Punch. I punched out 3 of the sprigs out of the Whisper White Thick Cardstock since I wanted them sticking up over the top of the bag and thought the Thick Cardstock would be a little stronger. One of the sprigs I cut apart and added one piece to each sprig. I colored all the sprigs with my Stampin’ Blends, two of them with the Light Crumb Cake and one with Soft Suede just to make it a little interesting and adhered the darker piece to the full sprig.
Just fill a cello bag with treats and tie with a ribbon! Put it inside the Easy Rudolph the Red-Nose Reindeer Gift Bag and you’ve got a fun gift for someone!