Tag Archives: Pine Tree Punch

Heartwarming Hugs Christmas Tree Card

Heartwarming Hugs Christmas Tree Card

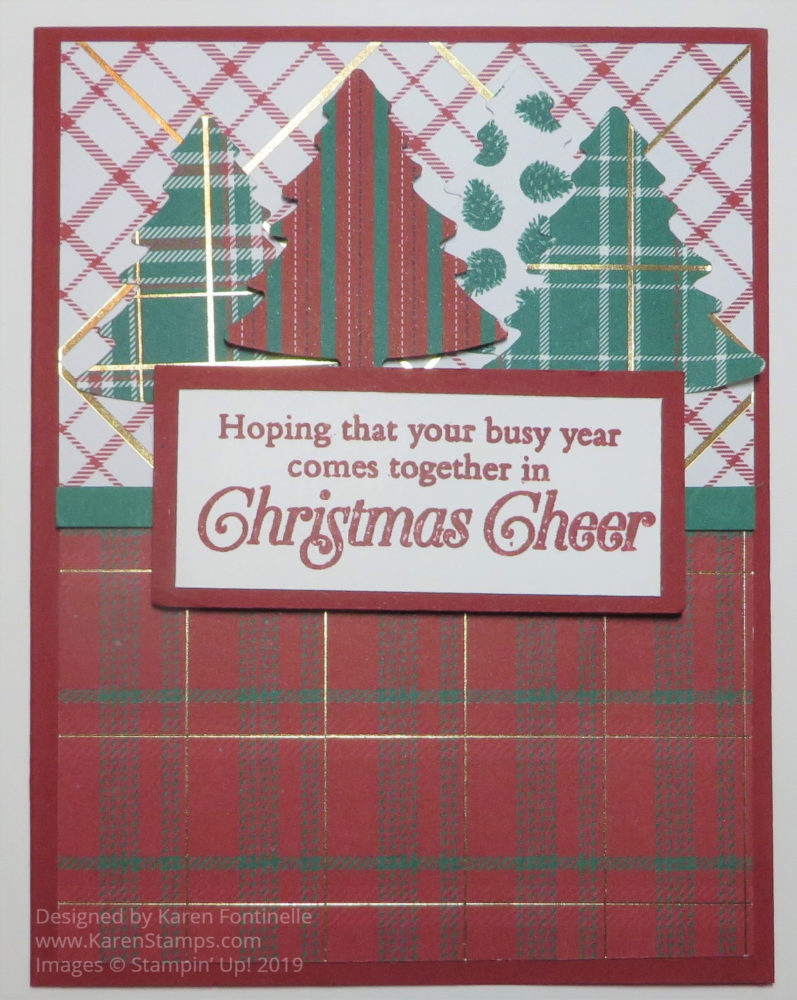
If you are anxious to get started on Christmas in July but you can’t order the new things yet in the Holiday Catalog, see if you still have some Heartwarming Hugs Designer Series Paper from last year’s catalog and make a card like this Heartwarming Hugs Christmas Tree Card! The paper is coming back in this current Holiday Catalog, going live August 3!

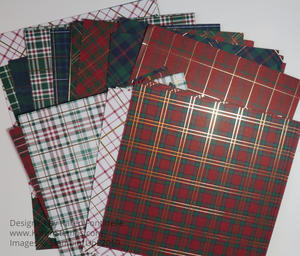
I still had some of this Heartwarming Hugs Designer Series Paper and I really like it. Lots of different plaids and stripes in traditional red, green and white! It’s just cute paper without having any special designs. Great for backgrounds on cards or other projects. Cute for making boxes and gift bags with both the inside and outside matching and looking like the holidays! Check your stash and see if you still have some.

The Pine Tree Punch is still current in the new Annual Catalog so get that out too! You can punch out lots of Christmas trees to your heart’s content!

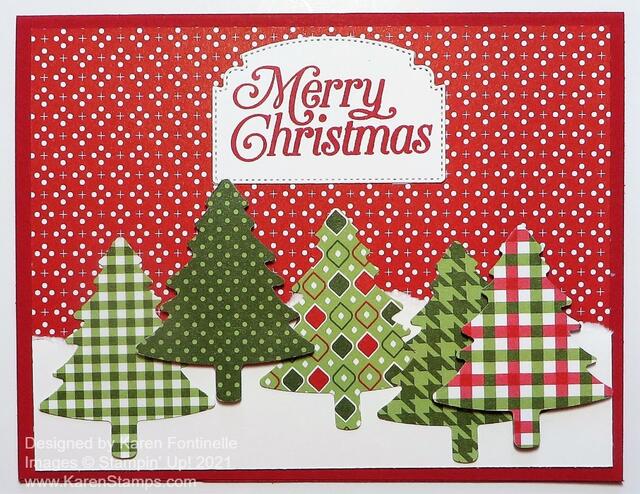
To make this card, I started with a base of Real Red Cardstock (my favorite color!). I chose this red background paper with white dots to see what I could do with it or if it would work with the punched trees. I started with a vertical card, but when that wasn’t quite coming together, I turned it sideways and that worked, of course!

I went back to one of the first techniques I ever learned in stamping – tearing the cardstock! Hold the paper in front of you and pull down with your right hand as evenly or unevenly as you want. You want that torn edge look with kind of the underneath layer of the cardstock showing. That’s the best I can describe it. You don’t necessarily want a very straight, even, perfect edge. I used Basic White to make a snowy base for the trees.

I punched out several trees with the Pine Tree Punch and just placed them along the “snow”, popping up a few with Stampin’ Dimensionals® and some just adhered flat on the card.

The greeting is from the Perfectly Plaid Stamp Set. This is another product carried over into the new Stampin’ Up! Annual Catalog that you may already have. I think it’s been around a couple of years now, which is nice. I stamped it in Real Red Ink and then cut it out with one of the Ornate Frames Dies. It seems to fit perfectly on the card! I love the little stitching around the edge and the shape of the die is already cute.

That’s all there is to this card! I could have added some sparkle to the trees or on the background. Sometimes all I can think of is adding bling to a card, and sometimes I don’t think of it at all – until after I have taken the photo for my blog! Either way, keep it simple or jazz it up, this Heartwarming Hugs Christmas Tree Card is a fun and easy card to make.

SHOP STAMPIN’ UP! ONLINE!

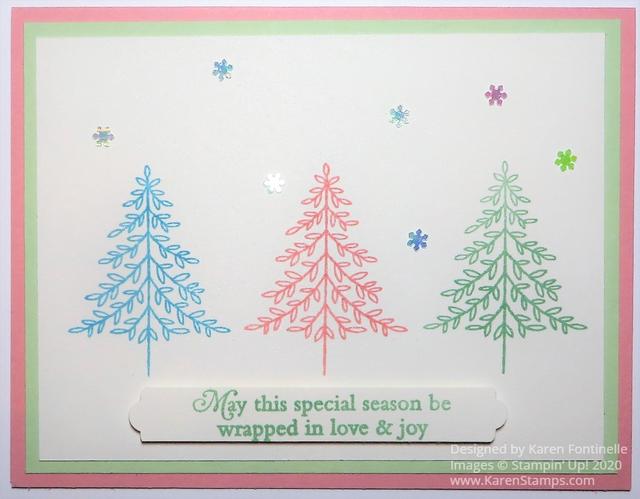
Perfectly Plaid Pastel Trees Christmas Card

Perfectly Plaid Pastel Trees Christmas CardPerfectly Plaid Pastel Trees Christmas Card

This Perfectly Plaid Pastel Trees Christmas Card came about after seeing some Christmas cards using non-traditional colors, even pastels! I thought I would see what I could do with a pastel color scheme for my card!

The card base is Blushing Bride Cardstock with a layer of Soft Sea Foam Cardstock. I tried putting another layer of Balmy Blue but it looked like too much. I left it at just the pink and green.

The main paper I used is Shimmery White Cardstock. This is my favorite paper ever! It has just the slightest shimmer to it if you look closely. It stamps so well and even takes watercoloring better than regular Whisper White Cardstock. I just love it!

The three trees stamped on the Shimmery White are from the Perfectly Plaid Stamp Set. This stamp set was carried over from last year and I’m glad because it has so many possibilities, not to mention the Pine Tree Punch which coordinates with the trees. I could also have punched out the trees with that punch and made them a little more 3D. The trees are stamped in Blushing Bride Ink, Balmy Blue Ink, and Soft Sea Foam Ink.

The greeting is also stamped in Soft Sea Foam Ink. It is also in the Perfectly Plaid Stamp Set as are some other ones I could have used. I just stamped this on a scrap strip in my Shimmery White Cardstock and then punched the ends with the Lovely Labels Pick a Punch. It is popped up with Stampin’ Dimensionals®.

Then to add a little something extra, I added some Adhesive-Backed Snowflakes. These are little snowflake sequins that have adhesive so they are easy to place and stick on a card! No glue required!

Another thing I could have done, instead of the snowflakes, was to put some Rhinestones or perhaps the Champagne Rhinestone Basic Jewels on the trees. If I would have stamped the trees up just a little bit higher I think that would have worked. Or maybe I could have stamped some small snowflakes. So many different things you can do with stamping!

You could change the color scheme of this card and use traditional red and green colors and see how different it would look. Here is another card I made with this set, in red and green colors, and using all three styles of trees. Or as I mentioned, use the Pine Tree Punch to punch out the trees and pop them up on Dimensionals instead of the greeting. Just play until you are satisfied!

SHOP STAMPIN’ UP! ONLINE HERE!

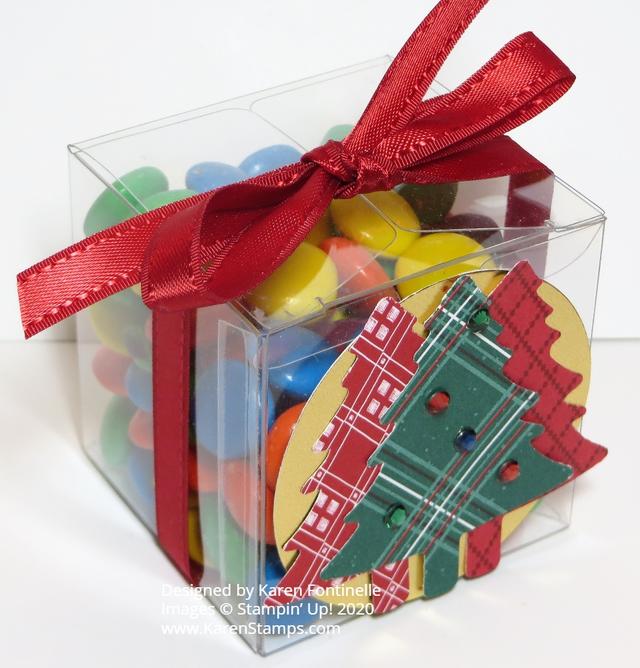
Tiny Christmas Treat Box With Trees

Tiny Christmas Treat Box With Trees

It’s time to be making some Christmas treats to have on hand or to gift as extra little gifts or stocking stuffers. Here is one you can make in minutes using a couple of punches, paper, and ribbon…..plus the candy!

I always have some Clear Tiny Treat Boxes on hand because you can make something like this little Christmas treat very quickly and easily. Just put whatever candy treat you have inside or even a very small gift and then decorate.

I got the idea for decorating this treat box kind of from the Christmas card I made on yesterday’s post with the Pine Tree Punch and using the same paper!

To make my little treat box really quick and easy, I just punched out a green Christmas tree from the ‘Tis The Season 6″ x 6″ Designer Series Paper using the Pine Tree Punch. I was only going to put that one tree on the front of the box, but I liked some of the red paper too so I thought, “Why not have two red trees also?”. I punched out two red trees and placed them on each side behind the green tree. Next, I thought it would be nice to have a piece of Gold Foil behind the trees, so I punched a circle that would fit with the 2″ Circle Punch.

For a little bling, I of course had to add a few of the Holiday Rhinestone Jewels just to the green plaid tree. The final step was to just tie a Real Red 3/8″ Stitched Satin Ribbon around the box. Not only is it decorative for the top of the box but it also keeps the lid closed! You could also add a greeting on the box or tie it on to the ribbon, perhaps from the Itty Bitty Christmas Stamp Set.

These Clear Tiny Treat Boxes keep you from having to look up measurements to make a little box! They store flat and all you have to do is unfold it, crease on the score lines, and make it into the box. Be sure to put a package on your next order!

SHOP STAMPIN’ UP! ONLINE!

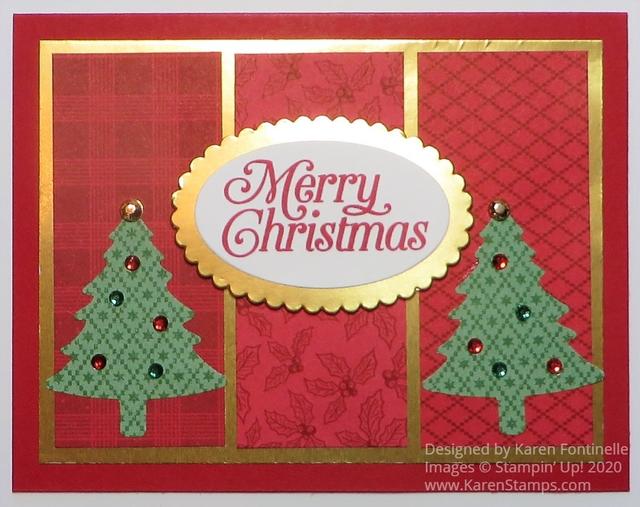
‘Tis the Season Tri-Panel Christmas Card

Tis the Season Tri Panel Christmas Card

For this card, the Tis the Season Tri Panel Christmas Card, I got the idea to copy myself! One of my fall cards was this same basic design and turned out pretty well. This is a great design for using up scraps of designer paper if you have them, or you can even stamp different panels for a card like this.

I used the ‘Tis the Season 6″ x 6″ Designer Series Paper for this card. It’s a great assortment of Christmas papers with generic and traditional designs. The 6″ x 6″ size is nice for making cards so you don’t have to work with the large designer paper.

The card base is Real Red, although Cherry Cobbler is also a coordinating color with the DSP. The Gold Foil is cut at 5″ x 3 3/4″ underneath the panels. Each panel of DSP is cut at 1 1/2″ x 3 1/2″. You can vary that size depending on if you make the foil layer a little larger or if you want the panels to touch on the sides rather than let the gold foil show through in between. Just try to adhere the panels evenly spaced and if necessary, you can trim the foil layer if it is uneven on one side or the other. You could also use another color of cardstock instead of foil if you like.

The greeting is stamped from the Perfectly Plaid Stamp Set in Real Red Ink on Whisper White and die cut with one of the Layering Ovals. Then a scalloped oval die was used for the Gold Foil layer.

The trees were punched with the Pine Tree Punch. I used a green pattern in the ‘Tis The Season Designer Paper. For a little bling, I added some red and green Holiday Rhinestone Jewels. To look a little like a star on top of the tree, I used a gold Gilded Gem at the top of each tree. I popped up the greeting with Stampin’ Dimensionals, but then glued down the trees flat so there would be room for the rhinestones and gems as far as height. Something to think about if you are mailing cards with embellishments. You might also enclose a piece of paper towel or any piece of scrap computer paper, maybe crimped, to cover and give protection to the embellishments. If you have a really fancy card, you should consider mailing it in a special padded envelope.

This is a pretty easy card to make and you can make all kinds with different pieces of paper. I want to try some more with this particular paper and design and see what else I can come up with! Here is my fall card I made with the beautiful Gilded Autumn Designer Paper.

Get out your designer paper for the holidays and even some non-holiday paper because you might find patterns you can use just fine on Christmas cards. It’s time to be making cards and mailing them early! Hope my ‘Tis the Season Tri-Panel Christmas Card gives you some inspiration for making your own cards!

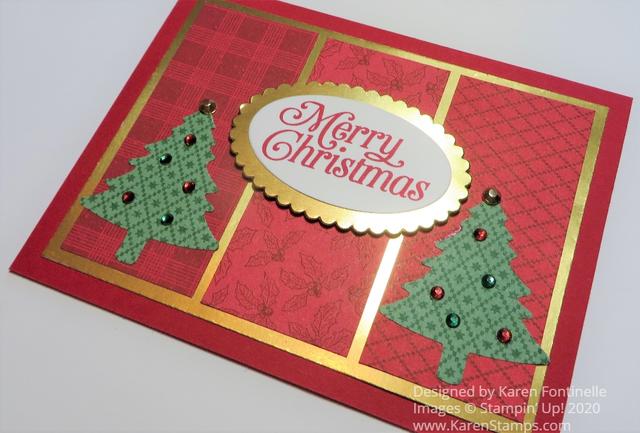
Tis the Season Tri Panel Christmas Card Closeup

Pine Tree Punch Christmas Card

Pine Tree Punch Christmas Card

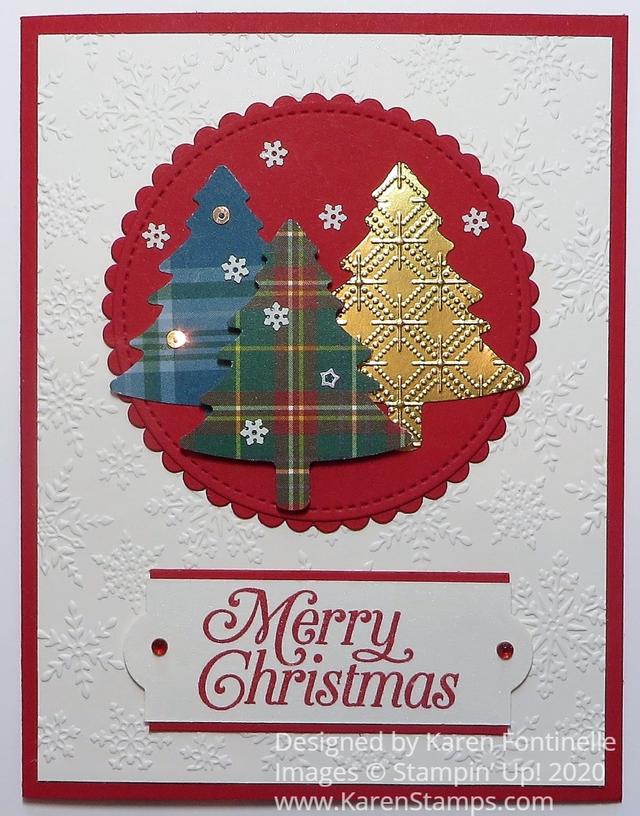
Even though we always want new things, I was happy to see a few things I already purchased last year show up in the new Stampin’ Up! Annual Catalog. Two things I used on this Pine Tree Punch Christmas Card were the Perfectly Plaid Stamp Set for the greeting and the Pine Tree Punch for the Christmas trees.

I got the idea for this card by looking back at last year’s Holiday Catalog at a sample of a tag. I changed it a little bit plus made it into a card. Of course, I could have stamped the trees from the Perfectly Plaid Stamp Set and punched them out as they did on the sample from last year’s catalog, but instead, I wanted to use our new Plaid Tidings 6″ x 6″ Designer Series Paper for the trees. One punch and done!

Instead of doing all three trees in plaid, I punched one out of Gold Foil, but then I embossed it with the new Dainty Diamonds Embossing Folder. Two trees are adhered flat to the background and the front green and red plaid tree is popped up on Black Stampin’ Dimensionals.

The card base is Real Red with a layer of Shimmery White Cardstock. I love the Shimmery White Cardstock for its very subtle shimmer. It is basically white but just a tiny shade off-white. I embossed this layer with the new Winter Snow Embossing Folder.

The circle behind the trees is actually two die cuts in Real Red. The outer one is the largest Layering Circle Die with a scalloped edge and then a Stitched Shapes Die circle on top of that.

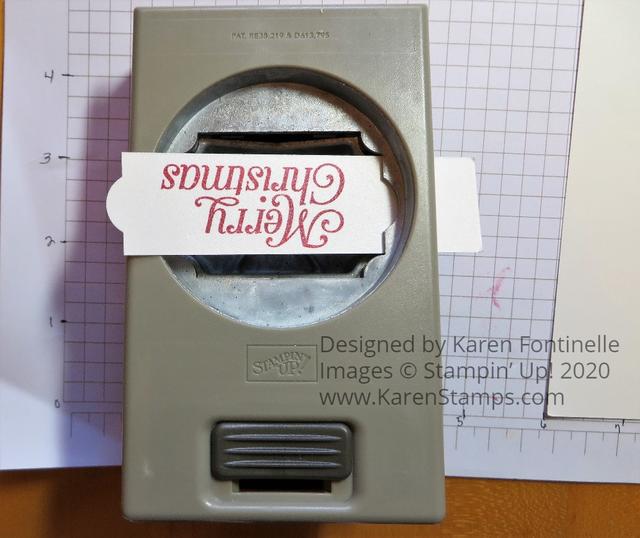
The greeting is stamped in Real Red Ink from the same Perfectly Plaid Stamp Set on Shimmery White. I got the idea to punch just the ends out of this narrow strip using the Everyday Label Punch.

Be sure you stick in the label from the top of the punch, not from the side like usual or you will punch both ends, unless that would happen to fit perfectly, but usually when you do a trick like this you have to punch one end at a time.

I tried various ways of layering some color underneath the greeting, even thinking about leaving the greeting without a layer, but finally, I came up with red just under the top and bottom of the greeting. Then I added a Red Rhinestone on each end. If you don’t have the Red Rhinestones, just color one of your clear rhinestones with a Stampin’ Blend marker! You can have rhinestones in any color!

I also added some Snowflake Sequins on the layer behind the trees and also on two of the trees. The gold embossed tree didn’t seem to need anything else! Mixed in with the sequins are other sequins that are not snowflakes so I used a few of those on the trees almost like ornaments. Put just the teeny tiniest dab of Multipurpose Liquid Glue where you want the sequin and place the sequin with the Take Your Pick tool. If you don’t already own this tool, you should put it on your next order! It is handy for picking up sequins with the sticky end and the pointy end or spatula end are great for picking rhinestones and other things up off their sheet getting underneath the adhesive. You will use it a lot!

Once you make one of this Christmas card, you could easily do an assembly-line process of making more. Get all the pieces punched or embossed or stamped and then just assemble. Don’t make one whole card at a time, except for maybe the first one for a sample. Cut all the strips for the greeting, emboss all the card layers, punch all the trees of one color, punch all the trees of the other color, etc. etc. In some ways, you almost get muscle-memory while you are working doing the same thing over and over and it makes assembly go faster! And it’s fun to make multiple cards without having to thing of designing each one! Try it with this Pine Tree Punch Christmas Card.

SHOP STAMPIN’ UP! ONLINE HERE!

Wrapped In Plaid Christmas Trees Card

Wrapped In Plaid Christmas Trees Card

Here is an easy Christmas card I made during a short stamping session with my daughter while visiting her in California, the Wrapped In Plaid Christmas Trees Card. I brought some projects along in the hopes that a couple of her friends could join us, but it ended up being just us! Of course, when you are on vacation, there is never enough time so we didn’t get to make everything we wanted to.

While she was working on another card using this plaid paper and the tree punch, I somewhat copied this card from a sample in the Holiday Catalog on page 12. The card base is Cherry Cobbler. The greeting is stamped from the Perfectly Plaid Stamp Set in Cherry Cobbler Ink and then layered on a piece of Cherry Cobbler Cardstock.

For the background of the card, I chose two designs from the Perfectly Plaid 6″ x 6″ Specialty Designer Series Paper. They overlap just a bit and I put a thin strip of Shaded Spruce Cardstock across the line where the two papers overlap.

The four Christmas trees are punched out easily with the Pine Tree Punch, new in the Holiday Catalog. I just chose patterns from the designer paper that I thought would stand out from the background. I could have also added a few embellishments, like the Holiday Rhinestone Basic Jewels on page 58.

If you use this dark cardstock for your card base, you probably want to put a piece of Whisper White Cardstock inside the card, perhaps stamping first, or writing a personal note later. Stamp a greeting or stamp just a small image somewhere on the inside of the card.

Really, with the Pine Tree Punch and the Perfectly Plaid Paper, this is a pretty easy card to make. You could change it up by only putting the designer paper on the bottom half of the card, allowing the punched trees to stand out more against a solid color background. Just play with the elements and see what you come up with! Use a ribbon around the seam between the two patterns of plaid paper.

Have fun thinking up creative ideas using the new products in the Holiday Catalog!

SHOP ONLINE FOR STAMPIN’ UP! PRODUCTS!

Wrapped in Plaid Christmas Trees Christmas Card

Wrapped in Plaid Christmas Trees Christmas Card

It’s the first Christmas card of the season, the Wrapped in Plaid Christmas Trees Christmas Card! This is a peek at some of the new products in the Stampin’ Up! Holiday Catalog! And just to get myself going, I decided to just “CASE” (Copy And Share Everything”) one of the samples in the catalog! This is the card that made me want to buy some of the products in this Wrapped in Plaid Suite. Ok, all of the products except the jingle bells!

And wait until you see this Wrapped in Plaid Specialty Designer Series Paper! I guess the word “Specialty” should have tipped me off, but I didn’t catch on until I got the paper. I was flipping through the papers, looking for the ones that matched the trees in the catalog. Finally, I flipped one over to see the other side, and WOW! It had gold foil accent lines on all the plaid pieces! You get 12 designs, 4 each in the package of 6″ x 6″ paper. Although the trees don’t show it off well, those gold accents on the plaid designs are really pretty!

Wrapped in Plaid DSP Plain Side
Wrapped In Plaid DSP Foil Accents

You can purchase the Pine Tree Punch in the Suite and even combine it with the Perfectly Plaid Stamp Set to save 10% in a Bundle. I know we have had other tree punches in prior catalogs but this is a nice one, different from the others. Very nice for punching out the stamped trees or just out of paper. You’ll be able to use it with some of the other suites, too.

The card base is Mint Macaron with a layer die-cut with the largest Stitched Rectangle Die. The trees are punched out and adhered to that die cut layer. They are larger than the rectangle so it is okay for them to hang over the top edge of the layer and over the bottom edge. Just don’t let them hang over the edge of the card base. I glued mine down with Multipurpose Liquid Glue but you could also pop them up with Dimensionals.

The greeting is stamped from one in the Perfectly Plaid Stamp Set in Shaded Spruce Ink on Whisper White. The catalog sample shows a Jingle Bell attached to the end of the greeting banner, but since I didn’t have the bells (yet) I found these All Is Bright Paper Clips that I already purchased. They are on the Clearance Rack! I clipped it onto the greeting and tied on a piece of Linen Thread. I actually think this will be better for mailing. I don’t think you can mail the Jingle Bells in a regular envelope, but they are cute for other projects or cards you will hand out.

I look forward to making many other cards with this cute designer paper and Pine Tree Punch! It’s not too early to start working on Christmas cards! Holiday Catalogs are probably in the mail, although they take longer than regular mail, but hopefully my customers will be receiving them soon!

If you are interested in purchasing Stampin’ Up! products and especially holiday and fall items and would like a Demonstrator to assist you, I would be happy to be yours! Send me your contact information and I can mail the catalogs to you.

In the meantime, keep checking out the new Annual Stampin’ Up! Catalog because once the Holiday Catalog comes out, the annual catalog doesn’t get much attention! Time will fly! We all need to get early starts on our holiday cards and projects!