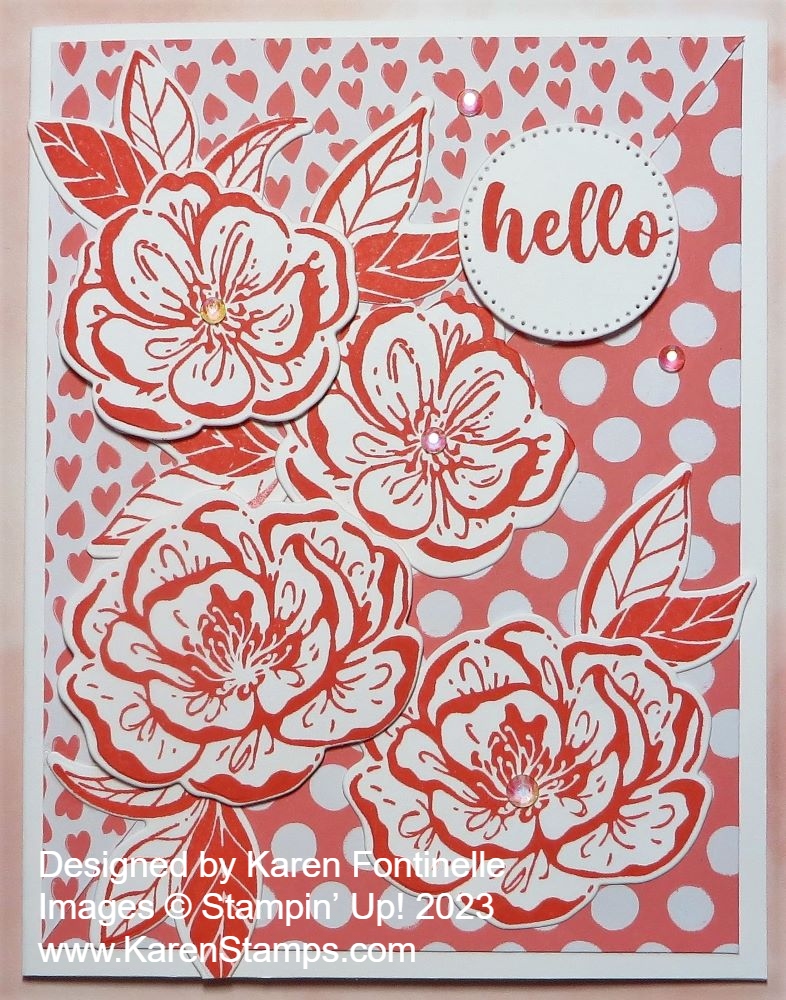
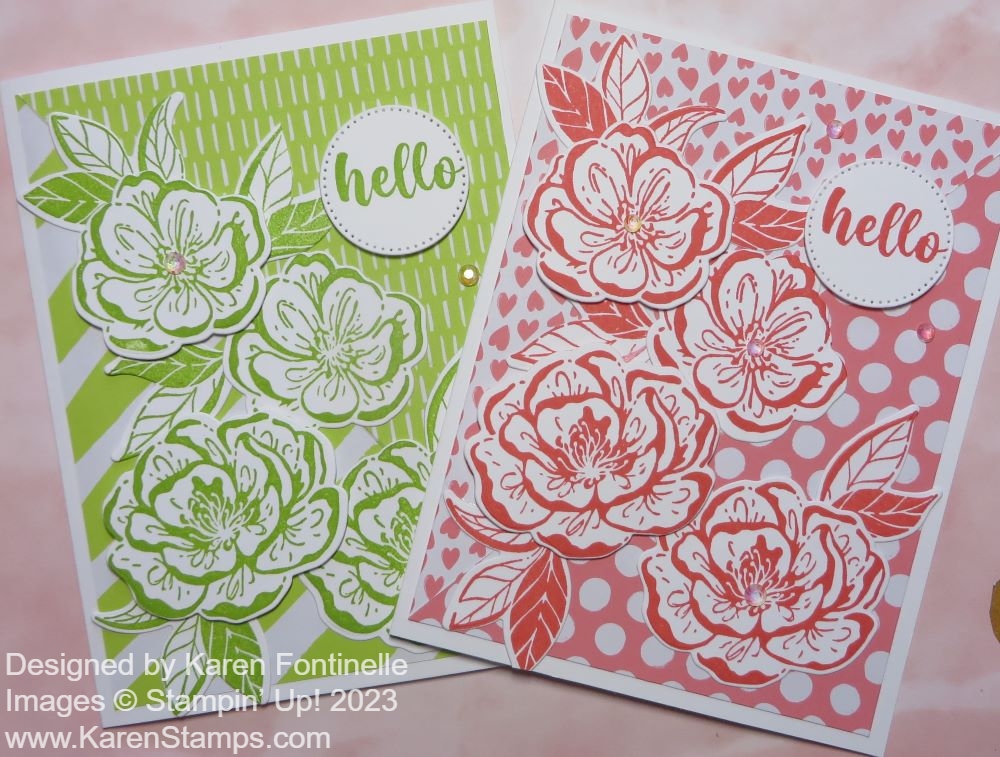
The other day I made a card exactly like this Irresistible Blooms Hello Card in Flirty Flamingo except in Lemon Lime Twist. I was SO happy with it after I made it that I wanted to make another one right away but in another color. I usually like a card after I make it or I wouldn’t even put it on my blog, but for some reason, this card design caught my eye!
The card base is Basic White but you could also use the same cardstock color as whatever designer paper you are using. In this case, I used the Flirty Flamingo patterned paper in the Brights 6″ x 6″ Designer Series Paper. I chose the hearts pattern and the polka dots and cut each sheet at 5 1/4″ x 4″. Then I cut each one in half diagonally. When you do this, be sure to look at the pattern in case it is going in a certain direction.
Just place the flowers and leaves around and see what arrangement you like best. You can pop up some of the flowers with Stampin’ Dimensionals as I did with one large flower and one small. Plan ahead to see where you are going to slide the leaves underneath the flowers so you don’t glue down the flowers completely to the edge. Or adhere the leaves to the flowers first before adhering to the card.
The “hello” greeting is in the Irresistible Blooms Stamp Set and is diecut with a small circle in the Stylish Shapes Dies.
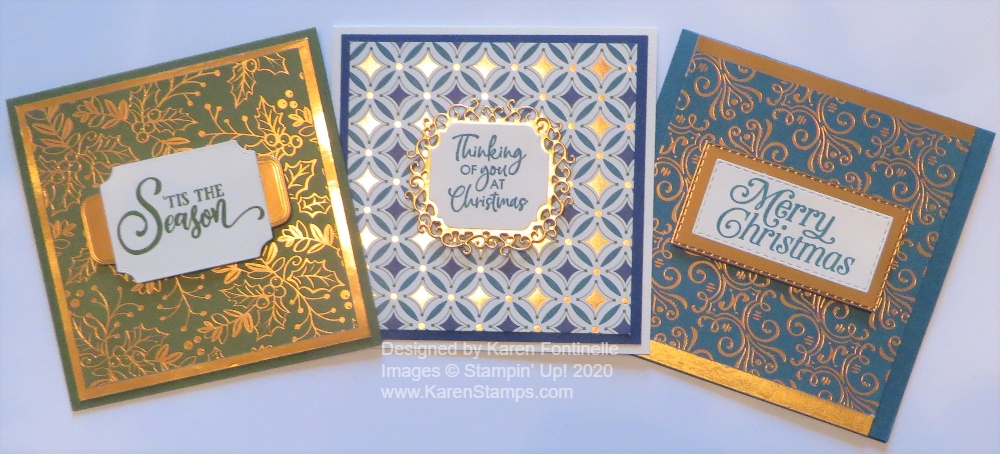
We’re down to the wire but you may still need some easy Christmas cards to make to put with a gift (or even mail late!) so take a look at these Brightly Gleaming Square Christmas Cards that you can make!
You can make square cards any size you like. I made these 4 1/4″ x 4 1/4″ by just cutting across a full sheet of cardstock horizontally at 4 1/4″. Since the paper is 8 1/2″ wide, when you fold it in half you have 4 1/4″ so that works out perfectly! You could also do 3″ x 3″ for a gift enclosure. Just trim your paper at 3″ x 6″.
You can make it super simple and just add a layer of designer paper, but I added some Copper Foil behind the designer paper on two of the cards. The first card has a base of Mossy Meadow Cardstock, then foil under the Mossy Meadow pattern of the paper, all just regular margins like we make on our cards.
The card on the right has a card base of Pretty Peacock Cardstock. When I went to make the foil layer underneath the Pretty Peacock pattern, all I had were scraps of the Copper Foil so I just cut two strips of foil and put them on two sides of the designer paper. It looks like I designed the card that way, not that I ran out of paper!
For the middle card, I used a card base of Very Vanilla with a layer of Night of Navy underneath the designer paper.
Each card just has a stamped greeting that is die-cut and then layered on another die-cut. You could use punches or simply cut squares or rectangles for the greetings and layers. I won’t even list the dies I used, just use what you have!
These cards I made are difficult to photograph because of the pretty foil accents on the Brightly Gleaming Specialty Designer Series Paper. This paper is, as I write this, on the Giant Year-End Closeout sale, discounted 50%! It’s very pretty so you might want to grab some if it is still available.
Square cards are quite the thing these days. The only thing is that if you mail a square card in a square envelope you are supposed to pay a surcharge. But these square cards will fit in our regular Medium Envelopes so no worries. But if you are just enclosing one with a gift or handing one to someone, you can use or make a square envelope with no issues.
These cards with just a card base, layer, and greeting are simple to make. Change up the designer paper or colors and greetings and you can make a card for a birthday or congratulations or whatever you need. Remember to check out this pretty paper in the Stampin’ Up! Online Store. It is well-worth 50% off for sure! If you need last-minute cards, try these Brightly Gleaming Square Christmas Cards!
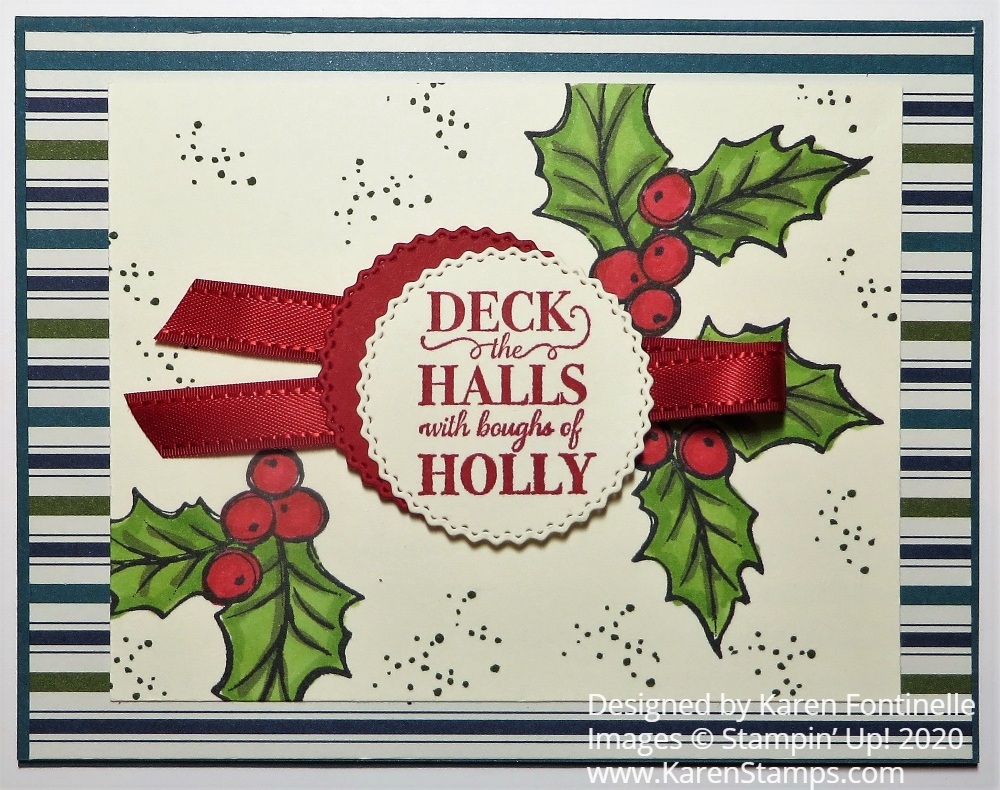
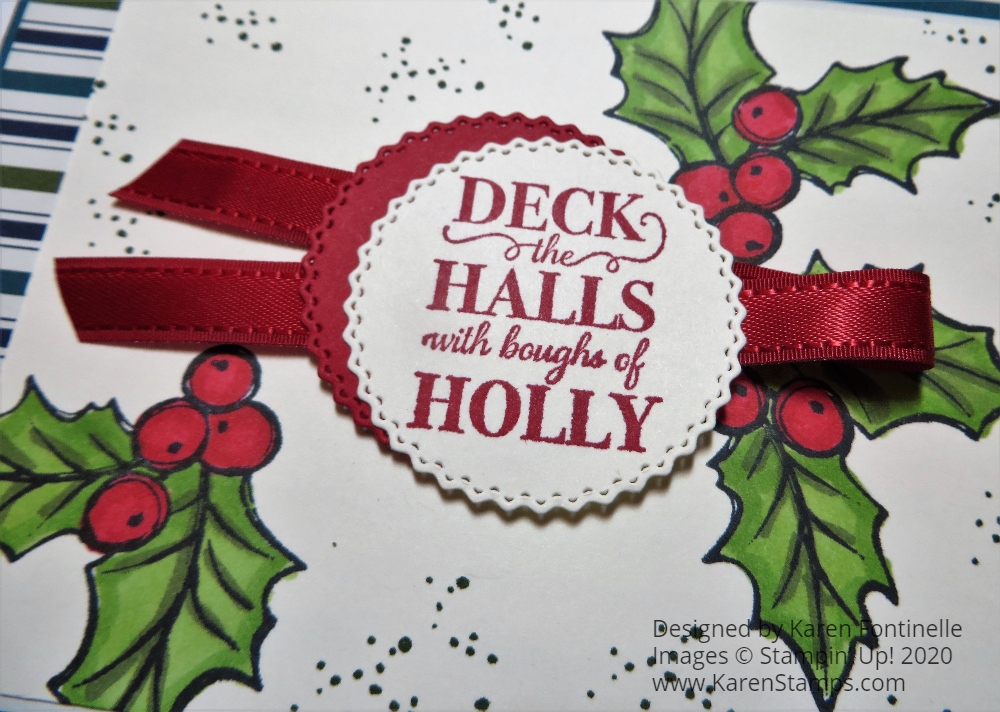
If the designer paper on this card looks familiar, it’s because it was in the Holiday Mini Catalog last year! This paper and the stamp set was carried over as were a few other products from last year into the upcoming August-December 2020 Mini Catalog. I had too many ideas in my head with too many new things and couldn’t think of a single card to make so I looked at the new holiday catalog and “got inspiration” for this Christmas Gleaming Deck the Halls Holly Card on page 19. And then I changed it up a little bit!
The card base is Pretty Peacock, one of the 2019-2021 In Colors. Then I used this striped pattern of the beautiful Brightly Gleaming Specialty Designer Series Paper (150429) for the card layer. I only left a 1/8″ margin around the edge of the card.
The focal point of the card is this Very Vanilla layer stamped with images from the Christmas Gleaming Stamp Set, also on page 19. I stamped the holly leaves in Memento Ink and colored them with Stampin’ Blends markers. I used Granny Apple Green with a touch of Daffodil Delight first on the leaves and a little bit of Mossy Meadow to draw over the leaf veins. The berries are Real Red, of course!
The greeting is stamped in Real Red Ink and die cut with the Tasteful Labels Dies. I loved the circle die in this set. After it cuts out the circle with the pretty edge, there is also a pretty edge left on the paper you cut the circle out of. I cut out another circle out of Real Red to layer behind the greeting, off center since it is the same size as the greeting.
Before I adhered the greeting to the Very Vanilla panel, I thought it needed a little something more so I used the stamp with tiny dots and stamped that randomly in Mossy Meadow. I added a piece of Real Red 3/8″ Double-Stitched Satin Ribbon folded over so it sticks out behind both sides of the greeting and layer. I popped up this greeting with Stampin’ Dimensionals®. I think it would also be fun to spritz the card with Champagne Mist Glimmer Paint in a Spritzer. I might try that if I make some more of this design!
After you get your new Holiday Catalog products and you make a Christmas card you really like, you might want to make maybe 5 cards and then you’ll have five cards made real easily and you can still make multiples of other designs! I usually like to make several different designs of cards!
On the inside of the card you will want to put a Very Vanilla layer since the card itself is a dark color. You can stamp a greeting for the inside of the card or use a strip of the designer paper or stamp one of the ornaments from the stamp set. You could also stamp an ornament on the envelope while you have everything out!
Don’t forget to use the wonderful Stampin’ Up! catalogs for inspiration! Copy exactly or change it up if you get a slightly different idea.
The August-December 2020 Mini Catalog (otherwise known as the Holiday Mini!) goes live Tuesday, August 4th! If you don’t have a copy you will be able to view it online on that day or just see all the products in the Online Store! If you already have this designer paper and stamp set from last year, you can duplicate this Christmas Gleaming Deck the Halls Holly Card right now!
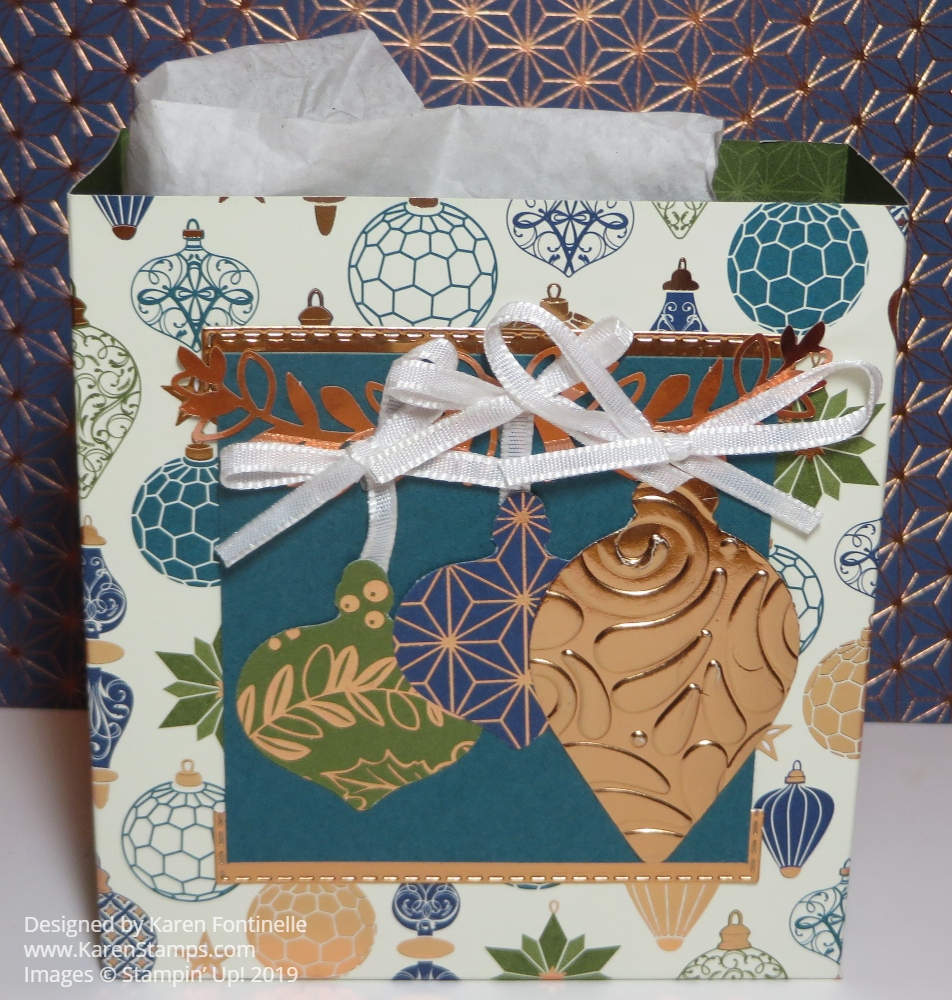
This Brightly Gleaming Ornament Gift Bag is perfect for a small gift and looks prettier than anything you would buy in a store! And instead of driving to a store for a little bag, use the time and stay home and make your own! It’s much more fun! Even better, sit down and make more than one bag and you’ll have a collection ready to go!
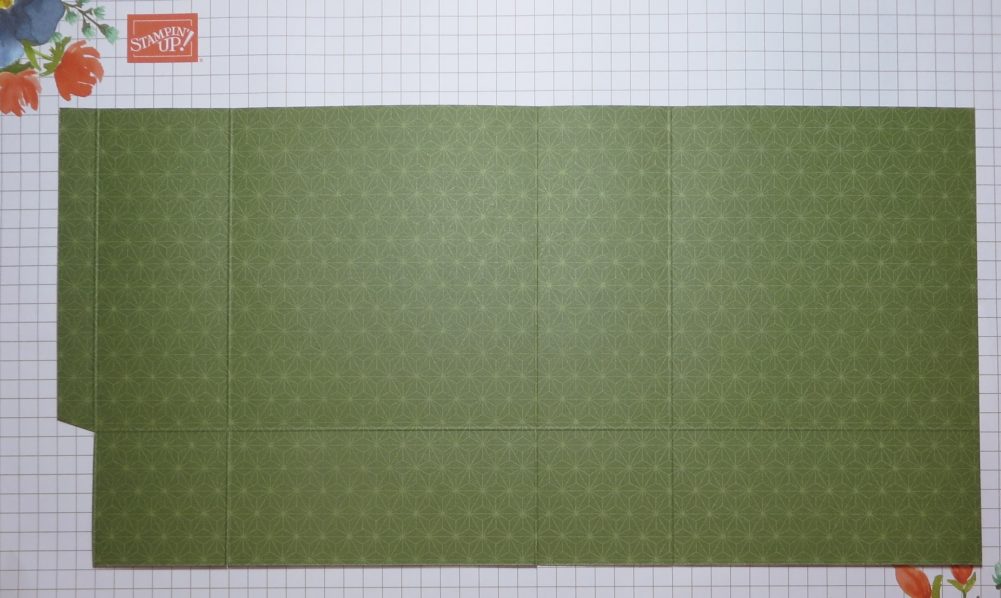
Start with a 6″ x 12″ piece of paper. Score at 4″, 5 3/4″, 9 3/4″, and 11 1/2″. Turn the paper so the short edge is at the top and score at 1 3/4″. This will make the bottom flaps of the bag. Cut those short bottom tabs up to the 1 3/4″ score line. Cut off the little 1/2″ tab on the bottom.
Fold on all the score lines and crease well with the Bone Folder. Adhere the tab on the end to the other side to assemble the bag. Then adhere the flaps on the bottom. The Tear & Tape Adhesive works great as far as strength but does not allow for any “wiggle room” like the Multipurpose Liquid Glue. So use whichever works best for you. You will be able to see how the bag goes together as you start to assemble it.
This little Brightly Gleaming gift bag doesn’t need too much in the way of decoration, but of course, I had to put a little more into it than I needed to! I punched the three ornaments with the Gleaming Ornaments Punch Pack. The copper foil ornament is embossed first with the Swirls & Curls Embossing Folder and then punched, but you could punch it out first.
I thought the ornaments needed a little bit of a background and I happened to have a scrap piece of Pretty Peacock Cardstock handy so I just used that, cutting it down as small as I could. Then I also saw a die cut Copper Foil piece and cut that in half lengthwise to be a top and bottom layer under the Pretty Peacock.
I used some copper foil branches in the Brightly Gleaming Foil Elements to look like the branches the ornaments were hanging from. I used some scrap white ribbon to “hang” the ornaments and then tied small bows.
That’s more embellishing than I needed to do on a little gift bag but it was fun! You could even put a cookie or two inside, tea bags, some jewelry, even a gift card. Make this basic gift bag with half a sheet of 12″ x 12″ paper for any occasion!
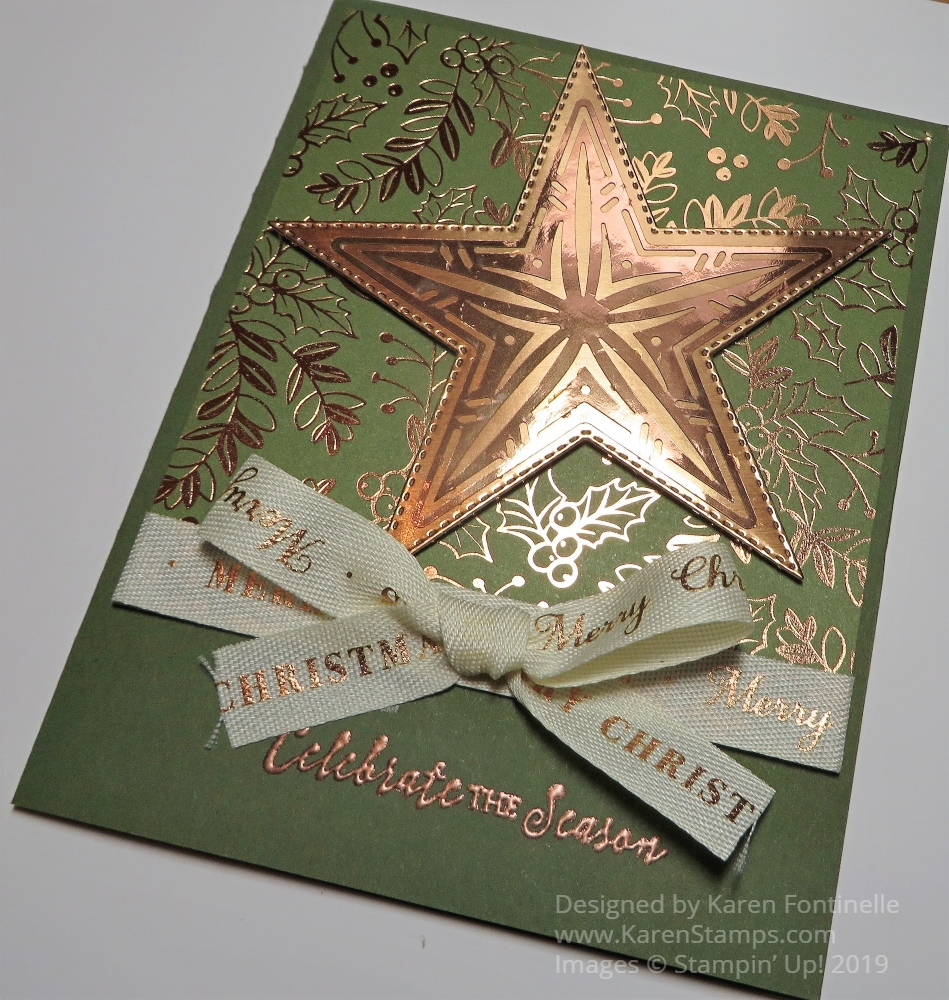
This Brightly Gleaming Stitched Star Christmas Card was very difficult to photograph without a giant glare of the Copper Foil, but I think I got it pretty well now on an angle! I’m feeling like I haven’t had enough time to play with all my Christmas stamp sets and accessories and time is getting short! Panic is setting in! And a sore throat that slowed me down this past week!
However, I did fit in some stamping time and here is one example! It seemed like a lot of samples I was seeing used the Night of Navy designer paper in the Brightly Gleaming Specialty Designer Series Paper. I thought I would change things up a bit and use the Mossy Meadow color.
The card base is Mossy Meadow and the Mossy Meadow patterned designer paper just comes down partway on the card base. Be sure to adhere some of the Very Vanilla/Copper 1/2″ Classic Weave Ribbon around the bottom of the designer paper before adhering the designer paper to the card base! And before you do any of that, if you want to emboss a greeting at the bottom of the card, do it before you have ribbon hanging in the way with the potential to ruin the card! I got lucky and could have covered it up with an embossed greeting on a different paper. But it’s better if you plan your card and space first and stamp or emboss before you get everything adhered to the cad!
The star is die cut with the largest star in the Stitched Stars Dies. I just love that we have star dies again because I think stars are SO useful in designing cards and projects. Just think about how many things you can use stars for besides Christmas! Birthdays, congratulations, babies, retirement, everything! These stars are beautiful dies and certainly not just for the holidays.
The star is cut from Copper Foil. Then that Copper Foil star is overlaid with the large star in the Brightly Gleaming Foil Elements. I used the Multipurpose Liquid Glue in teeny tiny dots on the back of the foil element to adhere to the die-cut star. I got lucky and didn’t make a mess with the glue so it worked fine. On this card, I popped up the foil star with Stampin’ Dimensionals, but you can also adhere it flat on the card.
The ribbon is really beautiful. I need to learn how to tie a bow with the words all going in the same direction if that’s possible! I passed it up on one of my first Holiday Catalog orders, but then added it later because it is something different!
For the greeting on the card front, I chose one from the Itty Bitty Christmas Stamp Set because I knew I needed something small. I stamped it with Versamark and heat embossed with Copper Stampin’ Emboss Powder and my Heat Tool. Heat embossing is magical, if you haven’t tried it yet!
For the inside of the card, I added a Very Vanilla layer of cardstock, stamped with a greeting in Mossy Meadow Ink and with a strip of the same Brightly Gleaming DSP along the inside edge of the Vanilla layer. The greeting used inside the card says “Hoping all your Christmas wishes come true.” in the So Many Stars Stamp Set. Save 10% by purchasing the So Many Stars Stamp Set and Stitched Stars Dies in a Bundle.
Thanksgiving is coming up so make those cards first if you are mailing a few cards to friends and family. But then it’s really time to get serious about Christmas cards!! You’ve probably paged through the Holiday Catalog a bunch of times, but maybe you need another few run-throughs before it gets too close to the holidays!
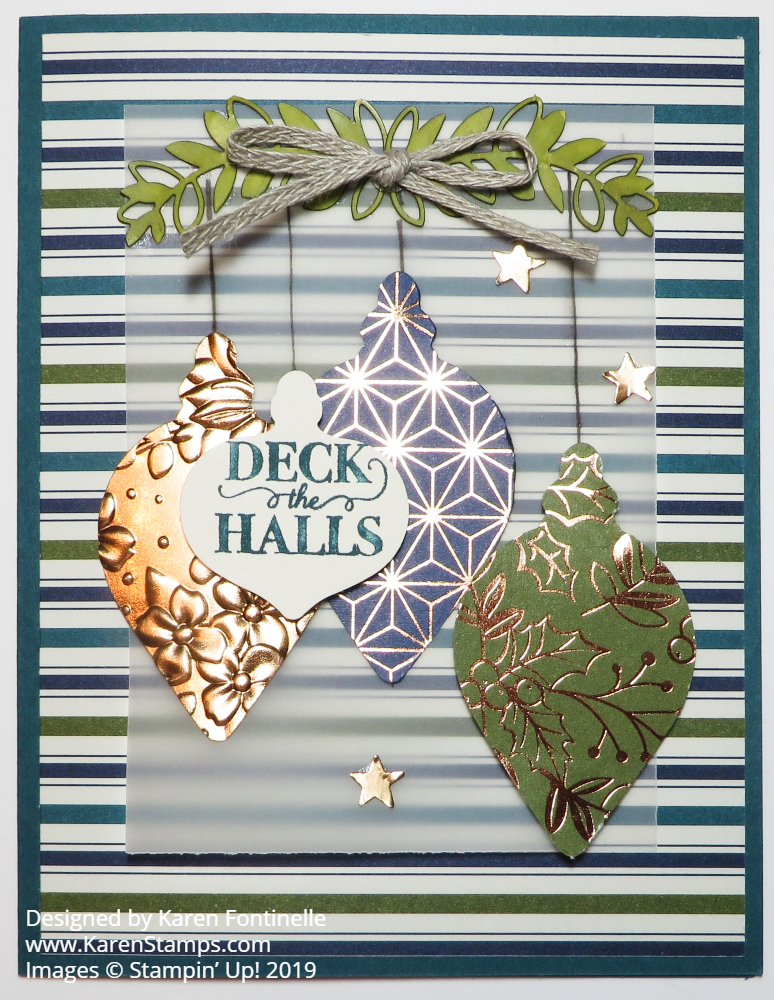
My second Christmas card, the Brightly Gleaming Ornament Christmas Card, is also one that I pretty much copied from the upcoming Stampin’ Up! Holiday Catalog. It was my favorite sample in the catalog for the Brightly Gleaming Suite! Mine has a few variations based on what I had or didn’t have or what effort I wanted to go to!
This Suite certainly has some beautiful designer series paper! It has copper foil accents on one side and beautiful generic designs on the other side. Except for the ornaments and the pattern with holly leaves, you can use most of this paper for other occasions. It doesn’t all have to do with Christmas! You will want to put this Brightly Gleaming Specialty Designer Series Paper on your Holiday Catalog order.
The card base is one of the In Colors, Pretty Peacock. The designer paper layer from Brightly Gleaming DSP is next with a smaller piece of Vellum Cardstock over it. I think the sample used one of the Stitched Rectangle Dies so it is probably either the vellum or the DSP but I couldn’t tell from the sample in the catalog. You can do it or not.
The greenery at the top really had me fooled! Finally, I figured out that it came from the Brightly Gleaming Foil Elements in the Suite on page 31. You can use the foil side but you can also flip them over and color the white side on the back! I used a Dark Old Olive Stampin’ Blend Marker to color the two greenery pieces. They may have used one more piece in the catalog because both sides of their greenery are turned up on the ends. I just used two pieces which I think are fine. They use Linen Thread to tie the bow and attach to the greenery. I am out of Linen Thread (although it is one of my staples to have on hand!) so I used the 3/16″ Braided Linen Trim.
The blue and green ornaments are punched with the large ornament in the Gleaming Ornament Punch Pack out of the Brightly Gleaming DSP. The sample stamps the green ornament and punches it out. I just used the pretty paper! The copper one is punched out of Copper Foil and then embossed using the Country Floral Embossing Folder! There is a new embossing folder in the suite that is used in the sample, the Hammered Metal 3D Embossing Folder.
The smallest ornament is stamped on Very Vanilla Cardstock using part of the wording on a stamp in the Christmas Gleaming Stamp Set. Just color in the words you want to use with a Pretty Peacock Stampin’ Write Marker and stamp. Then I punched it out with the smaller ornament in the ornament pack. Very handy to sell two sizes in one pack!
After arranging the ornaments, I just drew the strings to the greenery with the small tip of the Basic Black Stampin’ Write Marker. I popped up the green ornament and the ornament with the greeting with a Stampin’ Dimensional®.
The sample also has stars from the Stars Designer Elements package. I don’t have those so I found a retired punch, the Confetti Punch, which had tiny stars in it and used those from Copper Foil.
The good thing is you have lots of covered space behind the greenery and ornaments on the backside of the vellum where you can apply glue and it won’t show through to the front!
I think this card would be fairly easy to make if you wanted to make multiples once you know exactly how it is made. While you play around with your new products from the Holiday Catalog, go ahead and make multiples, maybe 5, or each design you try. Before you know it, you will have a stack of Christmas cards ready to send!
Catalogs are arriving in mailboxes for my customers so keep an eye on your mail! If you think you should be getting a catalog from me and don’t, either they are reading it at the post office or it has gotten lost. I can have Stampin’ Up! send out another one to you. If you are new and would like a catalog, please email me at Karen@Karenstamps.com with your contact information and I’d be happy to send one to you so you can order some of these beautiful new goodies as soon as the catalog goes live!
Don’t forget to use your July Bonus Coupons and if you got the August Paper Pumpkin Kit and you want to make cards, order the Add-On Kit in the Online Store on your next order! While Supplies Last!