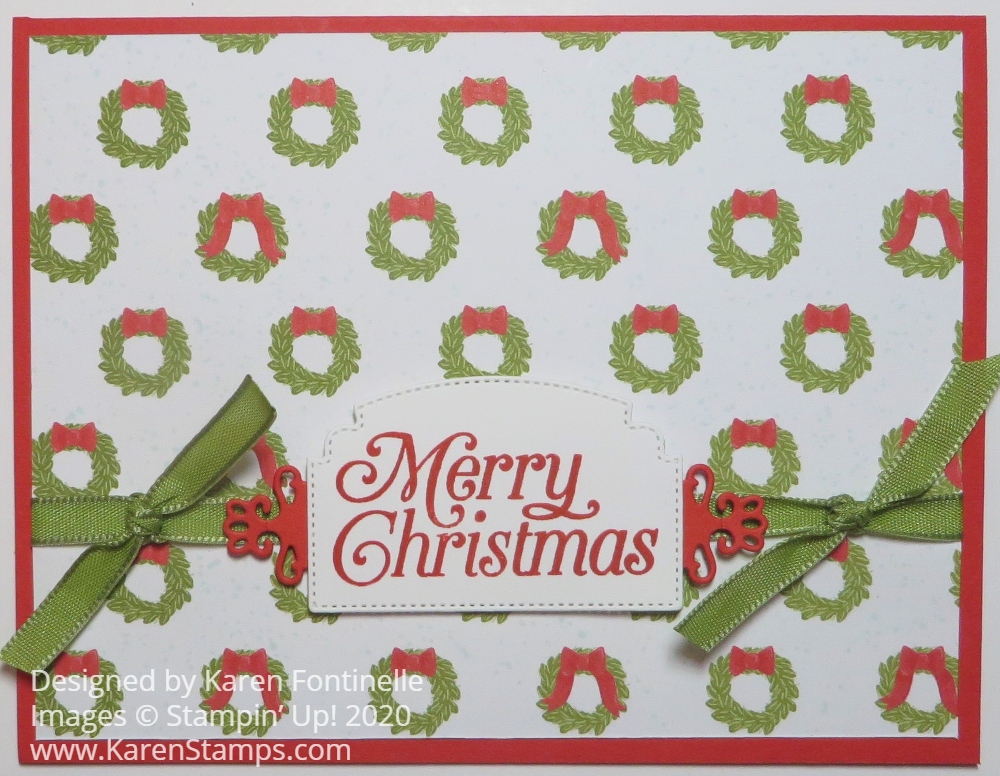
Make this Trimming the Town Wreath Christmas Card for a pretty quick and easy Christmas card. In fact, you can make it even easier than mine if you only use one die cut or no die cuts!
This is just a card with a piece of designer paper and a greeting plus a little ribbon. It’s a very simple design. The card base is Poppy Parade with a layer of designer paper from the Trimming the Town Designer Series Paper. You will find this cute wreath print on the back of the paper with all the holiday phrases. It’s often tough to know which side of the paper to use and tough to cut into it, especially when you like both sides!
Before adhering the designer paper to the card base, I adhered the strip of ribbon around the designer paper (just adhere the ends on the back, no need to go all the way around and waste a couple of inches of ribbon!). This ribbon is in the Ornate Garden Combo Pack.
The greeting is stamped in Poppy Parade Ink on Whisper White and die cut. The greeting is in the Perfectly Plaid Stamp Set. The die cut is part of the Ornate Frames Dies. To layer it on something, I cut out the narrow die with the fancy ends in the same set, but cut it in half so that I could place each piece at each end of the greeting. That die cut in Poppy Parade was adhered to the greeting and then popped up on Stampin’ Dimensionals. I also added two knots of ribbon on each side.
That’s all there is to this card. You could simply cut a rectangle out of Whisper White and a larger rectangle out of Poppy Parade with your Paper Trimmer and not do the die-cutting is you were making a lot of Christmas cards like this one.
Have fun trying out new card designs with different designer papers and greetings!
Stock up on stamp sets at a stellar price today! For one day only, you can purchase select cling and photopolymer stamp sets at a 15% discount. This short, stamp-tacular sale only happens once a year—you won’t want to miss out on these super savings!
For 24 hours on 23 September—from 12:00 AM to 11:59 PM (MT) online—a select number of cling and photopolymer stamp sets from the 2020–2021 Annual Catalog will be available for purchase at a 15% discount.
The Online Store will have a category entitled “Stamp Sale” that displays every stamp set on sale to ensure a quick and easy shopping experience.
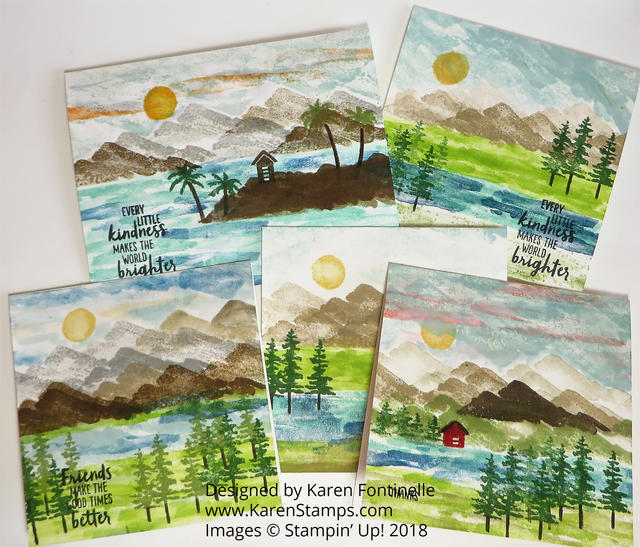
Here are some cards I have made with a few of the stamp sets on sale today so you can see some ideas for using them!
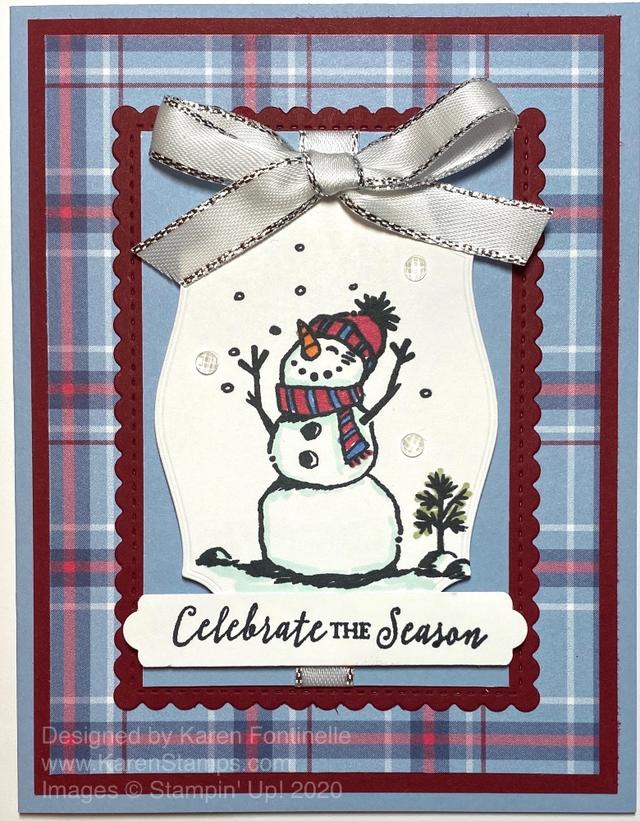
Snowman Season Stamp Set
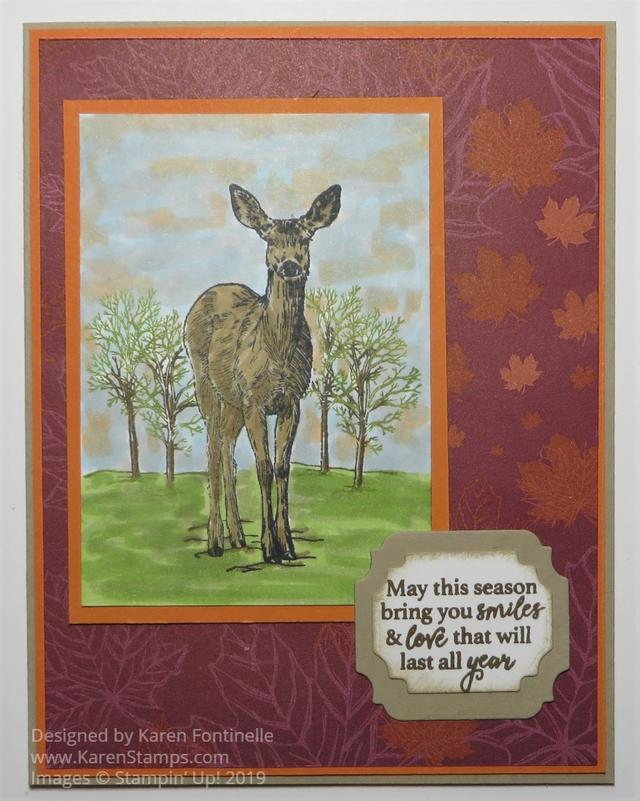
Nature’s Beauty Stamp Set
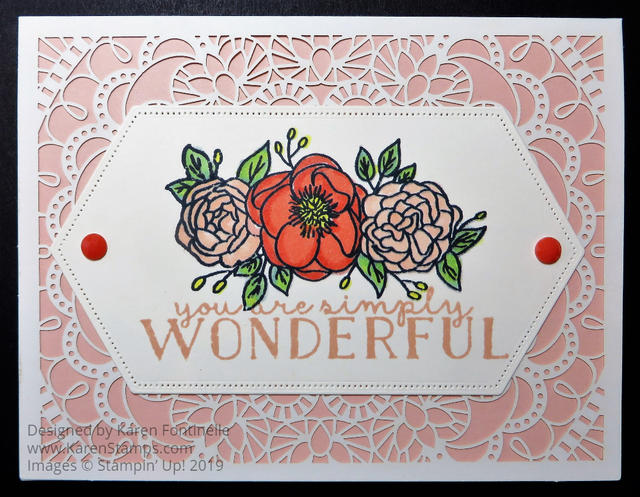
Beautiful Friendship Stamp Set
Perfectly Plaid Stamp Set
Waterfront Stamp Set
Butterfly Gala Stamp Set
Bloom & Grow Stamp Set
Hope these sample cards give you some ideas for how to use some of the stamp sets on sale today! Click on each photo to go to my blog post for details!
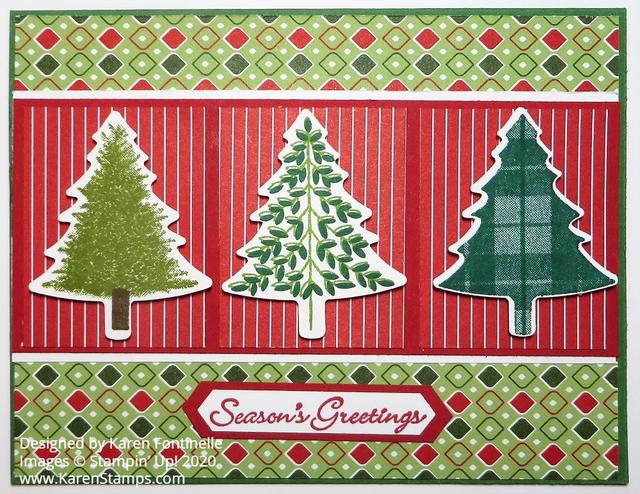
This Perfectly Plaid Christmas Card With Trees is one you can make with two stamp sets that will on sale at 15% off tomorrow, September 23 during the Stampin’ Up! Stamp Sale! This sale will only last 24 hours!
The sale will last basically for 24 hours on Wednesday, September 23, 2020—from 12:00 AM to 11:50 PM (MT) Remember, just select stamp sets but there are a lot to choose from.
For this Christmas card, I chose Garden Green for the card base with a layer of paper from the Heartwarming Hugs Designer Series Paper. So many great patterns to choose from for cards in this collection!
The stamp set that will be on sale is the Perfectly Plaid Stamp Set. This is a great Christmas set from last year that is now in the Stampin’ Up! Annual Catalog. There is a coordinating Pine Tree Punch that works great with the stamped trees if you want them to be cut out. I owned this Perfectly Plaid Stamp Set last year and used it a lot.
While that stamp set has lots of great holiday greetings, I also used another stamp set that will be on sale tomorrow for 24 hours, the Itty Bitty Christmas Stamp Set. I LOVE all these Itty Bitty stamp sets! Sometimes you need a small greeting to fit on the card and these sets always have something I can use! In this Christmas set, I chose “Season’s Greetings” and then punched it out with the Classic Label Punch. To help offset it, I added a piece of Real Red behind it and snipped the ends to match the punched ends.
I stamped each tree and punched it out, then layered it on a small piece of Heartwarming Hugs DSP. Those are layered on a strip of Real Red Cardstock. To help that stand out, I added a strip of Whisper White top and bottom on the Real Red strip. The trees are popped up on Stampin’ Dimensionals, the Minis and the Black ones.
If you need some stamp sets, make your list and check it twice! Save 15%! It’s something!
Even though we always want new things, I was happy to see a few things I already purchased last year show up in the new Stampin’ Up! Annual Catalog. Two things I used on this Pine Tree Punch Christmas Card were thePerfectly Plaid Stamp Setfor the greeting and the Pine Tree Punch for the Christmas trees.
I got the idea for this card by looking back at last year’s Holiday Catalog at a sample of a tag. I changed it a little bit plus made it into a card. Of course, I could have stamped the trees from the Perfectly Plaid Stamp Set and punched them out as they did on the sample from last year’s catalog, but instead, I wanted to use our new Plaid Tidings 6″ x 6″ Designer Series Paper for the trees. One punch and done!
The card base is Real Red with a layer of Shimmery White Cardstock. I love the Shimmery White Cardstock for its very subtle shimmer. It is basically white but just a tiny shade off-white. I embossed this layer with the new Winter Snow Embossing Folder.
The circle behind the trees is actually two die cuts in Real Red. The outer one is the largest Layering Circle Die with a scalloped edge and then a Stitched Shapes Die circle on top of that.
The greeting is stamped in Real Red Ink from the same Perfectly Plaid Stamp Set on Shimmery White. I got the idea to punch just the ends out of this narrow strip using the Everyday Label Punch.
Be sure you stick in the label from the top of the punch, not from the side like usual or you will punch both ends, unless that would happen to fit perfectly, but usually when you do a trick like this you have to punch one end at a time.
I tried various ways of layering some color underneath the greeting, even thinking about leaving the greeting without a layer, but finally, I came up with red just under the top and bottom of the greeting. Then I added a Red Rhinestone on each end. If you don’t have the Red Rhinestones, just color one of your clear rhinestones with a Stampin’ Blend marker! You can have rhinestones in any color!
I also added some Snowflake Sequins on the layer behind the trees and also on two of the trees. The gold embossed tree didn’t seem to need anything else! Mixed in with the sequins are other sequins that are not snowflakes so I used a few of those on the trees almost like ornaments. Put just the teeny tiniest dab of Multipurpose Liquid Glue where you want the sequin and place the sequin with the Take Your Pick tool. If you don’t already own this tool, you should put it on your next order! It is handy for picking up sequins with the sticky end and the pointy end or spatula end are great for picking rhinestones and other things up off their sheet getting underneath the adhesive. You will use it a lot!
Once you make one of this Christmas card, you could easily do an assembly-line process of making more. Get all the pieces punched or embossed or stamped and then just assemble. Don’t make one whole card at a time, except for maybe the first one for a sample. Cut all the strips for the greeting, emboss all the card layers, punch all the trees of one color, punch all the trees of the other color, etc. etc. In some ways, you almost get muscle-memory while you are working doing the same thing over and over and it makes assembly go faster! And it’s fun to make multiple cards without having to thing of designing each one! Try it with this Pine Tree Punch Christmas Card.
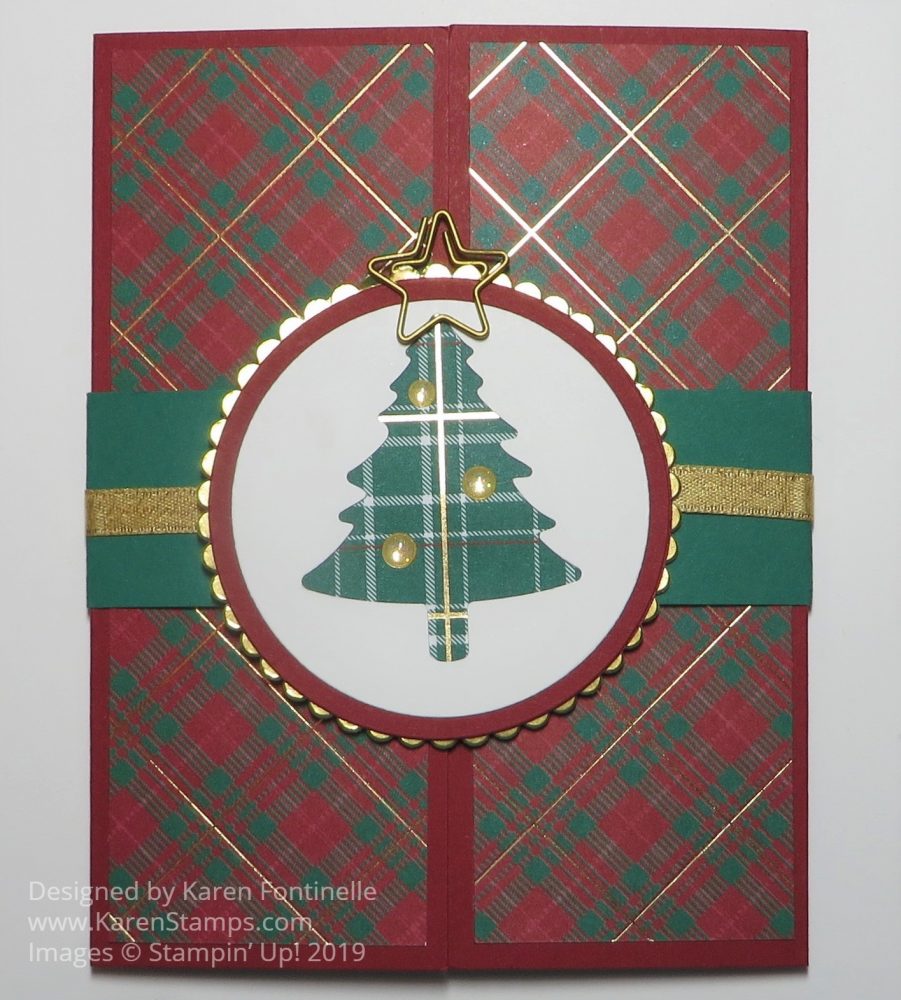
This Wrapped in Plaid Gatefold Christmas Card is fairly easy to make especially if you just copy my design! Gatefold cards are easy enough and yet look impressive to the recipient, especially knowing that you made it! It is still the size of a regular card and you can decorate the card base any way you like.
The card base is 8 1/2″ x 5 1/2″ as per usual. Instead of scoring and folding in half, score from each end to fold over the center of the card. Score at 2 1/8″ from each end of the Cherry Cobbler Cardstock. Crease and fold with the two ends meeting in the center.
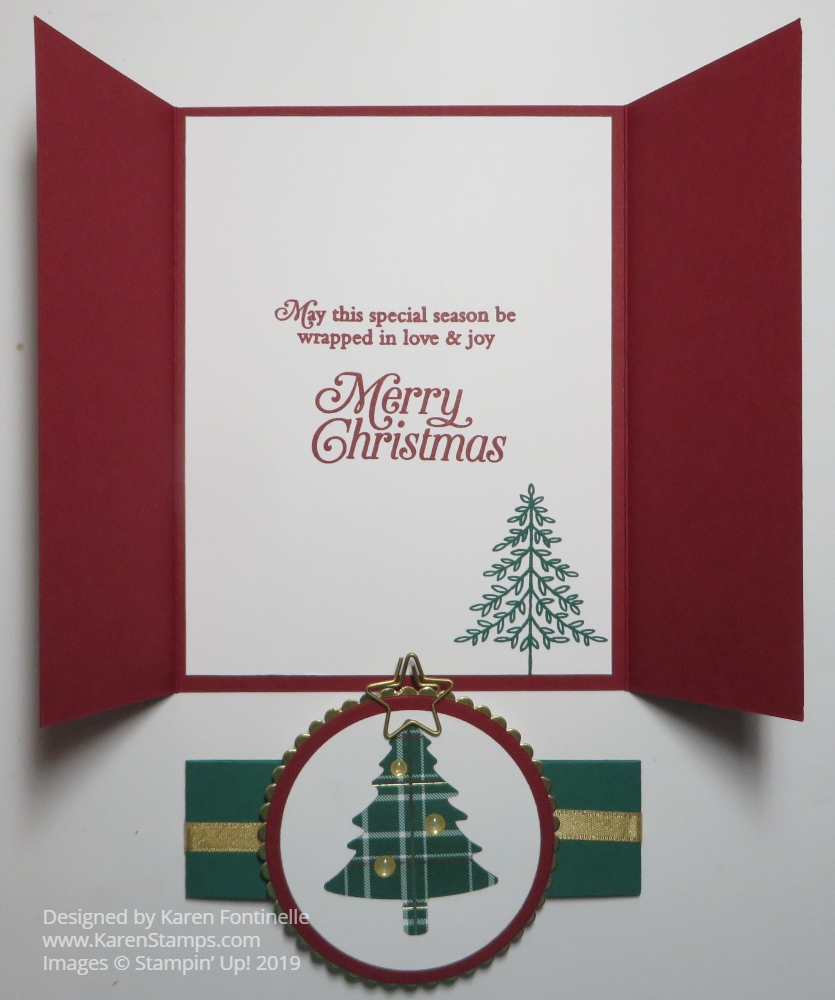
For the inside of the card, cut a piece of Whisper White and stamp whatever greetings you like. I added a tree from the Perfectly Plaid Stamp Set. You could also stamp right on the inside of the Cherry Cobbler Cardstock, but since it is a little dark, you might prefer the Whisper White layer for your personal greeting and signature.
For the belly band cut a strip of Shaded Spruce 11″ x 1 1/4″ or whatever width you would like. Fold around the card, crease the folds, cut off the excess length and have the overlapping ends meet at the front center of the card. You might think you would want the belly band to meet at the back, but if it meets at the front, the tree piece that you add will cover up the ends. I added a piece of Gold Shimmer Ribbon around the belly band and held in place with Mini Glue Dots.
You can add whatever you like for the center of the belly band. I used the Pine Tree Punch to punch a tree out of a piece of Whisper White and then die cut this piece with the Layering Circles Die. Behind that, I die cut a slightly smaller piece of Wrapped in Plaid DSP that I wanted to show through and adhered to the back of the punched tree. This was layered on a Cherry Cobbler die-cut circle, which is then layered on a die-cut scalloped circle of Gold Foil.
As I was looking in my drawer for embellishments, I came up this clip-on star that had been on the Clearance Rack. Perhaps you already own these clip shapes. If not, just punch out a gold star from whatever you have. And for a little extra bling, besides the gold accents in the Wrapped in Plaid DSP, I adhered a few Gold Glitter Enamel Dots. These dots, along with the Gold Shimmer Ribbon are items that are in the Christmastime Is Here Suite.