Tag Archives: Poinsettia Petals Stamp Set

Poinsettia Decorated Mini Coffee Carrier

Poinsettia Decorated Mini Coffee Carrier

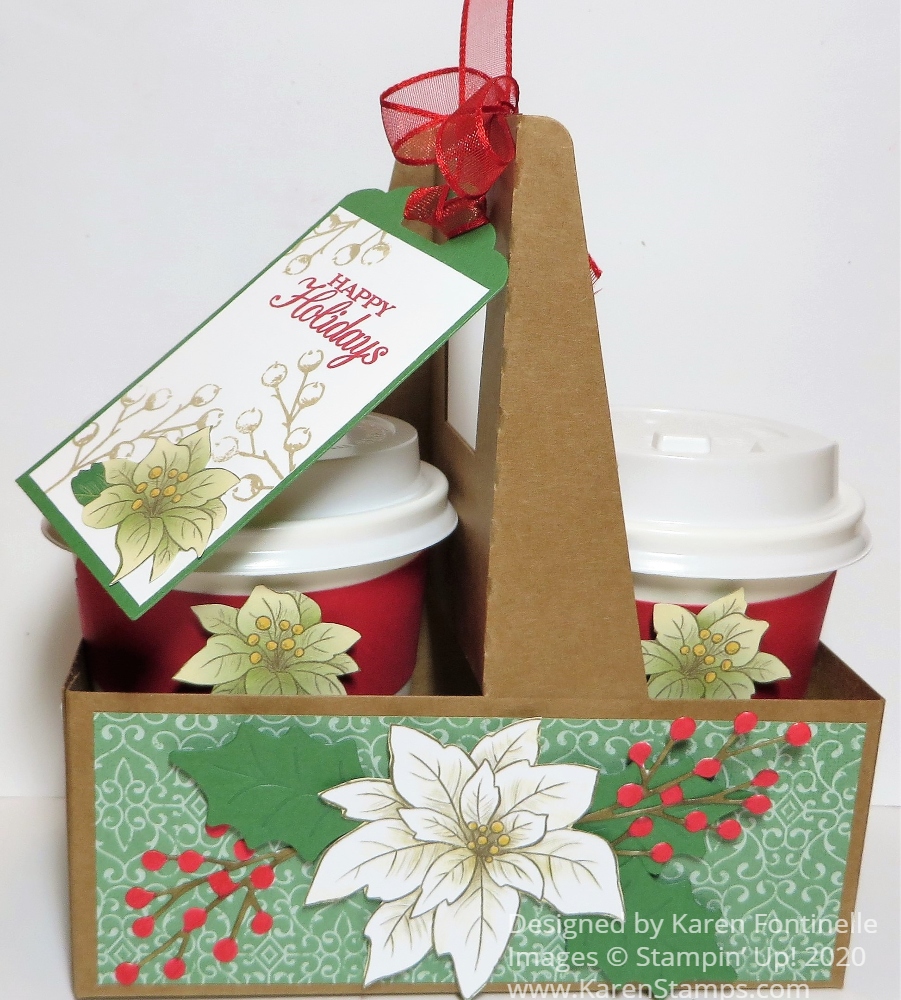
I’ve had these carriers for a while and kept forgetting to use them, but here is one for you today, my Poinsettia Decorated Mini Coffee Carrier! These will be fun to make for neighbor gifts or treats or extra presents for your family. You can use them in so many different ways for so many different treats!

Fill the cups with cocoa mix, or maybe just one cup and then on the other side put cello bags of marshmallows and maybe a peppermint stirrer. Put any kind of candy or maybe small cookies inside the cups. Fill cello bags with a treat and insert those inside the cup but leave off the lid so the recipient will see the pretty treat bag tied with a ribbon and a tag. Decorate the Mini Coffee Carrier but put in gifts of small candles or bath products or some other kind of product or container. The ideas are endless!

Mini Coffee Carrier Flat

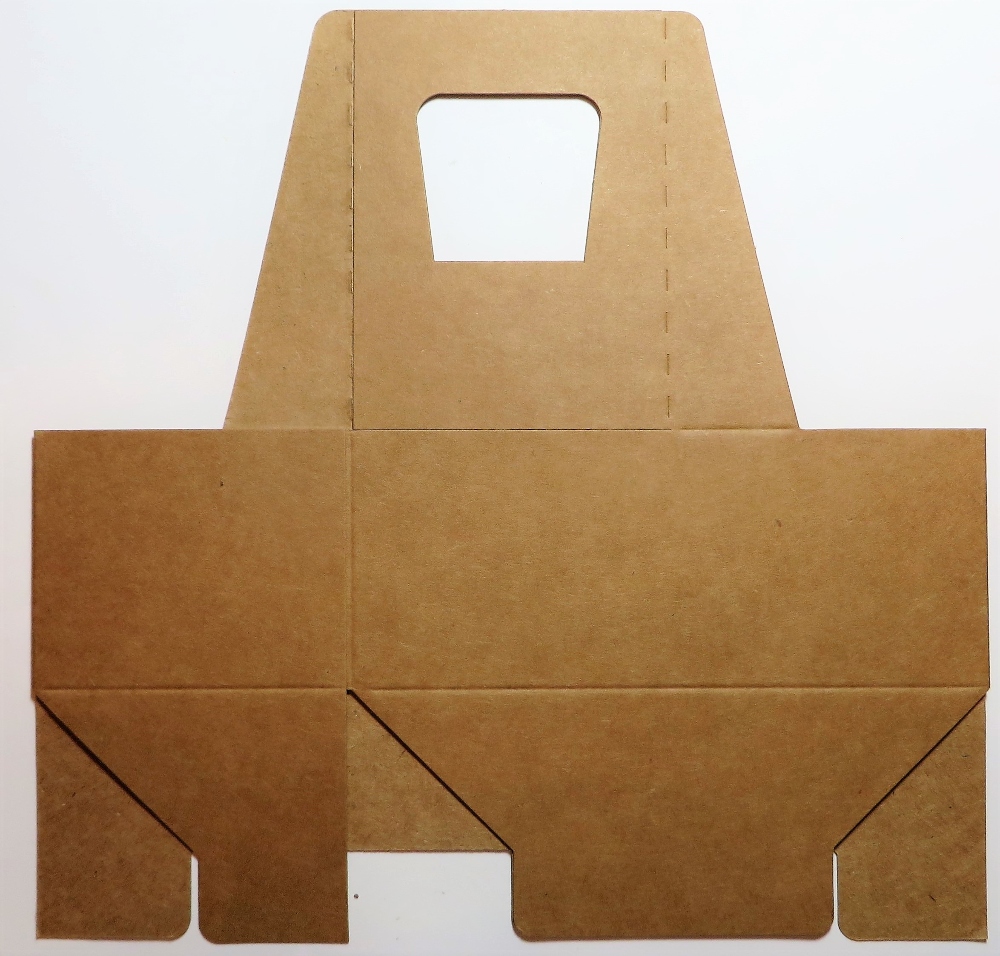
This is what the Mini Coffee Carrier starts out like! It is folded flat so you don’t have to worry about storage space. Just start sticking your hands in there to open it up and then when it gets loosened up, crease and fold on all the score lines to make your carrier. Play around with those tabs on the bottom and make sure you have them assembled so they are strong to hold the contents of the carrier. You get 8 kraft carriers for only $5!

The coffee cups are separate if you would like those. Order the Mini Coffee Cups and get eight cups and lids and they are food safe and can hold a beverage up to 200 degrees F.

Mini Coffee Carrier Side Paper

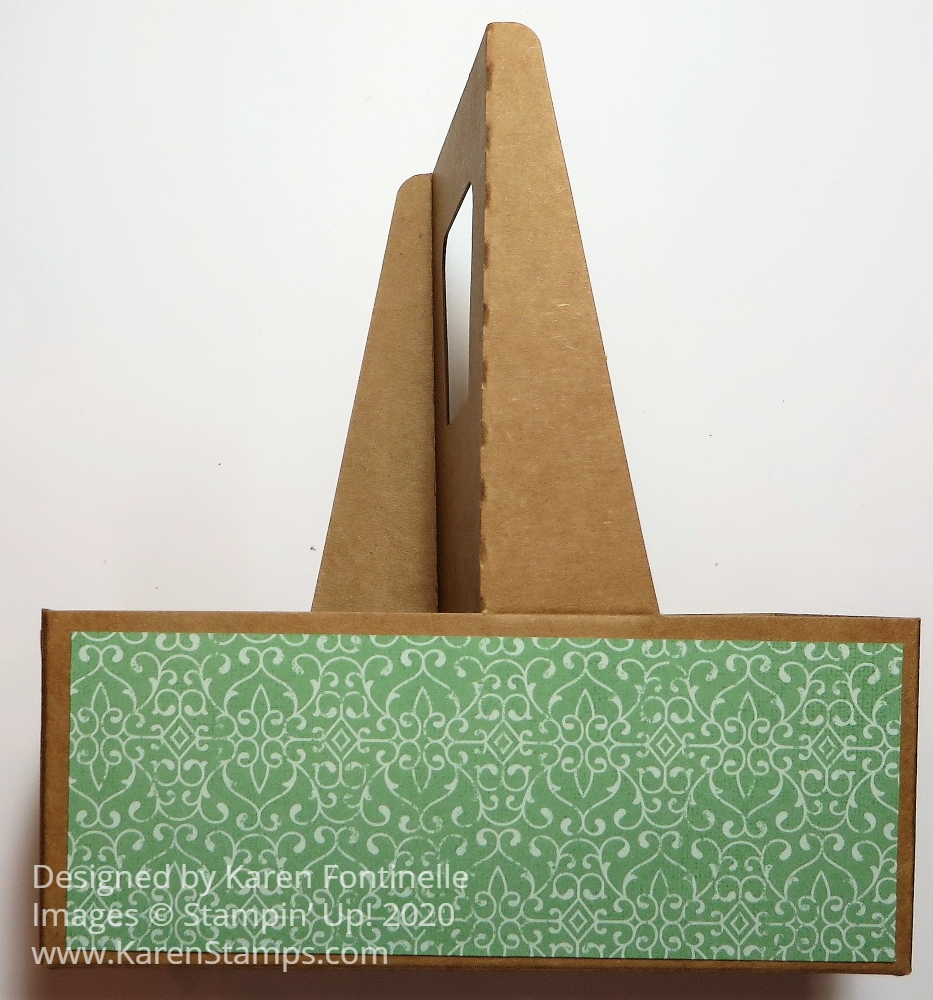
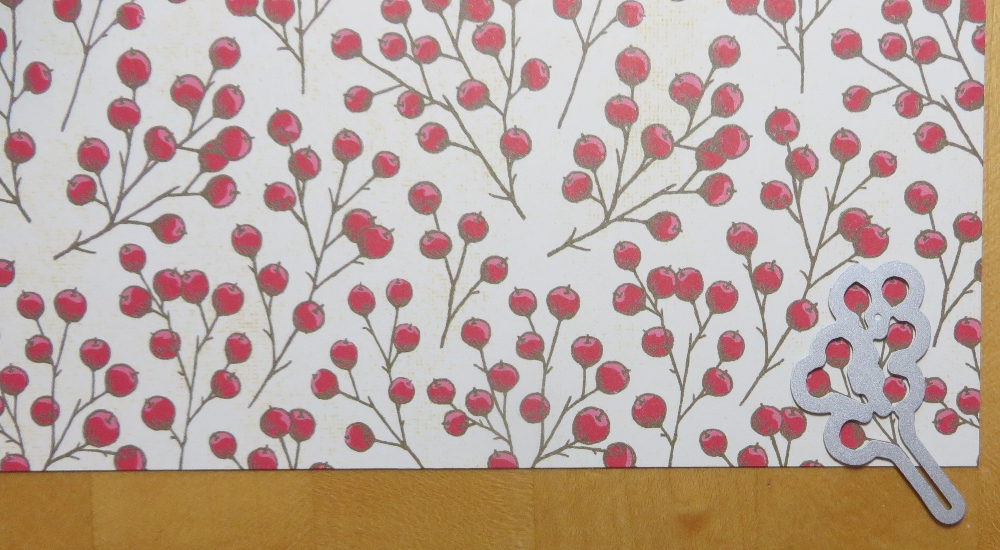
Here I started decorating my carrier with paper in the Poinsettia Place Designer Series Paper. You can wrap a strip of paper around as far as it will go or you can do as I did, just cut paper to fit each side of the carrier. To leave a small margin of the carrier showing, I cut my designer paper at 2 1/8″ x 5 1/2″ for the front and back and 2 1/8″ x 2 5/8″ for each end. I tried to match the pattern but it wasn’t that important with this paper, but make sure you check your patterns so one isn’t upside down or completely doesn’t match and look good.

Poinsettia Decorated Mini Coffee Carrier Front Decoration

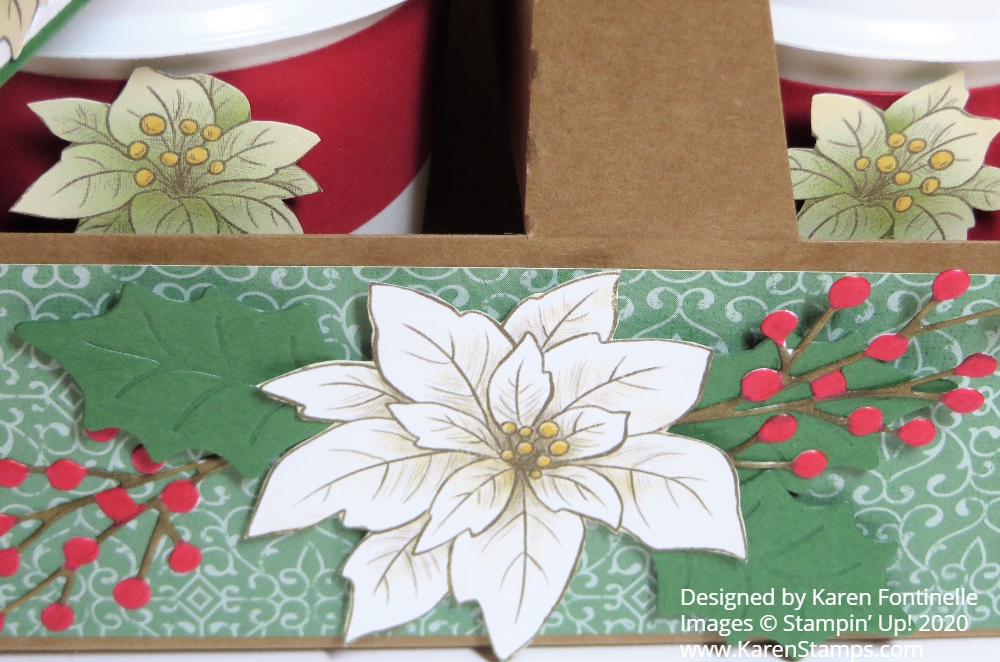
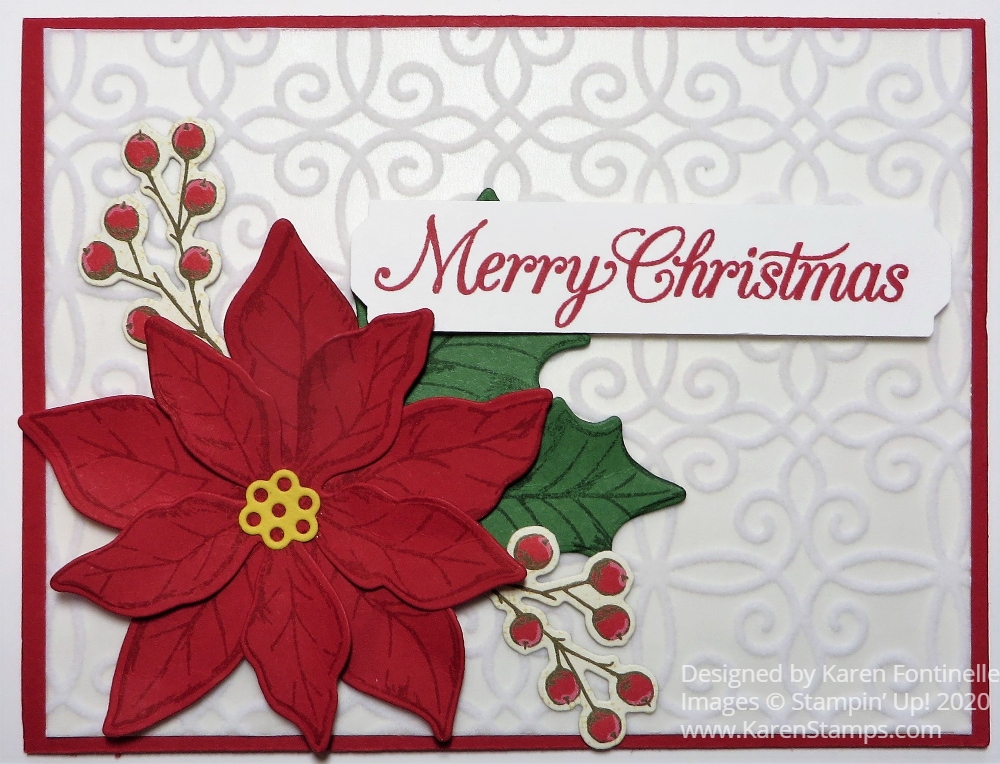
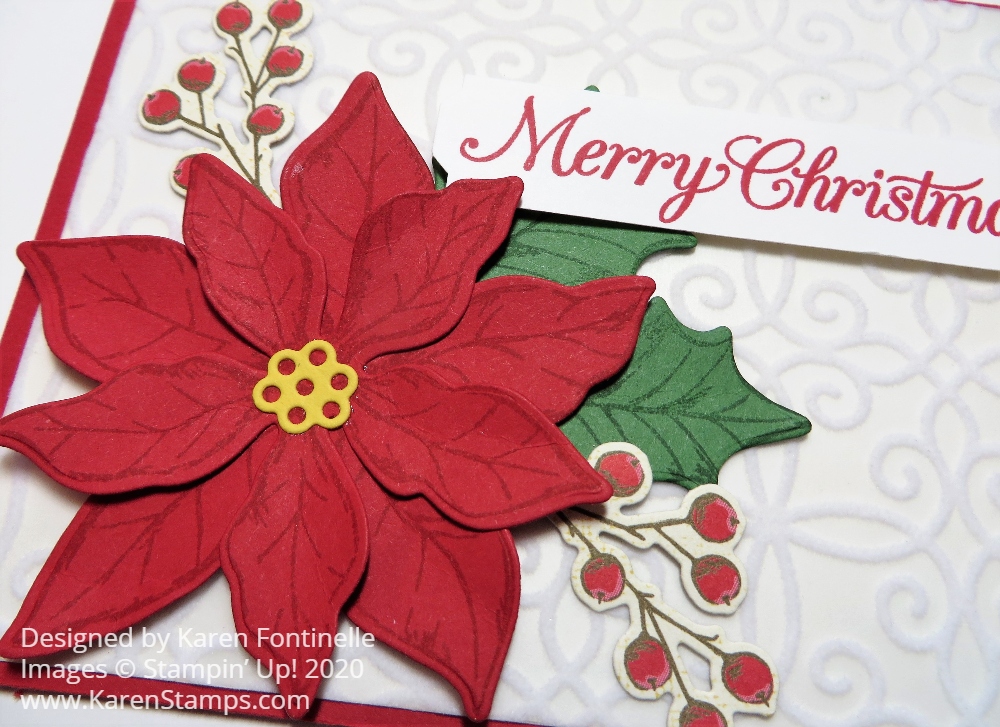
To decorate my carrier, I cut out a large poinsettia from one of the papers and die cut the leaves with the Poinsettia Dies. I used Garden Green Cardstock. For the berry sprigs, I die cut those from Whisper White Cardstock and then colored the berries with the Dark Real Red Stampin’ Blend and Dark Soft Suede for the stems. The flower and leaves are popped up on Stampin’ Dimensionals® and the sprigs adhered with tiny bits of Multipurpose Liquid Glue on the berries.

Poinsettia Decorated Mini Coffee Carrier Tag

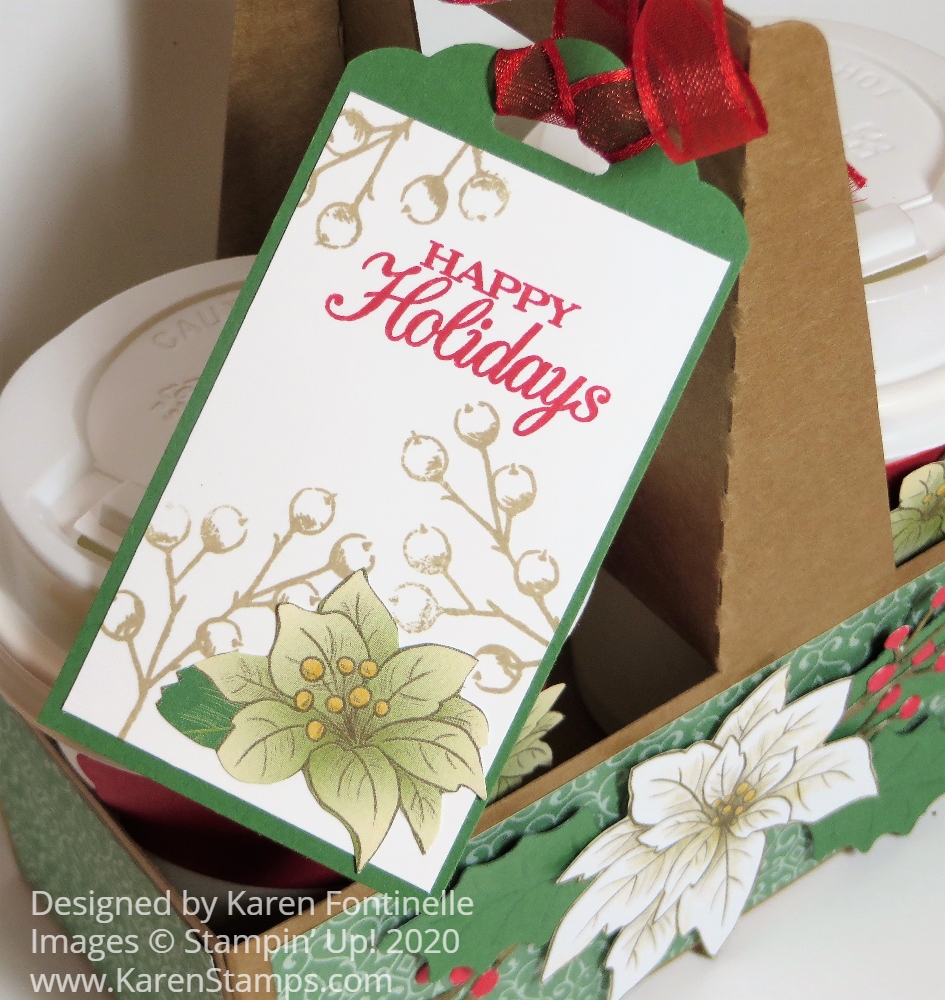
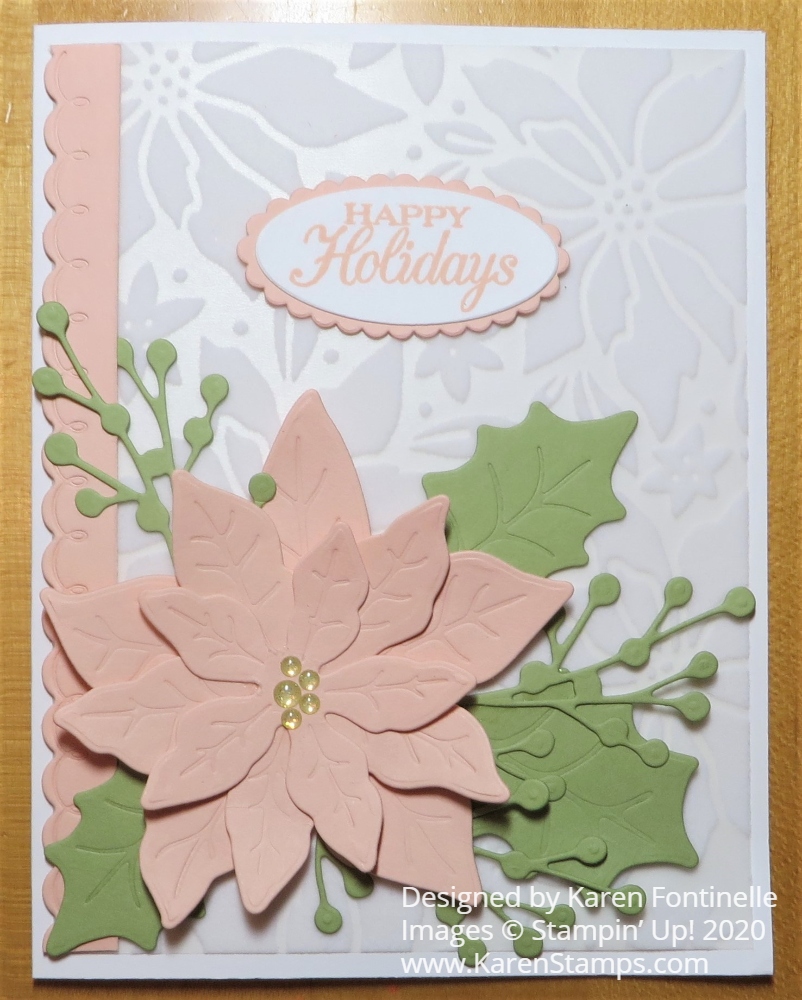
I actually love this tag that I came up with! The Garden Green tag is punched with the Scalloped Tag Topper Punch. The Whisper White layer is stamped with a Happy Holidays greeting in the Poinsettia Petals Stamp Set. Then I stamped the berry sprig in Crumb Cake ink to make a lighter interesting background. The poinsettia is hand-cut from the designer paper. The tag is tied on with the Real Red Sheer Ribbon.

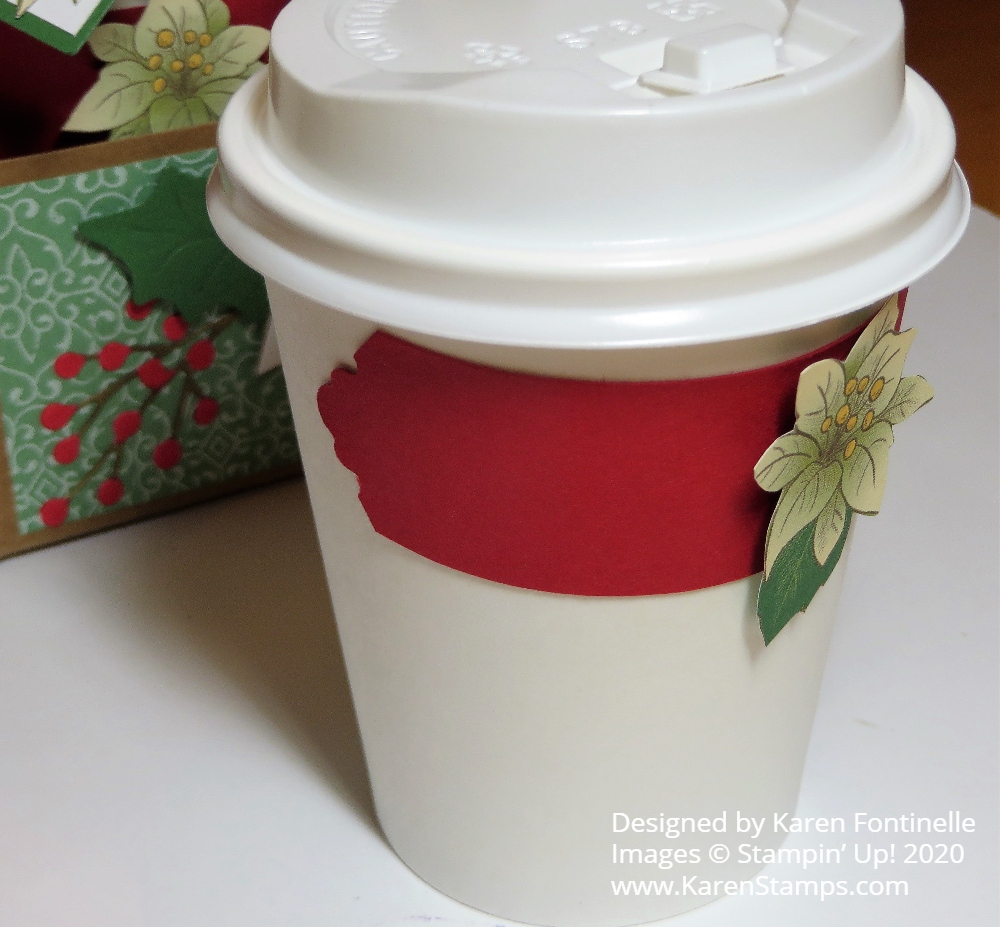
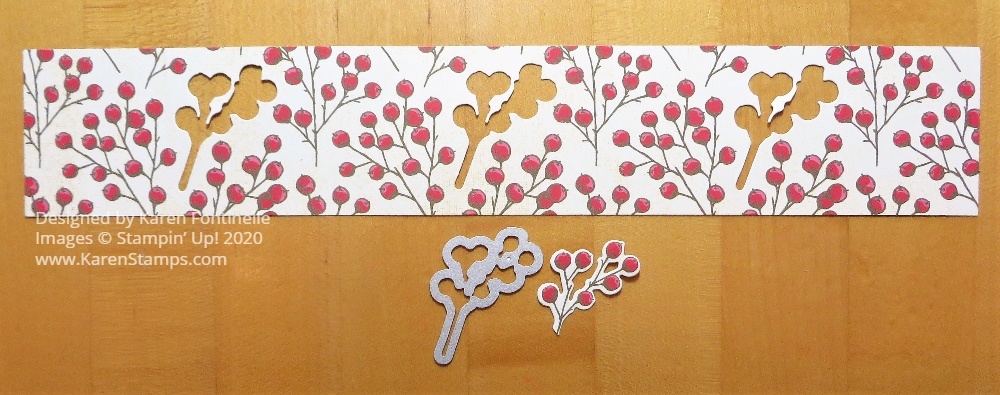
There are dies to order to make wrappers to go around the cups for decoration. If you don’t order these, you may have to cut up a cup for a template to make your paper fit around the cup. The dies are called Warm Wrap Dies and they will make your life easier! Since I don’t own them, I punched a strip of Real Red with the Lovely Labels Pick a Punch and adhered that to the cup, then added another hand-cut small poinsettia flower to each label.

It’s time to be thinking about making some holiday gifts! Really, you could use these any time of year! All you have to do is decorate for any occasion.

SHOP STAMPIN’ UP! ONLINE HERE!

Pink Poinsettia Petals Happy Holidays Card

Pink Poinsettia Petals Happy Holidays Card

I was really happy with the way this Pink Poinsettia Petals Happy Holidays Card turned out. The colors turned out to look pretty nice together with the Plush Poinsettia Specialty Paper in the background.

The card base is just Whisper White with a layer of the Plush Poinsettia Specialty Paper. This paper is beautiful with the flocked poinsettias on white vellum.

The poinsettia petals are all die-cut with the Poinsettia Dies. I used Petal Pink Cardstock and the die-cut leaves are Pear Pizzazz. Each poinsettia and leaf has two pieces – the outline that cuts it out and a separate inside piece that does the embossing of the veins in the leaves and petals. If you have trouble lining them up, just keep turning the inside piece until it fits in the outline die. You might even want to mark one of the lined up points with a Sharpie on both pieces. Those little green sprigs are also a die in the set. I think they add a lot.

The Petal Pink strip along the side was just in my bag of cardstock! It is from the Peony Dies. I think it is accidentally perfect! It adds a little something along the side of the card without taking away from the poinsettia and doesn’t take up any extra space like a ribbon with a bow would.

The greeting is in the Poinsettia Petals Stamp Set as well as a very nice “Merry Christmas” greeting. I stamped it in Petal Pink Ink on Whisper White and die cut with the Layering Ovals die along with a Petal Pink scalloped oval die for the layer. I think it is small enough to not take away from the poinsettia and fits just fine in the space.

For the poinsettia center, I just added some Gold Glitter Enamel Dots. I adhered three of the smallest ones and one the next size up and that looked perfect. As I was cleaning up, I had a Dot stuck on my finger from the package so I stuck that on the flower center too! I thought about using the Gilded Gems but for this card, I liked the Gold Glitter Dots better and they are better for mailing.

This card is a little fussier to make so I don’t know that I would want to make many multiples of it with all the die-cutting, yet now that I have the card design maybe it wouldn’t be too bad – or too bad for you to copy. Click HERE to see another poinsettia Christmas card I made, this time with the traditional red poinsettia.

This Poinsettia Place Suite of products is all so beautiful it’s worth a little extra effort so try your hand at a card something like this Pink Poinsettia Petals Happy Holidays Card.

Shop Stampin’ Up! Online HERE!

Snowflake Splendor Merry Christmas Card

Snowflake Splendor Merry Christmas Card

I couldn’t help but carry on with the snowflake theme with this Snowflake Splendor Merry Christmas Card. When I made the snowflake die cuts in the card from yesterday’s post, I had these three beautiful snowflakes I could use on another card.

It might look like I watercolored the background of this card, but it is actually the Snowflake Splendor Designer Series Paper. I chose a portion of the paper that had the colors of blue and also the purple. It’s really a beautiful background and not quite the traditional Christmas colors.

The card base is Highland Heather Cardstock with another layer of Whisper White to help set off the designer paper. These are just 1/16″ margins rather than 1/8″ because I needed the width of the card for the three snowflakes. The snowflakes are die cut with the So Many Snowflakes Dies.

I adhered the three snowflakes to the designer paper with tiny dots of Multipurpose Liquid Glue. The greeting is stamped from the Poinsettia Petals Stamp Set. Then I used the Lovely Labels Pick A Punch to punch each end of the stamped strip. This punch is like two punches in one so it is really fun to use! After I insert the strip, I turn the punch over to make sure the strip is fully inserted and that it is centered. You don’t really have to be this precise, but if I think of it, I like to double-check before punching.

I could have popped up the greeting, but since I thought I would probably put an embellishment at each end, I didn’t want it to be too thick for mailing. I used the lightest color, Coastal Cabana, in the Holiday Rhinestone Basic Jewels in the center of each snowflake and larger ones at each end of the greeting strip.

For the inside of the card, I added a Whisper White layer and stamped a greeting from the Poinsettia Petals Stamp Set. I had also die cut a snowflake, the same as the ones on the front of the card, out of a scrap of the same designer paper, but I thought it took up too much room on the inside Whisper White layer, so I adhered it to the inside of the back of the card front.

That’s all there is to this pretty card! It’s really just the die-cut snowflakes and the watercolor look of the designer paper. If you would like to make this Snowflake Splendor Merry Christmas Card, just visit the Stampin’ Up! Online Store!

Poinsettia Petals Merry Christmas Card

Poinsettia Petals Merry Christmas Card

I finally had some time to play and make this Poinsettia Petals Merry Christmas Card. Not knowing exactly what I would ultimately need, I stamped extra flowers of two sizes, many leaves of two sizes, and the yellow flower centers. This worked out well because I was able to make two cards, slightly different, and I already had the pieces stamped and cut out.

If you like poinsettias during the holidays, this whole Poinsettia Place Suite is for you! The papers, stamps and dies in this suite just provide so many opportunities for cardmaking and creativity!

To make this card, I used a Real Red card base. Real Red has always been my favorite Stampin’ Up! color. You will not find a more perfect “red” color anywhere! I’m still not happy that they moved it out of the Brights Family and put it in the Regals!

I was going to put a Whisper White layer on the card base, but then I decided to add the beautiful Plush Poinsettia Specialty Paper on top of the Whisper White. This Plush Poinsettia Paper is just gorgeous! It has very pretty flocked designs on six sheets, 2 each of 3 designs.

Next I assembled my poinsettia stamped with the Poinsettia Petals Stamp Set in Real Red Ink on Real Red Cardstock. I used the largest flower for the bottom layer and the next smaller one for the top. On the bottom flower, I tried out the embossing piece for the leaves in the Poinsettia Dies. The flower center is Daffodil Delight Cardstock. Before I glued the poinsettia petals together I kind of folded the petals a little bit and worked them with my fingers a little bit just to make them stand up a little bit and not be completely flat. Same with the Garden Green leaves, also die cut.

In the catalog, I saw that on one of the card samples the poinsettias had little red berry sprigs stuck out the sides of the flower. I noticed there was a die for them and I discovered it matches up with certain sprigs on the one patterned designer paper in the Poinsettia Place Designer Series Paper. I actually cut a strip of the designer paper all the way across and was able to die-cut three of the sprigs out of the strip. When you study the paper, you will find the exact sprigs that fit in the die and you will see how they repeat across the 12″ x 12″ paper. See the photos below.

Poinsettia Place Designer Paper Red Sprigs

Here you can see how I found one with a partial sprig that I could still die-cut and use on the corner of this paper so that was handy!

Poinsettia Place Paper Red Sprigs Die
See how the die fits the sprig in the lower right corner of the paper.

After die-cutting the cute sprigs, I just stuck a couple under the flower.

The greeting is also in the Poinsettia Petals Stamp Set. I happened to pull out a 3/4″ wide strip of Whisper White Cardstock and stamped the greeting in Real Red Ink. Then I used the new Lovely Labels Pick A Punch. I tried ideas for a green layer under the greeting, but decided I liked it as it was.

Poinsettia Petals Merry Christmas Card Closeup

You can purchase the Poinsettia Petals Stamp Set and Poinsettia Dies in the Poinsettia Petals Bundle and save 10%! That discount is also included in the price of the Suite if you decide to get the whole thing. Or you can order whichever products you would like individually.

And for the inside of the card, add a Whisper White layer for a greeting or personal note. This greeting is also in the stamp set and I stamped the smallest poinsettia in the corner.

Poinsettia Petals Merry Christmas Card Inside

Nothing says Christmas like poinsettias, so if you like them, get an early start on your poinsettia cards and projects this year. Use my Poinsettia Petals Merry Christmas Card for your inspiration or I’m sure you will come up with many of your own ideas!

SHOP STAMPIN’ UP! ONLINE IN THE NEW STORE HERE!