This die-cut piece was already laying on my table and I was in a “red” mood so I was pleased how this Many Layered Blossoms Birthday Card came together. Real Red is one of my favorite Stampin’ Up! colors!
You won’t believe how simple this card is to make and yet it will look like you make an elegant, fancy card! That’s what die-cuts can do for you!
The card base is Shimmery White Cardstock, one of my favorite papers! It just barely has a glimmer to it, very subtle, but it is there and makes the paper look rich. It’s a must-have in your stash in my opinion! Then I added a layer of Real Red underneath another piece of Shimmery White.
I had previously used the Many Layered Blossoms Die to cut out this piece or Real Red. I think I was trying out my new Stampin’ Cut & Emboss Machine to see how it would handle a large and intricate die. So I had this stack of die cuts on my table! I just used the teeniest dots of Multipurpose Liquid Glue on the back of the blossoms and adhered it to the front of the card.
I stamped the greeting in Real Red Ink on a strip of Shimmery White and snipped the banner in with the pointy part of the Tailored Tag Punch. Then I layered this on a piece of Real Red.
That’s all there is to this card! If you want a change from Halloween or holiday cards, go back to this popular stamp set and die and make a card like this Many Layered Blossoms Birthday Card.
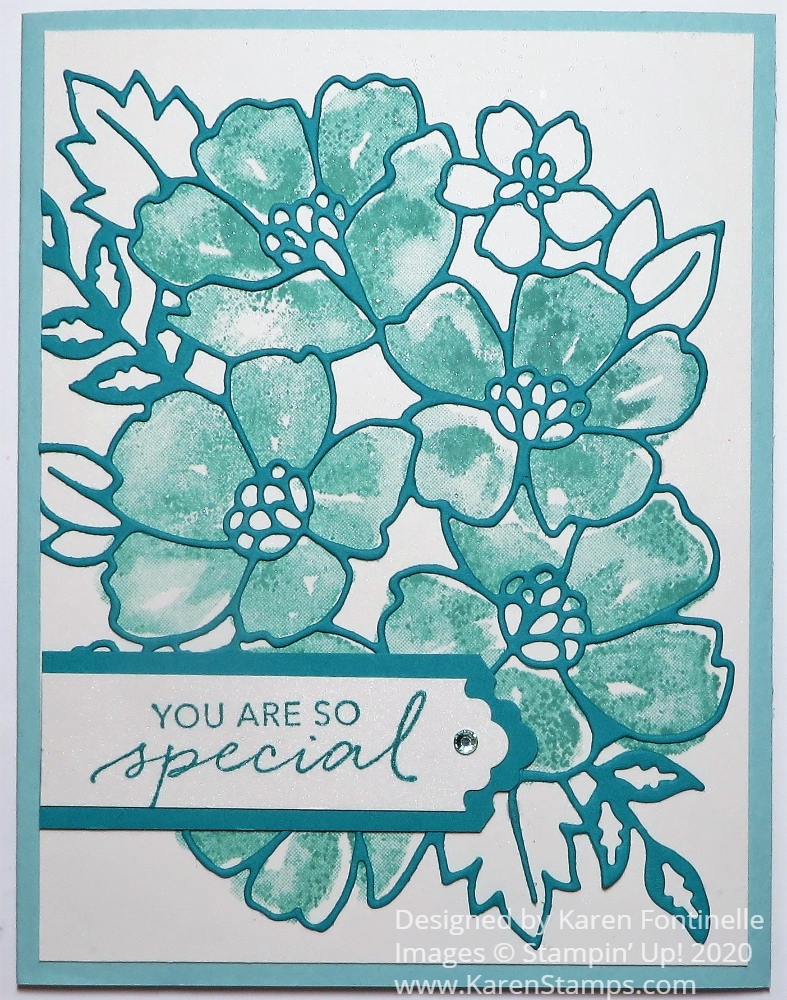
I don’t know what blossom or flower this is in this blueish color, but since it is art it can be anything, right? It all began with die-cutting some designer paper for the fuller layer underneath the outline layer but that didn’t seem to be what I was looking for. Sometimes if you original idea doesn’t work out, you just have to keep going and see what else you can come up with and that’s how this Blossoms In Bloom You Are Special Card came to be!
When you get right down to it, this card is pretty simple to make! The floral outline is die-cut with the Many Layered Blossoms Dies. The die is almost as big as the card front! If you think of it ahead of time, it would be a good idea to use the Adhesive Sheets on the cardstock before you die-cut it so that it will be like a giant sticker and you don’t have to worry about adhering it. I used teeny tiny dots of Multipurpose Liquid Glue but it is a little tedious!
The card base is Pool Party Cardstock, which I didn’t choose until I had the front of the card made! The floral die-cut is Coastal Cabana Cardstock. To add some color, I stamped the blossoms in the Blossoms In Bloom Stamp Set in Pool Party Ink.
I think if you are making a card like this you need to take a minute to think about the direction you want things to lay out in since everything is so large. Since I had the outline die cut first, I laid that down on my card front to see which leaf was going at the top and which way everything was pointing. Then I would know pretty close how to stamp the blossom image that would go underneath the die. It’s not something you can plan perfectly, but just so you get things pretty much how they are going to fit in the end.
The front layer of the card is Shimmery White Cardstock because at first, I thought I might do some watercoloring. Shimmery White Cardstock holds up better to water than Whisper White Cardstock. Plus it is the prettiest paper with its very subtle glimmer. It’s a little more toward the ivory or off-white color than pure white but you can really use it for either way.
The greeting is stamped from the Tasteful Touches Stamp Set. I used the Lovely Labels Pick A Punch which makes two different fancy ends to several sizes of paper strips. You can punch a 1/2″, 3/4″ or 1″ strip of paper. Just stick the length of cardstock way into the punch to get the fancy end. If you want to be extra careful, turn the punch over before punching and make sure the strip is all the way in and centered how you want it. Sometimes a tiny wiggle can get it off-center. I also cut a layer with the same punch with just a wider strip of paper. For a little bling, I used one Clear Epoxy Droplet. I think it was the perfect little bit of pizzazz on the card!
Don’t forget to use your July Bonus Coupons this month! You will see where to enter them on your order. I think you have to do one at a time if you have several to use. You can use all the coupons you have on one order, but you have to enter them one at a time. Before you submit your order, you will see that the coupon amount was taken off. Just remember, if you have a large order and reach Hostess rewards, when you enter your coupons that will bring down your total and you might have to add more to earn the Stampin’ Rewards.
Here is another way to use the Blossoms in Bloom Stamp Set along with the Many Layered Blossoms Dies. You can purchase the stamp set and dies. Then you will be all set to make something like my Blossoms In Bloom You Are Special Card.