Category Archives: Christmas

Christmas Votive Home Decor

Christmas Votive Home Decor

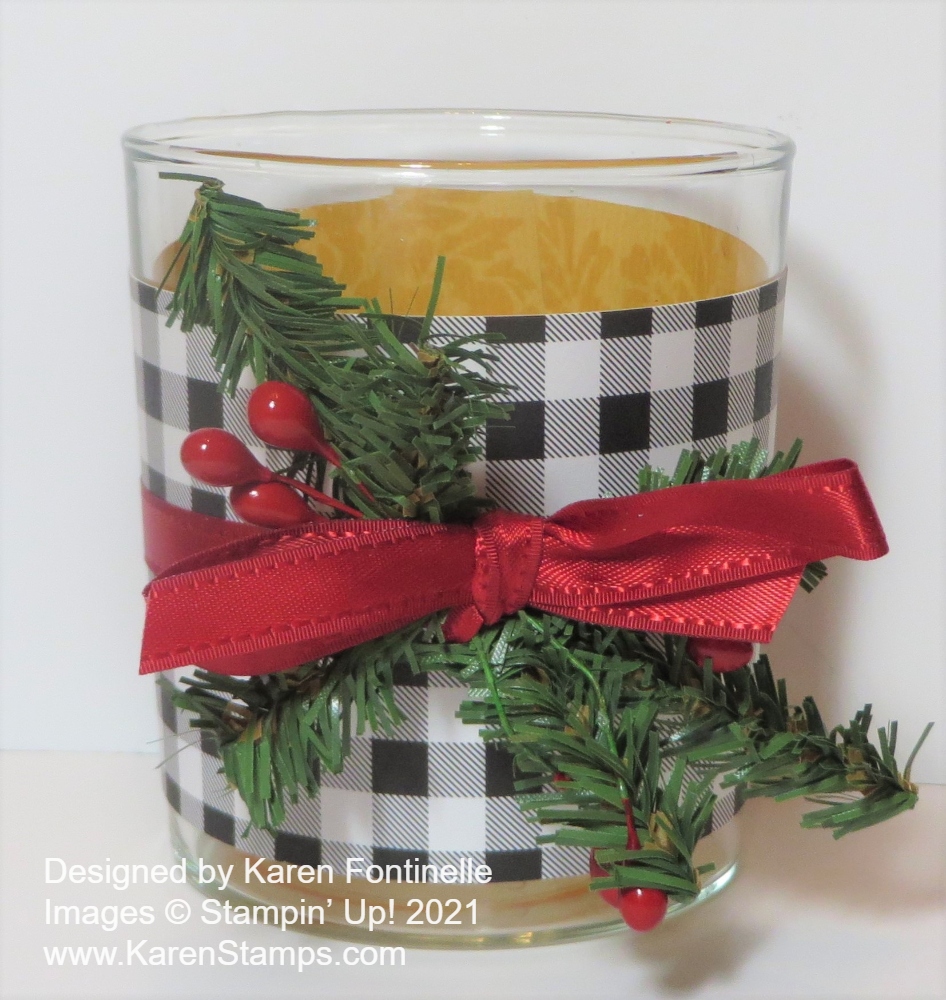
If you want to make a quick and easy gift for someone or even just a little decoration for your home, make a glass votive holder into a decorated piece of home decor for yourself or someone else! You probably even have a votive holder somewhere around your house or you can pick one up at almost any store.

Last year I made one with the retired Buffalo Check Background stamp with black ink on Real Red cardstock. I really loved the look. This year it seems like a black and white check is quite popular so I redid the votive holder. I found a piece of black and white check paper in the Pattern Party Designer Series Paper that is available free as Host Reward in the Stampin’ Up! Annual Catalog. Of course, you will have to judge the size of paper you need to use for your votive holder. Mine is about 2 1/2″ wide and wraps around the glass. If the glass tapers a little bit at the bottom the paper won’t fit around perfectly but that’s okay. Wrap it around as well as you can. I also tied a Real Red ribbon around to hold the paper in place. You can simply tie a bow, or for Christmas, I added some bits of artificial greenery and red berries. You could add a tag with a greeting or name, a little wreath instead of the greenery, maybe a small ornament, whatever you like and have in your stash!

Add a small votive candle or tea light and you have a cute little gift for someone! Wrap it up or put it in a cello bag and tie it with a ribbon. Just the presentation can take the gift up a few notches!

Christmas is coming VERY soon now, but it’s fun to make a few things for gifts or your own decorations for the holidays! This is the time of year we have looked forward to all year! Take some time to make those things you wanted to “get around” to making!

You Will Need Gift Card Holders!

You know you will need at least a few gift card holders for holiday gifts, so here is one version you can easily make! It is basically a strip of cardstock, folded in the middle with a slit so that a gift card can be inserted, and then decorate and personalize for the occasion. You will need gift card holders throughout the year so keep in mind how easy it is to make your own rather than just using an envelope.

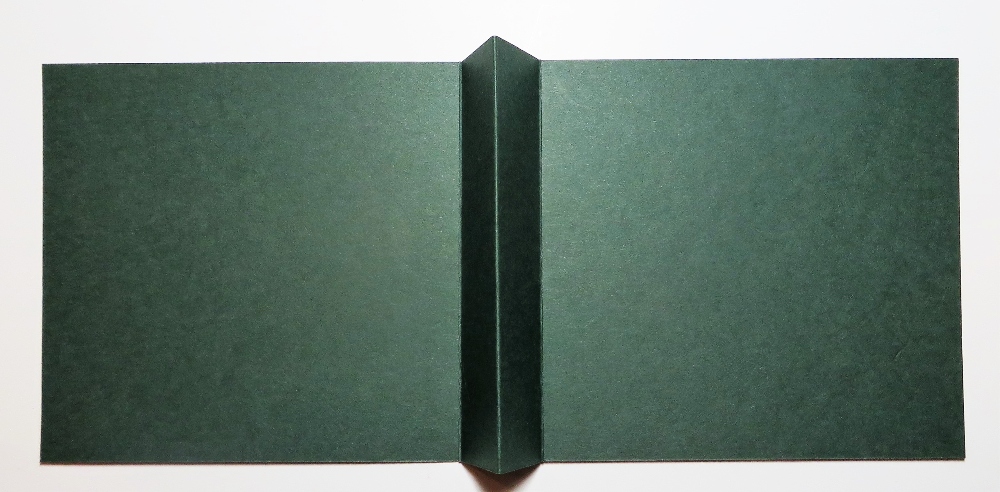
Start with a strip of cardstock that is 4 1/4″ x 11″. That is basically cutting a piece of cardstock in half, vertically. Score at 4 1/2″, 5 1/2″, and 6 1/2″. As you crease these score lines and use your Bone Folder on those folds, the center score line will be popped up (mountain fold) as you see in the photo above. This is where the gift card will eventually be held. It will be like a card opening on the side with this center fold inside the card.

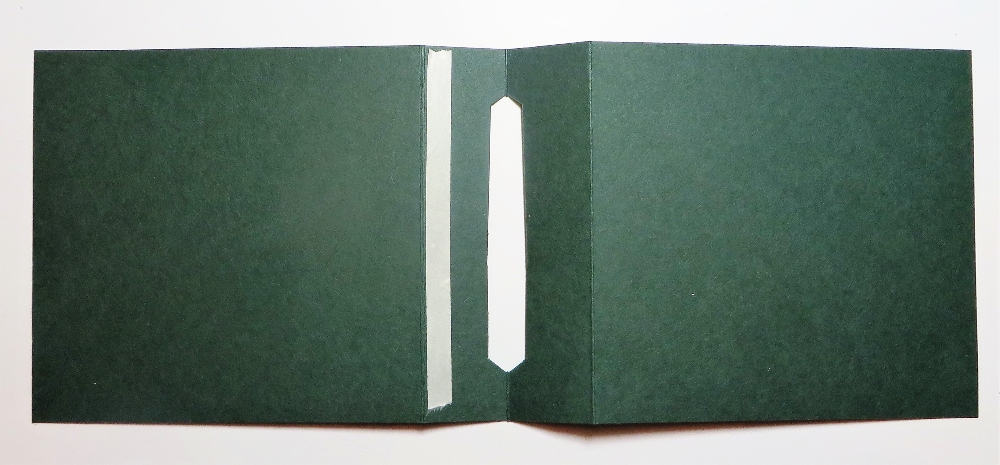
The next step is to cut a slit in that center fold to hold the gift card. I used my retired Classic Label Punch which was so perfect for a project like this. If you do not have the Label Punch, use your scissors to cut your own opening or use something like a craft knife. The opening does not go all the way across, of course. You just need it to be wide enough to hold the gift card, so have your gift card or any card or credit card handy so you can measure correctly.

In this photo above, you can clearly see the opening I punched right on that center score line. It doesn’t have to be that wide and you can use scissors or die or whatever you have available. To hold that pocket closed, place a piece of Tear & Tape as close to the side score line away from the slit. You can insert the gift card so that you can see how the gift card fits in the slot. Then remove it, remove the liner from the Tear & Tape and fold back on the score line to adhere.

Gift Card Holder with Card

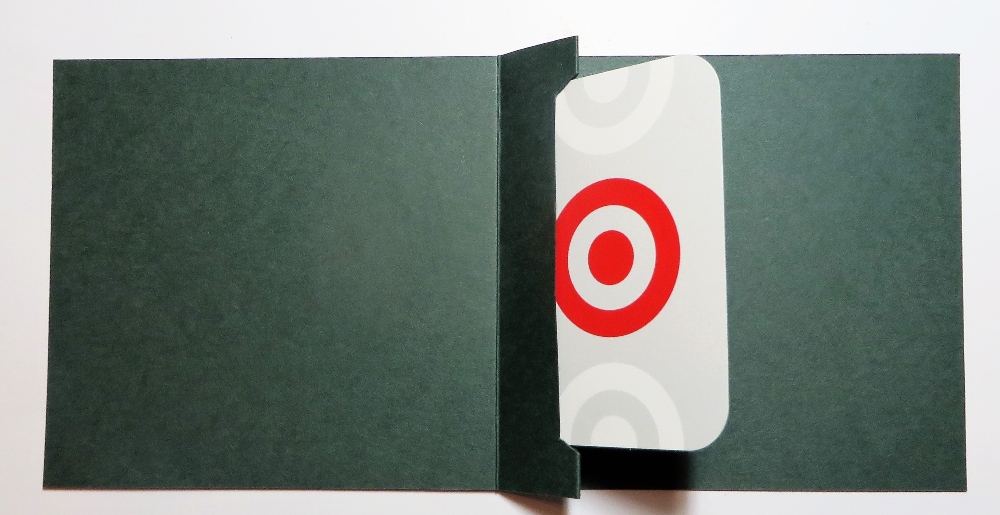
The gift card will fit in there far enough but not all the way down because of the tape. In this way, it can pop up when the card is opened!

Gift Card Holder Inside

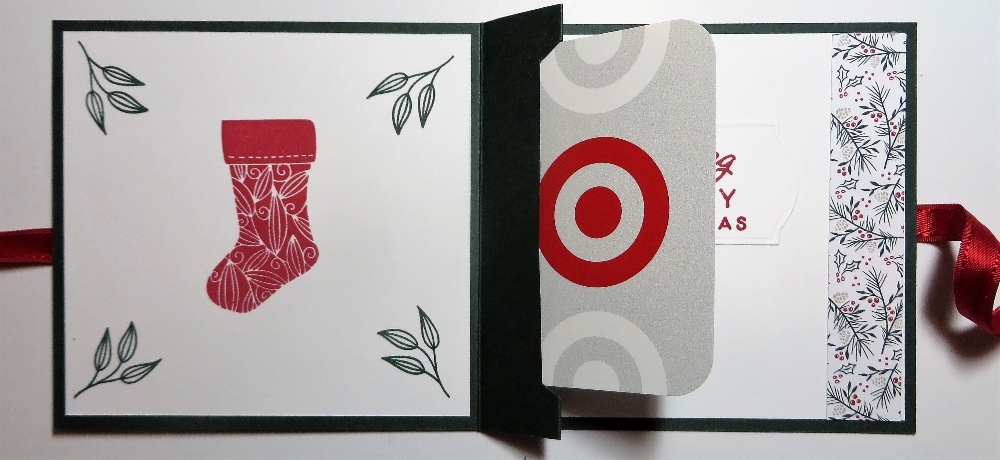
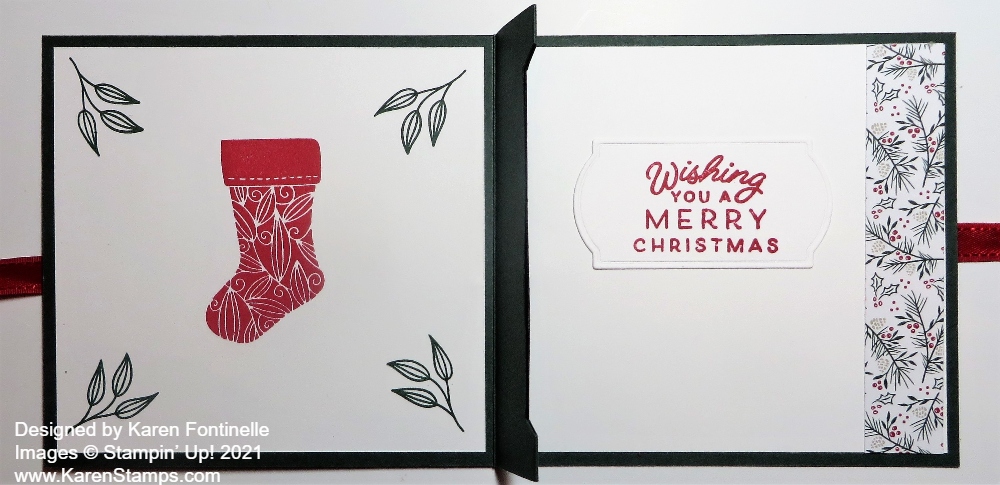
Now the fun part of decorating the inside. I cut Basic White layers of 4″ x 3 3/4″ for each side and stamped the left side with the stocking and leaves in the Tidings and Trimmings Stamp Set in Real Red and Evening Evergreen. On the right side, I already had a stamped and die-cut greeting in my scraps so I just adhered that to the center, plus a little strip of the Tidings of Christmas 6″ x 6″ Designer Series Paper on the right side that matches the front of the card.

Gift Card Holder Open

In the photo above you can see how the gift card pops up when the card is opened. That makes it a special treat for the recipient!

Gift Card Holder Front

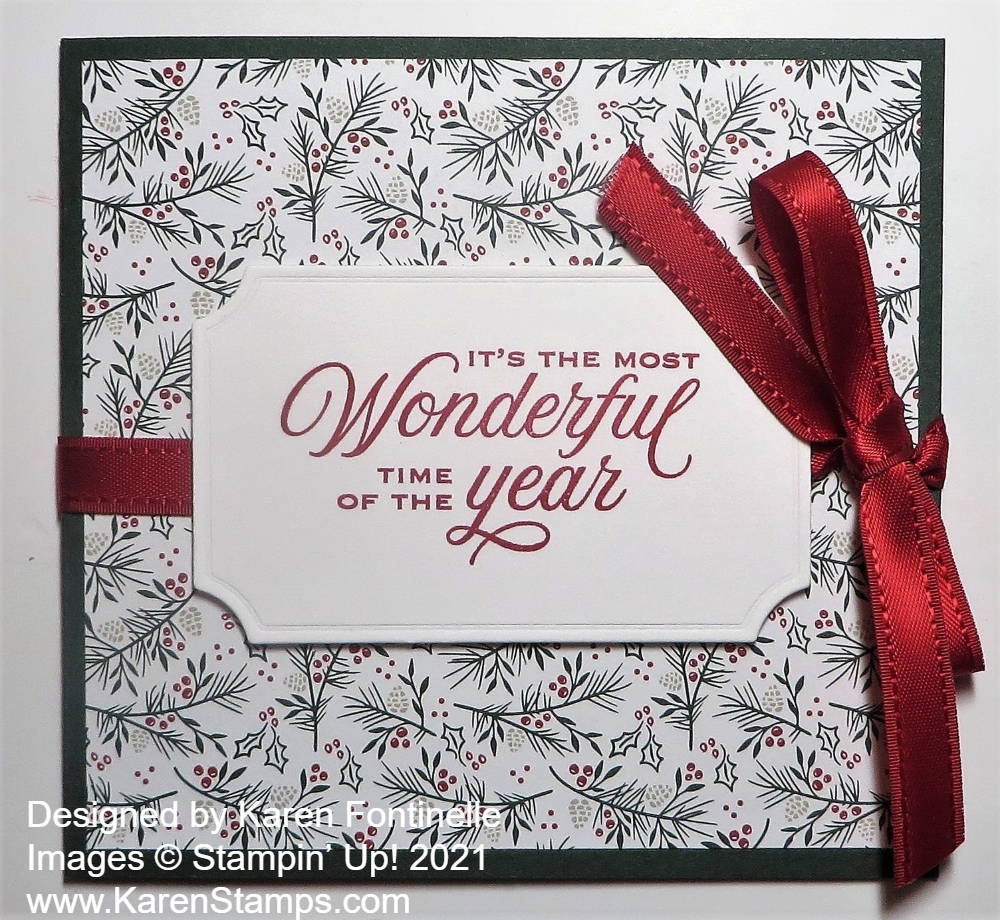
For the front of the gift card holder, which is essentially a card, I used a base of Evening Evergreen and a layer of Tidings of Christmas Designer Series Paper. The greeting is stamped in Real Red ink from the Tidings and Trimmings Stamp Set and die cut with one of the Tasteful Labels Dies. If you want to add ribbon to tie the card shut, when the greeting is adhered, just place the Stampin’ Dimensionals in the four corners of the die cut and not in the center. That way the ribbon can be slid underneath the popped-up greeting and tied on the side.

There are other designs for making gift card holders but this is one you can try! It looks very nice but keep in mind that it IS easy to make! Don’t let the pop-up slot in the middle scare you! For other occasions, just change the colors, paper, greeting and you are good to go!

Painted Christmas 2-4-6-8 Gift Bag

Painted Christmas 2-4-6-8 Gift Bag

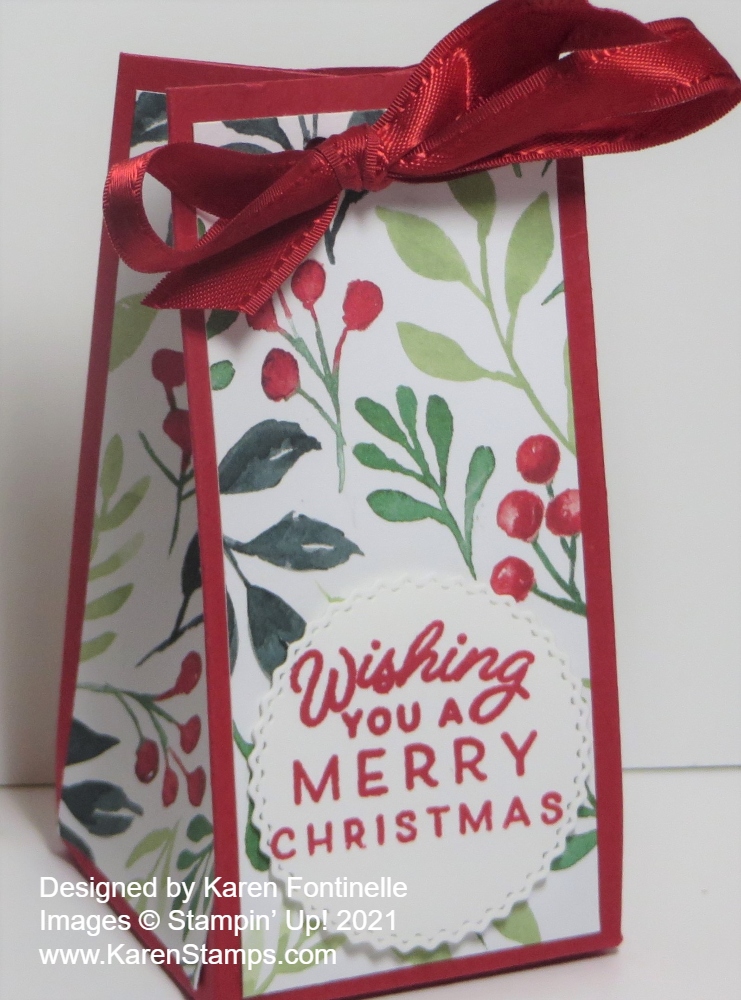
The time is rapidly approaching when we will need all shapes and sizes of gift bags and boxes so here is a basic, quick, and easy Painted Christmas 2-4-6-8 Gift Bag. You can vary the measurements if you need something taller or larger. But learning how to make a 2-4-6-8 box (or bag) is a basic every stamper should know!

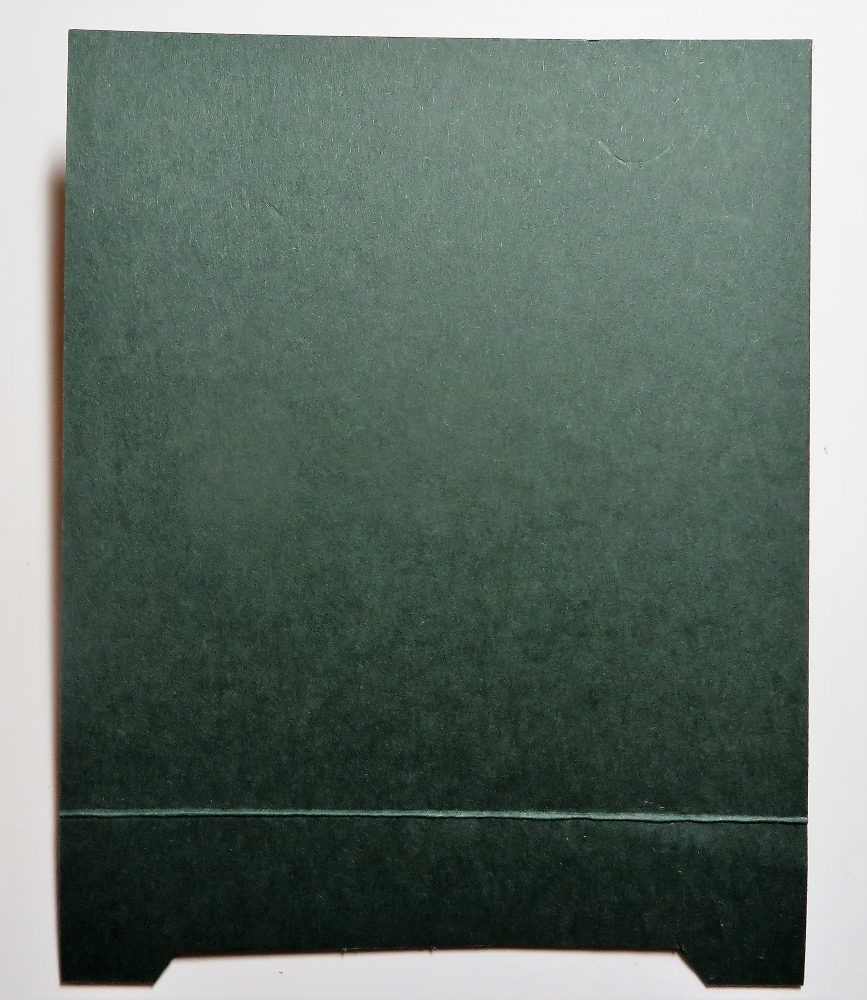
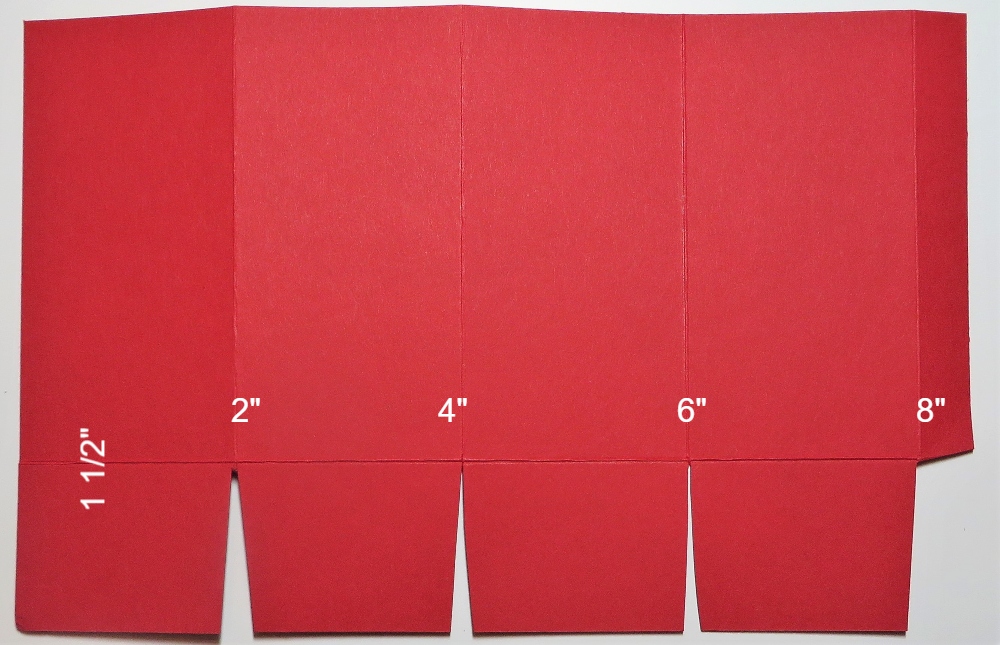
Here’s how to score your paper. This paper is 8 1/2″ x 5 1/2″. Just score at 2″, 4″, 6″, and 8″ which leaves the narrow little 1/2″ strip on the end which will be the tab to glue the box together. Then turn the paper and score at 1 1/2″ to form the bottom flaps. Cut off that smallest little section on the 1/2″ flap and cut up on the score lines to the 1 1/2″ score line to make the flaps at the bottom.

Diagram 2-4-6-8 Box

I used Real Red Cardstock because I wanted to use designer series paper on the side panels for decoration. I used the Painted Christmas Paper to cover each panel. Since each panel is 2″ wide by 4″ long, I cut the designer paper at 1 3/4″ x 3 3/4″. It’s easiest if you adhere the DSP pieces to the bag panels while the paper is flat before assembly.

Just crease and fold all the score lines to make it easy to assemble. If you are using patterned designer series paper with a pattern, be sure to think about the direction of the paper before you score and cut.

You have the choice of leaving the top open if you like or pinch it closed like I did, pushing in on the sides to indent a little. Punch holes in the top for ribbon or use some kind of clip instead to hold the top closed.

Here is another bag I made recently in THIS POST.

Just add a tag or adhere a greeting and decorate additionally however you like!

Don’t forget today is FREE SHIPPING at Stampin’ Up! all day with a $50 minimum order!

GO SHOP!

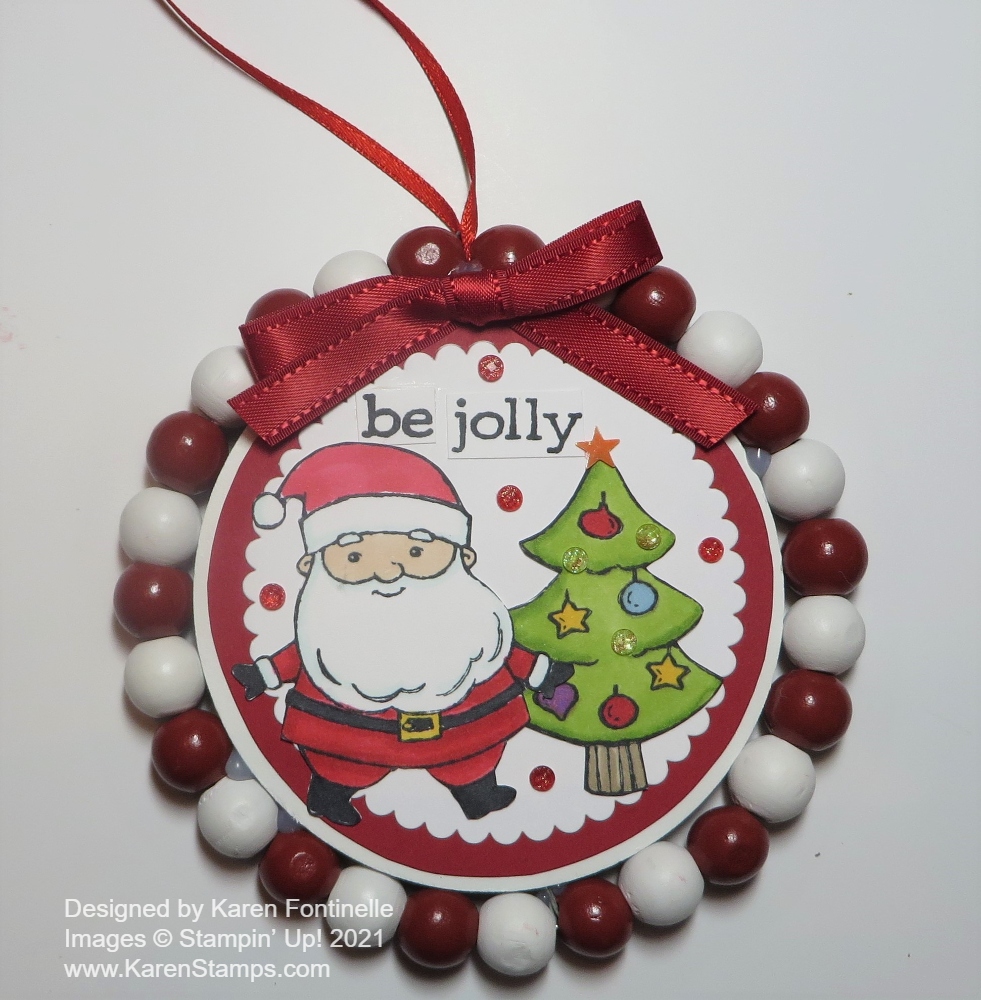
Be Jolly Altered Christmas Ornament

Be Jolly Altered Christmas Ornament

This Be Jolly Altered Christmas Ornament came about after watching some of these crafty gals on Instagram buy something cheap and junky at one of those dollar-type stores and then remake it into something cute for their holiday decorations! Usually, when I walk into one of those stores, all I see is junk and a mess, and I don’t come up with any creative vision for what I am seeing in there.

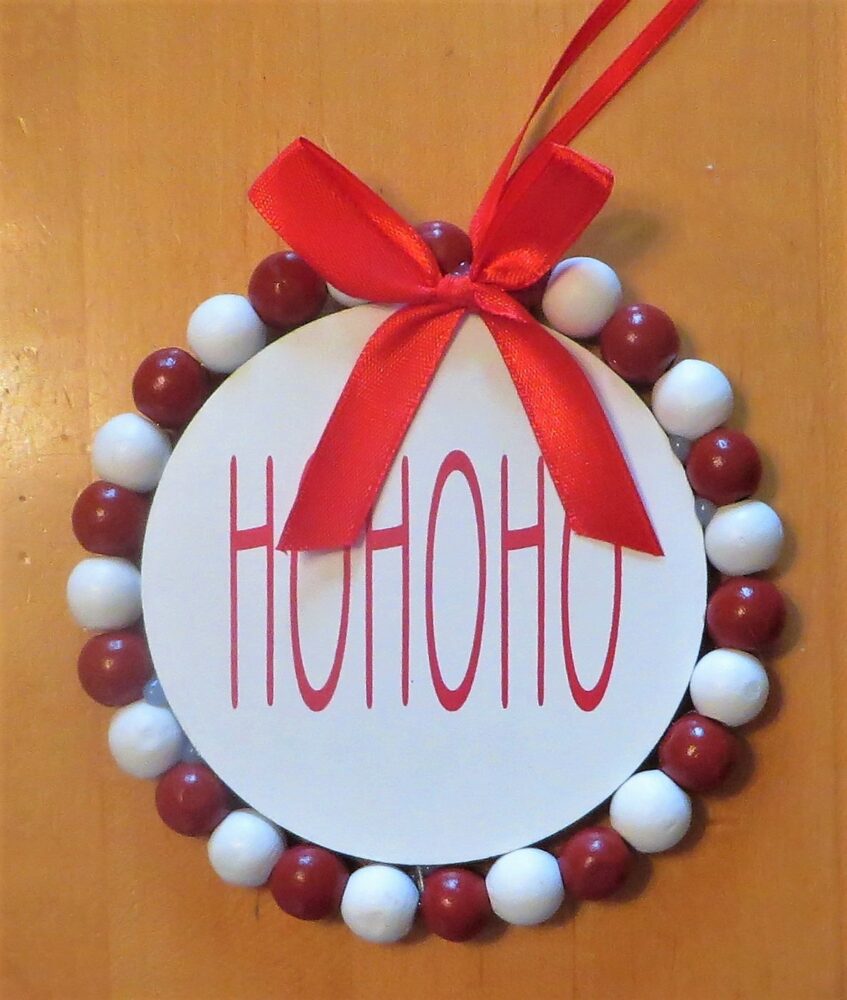
However, one day I saw this ornament pictured below at Walmart and although it was pretty cute as it was, that creative process came over me and I thought it would be cute to redo the front of the ornament and the beads would make it extra cute! Wooden beads seem to be pretty popular these days!

Ho Ho Ho Ornament

I thought the Be Jolly Stamp Set would be a perfect set with which to redo this ornament. We didn’t have a large enough circle die to cover the printed side of this ornament so I ended up finding a little bowl in the cabinet that fit inside this circle the size I wanted and just traced around it on Real Red Cardstock and cut it out by hand. The white scallop circle IS cut with the Layering Circles Dies. I wanted to use the white on the original ornament as a border margin, then layered the scalloped circle with some of the Real Red showing.

On a scrap of Basic White Cardstock I stamped the Santa and the Christmas tree in the Be Jolly Stamp Set with Memento Ink so I could color with Stampin’ Blends alcohol markers. You can use whatever colors you like. On the Santa, I used Real Red but Cherry Cobbler would be good, too. The Christmas tree is colored with the Granny Apple Green Combo and the ornaments with Real Red, Daffodil Delight, Balmy Blue, and one of the purples! I forget which one I used.

The greeting is stamped from the set. Since there wasn’t much empty space on the front of the ornament for the greeting, even this short one, I stamped it and then cut the words apart and glued them on separately. It is a fun design idea to do this, but also very practical sometimes when you really don’t have much space! You can space out the words on your project, they don’t have to be right together in a line. Mine are the tiniest bit offset.

For a final touch, I added some Elegant Faceted Gems to the tree plus an orange star from the Cute Stars Adhesive-backed Sequins. Yes, it is an orange star but I hoped on the ornament it would seem to be yellow or gold! Close enough! These star sequins are discounted as I write this on the Last Chance List for the Holiday 2021 Catalog. Of course, I couldn’t stop with just those gems on the tree, I had to add some red ones from the Wonderful Gems package scattered around. Sometimes you have to know when to stop, but being overly festive for the holidays is usually a good thing! These Wonderful Gems are also discounted right now.

I also have to add that on the back of the ornament, I add a Real Red die cut circle with a Basic White circle on top of that so there would be a place to stamp or write a message or a “To: From”. I also realized that I could have left the “Ho Ho Ho” side as is and decorated the “back” side. However, sometimes the back side is a little messier than the front so it just depends. I really liked the “Ho Ho Ho” side and hated to cover it up even though I wanted to! I guess it reminded me of the Rae Dunn products everyone is so crazy about.

The Be Jolly Stamp Set is also retiring although not discounted. It is a cute set I have enjoyed using. It’s so fun to color in but you could also use it in a monochromatic way on a card if you didn’t like coloring. And you could use any coloring techniques you like!

If you are out shopping and see an ornament or decoration with better potential being altered with Stampin’ Up! materials and your expertise, like this Be Jolly Altered Christmas Ornament, go for it! See what you come up with!

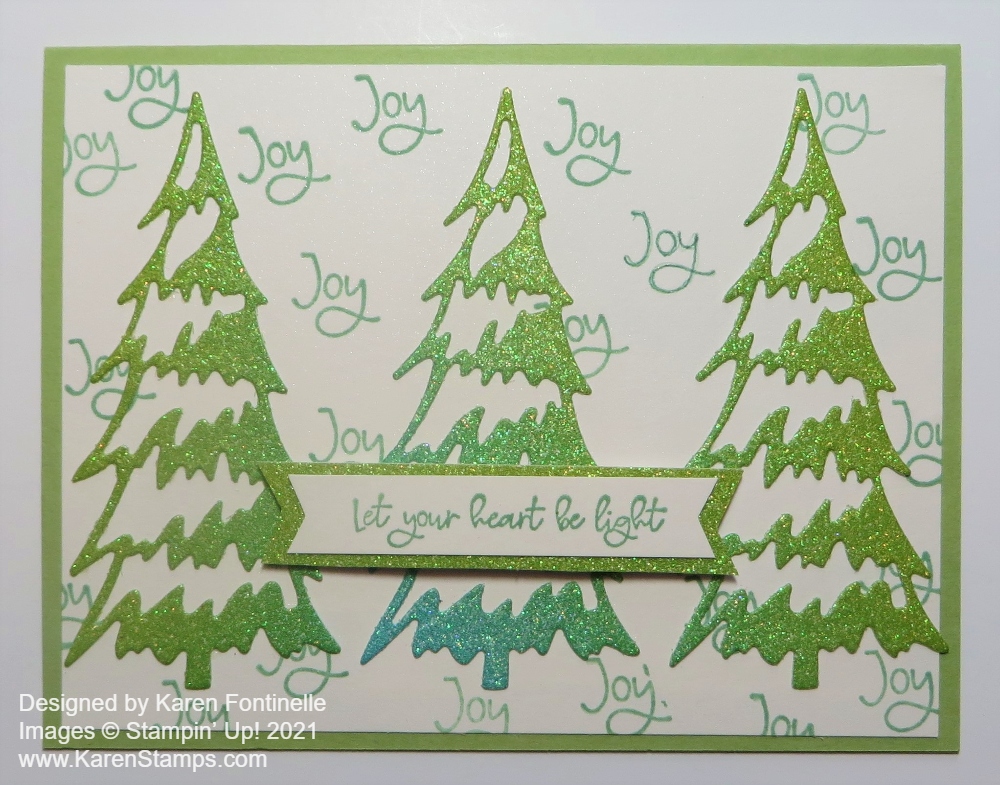
Rainbow Glimmer Christmas Trees Card

Rainbow Glimmer Christmas Trees Card

This Rainbow Glimmer Christmas Trees Card was sort of in my head, but then I started on two other projects first before deciding to give this idea a try! I thought it would be fun to use the Rainbow Glimmer Paper and try to get the ombre shades of the green color. The middle tree shows a different color at the base but the other two have slight variations in the green that doesn’t show up in the photo. I think it would be fun if this paper had narrower bands of colors so you could get more of an ombre effect on any projects. But, it is still really pretty and fun paper to use!

The card base is Mint Macaron with a layer of Shimmery White Cardstock. After cutting out and temporarily placing the trees on the card, I decided to try stamping the word “Joy” in the Whimsical Trees Stamp Set around in the background. There wasn’t a lot of empty space on which to do a little stamping so I’m not sure I like what I did. Maybe I do. What do you think??

The greeting is also in the Whimsical Trees Stamp Set and stamped with Mint Macaron. I layered it on a narrow piece of the Rainbow Glimmer Paper. I almost didn’t add a greeting since the card is a little busy already but I did! I really do like the Rainbow Glimmer Paper trees!

If you own the Christmas Trees Dies or will be purchasing them soon on the Last Chance Sale or the Whimsical Trees Bundle, note that there are two “pages” of dies in your package! I guess somehow I was only using what I saw when I pulled the dies out of the package and either forgot or never saw the rest of them! I wondered what happened to the trees that I used on this card that I had seen on other samples! So now I have lots more dies than I thought I had! Duh!

Remember the way these retirements work is that even if Bundles are carried over in the future to another catalog, they won’t still be Bundles. You might still be able to buy the stamp set and dies or whatever the individual components of the Bundle are, but you won’t get the 10% off discounted price. Be sure to check out the Last Chance Sale and the updated Clearance Rack to get the best chance of getting what you want lest anything sell out!

It was a rough morning because my website was not working so I couldn’t post my card until I went through two different Help Chats! Ugh! And even then they said it might work in a few minutes or it could take 24-48 hours globally! Thankfully it started working again after lunch!

Do some Christmas stamping this weekend! I hope to do that AND put up my tree! Wish me luck!

Gingerbread & Peppermint Ornament Trio Card

Gingerbread & Peppermint Ornament Trio Card

The Gingerbread & Peppermint Designer Paper has so many fun designs besides the gingerbread images! As it turned out, I had already used this pattern of the paper on another card earlier on, but since I love red, it was a natural draw for me to use it on this Gingerbread & Peppermint Ornament Trio Card.

The card base is Real Red, one of the coordinating colors of the Gingerbread & Peppermint 6″ x 6″ Designer Series Paper. After I got the idea to use the three ornaments, die-cut from the paper with the Gingerbread Dies, I thought they needed a white background to help them stand out from the red and white paper. I happened to find this die-cut from the Scalloped Contours Dies so I just used that. Since I was using that, I tipped the side ornaments in so they would fit better on that small background piece of Basic White.

The middle red ornament is glued straight on the card front, with the side ornaments popped up with Stampin’ Dimensionals®. I also tied small white bows with the Whisper White 1/4″ Crinkled Seam Binding Ribbon to put on each ornament. And then I had to add some Rhinestone Basic Jewels to each ornament in the center!

For the greeting, I used a sentiment in the Frosted Gingerbread Stamp Set. I wanted something small and simple since the rest of the card is pretty busy. I stamped the greeting on Basic White cardstock with Real Red Ink and then die cut it with a small Stitched Rectangle Die. I didn’t even layer it on anything, I just wanted it to be simple.

This Frosted Gingerbread Bundle (stamp set and dies) will be on the Last Chance List tomorrow along with the designer paper, so check out the promotion tomorrow, December 1st in the Online Store!

SHOP STAMPIN’ UP! ONLINE!

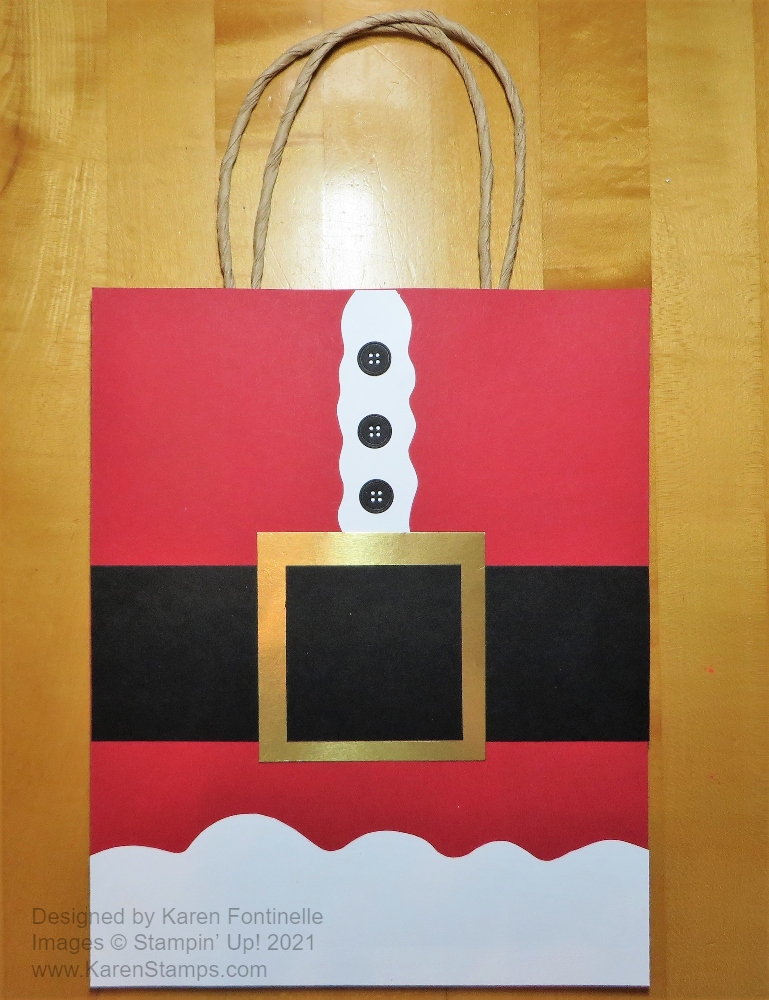
Santa Suit Christmas Gift Bag

Santa Suit Christmas Gift Bag

It soon will be time for gift bags and this Santa Suit Christmas Gift Bag is an easy one for you to make out of a plain kraft shopping bag! So fun for Christmas!

You may already have some handled shopping bags like this one in your stash of bags from certain stores or you can purchase a package of bags at the craft store. If they have the store name or design on the side, it will get covered up anyway so it is okay.

For this bag, I just measured the front side of the bag, which was 6″ x 8″, and cut a piece of Real Red Cardstock to cover the whole front for Santa’s red suit. Then I started at the bottom with the fur on the bottom of his red jacket. I just cut a 6″ wide piece of Basic White Cardstock a few inches wide and cut the curves freehand with scissors. They don’t have to be perfect and if you don’t like the look, just redo a few of the curves to even things out a little.

The Basic Black Santa belt is about 2″ wide. You can make yours narrower if you like. The trick to making a belt and belt buckle is to first cut the strip for the belt. Then cut the Gold Foil for the buckle a little wider than the belt, but just a solid square. To look like the black is going through the belt buckle, just cut a square of Basic Black to adhere to the top of the gold foil square. Just line it up even with the black strip and you’ll have a belt and buckle!

For the buttons, I looked through my dies for small circles, but I came across the button dies in the All Dressed Up Dies. They were perfect, but you could use some retired circle punches or just cut out little circles. I realized I probably should have some white fur on his jacket so I just cut a narrow piece of Basic White. Again, the fur doesn’t have to be perfect, fur isn’t perfect.

Attach a tag to the handle and you are all set with a great Santa Suit Christmas Gift Bag for a special, fun gift for someone!

Don’t Miss the Last 4 Weeks of My 12 Weeks of Christmas!

12 Weeks of Christmas 2021

Have you been receiving my “12 Weeks of Christmas” holiday emails every Wednesday? If you haven’t, you need to sign up for my Stamping With Karen Mailing List! These special holiday emails I send out every year are a thank you to my subscribers who get a weekly email with the latest Stampin’ Up! news and project ideas with complete instructions PLUS these special 12 Weeks of Christmas emails with one new card idea, gift idea, or gift wrap/tag idea every week.

You have already missed the first 8 weeks of the 12 Weeks of Christmas emails, but you can still get on my list and get the rest of the emails. The next one, Week 9 comes out tomorrow, November 24. You missed Weeks 1-8 but you can still get Weeks 9-12! Sign up today or before 1:00 PM CT tomorrow and get Week 9 tomorrow! These emails usually get sent out at 1:00 pm CT every Wednesday in the weeks leading up to Christmas!

These are exclusive projects that I won’t be putting on my blog or social media. They are just for my email subscribers. I love sending out these emails and I hope they are fun for my subscribers to receive and that they make their holidays a tiny bit easier if they are looking for a card idea or some other creative idea for handmade gifts or even tags and bags for wrapping!

Please join us if you would like! Sign up today or before 1:00 PM CT on Wednesday, October 27 to begin receiving the 12 Weeks of Christmas holiday emails! And then you’ll already be on the list for next year!

Just go to the red box here on my blog. If you are on your desktop computer, you should find it in the top right corner at the top of my blog post. If you are on your phone, you might have to scroll all the way down to find it. Or, click the link below to go to a special page with a signup box. Any way you do it, it works!

JOIN THE STAMPING WITH KAREN MAILING LIST!

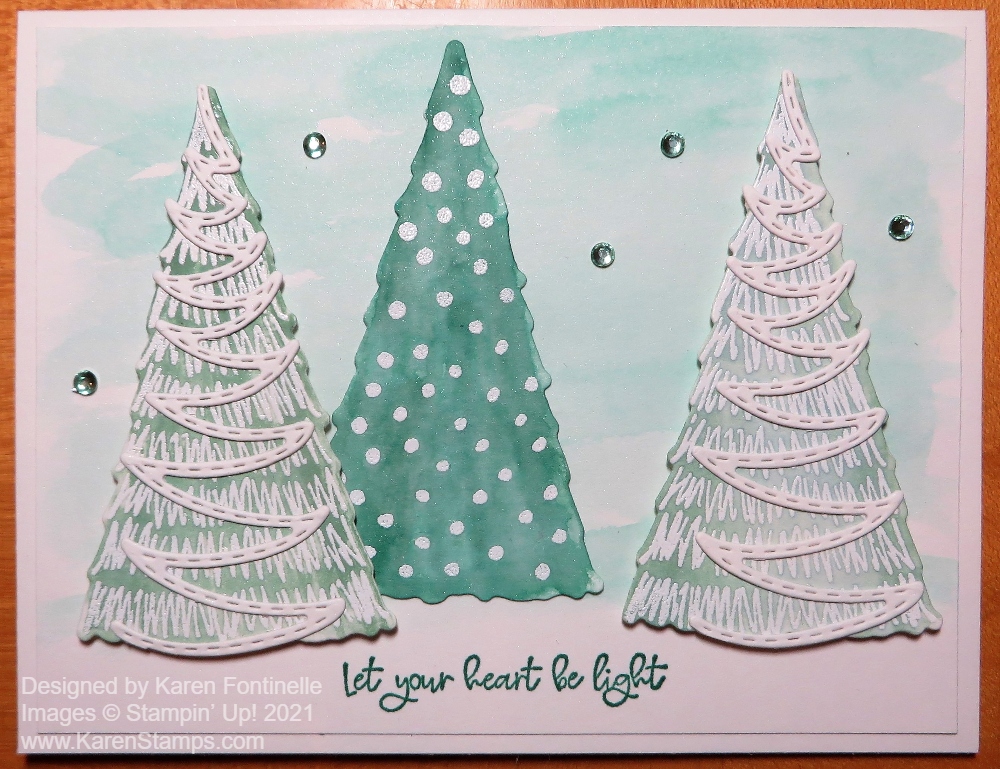
Embossed and Colored Whimsical Trees Christmas Card

Embossed and Colored Whimsical Trees Christmas Card

This card started out being an experiment of using white trees on a white layer on a white card, but it turned into this Embossed and Colored Whimsical Trees Christmas Card. That didn’t seem to be going like I imagined so I tried another technique of embossing and coloring the trees.

This white paper I used is my favorite, Shimmery White! If you look closely, in person, you can just barely see a little shimmer on the paper. It also works pretty well for a little watercoloring, as I used on this card. But the paper is so elegant, I think! I love using it.

To make this card, I started with a Shimmery White Cardstock card base with a layer of Shimmery White. On a separate piece of Shimmery White, I stamped two of the same trees and one different using Versamark Ink with the Whimsical Trees Stamp Set. Then I embossed with white embossing powder, which comes in the Basics Embossing Powders of three colors – white, black, and clear. You also need a Heat Tool to do embossing! Just hold the Heat Tool over the powder until you see it change! You will notice and it’s just magical! But it may take a minute until the Heat Tool gets hot enough after you turn it on.

After embossing the trees I die-cut them with the Christmas Trees Dies. I also die-cut the little ribbon decoration you can add to the tree. I cut out two of those for two of the trees. If you can think of it, this would be a good time to use the Adhesive Sheets so you don’t have to use glue.

After I decided the pure white trees on a white card weren’t going to work, I decided to use my Water Painter to add green color using an ink refill in the lid of the ink pad. Use it like a paintbrush except the water is already inside! Love these! I used Pear Pizzazz on two of the trees and Just Jade on the center tree. The embossing resists the ink so it still shows through. You can take a tissue and wipe any excess off the embossing if you need to. You could use any two or three green colors that you like. We have lots of choices!

When the trees were dry, I glued the ribbon piece onto two of the trees with tiny drops of glue.

For the background of the card, I used a watercolor background of Pool Party. I tried to apply it lightly with lots of water squeezed out of the Water Painter and a little bit of ink. I didn’t bring it all the way to the bottom so it would look like snow on the bottom of the card. Then I stamped a greeting with Just Jade ink at the bottom of the card with the Whimsical Trees Stamp Set.

After coloring the background and letting it dry, I adhered the trees, two popped up with Stampin’ Dimensionals and one flat on the card. I usually like to slip one partially underneath another one.

It was absolutely necessary (to me!) to add some bling but you could totally not do this. I added a few of the greenish rhinestones in the Holiday Rhinestones. You could add them to the trees instead if you liked.

So all in all, even though I changed my original idea, I really like this card and maybe I will make extras to send. It’s time to start cranking out those Christmas cards so that you can mail them extra early this year! Have fun!

SHOP STAMPIN’ UP! ONLINE!

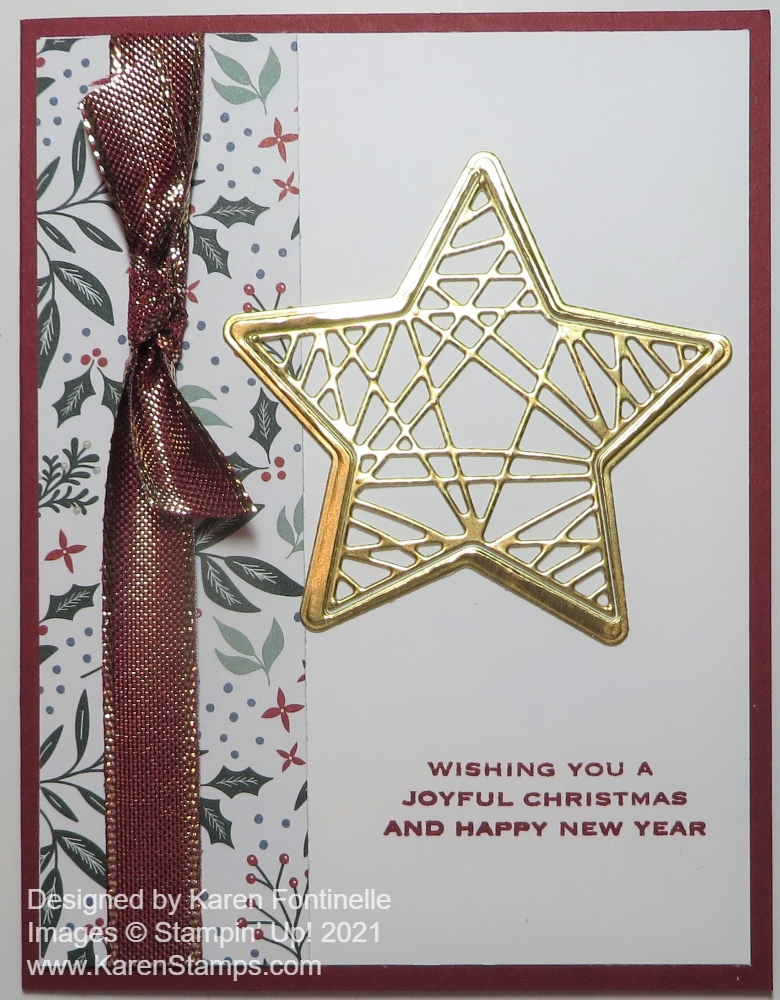
Tidings and Trimmings Gold Star Christmas Card

Tidings and Trimmings Gold Star Christmas Card

I was a little slow in discovering the Tidings and Trimmings Bundle in the Annual Catalog, but when I saw the die-cut stars I thought maybe I had to have it! I like how this Tidings and Trimmings Gold Star Christmas Card turned out even though I thought I was going to use a Christmas stocking and not the star! You never know where your card will end up!

First I got out the Tidings of Christmas 6″ x 6″ Designer Series Paper. There are a lot of pretty, traditional holiday designs in this paper. I happened to choose a scrap strip that just needed to be trimmed a little to fit on the Basic White layer. The card base is Cherry Cobbler which coordinates with the designer paper.

Before I ever got to try out a stocking on the front of the card, I decided to try a gold star. I love the designs of the large and smaller stars in the Christmas Tidings Dies. Just die cut the star using the outline around it. If you are smart, this is the perfect opportunity to use the Adhesive Sheets! I really wish I remembered to use these more often before die-cutting, particularly when it is an intricate design. Besides making it easy to adhere the image with the adhesive already on the back, but when you pull off the adhesive backing, it pulls out the stubborn little pieces that had not come out of the die-cut piece yet!

The greeting is stamped in Cherry Cobbler Ink at the bottom, slightly off to the right, on the front of the card. The greeting is in the Tidings and Trimmings Stamp Set. This is a great stamp set with its nice artwork and good sayings and words to put on your cards. You can purchase the Tidings and Trimmings Stamp Set and the Christmas Tidings Dies together in the Tidings and Trimmings Bundle and save 10%.

For a little extra embellishment, I tied on a piece of Cherry Cobbler & Gold 1/2″ Ribbon with just a knot. I think the gold trim on the ribbon goes with the gold star.

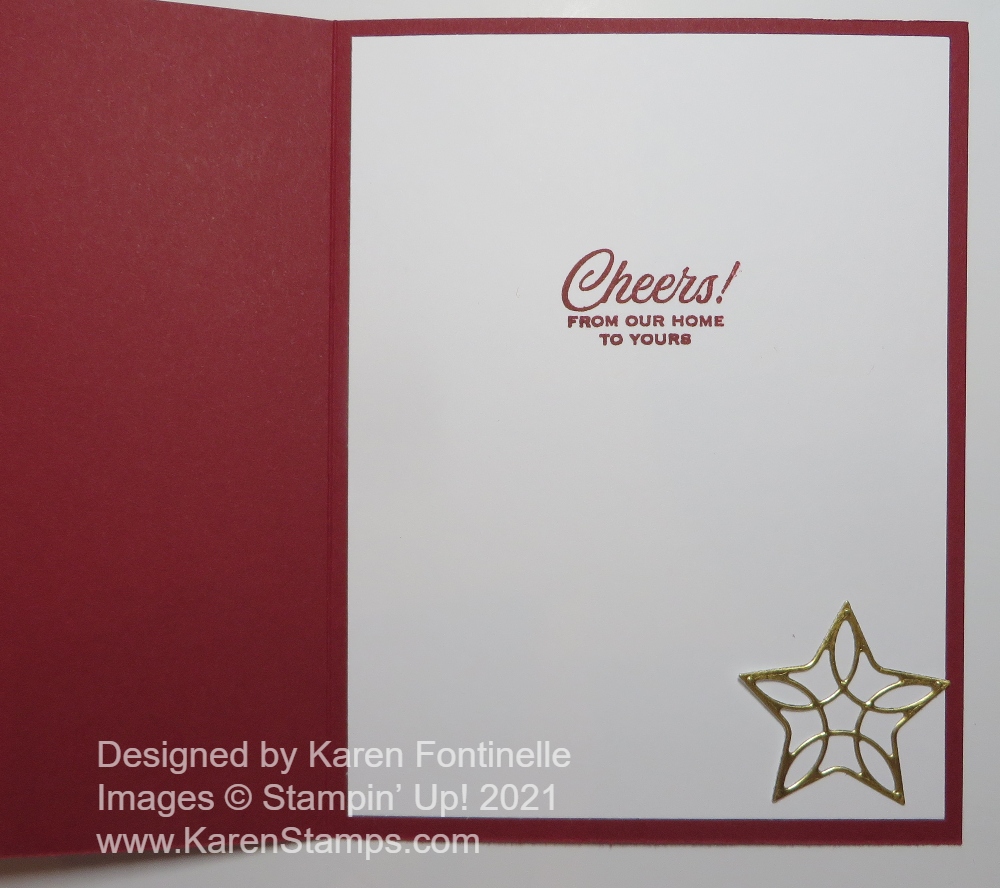
Once the card was all put together, I was really happy with it On the inside, I stamped another greeting and adhered a small die-cut gold star. At the Onstage Event this past weekend, Shelli and Sara reminded us not to send “naked envelopes”! If you want to make this card extra-special, stamp something on the envelope or use some of the designer paper to decorate the envelope flap! Just have fun with it!

Tidings and Trimmings Gold Star Christmas Card Inside

Don’t forget about the Seasonal Sale going on for the last day today!! Purchase cardstock at 10% off, 15% off Stampin’ Up! ink pads, and 20% off dies in the Stampin’ Up! Annual Catalog! If you don’t own these Christmas Tidings Dies with beautiful star images, you can purchase them TODAY for 20% off!

Festive Foliage Merry Christmas Card

Festive Foliage Merry Christmas Card

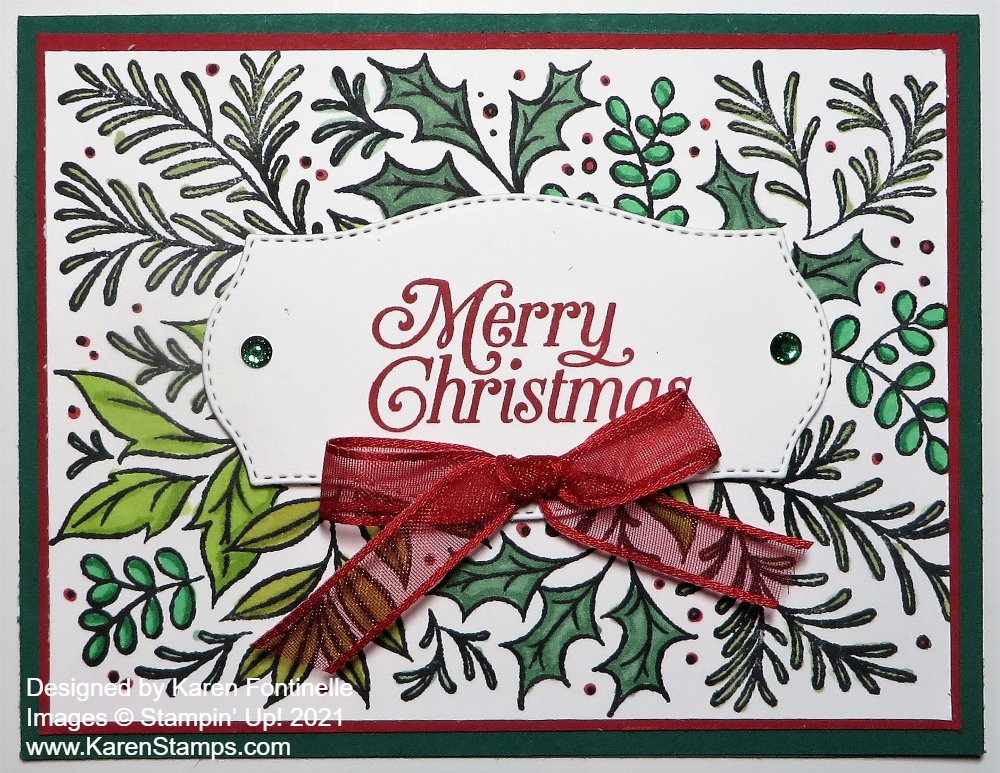
You may think that this card, the Festive Foliage Merry Christmas Card, has lots of stamping on it, but it is really only ONE stamp! The stamp is Festive Foliage! I have to admit, it is one stamp that I really overlooked in the Stampin’ Up! Annual Catalog. You’ll find it on page 90 in the lower-left corner of the page. Very easy to miss! But when a few of my customers started ordering it, I wondered what the big deal was and started looking at some samples. Of course, then I had to have it, too! All that foliage will make some very pretty Christmas cards!

The card base is Shaded Spruce cardstock with a layer of Real Red. You wouldn’t have to add the red layer, but I love red and I think it brightens up the stamping and all the green. The foliage is stamped in Memento Ink on Basic White cardstock.

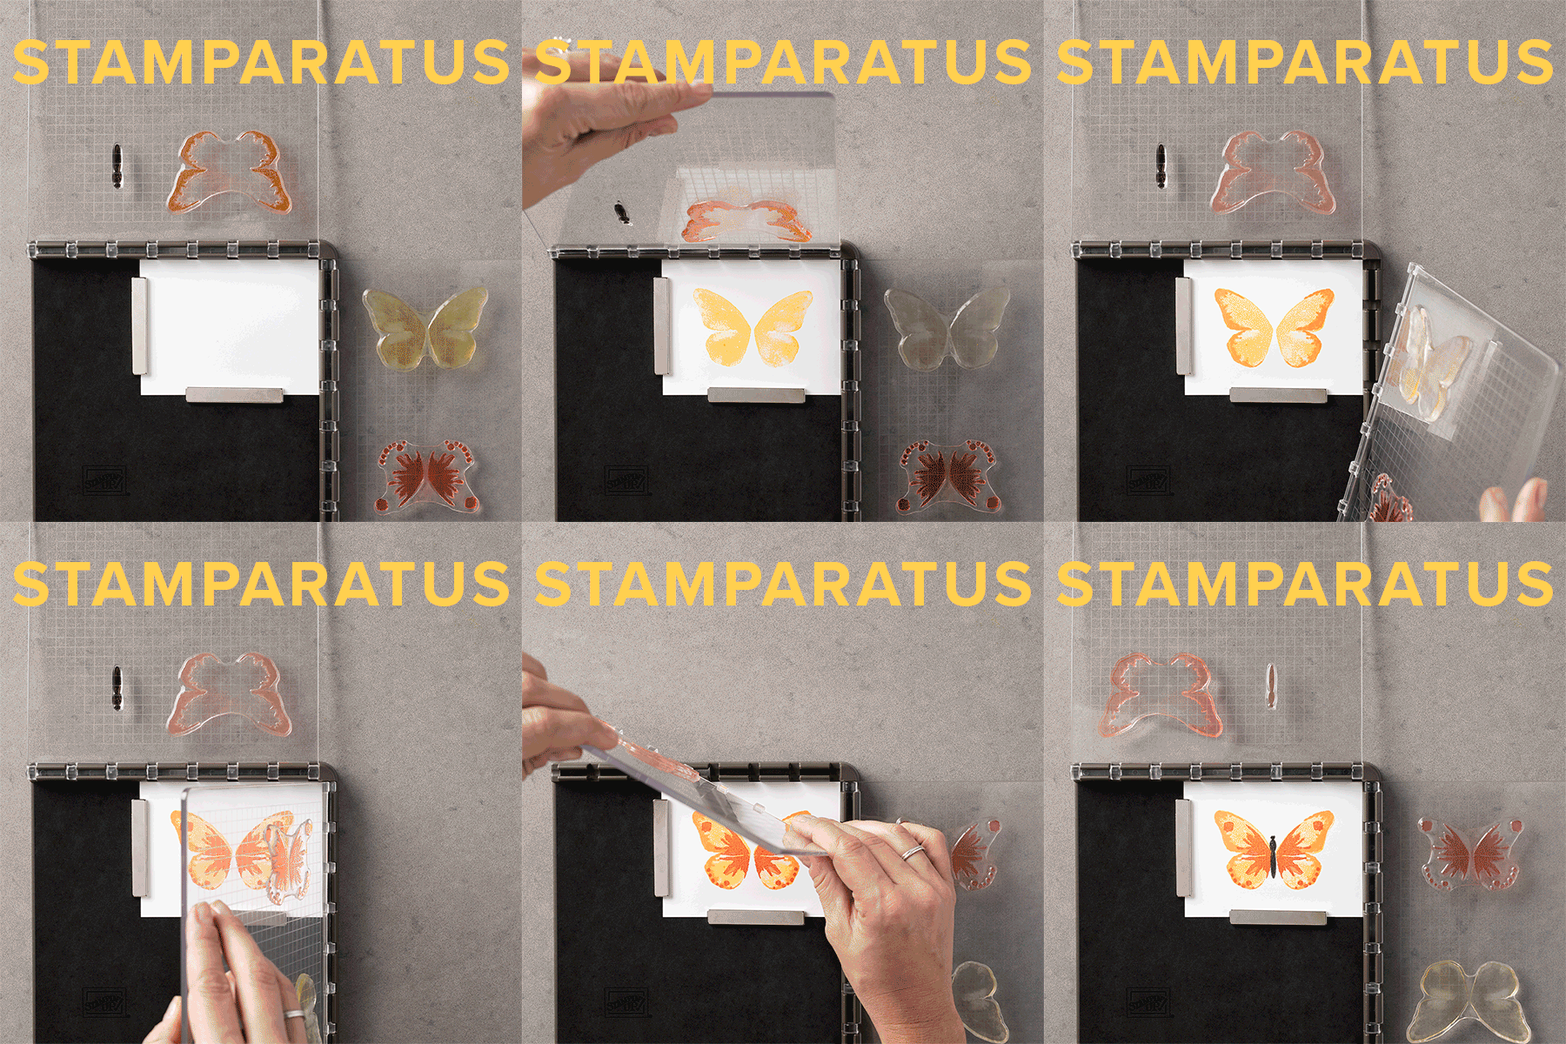
It’s really handy if you have a Stamparatus (146276) with a large stamp like this one. As long as you don’t move the stamp or the paper, you can reink the stamp and stamp again if you need to. Sometimes one little area doesn’t get inked well enough or doesn’t get pressed enough to transfer the ink from the stamp to the paper. But with the Stamparatus, you can just stamp again!

Stamparatus GIF

For coloring the foliage I used Stampin’ Blends…almost all the greens I could find! And then I dotted and colored in all the little berries with Real Red.

The greeting is in the Perfectly Plaid Stamp Set. This is one we have had for a couple of years. It is stamped with Real Red ink and then die cut with one of the Tasteful Labels Dies. It is popped up on Stampin’ Dimensionals. There was plenty of space and plenty of foliage still showing on this card to use such a large label. Then for some bling, I added two green Holiday Rhinestones and tied a bow with the Real Red 3/8″ Sheer Ribbon. It is adhered with a Glue Dot. I liked this sheer ribbon because it adds something to the card but because it is sheer, it doesn’t block the stamping underneath!

If you like coloring, you will love the Festive Foliage Stamp….and if you don’t love coloring, just stamp it in one color like green and don’t color in anything!

If you don’t own the Stamparatus, to get a good image with a background stamp like this one, I recommend laying the stamp face up, ink it up, and then lay your cardstock over the top. Put a piece of computer paper over the top or pull up your Grid paper over it, and give it a good rub with your fingers to get all the ink to transfer to the cardstock. This way you can see what you are doing and have a little more control over the pressure on the cardstock and stamp.

I can’t wait to make more cards with my new Festive Foliage Stamp because I really like how this Festive Foliage Merry Christmas Card turned out! Go check it out in the Online Store and see if you noticed it before in the catalog or missed it!

SHOP STAMPIN’ UP!

Encircled in Beauty Christmas Card

Encircled in Beauty Christmas Card

Don’t forget to think of the Encircled in Beauty Dies when it comes to making Christmas cards, as I used in this Encircled in Beauty Christmas Card. We also have the Encircled in Warmth Stamp Set with wonderful greetings for the holidays. There are so many pretty possibilities!

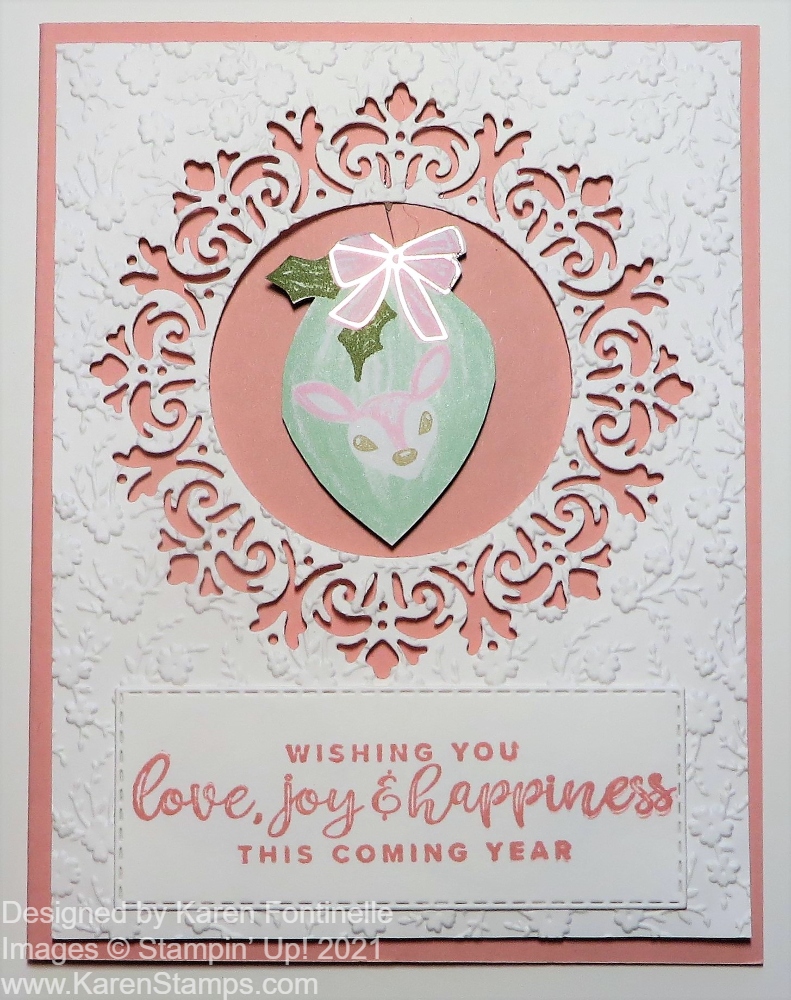
This card is relatively easy to make. The card base is Blushing Bride with a layer of Basic White Cardstock. I used the Encircled in Beauty Die to cut out the doily image but I did not use the outer die to cut out the whole image from the Basic White paper. Instead, I used the “negative” image left in the paper as the focal point, removing the center circle that was die cut. Next, I embossed the paper just for some texture with the Ornate Floral 3D Embossing Folder.

I layered this die-cut and embossed piece of Basic White on the Blushing Bride while I decided how to finish off the card. I decided to use the greeting in the Encircled in Warmth Stamp Set. It is stamped in Blushing Bride ink and die cut with one of the Stitched Rectangle Dies.

While looking at the beautiful Whimsy & Wonder Designer Series Paper I thought of cutting out one of the ornaments on the paper with Paper Snips and using it in the center of the doily image. I used a piece of the silver metallic thread from the Flowers For Every Season Ribbon Combo Pack. You could use any other kind of twine or ribbon. I wanted something very thin.

I popped up the Basic White die cut piece with Stampin’ Dimensionals® and also the ornament to look like it was hanging inside the empty circle. Then the greeting was adhered flat on the card front with Stampin’ Seal.

You will find the Encircled in Beauty Dies in the Stampin’ Up! Annual Catalog and you will find the Encircled in Warmth Stamp Set in the Holiday Mini Catalog. I think it might be easy to forget about these stamps and dies but they will make beautiful and unique cards, for Christmas and other occasions using the Encircled in Friendship Stamp Set also.

It’s time to plan your Christmas cards and gather your supplies to get a start on your holiday preparations! If you already own these Encircled in Beauty Dies, be sure to pull them out and use this Encircled in Beauty Christmas Card for some inspiration.

SHOP STAMPIN’ UP! ONLINE HERE!

Don’t Miss the November Gifts Galore Paper Pumpkin Kit!

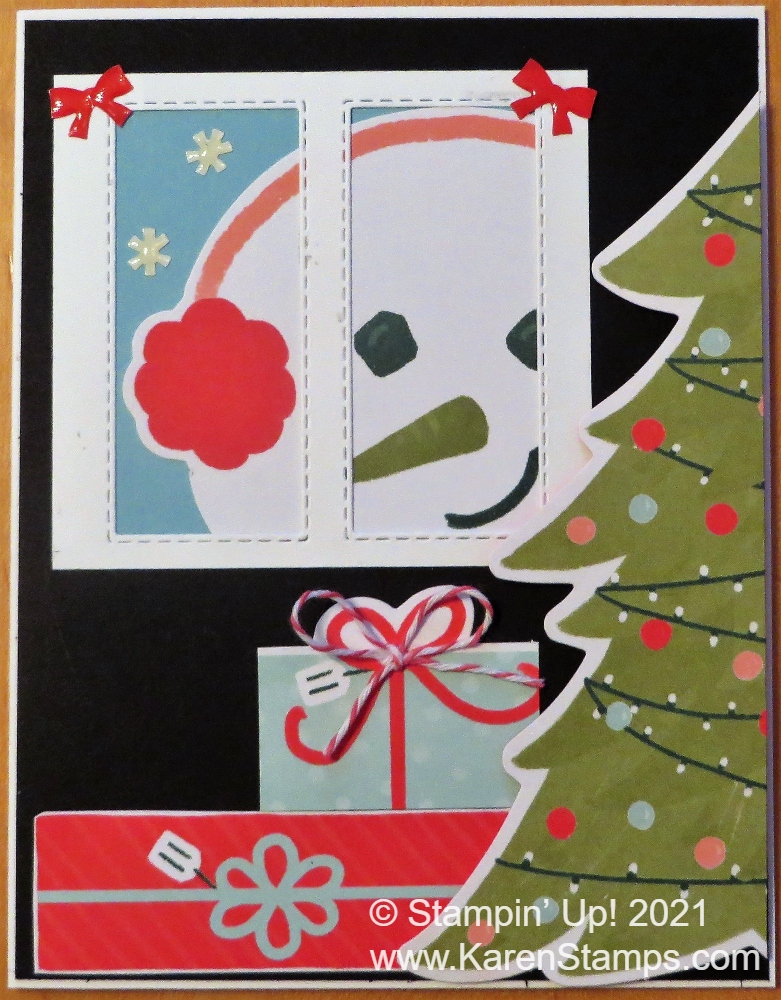
We all love to see piles of presents on Christmas morning. Make that your reality with the Gifts Galore Paper Pumpkin Kit! With classic Christmas sentiments, bright and festive colors, a sweet snowman, a tree with all the trimmings, or a playful pile of presents, you’ll have everything you need to make eye-catching treat packages that are sure to spread Christmas cheer. Each Gifts Galore box contains enough supplies to create nine treat packages—three each of three designs—and nine food-safe bags that are adorably styled for easy Christmas gifting. There’s plenty of joy to share with Gifts Galore! 

DETAILS

  • Kit contains enough supplies to create nine treat packages—three each of three designs—and nine food-safe bags. 
  • This all-inclusive kit includes printed die cuts, die-cut boxes, cellophane treat bags, adhesive, and more!
  • Includes an exclusive stamp set and a Classic Stampin’ Spot
  • Coordinating colors: Evening Evergreen, Flirty Flamingo, Old Olive, Pool Party, Poppy Parade

Every kit is guaranteed by Stampin’ Up!  No risk, no obligation. Easy to try out!  

Deadline Wednesday, November 10, 2021

 JOIN PAPER PUMPKIN TODAY!

Or you can purchase a Prepaid Subscription if you want to add a subscription choice to your Stampin’ Up! order.

Little Delights Christmas Bulb Christmas Card

Little Delights Christmas Bulb Card

The longer I have the Little Delights Stamp Set, the more possibilities I see with it, like this Little Delights Christmas Bulb Christmas Card. All I needed was the little Christmas bulb stamp and the greeting! The only problem is that you can’t stop stamping the cute little bulbs!

The card base is Real Red with a layer of Basic White Cardstock. I just randomly stamped the Christmas bulbs in different colors. I used Real Red, Daffodil Delight, Just Jade, Pacific Point, Pumpkin Pie, and Highland Heather ink colors. After figuring out the greeting and the space it would take up, I added more bulbs so every color would have a good representation!

The die-cut greeting layer is Real Red cut from the Scalloped Contours Dies. I stamped the greeting from the Little Delights Stamp Set on Basic White and cut it to fit on the Real Red layer with my Paper Trimmer.

For some embellishment, I tied a little red bow from the Real Red 3/8″ Double-Stitched Satin Ribbon and adhered it to the corner of the greeting. I just love the font of that “Merry Christmas” sentiment! I also adhered some little Holiday Rhinestone Basic Jewels on the greeting as well!

If you wanted to jazz up the card even more, you could add Wink of Stella for a little glimmer of the Christmas bulbs! Or you could stamp fewer bulbs and connect them with a drawn line to look like a string of lights. Just play and see what you come up with!

The Little Delights Stamp Set is a cute one with several holiday images and greetings for cards and projects! These images and words are great for all kinds of stamping projects throughout the year!

Little Delights Christmas Bulb Christmas Card

Shop Stampin’ Up! Online HERE!

Don’t Miss My 12 Weeks of Christmas!

12 Weeks of Christmas 2021

Have you been receiving my “12 Weeks of Christmas” holiday emails every Wednesday? If you haven’t, you need to sign up for my Stamping With Karen Mailing List! These special holiday emails I send out every year are a thank you to my subscribers who get a weekly email with the latest Stampin’ Up! news and project ideas with complete instructions PLUS these special 12 Weeks of Christmas emails with one new card idea, gift idea, or gift wrap/tag idea every week.

You have already missed the first 4 weeks of the 12 Weeks of Christmas emails, but you can still get on my list and get the rest of the emails. The next one, Week 5 comes out tomorrow, October 27. You missed Weeks 1-4 but you can still get Weeks 5-12! Sign up today and get Week 5 tomorrow! These emails usually get sent out at 1:00 pm CT every Wednesday in the weeks leading up to Christmas!

These are exclusive projects that I won’t be putting on my blog or social media. They are just for my email subscribers. I love sending out these emails and I hope they are fun for my subscribers to receive and that they make their holidays a tiny bit easier if they are looking for a card idea or some other creative idea for handmade gifts or even tags and bags for wrapping!

Please join us if you would like! Sign up today or before 1:00 PM CT on Wednesday, October 27 to begin receiving the 12 Weeks of Christmas holiday emails! (It is less than two months until Christmas! Yikes!!)

Just go to the red box here on my blog. If you are on your desktop computer, you should find it in the top right corner at the top of my blog post. If you are on your phone, you might have to scroll all the way down to find it. Or, click the link below to go to a special page with a signup box. Any way you do it, it works!

JOIN THE STAMPING WITH KAREN MAILING LIST!