
This Be Jolly Altered Christmas Ornament came about after watching some of these crafty gals on Instagram buy something cheap and junky at one of those dollar-type stores and then remake it into something cute for their holiday decorations! Usually, when I walk into one of those stores, all I see is junk and a mess, and I don’t come up with any creative vision for what I am seeing in there.
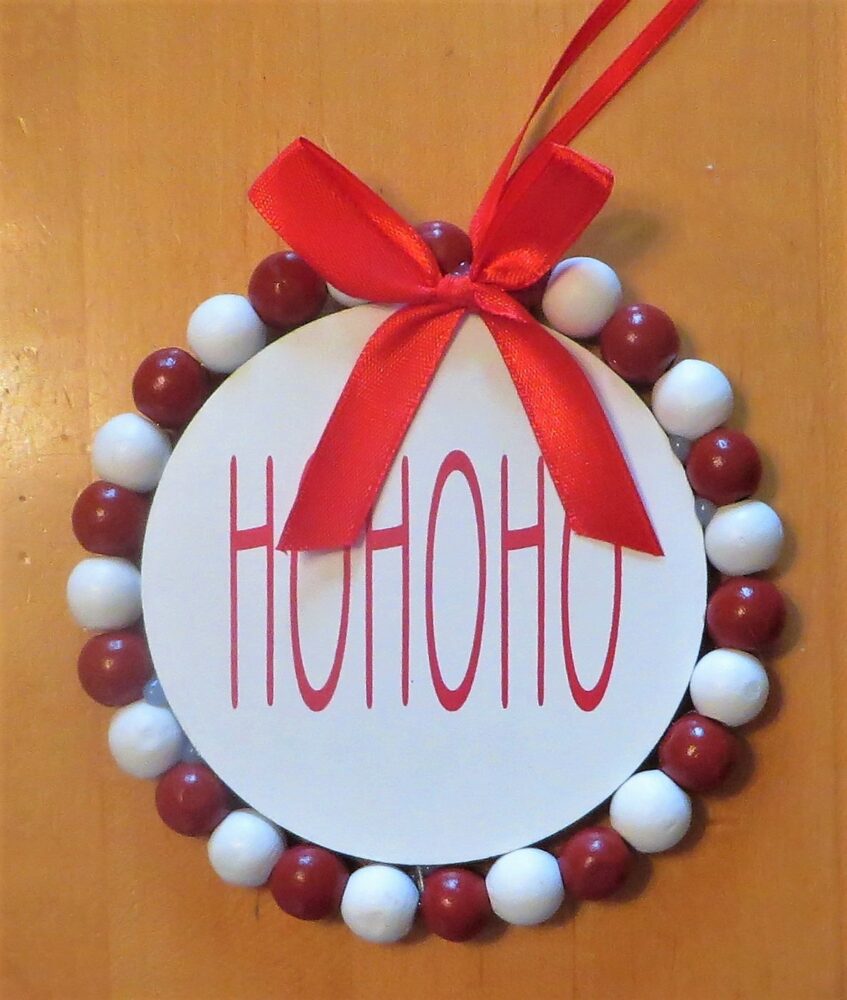
However, one day I saw this ornament pictured below at Walmart and although it was pretty cute as it was, that creative process came over me and I thought it would be cute to redo the front of the ornament and the beads would make it extra cute! Wooden beads seem to be pretty popular these days!
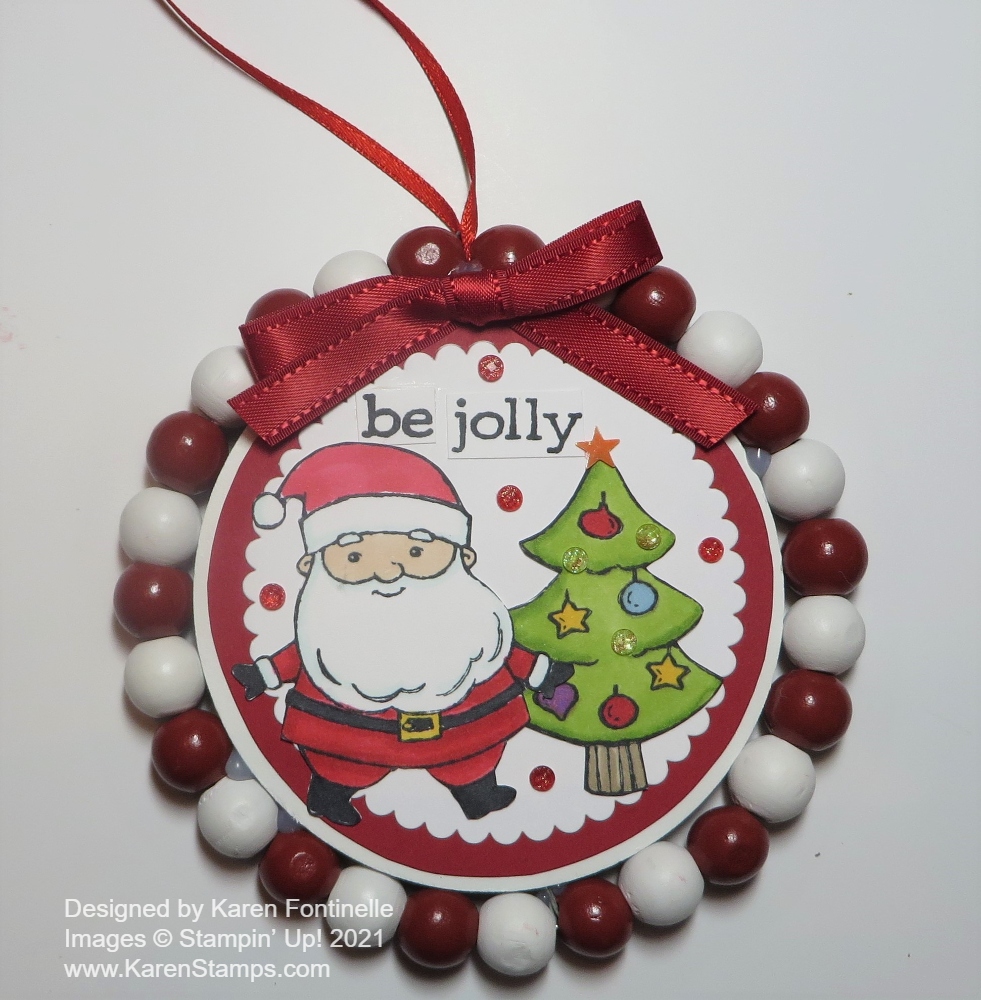
I thought the Be Jolly Stamp Set would be a perfect set with which to redo this ornament. We didn’t have a large enough circle die to cover the printed side of this ornament so I ended up finding a little bowl in the cabinet that fit inside this circle the size I wanted and just traced around it on Real Red Cardstock and cut it out by hand. The white scallop circle IS cut with the Layering Circles Dies. I wanted to use the white on the original ornament as a border margin, then layered the scalloped circle with some of the Real Red showing.
On a scrap of Basic White Cardstock I stamped the Santa and the Christmas tree in the Be Jolly Stamp Set with Memento Ink so I could color with Stampin’ Blends alcohol markers. You can use whatever colors you like. On the Santa, I used Real Red but Cherry Cobbler would be good, too. The Christmas tree is colored with the Granny Apple Green Combo and the ornaments with Real Red, Daffodil Delight, Balmy Blue, and one of the purples! I forget which one I used.
The greeting is stamped from the set. Since there wasn’t much empty space on the front of the ornament for the greeting, even this short one, I stamped it and then cut the words apart and glued them on separately. It is a fun design idea to do this, but also very practical sometimes when you really don’t have much space! You can space out the words on your project, they don’t have to be right together in a line. Mine are the tiniest bit offset.
For a final touch, I added some Elegant Faceted Gems to the tree plus an orange star from the Cute Stars Adhesive-backed Sequins. Yes, it is an orange star but I hoped on the ornament it would seem to be yellow or gold! Close enough! These star sequins are discounted as I write this on the Last Chance List for the Holiday 2021 Catalog. Of course, I couldn’t stop with just those gems on the tree, I had to add some red ones from the Wonderful Gems package scattered around. Sometimes you have to know when to stop, but being overly festive for the holidays is usually a good thing! These Wonderful Gems are also discounted right now.
I also have to add that on the back of the ornament, I add a Real Red die cut circle with a Basic White circle on top of that so there would be a place to stamp or write a message or a “To: From”. I also realized that I could have left the “Ho Ho Ho” side as is and decorated the “back” side. However, sometimes the back side is a little messier than the front so it just depends. I really liked the “Ho Ho Ho” side and hated to cover it up even though I wanted to! I guess it reminded me of the Rae Dunn products everyone is so crazy about.
The Be Jolly Stamp Set is also retiring although not discounted. It is a cute set I have enjoyed using. It’s so fun to color in but you could also use it in a monochromatic way on a card if you didn’t like coloring. And you could use any coloring techniques you like!
If you are out shopping and see an ornament or decoration with better potential being altered with Stampin’ Up! materials and your expertise, like this Be Jolly Altered Christmas Ornament, go for it! See what you come up with!