Tag Archives: Christmas gift

Candy Bar Homemade Christmas Fudge

Candy Bar Homemade Christmas Fudge

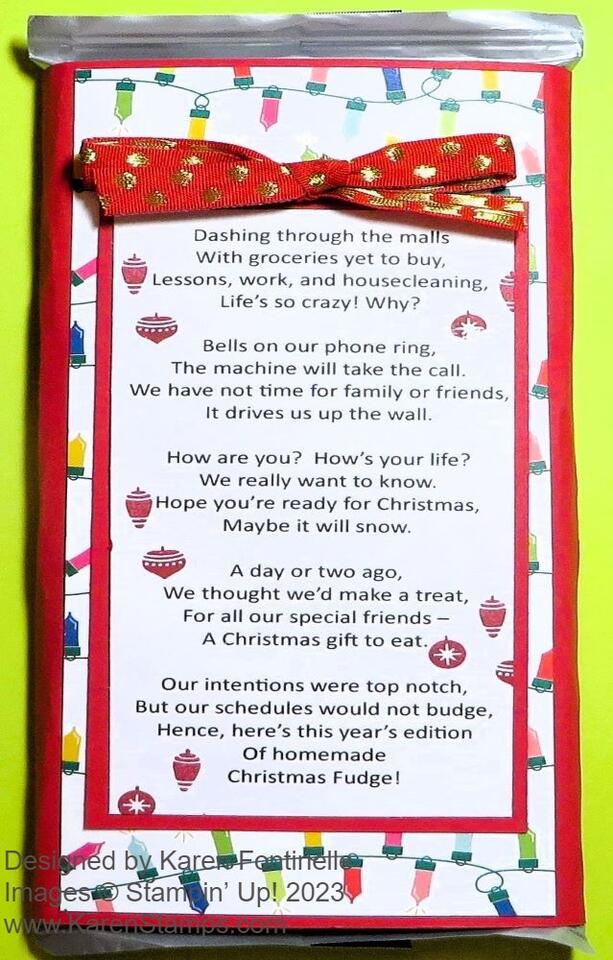
I’m bringing back an oldie but goodie! This Candy Bar Homemade Christmas Fudge poem and idea has been around probably as long as I have been a Demonstrator, which is a long time! But no matter how old it is, it will look updated with current designer paper and is always a funny gift to give!

You can modify this idea to whatever size candy bar you have, but my chocolate candy bar is 4.4 ounces and says “XL” on the label. You might even find a gigantic candy bar you could use!

I wrapped a piece of Real Red cardstock around the candy bar, and cut the correct length to cover the candy bar, without scoring. Since the candy bar has some thickness it probably works better to wrap, unless you want to figure out the score lines. The measurements all depend on the size of your candy bar. I think I used a piece about 7″ x 7 1/4″. Then I measured just the top of the bar and cut a piece of designer series paper almost like a card, leaving a slight red margin around the edges. I used the Merry Bold & Bright Designer Series Paper with the cute little light bulbs.

After typing and printing out the poem (you can do it on computer paper or Basic White cardstock if that works in your printer) I cut it down to a narrow size and layered it on a slightly larger piece of Real Red cardstock so it would stand out from the designer paper. I even stamped a few little ornaments in Real Red ink from the Merriest Trees Stamp Set. For the finishing touch, I added a Real Red & Gold Dotted Ribbon bow to the top of the poem.

You will find a few different versions of this poem online, but they are basically the same. Feel free to change it up for your personalization if you are good at poetry!

If I knew how to share a link to the poem I would, but you can type it up and make it whatever size and font you like.

Have fun with this project! I hope you find some giant chocolate bars!

Christmas Votive Home Decor

Christmas Votive Home Decor

If you want to make a quick and easy gift for someone or even just a little decoration for your home, make a glass votive holder into a decorated piece of home decor for yourself or someone else! You probably even have a votive holder somewhere around your house or you can pick one up at almost any store.

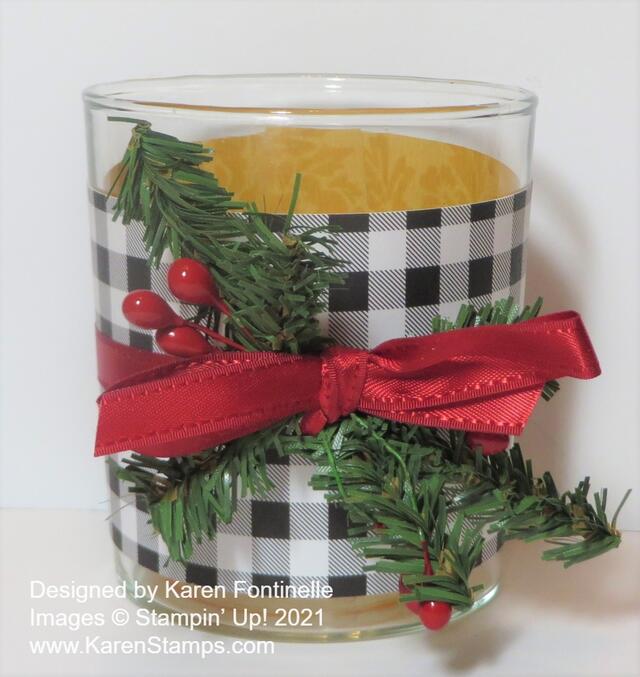
Last year I made one with the retired Buffalo Check Background stamp with black ink on Real Red cardstock. I really loved the look. This year it seems like a black and white check is quite popular so I redid the votive holder. I found a piece of black and white check paper in the Pattern Party Designer Series Paper that is available free as Host Reward in the Stampin’ Up! Annual Catalog. Of course, you will have to judge the size of paper you need to use for your votive holder. Mine is about 2 1/2″ wide and wraps around the glass. If the glass tapers a little bit at the bottom the paper won’t fit around perfectly but that’s okay. Wrap it around as well as you can. I also tied a Real Red ribbon around to hold the paper in place. You can simply tie a bow, or for Christmas, I added some bits of artificial greenery and red berries. You could add a tag with a greeting or name, a little wreath instead of the greenery, maybe a small ornament, whatever you like and have in your stash!

Add a small votive candle or tea light and you have a cute little gift for someone! Wrap it up or put it in a cello bag and tie it with a ribbon. Just the presentation can take the gift up a few notches!

Christmas is coming VERY soon now, but it’s fun to make a few things for gifts or your own decorations for the holidays! This is the time of year we have looked forward to all year! Take some time to make those things you wanted to “get around” to making!

Santa Suit Christmas Gift Bag

Santa Suit Christmas Gift Bag

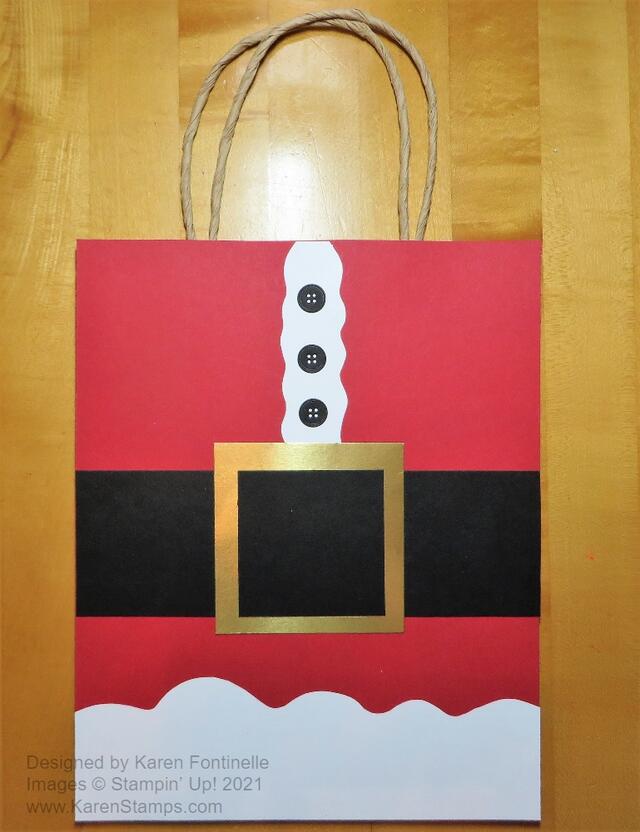
It soon will be time for gift bags and this Santa Suit Christmas Gift Bag is an easy one for you to make out of a plain kraft shopping bag! So fun for Christmas!

You may already have some handled shopping bags like this one in your stash of bags from certain stores or you can purchase a package of bags at the craft store. If they have the store name or design on the side, it will get covered up anyway so it is okay.

For this bag, I just measured the front side of the bag, which was 6″ x 8″, and cut a piece of Real Red Cardstock to cover the whole front for Santa’s red suit. Then I started at the bottom with the fur on the bottom of his red jacket. I just cut a 6″ wide piece of Basic White Cardstock a few inches wide and cut the curves freehand with scissors. They don’t have to be perfect and if you don’t like the look, just redo a few of the curves to even things out a little.

The Basic Black Santa belt is about 2″ wide. You can make yours narrower if you like. The trick to making a belt and belt buckle is to first cut the strip for the belt. Then cut the Gold Foil for the buckle a little wider than the belt, but just a solid square. To look like the black is going through the belt buckle, just cut a square of Basic Black to adhere to the top of the gold foil square. Just line it up even with the black strip and you’ll have a belt and buckle!

For the buttons, I looked through my dies for small circles, but I came across the button dies in the All Dressed Up Dies. They were perfect, but you could use some retired circle punches or just cut out little circles. I realized I probably should have some white fur on his jacket so I just cut a narrow piece of Basic White. Again, the fur doesn’t have to be perfect, fur isn’t perfect.

Attach a tag to the handle and you are all set with a great Santa Suit Christmas Gift Bag for a special, fun gift for someone!

Buffalo Check Decorated Candle

Buffalo Check Decorated Candle

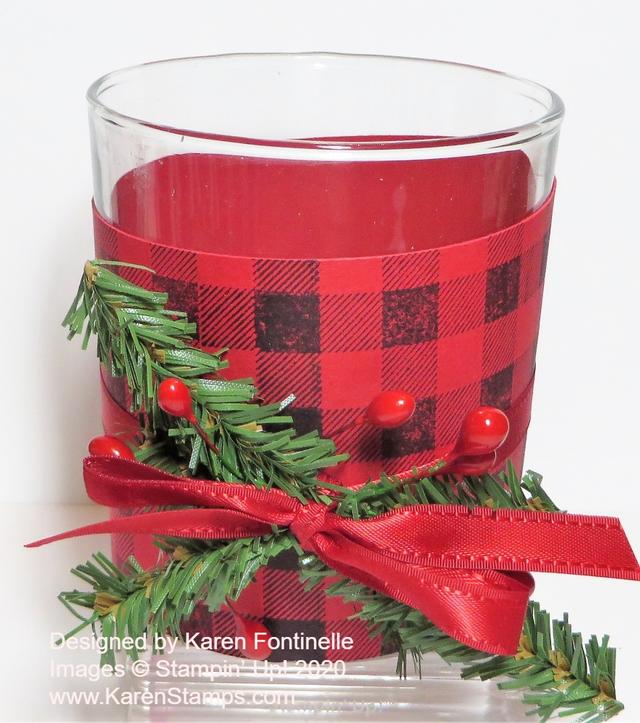
I was watching someone’s Instagram “story” and saw in her home these black and white buffalo check candles. I think black and white is trendy in some Christmas home decorations this year. It gave me the idea to decorate a glass candle holder I had with a red and black buffalo check which is a little more traditional.

If you have a real candle, a flameless candle (even better), or a votive or candle holder of some kind, you can decorate it with your papercrafting supplies. We can do so much with our stamping supplies! That is why it is such a great hobby!

I haven’t used it in awhile, but I got out my Buffalo Check Stamp. This is a large background stamp, as we used to call them. You can purchase either the “cling” or the “wood-mount”. If you choose the cling, you need the largest acrylic block on which to mount it. I have always liked to use my background stamp stamp-side up, ink it up, and then lay the cardstock I am stamping on top of it. Then I take a scrap paper to cover the cardstock so I can rub all over with my fingers to make sure every area gets inked up.

This stamp was a little tricky but I got lucky! Obviously I wanted to line up the pattern going around the strip of cardstock that was going to go around my votive holder and it worked! Somehow I managed to lay down the strip in just the right place, at least close enough.

For decoration, I wrapped around a piece of Real Red Satin Ribbon and then tied on some pieces of greenery I had in my craft stash. I also had some of those red berries that I stuck in there. Maybe I could have added some other embellishments I have but I stopped with this. I could also have added a greeting on the candle. You can do so much with a project like this yet keep it very simple.

Look around your house and surely you will find some votive holders or maybe vases or who knows what that you can decorate for the holidays for little decorations in your home or maybe on your holiday dinner table. Here’s another votive holder I decorated by cutting out images from the fall Gilded Autumn Designer Series Paper. Just use your imagination and you will come up with a fun decoration for a Christmas candle or votive or even to give one as a gift!

Poinsettia Decorated Mini Coffee Carrier

Poinsettia Decorated Mini Coffee Carrier

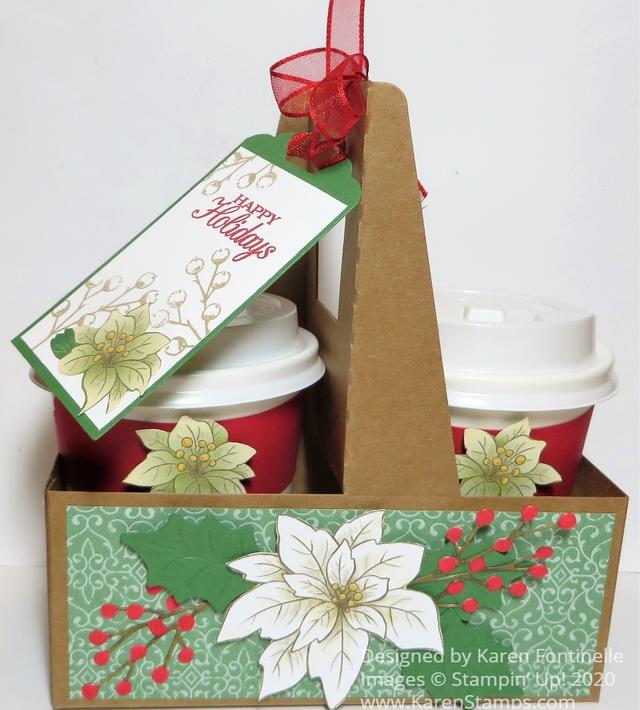
I’ve had these carriers for a while and kept forgetting to use them, but here is one for you today, my Poinsettia Decorated Mini Coffee Carrier! These will be fun to make for neighbor gifts or treats or extra presents for your family. You can use them in so many different ways for so many different treats!

Fill the cups with cocoa mix, or maybe just one cup and then on the other side put cello bags of marshmallows and maybe a peppermint stirrer. Put any kind of candy or maybe small cookies inside the cups. Fill cello bags with a treat and insert those inside the cup but leave off the lid so the recipient will see the pretty treat bag tied with a ribbon and a tag. Decorate the Mini Coffee Carrier but put in gifts of small candles or bath products or some other kind of product or container. The ideas are endless!

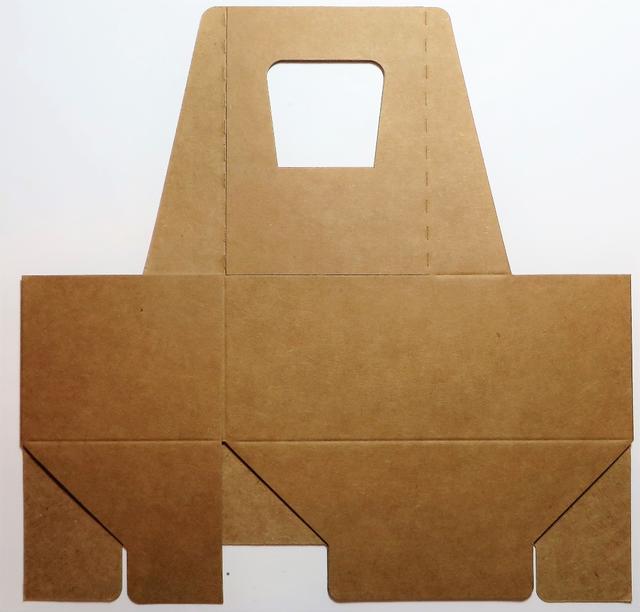
Mini Coffee Carrier Flat

This is what the Mini Coffee Carrier starts out like! It is folded flat so you don’t have to worry about storage space. Just start sticking your hands in there to open it up and then when it gets loosened up, crease and fold on all the score lines to make your carrier. Play around with those tabs on the bottom and make sure you have them assembled so they are strong to hold the contents of the carrier. You get 8 kraft carriers for only $5!

The coffee cups are separate if you would like those. Order the Mini Coffee Cups and get eight cups and lids and they are food safe and can hold a beverage up to 200 degrees F.

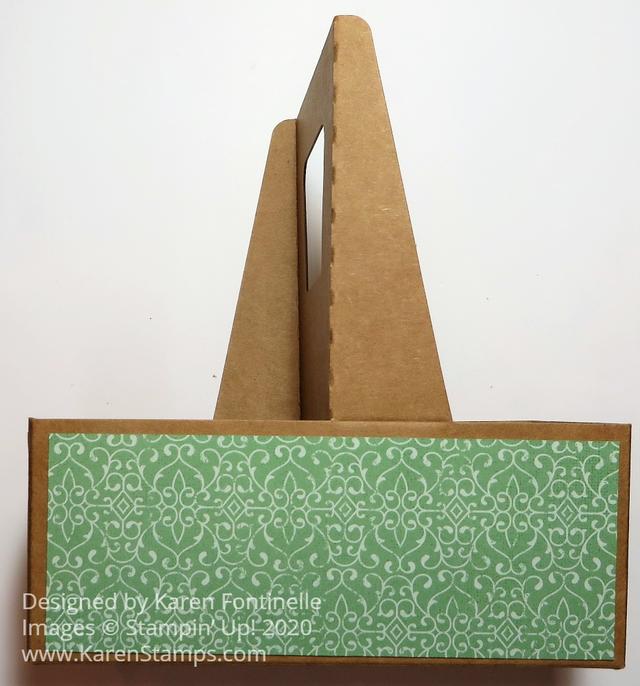
Mini Coffee Carrier Side Paper

Here I started decorating my carrier with paper in the Poinsettia Place Designer Series Paper. You can wrap a strip of paper around as far as it will go or you can do as I did, just cut paper to fit each side of the carrier. To leave a small margin of the carrier showing, I cut my designer paper at 2 1/8″ x 5 1/2″ for the front and back and 2 1/8″ x 2 5/8″ for each end. I tried to match the pattern but it wasn’t that important with this paper, but make sure you check your patterns so one isn’t upside down or completely doesn’t match and look good.

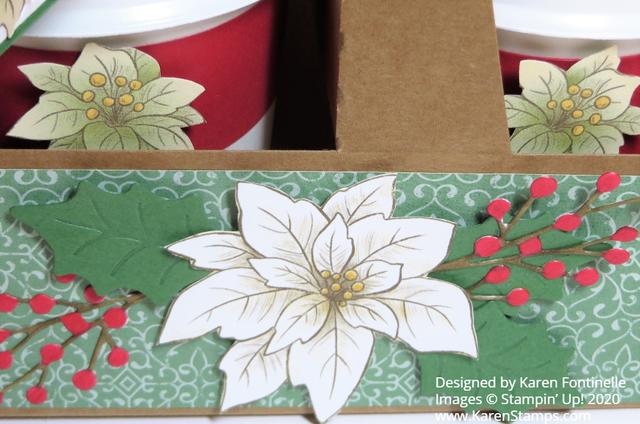
Poinsettia Decorated Mini Coffee Carrier Front Decoration

To decorate my carrier, I cut out a large poinsettia from one of the papers and die cut the leaves with the Poinsettia Dies. I used Garden Green Cardstock. For the berry sprigs, I die cut those from Whisper White Cardstock and then colored the berries with the Dark Real Red Stampin’ Blend and Dark Soft Suede for the stems. The flower and leaves are popped up on Stampin’ Dimensionals® and the sprigs adhered with tiny bits of Multipurpose Liquid Glue on the berries.

Poinsettia Decorated Mini Coffee Carrier Tag

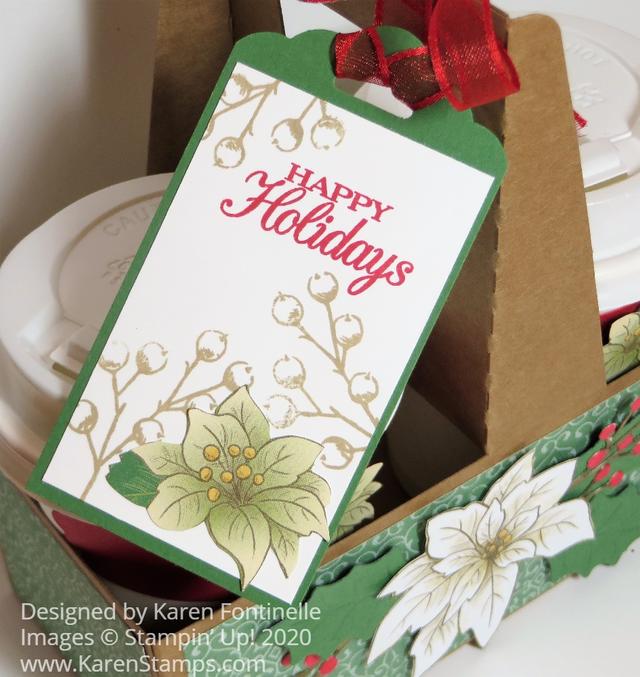
I actually love this tag that I came up with! The Garden Green tag is punched with the Scalloped Tag Topper Punch. The Whisper White layer is stamped with a Happy Holidays greeting in the Poinsettia Petals Stamp Set. Then I stamped the berry sprig in Crumb Cake ink to make a lighter interesting background. The poinsettia is hand-cut from the designer paper. The tag is tied on with the Real Red Sheer Ribbon.

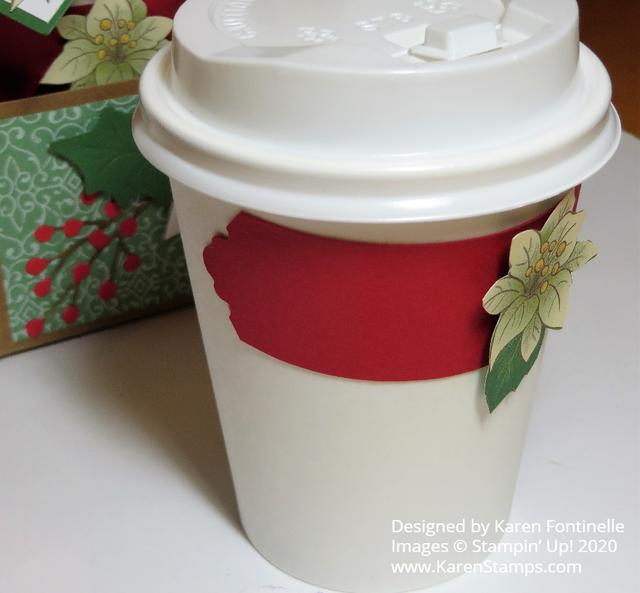
There are dies to order to make wrappers to go around the cups for decoration. If you don’t order these, you may have to cut up a cup for a template to make your paper fit around the cup. The dies are called Warm Wrap Dies and they will make your life easier! Since I don’t own them, I punched a strip of Real Red with the Lovely Labels Pick a Punch and adhered that to the cup, then added another hand-cut small poinsettia flower to each label.

It’s time to be thinking about making some holiday gifts! Really, you could use these any time of year! All you have to do is decorate for any occasion.

SHOP STAMPIN’ UP! ONLINE HERE!