Category Archives: Christmas

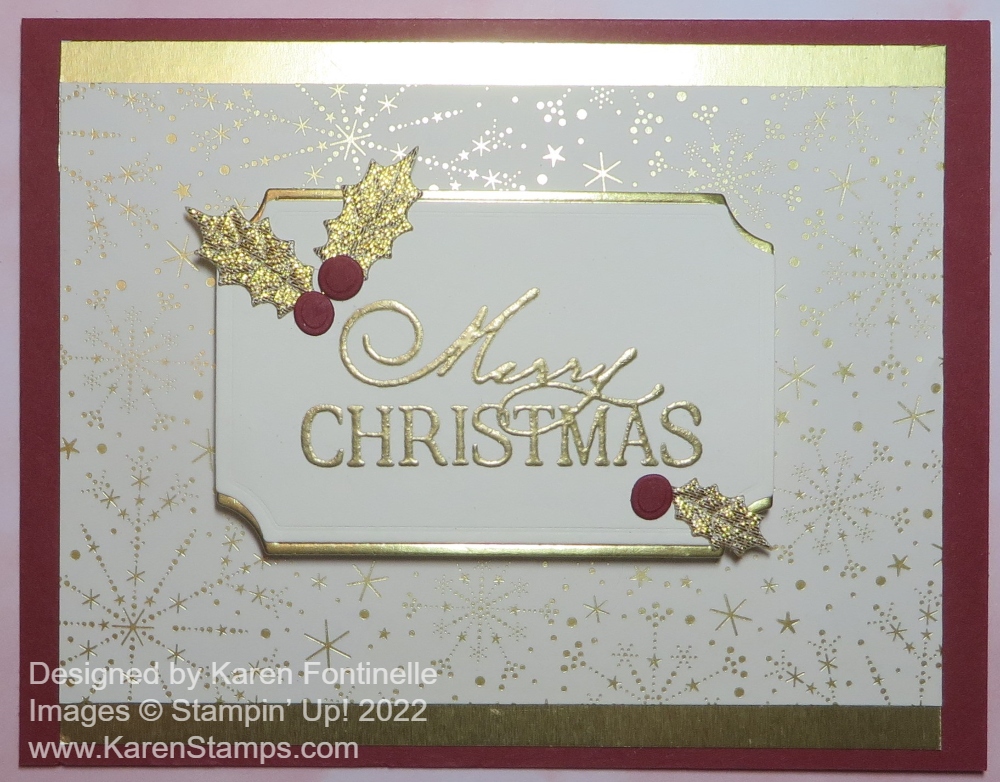
Lights Aglow Gold Christmas Card

Lights Aglow Gold Christmas Card Closeup

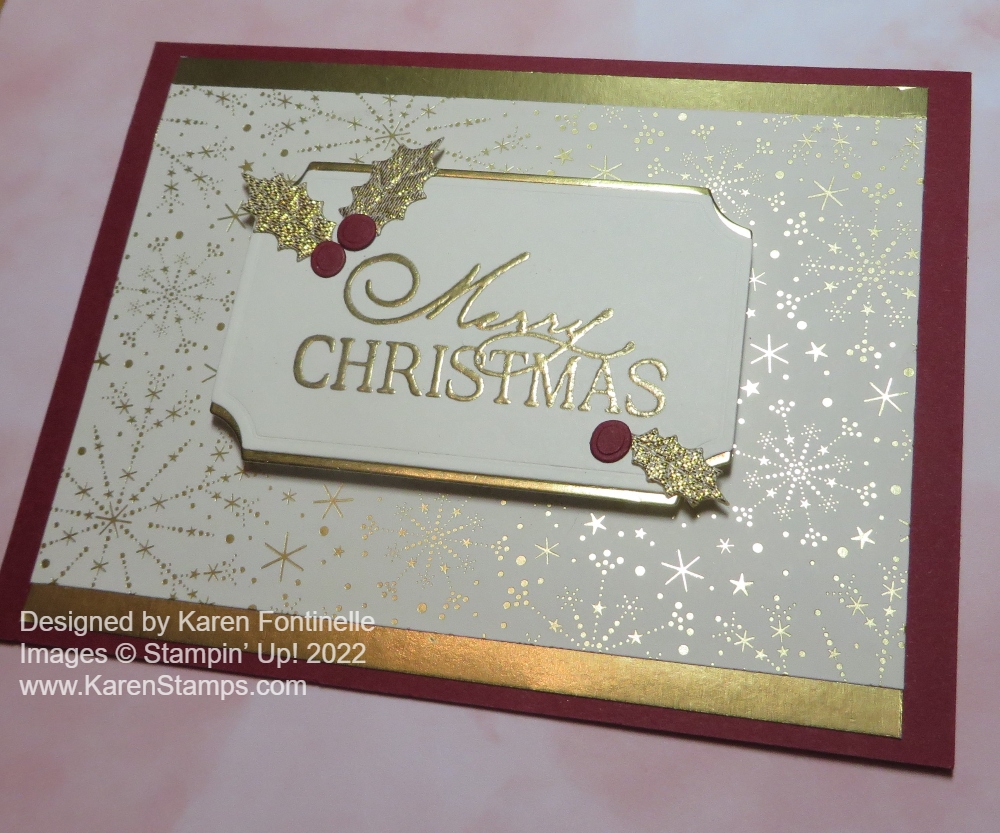
I looked through the Lights Aglow Designer Paper and chose this pattern without knowing what I would make. That’s a good way to get started when you are trying to come up with an idea. In a little while, I had this Lights Aglow Gold Christmas Card made!

After deciding on this gold foil snowflake pattern of paper in the Lights Aglow 6″ x 6″ Specialty Designer Series Paper, I decided to make the card base Cherry Cobbler cardstock. I started with Real Red, but I think just knowing the coordinating color for this designer paper pack was Cherry Cobbler, Real Red just didn’t feel right. I cut the snowflake layer down a little so I could add some Gold Foil strips to the top and bottom. I cut two Gold Foil strips 3/4″ x 5″ to add a 1/4″ edge peeking out.

For the greeting, I stamped “Merry Christmas’ in the Brightest Glow Stamp Set. I stamped it with Versamark ink so I could heat emboss it with Gold Embossing Powder in the Metallics Embossing Powders using the Heat Tool. I used Very Vanilla cardstock.

To help the Very Vanilla greeting stand out, I diecut it with one of the Painted Labels dies and immediately cut another one out of Gold Foil. The gold foil is then cut in half horizontally so that it could be layered just a tiny bit under the top and bottom of the greeting piece. It’s not absolutely perfect, but plenty close enough.

For a little embellishment, I remembered that I had Gold Holly Leaves leftover from last year’s Holiday Catalog but carried over to the current Holiday Mini. They are almost like little fabric leaves and come in two sizes in the package. Then I die cut some Cherry Cobbler berries from the Christmas Banners Dies. I think they are a little larger than I would have liked but they still are okay. I popped the greeting up not on Stampin’ Dimensionals but on Foam Adhesive Strips. They seem to be a little higher than the Dimensionals so I might have preferred the Dimensionals. But it is fine!

So once you know what the design is on this card, it’s really fairly simple! You can change the background designer paper and make it a little different or even make the card for a different occasion, instead of this Lights Aglow Gold Christmas Card.

Lights Aglow Gold Christmas Card Closeup

SHOP STAMPIN’ UP! and SALE-A-BRATION (until Aug. 31st)!

Lights Aglow Tis the Season Christmas Card

Lights Aglow Tis the Season Christmas Card

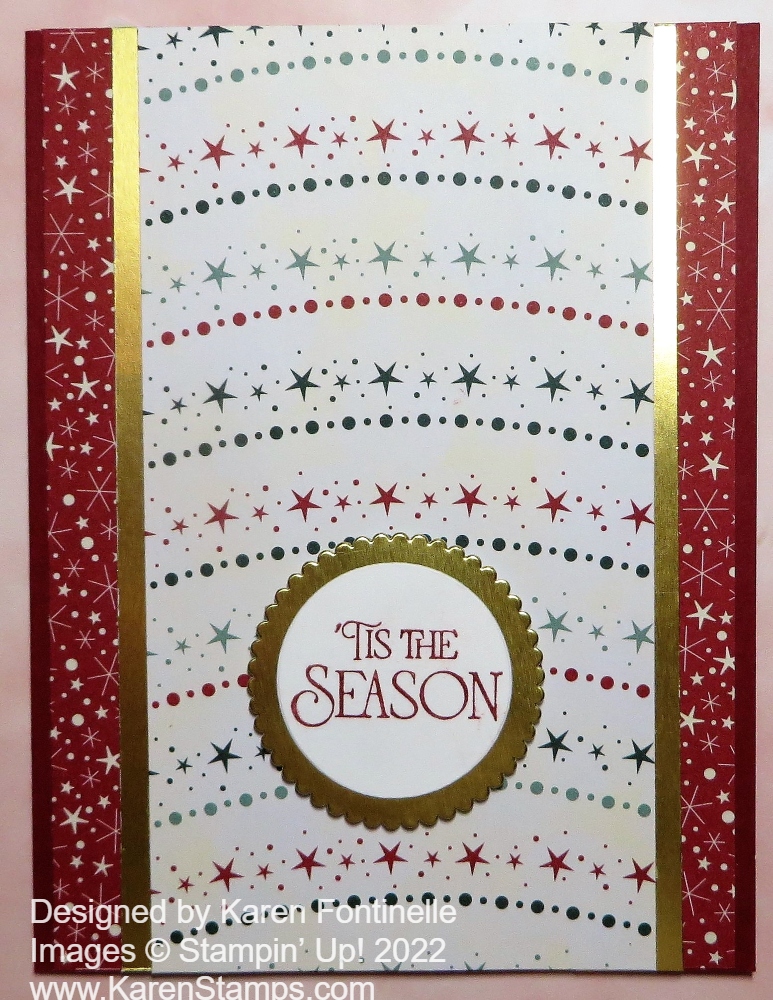
I just got this designer paper and sort of copied a sample card in the Holiday Mini Catalog to come up with this Lights Aglow Tis the Season Christmas Card. When you don’t have an idea of what to make with one of your Stampin’ Up! products, always remember to look in the catalog for ideas. You might think you will copy the card exactly, but I’m willing to bet that as you go along you may just change it up a little as your ideas start to flow.

Although I don’t have the Christmas Lights Bundle in the Lights Aglow Suite, I wanted to get the Lights Aglow 6″ x 6″ Specialty Designer Series Paper. As I write this, the Lights Aglow Paper is not available but should be back in stock in early September. I must have ordered the last pack! LOL! This paper has gold foil dots that are meant to look like twinkling lights! Very pretty papers!

To make this card, I started with a Cherry Cobbler card base. Then I used the Cherry Cobbler paper with tiny stars all over as a layer on the card base. If you wanted to save paper, you could just add strips to the side. I made all the paper layers on this card run the full length of 5 1/2″. The Cherry Cobbler paper with stars is 5 1/2″ x 4″.

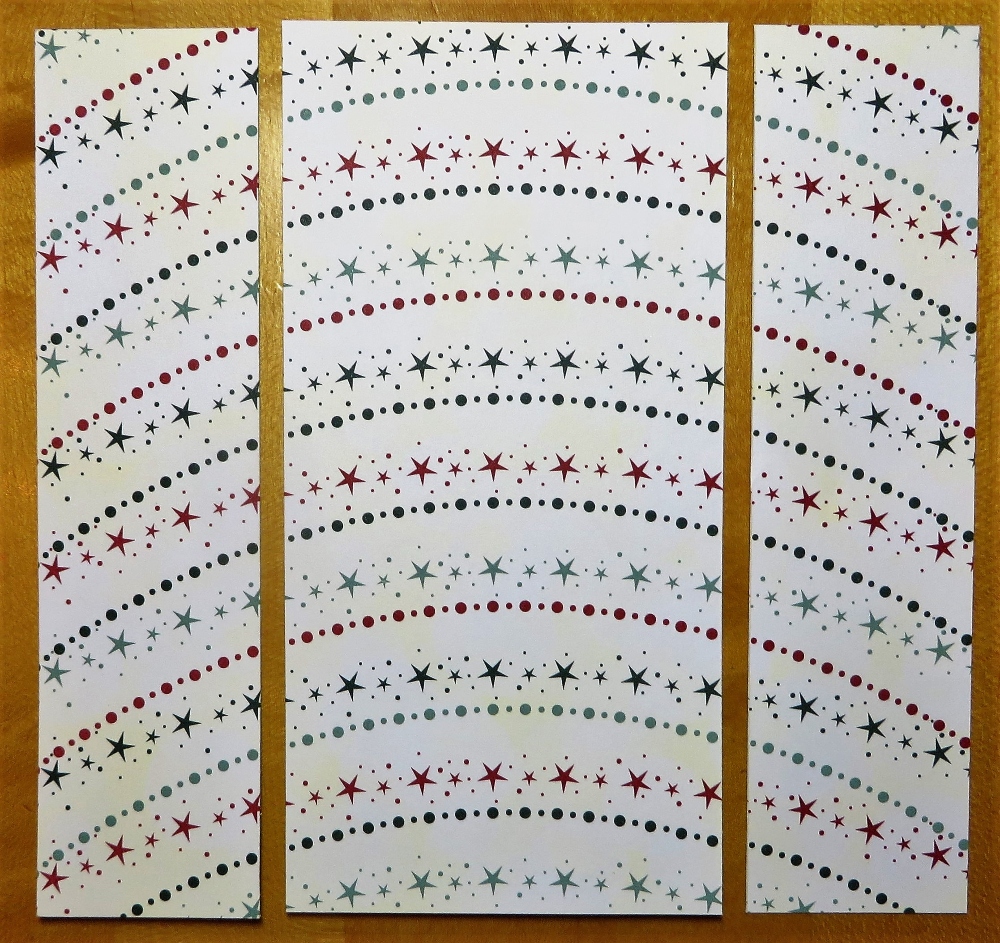
The center portion of the card, the arcs of stars and dots, needs a little extra care. Surprisingly I realized that before I cut it! To get the proper arc, you need to cut the center portion of the sheet of that paper. Below is a photo of how I cut the paper. Since I wanted a 3″ wide section, that left 3″ so I cut 1 1/2″ off each side.

How to Cut the Paper

Before adhering that center paper to the card, add some Gold Foil strips to each side, or as the Holiday Catalog shows (page 30) use the Gold Glimmer Paper in the Glimmer 12″ x 12″ Specialty Paper.

For the greeting, I sort of copied the design of the sample card but changed it up a little bit. I used a sentiment in the Brightest Glow Stamp Set. I think this is a fantastic set of traditional Christmas greetings in pretty fonts. I chose the ‘Tis the Season stamp and stamped it in Cherry Cobbler. Then I die cut it with a small plain circle in the Layering Circles Dies and layered it on a scalloped circle die in the same set, cut out of Gold Foil.

On the inside of the card, I used a layer of Basic White and added a strip of designer paper with the little stars that I used on the front of the card. That way you can stamp a greeting or write a note.

That’s all there is to this Lights Aglow Tis the Season Christmas Card but if you wanted to add any extra embellishments you could do that.

SHOP STAMPIN’ UP! ONLINE HERE!

Painted Christmas 2-4-6-8 Gift Bag

Painted Christmas Gift Bag

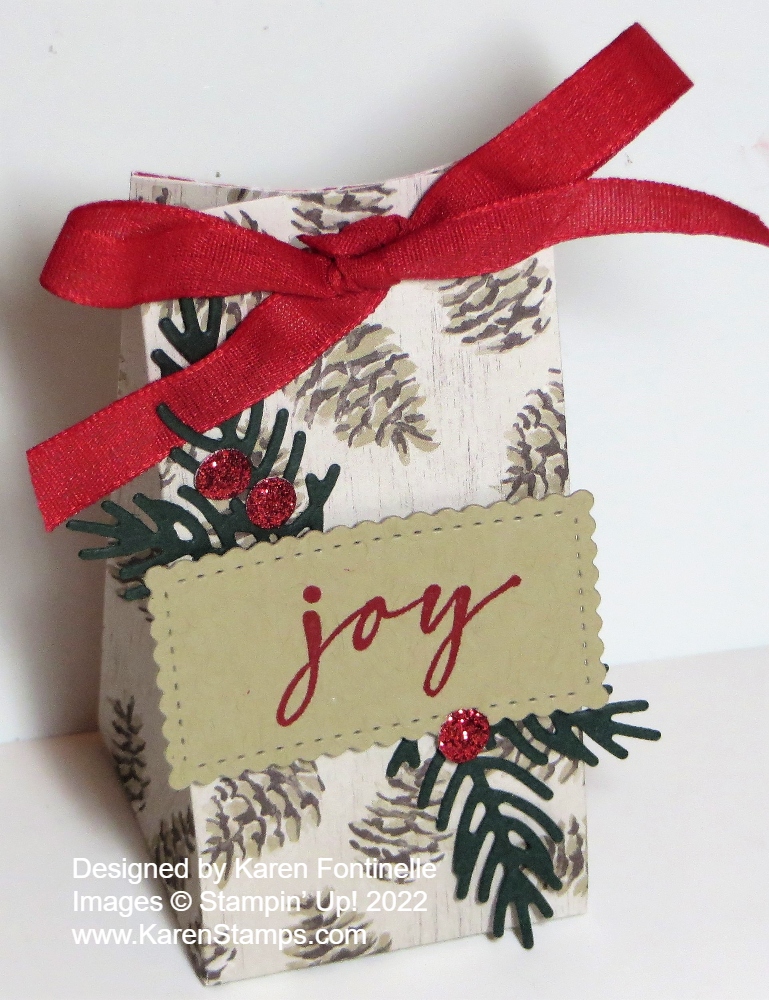
I was inspired to make something different than a card so I looked through my designer paper and this pinecone paper is what jumped out at me! I thought it would be perfect for an easy little gift bag for the holidays, like this Painted Christmas 2-4-6-8 Gift Bag. You know the holidays will be here before we know it!

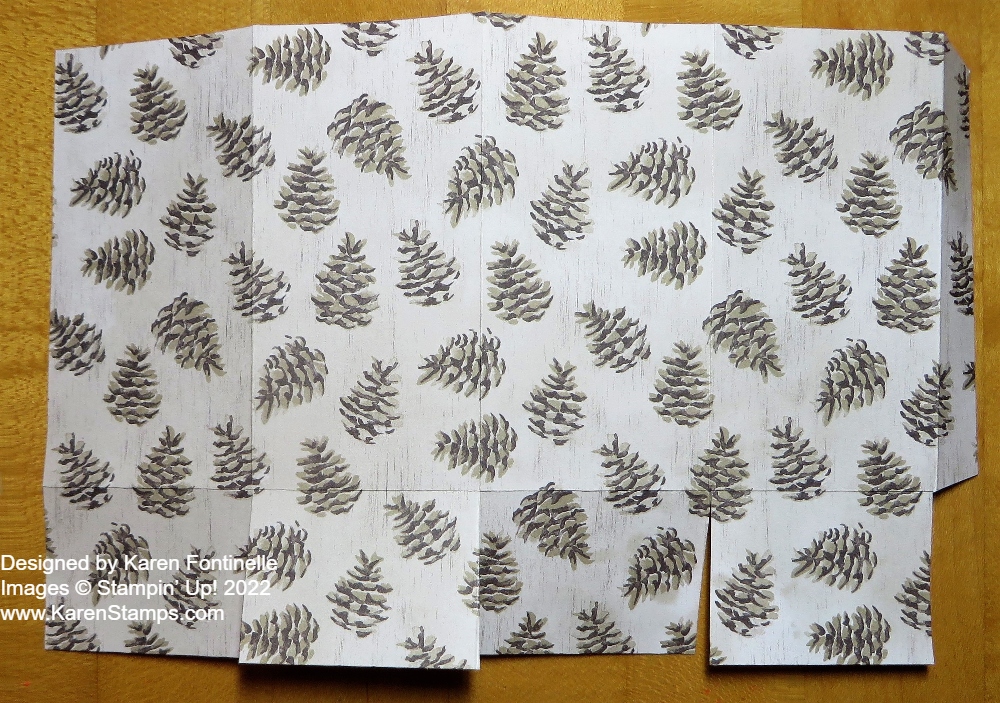
There’s almost nothing easier to make than a 2-4-6-8 gift bag! And so versatile! you can leave the top open or you can pinch it closed, as I did. Make a lid if you like. All this one takes is a piece of paper – cardstock or designer series paper – cut at 5 1/2″ x 8 1/2″. I used the Painted Christmas Designer Series Paper which was around last year and has returned this year in the Holiday Mini Catalog so you may have some! Put it in your Paper Trimmer or Simply Scored board to score at 2″, 4″, 6″, and 8″. Make sure you pay attention if there is a pattern so you have the design going the right way and not upside down or something. Then turn the paper lengthwise and score at 1 1/2″ or 2″ to make the bottom flaps of the bag. You can vary the height of the bag if you make it wider than 5 1/2″. Then cut those score lines for the flaps up to the horizontal score line. Also, cut off the tiny little 1/2″ piece at the end. Check out the paper below.

Painted Christmas 2-4-6-8 Gift Bag

To assemble, crease all the score lines with a Bone Folder for a good fold, and then see how the bag is going to go together. Apply adhesive (Multipurpose Liquid Glue gives you some wiggle room to get the paper lined up but Tear & Tape or Stampin’ Seal+ is good, too!) to that narrow 1/2″ piece on the end. You don’t really have to hold the bag up in the air to adhere the other side to that 1/2″ side. Just lay it flat on the table and carefully fold over the opposite side to adhere to that 1/2″ side. Then just fold in the flaps, trying to not have seams showing on the front side of the bag. Apply some adhesive to the flaps and always stick your Bone Folder or something down inside the bag to put pressure on all those flaps and make sure they have fully adhered together. If you want the top of the bag closed AFTER you put your gift or treat inside, just pinch in on the sides and then close the top with ribbon through some punched holes, a staple, or some kind of clip. Whatever you like!

To decorate the bag, I used a little diecut rectangle out of Crumb Cake Cardstock and die-cut some evergreen branches out of Evening Evergreen Cardstock using the Christmas Banner Dies. I had a scrap of the Real Red Glimmer Paper in the 6″ x 6″ Pack so I diecut some red berries just in case I wanted to use them. The “joy” is stamped in Real Red ink from the Brightest Glow Stamp Set. You can purchase the whole Brightest Glow Bundle with the stamp set and some fancy dies, but if you just need some more or some Christmas greetings, you can just get the stamp set.

This little Painted Christmas 2-4-6-8 Gift Bag started out with some not real exciting pinecone paper and got turned into a real Christmasy bag for a small gift or treat! Time to get ready for the holidays!

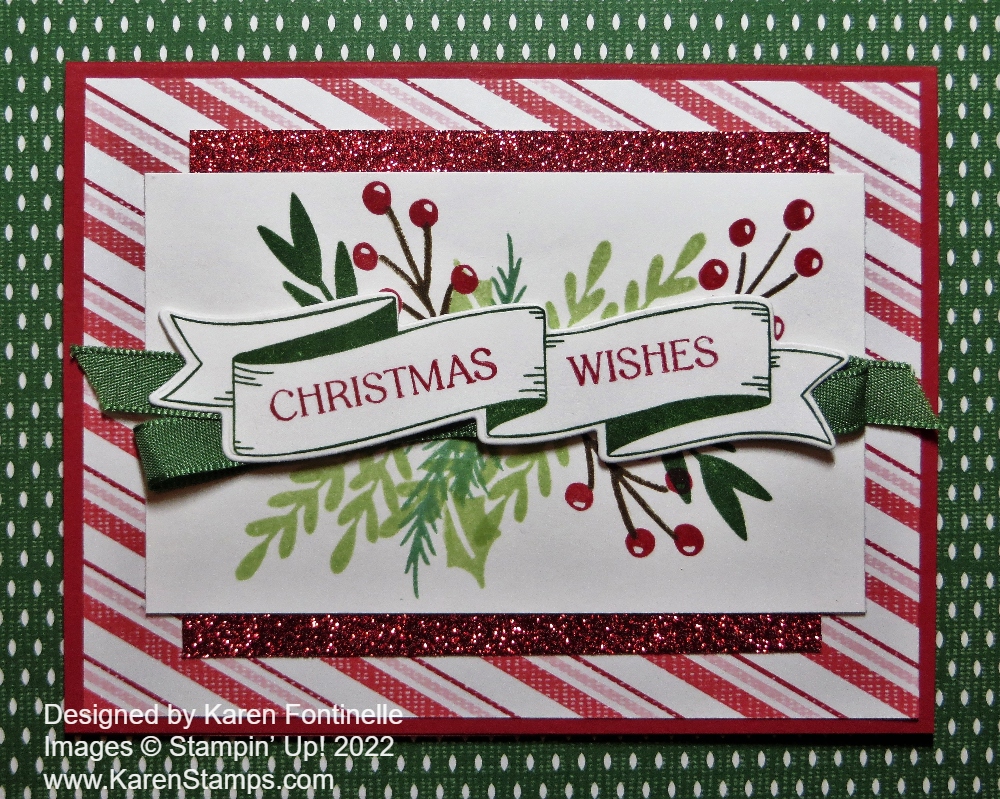
Christmas Wishes Banner Card

I wanted to make another Christmas card sample so I copied a design in the Holiday Mini Catalog on page 11. I found just the Real Red card base and the striped paper already cut so I just started with that even though the sample design uses a green stripe paper. I was happy with my Christmas Wishes Banner Card when I finished. That red glimmer paper really adds some pizzazz!

The green paper in the background is just another of the Sweetest Christmas Designer Series Paper designs that I put under my card for the photograph, but I kind of like it if I wanted to make a card with that as the layer if I made the center part smaller!

As I said the card base is Real Red with a striped layer of the Sweetest Christmas DSP. The center piece is Basic White cardstock, stamped with leaves, with a die-cut banner overlaid, and some glimmer paper on the top and bottom.

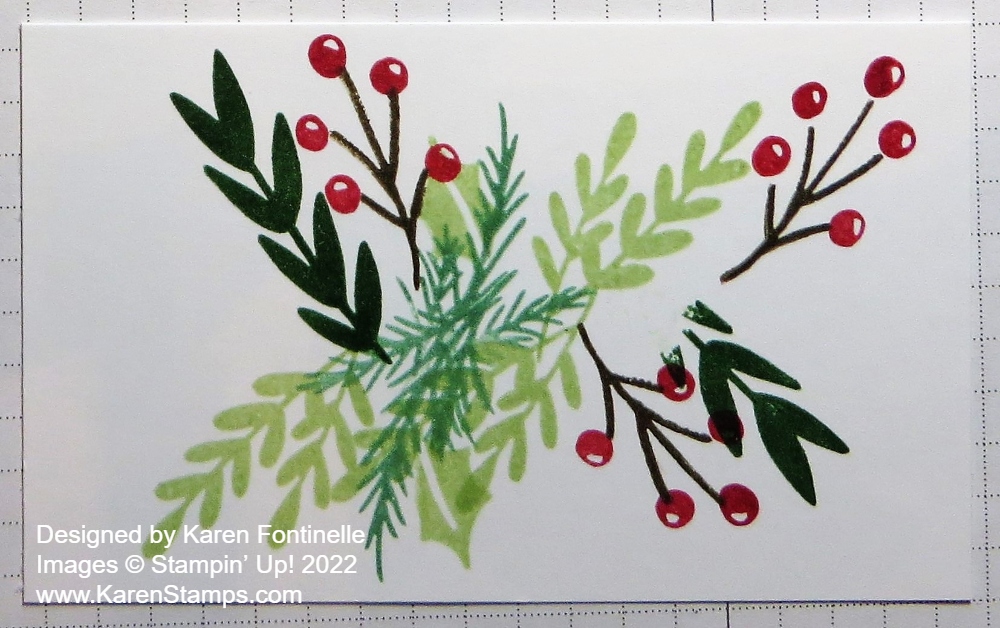
Here are the details! The Basic White piece is 4 1/2″ x 2 3/4″. I stamped various leaves and stems in the Christmas Banners Stamp Set. I used Garden Green, Soft Sea Foam, and Mint Macaron in for the greenery and Soft Suede and Real Red for the stems of berries. I love how those turned out! The berries and stem are two different stamps so you don’t have to color directly on the stamp to get two colors. As I stamped the greenery and berries, I just imagined the banner going across the middle so I didn’t have to worry about how it looked underneath. You can see in the photo below how I stamped all of that.

Christmas Banner Card Stamping

The banner is stamped in Garden Green ink with the greeting words stamped in Real Red. The banner was diecut with the Christmas Banner Dies. You could just place the banner over the center of that stamping, but I noticed the catalog sample looked like it had ribbon underneath it. I used the green ribbon in the Real Red & Garden Green 3/8″ Ribbon Combo Pack. It just goes across and back and then back to the other side so that you can see a loop at each end of the banner. I added some Stampin’ Seal on the back of the banner so I could adhere the ribbon going back and forth and back, then popped up the whole banner with Stampin’ Dimensionals.

Before adhering the piece to the front of the card, I added two scrap pieces of red glimmer paper from the Real Red & White 6″ x 6″ Glimmer Paper to the top and bottom of the center piece. I cut the glimmer paper at 4″ x 5/8″ and adhered to the white cardstock, then adhered the whole thing to the card front.

The sample in the catalog has a little bow tied with one of the Flat Jingle Bell Trinkets. You could also add some jewels if you wanted to, such as the Red Rhinestone Basic Jewels.

Even if you copied this sample, there are ways you could change things up a little if you wanted. It at least helps you to get going to copy something!

Shop Stampin’ Up! Online HERE!

Slimline Painted Christmas Banner Card

Slimline Painted Christmas Banner Card

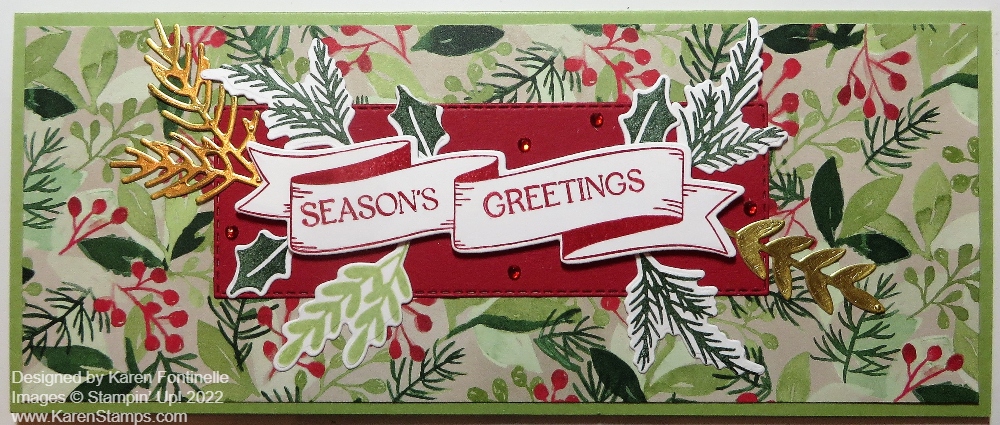
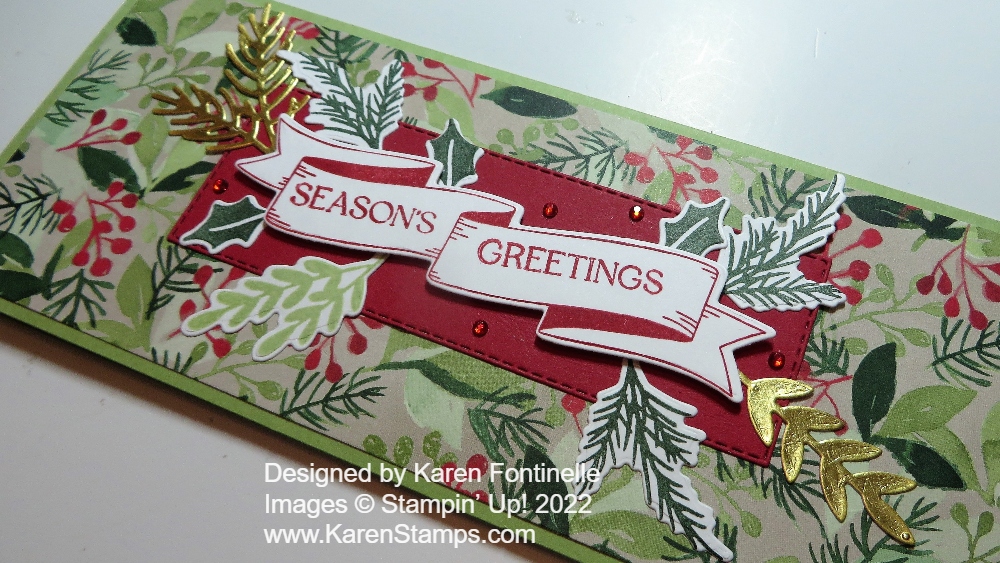
I remembered that one of the Christmas papers in the Holiday Mini Catalog is a returning one, Painted Christmas! And I have it from last year so I was anxious to try it out again! After pulling out all the papers and some coordinating colors of cardstock, I came up with this Slimline Painted Christmas Banner Card, much to my surprise!

I say “much to my surprise” because I didn’t imagine I would be making a slimline Christmas card! But you never know what you may come up with! As it turned out, from the pieces of designer paper and scraps of cardstock, it just seemed like they would fit well as a slimline card! This is even a fairly large one that could be used if you wanted a lot of people to sign the card!

The card base is 8 1/2″ x 7″, folded in half so the width is 3 1/2″. I used Pear Pizzazz cardstock. The layer of Painted Christmas Designer Series Paper is 3 1/4″ x 8 1/4″.

For the greeting, I decided to use the Christmas Banners Stamp Set. I stamped the banner in Real Red ink, diecut it with the Christmas Banner Dies, then stamped the words. You could do all the stamping before die-cutting. The stamp set and dies can be purchased together as the Christmas Banners Bundle so you can save 10%. I thought the banner might need a background to stand out better so I used Real Red cardstock to die cut a Stitched Rectangle. You might notice it is longer than the actual die. I used that technique to partially cut the rectangle, then stop and move the die down longer, lining it up with the already cut die-cut lines. You will feel it fit in there. But don’t roll that end of the die through the Stampin’ Cut & Emboss. Start it farther down and then roll the platform past the longer end. If you try it, you will figure it out! It always takes me a minute to remember how it works, but it’s a good technique when you want a longer die.

Next, I stamped and diecut lots of the leaves and stems in the Bundle to decorate around the greeting. I even found a scrap of gold foil in my little pile so I used that for a little gleam on the card. The banner greeting is popped up on Stampin’ Dimensionals® and the stems can be slid a tiny bit underneath the banner around the sides. Just lay around with the pieces that you have and see what looks good. For a finishing touch, I added some Red Rhinestone Basic Jewels.

This card will fit into one of those long business envelopes or you can use the Slimline Envelopes in the Annual Catalog. Here is another slimline card, but much smaller, in this post. That one is 3″ x 6″ but I think that’s a good size too. Just make your cards to fit the envelope you have! We are past July 25th so it is LESS THAN five months until Christmas! I hope this Slimline Painted Christmas Banner Card offers you some inspiration for a holiday card!

SHOP STAMPIN’ UP! ONLINE HERE!

Christmas Candy Cane Card

Christmas Candy Cane Card

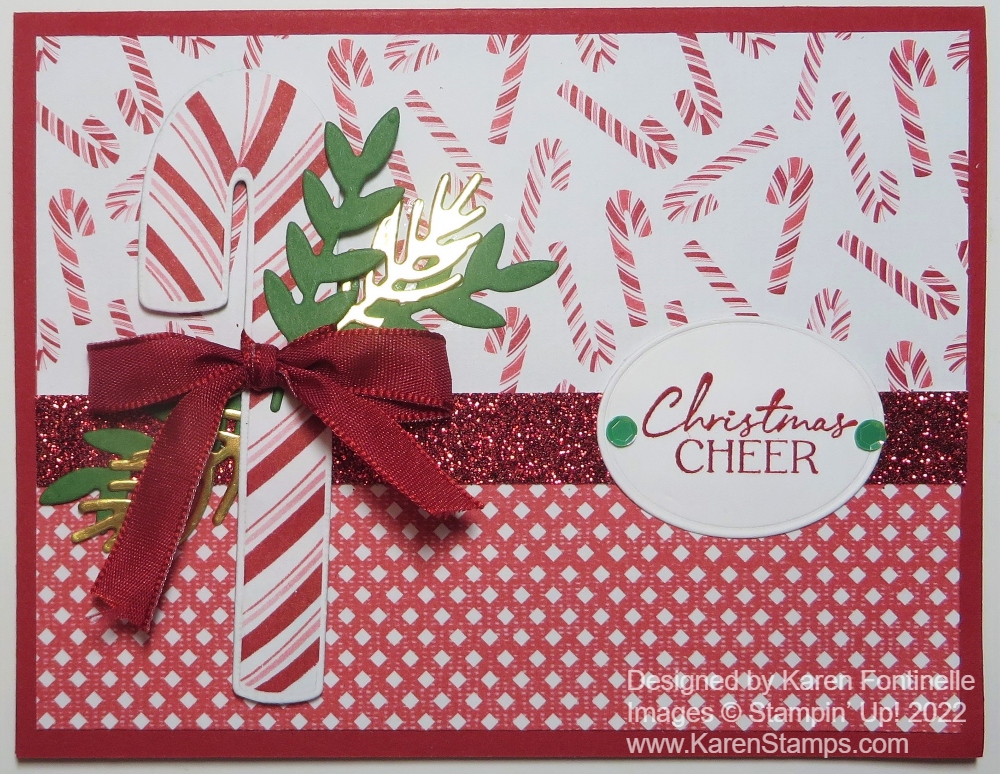
As long as I still had the paper, stamps, and dies out from yesterday’s card I decided to make another card design with all those materials. As I looked through the Sweetest Christmas Designer Series Paper, I liked this small candy cane print with this little red and white print on the backside of a candy cane stripe and that’s how this Christmas Candy Cane Card was born!

The card base is Real Red. I cut the two pieces of the designer paper to overlap a little bit. I intended to use Real Red Ribbon across the seam but I glued the paper down to the card base before I put the ribbon across. So the next best thing, maybe even better, was to use a strip of the Real Red Glimmer Paper! It really makes it festive!

To decorate the card, I die-cut one of the candy canes on the Sweetest Christmas Designer Paper from the Candy Cane Dies. You can cut it out with Paper Snips if you don’t have the dies. However, you can purchase the Sweet Candy Canes Bundle with the stamp set & dies and save 10% over buying them separately. I popped up the candy cane with Stampin’ Dimensionals and tied on a bow with the Real Red Ribbon in the Real Red and Garden Green Ribbon Combo Pack. Then I used some diecuts of leaves, Gold Foil and Garden Green, using the Christmas Banner Dies. You can decorate the candy cane as much or as little as you like.

The greeting is in the Sweet Candy Canes Stamp Set. I used the oval die in the All That Dies to cut it out. I think it fits perfectly along the glimmer band. For a finishing touch, I added two of the Adhesive-Backed Seasonal Sequins in green. They come in four different colors.

This would be a relatively easy card to make multiples of because it’s mostly designer paper. The candy cane is easy enough to cut out by hand or die-cut and the extra greenery, whether gold foil or green doesn’t need to be stamped, just diecut. Only the greeting is stamped. Even if you don’t make lots of multiples, you could make 5-10 of this same card, and little by little as you make new Christmas cards you will end up with enough to mail out to lots of friends and family!

You can get by making this card with just the package of the Sweetest Christmas Designer Series Paper, the Real Red & White Glimmer Paper, some ribbon, and a Christmas greeting (which we all have in our stash!) plus some die-cut leaves (and if you have any die cuts, you probably have some leaves or sprigs or a punch!). This Christmas Candy Cane Card is really a basic card design with two different patterns of designer paper top and bottom, a focal point, and a greeting. Here you can see some cards from a few years ago with the two patterns of designer paper and a greeting. Easy peasy!

Sweet Candy Canes Christmas Card

Sweet Candy Canes Christmas Card

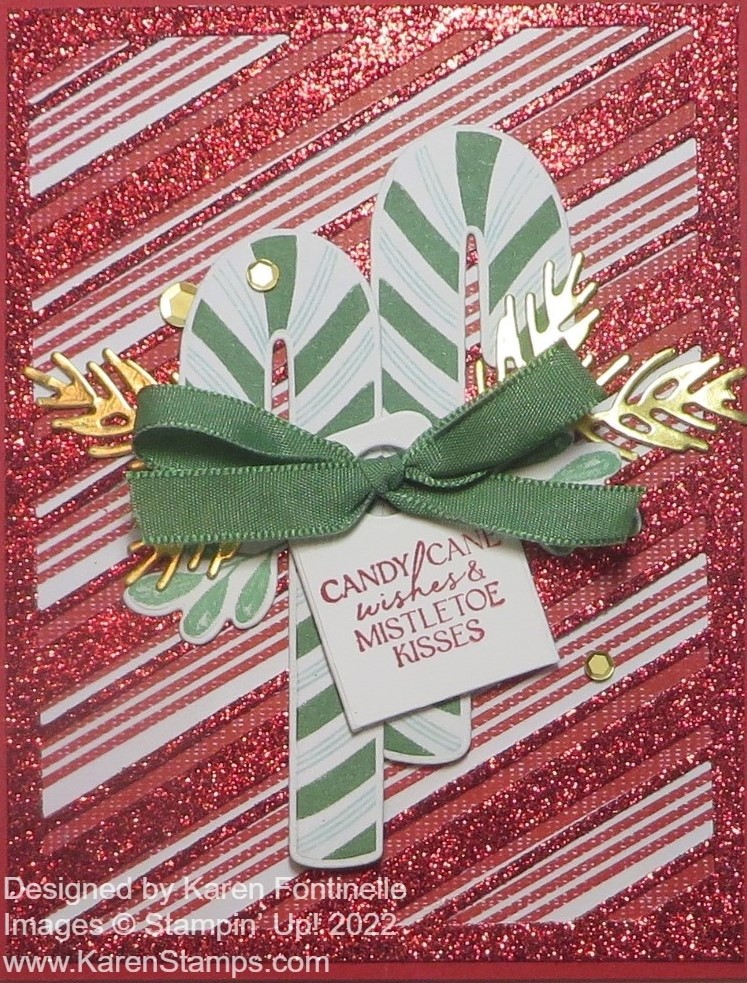
My first order from the new Holiday Mini Catalog arrived yesterday, and after a busy day, I got to open it late last night. The first thing I wanted to make was this pretty Sweet Candy Canes Christmas Card that is pictured in the catalog on page 10 in the Sweetest Christmas Suite Collection. I didn’t want to try to figure out my own design at that moment since it was late, but I look forward to playing more with the paper, stamps, dies, and embellishments as soon as possible! I already had ideas dancing in my head just opening the designer paper package! I didn’t take time to look up the sample recipe for how Stampin’ Up! made this card, I just stared at the catalog page multiple times to figure out at least something close to this sample card! The sparkle is so pretty!

I started with a card base of Real Red and used the large striped die in the Candy Cane Dies to die cut the new Real Red and White 6″ x 6″ Glimmer Paper. I only used it once, but there are a lot of narrow slivers of glimmer paper that will come out of your die-cut piece. I believe that if you turn the glimmer paper over to the other side, you will be able to see the die-cut lines better and see if you got all of them out of your piece.

You can use just the die first to see how it lines up with the diagonally striped designer paper in the Sweetest Christmas Designer Series Paper to make the background look like candy cane stripes, just to get the idea. I’m not sure yet the best way to size a piece of designer paper to line up with that die, so for now I would say either cut a larger piece of designer paper than you need, adhere the glimmer paper, then trim off the excess or just adhere the die-cut glimmer paper on the large 12″ x 12″ paper and then trim. Someone will figure out a less wasteful way to get the diecut placed correctly on the designer paper!

The Candy Canes Dies work with the candy cane printed paper in the Sweetest Christmas DSP. You might want to just cut with your scissors into the candy cane you want to diecut. At that point, it really is almost easier to just cut out the candy cane with your scissors! But the dies do match and that’s what I did for this card. Just make sure you get the candy canes that face different directions if that is what you want. You can also use the stamps, inking up the whole candy cane in one color or use Stampin’ Write Markers to color multiple colors on the different stripes. I think that will be fun too to make your own custom candy canes! I adhered my candy canes flat on the card but you could pop them up on Stampin’ Dimensionals.

Next, I stamped the tag with a greeting from the Sweet Candy Canes Stamp Set. There is a die for making this tag and you can use it a couple different ways. I simply cut off the bottom half of the tag and the bow went over the hole when I adhered it to the card. The ribbon is in the new Real Red & Garden Green 3/8″ Ribbon Combo Pack in the Suite.

The small green leaves on the card sticking out from behind the tag and candy canes are stamped from the Sweet Candy Canes Stamp Set and die cut. The Gold Foil leaves are die cut with the dies in the second Bundle in the Suite on page 11 of the catalog. These are the Christmas Banner Dies. There are several leaf options you can choose from.

For a finishing touch, use a few of the Adhesive-Backed Seasonal Sequins in the Suite. These are metallic and somewhat shiny but not sparkly and come in two sizes and several colors. Since you have a lot of glimmer going on already on this card, you don’t need too much more sparkle!

I think this is going to be a useful and fun Suite to work with making Christmas cards and other projects. There are lots of sample ideas in the catalog to get us started! Soon there will be hundreds and thousands of ideas online I’m sure for using this Suite of products! Maybe you make all your cards the same, but if you like a variety, when you design and make one card you make go ahead and make several more (like 4 more) then you will have five cards that are done and ready to go. When you make the same card over and over it is faster because you are not figuring out the design each time and you can make the additional cards assembly-line style!

If you want ALL of the products on pages 8-11, just use the Sweetest Christmas Suite Collection number #159579. If you want to leave out certain items, then order each product you want separately or order extras of certain ones you want more of! You can try out this Sweet Candy Canes Christmas Card to get you started with a very lovely card to send and then come up with more of your own creative ideas or use the other samples in the Holiday Catalog for inspiration!

SHOP THE HOLIDAY CATALOG HERE!

Whimsy & Wonder Christmas Thank You Cards

Whimsy & Wonder Christmas Thank You Cards

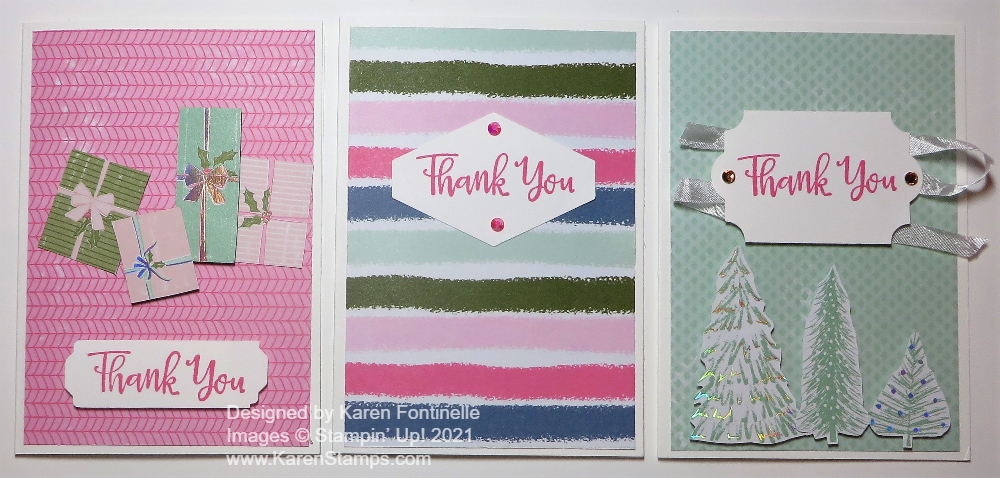
Christmas is over and now it is time to write those thank you notes like these Whimsy & Wonder Christmas Thank You Cards. It may be an old-fashioned thing and email or texting is faster, but a real thank you note is always best! Here are three quick examples!

To keep it simple, I chose the Basic White Note Cards but you could use a regular size card as well. Then I just decorated the cards using the Whimsy & Wonder Specialty Designer Series Paper. This is your chance to use the “other side” of the fancy paper, although I still cut out some images from the fancy side! You could even just use a strip of the designer paper if you wanted to use up your tiny scraps.

These note cards are 3 1/2″ x 5″, which is a mailable size and they come with envelopes. Therefore, I cut my layer of designer paper at 3 1/4″ x 4 3/4″. The “Thank You” is in the Peaceful Moments Stamp Set. I stamped it with Polished Pink ink just to keep it simple. Then I used different punches for the sentiment.

The first note card uses a pink “other side” of the paper. I cut out some of the packages on another pattern and adhered those to the front of the card, some popped up with Stampin’ Dimensionals, some flat on the card. Then the “Thank You” was stamped and punched out using the Lovely Labels Pick A Punch.

The middle note card is the simplest of all! I just used the striped pattern in the Whimsy & Wonder DSP and added a stamped “Thank You”, punched out with the Tailored Tag Punch. I added a couple of jewels just for a little extra something.

The note card on the right uses a light green layer, plus a few cut out trees from the paper. The Thank You is stamped in Polished Pink and punched out with the Everyday Label Punch. I do have the dies for the trees, but since I had to clean up and put away my die-cutting machine, dies, and mess for Christmas dinner, it was easier to just cut the trees out by hand! Your recipient won’t know, “Gee, she could have die cut these and she didn’t!!” I added a little White Crinkled Seam Binding Ribbon behind the sentiment, just the back and forth underneath the label.

Since these Basic White Note Cards are smaller, they are not necessarily meant to be super-fussy cards so you can go a lot simpler and quicker with these! If you made just one style of Christmas card, it might be fun to use that same paper, even if you only used a strip, to continue with the theme of your Christmas cards! Whatever you do, the gift-giver will appreciate a little note (and the handmade note card!) from you! Or just write a note to those who know your family or couldn’t be with you and tell them about your Christmas, just a post-holiday note! It will ease the withdrawal from Christmas cards in the mail and no Amazon packages at the door! LOL!

And if you used up every bit of your paper and embellishments from the Holiday Mini Catalog, be sure to check out the Last Chance List, ending January 3rd, and the Clearance Rack where you might find some bargains to use now or to save for next year! Be old-fashioned and send a few thank you notes like these easy Whimsy & Wonder Christmas Thank You Cards with whatever paper you have left!

SHOP STAMPIN’ UP!

SHOP THE HOLIDAY MINI LAST CHANCE PRODUCTS!

SHOP THE CLEARANCE RACK!

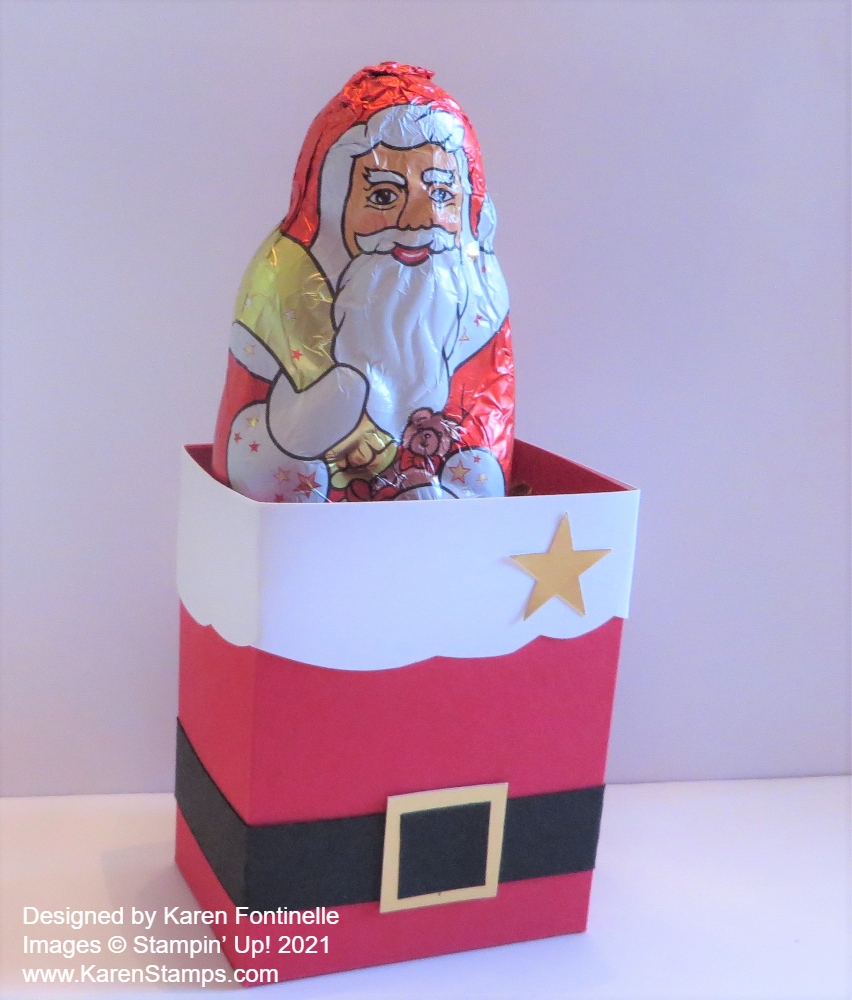
Chocolate Santa in the Chimney

Chocolate Santa in the Chimney

I made this Chocolate Santa in the Chimney late last night but couldn’t resist posting it today in case anyone sees it and can use it over the holiday! My friend I texted last night said it was “too cute”! I copied it from Melanie, @sternenglanzpapierzauber, a Demonstrator (I assume) in Germany. She didn’t have directions but I figured it out! All you have to do is make (or use) a box and stick a chocolate Santa inside!

My Santa is a Lindt chocolate Santa and a decent size, not really small. You could use a smaller Santa, just make the box smaller.

I started with Real Red cardstock 5 1/2″ x 10 1/2″. Score at 3″, 5″, 8″ and 10″. Turn the paper longways to score the bottom flaps at 1 3/4″. Just like we do on most boxes and bags, cut those flaps on the score lines up to the score line going across. Cut off the tiniest 1/2″ section. Crease well, see how it goes together, then glue that 1/2″ flap to the other side. Fold in the flaps and apply adhesive. I like to stick my bone folder inside and rub to really adhere the bottom flaps together.

For the white fur part at the top, I cut a 2″ x 11″ strip of Basic White and then just cut it curvy freehand! You may have a die to use as Melanie did on hers. The only thing is you want the ends to match in width so that when you get to the back of the chimney where they meet up, you don’t want one narrow and one wider (If you want it perfect!). I applied adhesive and placed the middle of the strip in the center of the chimney on the front and wrapped the ends around the sides and to the back. Since I was copying, I just punched out a Gold Foil star with a retired punch (you can use a die) and adhered that to the white.

For the belt, I cut a 3/4″ x 11″ strip of Basic Black and adhered it the same way as the white above. Just use your fingers to crease on the edges to make a tight fit rather than trying to score and having it not fit right.

For the belt buckle, I cut a 1″ x 1″ piece of Gold Foil, adhered that, then adhered a 3/4″ x 3/4″ piece of Basic Black in the center to look like the belt going through the buckle.

It’s just that easy! I suppose you could even emboss the Real Red cardstock to look like brick or some other texture. You could even omit the white fur and belt and make it look really like a chimney and maybe add a greeting to the front. Whatever you like!

Growing up, Christmas Eve was really my favorite day because my family opened presents at our house on Christmas Eve with my grandparents and maybe other visiting relatives, maybe going to church before or after. Then on Christmas Day we would go to my grandma’s house, who hadn’t hauled her presents to our house, and have Christmas dinner at her house then open presents from her. Of course, Santa came to our house on Christmas morning! What is better than being a young child and having Santa come??!!! My mother would often”apologize” on Christmas Eve that my parents couldn’t buy us more than one or two gifts on Christmas Eve because they didn’t have the money! But Santa always came through!! LOL!

I hope you have a wonderful Christmas Eve!

Last Minute Stamping Christmas Ideas

We’re here! Tomorrow is Christmas Eve so depending on your celebration schedule, today might be the last day you are trying to get things done and tie up loose ends for your holiday celebration! Here are some past ideas I think you can use, maybe with retired products but ones that you can substitute with current products or dig out your old products that you may still have in your stash!

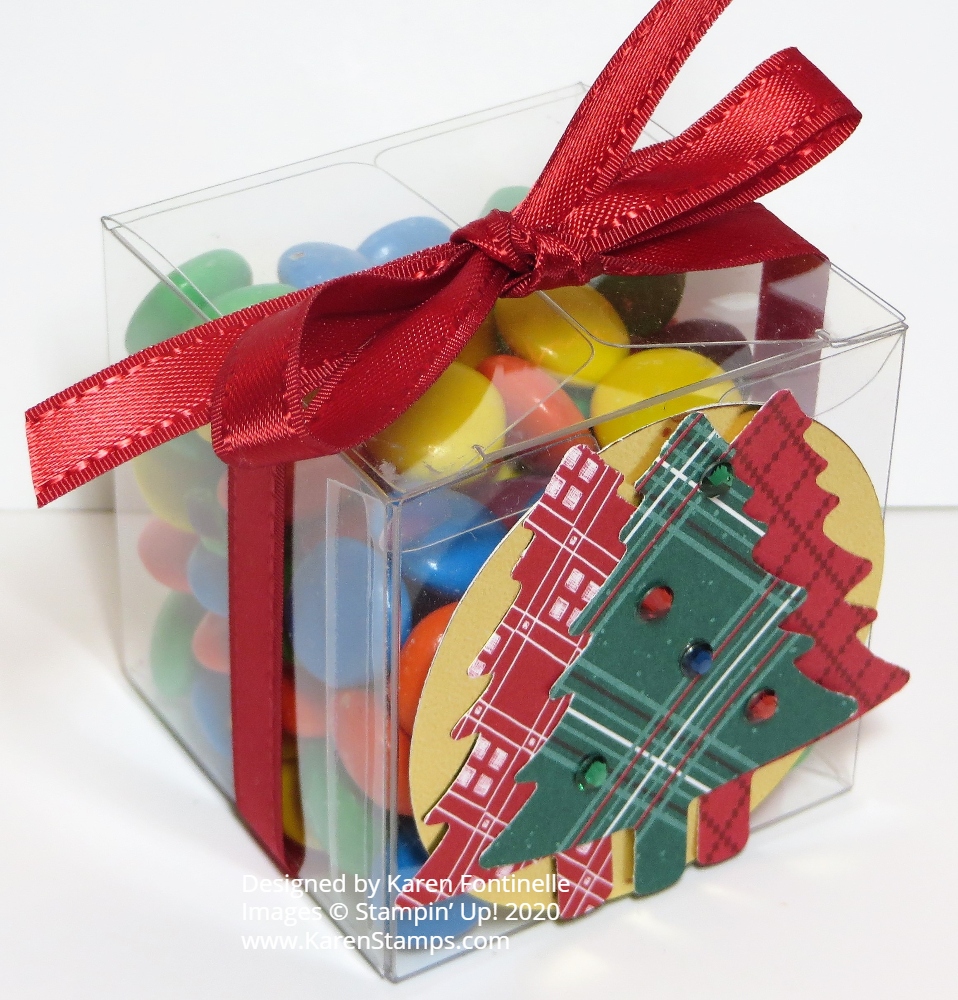
Tiny Christmas Treat Box With Trees

This little Tiny Christmas Treat Box With Trees uses the retired little acetate box, but you can use any box. Just punch out or die-cut three little trees out of cardstock or designer paper plus a little ribbon and maybe some gems to decorate! Fill with candy or a small gift! So easy!

Gold Mini Pizza Box With Christmas Poinsettia

This Gold Mini Pizza Box With Christmas Poinsettia uses the still-current Poinsettia Dies so you can decorate any box with a beautiful poinsettia!

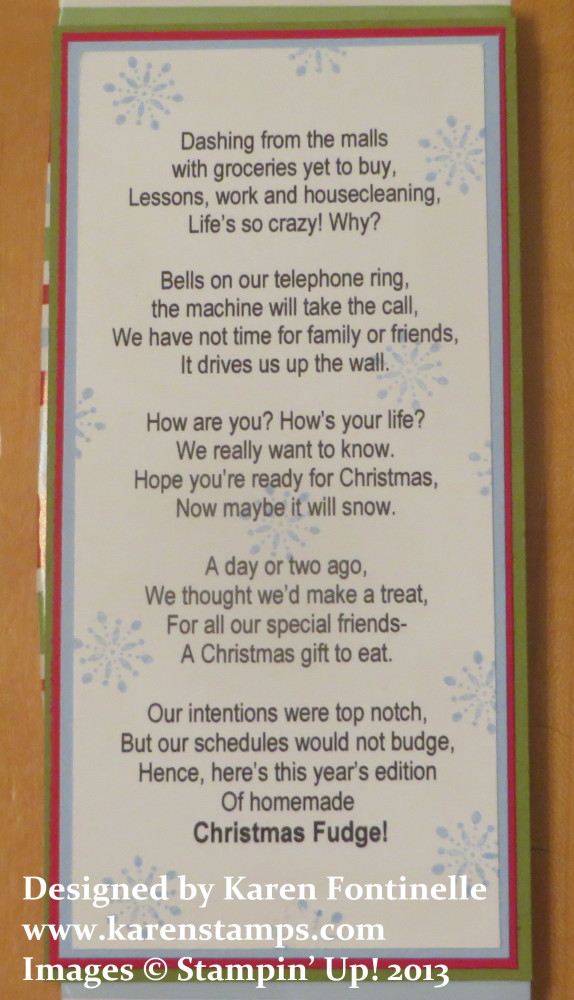
Christmas Fudge Candy Wrapper Poem

Pick up one of those giant chocolate bars on your last trip to the grocery store or drugstore and print out this poem! It’s the Christmas Fudge Candy Wrapper Poem! It’s an oldie but goodie and easy to make for a funny gift!

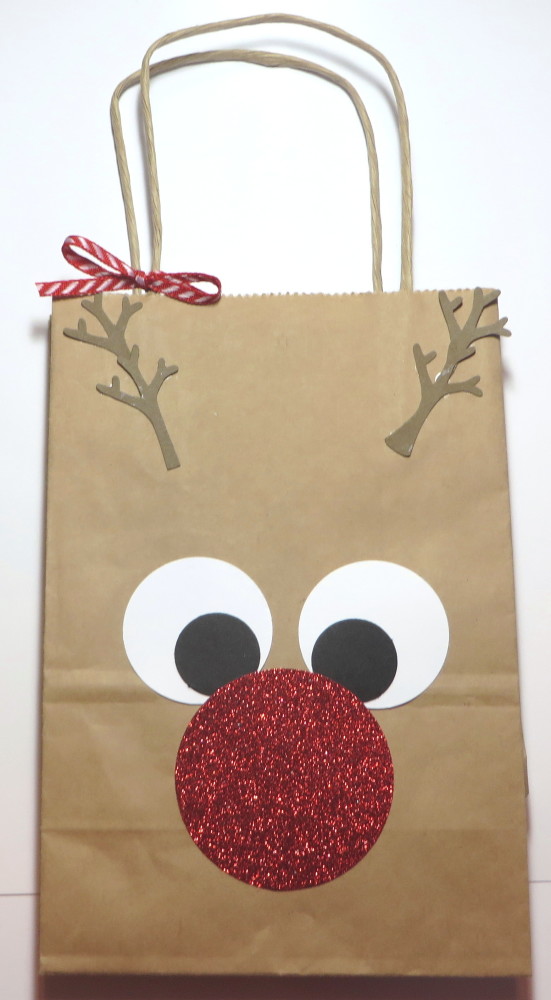
Rudolph the Red Nosed Reindeer Gift Bag

This Rudolph the Red-Nosed Reindeer Gift Bag has been a real favorite! So easy to make and so fun for a gift bag! Or decorate the top of a package like this!

Snowman Gift Bag

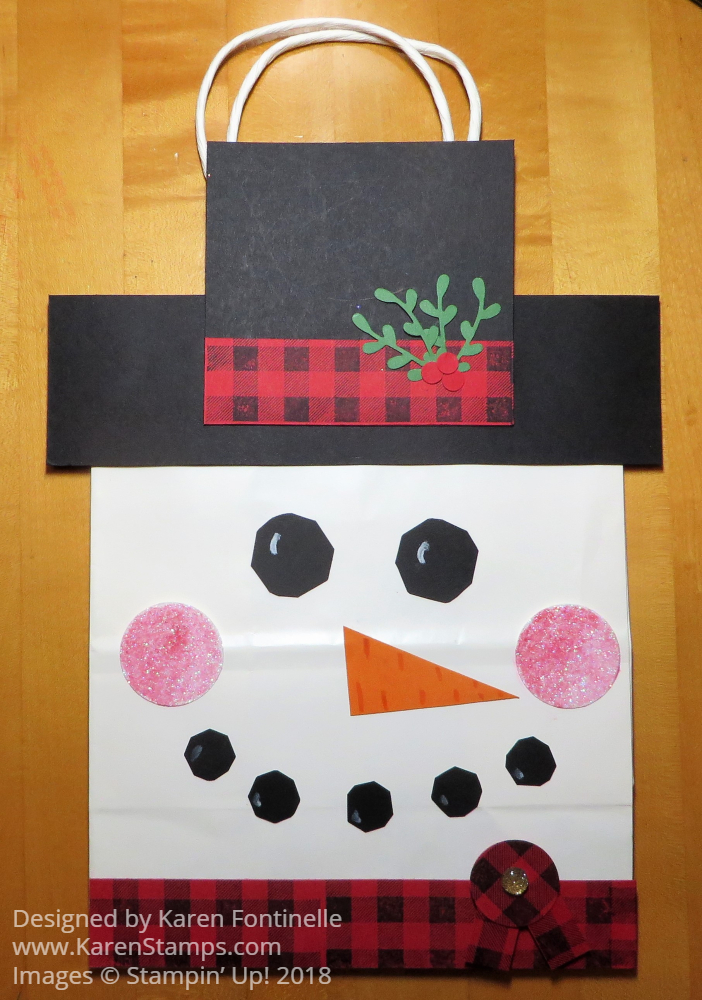
Want to decorate a gift bag? This Snowman Gift Bag will easily cover up any printing of the store name on the front of the bag! And again, you could decorate the front of a package in a similar way! Just takes a few minutes!

Toile Tidings Christmas Red Gift Card Holder

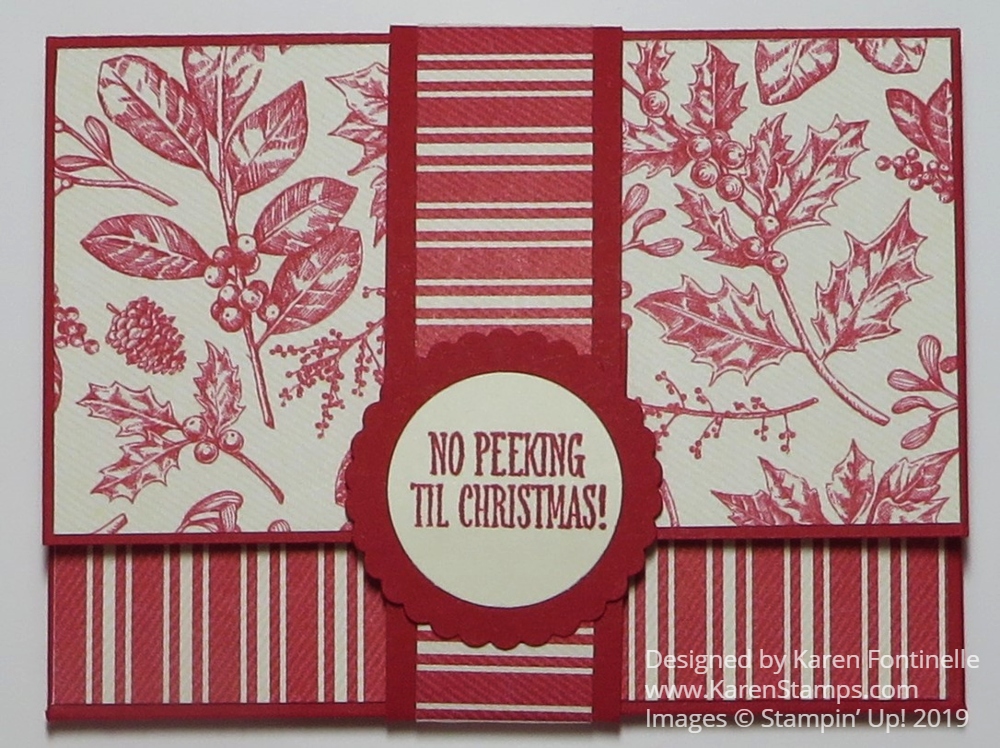
I heard on the news the other night the high number of gift cards that are given at Christmas! Make yours special with your own gift card holder like this one! Of course, use any paper you have or something current! Probably you have scraps that will be put to good use!

These are just a few of my older blog posts with Christmas ideas. If you want more, just use the Category drop-down box on the right to search Christmas or #3D Gifts & Things! It’s fun to look back at the older ideas because we still can use them!

Merry Christmas!

A Stamper’s Christmas Card Poem

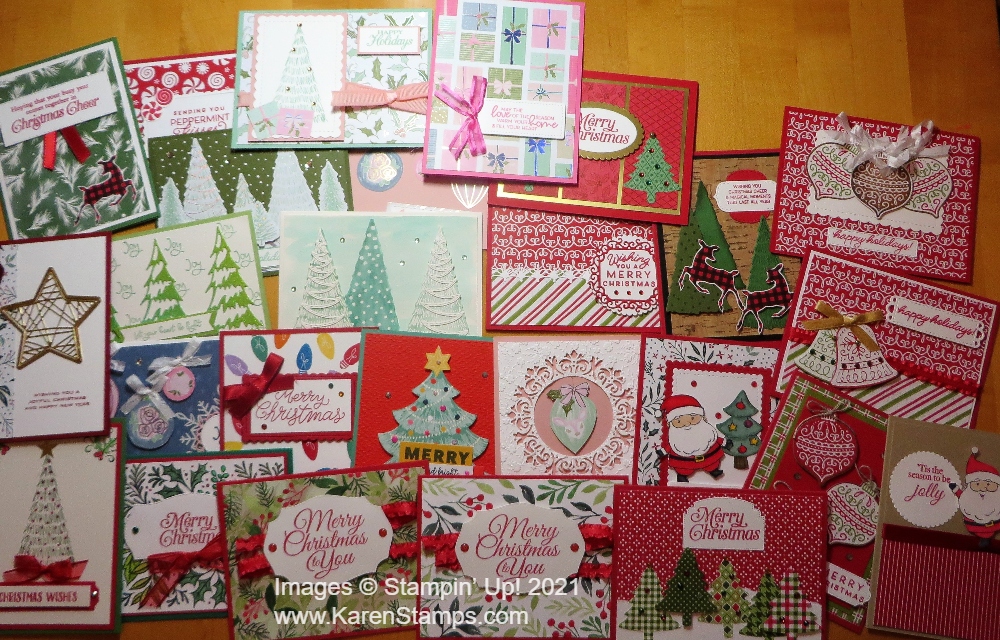
Christmas_cards_2021

The Week Before Christmas (In a Stamper’s House)

‘Twas the week before Christmas, and the house was a hush
Save the stamping of rubber in a last-minute rush.
The cardstock was cut with precision and care
In hopes that a greeting would soon be stamped there.

The children were tucked in their beds around eight,
But now it’s ten-thirty… How’d it get so late?
And I in my PJs with bleary red eyes
Had finally arranged all the stamping supplies.

It started out simple. (It does every year.)
Just make a few cards for friends who are dear.
I pressed ink to paper. (It looked crisp and clean.)
A sprinkle of powder, heat to a sheen.

When what on my green Christmas card should appear?
Why, a tiny gold Santa with sleigh and reindeer.
On pigment! On powder! On heat from a gun!
Now ribbon and glitter! Can I make eighty-one?

“I can do it!” I said with all of my might
And looked at the clock – ’twas well past midnight.
I went straight to stamping out card after card.
“This might take all night, but at least it’s not hard.”

But after I finished, they looked a bit lame.
I didn’t want fancy, but these were too plain.
And then in a twinkling, a thought came to mind.
“I’ll just dress them up, and then they’ll be fine.”

So I went to my craft room and looked all around,
Then back to the table with all that I’d found.
My Fiskars I brandished (I wasn’t a quitter),
And soon I was covered in EP and glitter.

The cap of a marker I held in my teeth.
I’d lay in some color or maybe gold leaf.
My broad little face was all beaded with sweat,
But I wouldn’t give up – well, not at least yet.

There was glue on the table and ink on the floor.
I laughed at the sight though my fingers were sore.
I did not complain, just kept up my work.
When more things went wrong, I did not go berserk.

When finally finished, one card about six,
It looked pretty good after all of my tricks.
I’m keeping this one. My work on it shows.”
So clutching my card, up the stairs I arose.

I crawled into bed at the crack of dawn,
Creativity all spent motivation all gone.
But make no mistake, I promise one thing:
You’ll all get your cards, but not ’til next spring!

–Author Unknown

Quick & Easy Snowman Season Gift Tags

Snowman_Season_Gift_Tags

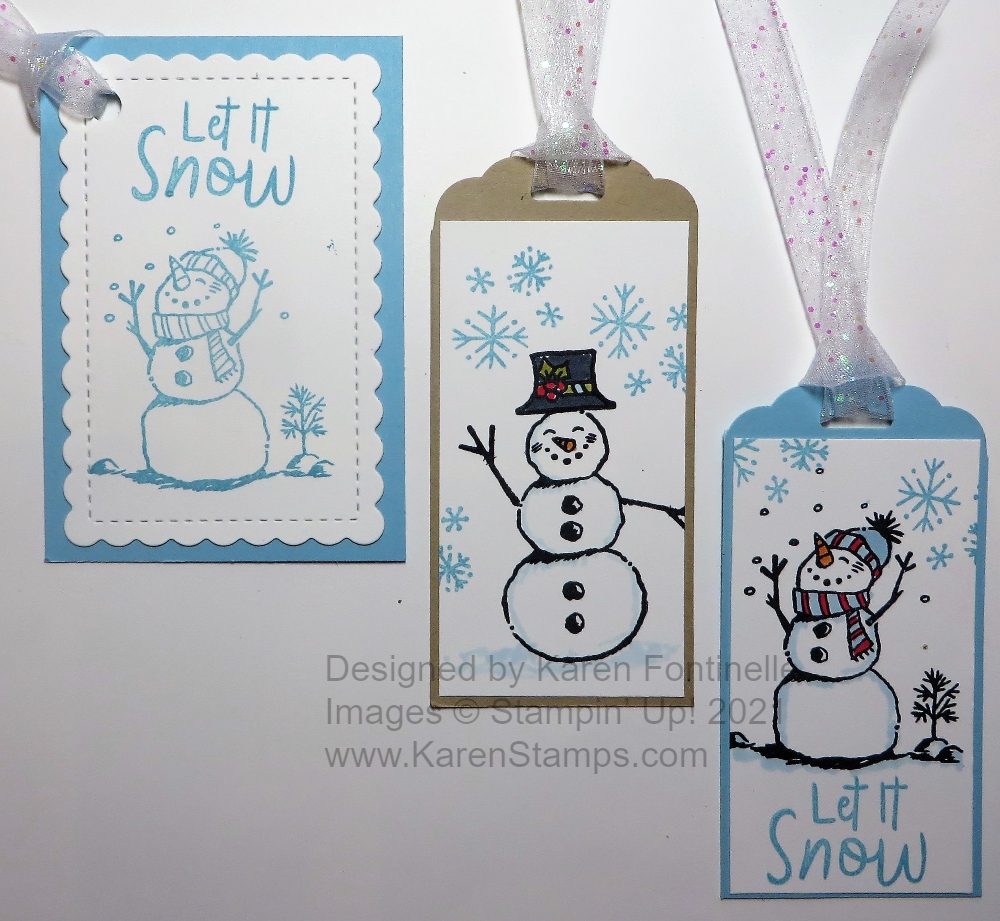
Here are some Quick & Easy Snowman Season Gift Tags that you can make here at the last minute if you run out of gift tags (as we often do!). I suddenly realized I hadn’t made anything with a snowman this season and this Snowman Season Stamp Set is so cute! It’s been around a little bit so I thought I better use it before it retires, although I hope it stays a little longer! And perhaps you already have this in your inventory so it would be easy for you to copy. You’ll find it in the Stampin’ Up! Annual Catalog on page 93. And notice the round tag on page 92, which, without seeing this page first, I was thinking of making a round tag like that one but I ran out of time to make one more!

The tag punch I used is retired but is very similar to the two tag punches Stampin’ Up! does carry right now, the Delightful Tag Topper Punch and the Fancy Tag Topper Punch. This type of punch is so handy to have so I recommend you have one kind or another in your supplies.

I just layered a piece of Basic White cardstock on the Balmy Blue and the Crumb Cake tag bases. The snowmen fit perfectly on this narrow piece. If you stamp with Memento Ink you can color in with Stampin’ Blends alcohol markers. Or you can stamp with Stazon and color in with Stampin’ Write Markers or some other coloring product, like Watercolor pencils or ink.

The first tag in the photo was the last tag I made. That’s where I was going to make the circle gift tag with dies but I already had this scalloped rectangle in the bag with Basic White cardstock so I just grabbed it and stamped on that piece, then layered it on Balmy Blue cardstock. Also, since I was short on time, I didn’t have any more time for coloring so I stamped the snowman and greeting in Balmy Blue ink and let it be monochromatic! Easy enough and looks just as good! I just punched a hole in the corner and tied on the ribbon.

The beautiful ribbon I used and went well with the snowmen I thought is the White 3/8″ Glittered Organdy Ribbon. It is a white sheer ribbon with a little glitter and glimmer in it! Really pretty!

Now that it is officially winter, I think the snowman gift tags are just perfect. For more ideas, check out the Snowman Season tags I made last year HERE.

Just a few more days until Christmas so make a few of these Quick & Easy Snowman Season Gift Tags just in case you need a few more gift tags at the last minute!

Paper Pumpkin Gifts Galore Kit Snowman in Window

Paper_Pumpkin_Gifts_Galore_Kit_Snowman_in_Window

I admit to almost completely copying this Paper Pumpkin Gifts Galore Kit Snowman In Window card from someone on Pinterest, Bonnie Friday. I don’t know if she was the original person or not, but this was a card I saw “somewhere” online and then could not find it ANYWHERE later when I wanted it – until I found hers on Pinterest finally. The first time I saw this card, I believe the creator said she wondered if it looked a little “creepy” with the large snowman head peering in the window at the Christmas tree! Then there were more comments agreeing or disagreeing or laughing about that idea! That really caught my eye and made me giggle because I knew the perfect person to send a “creepy” Christmas card to just for fun!

This card is made from the contents of the November 2021 Paper Pumpkin Kit, Gifts Galore. This kit, in my opinion, is one of the best Paper Pumpkin kits! It contained very large die-cut images of this snowman, a Christmas tree, and packages. The design plan was to use two of the same images, front and back, on a small open box that would hold some kind of treats. Here is my post of the first treat holders I made as designed.

As always, stampers come up with alternative ideas for the materials in their kit. If they don’t need treat holders, they would rather make cards with the supplies or scrapbook pages or some other projects. And you can do that with your Paper Pumpkin Kit!

This card starts with a Basic White card base and a layer of Basic Black. The Christmas tree is cut a tiny bit more than in half. If you look at this sample, you can figure out where to cut it. I popped it up on Dimensionals and Foam Strips.

The snowman head is trimmed as shown so that it fits behind this “window”. This is a little tricky to figure out (maybe it won’t be for you, though!). I used a piece of Basic White and die cut two stitched rectangles out of it. You just have to make the sides wide enough so you can glue the snowman image behind it. I put a piece of Balmy Blue behind the snowman to look like the sky. Just fiddle with it and you’ll get it. The packages are cut from the piece in the kit. Most are pretty large. In fact, the top package I cut down from a larger package. Then I added a bit of the twine in the kit for a bow just for an embellishment even though there is a printed bow. In my retired stash, I had some stick-on bows and snowflakes so I added those just for fun! You could also add rhinestones or jewels to the tree. Do what you like!

I hope you get a kick out of the creepy snowman card made with the November 2021 Paper Pumpkin Kit Gifts Galore! If you still need cards or little projects, maybe you still have some pieces left in your Gifts Galore kit you can use!

JOIN PAPER PUMPKIN!

Wrapped Christmas Candy Bars

Wrapped_Christmas_Candy_Bars

Christmas is getting close! If you need some fun candy treats or stocking stuffers, here is a fun and easy idea! Just decorate some candy bars with your craft supplies like these Wrapped Christmas Candy Bars. You can use any size candy bars you have, big or little!

These candy bars I used are just regular size Hershey Bars. It’s a great way to use up some scraps of designer paper you have around. You could use cardstock and layer with designer paper or stamp on cardstock! Whatever you want! It’s so fun to make these you barely need to think about it!

The paper sizes all depend on your candy bar size, of course. I found 5 1/4″ wide worked well on these candy bars. Then I just wrapped the designer paper around the bar and adhered the overlapping ends.

The top candy bar in the photo uses the Tidings of Christmas 6″ x 6″ Designer Series Paper. I was going to put one solid green tree in the center but I notice the other side of the paper was pretty so I punched three trees with the Pine Tree Punch and added some gems to the solid trees.

The middle candy bar uses the Penguin Playmates Designer Paper that was available during Sale-A-Bration. It’s such cute paper and you probably have some. I kind of picked the characters I wanted on the center of the candy bar and cut the paper to fit. Then I just tied some Soft Succulent 3/8″ Open Weave Ribbon around each end because I didn’t want to cover up the center image of the paper!

The third candy bar is wrapped with a piece of the Gingerbread & Peppermint 6″ x 6″ Designer Series Paper (retired). Since there wasn’t much space and I was keeping these super easy, I just cut a strip of another pattern of the paper to get the ornaments and bell images for the center of the candy bar.

You could think of tons of ways to decorate candy bars for Christmas or other occasions. Here is a post from 2014 with candy bars decorated for Christmas! These are really fun and cute!

You still have time to make some candy treats for Christmas, for stockings, party favors, or table settings. Make them into place cards if you are having people for dinner! They are really fun so enjoy!

3″x 3″ Gift Tags

3" x 3" Gift Tags

If you are wrapping gifts right about now and you don’t have much time to stamp, for lots of fun I suggest making these 3″ x 3″ Gift Tags! On some presents, the hanging tags aren’t quite right or you’d like to write a little note, so make some of the gift tags or gift cards to enclose with your gift. You may even already have some 3″ x 3″ envelopes to put them in.

These are simply made with a 3″ x 6″ piece of any cardstock, scored at 3″ in the middle and folded to make the 3″ x 3″ card. Then embellish to your heart’s desire! I barely had to go to any work on these because I had some scraps, some greetings, some die cuts that I had made but hadn’t used just sitting on my table. All I had to do was make the card base and add some scraps of 2 3/4″ square designer paper or maybe just a strip, pieces from other designer paper that had already been cut out by hand or die-cut, and maybe a greeting or two! Add a few jewels if you like for some sparkle!

No need to go into the exact details of how I decorated these! I’m sure you also have scraps and pieces you can use or you can quickly stamp or cut some out! For sure these are super fun to make! I think you could make a ton of them in just half an hour or so!! If you want just a tag, just cut a 3″ x 3″ square of cardstock and write the “To: and From:” on the back of that. Punch a hole in the corner of these cards and put some ribbon or twine through to tie on your package unless you are using an envelope. Bet you can’t make just one!!