
This card started out being an experiment of using white trees on a white layer on a white card, but it turned into this Embossed and Colored Whimsical Trees Christmas Card. That didn’t seem to be going like I imagined so I tried another technique of embossing and coloring the trees.
This white paper I used is my favorite, Shimmery White! If you look closely, in person, you can just barely see a little shimmer on the paper. It also works pretty well for a little watercoloring, as I used on this card. But the paper is so elegant, I think! I love using it.
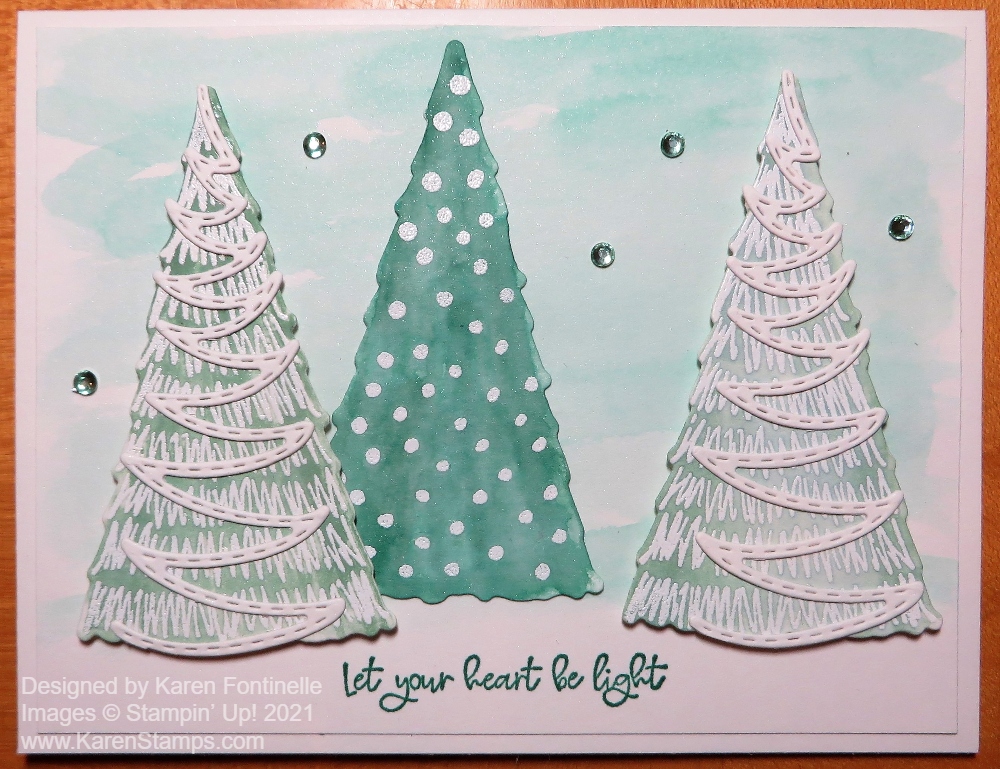
To make this card, I started with a Shimmery White Cardstock card base with a layer of Shimmery White. On a separate piece of Shimmery White, I stamped two of the same trees and one different using Versamark Ink with the Whimsical Trees Stamp Set. Then I embossed with white embossing powder, which comes in the Basics Embossing Powders of three colors – white, black, and clear. You also need a Heat Tool to do embossing! Just hold the Heat Tool over the powder until you see it change! You will notice and it’s just magical! But it may take a minute until the Heat Tool gets hot enough after you turn it on.
After embossing the trees I die-cut them with the Christmas Trees Dies. I also die-cut the little ribbon decoration you can add to the tree. I cut out two of those for two of the trees. If you can think of it, this would be a good time to use the Adhesive Sheets so you don’t have to use glue.
After I decided the pure white trees on a white card weren’t going to work, I decided to use my Water Painter to add green color using an ink refill in the lid of the ink pad. Use it like a paintbrush except the water is already inside! Love these! I used Pear Pizzazz on two of the trees and Just Jade on the center tree. The embossing resists the ink so it still shows through. You can take a tissue and wipe any excess off the embossing if you need to. You could use any two or three green colors that you like. We have lots of choices!
When the trees were dry, I glued the ribbon piece onto two of the trees with tiny drops of glue.
For the background of the card, I used a watercolor background of Pool Party. I tried to apply it lightly with lots of water squeezed out of the Water Painter and a little bit of ink. I didn’t bring it all the way to the bottom so it would look like snow on the bottom of the card. Then I stamped a greeting with Just Jade ink at the bottom of the card with the Whimsical Trees Stamp Set.
After coloring the background and letting it dry, I adhered the trees, two popped up with Stampin’ Dimensionals and one flat on the card. I usually like to slip one partially underneath another one.
It was absolutely necessary (to me!) to add some bling but you could totally not do this. I added a few of the greenish rhinestones in the Holiday Rhinestones. You could add them to the trees instead if you liked.
So all in all, even though I changed my original idea, I really like this card and maybe I will make extras to send. It’s time to start cranking out those Christmas cards so that you can mail them extra early this year! Have fun!