Tag Archives: birthday card

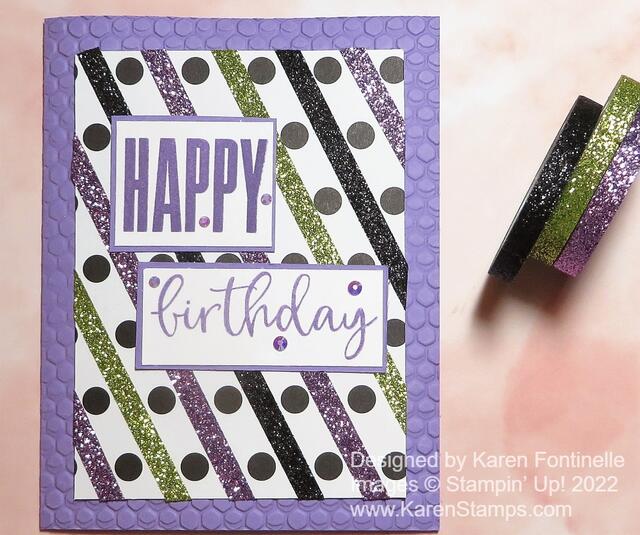
Glitter Washi Tape Birthday Card

Glitter Washi Tape Birthday Card

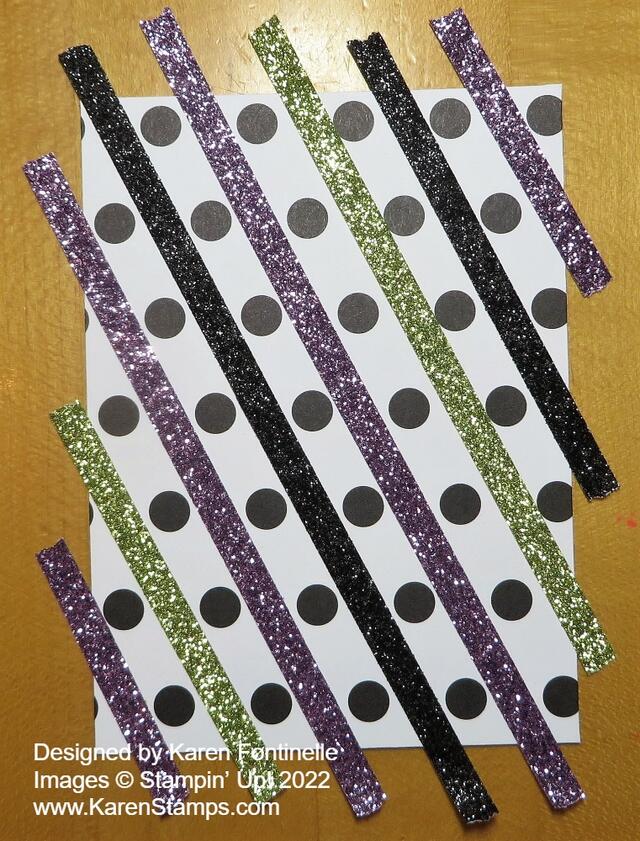
I saw this idea of using our Glitter Washi Tape this way on the @Stampinupofficial Instagram account the other day and I loved the idea! Because of the colors, I assumed they were suggesting this was a way to make a Halloween card. While that would be very cute, I thought I could make a Glitter Washi Tape Birthday Card with three of the four washi tape colors! And I did! But I’m also dying to make a Halloween card using this technique, too!

The main idea is to use the Black & White Designs Designer Series Paper and add strips of the Glitter Washi Tape in the Holiday Mini Catalog on page 57. You have to look up in the upper left corner of the page to find it! I did make THIS CARD for Halloween using some Glitter Washi Tape but not in this way. I think this is such a clever idea to use this washi tape with this designer series paper!

The colors of the Glitter Washi Tape are Old Olive, Black, Highland Heather, and Pumpkin Pie. I left out the Pumpkin Pie so it wouldn’t look like Halloween. The card base is Highland Heather and I embossed the front with the Hive 3D Embossing Folder. I would normally use a separate layer to emboss, but since this card base was already cut and folded in the cardstock package I just went with it this way. I had to run the folder through my Stampin’ Cut & Emboss Machine sideways which isn’t the best but it worked. Since I had a slightly smaller layer for the card front I thought a little texture around the edges of the card was in order.

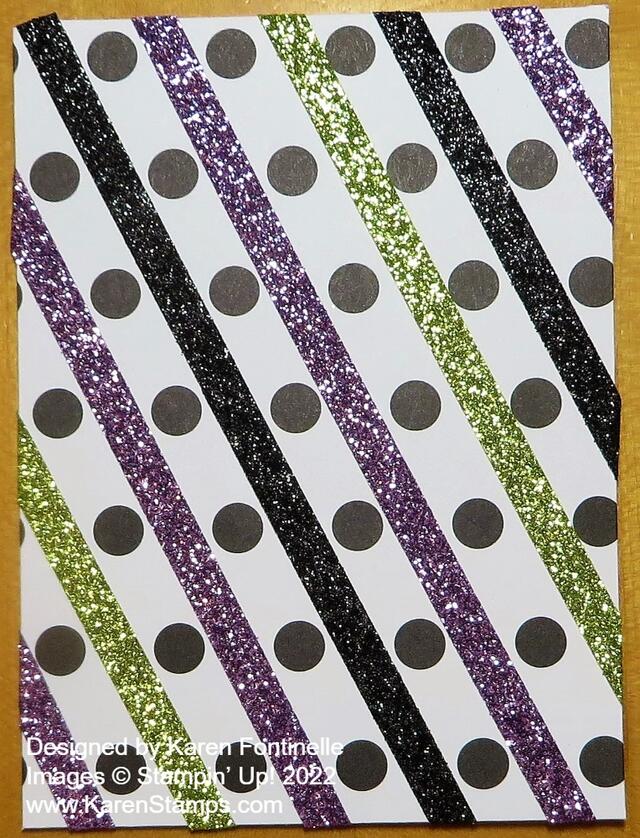
The card front is a polka dot pattern in the Black & White Designs Designer Series Paper in the Holiday Catalog. I ran the washi tape diagonally in between the polka dots. There are also striped designs and others so you can choose other ways to apply the washi tape. Just let the strips of washi tape extend over the edges of the cardstock and then fold them all under instead of cutting or tearing them off at the ends. You could do that though. I used Stampin’ Seal+ adhesive to adhere the striped card front to the card base.

Glitter Washi Tape Card Front
Glitter Washi Tape Card Front2

I used the Biggest Wish Stamp Set for the greeting and focal point of the card. I stamped the words separately in Highland Heather ink and cut them very closely to the words with the Paper Trimmer. I also added a narrow layer of Highland Heather behind the stamped words. This stamp set is a fun one to own and perfect for a card like this.

Just in case the Glitter Washi Tape wasn’t enough “bling” on this card, I added a few 2021-2023 In Color Jewels even though they are retired now. (Such a shame!) I thought the Fresh Freesia jewels could be a close enough match to work on the card and applied a few to the greeting.

You might want to add this 4-pack of Glitter Washi Tape to your next order. It’s not just for Halloween and you can use the tape in so many ways in cardmaking and scrapbooking. You could just use little touches of it or actually make stripes or designs with it on cards. Just one of the fun embellishments we have for our papercrafting!

SHOP STAMPIN’ UP! ONLINE HERE!

Enjoy The Moment Birthday Card

Enjoy The Moment Birthday Card

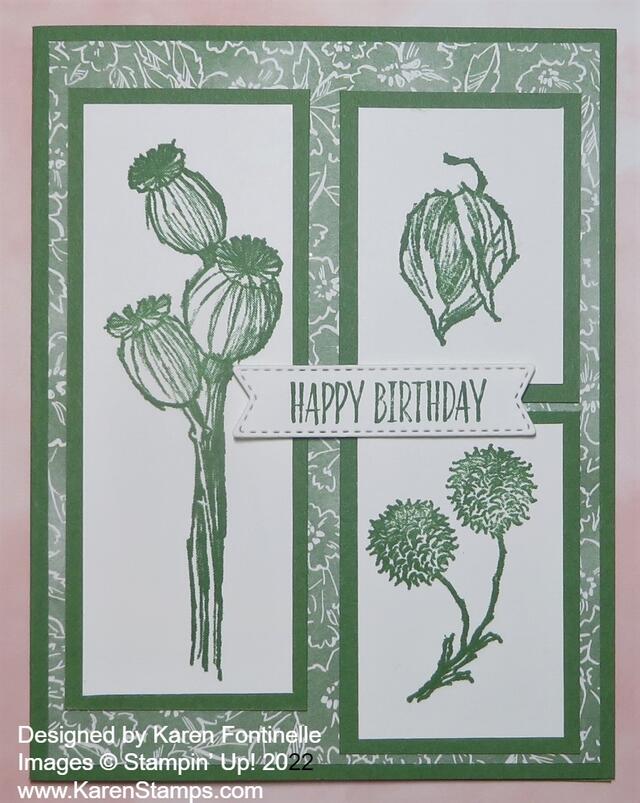
This Enjoy The Moment Birthday Card is made with the Enjoy The Moment Stamp Set that is retiring on Monday, May 2. This is an odd stamp set to me! I would generally say I don’t like this stamp set … yet, when I have made cards with it, I really like the card! Probably a lot of people don’t even know what the images are in the stamp set. They are nuts, seeds, and pods…I guess! Anyway, there is something about this stamp set that is fun even though I don’t care for it!

The card base is Garden Green cardstock. I don’t use this color very much, but I had already chosen this green and white floral pattern of paper in the Hand-Penned Designer Series Paper (now retired) for the background layer. Then I just stamped three of the images from the stamp set, and cut them down 1 1/2″ wide and just long enough. I layered those on the Garden Green cardstock and hoped they would fit okay on the card without doing the math! They did! I just used Garden Green ink to keep it monochromatic and simple.

I adhered the images flat on the card. You could pop them up on Dimensionals if you wanted to. The birthday greeting is in the same stamp set so I stamped that in Garden Green ink also and cut it out with the little banner die in the Tasteful Labels Dies. These dies are retiring on May 2 and are even discounted so you can save about $6 on these dies right now. These have been some of my most-used dies. I hate to see them leave. This greeting I did pop up on Stampin’ Dimensionals.

On the inside of the card, since the cardstock is rather dark if I wanted to write something inside the card, I added a Basic White layer on which I stamped another image in the upper left corner and added a strip of the same designer paper across the bottom. Now the inside carries the same look to the inside and is ready for stamping or writing a personal note or message.

Here’s another card I made with this Enjoy the Moment Stamp Set.

I think this set was used in a virtual Stampin’ Up! event a while back. I know I wouldn’t have just bought it on my own. But as I said, each card I have made I have enjoyed! So, are there really any “bad” Stampin’ Up! stamp sets??!! I even used one of the seed pod (?) images to look like fireworks on THIS CARD last July.

I think Stampin’ Up! should have included these live oak tree pollen things we have here in Texas that have caused so much allergy suffering by those allergic to the pollen. For weeks now, our live oak trees have been shedding this yellow dusty pollen and leaves and now these “catkins” have been falling and are all over yards and sidewalks. Along with the falling leaves from the trees, these catkins, which are male flower parts, are just everywhere. You can leave them and have your yard completely covered or rake them up into bags and hope the yard waste garbage truck comes by. In almost a few minutes, you will have to rake again! There is your science lesson for today!

If you are interested in plants and nature, you might like this Enjoy the Moment Stamp Set (it’s even on sale!) but be sure to order it soon as Monday, May 2 is the last day for this stamp set.

SHOP STAMPIN’ UP! ONLINE HERE!

Flowing Flowers Trio Birthday Card

Flowing Flowers Trio Birthday Card

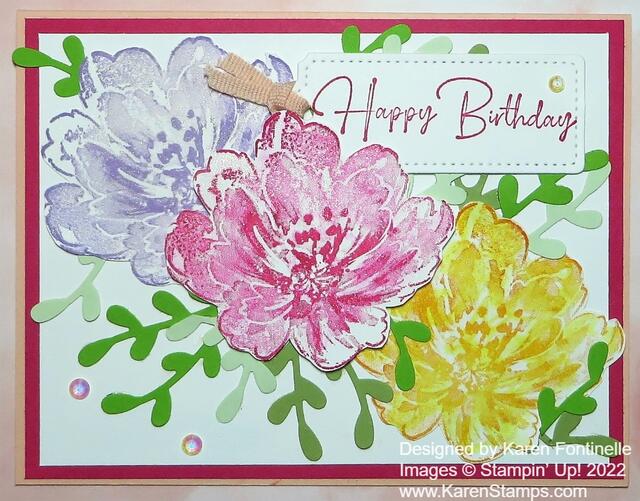
Sometimes you don’t know exactly where you are going with a card idea, or what you thought of doesn’t work out very well, yet in the end, something works out and you come up with a card you are happy with like this Flowing Flowers Trio Birthday Card!

The card base, which is difficult to see in the photo is Petal Pink with a layer of Melon Mambo, and then Basic White for the card front and flowers. The Flowing Flowers Stamp set is a beautiful one! This is a Distinktive** stamp set; it has a special texture that gives added depth and dimension in a single step, creating photo-realistic images. **Patent pending. In other words, the stamp does all the work and will stamp surprisingly beautiful! If you look at it after inking it, it will look like you missed some areas. You can stamp on scrap paper just to make sure and then reink it for your card or project. Some areas will be darker, some lighter, and some blank. It’s a surprise when you stamp it and see how pretty the image is!

For this card, I stamped several Flowing Flowers but ended up using just three of them. One is Highland Heather, one is Melon Mambo, and one is Mango Melody. I stamped them and then cut them out with Paper Snips. If I had known for sure how the card would come together, I could have stamped the two flowers on the ends straight onto the card front and then added the separate middle flower. But I didn’t know that at first! The flowers may look complicated to cut out but you don’t need to cut right on the lines and in some spaces, there aren’t any lines so just cut it out free and easy! I usually like to leave a tiny margin of white around the stamped image anyway so you don’t have to be precise.

The middle flower is popped up with Stampin’ Dimensionals and the other two adhered right on to the cardstock. There are no leaf stamps in the stamp set, so I just used the Sprig Punch to quickly punch out a bunch of leafy sprigs. I used three different green cardstock – Granny Apple Green, Pear Pizzazz, and Soft Sea Foam. I just tried to scatter them around tucking them underneath the flower edges.

There wasn’t much room for a greeting, but I stamped the “Happy Birthday” on Basic White and die cut it with one of the Tailor Made Tags. It seemed to fit best tucked in the upper right corner, just barely tucked under the Melon Mambo flower. It also has a piece of the Petal Pink 1/8″ Cotton Ribbon Combo Pack.

For some sparkle and glimmer, I colored over all three flowers with Clear Wink of Stella and also added a few Iridescent Rhinestones Basic Jewels.

Check out the Flowing Flowers Stamp Set. There are no dies, so you can just buy the stamp set and not worry about spending extra money on the dies! With that Distinktive style, you will stamp beautiful flowers on your cards and projects. Here is another card I made recently with the other major flower stamp in the set.

SHOP STAMPIN’ UP! ONLINE HERE!

Calming Camellia Birthday Card in Fresh Freesia

Calming Camellia Birthday Card in Fresh Freesia

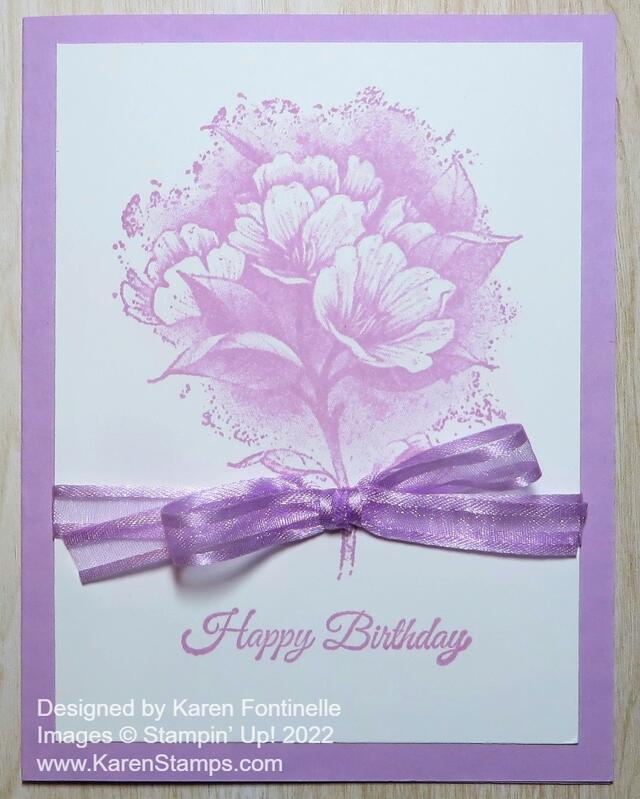
I so loved making the card the other day with the Calming Camellia stamp that I had to try another one. This Calming Camellia Birthday Card in Fresh Freesia though was really super simple! The stamp does all the work of making a beautiful card!

The card base, as you might have guessed, is Fresh Freesia Cardstock, one of the 2021-23 In Colors. I really like this group of In Colors. I cut the Basic White layer for the card front a little smaller than usual just to let more of the Fresh Freesia color show. It is 5″ x 3 3/4″. I stamped the camellia up a little high in the center of the Basic White with Fresh Freesia ink. The entire image you see on that card is all from the Distinktive stamp, a new type of stamp developed by Stampin’ Up! You don’t have to add anything else to get that full look of all the texture and detail.

The birthday greeting is also in the Calming Camellia Stamp Set so I stamped that near the bottom of the card. I decided not to do a die-cut or punch, but just to stamp right on the card front (unless I messed up!). Then I just tied the Fresh Freesia Open Weave Ribbon around with a bow so it looked like the bow was on the flower stem. That’s all there is to it! I didn’t even add any jewels this time, I just wanted the card to be simple and basic.

Now this stamp set, Calming Camellia, is special because you can’t just purchase it. It’s a Host set to earn with a $300 order during Sale-A-Bration which is quickly coming to an end in less than ten days! It can be all your own order or go in with some friends to reach that amount.

You can earn Sale-A-Bration products by ordering from either of the catalogs plus from the Clearance Rack! Just spend $50 and choose a product in the Sale-A-Bration Brochure. Spend $100 and you have additional choices! No limit to the products you can earn, so shop in $50 increments!

SHOP STAMPIN’ UP! ONLINE HERE!

Blessings of Home Floral Birthday Card

Blessings_of_Home_Floral_Birthday_Card

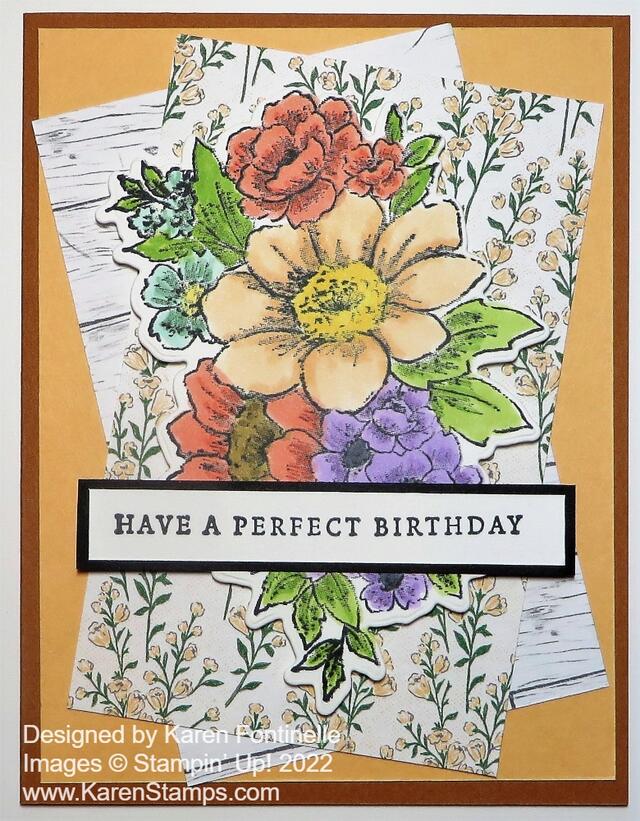
The Blessings of Home Stamp Set in the new January-June 2022 Mini Catalog has this beautiful bouquet stamp in it. You might think it would be too involved to color in this Blessings of Home Floral Birthday Card, but I found that I was done before I knew it.

This time I started with the stamp set, Blessings of Home, with the largest bouquet. I would decide later what color the card base would be, etc. I stamped the bouquet on a piece of Basic White Cardstock and die-cut it with the Flowers of Home Dies. You can purchase both the stamp set and dies in the Blessings of Home Bundle and save 10% over buying them separately.

I stamped the bouquet in Memento Ink so I could color it with my Stampin’ Blends alcohol markers. I looked at the colors that coordinate with the Heart & Home 12″ x 12″ Designer Series Paper but mostly I just wanted a soft look to the flowers. I started with Pale Papaya for the big center flower with a Delightful Daffodil center, with maybe a touch of Mango Melody to darken it. The other flowers are Calypso Coral, Highland Heather, and Pool Party. The leaves are mostly Granny Apple Green. Just use whatever colors you are in the mood for!

I decided on Cinnamon Cider for a card base with a Pale Papaya layer. Then I cut two pieces of the Heart & Home Designer paper to use for angled layers. They are 3″ x 4 3/4″. I actually mixed them up by accident! I intended for the wood pattern one to go behind the flowers since it is plainer, but I think it works okay the way I made it. The busy flower pattern is behind the bouquet but I think it still looks good. You probably can’t go wrong with the pretty designer paper and this floral stamp! The floral bouquet is popped up on Stampin’ Dimensionals®.

The birthday greeting is in the Blessings of Home Stamp Set. I simply stamped it in Memento Ink on a scrap strip of Basic White and cut it down to the right length. I put a strip of Basic Black behind it to help it stand out. I could have used Cinnamon Cider perhaps or one of the other colors in the flowers instead. Since it goes across the popped up bouquet, I put Mini Dimensionals on each end and a bit of Stampin’ Seal in the center to adhere to the card over the bouquet.

It really didn’t take me long to color the flowers. Besides, coloring is good for our mental health and relaxation so we should take the time and not feel rushed! But if you don’t have time or really don’t like to color, just stamp the bouquet in a color. HERE is a card I made earlier with the smaller bouquet and just stamped it in Cinnamon Cider.

There are many beautiful and fun stamp sets and products in the new January-June 2022 Mini Catalog or Spring Mini, so take your time and make out your shopping list! Don’t delay too long though for things you really want because you know what can happen sometimes! And don’t forget about Sale-A-Bration! With every $50 purchase, you earn a FREE Sale-A-Bration product!

HAPPY SHOPPING!

Sunshine & Rainbows Birthday Wishes Card

Sunshine & Rainbows Birthday Wishes Card

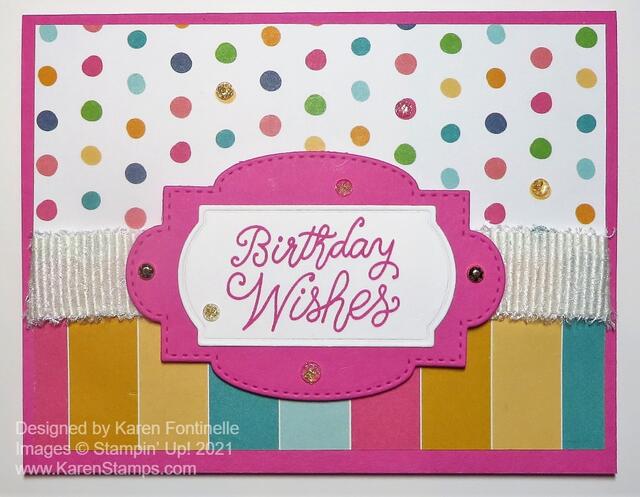
Here’s a bright and happy card to start the New Year, this Sunshine & Rainbows Birthday Wishes Card. With things still disorganized at my house from moving things around for Christmas, I don’t even know what new products I have or where they are! I found one little pile and this paper was in it!

Beginning Tuesday, January 4 (yes, tomorrow!) the new Stampin’ Up! Spring Mini Catalog goes live plus our Sale-A-Bration promotion! Spend $50, get one free Sale-A-Bration product! This is everyone’s favorite promotion because who doesn’t like free product! This paper is used on this card is a Sale-A-Bration product that you can earn for free with a $50 purchase! It’s the Sunshine & Rainbows 6″ x 6″ Designer Series Paper and it coordinates with the Rainbow of Happiness Bundle in the Spring Mini Catalog. Some images coordinate with the dies and the new punch.

I was surprised to find this polka dot paper in the package, I was thinking it was all going to be rainbows on the “front” side of the paper, but when I saw this colorful polka dot, I had to use it! The bottom striped portion is the opposite side of the polka dots side!

The card base is Magenta Madness. I cut one of the pieces of designer paper a little longer so that they could overlap and not just meet, although that would have worked out okay, I didn’t know which ribbon I was using at first. The striped bottom piece is 5 1/4″ x 1 3/4″ and the polka dot pattern is 5 1/4″ x 2 1/2″ so the two papers can overlap by about 1/4″. The ribbon I used is the White 3/4″ Frayed Ribbon in the Spring Mini.

The greeting is found in the Little Delights Stamp Set, stamped in Magenta Madness ink on Basic White cardstock, and die cut with a die in the Painted Labels Dies. Then the greeting is layered on one of the Stitched So Sweetly Dies in Magenta Madness. It is popped up on Stampin’ Dimensionals over the wide ribbon. This stamp set is retiring from the Holiday Mini so TODAY is the LAST DAY for the great stamp set! Get it while you can!

To finish off this card, since the die cut behind the greeting was rather large, I felt like I should add something. Of course, that something was some jewels! I used the new Iridescent Rhinestone Jewels and a couple of the Gilded Gems from the Annual Catalog on each side of the Magenta Madness die cut. I’m not sure I love the placement of the gems, I didn’t feel like I was getting it right, but it’s right enough, so I decided to leave well enough alone! Sometimes you have to know when to stop!

*** Remember: Today is the last day for the LAST CHANCE PRODUCTS, the products retiring from the July-December 2021 Holiday Mini Catalog! Take a final look at your list and especially check in the Online Store to see what is still available! Check the Clearance Rack, too, as long as you are looking! There are a few things you could even use for making Valentine projects soon, plus punches, embossing folders, great dies, Gold Mini Pizza Boxes (great for treats, little 3″ x 3″ cards, small gift)

One more day until the new January-June 2022 Spring Mini Catalog AND Sale-A-Bration! Sleep well so you are bright-eyed and bushy-tailed tomorrow!! Happy New Year and Shopping!

Counting Sheep Birthday Card

Counting Sheep Birthday Card

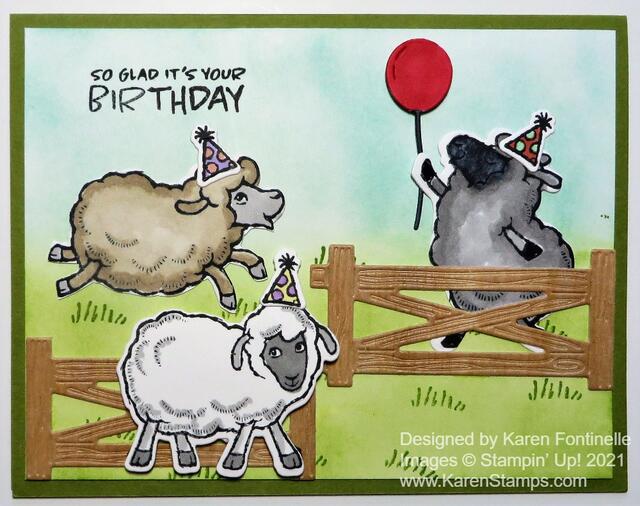
If you like sheep, I hope you are able to get this cute stamp set and dies to make a card like this Counting Sheep Birthday Card. I really had fun making this card and coloring the sheep and the background of the card. I think it’s the party hats and balloon that made me so happy! Who can’t be happy when you have party hats??!

The card base is Old Olive and the top layer is Basic White, but I colored it with ink. For the grassy area, I used Granny Apple Green ink and applied it with the Blending Brush. For the sky, I used Coastal Cabana ink. The fences are cut with the Sheep Dies. When I was going through some retired stuff in my stash, I found these wood sheets that Stampin’ Up! sold several years ago. It’s so thin it’s meant to be used like paper almost. So I die cut the fences using the wood sheets rather than paper! I also thought about using the Cork Paper! You can use any card stock you like.

The sheep were stamped on Basic White Cardstock with Memento ink and I colored them in with various Stampin’ Blends. The party hats were also stamped and colored with Blends and then everything was die cut with the Sheep Dies. The stamp set for everything is the Counting Sheep Stamp Set. After I had everything planned where I wanted it placed, I stamped the greeting at the top, which is in the same stamp set. I stamped the “You’re Amazing” on the inside of the card as well.

You can earn the Counting Sheep Stamp Set or the Sheep Dies during Sale-A-Bration with a $50 purchase. If you want both the stamps and the dies, you would need a $100 order. Sale-a-Bration ends Thursday, September 30 so don’t let it pass you by! It’s the biggest promotion of the Stampin’ Up! year and this year we had TWO Sale-A-Brations so that was pretty special…and historic! Check HERE under Sales & Specials in the Online Store to see what is currently available during Sale-A-Bration. Right now the only thing that is gone is the Be Dazzling Designer Paper.

I hope you are having as much fun as these sheep are on this Counting Sheep Birthday Card celebrating someone’s birthday!

SHOP STAMPIN’ UP! ONLINE HERE!

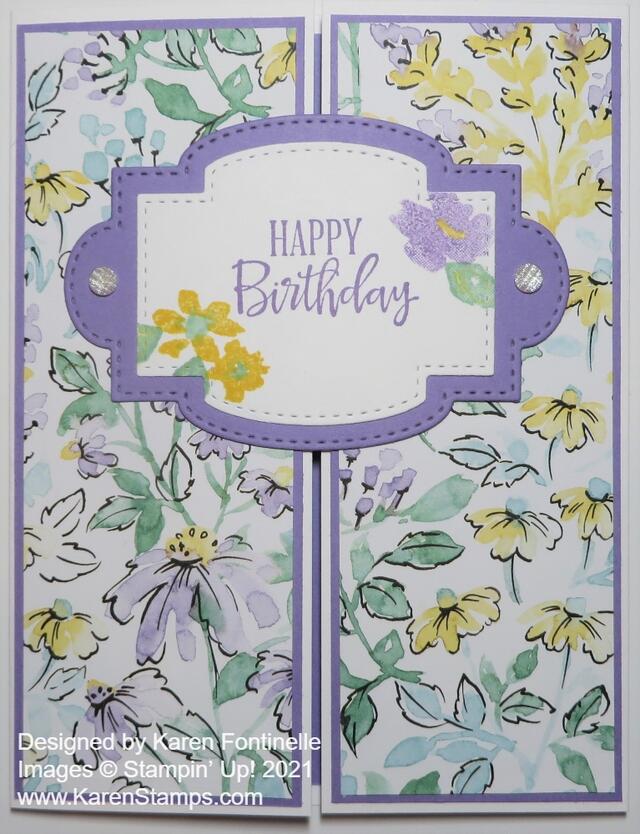
Hand-Penned Gatefold Birthday Card

Hand-Penned Gatefold Birthday Card

Bet you can’t make a card with this Hand-Penned Designer Series Paper, like this Hand-Penned Gatefold Birthday Card, without feeling happy afterward! It’s not about making the card, it’s that designer paper that just is so pleasing to me!

Just to make things a little more interesting, I made this into a gatefold card. Instead of folding the card the normal way, you fold in both sides. The center greeting is just glued on the left side so that it can be opened!

The card base is Basic White. Cut the cardstock in half like usual – 5 1/2″ x 8 1/2″. But don’t score and fold in the middle! Score each end at 2 1/8″. The math is that you want the center of the card to be 5 1/2″ x 4 1/4″. So you divide 4 1/4″ in half, so each side “gate” will fold in to cover the center of the card. That gives you 2 1/8″ on each end. Mine somehow didn’t quite meet in the middle. Maybe I should have folded the sides in from the opposite side. You can try both ways!

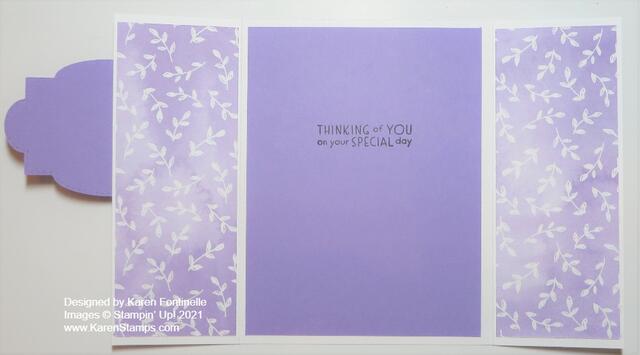
For this card, I cut a Highland Heather piece of cardstock to go on the inside of the card. I made it the usual layer size, 5 1/4″ x 4″. I stamped a greeting on the inside before I adhered it to the center of the card. This greeting is from the Inspired Thoughts Stamp Set.

On the front of the card, I cut a layer of Highland Heather to go behind the Hand-Penned Designer Series Paper. Since the gate-fold panel is already pretty narrow, you have to cut the other layers pretty narrow. The Highland Heather layer is 5 3/8″ x 2″ on each gatefold panel. The designer paper is 5 1/4″ x 1 7/8″.

Now as I was putting glue on the back of this pretty floral designer paper, I also liked the Highland Heather color print on the other side. So I added that side of the designer paper to the inside panels of the card!

Hand-Penned Gatefold Birthday Card Inside

For the greeting on the front of the card, you could use a variety of shapes – circles, rectangles, squares, ovals. Use whatever you like or fits the greeting. I used these two die cuts from the Stitched So Sweetly Dies. The Happy Birthday greeting is from the Peaceful Moments Stamp Set. I stamped that in Highland Heather Ink and also stamped a few flowers and leaves in the Hand-Penned Petals Stamp Set. Layer the Basic White stamped piece on top of the Highland Heather piece. Be sure to only apply adhesive to the left side of the greeting from the middle over to the left side. Check the inside to make sure no glue is showing on the inside or it will stick to the other side of the card. I added two Elegant Faceted Gems to each side of the Highland Heather die cut.

Here is a fairly recent card I made in the gatefold style using the Expressions In Ink Designer Series Paper.

This is an easy card but the gatefold gives it a little extra pizzazz. Try your hand at making something like this Hand-Penned Gatefold Birthday Card.

SHOP STAMPIN’ UP! ONLINE HERE!

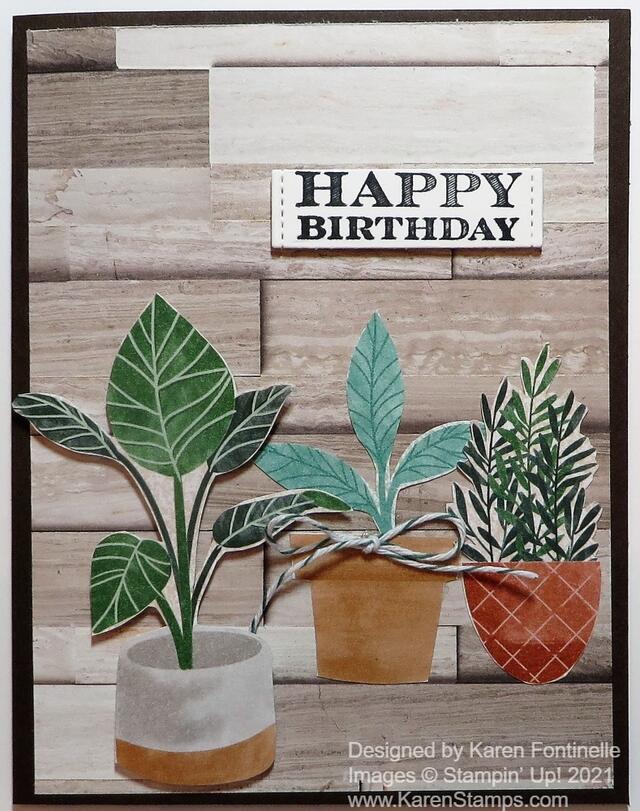
Bloom Where You’re Planted Happy Birthday Card

Bloom Where You're Planted Happy Birthday Card

If you would like to make this Bloom Where You’re Planted Happy Birthday Card, you can buy the paper with the plants and the paper with the background both on sale in the Stampin’ Up! Designer Series Paper Sale! There are nine select papers on sale right now through August 2 so you can stock up or try out new ones at a 15% discount!

To make this card, I used two of the papers on sale now – In Good Taste for the background and Bloom Where You’re Planted for the plants! In Good Taste is a giant package of paper, 24 sheets of paper, 2 papers each of 12 different designs. You are sure to find patterns for every creation in this package! Each sheet has photographic images of wood, tile, stone, and other elements to add visual textures to all kinds of projects. These would be great backgrounds for scrapbook pages as well.

For the card base, I used Early Espresso Cardstock. Since this paper is so dark, you will want to add a Basic White or lighter color layer inside the card on which to stamp or write your message. You might even stamp or add a cutout image of one of the plants to this inside layer for a fun surprise.

For the plants, I just went through the Bloom Where You’re Planted Designer Paper and chose some plants I wanted to cut out. This paper has sheets of separate plants and pots, leafy backgrounds as well as various generic backgrounds to look like walls where you might place a plant. If you have the Perfect Plant Dies, you can cut out certain pots and plants on separate papers by running them through the Stampin’ Cut & Emboss Machine. I just used my Paper Snips to cut out one separate pot and separate plant and the other two were the full pot and plant on another sheet.

The largest plant on the left is popped up on Stampin’ Dimensionals® and the other two are adhered right down on the background paper. I found a retired spool of twine and used that to tie a little bow and adhered it to the middle pot with a Mini Glue Dot.

The greeting was already die-cut in a little pile on my table from the Many Messages Stamp Set and Messages Die. This is an amazing concept! It’s like a large background stamp filled with greetings that is best to stamp with the Stamparatus so you make sure every inch is stamped fully. Then die cut with the one large die, making sure it is lined up properly, and it cuts out all the greetings in one fell swoop! You used to be able to buy both the stamp set and die in a Bundle, but that retired now so you have to buy them separately. However, they added a new stamp set, the Many Happenings Stamp Set, for even more greetings to be stamped and die-cut in the same way! If you stamp and cut out these greetings maybe in a couple of colors of ink or on different colors of cardstock, then store them in a little box or bag, you will have a whole bunch of greetings ready to go when you don’t have time to look for a specific stamp set to use!

In this previous post, you can see how I used the Stamparatus to stamp all these greetings!

Check out all the papers on sale, if you haven’t already! Maybe you have purchased one of the patterns already but used a lot of it. Now is the time to stock up on more at a discount! Every little bit helps! My Bloom Where You’re Planted Happy Birthday Card was fun to make!

SHOP STAMPIN’ UP! TODAY!

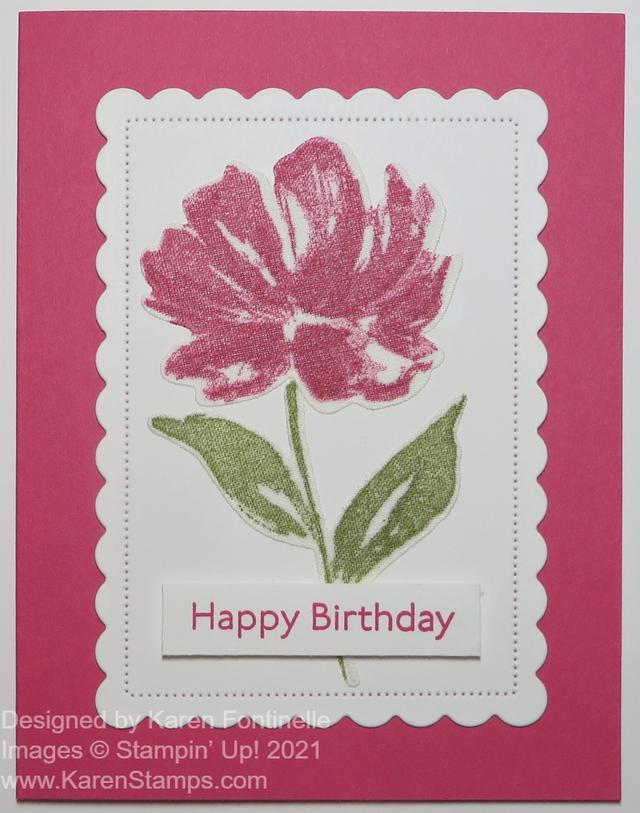
Art Gallery Linen Flower Birthday Card

Art Gallery Linen Flower Birthday Card

Something new in the Stampin’ Up! Annual Catalog 2021-22 is the Linen Paper that I used on this Art Gallery Linen Flower Birthday Card. Does this card have a different look to it than regular stamping? I think we all have lots of experimenting to do with this new product! I didn’t know such a think existed! And wait until you hear one of the features of this special paper!

The Linen Specialty Paper (155681) is on page 136, the first of the photos of products on that page. It’s easy to miss! So far I know you can stamp on it, die cut it, and blend ink on it. We will have to experiment with different colors, maybe using the Stamparatus so you can repeat the stamping to make it darker maybe, see what colors look good on the linen or not and more!

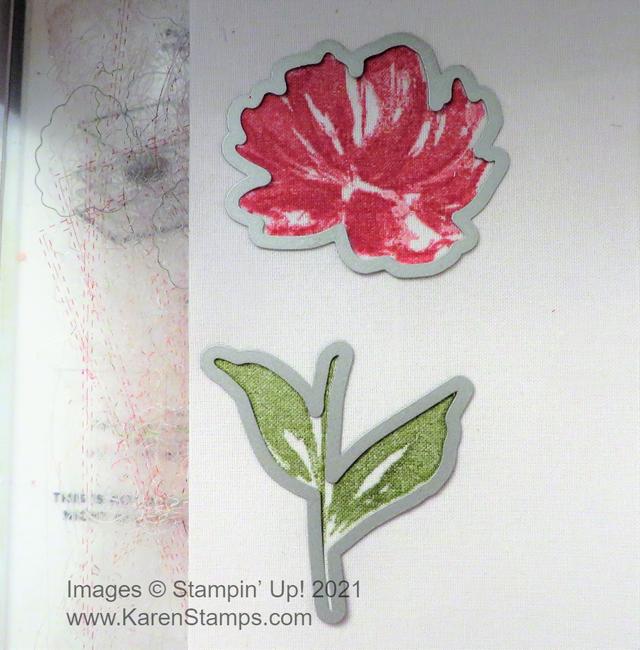
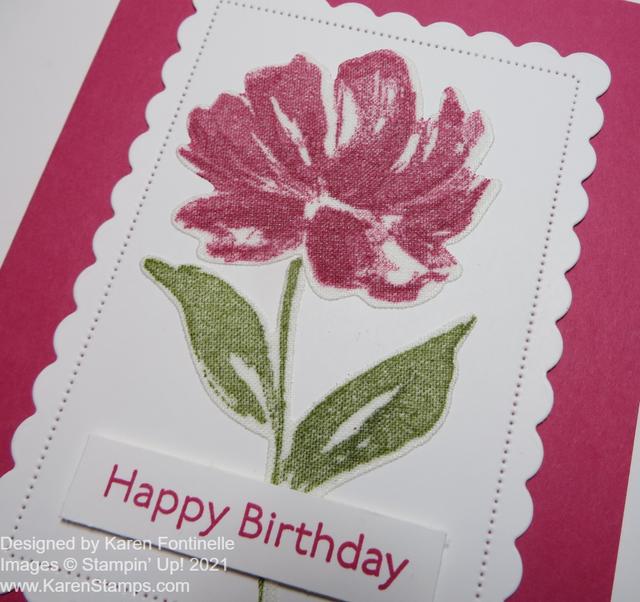
To make this card, I was pretty sure the ink color was going to turn out lighter than on regular paper. It doesn’t stamp quite as heavily as on paper, because this is fabric paper! The texture is going to keep the ink from being really smooth. I used Melon Mambo ink for the flower in the Art Gallery Stamp Set and Old Olive for the stem and leaves thinking these would be dark enough to show up well. I think the Melon Mambo stamped a little shade darker than it would have on paper. Just a different look! Then just die-cut it with the coordinating Floral Gallery Dies. The Linen Paper die-cuts just as nicely as paper, at least this first time!

Art Gallery Linen Flower Die Cut

The background I chose to put the flower on is Basic White die-cut with the Scalloped Contours Dies. These new dies will be very popular. And I didn’t even have to glue down the linen flower! The Linen Specialty Paper comes with adhesive on the back! After die-cutting, just carefully peel off the backing and you can adhere your die-cut linen piece wherever you want it! You probably should lay it out it out first to see exactly where you want to adhere it. If parts of your pieces are very thin, like this flower stem, just handle it carefully and try to place the larger parts where you want them first and then the skinnier areas.

The card base is Melon Mambo to match the flower, although, as I said, the stamped color looks slightly different than the cardstock. But it’s very close. Maybe it looked darker when I first stamped it than later on. The greeting is in the Art Gallery Stamp Set. In the end I decided to just keep the whole card simple, to focus on the linen flower. I tried all kinds and colors of designer paper as a layer under the die-cut scalloped piece and nothing looked right. I thought about added some jewels or embellishments and that didn’t seem right either! So in the end, I just left the card simple! Sometimes you have to know when to stop!

Here is a close-up of my card so you can see the Linen Specialty Paper better.

Art Gallery Linen Flower Birthday Card Closeup

How many more days until the new Stampin’ Up! Annual Catalog goes live? One!!! Tomorrow, May 4th is the day! Supposedly there will be no down time so if you want to order in the middle of the night you may be able to. However, on a new launch like this, LOTS of people like to order right away and the website will probably be a little wonky! If it crashes on you or the little thing just spins and spins, just keep trying until you catch it at the right moment….or come back a little later! It will likely be a busy day!

Today is the last day for the Last-Chance Products that are retiring! Check those out today!!

Tomorrow is the big day! Shop the NEW catalog!

SHOP STAMPIN’ UP! ONLINE HERE EVERYDAY!

Gingham Pansy Petals Birthday Card

Gingham Pansy Petals Birthday Card

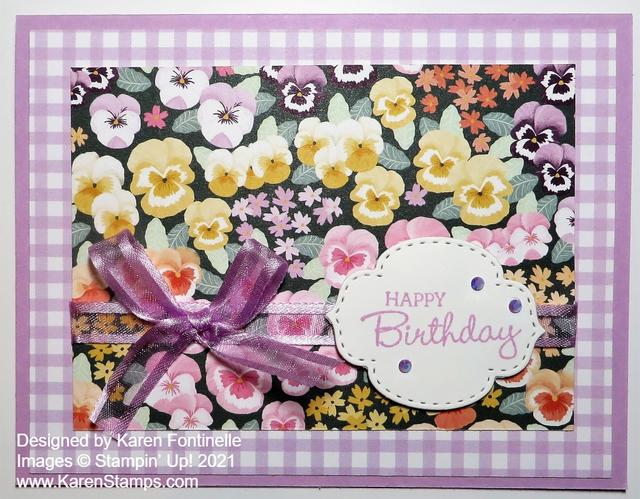
I got this Gingham Pansy Petals Birthday Card idea from a sample in the new Stampin’ Up! Catalog, coming May 4. I changed it up a little bit as often happens even when you think you are going to copy a card exactly! I’ve been seeing so many pansies around the neighborhood recently and I think of this beautiful new Pansy Petals Suite coming soon!

I love this Pansy Petals Designer Series Paper, not only for the pansies, but for the designs on the non-floral sides, like this gingham pattern. The sample in the catalog uses this pattern of the tiny pansies all close together and then uses the opposite yellow side for a layer underneath. I chose this Fresh Freesia gingham pattern on another sheet and layered it on a card base of Fresh Freesia. Fresh Freesia is one of the incoming In Colors 2021-23 so be sure to look for those!

I left a wide margin, about 1/2″ of the gingham showing, which them always makes the top layer look very small. In reality, it all fits just fine. I added a piece of the Fresh Freesia 3/8″ Open Weave Ribbon around the pansy paper and tied a bow separately and adhered it with a Mini Glue Dot.

The greeting is stamped with “Happy Birthday” in a pretty font in the Pansy Patch Stamp Set. I didn’t want too small of a die-cut but nothing too big and I think this one in the Stitched So Sweetly Dies is just right. These dies are in the current catalog and thankfully are carrying over to the new catalog! They’re very versatile.

I couldn’t resist adding some of the new In Color Jewels that are so pretty! Be sure you put a package or two of those on your first order! They are beautiful colors for a little embellishment.

The Pansy Petals Suite Collection comes with the Pansy Patch Bundle (stamp set and dies), the Pansy Petals Designer Series Paper, plus the cute little Bumblebee Trinkets. If you like this Gingham Pansy Petals Birthday Card, I hope you will take a look at the Pansy Petals Suite because it will make pretty cards for you!

SHOP STAMPIN’ UP! ONLINE HERE!

Fine Art Floral Golden Garden Birthday Card

Fine Art Floral Golden Garden Birthday Card

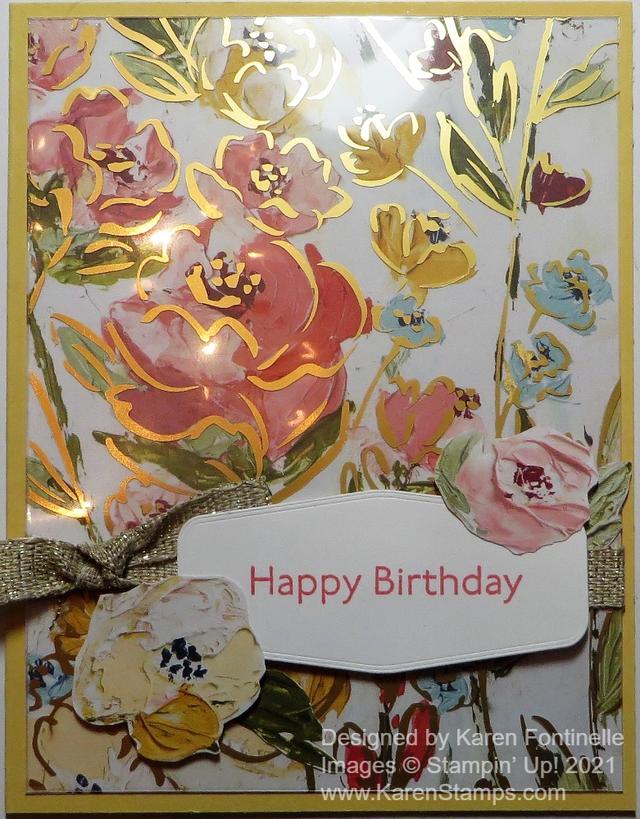
I thought I would make an easy but beautiful card for this blog post and of course that meant using the Fine Art Floral Suite to make this Fine Art Floral Golden Garden Birthday Card. I know the title is a little weird, but it’s because I used the Golden Garden Designer Specialty Acetate Sheets. I didn’t even know what they were called, just that they were in the new spring mini catalog and I had them! If you place them just right, some parts match this designer paper!

First I made the card. I wanted to use the Fine Art Floral Designer Series Paper. I chose the sheet that has one top corner bare of flowers. Actually, there is another sheet with a blue background and yellow flowers, but this one has the white background with pinkish flowers. You’ll see it in your package. You could also just frame this sheet of paper, kind of like some other designer paper we had one time! Or use it for a scrapbook page. I chose So Saffron for the card base, one of the paper’s coordinating colors….and there are a lot of coordinating colors with this paper!

Next, I got out the Golden Garden Acetate Sheets and found the portion that matched the flowers on the paper and cut it out. I just put tiny dots of Multipurpose Liquid Glue on the back of the acetate on the widest parts of the printed design in hopes of hiding the glue. Actually, when you turn the acetate over, you could use that side instead! Then I carefully overlaid the acetate on the floral paper. Be sure to adhere the ribbon around the designer paper and acetate before you adhere to the card base. I added a piece of the 3/8″ Fine Art Ribbon which is soft, pliable, and has gold in it!

The greeting is stamped in Flirty Flamingo Ink from the Art Gallery Stamp Set in the Suite. I die cut the piece with one of the Tasteful Labels Dies. Next, I cut out two flowers from a scrap of the designer paper and popped them up on the corners of the greeting. I’m not sure if I like them or not, but they are there.

That’s all there is to this card! Once again, the beautiful designer paper does most of the work to give you a lovely card! The acetate overlay is a bonus. HERE is another card I made recently with both sides of the same designer paper.

You’ll find all of these supplies in the January-June 2021 Mini Catalog. And while you are ordering, be sure to keep Sale-A-Bration in mind and order in $50 increments so you earn FREE Sale-A-Bration products! No limits!

If you want EVERYTHING, order the Fine Art Floral Suite Collection (155982) and get it all by just putting in one item number. It has been on backorder but as I write this it should be available next week. Or just order the individual products that you want, or the Bundle. I’m sure you will want these beautiful products to make a card like this Fine Art Floral Golden Garden Birthday Card!

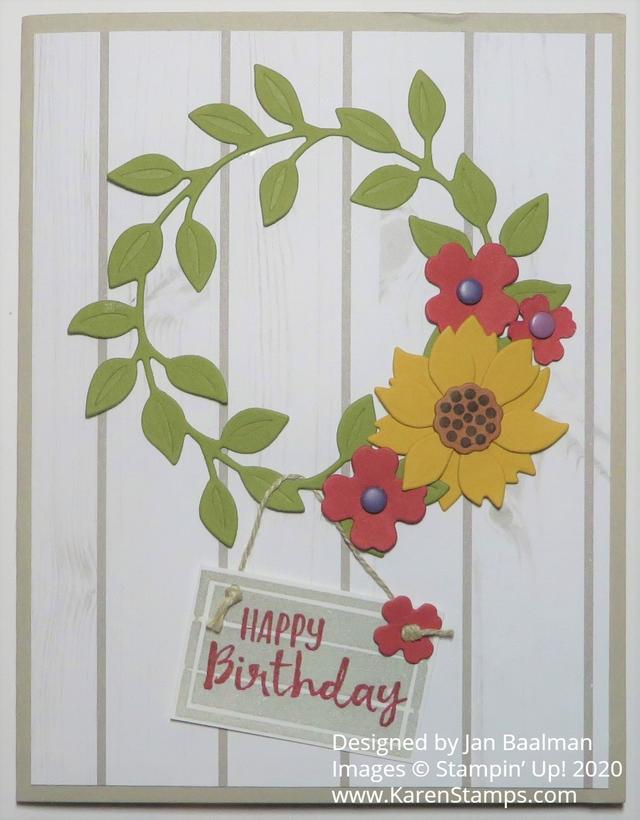
Arrange a Wreath Happy Birthday Card

Arrange a Wreath Happy Birthday Card

I got several very nice cards for my birthday a couple of weeks ago and this Arrange a Wreath Happy Birthday Card was made by my dear, long-time friend who got me into Stampin’ Up! in the first place!

I still remember stopping by her house when we were in town to go to a wedding shower and her taking just a few minutes to show me some projects she had made at a party by this company called Stampin’ Up! that I had never heard of. I barely knew anything about rubber stamping and had not been successful in my stamping attempts with stamps from the craft store, but her projects were so cute!! She had just received her Starter Kit but hadn’t opened it yet and we didn’t have time that day anyway. When I went back later in the summer for our friend’s wedding, I got to spend time stamping with her and fell in love with it! I didn’t really want to go anywhere else or do anything else, just stay at her house and stamp or look at the cards and things she had made. A few months later, I think, I signed up to be a Demonstrator.

This card was made with the Arrange a Wreath Stamp Set and Wreath Builder Dies. You can purchase both together in a Bundle and save 10%. I have seen some really cute cards made with this Bundle so I just might have to purchase it myself someday!

The card base is Sahara Sand with a layer of designer paper. You could choose something from the In Good Taste Designer Series Paper that might look similar. The wreath is die cut with the Wreath Builder Die out of Old Olive Cardstock. Then you can diecut some flowers from the set in any colors you like to decorate the wreath She used some enamel dots for the flower centers. I think the little Happy Birthday sign hanging from he wreath is so cute!

Obviously you can use this wreath for LOTS of occasions and all the seasons of the year, making this a very versatile stamp set. I love this card!

The latest reports about Hurricane Laura are that Houston is “out of the cone” so we should just have minimal effects, maybe some bands of rain and some gusty winds. The storm will go in around the Texas-Louisiana border which is certainly bad for those people. I just hope our power stays on! We’ve been lucky through many storms but you never know when your power might go out seemingly for no reason! We were making hurricane preparations anyway when it looked like it was coming directly here, so we have batteries and candles and lanterns and a ton of chocolate chip cookies I baked last night!

Take a look at the Arrange a Wreath Bundle for your next Stampin’ Up! order. You’ll find it in the Stampin’ Up! Annual Catalog on page 127 with the dies on page 173. Don’t forget to use your Bonus Coupons from July by August 31 when they expire.

SHOP STAMPIN’ UP! ONLINE TODAY!

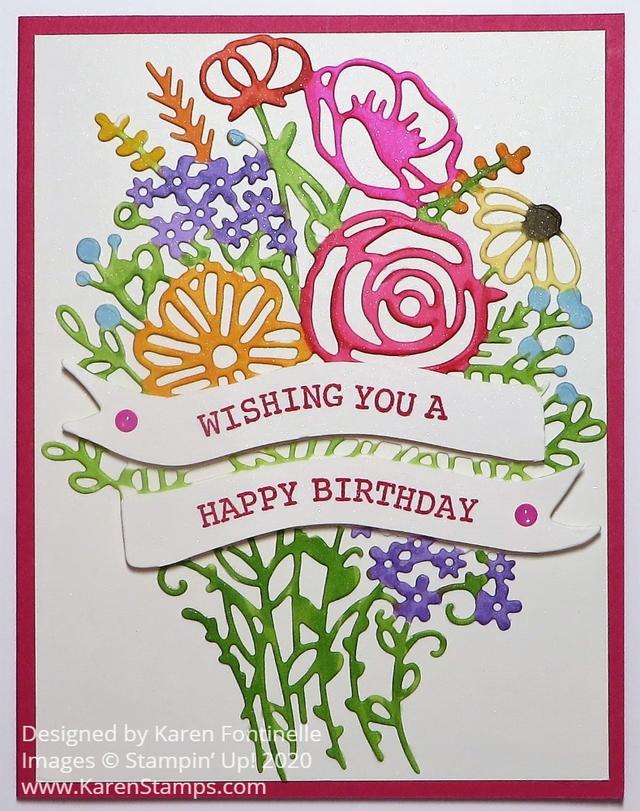
Banner Blooms Colored Flowers Birthday Card

Banner Blooms Colored Flowers Birthday Card

This Banner Blooms Colored Flowers Birthday Card is another example of how I did something different than I planned to! I originally thought I would color this die-cut by sponging on some color, maybe in a very soft look. But when I went to actually color on the die-cut, I grabbed my Stampin’ Blends markers instead and went to town!

When I stamp, I am always, always, always using Grid Paper on my table. It is handy for lining things up and especially for measuring quickly and easily. When I took a decorative painting class years ago, the teacher had us put down a towel on the table and after that, I couldn’t paint unless I had a towel underneath my project! Now you can even choose from several kinds of Grid Paper from Stampin’ Up!, even colorful ones! For coloring these die-cut flowers, I needed a plain white paper underneath (and you always need a paper underneath when coloring with Stampin’ Blends because they do bleed through the paper) so I could see the die-cut well. I simply turned my Grid Paper over to the other side.

This card uses Melon Mambo Cardstock for the card base. I chose it after coloring the flowers. I used Shimmery White Cardstock, my favorite, for the die-cut and also for the card layer, because it is good to color on and it has a very subtle shimmer to it. The paper is very pretty all on its own!

I die cut the flower bouquet with the Banner Blooms Dies. This die is really different from the ones we have had. I found that it works best placing the die cutting side up with the paper on top rather than face down on the paper. I don’t know why, but it does! I also ran it through my machine three times and after that, almost all the pieces popped out on their own and the few that were left I used the Take Your Pick Die Brush Tip to roll over the die cut piece and also over the die to get out just a few pieces of paper that remain in the die.

As I said, I planned to use maybe Sponge Daubers to lightly sponge on ink colors on the flowers and leaves over the die, not really being precise, just adding color. But then I grabbed my Stampin’ Blends Markers and had fun coloring the whole thing! I didn’t try to be absolutely perfect but used mostly the brush tips of the markers to quickly color in the different areas. On the really narrow areas, I used the tip ends of the markers. I usually started with the Light color and also added the Dark for a tiny bit of shading. Since I LOVE coloring with these markers I didn’t find the coloring tedious.

To make the banners going across the bouquet, just stamp the greeting in the Hand-Drawn Blooms Stamp Set on a scrap piece of paper. Then line the die up over the stamped greeting (but you don’t need a full piece of paper or you’ll be wasting it). You will end up with the portion with the stamped banners. Then just trim these off the rest of the bouquet and adhere to the bouquet you have just colored. The greetings in the stamp set are doubled-up to fit perfectly on the banner areas. You could also cut out the banners and use stamps from other sets that would fit.

The banners are stamped in Melon Mambo ink. I popped them up on Stampin’ Dimensionals®. I added two Magenta Madness 2020-22 In Color Enamel Dots to the banners.

The whole bouquet is adhered to the card with lots of teeny tiny dots of Multipurpose Liquid Glue. I placed the bouquet on the Silicone Craft Sheet which held it steady and it didn’t matter if a little glue got on the craft sheet.

A good thing to use for delicate die-cuts like this is the Adhesive Sheets which you adhere to the paper before die-cutting and it turns the die-cut into a sticker when you remove the backing paper. I just never think ahead to use it!

Here is another card I made with the Banner Blooms Die using Rainbow Glimmer Paper, another great option if you don’t want to color in!

Remember, we only have about a week left of Bonus Days! When you spend $50 on any order, you will receive via email a $5 Bonus Coupon to use on an order in August. No limit to how many coupons you can earn with every $50 you spend! Bonus Days ends on July 31.

SHOP STAMPIN’ UP! ONLINE HERE!

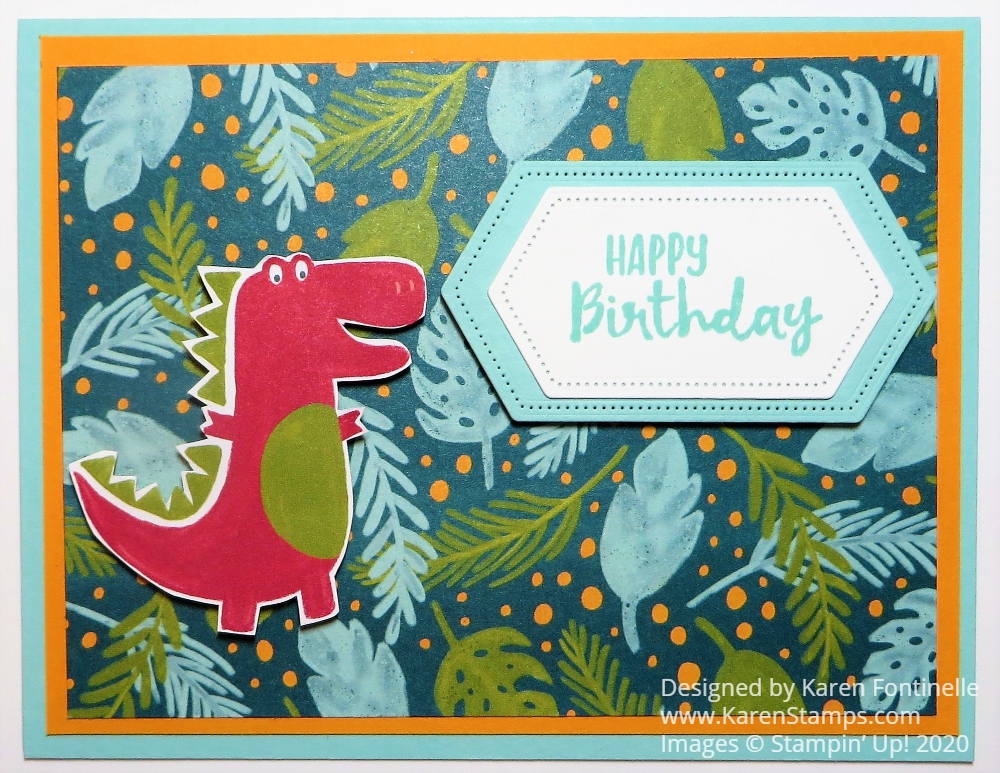
Dinoroar Dinosaur Birthday Card

Dinoroar Dinosaur Birthday Card

It certainly is fun to make cards with this designer paper as you can see on this Dinoroar Dinosaur Birthday Card! Perhaps you already ordered this paper from the catalog or maybe you choose it during the last part of Sale-A-Bration. If you don’t own it yet, you can purchase it as a Last-Chance product even at a discount!

The Dinoroar Designer Series Paper is a fun paper to have in your stash for children’s and baby cards…..or even for anyone else! Why not?! Some adults might enjoy getting a dinosaur card for their birthday!

This card has a card base of Pool Party and then a layer of Mango Melody underneath the designer paper. I wanted to use a pattern that had leaves and foliage to look like the dinosaur was roaming the forest! The dinosaur is even cut out from one of the patterns of designer paper!

The greeting is stamped from the Peaceful Moments Stamp Set. The greeting and the layer are cut with the Stitched Nested Label Dies. I wanted to just keep the front of the card simple since the background paper is pretty busy with rather large images and I wanted the dinosaur to stand out.

Here is another dinosaur card I made recently. Now that card you could send to almost anybody just to say “Hello” or put a smile on their face when they open the envelope!

You can still purchase the Dino Days Bundle, consisting of the Dino Days Stamp Set and the Dino Dies for 10% off. The stamp set and dies will be in the new catalog but not bundled for the 10% off price. So if you like it and want to save 10%, get it now. The little Dinoroar Enamel Shapes are on sale also right now in the Last-Chance Products at more than 50% off!

These Last-Chance retiring products are available through June 2, while supplies last, until the new Stampin’ Up! catalog comes out June 3rd! Get some bargains while you can and don’t forget to check the Clearance Rack, too!

SHOP STAMPIN’ UP! ONLINE HERE!