Tag Archives: Black & White Designs Designer Series Paper

Spooky Best Witches Halloween Card

Spooky Best Witches Halloween Card

Happy Halloween!

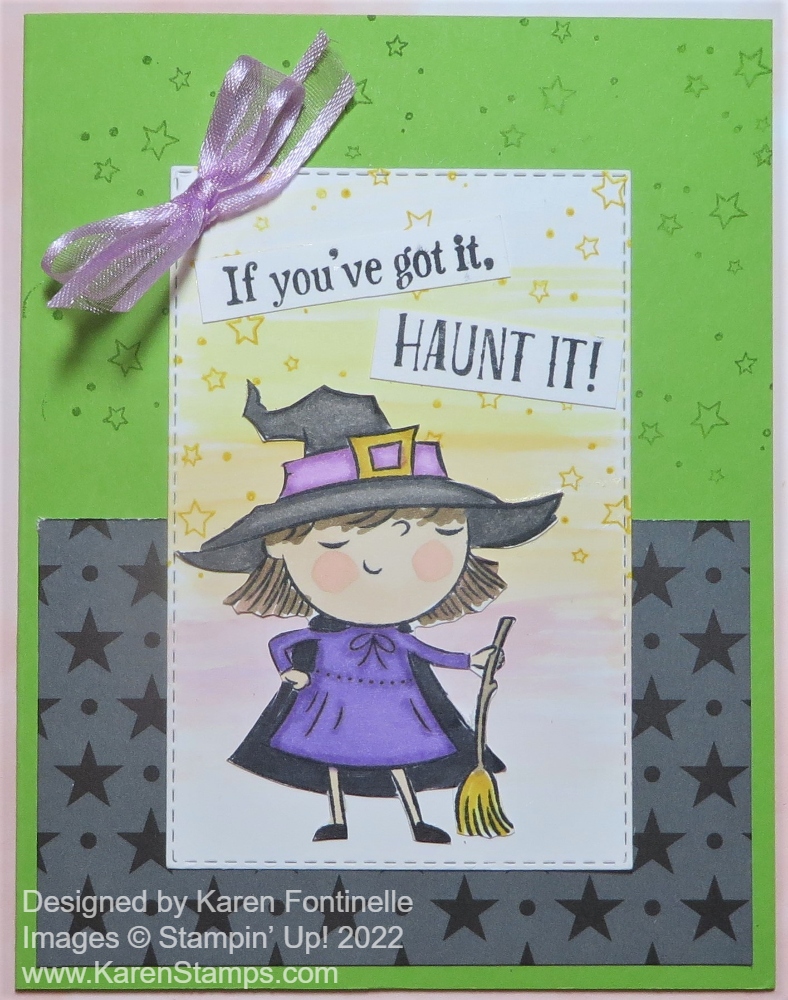
This Spooky Best Witches Halloween Card is the last Halloween card of the season I guess! I hate to see the end of using the Best Witches Stamp Set and the Scary Cute Stamp Set. I have loved stamping the Best Witches and coloring them with Stampin’ Blends.

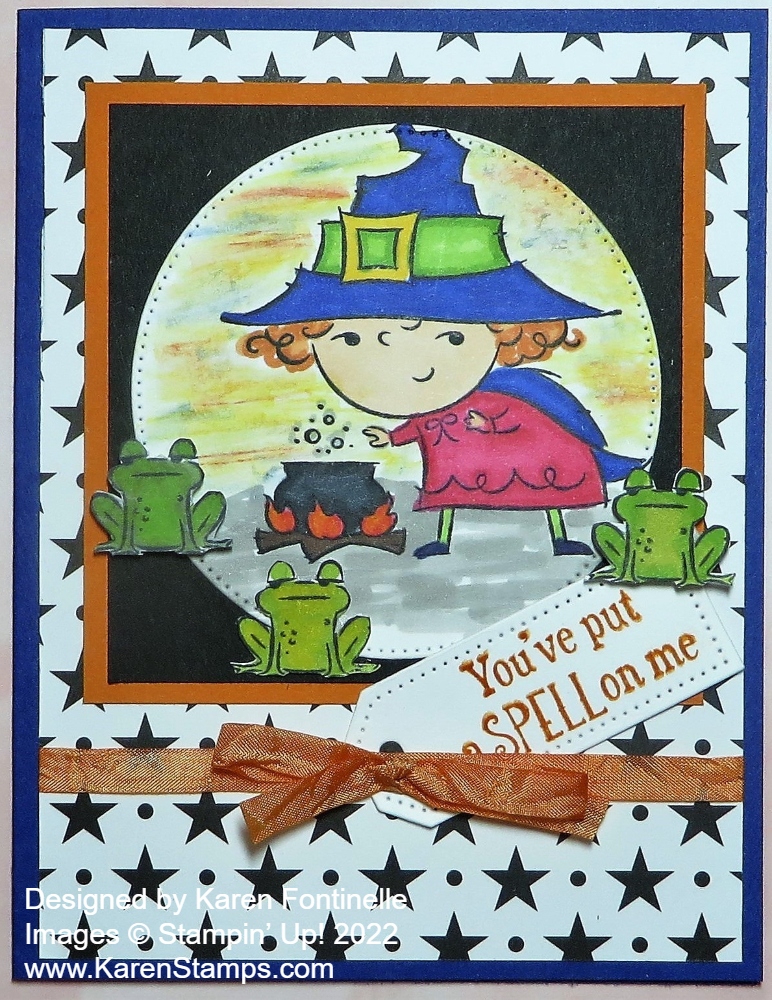
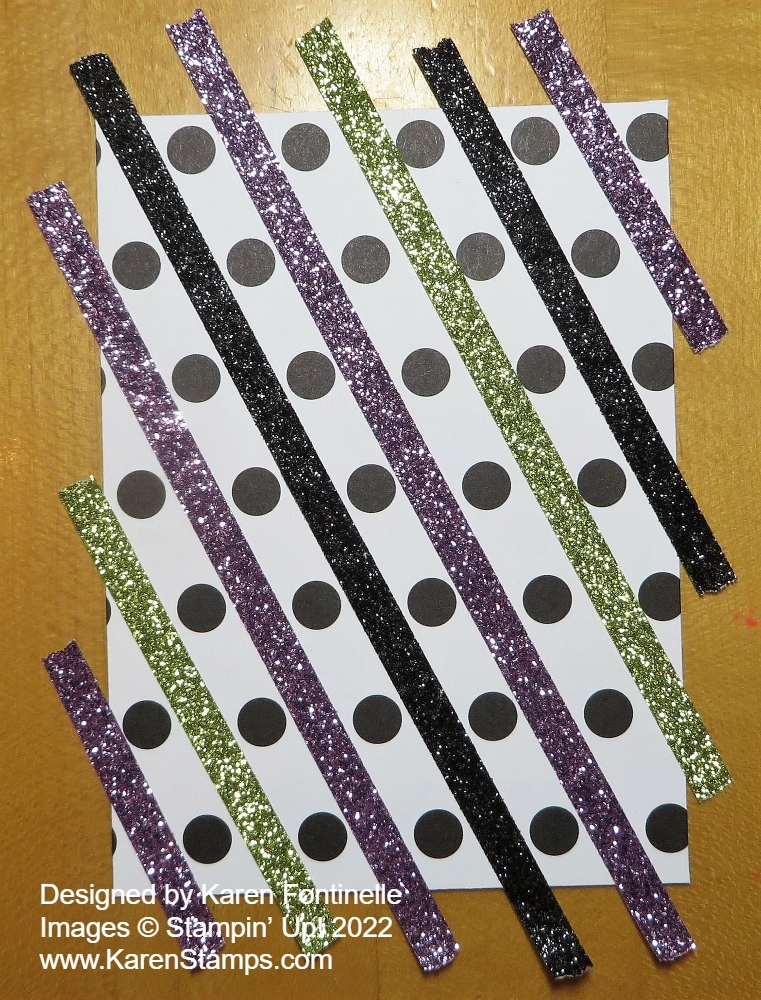
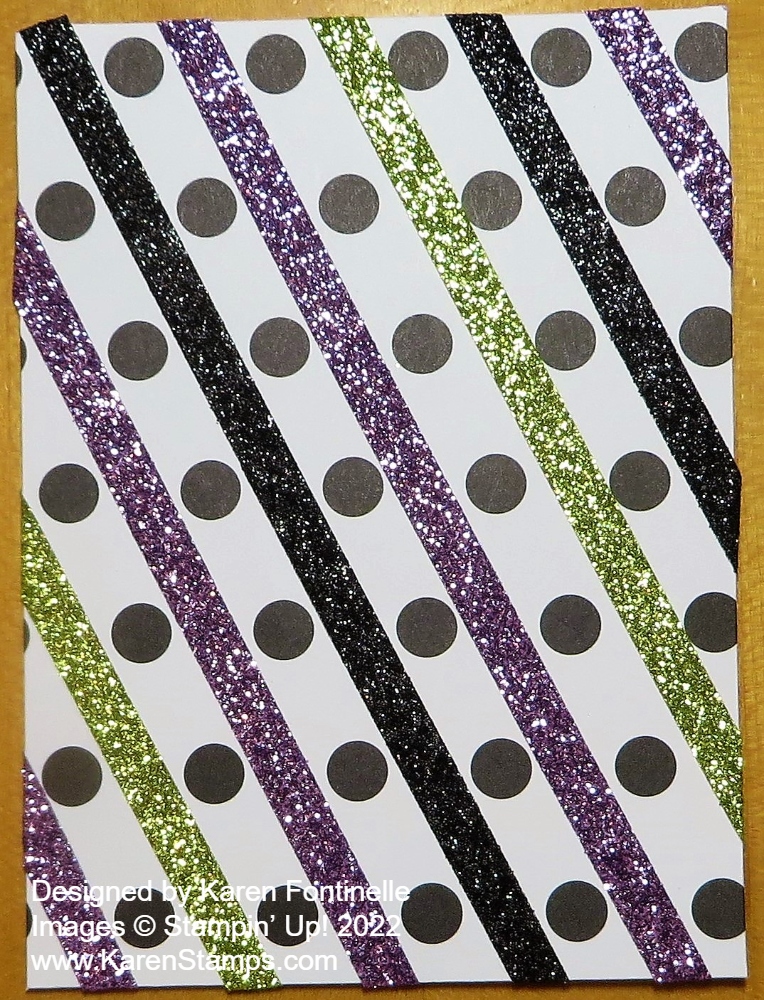
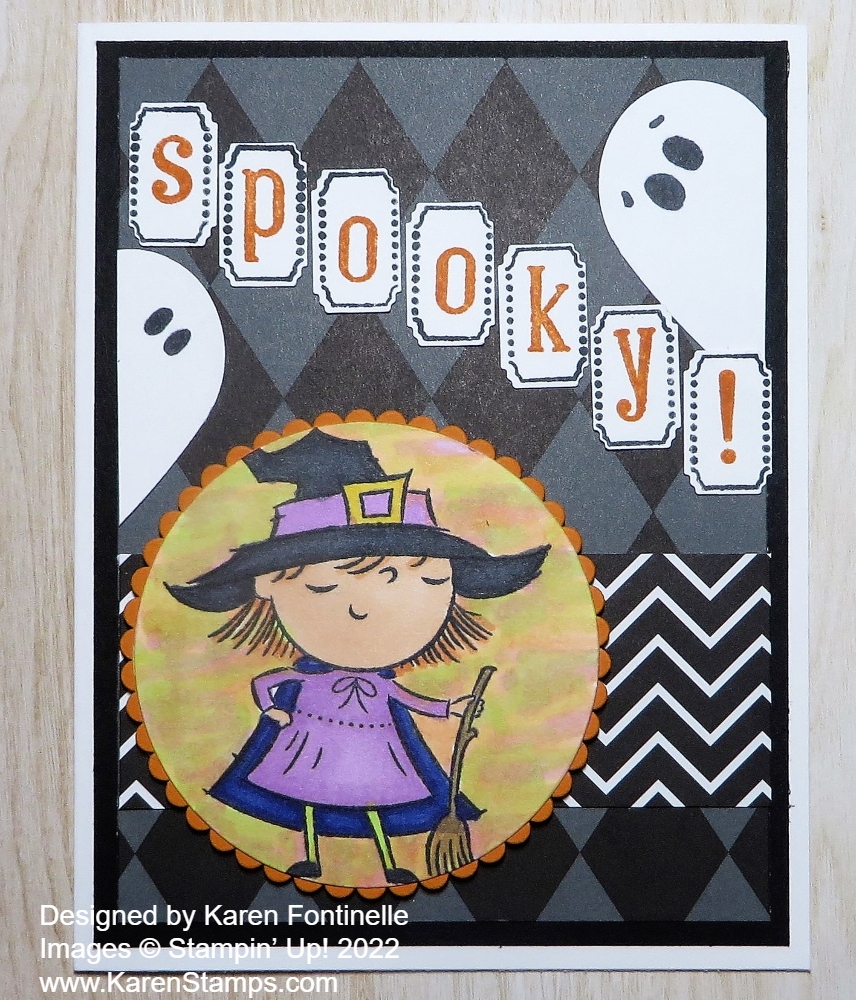
This card has a Basic White card base and a layer of Basic Black cardstock. Then I layered on a piece of the Black & White Designs Designer Series Paper for the background and even added a little strip of another pattern down lower on the card.

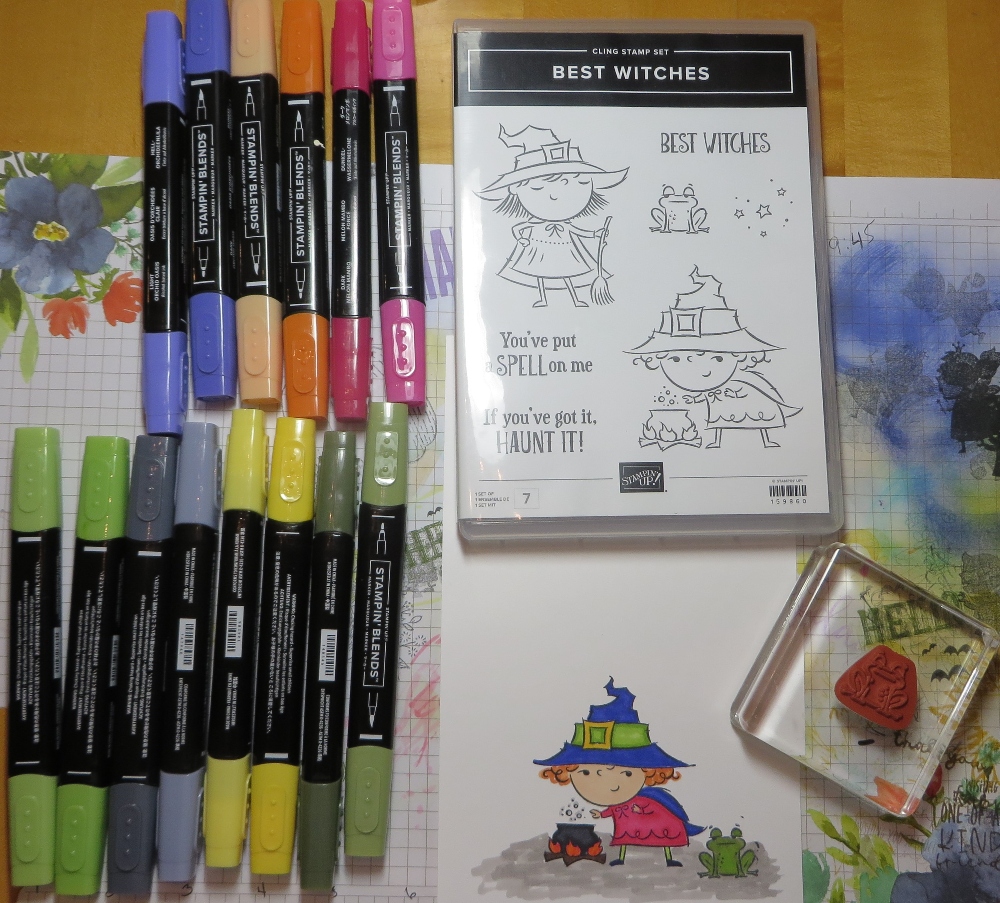
The witch is stamped with Memento ink on Basic White Cardstock and colored in with various Stampin’ Blends alcohol markers. I diecut her with a Layered Circle Die and layered on a piece of Pumpkin Pie Cardstock cut with a scalloped circle die in the same set. The witch looked a little plain so I colored in the background to look more like Halloween night. I used several different colors of Stampin’ Blends – a little light yellow, some bright green, some orange, then Pale Papaya over all of it, plus some Granny Apple Green to finish it off! You can just play with these markers and see what turns out!

I used the Alphabest Stamp Set and the Best Label Punch to spell out “Spooky!” across the card. I barely had room to fit it in! It’s really a fun set to play with, as I am finding out. You can purchase both the stamp set and little punch in a Bundle and save 10%. You’ll find both in the Stampin’ Up! Annual Catalog.

The ghosts peeking out from the sides of the card have special significance! Ghosts are part of what attracted me to Stampin’ Up! and to sign up to be a Demonstrator 20 years ago, as it turns out! When I saw cards made with ghosts out of hearts cut in half, I was sold on the creative possibilities of stamping!! To make these ghosts I punched a heart with the Heart Pack punch out of Basic White cardstock and cut it in half with scissors. The ghost on the left side is cut down just a little smaller to make him fit better. Then I just added eyes with a marker! So fun!

Here is another card I made with my heart ghosts a few years ago!

I hope you have your Halloween treats all ready for the trick-or-treaters tonight! Not sure we will have as many as we used to have back when more kids lived here and there was a little carnival down the street at the pool. I love handing out candy when the kids come to the door! I have my Paper Pumpkin treat boxes ready plus some extra bags of candy. The Paper Pumpkin treat boxes I already handed out were quite a hit, so consider trying out the Paper Pumpkin Kits especially for holiday times!

Best Witches and Frogs Halloween Card

Best Witches and Frogs Halloween Card

I was in the mood for some coloring and I even thought I would try for different colors on this Halloween witch. In the end, I don’t think I strayed too far from typical Halloween colors except for her Melon Mambo dress! This Best Witches and Frogs Halloween Card is one you make just to have fun coloring and playing!

I started off using the Best Witches Stamp Set and stamping the stamp with the witch and her cauldron on Basic White cardstock with Memento ink. I colored her with a bunch of different Stampin’ Blends. You can see some of the colors I used in the photo below. I also used some of the Natural Tones markers for her face and hands and the logs for the fire. I also stamped a frog but decided to cut him out separately, and then I decided on stamping and cutting out some more frogs!

Coloring Best Witches

After I had the witch stamped and colored in with her cauldron, I diecut the image with the largest circle in the Stylish Shapes Dies. I wanted to layer it on a scalloped circle in the Layering Circles Dies, but it wasn’t large enough so I just cut out two square layers, Basic Black and Pumpkin Pie. The black one is 3 1/4″ x 3 1/4″ and the Pumpkin Pie is 3 1/2″ x 3 1/2″. I used the Black & White Designs Designer Series Paper with the black stars as the layer on the Starry Sky cardstock card base. Before adhering the designer paper, I wrapped around some ribbon. I colored the White 1/4″ Crinkled Seam Binding Ribbon with the Dark Pumpkin Pie Stampin’ Blend. Just do it on top of a piece of scrap paper and run the side of the brush tip of the marker along the ribbon, holding it down at one end with your finger. Give it a little bit of time to dry completely or even rub a tissue along it to remove any ink that hadn’t dried yet. I tied the bow separately and adhered it with a Mini Glue Dot.

Back to the stamped and die-cut witch piece. I colored underneath with a bit of light gray marker. For the sky, I thought I would try Soft Pastels in various colors. I started off picking up some chalk color with a Blender Pen but then I just scribbled on various colors for the Halloween night sky and softened them with the Blender Pen. You have to be a bit careful to not make the paper pill up from having too much moisture or rubbing too much. But you can get away with a lot for a Halloween sky! After adhering this piece to the front of the card above the ribbon, I adhered the little frogs, two with Stampin’ Dimensionals and one flat on the card with the Multipurose Liquid Glue.

The greeting is in the Best Witches Stamp Set and is stamped in Pumpkin Pie ink and die cut with one of the Tailor Made Tags. I decided to tuck it under the bow so I added another Mini Glue Dot to hold the ribbon in place over the tag hole and put a frog partly on the end of the tag. That’s all there is to this fun Best Witches and Frogs Halloween Card!

SHOP STAMPIN’ UP! ONLINE HERE!

Glitter Washi Tape Birthday Card

Glitter Washi Tape Birthday Card

I saw this idea of using our Glitter Washi Tape this way on the @Stampinupofficial Instagram account the other day and I loved the idea! Because of the colors, I assumed they were suggesting this was a way to make a Halloween card. While that would be very cute, I thought I could make a Glitter Washi Tape Birthday Card with three of the four washi tape colors! And I did! But I’m also dying to make a Halloween card using this technique, too!

The main idea is to use the Black & White Designs Designer Series Paper and add strips of the Glitter Washi Tape in the Holiday Mini Catalog on page 57. You have to look up in the upper left corner of the page to find it! I did make THIS CARD for Halloween using some Glitter Washi Tape but not in this way. I think this is such a clever idea to use this washi tape with this designer series paper!

The colors of the Glitter Washi Tape are Old Olive, Black, Highland Heather, and Pumpkin Pie. I left out the Pumpkin Pie so it wouldn’t look like Halloween. The card base is Highland Heather and I embossed the front with the Hive 3D Embossing Folder. I would normally use a separate layer to emboss, but since this card base was already cut and folded in the cardstock package I just went with it this way. I had to run the folder through my Stampin’ Cut & Emboss Machine sideways which isn’t the best but it worked. Since I had a slightly smaller layer for the card front I thought a little texture around the edges of the card was in order.

The card front is a polka dot pattern in the Black & White Designs Designer Series Paper in the Holiday Catalog. I ran the washi tape diagonally in between the polka dots. There are also striped designs and others so you can choose other ways to apply the washi tape. Just let the strips of washi tape extend over the edges of the cardstock and then fold them all under instead of cutting or tearing them off at the ends. You could do that though. I used Stampin’ Seal+ adhesive to adhere the striped card front to the card base.

Glitter Washi Tape Card Front
Glitter Washi Tape Card Front2

I used the Biggest Wish Stamp Set for the greeting and focal point of the card. I stamped the words separately in Highland Heather ink and cut them very closely to the words with the Paper Trimmer. I also added a narrow layer of Highland Heather behind the stamped words. This stamp set is a fun one to own and perfect for a card like this.

Just in case the Glitter Washi Tape wasn’t enough “bling” on this card, I added a few 2021-2023 In Color Jewels even though they are retired now. (Such a shame!) I thought the Fresh Freesia jewels could be a close enough match to work on the card and applied a few to the greeting.

You might want to add this 4-pack of Glitter Washi Tape to your next order. It’s not just for Halloween and you can use the tape in so many ways in cardmaking and scrapbooking. You could just use little touches of it or actually make stripes or designs with it on cards. Just one of the fun embellishments we have for our papercrafting!

SHOP STAMPIN’ UP! ONLINE HERE!

Best Witches Haunt It Halloween Card

Best Witches Haunt It Halloween Card

This Best Witches Haunt It Halloween Card is the first Halloween card of the season! It’s a little early, considering it is over 100 degrees these days here in Houston! I have to say some Halloweens here haven’t been all that much cooler either by October 31st! But weather aside, I wanted to try in my new Halloween stamp set, Best Witches and I was in the mood to color!

You’ll find the Best Witches Stamp Set in the July-December 2022 Mini Catalog or Holiday Catalog, as I like to call it (and type it!) on page 55. The stamp set has two cute witches, a toad, some stars, and some cute sayings! It’s just my kind of Halloween set!

To make this card, I used Granny Apple Green cardstock for the card base. Then I added a piece of Black & White Designs Designer Series Paper to the bottom half of the card. These will be fun papers to use for Halloween or any time. You can leave them black and white or you could color the white parts of the papers.

I stamped the witch in Memento Black and colored her in with Stampin’ Blends. I just chose whatever colors I wanted with no planning so just play and choose whatever colors you are in the mood for. I think I used Smoky Slate and Gray Granite on the witch’s hat, Daffodil Delight for the gold buckle, Fresh Freesia for the hat band, but Highland Heather for her dress. Her face is Ivory with a little pink blush on her cheeks, Petal Pink. Then I cut out the witch by hand with Paper Snips You wouldn’t have to but that was my original idea when I wasn’t quite sure what the background was going to be.

Stampin’ Up! says July is Watercolor Month so I thought I would do a little watercolor background on which to layer the witch. Since I was using Basic White which can’t handle very much water at all, I watercolored VERY lightly. I used the wide Water Painter to pick up just a little bit of ink in the lid of the ink pad with minimal water and just brushed across the paper very lightly. I used Daffodil Delight, Pumpkin Pie, and Gorgeous Grape. You can barely see it but, as I said, I didn’t want much water on the paper which could make the paper pill and look messy. Then I stamped with the small stars stamp in the Best Witches Stamp Set, in Daffodil Delight, on the background. I had also stamped at the top half of the Granny Apple Green with Granny Apple Green ink so that it would just be very light in the background to add a little interest and match the stars on the designer paper.

The Basic White paper was die cut with one of the Stitched Rectangle Dies. The witch is adhered flat on the paper although you could use Stampin’ Dimensionals to pop her up if you wanted to. The greeting is stamped in Memento Black and then cut apart just for fun. I think this would be a fun card to send to a girlfriend for Halloween! I love it! And for a finishing touch, I couldn’t resist adding a bow of Fresh Freesia ribbon in the corner. My other thought was to use Iridescent Rhinestone Jewels for a little sparkle but I did the ribbon for something different.

I love Halloween and I had so much fun making this card! It may barely be the middle of summer but you know time flies so if you enjoy Halloween, don’t hesitate to get an early start on fall. If you are having summer heat like we are, maybe making a fall or holiday card will cool you off! Certainly staying inside in the air-conditioning and stamping will keep you cool! I hope this Best Witches Haunt It Halloween Card will inspire you to think ahead a little bit to the fun days coming up!

SHOP THE HOLIDAY CATALOG ONLINE HERE!