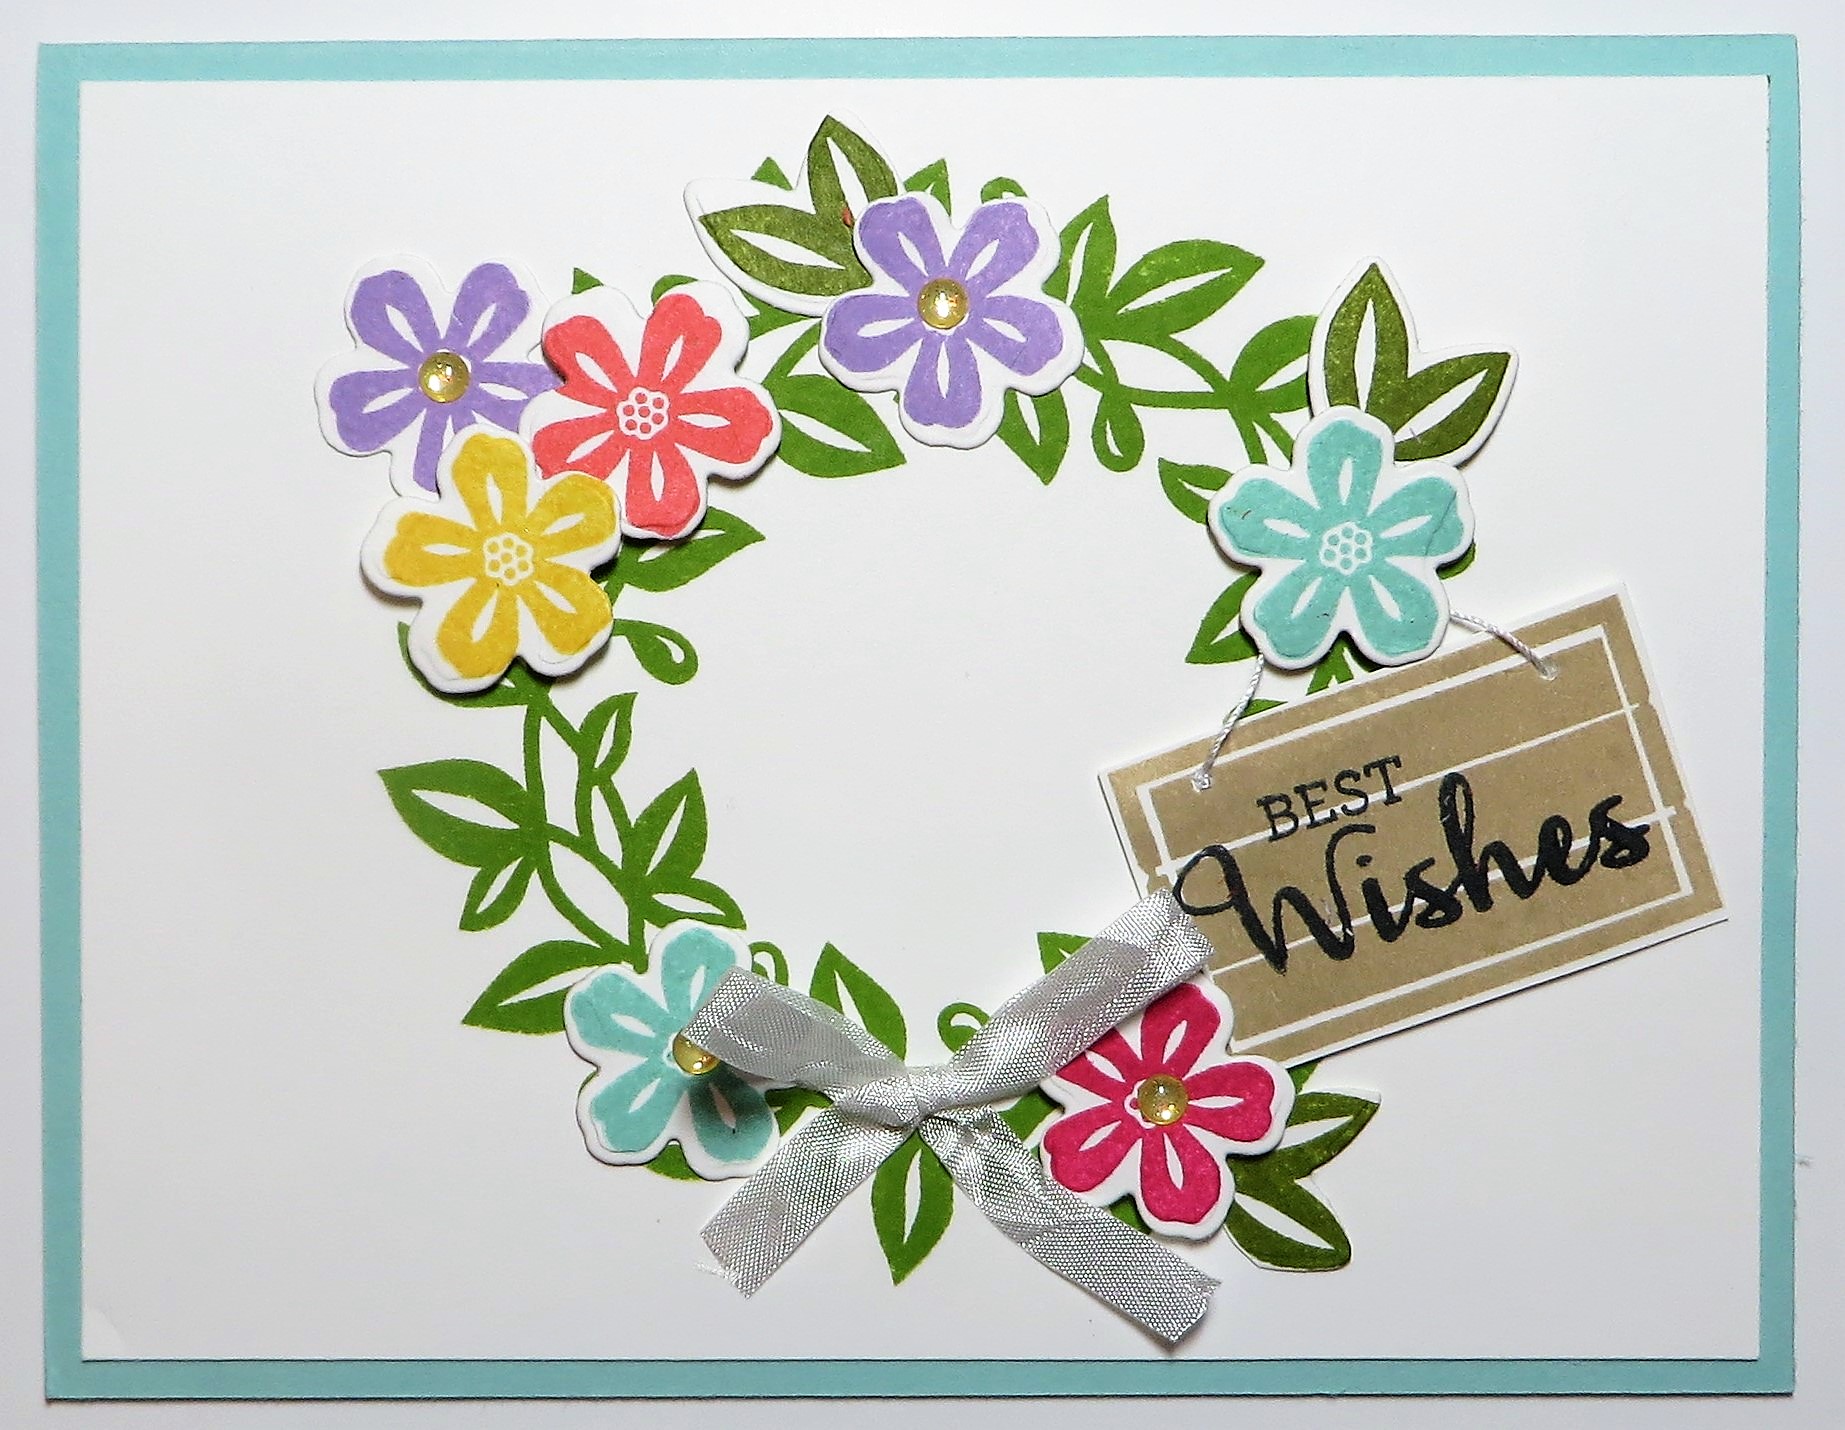
I just had to make this Arrange a Wreath Best Wishes Card before the Arrange a Wreath Stamp Set and matching dies retires on May 3rd. I don’t know what they are thinking letting this set go! Usually I die-cut the wreath, so this time I thought I would try some stamping!
The card base is Pool Party just because I love that color! Then a layer of Basic White, stamped with the wreath in the Arrange a Wreath Stamp Set in Granny Apple Green Ink.
Next, I stamped a bunch of flowers in different colors, like Melon Mambo, Pool Party, Daffodil Delight, Calypso Coral, and Highland Heather, plus some of the leaves in the stamp set. Then I die cut those stamped images with the Wreath Builder Dies (retired).
The cute little sign hanging on the wreath by a thin thread (!) is stamped in Crumb Cake Ink, with the sentiment stamped in Memento Ink. Then I just cut out the sign by hand with Paper Snips.
To assemble the wreath, I just adhered some of the flowers popped up on Stampin’ Dimensionals and some adhered flat with Stampin’ Seal, along with a few leaves. For some embellishment, I added some Gold Glitter Enamel Dots in the center of some of the flowers plus a little bow tied from the Whisper White 1/4″ Crinkled Seam Binding Ribbon.
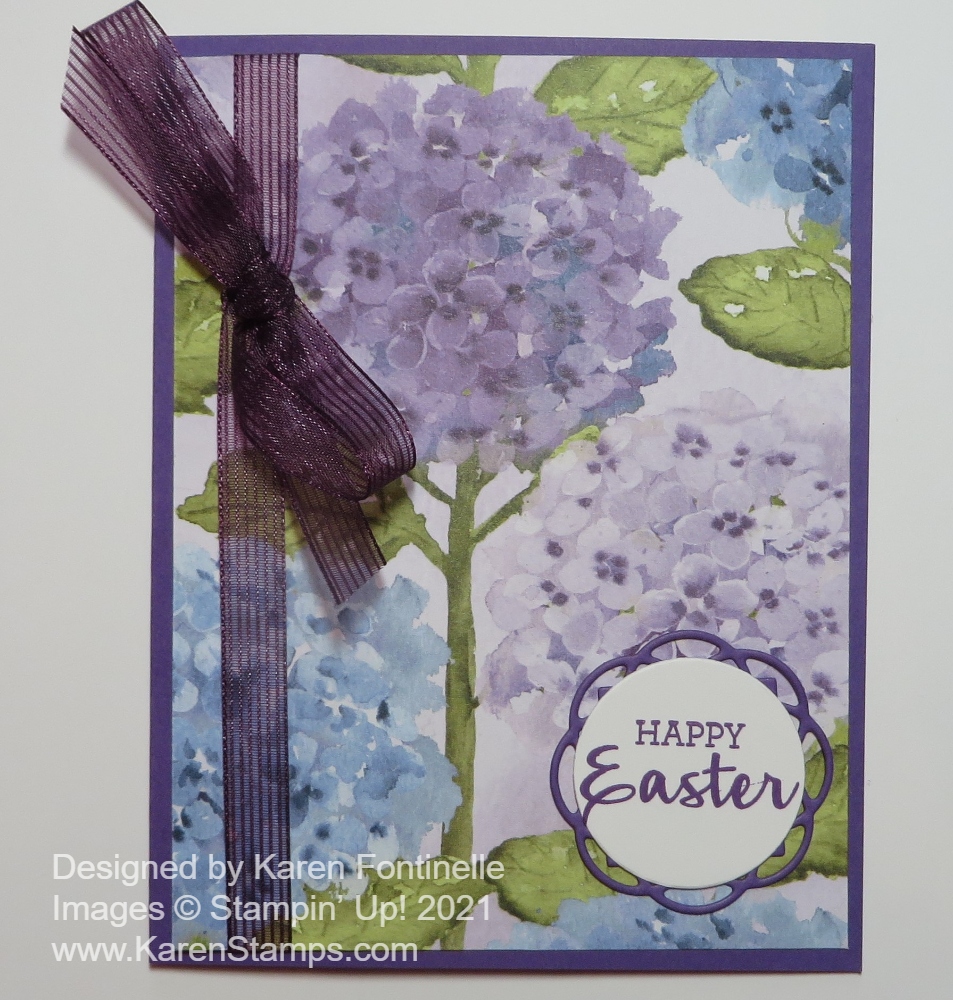
Easter is coming in just a few days, so if you wanted to have a few Easter cards to mail or hand out, this Hydrangea Hill Happy Easter Card is a super simple one to make! You can see it is just a basic, easy card design and one you can change up with different paper and greeting.
The Hydrangea Hill Designer Series Paper is a beautiful paper on it’s own so it works well with a simple card like this one. You wouldn’t want a lot of other embellishments or fancy greetings and die cuts that would take away from the beauty of the paper as it is.
The card base of Gorgeous Grape Cardstock is one of the coordinating colors with the Hydrangea Hill Paper. A lighter shade of purple would be Highland Heather. I just cut a piece of the designer paper to the usual layer size of 4″ x 5 1/4″. When you have a design like this, with the larger hydrangea flowers, you might want to try to strategically cut the paper to get the best view of the flowers. On this particular paper, you can see how there is one hydrangea that is kind of the focal point because all of it is on the card. You might not have a choice depending on if you have already cut up your paper for other projects, but I still had enough of this paper to cut a 4″ wide strip the length of the paper. Then I could go back in and cut out just the portion that showed off the flower well. You might end up with not one full flower on your card front but it would likely still be pretty because that would just be a different look of all the colors of the various flowers.
Before adhering the designer paper to the card front, I added some Blackberry Bliss 3/8″ Striped Ribbon. Actually, I originally thought it was Gorgeous Grape but it still matches just fine! The sheerness and the pretty stripes of this ribbon are beautiful on this card. I tied the bow on separately.
The greeting is from the Arrange A Wreath Stamp Set and is stamped in Gorgeous Grape. I cut it out with one of the Layering Circles Dies and layered it on a pretty decorative circle in the Painted Labels Dies. You can see that you could put a birthday greeting, anniversary, thinking of you, sympathy, even a wedding sentiment on this same card and it would be perfect. I could have added some pretty sequins or rhinestones around on the card as well. But as I said, the paper is so pretty, you almost don’t want to add much because you want the recipient to focus on the beautiful paper design.
This Hydrangea Hill Designer Series Paper is in the January-June 2021 Mini Catalog so is not in danger of retiring right away as the Annual Catalog products are. However, usually all designer paper retires eventually to bring in new, so enjoy your hydrangea paper while we have it! The Arrange a Wreath Stamp Set is retiring from the Annual Catalog along with the Wreath Dies by May 3.
Here is another basic card design using the Hydrangea Hill Designer Paper, with a less busy design, but you could change it out using this floral pattern.
Finish up your Easter cards and projects, but you can also make this Hydrangea Hill Happy Easter Card card for any other occasion.
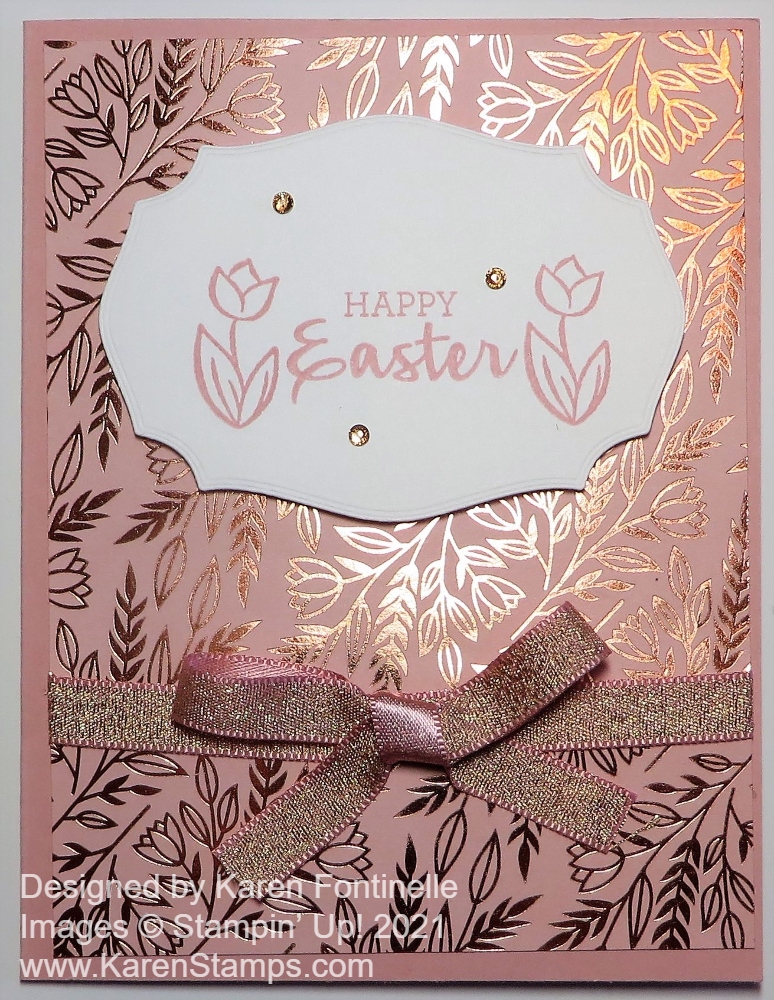
Can you use Valentine paper to make an Easter card? Sure, with the Love You Always Specialty Designer Series Paper with its beautiful foil floral design on three different colors of papers. Of course, it is not officially Valentine paper. It is just presented in the January – June 2021 Mini Catalog in “sort of” the Valentine section of the catalog, in the Love You Always Suite. It is actually beautiful paper that you can use for many occasions. Since two of the three sheets of paper are pink (Blushing Bride and Rococo Rose) and since the suite contains hearts, we perceive it as Valentine’s Day paper. But if it would have been added to a floral suite, we wouldn’t consider it Valentine paper! All this to say, you can use this Love You Always Paper to make almost any pretty cards that you want!
This easy Easter card starts with a Blushing Bride Cardstock card base. The layer is the Love You Always Paper in Blushing Bride. I wanted to keep the card simple so I didn’t try for anything fancy. I stamped the greeting with stamps from two different stamp sets. First, stamped the Easter greeting from the Arrange a Wreath Stamp Set (retiring from the Annual Catalog!) and then for a little extra, I remembered the tulip in the Springtime Joy Stamp Set which I thought would sort of match the designer paper. I stamped just one tulip but decided on one on each side of the greeting.
Next, to cut out the greeting, I looked through my dies and finally decided on a large one in the Tasteful Labels Dies. Then I tried various things to make a layer of Blushing Bride Cardstock under the greeting, usually by cutting another die in half so it would just show out to the sides of the greeting. Nothing seemed to add anything to the card.
I thought I would try ribbon, so I used the Blushing Bride 3/8″ Metallic Ribbon. I’ve been using this ribbon pretty often. It’s very pretty with its one satin side and one metallic side. I wrapped this ribbon horizontally around the designer paper and added a bow separately. This seemed to enhance the card without interfering with the large die-cut greeting.
The greeting is popped up with Stampin’ Dimensionals®. For a little bling, I added a few of the smallest Champagne Rhinestone Basic Jewels, which I really liked on this card!
If you were to copy this card, you would find it very quick and easy to make because you wouldn’t have to figure out which elements to use! So if you need a quick and easy Easter card, try this card design! You can change it up however you like, but at least you will have a quick and easy idea to go by if you need to make some Easter cards and get them in the mail today! This Love You Always Happy Easter Card is really a basic card design so you can make a card like this for Easter.
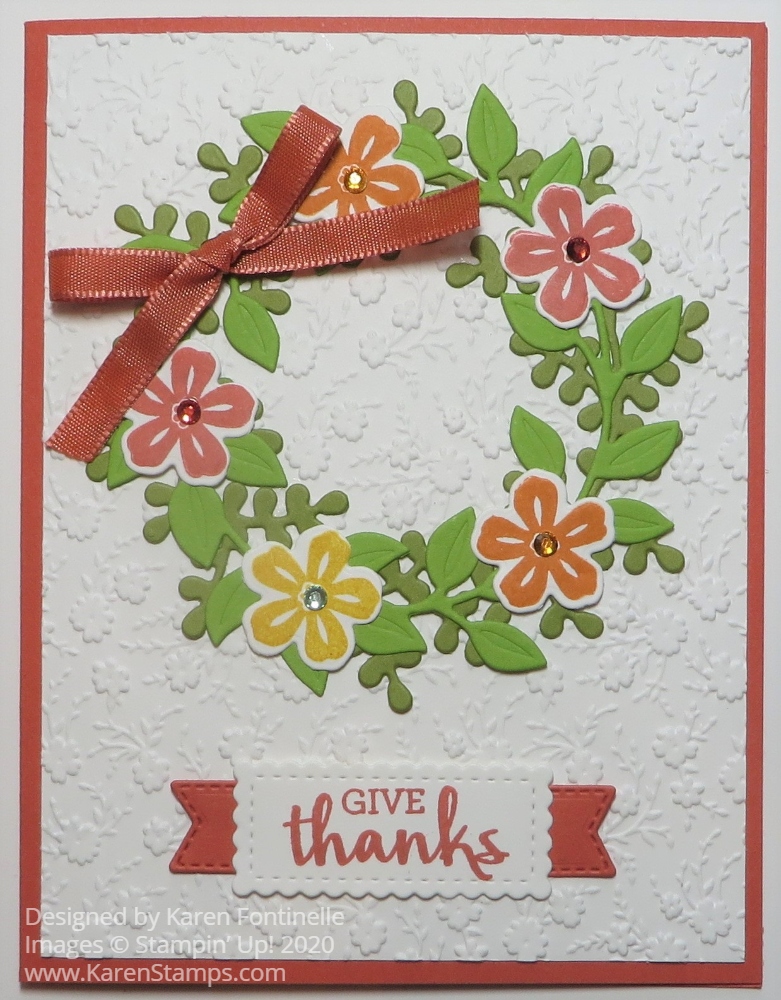
After seeing a lot of cute samples of wreath cards and receiving a birthday card from my friend using the wreath die cut, I decided I had to have this set! Finally, I got around to trying it out, and here is my fallish Arrange a Wreath Floral Wreath Give Thanks Card.
I didn’t even realize how much is included in both the Arrange a Wreath Stamp Set and Wreath Builder Dies. Of course, you can get the Arrange a Wreath Bundle and save 10% off the price of both. There are two different dies for wreaths, giving you two different looks or just two different wreaths to use separately. You get all kinds of different little items for decorating the wreaths to cover several occasions or just any occasion. The stamp set has five different greetings to use. So you are covered for just about anything with this Bundle!
For my card I chose Terracotta Tile for the card base. I seldom use these In Colors from last year but I thought Terracotta Tile might be a nice color for a fall card.
The Whisper White embossed layer I found on the table that I had made a while back just testing my new Stampin’ Cut & Emboss Machine with embossing folders! I thought it would work just fine as a background behind my wreath. The background is made with the Ornate Floral 3D Embossing Folder. It just adds a little bit of subtle prettiness I think!
I die cut both wreaths using two different greens – Granny Apple Green and Old Olive. I played around with which one looked better on top and finally settled on this combination. Then I stamped some flowers from the stamp set and cut them out with the dies. I chose Terracotta Tile, Pumpkin Pie, and Crushed Curry ink for the flowers. There is a die to cut a ribbon for the wreath but I decided to use a real ribbon, the Terracotta ribbon in the Ornate Garden Ribbon Combo Pack. For a little bit more embellishment I used some Holiday Rhinestones for each flower center.
That’s all there is to this card! Take a peek again at the card my friend sent to me for my birthday. It’s really pretty easy and simple, but lots to play with in this stamp set and dies as I said! You will get a lot of use out of this Bundle because you can use a card with a wreath for lots of occasions.
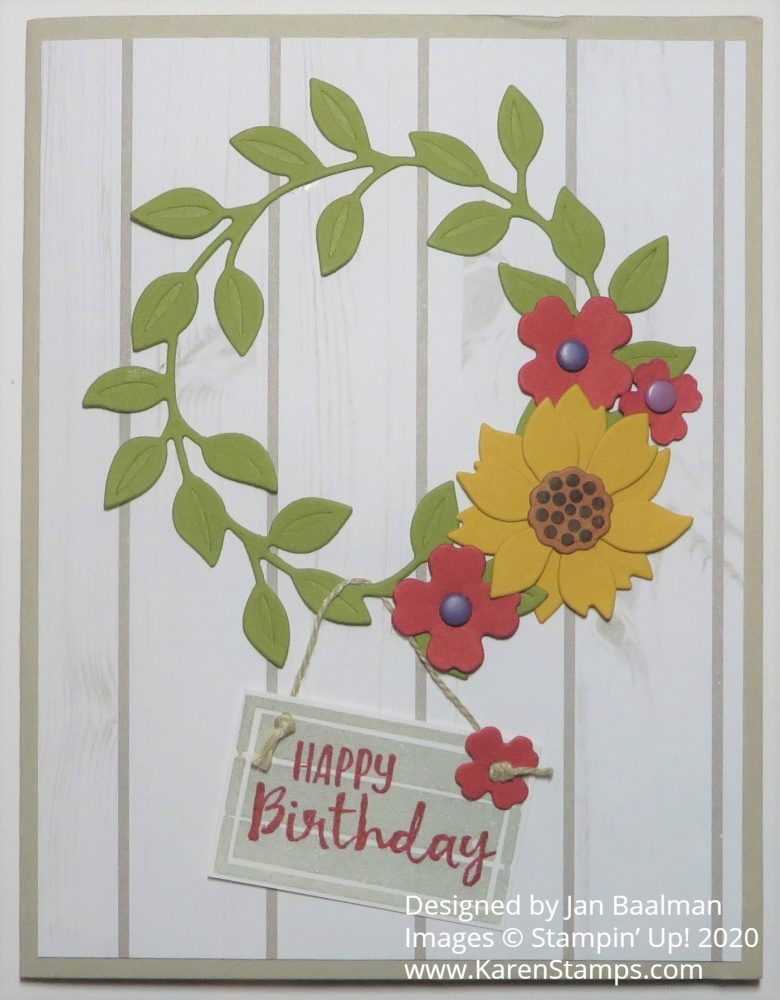
I got several very nice cards for my birthday a couple of weeks ago and this Arrange a Wreath Happy Birthday Card was made by my dear, long-time friend who got me into Stampin’ Up! in the first place!
I still remember stopping by her house when we were in town to go to a wedding shower and her taking just a few minutes to show me some projects she had made at a party by this company called Stampin’ Up! that I had never heard of. I barely knew anything about rubber stamping and had not been successful in my stamping attempts with stamps from the craft store, but her projects were so cute!! She had just received her Starter Kit but hadn’t opened it yet and we didn’t have time that day anyway. When I went back later in the summer for our friend’s wedding, I got to spend time stamping with her and fell in love with it! I didn’t really want to go anywhere else or do anything else, just stay at her house and stamp or look at the cards and things she had made. A few months later, I think, I signed up to be a Demonstrator.
This card was made with the Arrange a Wreath Stamp Set and Wreath Builder Dies. You can purchase both together in a Bundle and save 10%. I have seen some really cute cards made with this Bundle so I just might have to purchase it myself someday!
The card base is Sahara Sand with a layer of designer paper. You could choose something from the In Good Taste Designer Series Paper that might look similar. The wreath is die cut with the Wreath Builder Die out of Old Olive Cardstock. Then you can diecut some flowers from the set in any colors you like to decorate the wreath She used some enamel dots for the flower centers. I think the little Happy Birthday sign hanging from he wreath is so cute!
Obviously you can use this wreath for LOTS of occasions and all the seasons of the year, making this a very versatile stamp set. I love this card!
The latest reports about Hurricane Laura are that Houston is “out of the cone” so we should just have minimal effects, maybe some bands of rain and some gusty winds. The storm will go in around the Texas-Louisiana border which is certainly bad for those people. I just hope our power stays on! We’ve been lucky through many storms but you never know when your power might go out seemingly for no reason! We were making hurricane preparations anyway when it looked like it was coming directly here, so we have batteries and candles and lanterns and a ton of chocolate chip cookies I baked last night!
Take a look at the Arrange a Wreath Bundle for your next Stampin’ Up! order. You’ll find it in the Stampin’ Up! Annual Catalog on page 127 with the dies on page 173. Don’t forget to use your Bonus Coupons from July by August 31 when they expire.