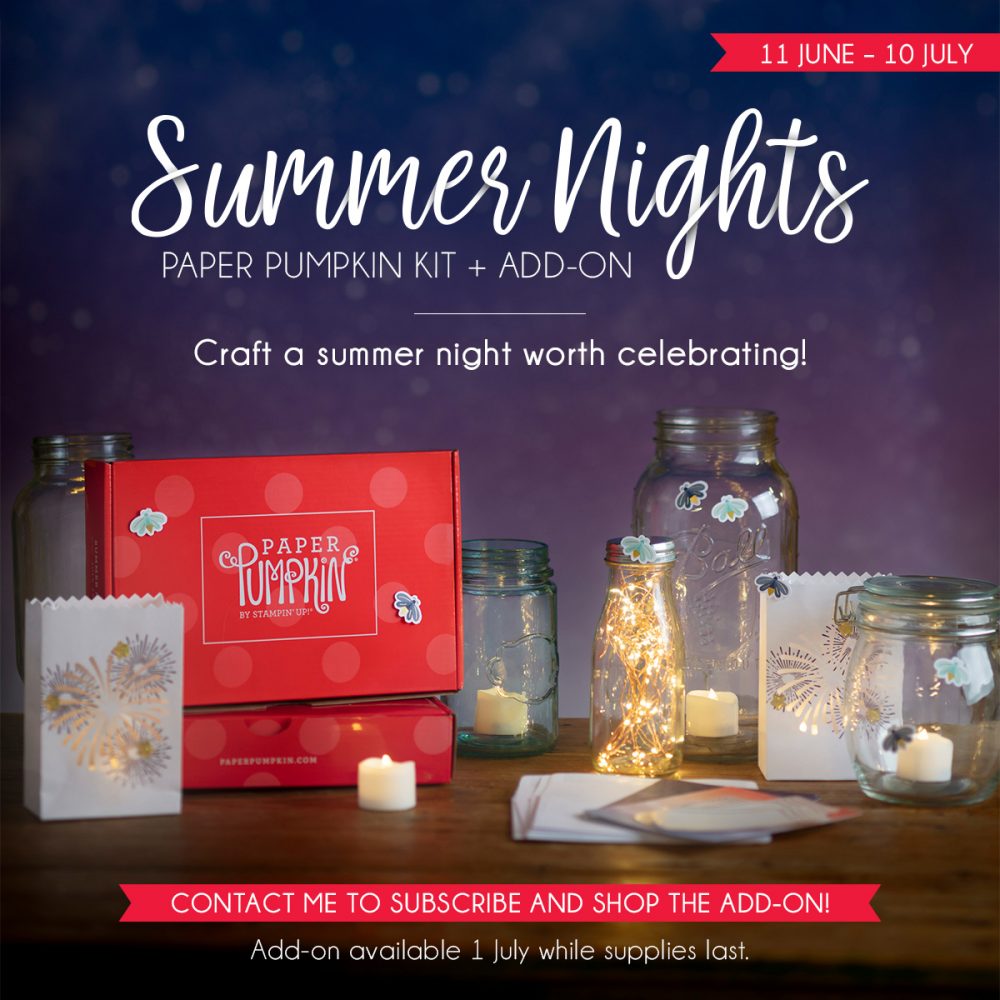
Time to start thinking about the next Paper Pumpkin Kit coming out mid-July! This one looks really interesting! It is definitely summertime where I live so this kit really fits right in!
Celebrate the magic of summer nights with the Summer Nights Paper Pumpkin Kit! In this exclusive fun-filled kit, you’ll unbox enough supplies to create nine postcard-style cards, coordinating envelopes, and die-cut tealight bags.
What’s even more spectacular about July’s kit is the add-on you can purchase along with it! The Summer Nights Add-On includes 24 card bases and envelopes in coordinating Summer Nights designs. This add-on is perfect for helping you expand the Summer Nights creative experience beyond the Paper Pumpkin kit. Between the add-on and the leftover supplies from your Summer Nights kit, you will be crafting a summer night worth celebrating all month long!
***Order the Summer Nights Add-On starting 1 July in the Stampin’ Up! Online Store, perhaps with your regular order.
While supplies last.
ABOUT THE JULY KIT
Kit contains enough supplies to create nine postcards and coordinating envelopes, as well as nine die-cut tealight bags.
Card size: 4” x 5-1/4” (10.2 x 13.3 cm) Envelope size: 4-1/2” x 5-3/4” (11.4 x 14.6 cm) Coordinating Colors: Blackberry Bliss, Calypso Coral, Costal Cabana, Night of Navy
The Paper Pumpkin kit does not require the add-on to create completed projects.
ABOUT THE SUMMER NIGHTS ADD-ON
Contains 24 preprinted card bases and coordinating envelopes.
Card size: 4-1/4″ x 5-1/2″ (10.8 x 14 cm) Envelope size: 4-1/2″ x 5-3/4″ (11.4 x 14.6 cm) The Summer Nights Add-On is not required to complete the Paper Pumpkin kit projects.
Note: During demonstrator product testing, we learned that the Summer Nights Add-On could make at least 20 additional cards when combined with the leftover pieces from the Summer Nights kit.
Don’t delay! Go ahead and get subscribed to Paper Pumpkin now so you won’t forget and so you can order the Add-On Kit in July. You must be a current subscriber in order to purchase the Add-On Kit.
***In case you are wondering, I don’t think the little fairy light strings are not included in the kit but you could use them perhaps in the bags or you can use flameless tea lights. Set the bags out on the porch or patio while you are sitting out in the evening watching fireflies!
This is my personal link below so you don’t have to put in my name. However, if you are working with another Demonstrator, then go to www.PaperPumpkin.com and find his or her name.
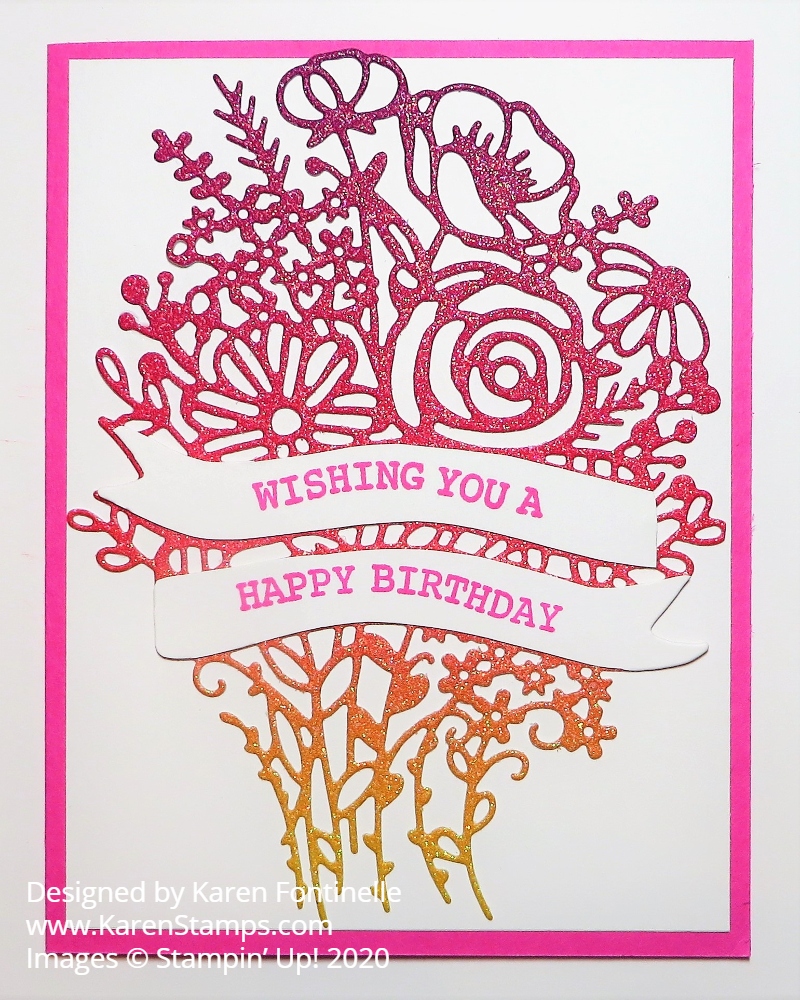
This card began as an experiment to see how this die worked and how it would work with the new glimmer paper and how the banners worked and finally I made this Rainbow Glimmer Banner Blooms Birthday Card!
This is the beautiful floral bouquet die in the Banner Blooms Dies. I thought it would be pretty to die cut the Rainbow Glimmer Paper, which it was! This glimmer paper is not only gorgeous with the ombre effect of multiple colors, but the glimmer doesn’t fall off! And it went through the die just fine! With the older thicker glimmer paper we have had, I often tore off the backing of the glimmer paper so it would be thinner to go through the die-cutting machine. This one worked fine without doing that. I only wish we could get all the colors of the Rainbow Glimmer Paper onto this one die! But you would have to have a 12″ long die!
I adhered the floral bouquet to Whisper White Cardstock with tiny little dots of Multipurpose Liquid Glue. You can do it if you are patient and really use the smallest dots of glue you can imagine. And work quickly! Then make sure to place it on the Whisper White cardstock in the exact spot you want it as best you can so you don’t get the glue where you don’t want it.
I was puzzled by how to make the greeting banners on the bouquet until I looked back at the die and saw that it would cut out the stamped banner. Just stamp your greeting in the Hand-Drawn Blooms Stamp Set and then place the bouquet die right over it, lining up the words inside the banner areas. You don’t need to stamp the greeting on a full piece of paper, just the area with the greeting because you are going to cut it apart. Using your scissors, just cut off the excess away from the banner greetings. Then glue the banners onto the die-cut bouquet on your card! The stamp will have both lines of the greeting, like this one I used on this card, properly placed to fit the die.
That’s all there is to it! When I make a similar card again, I think I will try to jazz it up a little bit. This card is pretty but in my opinion, I think it needs a little something more but not sure what yet! Just play with your new stamps and accessories and see what you come up with.
If you want both the stamp set and the dies, purchase the Hand-Drawn Blooms Bundle and save 10%. This will be an interesting stamp set and dies to play with, something a little different! A beautiful wedding card could be made with this set, congratulations for an engagement or graduation, or a birthday card, to name a few, like my Rainbow Glimmer Banner Blooms Birthday Card.
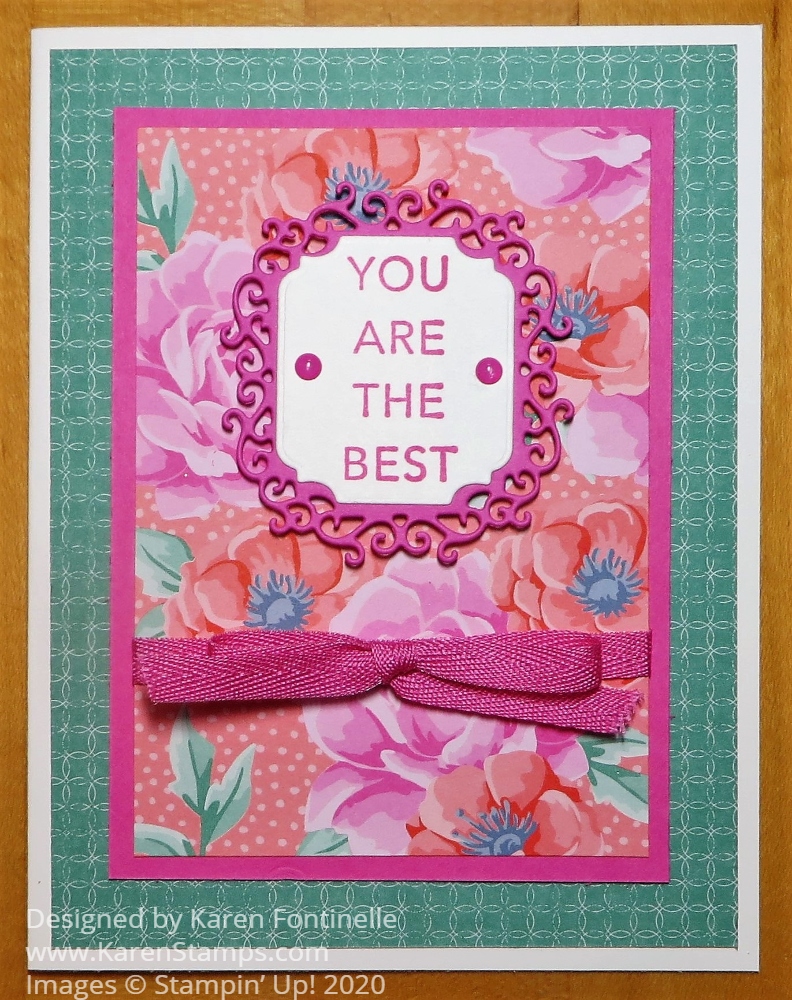
It’s possible to go from not liking a card so much to liking it a lot as I did with this Flowers For Every Season You Are The Best Card. Sometimes you just have to keep playing with making a card and sometimes the paper just wins you over after awhile!
This card features the Flowers For Every Season 6″ x 6″ Designer Series Paper. It has beautiful floral designs plus generic designs on the backs of some of the floral sheets so you have a lot to choose from. I wasn’t too crazy about the floral design on this card at first but once I layered it on a piece of cardstock and tied the ribbon and bow around it, I really liked it!
The card base is Whisper White. You can always use the regular Whisper White Cardstock, but if you would like a heavier card base, try the Whisper White Thick Cardstock. I added this Just Jade designer paper layer on the card base. The focal point, the pinkish floral sheet, is cut at 3″ x 4 1/4″ and the Magenta Madness In Color layer underneath it at 3 1/4″ x 4 1/2″. Before adhering the floral paper, I adhered a piece of the Magenta Madness 1/4″ In Color Ribbon around it. I tied the bow separately and adhered to the ribbon withMini Glue Dots.
For the greeting, I stamped “You Are The Best” from the Tasteful Touches Stamp Set. I used the Ornate Frames Dies to cut out the greeting and also the fancy frame on which to layer it. This is popped up on Stampin’ Dimensionals®. And I couldn’t resist using two of the Magenta Madness In Color Enamel Dots.
This card has the center layers a smaller size than usual so you have wider margins and can see more of the Just Jade paper underneath. If you like florals, you have to get the Flowers For Every Season 6″ x 6″ Designer Paper and make all kinds of pretty cards!
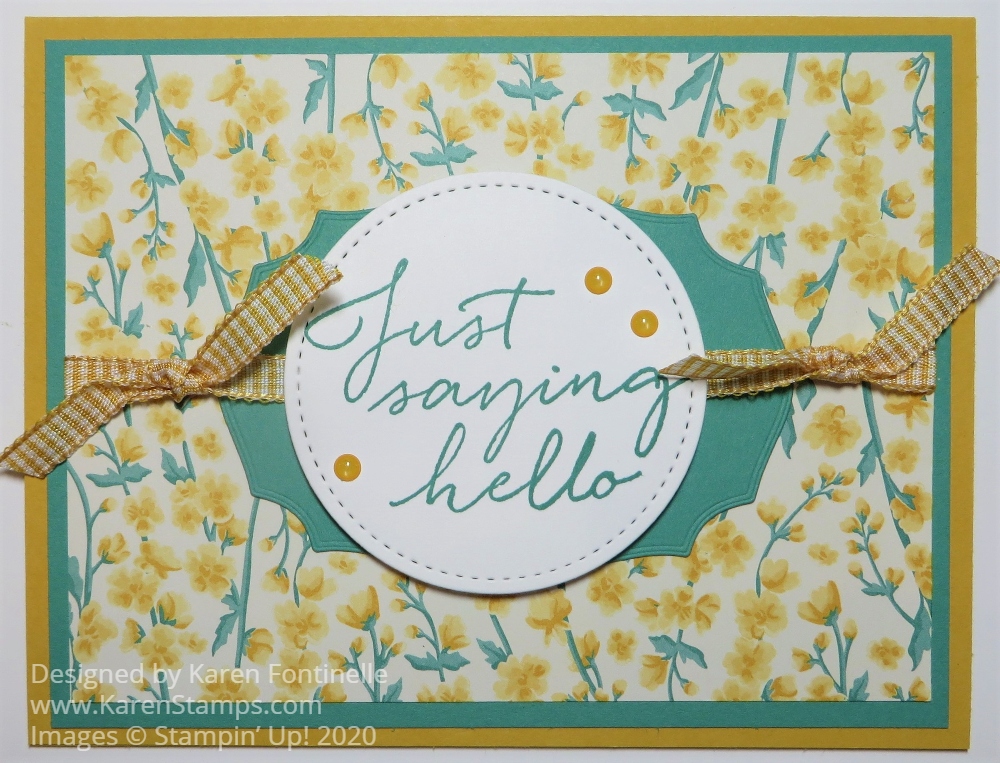
This Flowers For Every Season Hello Card is a pretty basic card design and simple to make. I would also call it a “happy” card because of the pretty colors! If you could see the floral design on the other side of this paper you would call that “happy” also! It’s often difficult to decide which side of the pretty designer paper you want to use!
I’m using two of the new In Colors on this card – Bumblebee and Just Jade. I’m not that crazy about green as a color, but when I opened the package of assorted In Color cardstock, I was really struck by how pretty the Just Jade Cardstock was! I thought using the Just Jade behind the designer paper would help it stand out.
Before glueing down the designer paper layer, I adhered a piece of the new 1/4″ Bumblebee Gingham Trim across the middle. Then I slipped that Just Jade die-cut underneath the ribbon with the greeting popped up on Dimensionals over the center. I also tied a little ribbon knot on each side of the greeting.
For just a final touch, I added three of the little Bumblebee dots in the 2020 In Color Enamel Dots. These dots were so popular they are out of stock right now but should be back in about two weeks. Get some because the colors are so pretty!
I think I am liking the new 2020-2022 In Colors this year! I ordered the 2020-2022 In Color 8 1/2″ x 11″ Assortment as well as the 12″ x 12″ assortment. That way I have some of all the colors and if I like certain colors a lot, then I can order the packages of single colors.
Have fun checking out all the new products in the Stampin’ Up! Catalog!
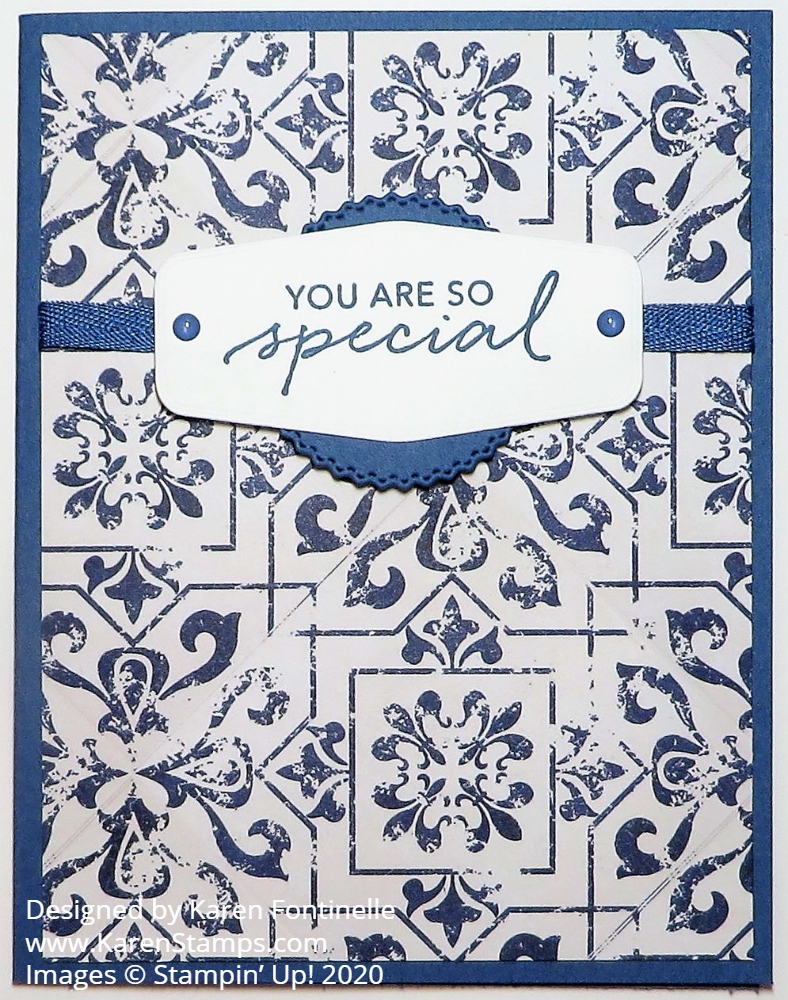
Here is a very simple card that I made with a new color, new designer paper, new stamp set, new die, and new ribbon! Oh, and new enamel dots! However, I did choose the wrong coordinating color, but as you can see, I think it is a close enough match no one will notice! I didn’t!
This blue pattern of paper comes in the In Good Taste package, a really big package of designer paper of photographic images of different textures. And I mean realistic looking images! As I was cutting up this paper, I thought there was a wrinkle or something in the paper, but its just part of the look of the paper. And as I was applying adhesive to the backside of the paper, which is a woodgrain, there was a line in the pattern that I had to touch to make sure it wasn’t sticking up or that something hadn’t gotten on the paper!
The In Good Taste Designer Series Paper has 24 sheets of paper, 2 each of 12 designs. You get images of brick, wood, tile, stone, even ones that look like fabric. Honestly, when I first saw it in the catalog I wasn’t interested, but then I changed my mind when I saw cards other Demonstrators were making and had to have it. I think you will find it will create a lot of texture and interest to use in your cardmaking and other projects.
To make this card, I used a card base of one of the new In Colors, Misty Moonlight to coordinate, I thought. As I found out later, when I looked on the back of the In Good Taste package, the blue coordinating color is Night of Navy. The only thing I noticed was when I stamped a flower from the Tasteful Touches Stamp Set in Misty Moonlight to put on this card somewhere, somehow I didn’t think it looked quite right and didn’t use it. Maybe it was just the card design or maybe it was the color.
I liked the look of this blue pattern in the designer paper and adhered a bit of Misty Moonlight Ribbon around the card before adhering. I realized I usually put the greeting near the bottom of the card, but this time I moved it up near the top. The greeting is stamped from the Tasteful Touches Stamp Set and die cut with the Tasteful Labels Dies. There were several choices there to use! I thought maybe there should be a layer behind the Whisper White greeting and then I noticed the round die-cut in the same Tasteful Labels Dies and used that for just that little bit of color behind the greeting.
And for just a little bit of embellishment that seemed to really finish off the card, I used two of the Misty Moonlight In Color Enamel Dots on the greeting.
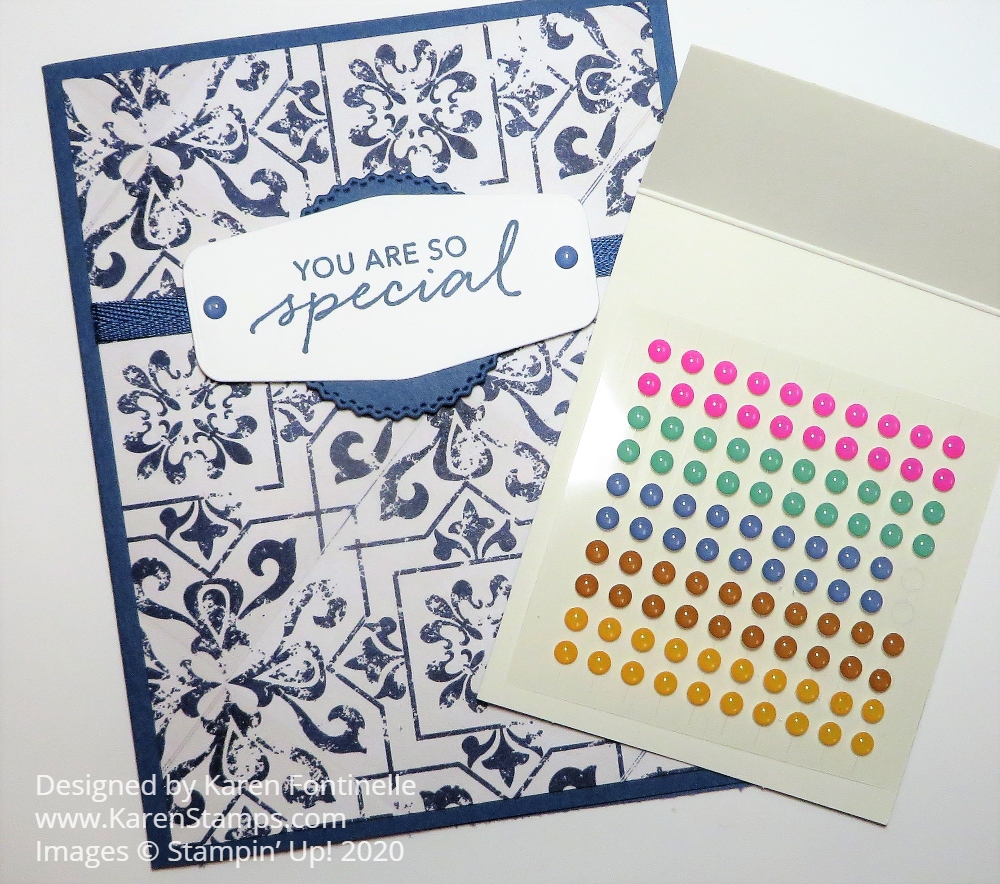
When I opened the package of those enamel dots, I just thought the colors were stunning! Maybe it is the bright Magenta Madness! I took a photo with the dots next to the card although the photo doesn’t quite do them justice. The dots are currently unavailable, however, as I write this.
As you look through the new Stampin’ Up! Catalog, check out the In Good Taste Designer Series Paper. You might be surprised that it appeals to you as it did to me with this In Good Taste You Are So Special Card.
You have today and tomorrow to sign up for this fun June Kit of Paper Pumpkin! The deadline is always the 10th of any month, so tomorrow, June 10th, is the last day to subscribe and get the June Paper Pumpkin Kit mid-June in the yellow box! Get signed up TODAY!
What is so special about this Paper Pumpkin Kit?
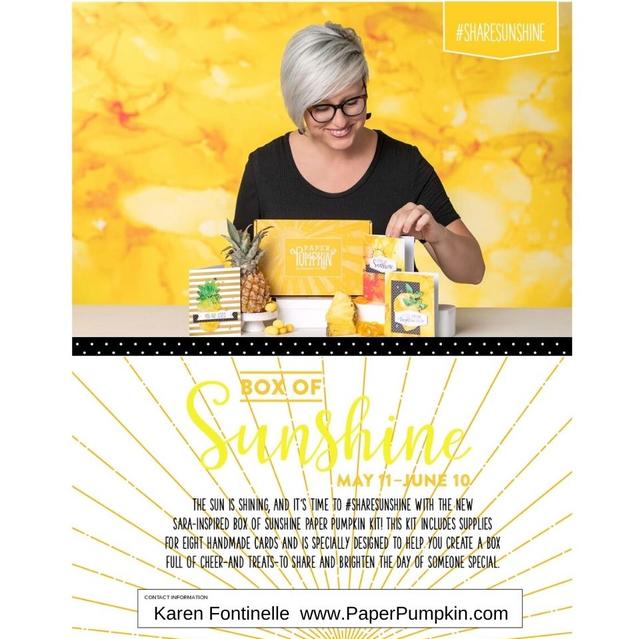
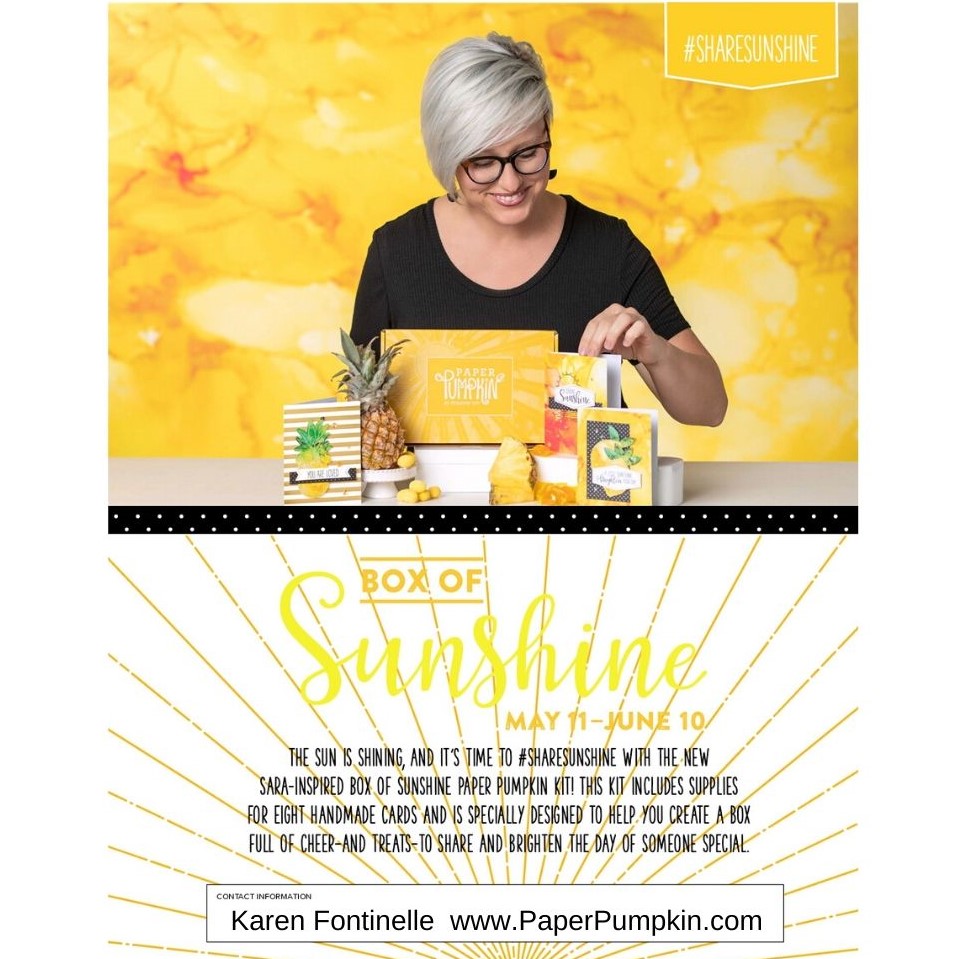
This exclusive Sara-inspired Paper Pumpkin kit is here to help you #sharesunshine. It includes supplies for eight handmade cards and is specially designed to help you create a box full of cheer. Once you’ve made all the cards, use any leftover pieces to decorate the box. Fill it with yellow or bright-colored goodies, add the included adhesive label, address it to someone special, and brighten their life with a little sunshine!
Some suggestions to put in your box of sunshine when you are ready to pass it on to someone are candy (of course!), little yellow toys, balloons, sticky notes, little notebook, pen, pencil, yellow stickers, lip balm, hand lotion….in fact, you can do a search on Amazon for “yellow” and at least get some ideas.
ABOUT THE JUNE KIT
The Box of Sunshine Kit contains supplies for 8 cards and envelopes (2 cards of 4 designs): Card size: 4-1/4″ x 5-1/2″ Envelope size: 4-1/2″ x 5-3/4″ Coordinating Colors: Basic Black, Bumblebee, Crushed Curry, Poppy Parade, Shaded Spruce, White, and Gold
Box of Sunshine Information
This kit includes extra pieces and stickers (including a sticker label) to help you create cards AND a Box of Sunshine filled with treats and goodies to send to a friend. (Treats not included.)
You can also add a Prepaid Subscription to your Stampin’ Up! order of one month or several months or even give this as a gift. You will receive an email with directions for setting up your account and how to input the code showing you have a Prepaid Subscription. Be sure to set this all up right away by June 10th so you don’t miss out!
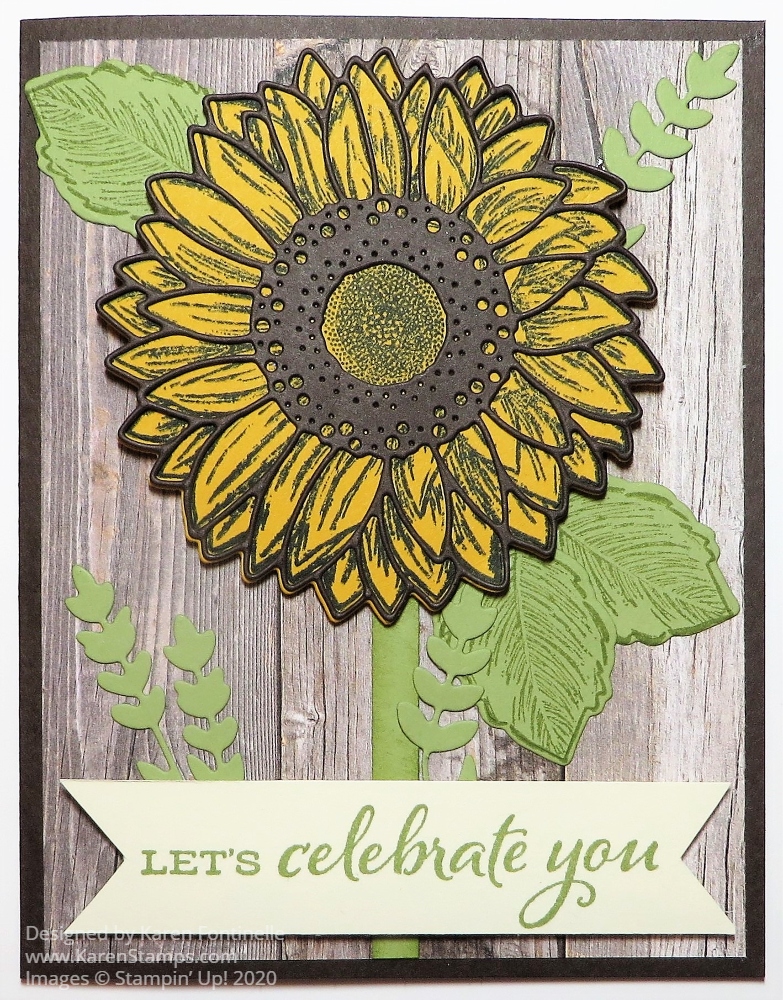
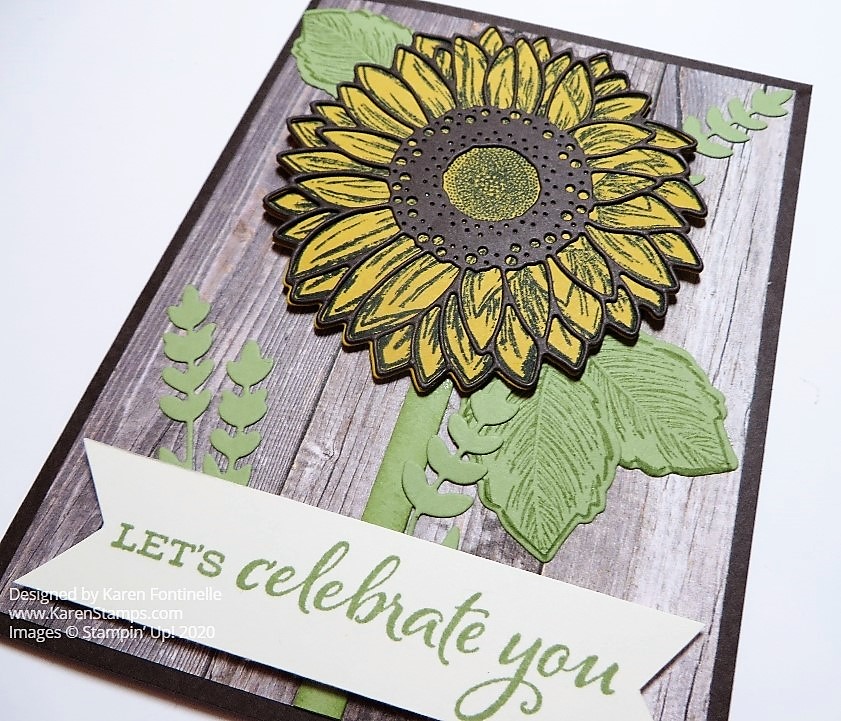
It was time to play with the Celebrate Sunflowers Stamp Set and matching dies in making this card, Celebrate Sunflowers Celebrate You. You could send this card with this greeting to someone who was celebrating something big or small or just someone who needed a little perking up!
I knew I wanted to use the new In Good Taste Designer Series Paper along with the sunflower. You won’t believe this designer paper! It is photographic images of wood, tile, stone and other elements. Some look like carpet or fabric! And you get 24 sheets in the package, 2 sheets of 12 different double-sided designs! This wood sheet that I used on this card looks like a real piece of wood up close! It’s great!
To make the large sunflower in the Celebrate Sunflowers Stamp Set, I stamped the flower on Crushed Curry Cardstock with Memento Ink. If you stamp on the color of cardstock you like, then you don’t have to color the stamped image.
I die cut the sunflower outline in Early Espresso to match the card base of Early Espresso. The leaves are stamped in Pear Pizzazz and die cut.
The greeting comes in the stamp set. Of course, you could change it out with almost anything or just leave it off the card. The card design will stand on its own.
The Celebrate Sunflowers Stamp Set and dies are just a couple of the amazing new products in the new Stampin’ Up! Annual Catalog! Get your favorites while you can!
Remember, with a $150 order you earn Stampin’ Rewards, and during June, a $250 or more order earns an EXTRA $25 in Stampin’ Rewards!!
Sit down with Shelli Gardner and Sara Douglass (mother and daughter, if you are new!) and go through the new Stampin’ Up! Annual Catalog with them!
Watch these videos about a few of the new products you will find in the catalog!
Most of these are very short but give you an idea of the new product and a close-up view!
So many great new products to absorb as you look through the new Stampin’ Up! Catalog!
If you want to be a Stampin’ Up! customer but do not have a Demonstrator to get a catalog to you, please send me your contact information at Karen@Karenstamps.com and I can send you a complimentary catalog if you are interested.
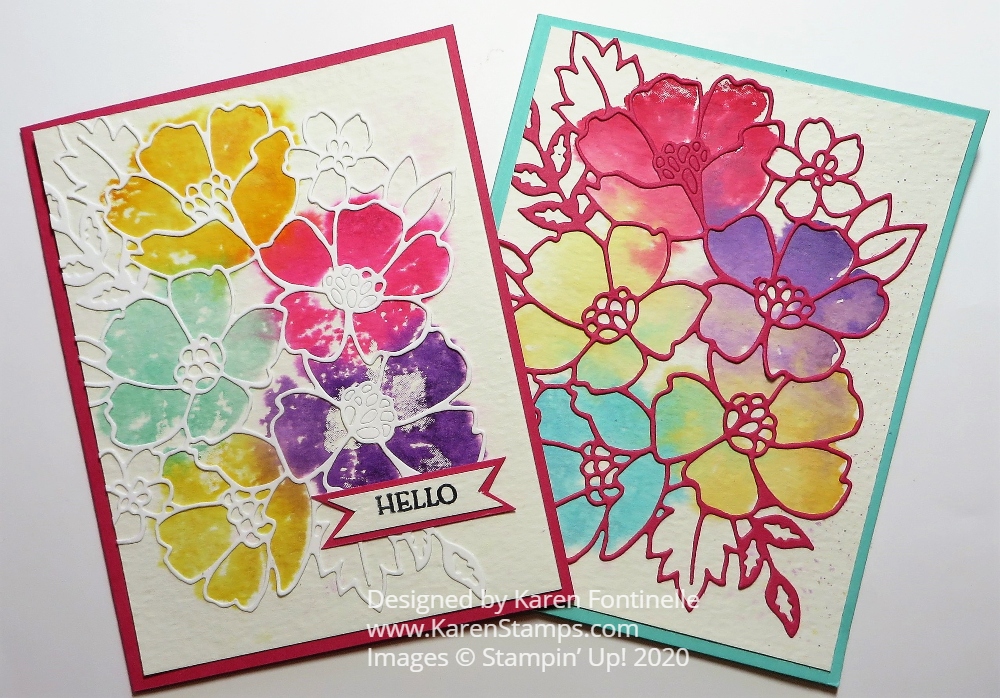
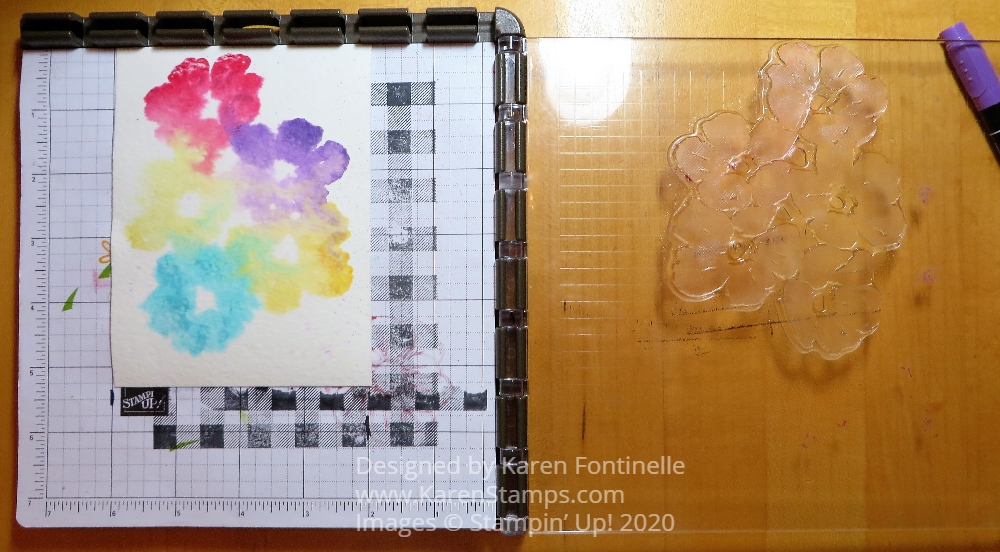
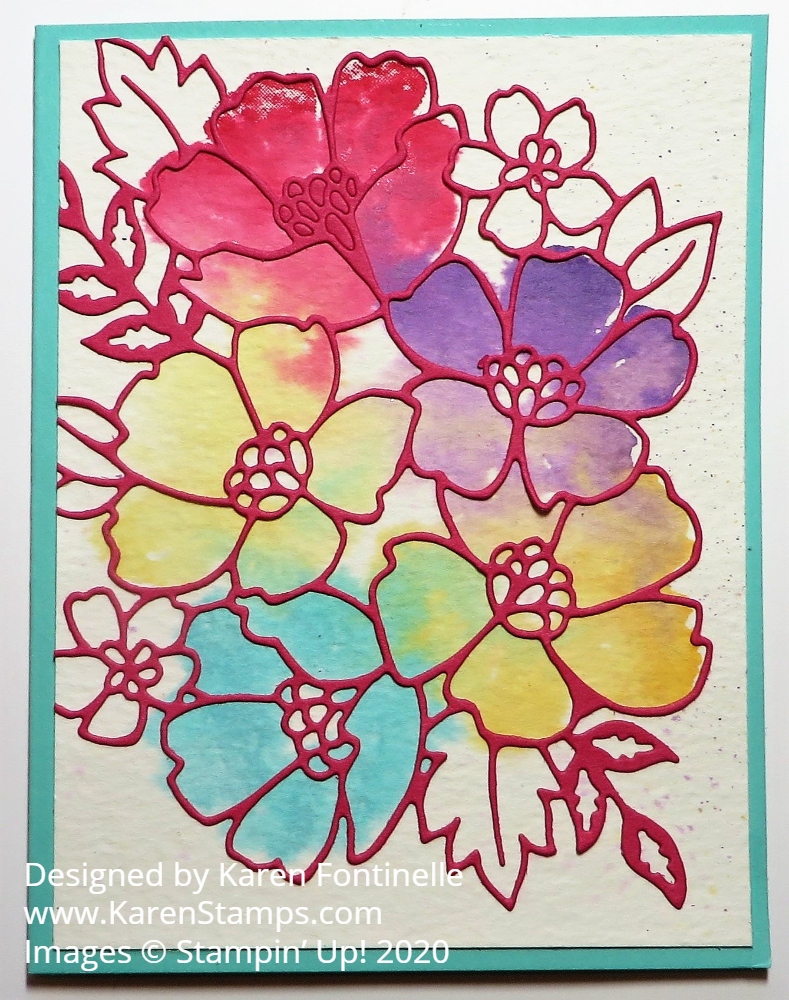
I thought I would try some watercoloring with this stamp set and dies and ended up with these Blossoms In Bloom Watercolor Stamping Cards. I’m calling it watercoloring stamping. I used watercolor paper, moistened it and also spritzed water on the stamp before stamping.
I used my Stamparatus to stamp since the Blossoms in Bloom stamp is so large. I used my Aqua Painter (now Water Painters in the new catalog) to moisten the Fluid 100 Watercolor Paper and I also spritzed the stamp with water after coloring with Stampin’ Write Markers. On the other card, I applied the ink to each flower with Sponge Daubers. When I stamped with the Stamparatus on the wet watercolor paper with the wet stamp, it looked like a mess! But all I had to do was dab with a paper towel to pick up the excess water and it was fine! I really just wanted a bit of color underneath the die cut I would later put on.
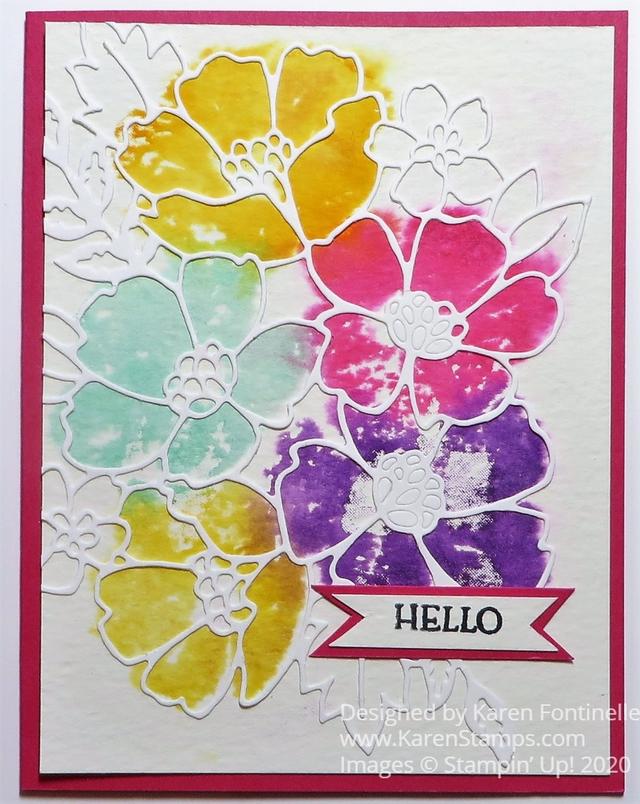
After letting the watercolor paper dry, I adhered the thin Whisper White die cut of the Many Layered Blossoms Dies with teeny tiny drops of Multipurpose Liquid Glue. Then this piece was layered on the card front of Melon Mambo Cardstock.
The die cut didn’t quite cut all of the flower centers but I don’t think anyone will mind. I could have even colored them perhaps with yellow to make them look like they were supposed to be there. I like how I didn’t have to place the die cut perfectly, if the color extended beyond, it looked fine because it was watercolor.
And then I did another one to see if I could get it less watery, but I didn’t, although using a Melon Mambo die cut on Coastal Cabana Cardstock gives this card a different look anyway.
I like the way some of the colors bled into each other which gives it a good watercolor look. I even accidentally got some splatters on the watercolor paper.
If you’d like to watercolor, but don’t know “how”, just use this stamping method on watercolor paper, spritzing before or after. Just experiment! There are lots of ways to do this. If you don’t have official watercolor paper, Shimmery White Cardstock is the next best thing.
Try your hand at some watercoloring with whatever you have! And you can get some other ideas of how to use the Many Layered Dies on these cards in THIS POST.
I think you will find these Blossoms In Bloom Watercolor Stamping Cards fun to make!
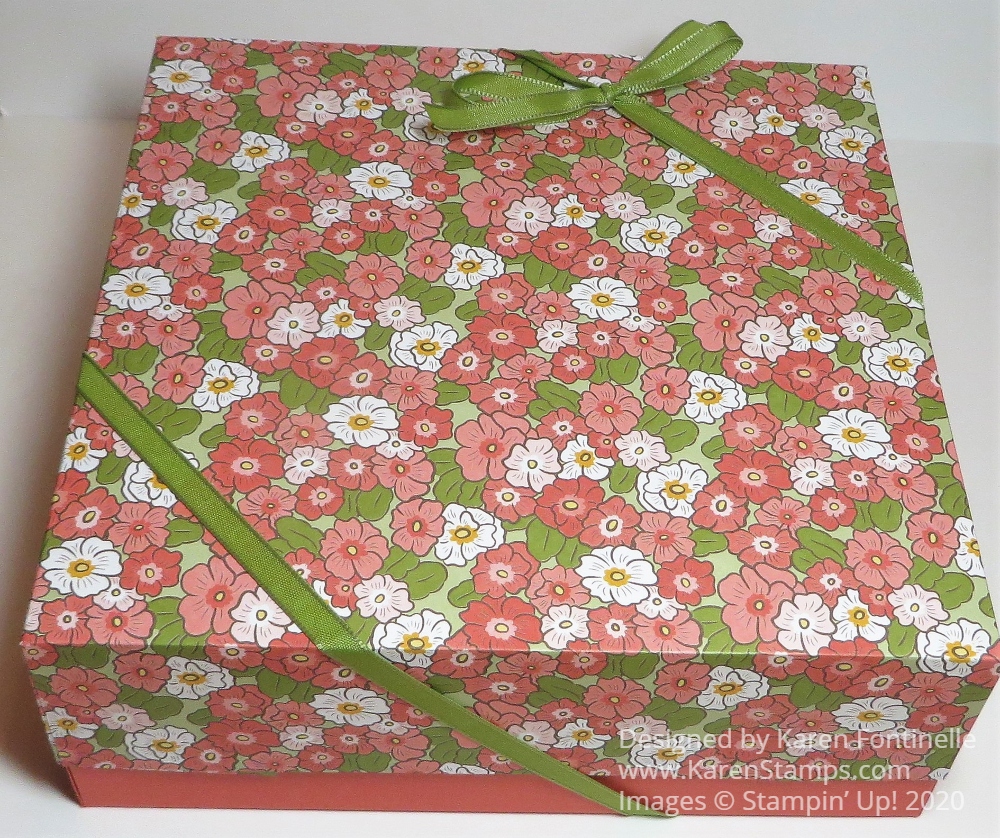
It’s time to give yourself a present, like the paper and ribbon to make this Ornate Garden Handmade Gift Box!
Order new products from the brand new Stampin’ Up! Catalog!
That’s right! The new Stampin’ Up! 2020-21 Catalog went live yesterday and there was certainly a flurry of orders, judging from a few glitches on the website, which usually happens on such an exciting day! Customers and Demonstrators were trying to get their orders in as quickly as possible so they could get their hands on the new products as quickly as possible!
If you have a large order, keep in mind these amounts:
A $150 or higher order of merchandise earns 10% or more in Hostess Rewards (see page 187).
June 3-30 a $250 order earns an EXTRA $25 in Hostess Rewards!!
Remember, there are Bundles in the new catalog that will save you 10% if you buy the two items together. Make sure you are putting in the correct number for the Bundle, not just the stamp set. I think it is a little trickier to spot the Bundle on the catalog pages but just look!
There are now a few Collections, such as the Ornate Garden Suite Collection on page 64 or the World of Good Suite Collection on page 24. If you want EVERYTHING that goes together….the stamp set, the dies, the paper, the ribbon, the embellishments…you can just put in that one number for the Collection. You will still get the 10% discount if there is a Bundle involved, but if you don’t like the ribbon or don’t want the embellishments, then just order the individual items you want.
As you look through the back of the catalog, with the tools and accessories, you may notice that the listings are a little confusing. There are numbers on the product photo that you then need to match up with the number of the listing and description of the product. I found that particularly confusing on the page with rhinestones, sequins, dots, etc. You can’t just look across and see what is what, you have to match the numbers.
Watch for the tiny little red “N” symbol on the New products.
Read the “fine print” in the product descriptions to see if there are dies that coordinate and on what page to find them. There are a couple pages of Bundles in the back of the catalog with stamp sets and dies and then there are other pages with just dies, but they aren’t duplicated so you have to look in both places to see all the dies available.
Check out the new adhesives! Snail Adhesive is gone and replaced with the new Stampin’ Seal. Be sure to buy some refills when you order. The other new adhesive is the Stampin’ Seal+ (plus) which is stronger and replaces the old Fast Fuse we had once upon a time ago. And then we still have our other adhesives like the Multipurpose Liquid Glue.
The new Stampin’ Cut & Emboss Machines on pages 170-1 and the Tools that go with them on page 172 are not available YET and we have no date when they will be available. They sure look cute and I hope they hurry up!
So back to my Ornate Garden Handmade Gift Box! After you treat yourself to some “gifts” from the new catalog, maybe you can make a box like this to store some adhesives in or ribbons or whatever.
I made this gift box just like I made THIS ONE recently on my blog.
To begin making the bottom of the box, you will cut the tiniest sliver off the side of two sides that share a common corner. To determine a “sliver” you can just slide your paper the teeny tiniest bit past the cutting track. It might not be even 1 1/16″ wide but you could use that measurement if you want. This makes the bottom just the tiniest bit smaller so that the box lid will fit easily over it.
Next, score at 2 1/2″ on all four sides of the box. Crease well with a Bone Folder to make the folds crisp, like a box should be. Then cut the flaps on opposite sides of the paper on the score lines. If you want, cut a small wedge off all four corners just to make the box bottom a little neater when the sides all come together.
After creasing all the folds really well, assemble the box and use a strong glue to assemble. You could use Tear & Tape but I like to use Multipurpose Liquid Glue to give me that extra few seconds to make sure everything is lined up perfectly.
For the top of the box, I used a sheet of the Ornate Garden Designer Series Paper but you could use cardstock too. The top piece is 10 1/2″ square. Make the top in the same way (except don’t cut off a sliver!). Score 1 3/4″ all around and cut the flaps in the same way. Assemble with glue and put the lid on the box! This allows part of the bottom of the box to show, if that’s what you want. The inside of the lid will also have a lovely paper pattern from the other side of the paper! Usually it is difficult to decide which side of the paper to use! This way both sides are seen!
You can watch a video by Donna Griffith from a few years ago about how to make these boxes and how to resize them to what you want!
I hope you are enjoying the new Stampin’ Up! Catalog! I always say to treat yourself once in awhile and I think this catalog has come out at the perfect time when we need to relax and use our stamping as therapy at times! Just paging through the catalog and getting ideas from the samples is relaxing and fun!
If you plan to be a Stampin’ Up! customer but don’t have a Demonstrator to assist you, I would be happy to be yours and send you a complimentary catalog if you would like one. Just send me your contact information.
This Love What You Do Floral Card is one using a stamp set that I hate to see retire because I like the phrase in it so much as all the other greetings…..and the images!
I think all of us stampers really like that “love what you do” sentiment because we all DO love what we do when it comes to stamping and cardmaking as well as all our other projects.
And if you really do love stamping and creating a lot, maybe you would like sharing it as a business with other people! If you sign up to be a Stampin’ Up! Demonstrator, you can take advantage of this special promotion from June 3 – 30! If you sign up to be a Demonstrator between June 3 – 30, you get to choose a Bundle from the new catalog FREE in your Starter Kit!
Here are the details:
Promotion Dates: June 3–30, 2020
New demonstrators who submit their Independent Demonstrator Agreement (IDA) before June 3 or after June 30 will not be eligible for this promotion.
When they purchase their Starter Kit, new recruits can select ONE stamp and punch bundle (p. 168–169) or ONE stamp and die bundle (p. 173-179) from the 2020–2021 Annual Catalog—in addition to their regular Starter Kit.
The cost of the Starter Kit is $99 and you choose $125 worth of products! Free shipping! Plus you will add that Bundle in there! And as soon as you get your Demonstrator number in an email, you can start planning your stamping business!
After you look at that page, if you are interested and have any questions, just ask me!
Now about my card! The card base is Flirty Flamingo with a layer of Whisper White. As I’ve been doing frequently recently, I stamped the flowers from the Love What You Do Stamp Set (retired) randomly on the cardstock in Memento Ink and then colored in withStampin’ Blends.
The greeting is stamped in Flirty Flamingo Ink and then die cut with a frame from the Painted Labels Dies. I also die cut the little frilly piece to go underneath the label. I added a few little pearl embellishments that are retired on the label. The ribbon is Old Olive in the Ornate Garden Ribbon Combo Pack.
Simple card to make but if you “love what you do” then join the fun at Stampin’ Up!
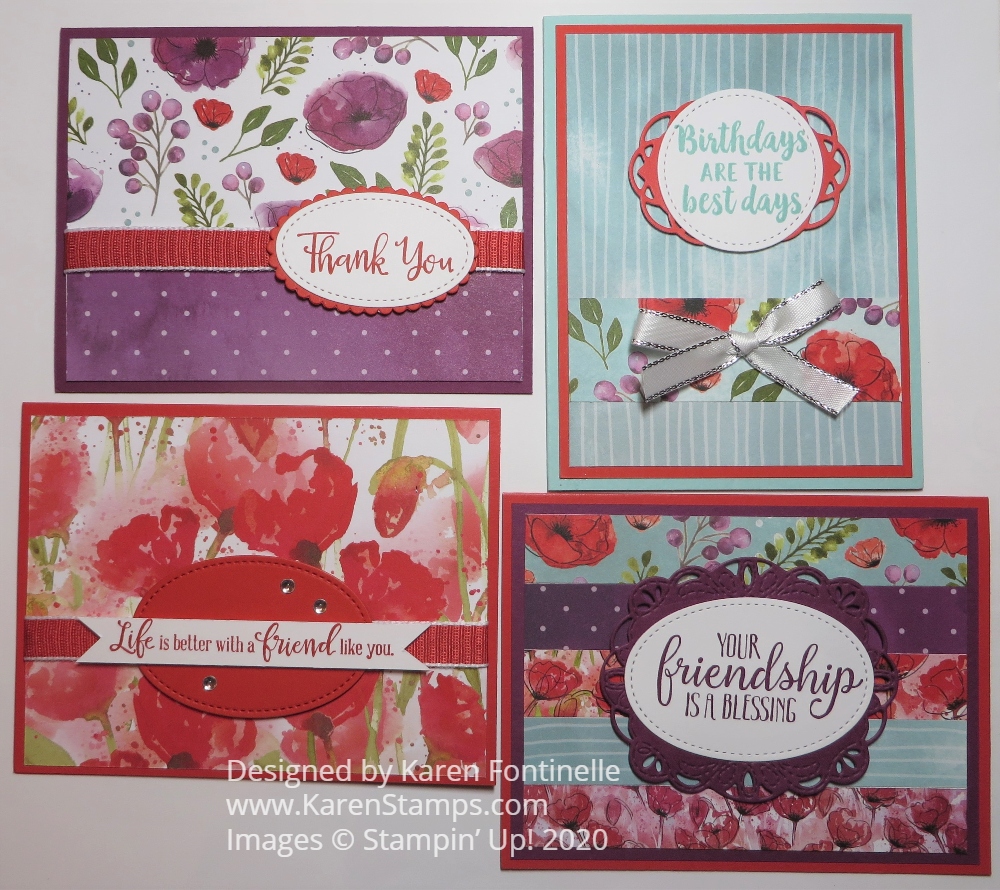
There are even Poppies Bundles available, and unlike most Bundles that are retiring with the current catalog, these Poppies Bundles are carried over into the new catalog! That is good news so you can still save 10% on stamp sets and dies together. There is the Painted Poppies Bundle and the Peaceful Moments Bundle. Order them now or later if you don’t already own them! I would recommend ordering them with the new catalog actually.
Today and tomorrow, June 1 and 2, are the last two days to order any retiring Last-Chance products from the current catalog.
The new catalog begins around Noon (Mountain Time) on Wednesday, June 3. Keep in mind the website will probably be quite busy that day so if you have trouble getting in just keep trying.
Some new products might not be available due to the problems of shipping and keeping inventory supplied so there may be backorders or even products that will be unorderable perhaps. However, I recommend ordering things that are your first choices as soon as you can and try to beat the backorders! I always recommend going ahead and ordering something that is backordered if you want it because Stampin’ Up! will send that item out to you as soon as they are resupplied and that will be faster than waiting to order it for the first time yourself.
***There will be a special for placing a $250 order or more during June in the NEW CATALOG, June 3-30. Orders of at least $250 in merchandise will receive an EXTRA $25 in Stampin’ Rewards! Prepaid Paper Pumpkin subscriptions can count toward that amount if you need something extra to reach $250.
Hopefully my regular customers have received their new catalogs that I mailed out to them so you can be making out your Wish List of new products that you would like! If you are new to Stampin’ Up! and looking for a Demonstrator to assist you and are interested in Stampin’ Up! products, I would be happy to send you a complimentary catalog if you send me your contact information.
So today and tomorrow check the Last-Chance Products and Clearance Rack and see what you need to order today and tomorrow before the current catalog ends at midnight (MT) on June 2.
You may think it is early to subscribe or reactivate your account in order to receive the June 2020 Paper Pumpkin Kit, the Box of Sunshine, but be forewarned this kit is likely to be popular and could sell out! Get yourself signed up TODAY!
What is so special about this Paper Pumpkin Kit?
This exclusive Sara-inspired Paper Pumpkin kit is here to help you #sharesunshine. It includes supplies for eight handmade cards and is specially designed to help you create a box full of cheer. Once you’ve made all the cards, use any leftover pieces to decorate the box. Fill it with yellow goodies, add the included adhesive label, address it to someone special, and brighten their life with a little sunshine!
ABOUT THE JUNE KIT
The Box of Sunshine Kit contains supplies for 8 cards and envelopes (2 cards of 4 designs): Card size: 4-1/4″ x 5-1/2″ Envelope size: 4-1/2″ x 5-3/4″ Coordinating Colors: Basic Black, Bumblebee, Crushed Curry, Poppy Parade, Shaded Spruce, White, and Gold
Box of Sunshine Information
This kit includes extra pieces and stickers (including a sticker label) to help you create cards AND a Box of Sunshine filled with treats and goodies to send to a friend. (Treats not included.)
The May 2020 Paper Pumpkin Kit with the new In Colors inside sold out in a flash, before May 1st! Don’t delay if you want this June Paper Pumpkin Kit because I think people will order multiple kits to give with treats inside and will be popular, especially because anything Sara Douglass helps design will be something special!
The deadline for signing up or reactivating your account is June 10 but I wouldn’t wait that long! You can also add a Prepaid Subscription to your Stampin’ Up! order of one month or several months or even give this as a gift. You will receive an email with directions for setting up your account and how to input the code showing you have a Prepaid Subscription. Be sure to set this all up right away so you don’t forget or you may miss the June Kit.
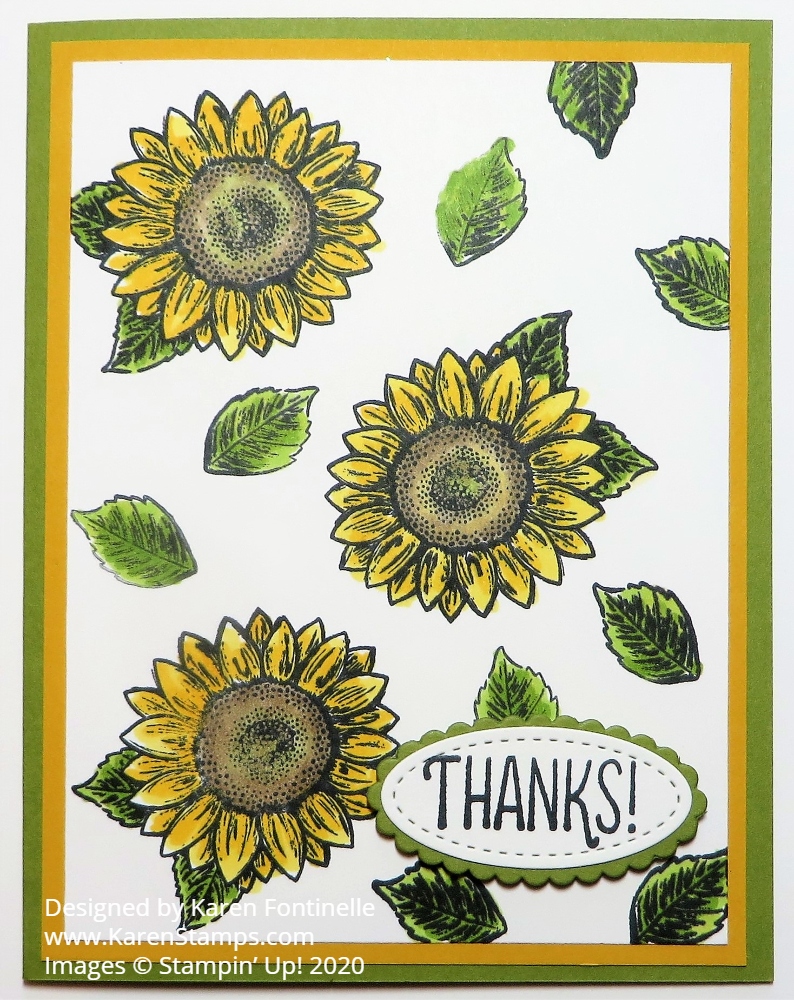
I wanted to try out this stamp set but in an easy card, so I came up with this Celebrate Sunflowers Stamped Thank You Card. Demonstrators who were able to pre-order this stamp set have been making beautiful cards with it and with the coordinating dies! So be sure to check it out when you get your catalog!
Ordering from the new Stampin’ Up! Catalog begins Wednesday, June 3, no later than Noon (Mountain Time/Stampin’ Up! Time). That’s 1:00 PM Central Time. That’s the plan anyway! Stampin’ Up! will be setting up the website with the new catalog products from midnight until Noon MT so ordering will be unavailable until it IS available again!
I wanted to try out the Celebrate Sunflowers Stamp Set but I wanted it to be easy. I chose the smaller sunflower and decided to just stamp a few randomly on the Whisper White card layer along with some leaves. I stamped all of these in Memento Ink and then colored in with Stampin’ Blends.
The card base is Old Olive and the next layer is Crushed Curry. I could have used the new Bumblebee color of cardstock but I didn’t think about it and I didn’t have a matching Stampin’ Blend marker.
After stamping with Memento Ink, I used various Stampin’ Blends to color in the sunflowers and leaves. If you aren’t sure which color to use on any project, get a piece of scrap Whisper White Cardstock and try out some colors on that. You get a better view of the actual color than if you color on Grid Paper or computer paper. Use the real cardstock!
For the flower centers, I used the Dark and Light Crumb Cake plus a touch of Old Olive. Maybe even a touch of yellow. For the petals, I used Light and Dark Daffodil Delight (I think) but I also had Mango Melody handy. Mango Melody has a little more orange in it. But just try out some colors and see what you are in the mood for!
The greeting I took from another new stamp set just because of space. This “Thank You” is in the Many Mates Stamp Set which has lots of great greetings. I used a die from the Stitched Shapes Dies (one of my favorite die sets!) and then layered it on an Old Olive scalloped oval from the Layering Ovals Dies.
This card would also be pretty made with Shimmery White Cardstock with just that faint hint of glimmer, plus if you wanted to watercolor the sunflowers, the Shimmery White paper holds up a little better to water than the regular Whisper White cardstock. Shimmery White is probably my favorite paper except for Real Red!
So, basically an easy card to make although it does take a little bit of time to color the sunflowers and leaves, but that’s good therapy and relaxation! And we all need that right now! Just take your time stamping and enjoy!
Remember, the last day for the current annual catalog is Tuesday, June 2 until around midnight (Mountain Time). If you want any SINGLE Stampin’ Blends, get them by Tuesday because in the new catalog they are only sold in the Combo sets of Light and Dark. So if you only need one of the colors, order now. Also, check the Last-Chance products and the Clearance Rack! Get all the bargains!
AND Stampin’ Up! has extended the early release ordering of the Ornate Garden Suite of products through June 2 since it has been so popular, I think it was to end May 31. It is in the new catalog so you can also order it with a new catalog order.
I hope you like these new sunflowers in the Celebrate Sunflowers Stamp Set! And if you like dies, you can get the Celebrate Sunflowers Bundle and save 10% off the total price! It’s all on page 13 of the new Stampin’ Up! Catalog.