
If you get some or all of this Peony Garden Suite, you will have so many ways to create that you will come up with many kinds of cards and projects like this simple Prized Peony Die-Cut Flower Card.
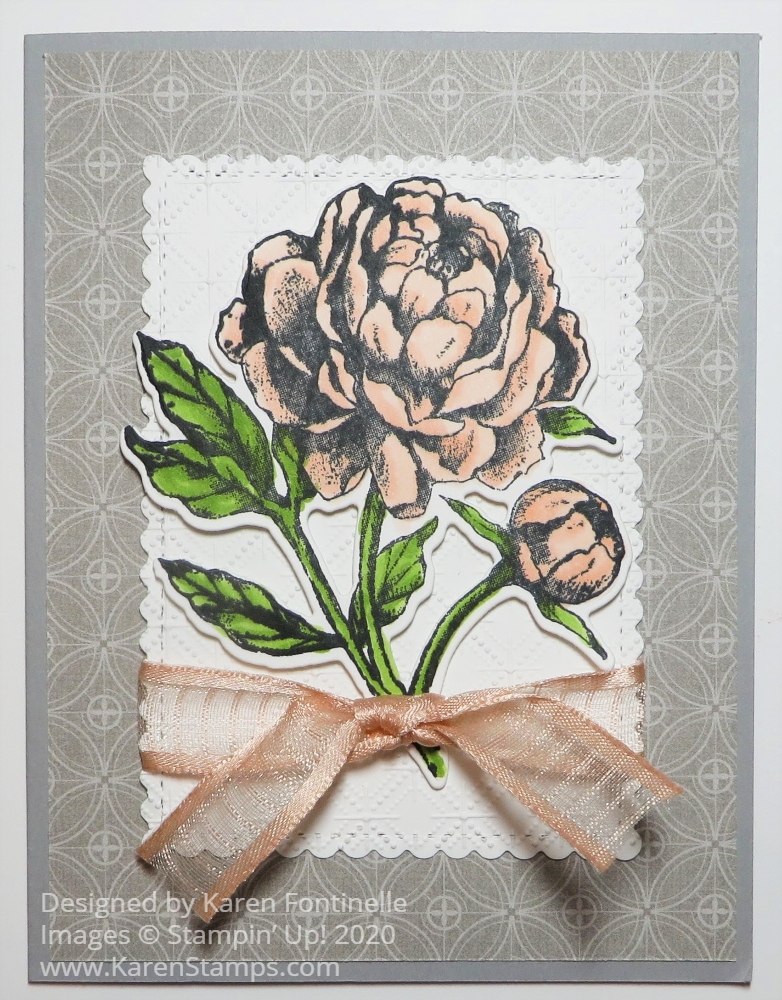
For this card, I wanted to stamp the flower, color in, and then die cut it! I stamped the flower from the Prized Peony Stamp Set in Memento Ink and colored in the flower and bud with Petal Pink Stampin’ Blend Markers plus Granny Apple Green Stampin’ Blend Markers for the leaves. Then I cut it out with the Peony Dies.
My original idea was to use the Peony Garden Designer Series Paper just in a basic card design way using one side of a pattern of designer paper on half the card and the other side of paper on the lower half (or so), with maybe a ribbon across the seam where the papers join or overlap a little. I thought I would use this gray pattern plus the pink floral design on the other side – but then I decided I liked using just the gray pattern for the card layer! You never know what you will really come up with once you start making a card!
The card base is Gray Granite with the designer paper adhered to the front. I had already colored and die cut the peony flower, but I thought maybe it needed some background to help it stand out. I looked through my dies and choose the largest rectangle in the Stitched So Sweetly Dies. That would have been fine as is, but I wanted to try out the Dainty Diamonds Embossing Folder so I embossed the die cut. It was very pretty!
Before adhering the embossed piece to the card, I wrapped a piece of the pretty Petal Pink 5/8″ Organdy Striped Ribbon around near the bottom. Then I adhered the peony using Stampin’ Dimensionals® and placed it underneath the ribbon. For the final touch, I tied on a small piece of ribbon just in a knot in the center. I didn’t even want to add a greeting.
Inside, since the cardstock was gray, I added a Whisper White layer inside the card, stamping and coloring one of the small flowers in the stamp set in the bottom corner. It has such a pretty vintage floral look! Now I can stamp a greeting inside the card or write my own note or personal message when I want to use the card. Be sure to check out my first card using the Prized Peony Stamp Set in this post yesterday.
Stamping and coloring the peony is another step to take but is easy enough, even the coloring, and certainly the die-cutting. Then I just used a piece behind the flower to help showcase the peony and added a ribbon to my Prized Peony Die-Cut Flower Card.