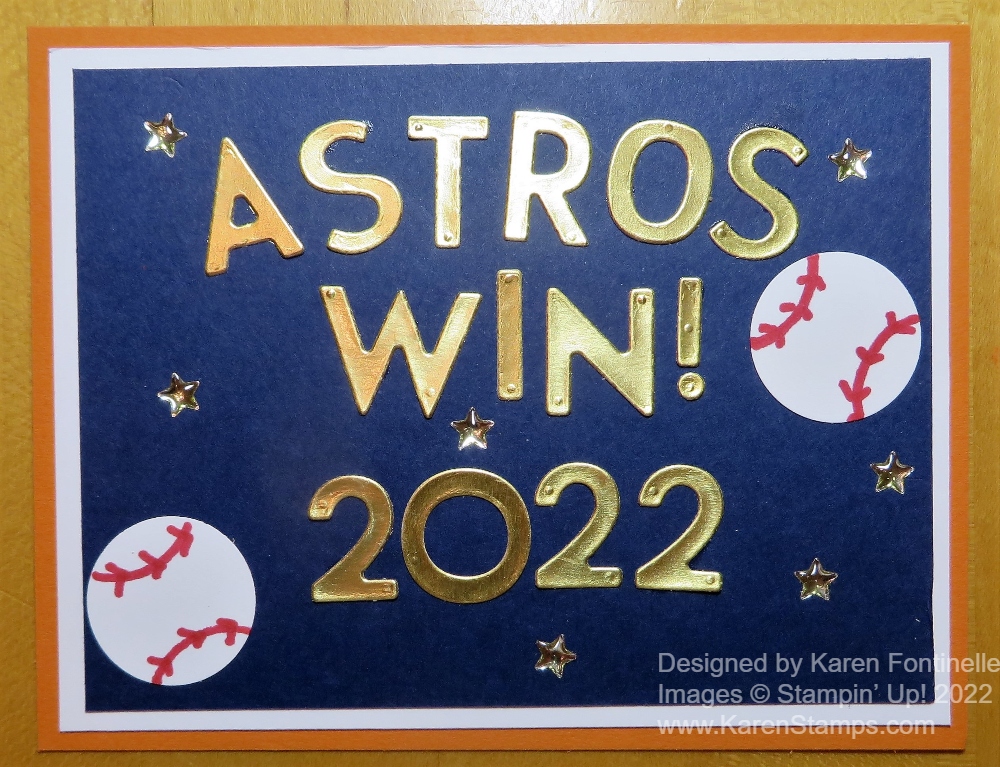
You can make a card for ANY occasion with Stampin’ Up! supplies when the Astros WIN the WORLD SERIES!!!
What a game! What a night!! Houston is very excited for our baseball team!
CONGRATULATIONS ASTROS!!!

You can make a card for ANY occasion with Stampin’ Up! supplies when the Astros WIN the WORLD SERIES!!!
What a game! What a night!! Houston is very excited for our baseball team!
CONGRATULATIONS ASTROS!!!
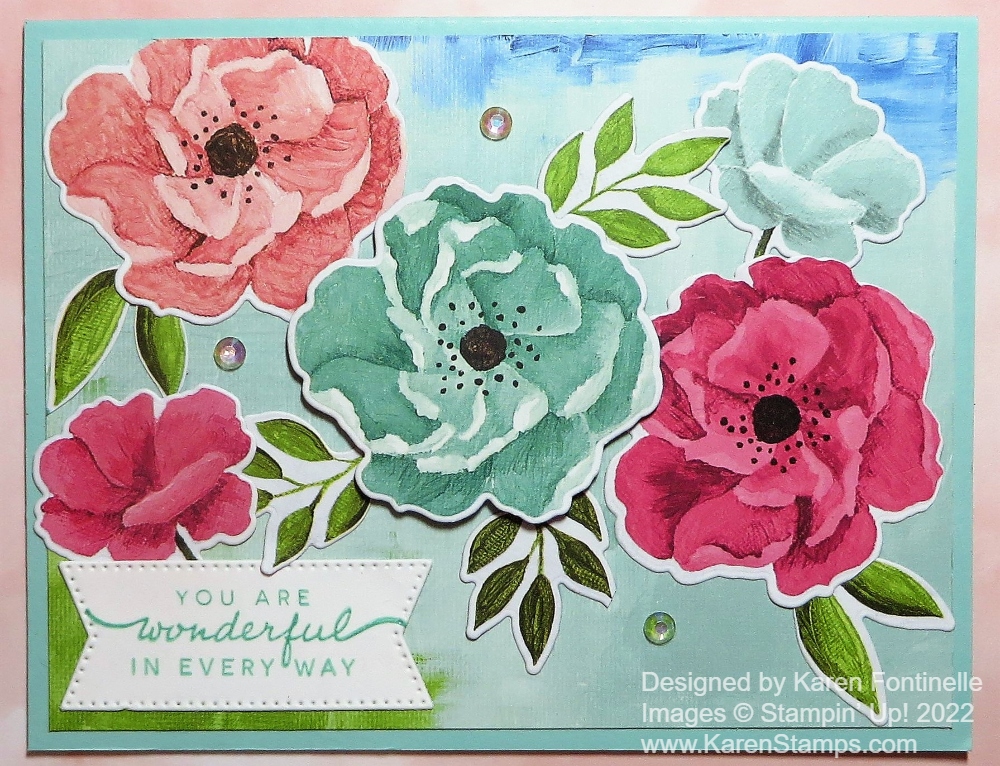
Did you know that a lot of the flowers and even leaves in certain papers in the Hues of Happiness Designer Series Paper can be diecut right from the designer paper?! It’s a fun new trick Stampin’ Up! has been doing with some of its designer paper patterns. I came up with this Hues of Happiness Floral Card idea just by looking through the designer papers and finding this “other side of the paper” that looked so soft and pretty with mostly light blue and just a touch of green and blue in the corners to use as the background layer.
The card base is Pool Party with a layer, as I said, from “the other side” of one of the gorgeous floral papers. When you have papers like this you hate to NOT use the side with the pretty flowers, but sometimes, it must be done! I cut the paper so that it was mostly the Pool Party shade of blue and then a watercolor area of a darker blue in the upper right corner and a green watercolor area in the lower-left corner. You can see the brushstrokes.
Next, I cut the floral paper into smaller pieces so I could die cut a lot of the flowers and leaves using the Blossoming Happiness Dies. I die cut more than I needed, but I can use the extras on another card. I didn’t realize I could diecut leaves as well! Then I laid them out on the card front, fiddled with them for a while to figure out the design I liked, and fiddled some more. Finally, I was satisfied and started gluing them down. The large center flower is popped up on Stampin’ Dimensionals. Then I placed the leaves around where they looked good.
The greeting is in the Happiness Abounds Stamp Set. I stamped it in Pool Party ink on Basic White and die cut it with one of the banner dies in the Stylish Shapes Dies. This is a new set of dies in the Annual Catalog in the shapes of circles, squares, and labels all with a stitched edge. Very useful! And for a final touch, I added some Iridescent Rhinestone Basic Jewels for a little sparkle.
When you have new designer papers, be sure to check if maybe the dies work on the images on the paper! Sometimes they do like on this Hues of Happiness Designer Paper that I could use on this Hues of Happiness Floral Card.
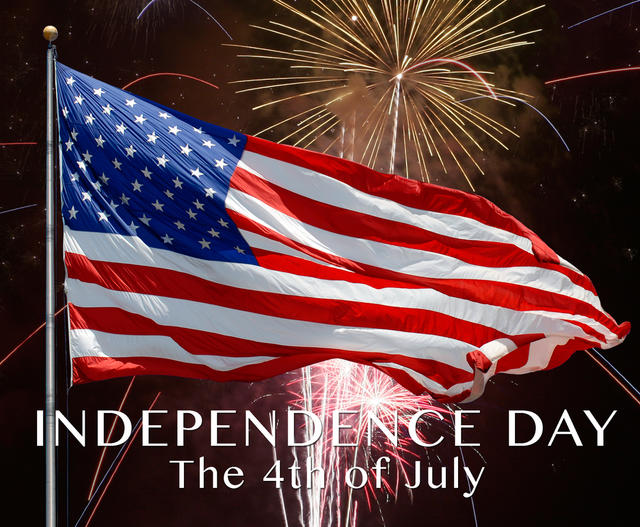
Have a safe, healthy, and
Happy 4th of July!
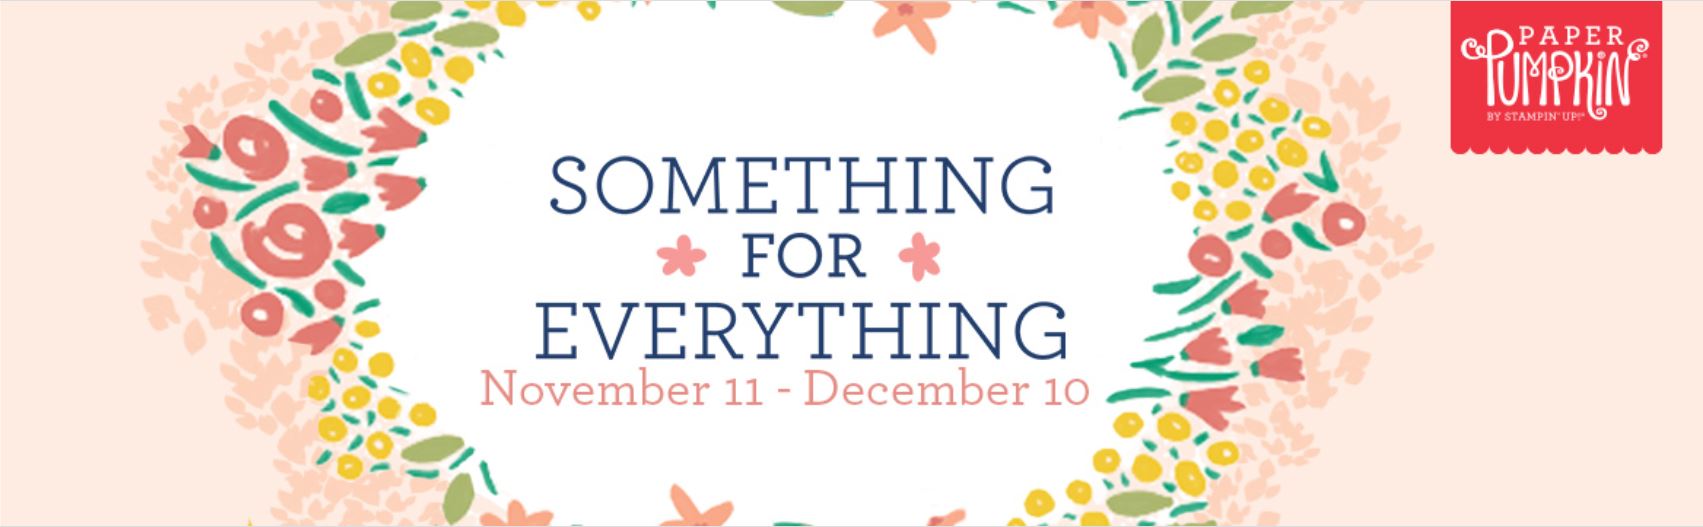
The November Paper Pumpkin holiday kits are on their way to subscribers’ destinations so now it is time to find out about the December Paper Pumpkin Kit coming out mid-December.
The Something for Everything kit includes a super-versatile stamp set complete with (a whopping!) 13 sentiments that can be used for occasions ranging from wedding, to get well, birthdays, and more! Plus, the three full-sized card designs (4 of each) are gorgeous but completely versatile, giving you the flexibility to use them for any occasion. Start the new year right with cute, fun, and easy cards for 2020.
It sounds like a great way to get an assortment of cards made that will be at your fingertips for mailing when the occasion arises. Often we need a card right away and don’t have time to make one of our usual masterpieces! If you get this Paper Pumpkin Kit and make up the cards, you can keep them handy for those moments when you really need a card right away!
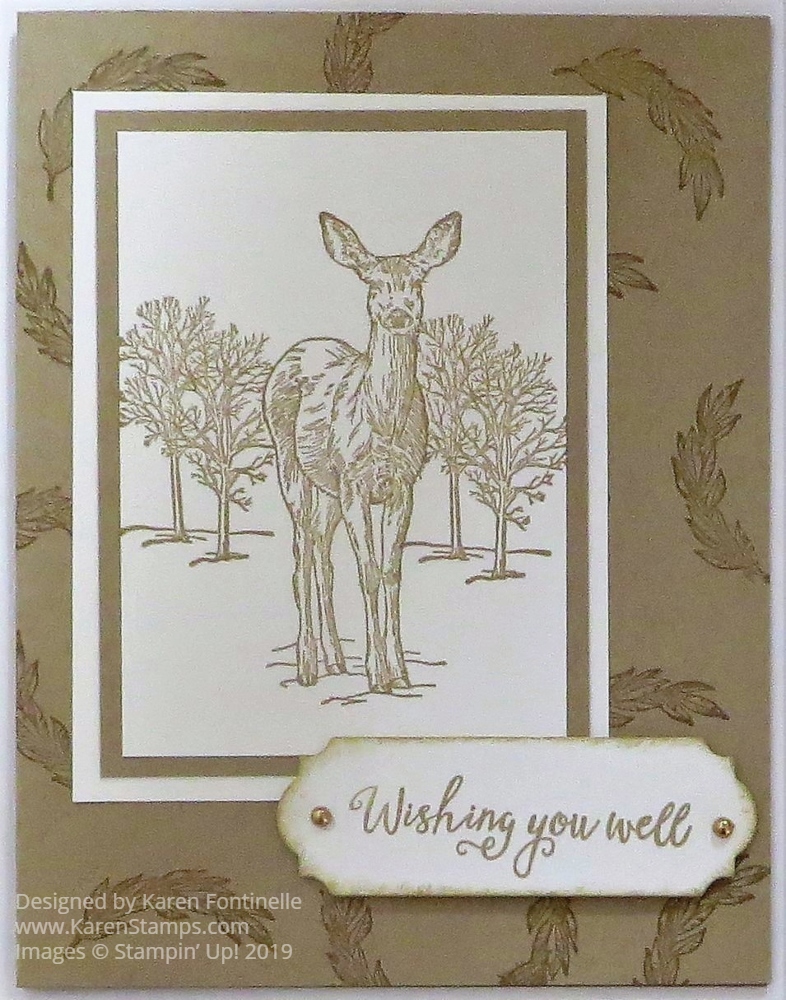
This Nature’s Beauty Monochromatic Deer Card shows an easy way to make a card using this beautiful stamp set. Enjoy using this Nature’s Beauty Stamp Set while knowing that a portion of every stamp set sold goes to mental health organizations. Enjoy your hobby while helping other people!
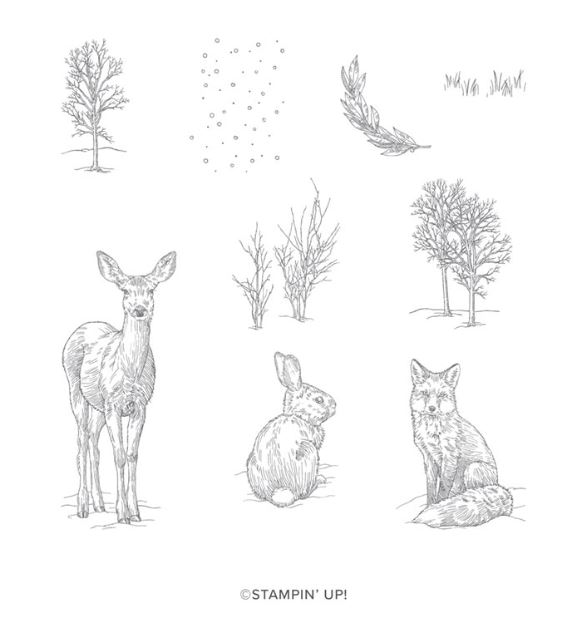
You can make cards for many occasions with this Nature’s Beauty Stamp Set. That bunny is perfect for baby cards or Easter. Everyone loves deer so you have that covered for many cards. Even just the little trees will be fun to use.
To make this card, I used Crumb Cake for everything. The card base is Crumb Cake Cardstock with some stamping of Crumb Cake Ink. You could also use Versamark Ink for that same color or watermark look. The deer and trees are stamped on Whisper White Cardstock with Crumb Cake Ink. The greeting is stamped in Crumb Cake Ink with a little sponging around the edges.
The greeting is stamped and then die cut with one of the Ornate Frames Dies. The greeting itself is from the Gather Together Stamp Set. Just for a tiny bit of bling, I added two gold dots (that I think are retired!).
To stamp the deer with the trees behind him, stamp the deer on the Whisper White Cardstock, then stamp him preferably on a piece of sticky note and cut out. The “sticky” will help hold the “mask” on the cardstock in place. Place the mask over the deer then stamp the trees, even overlapping onto the sticky note because that is protecting the deer. Remove the mask and see how the masking technique worked! Save the mask in your stamp set so you can reuse it, no matter how messy it looks!
If you are looking for masculine cards or for someone who likes nature, this stamp set is perfect, not to mention making any kinds of cards you like with it. I think it is a nice change from all the florals and more “common” type of stamp sets. My son became fascinated with foxes after going to some national parks or other similar places were he saw foxes. One place was even some kind of preserve for foxes and people gather at a distance to take photos. So sometime I will make him a fox card!
If you don’t have time for coloring and all that, for any card that you are making, remember the monochromatic way of stamping…..just one color, no coloring!
Shop for the Nature’s Beauty Stamp Set on the back inside cover of the Holiday Catalog and in the Stampin’ Up! Online Store!
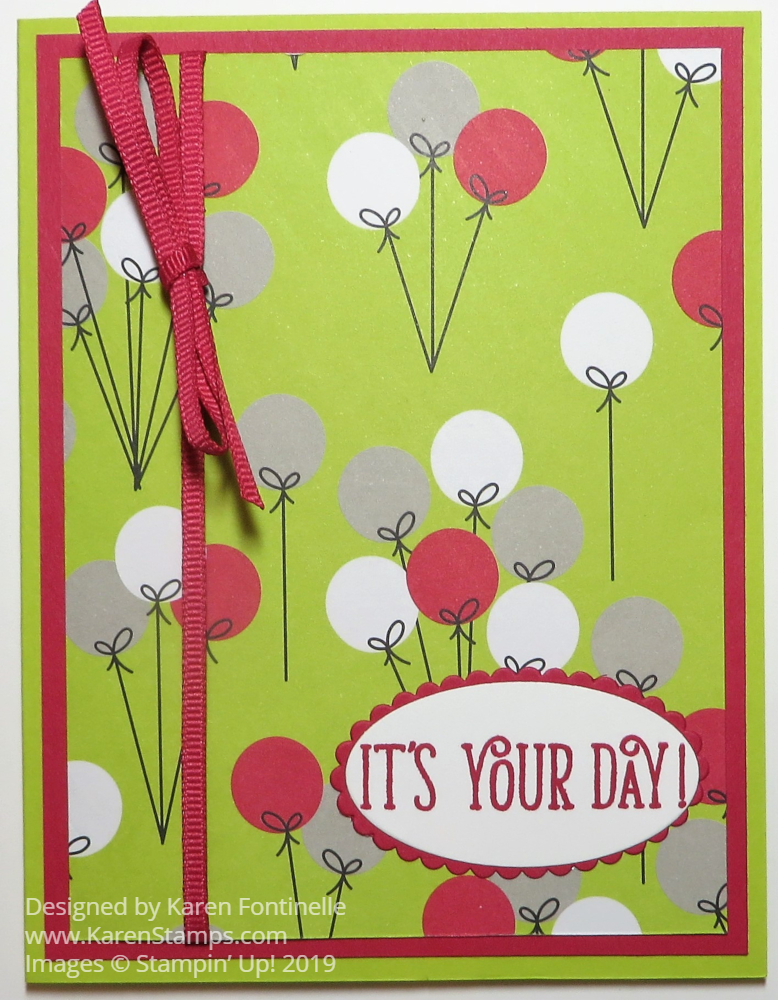
Make an easy celebration card for someone very quickly with this basic card design! It’s always simple to make a card with a card base, a layer and a greeting and from there you can embellish a little bit or a lot depending on your style and the occasion for the card!
This card starts with a Lemon Lime Twist card base. What will we do without Lemon Lime Twist when this In Color retires?! If you want any of the 2017-2019 In Colors – ink, refills, cardstock, papers, embellishments – be sure you get them before they retire on June 3, 2019.
I chose the Broadway Bound Specialty Designer Series Paper for this card. I like this balloon pattern because it can be for any happy occasion! This card could be for a birthday, graduation, or simply any congratulatory note. This package of paper has a party design on one side and gold foil designs on the other so you can be as festive as you like!
To set off the designer paper from the Lemon Lime Twist card base, I added a layer of Lovely Lipstick, one of the current In Colors that are sticking around another year. And since I had this narrow Lovely Lipstick 1/8″ Grosgrain Ribbon I added that for some embellishment.
The greeting is from the Happy Birthday Gorgeous Stamp Set. It is stamped in Lovely Lipstick and die cut with an oval die, layered on a scalloped oval die, both from the Layering Ovals Framelits Dies.
Here are three cards I made with the Broadway Bound Paper that might give you some other ideas!
Whether you use this paper or some other designer paper, you can use this card layout and design for either a simple card or as a base for something fancier.
Be sure to check out the Last-Chance List of retiring products to see what is available and what you can’t live without! If you have any questions about things that might be in the new catalog, feel free to ask! I don’t have the new hard copy yet but I can look online!
Also, don’t forget the Clearance Rack if you didn’t get to shop the other day!

This may seem like a bit of an odd card, this Eclipse Technique Graduation Card 2018, but I was trying to incorporate a stamp set I hate to see retire, the Heart Happiness Photopolymer Stamp Set, plus the Large Numbers Framelits Dies.
I don’t know why Stampin’ Up! is retiring the Large Number Dies because they are perfect for a card like this! These Large Numbers are great for special occasions and birthdays to denote the year or age or anniversary years.
I also loved the Heart Happiness Stamp Set in the Occasions Catalog. Even though it may have been thought of as a Valentine set, I know hearts are good for many occasions! And it has all styles of hearts to use! For this graduation card, you can use whatever the school colors are and stamp on the card front. I just used the same heart randomly stamped with Pacific Point Ink. For the Eclipse Technique just die cut the numbers on the top card layer. Adhere a darker layer underneath. Then adhere this layer to the card base. Using Stampin’ Dimensionals or perhaps Mini Dimensionals, adhere the die cut numbers back into their spaces but popped up. This way you can see a little bit of the dark color underneath.

The greeting is from the stamp set Special Celebrations. For this card I just left the strip as is and popped it up with Stampin’ Dimensionals. Then for a little bling and contrast to all the blue, I added two little stars in the Metallic Enamel Shapes.
This is the LAST week for the current annual Stampin’ Up! Catalog as well as the Occasions 2018 Catalog! Don’t forget to check both of these catalogs to make sure you have what you want. It’s best to go to the Online Store. If it is shown there, then it is still available. If not, it is gone.
Remember, it is graduation time at all levels so be sure you have some graduation cards ready to go! It doesn’t always have to be a card with a graduation cap either as you can see with this Eclipse Technique Graduation Card 2018!

If you need a quick and easy gift bag idea for Mother’s Day or any occasion, this is my favorite project! Just grab one of those shopping bags you probably have from a store and decorate it! Even if it has the store’s or business’s name printed on it, you likely will be able to cover it up. This is a great way to recycle these shopping bags we usually save!
Depending on the size of your bag, you will adjust the paper sizes. I just grabbed one sheet of designer paper, cut it the proper width and length, and then cut it into two pieces. In this case, the designer paper is the retiring Fresh Florals (I think it’s sold out!) in the current 2017-2019 In Colors. The colors are staying but the paper is retiring. To cover the paper seam, I cut a narrow strip of Powder Pink Cardstock. Before I adhered it, however, it looked like it needed something, so I added some Silver 3/8″ Metallic-Edge Ribbon and tied a bow. It’s easiest to tie a bow separately and stick on with Mini Glue Dots.
For a little more on the bag, I stamped the retiring You’ve Got This flower just in Powder Pink ink (because I didn’t want to color it in!) and die cut with the Stitched Shapes Framelit Die. Then to match the ribbon, I layered the die cut shape on a piece of Silver Foil die cut with one of the scalloped dies in the Layering Circle Framelit DIes. I was planning to put the flower in the bottom corner of the bag, but I then I placed it on the ribbon and liked it better there. So just play around!

Even though this paper is sold out, you can use any designer paper or cardstock appropriate for the occasion. This is a great way to recycle bags like this. If you don’t have any, you can purchase them at a craft store! Click HERE To see another gift bag I made like this one!
Whenever you need a pretty gift bag, think of this Quick and Easy Gift Bag Idea For Mother’s Day or any occasion!

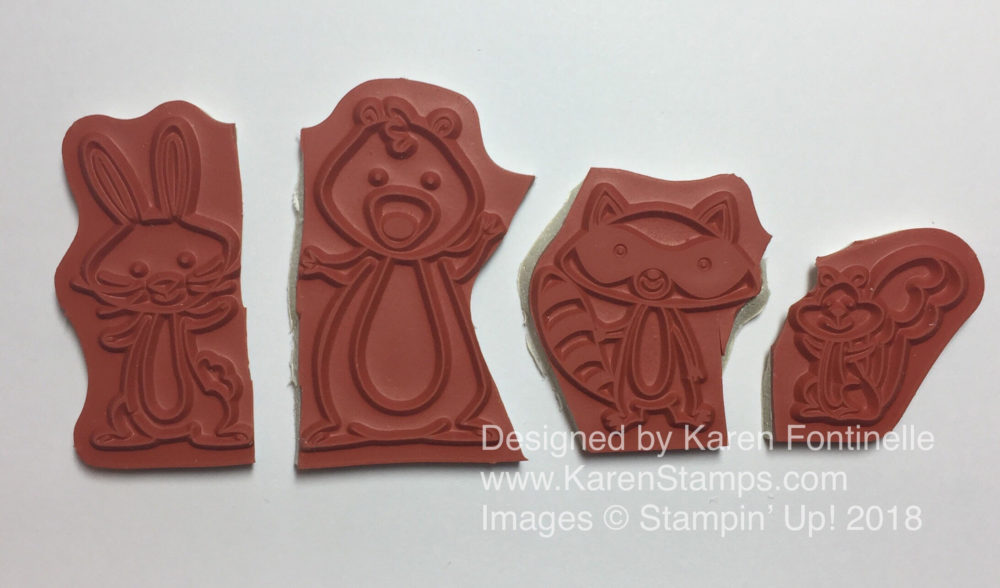
These Animal Critters Celebrate With the We Must Celebrate Stamp Set in the Occasions Catalog! Aren’t they so cute?! Actually I passed this stamp set up at first until I saw so many cute samples with these cute animals! Then I had to have it!
The animals all come attached on one stamp, but, if you want, and if you are very careful, you can cut the animals apart. Actually if you are very careful, you can line the stamps back up on one block and stamp them all together, which is what I did on this card! Then you can have it both ways, but it is very hard to alter your stamp like this! And the bunny is perfect to use right now for Easter and spring.
I happened to have a scrap already-folded square card so I stamped it and colored everything in with Stampin’ Blends markers. Of course the color shows through on the other side of the paper, so it was showing on the inside of the card. I decided to just cut that front of the card off and layer it on a card base of Marina Mist Cardstock.
Next, for a greeting, I used my new Celebrate You Thinlit Dies. You can earn it free during Sale-A-Bration with a $100 purchase. I die cut the word “Celebrate” from Crumb Cake cardstock. I like the word and the color on the card to complement the animals and critters. Very simple card, really, but cute!
Whatever you are are celebrating, I think you can use the We Must Celebrate Stamp Set to celebrate with these animals and critters!
Make your own soda pop bottle greeting cards and projects with the fun Bubble Over Photopolymer Bundle from Stampin’ Up! This Bundle comes with the Bubble Over Stamp Set and the Bottles & Bubbles Framelits Dies together saving you 10%! Add a little more to your order and you can earn the Bubbles & Fizz Designer Series Paper FREE during Sale-A-Bration!
If you are new to Stampin’ Up!, Sale-A-Bration is the annual promotion, a favorite of everyone’s, where you can earn a FREE Sale-A-Bration product with every $50 purchase! This year Stampin’ Up! has added a $100 choice or two as well! And there are other benefits as well, like an extra $25 in Stampin’ Rewards with a $250 or more order, and a chance to earn two FREE stamp sets if you decide to join Stampin’ Up! as a Demonstrator!
This Bubble Over Bundle is of particular interest to me because I’d always heard my dad talk about when his father owned a “soda factory” in the small Illinois town where he grew up. They would deliver “sodie” (as I sometimes heard it called) to various school picnics, homecomings, etc. around the area. I’m not really sure how else it was sold. My dad enjoyed sometimes getting to drive the delivery truck (even though he was underage to be licensed at the time, but back in those days I doubt it mattered!). It turns out it was my great-grandfather who started this soda bottling works. I’d always heard my grandpa invented a certain flavor soda that everyone liked, although I don’t recall ever having any.
Amazingly, through a Facebook group about this town, I discovered that people were collecting and selling these bottles on Ebay! In fact, there are plenty of bottle collectors and bottle cap collectors out there! Since I have discovered this, I have purchased several different glass soda bottles on Ebay, some with my great-grandfather’s name on them, some with my grandfather’s name. I even found a photo of the inside of the bottling works and several of decorated cars in homecoming parades advertising the company! It is just so amazing to me that I have found these treasures that are part of my family history! If only I could tell my dad and grandparents!!!
You can make lots of cute cards and other projects with this Bubble Over Bundle and the FREE Sale-A-Bration paper, Bubbles & Fizz! Wouldn’t these be fun card ideas for teenagers? And certainly the bottles might hold something other than soda!! The bottles can be embossed with clear embossing powder to look like shiny glass. The bottles can be die cut out of vellum cardstock to look like glass or frosted bottles. These products would also make great birthday, congratulations, and celebratory cards and gifts! Lots of creative ideas!
Watch and enjoy the Stampin’ Up! video above, and be inspired to make your own soda pop bottle greeting cards and other projects!

Exciting times in Houston, Texas as the Astros made it into the World Series and last night was Game 3, the first game in Houston after two games in Los Angeles against the Dodgers. Houston is SO excited to be playing in the World Series and to have the game at home for three nights!
After Hurricane Harvey the end of August, this is a great distraction for those who have been dealing with the flooding and aftermath for almost two months. As someone said on TV, Houston deserves to win the World Series!” We’ll see what happens! I’m sure the Dodgers think they deserve to win just as much after a long wait to get in the World Series!
Of course being able to stamp and make cards makes it fun when we have a special event like the World Series going on! This is a card I made sort of looking like a certain vintage Astros sweater that was recently made oh so popular as Kate Upton was spotted wearing it (she’s engaged to one of our Astros pitchers, Justin Verlander!). With all the colors of paper that Stampin’ Up! has, there usually is something to use for most any occasion when you are trying to match colors. The letters I made on the card spelling out Astros were die cut with the Little Letters Thinlits Dies, which are retired…..but they fit just perfectly on my card!
Stay tuned tonight for Game 4! I’m keeping my fingers crossed for another win!
The Designer Series Paper Sale, Buy 3 Get the 4th Paper Free, ends Oct. 31. That’s Tuesday!
The Merry Patterns Promotion ends October 31.
JOIN PAPER PUMPKIN by November 10th to get the second coordinating kit (but each kit stands alone!).
NEW Stampinn’ Blends Alcohol Markers available to purchase November 1! Get yours right away!

Woohoo! What an exciting two nights, watching the Houston Astros play two must-win games and they DID win! They will be in the World Series playing against the Los Angeles Dodgers! This is the second time the Astros have made it to the World Series, the other time being 2005. I even got to go to one of those games, thanks to my friend!
This World Series will be a family affair as our daughter and son-in-law are big Los Angeles Dodgers fans! We’ll see how this turns out!
It’s nice to have stamping to commemorate various events and activities in your life! So when the Astros win the American League Pennant and are going to be playing in the World Series, you have to post a handmade baseball card! I think stars whether in stamps or die cuts are always great to have on hand for congratulatory and exciting times!
After Hurricane Harvey and all the flooding and damage so many people experienced here the end of August, it will be great for our city to have the Astros playing in the World Series!

This project today shows how to use small paper scraps on a card! Do you ever have a bunch of little pesky scraps of designer paper that you like but you don’t want to just throw them away?! Well, most of the time we SHOULD just throw away small paper scraps of any kind instead of hoarding every single piece! But since this Color Theory Designer Series Paper Stack is brand new, when I saw all these little slivers of paper laying on the table after cutting some larger pieces, I just had to figure out a way to use them.
I chose Dapper Denim for the card base, since it is one of the coordinating colors with the Color Theory Paper. And for an extra colorful layer, I added Crushed Curry, another coordinating color. And of course, Whisper White for the top layer.
I just laid out the strips of designer paper across the card to see how they would look, turning some on one side and some on the other side of the paper. For a greeting, I chose one from the new stamp set Icing on the Cake and stamped with Berry Burst Ink. If you trim the ends, you can give it the banner look. I also added two of the little Glitter Enamel Dots, which come in ombre shades. Be sure to order some of these new dots because they are very cute and fun and not too thick to put on cards you are going to mail.
Remember that Bonus Days are going on during the month of July! With every $50 you spend in July, you get a Bonus Coupon for $5 to use on your order in August. Be sure to save the emails with the Bonus Coupon codes!
Just think of the possibilities for cardmaking using small scraps of paper, now that you have some inspiration!

If you need an engagement card for an engagement party, use the Shimmery White Cardstock, which is beautiful in itself, and the gorgeous Bloomin’ Heart Thinlit Dies to make a Shimmery Heart Die Cut Engagement Card.
Here is how I made the card. The card base is Shimmery White Cardstock. The next layer is embossed with the Falling Petals Textured Impressions Embossing Folder. To me, this looks like little hearts, but I guess they are meant to be flower petals! It makes it hard to remember the name because I think the folder should be named “heart-something”! But it is a beautiful embossing folder and will be great to use on many, many cards. The heart and little flowers are die cut with the Bloomin’ Heart Thinlits. It’s best to use the Precision Base Plate with the Big Shot since this is a more intricate die, and be sure to run it through twice, depending on your machine. And I also highly recommend that you have the Big Shot Die Brush to use to get the little pieces out of the die and the die cut. Then adhere the little flowers on to the heart. I used the Dazzling Diamonds Glimmer Paper for the heart and flowers. And for a little bling, Rhinestone Basic Jewels are always good! The “Congratulations” greeting is from the Floral Phrases Stamp Set.
This card doesn’t photograph well because of the subtle shimmer of the Shimmery White Cardstock and the dazzle from the Dazzling Diamonds Glimmer Paper! In person, it looks very pretty and elegant. You wouldn’t even have to have the Falling Petals embossed background, the die cut heart is pretty enough by itself on a card. You could even color the glimmer paper with a little reinker and Aqua Painter or brush to add some lightly colored flowers on the heart. You can see this coloring technique that I did on some punched hearts on this card here on my blog.
They say June is the month for weddings, so maybe you need to start an engagement and wedding stack of cards! It’s always nice to have some extra cards on hand. When you make one card and like it, make a couple more of the same while you have the supplies out. You could also make this same card for other occasions, just by changing the greeting or leaving any greeting off. This Shimmery Heart Die Cut Engagement Card is well suited for an engagement card, wedding, birthdays, congratulations and many occasions.

I received a nice big box of new products from the Occasions Catalog, but I’ve been working on a project where I used this big dahlia stamp and got the idea for this Definitely Dahlia Gold Embossed Congratulations Card. Sometimes we forget about the products in the Annual Stampin’ Up! Catalog when we have the new seasonal catalogs. When I used the Definitely Dahlia Stamp Set (really just one big single stamp!) on the other project it reminded me how elegant and pretty the stamp was.
The dahlia is first stamped with Versamark Ink and then heat embossed with the Gold Stampin’ Embossing Powder and the Heat Tool. I think heat embossing is one of the most dramatic and easy techniques you can do. You never get tired of watching that powder melt and turn into your beautiful stamped image. I also embossed the greeting in gold at the bottom of the card. The greeting is from Floral Phrases. You could also offset the dahlia to be more in the corner of the card.
I prefer the wood-mount stamp on large single stamps like this one, although you can also buy it in clear-mount. I just like the wood-mount because it is ready to go and you don’t have to take time sticking this large stamp to the acrylic block and hoping it doesn’t fall off. Often times it is easier to lay the stamp facing stamp-side up on the table, pat the ink pad onto the stamp rather than the stamp onto the ink, and then place the cardstock on which you are stamping onto the inked stamp. Then if you don’t want to get inky fingers, grab a piece of computer paper to lay over the cardstock and rub gently with your fingers over the whole stamp area without letting the cardstock move. It usually works fine! This way you aren’t handling a large block and stamp in your hands.
The card base is Whisper White with just a bit of Gold Foil around the border of the dahlia image. You can cut out the center of the gold foil since it won’t show anyway and use that piece for something else.