Tag Archives: Peony Garden Designer Series Paper

Prized Peony All-Occasion Square Card

Prized Peony All-Occasion Square Card

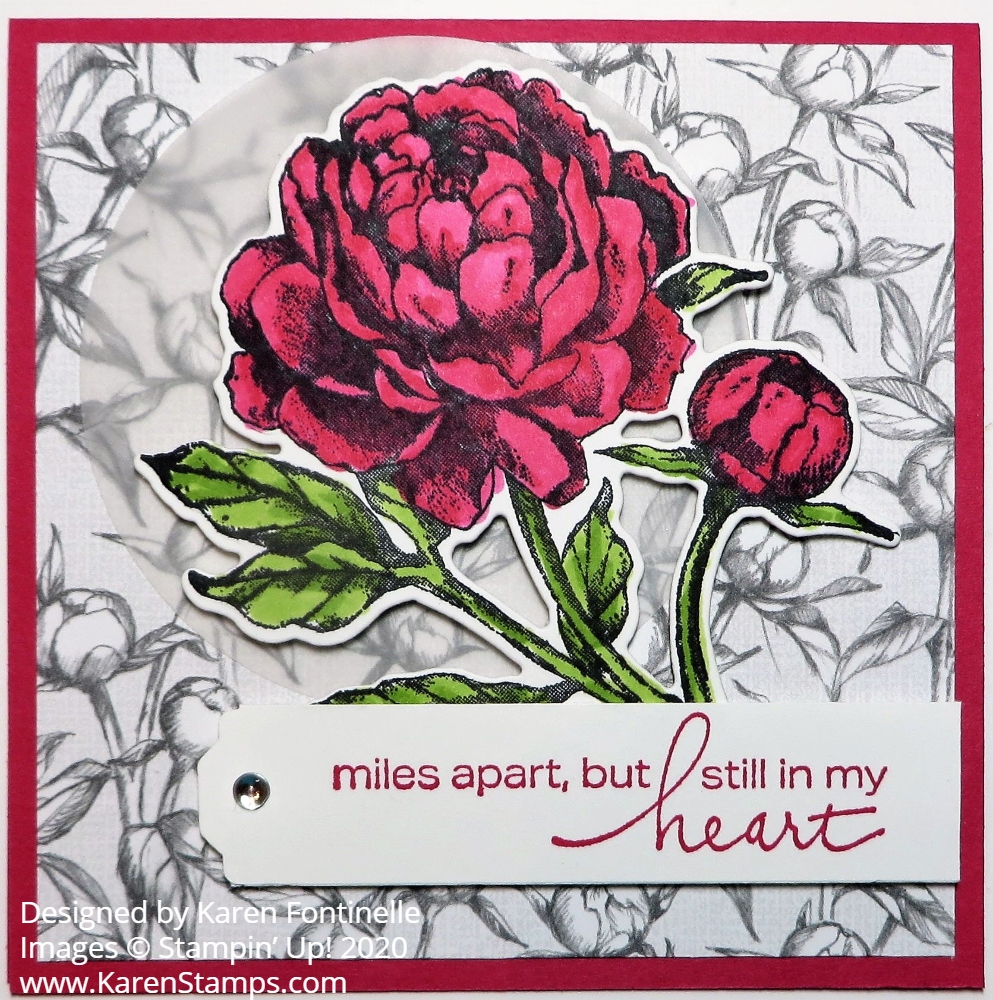
I started out looking at the peony designer paper but couldn’t come to a decision of what card design to make, so I looked in the Stampin’ Up! Annual Catalog at the Peony Garden Suite for ideas. Finally I settled on this Prized Peony All-Occasion Square Card that was inspired by a square card I saw on page 84.

It’s really a very easy card. I cut the Melon Mambo card base to 8 1/2″ x 4 1/4″ and folded in half. The Peony Garden Designer Series Paper is cut at 4″ x 4″ for a layer on the card base. I wanted something not too plain in the background but not too big that the big flower would not stand out.

The focal point on the card is the stamped and die-cut Prized Peony. I stamped it in Memento Ink and colored in with Melon Mambo Combo Stampin’ Blends markers and the leaves with the Granny Apple Green Combo Stampin’ Blends markers. The flower is stamped with the Prized Peony Stamp Set and cut out with the Peony Dies. You can purchase both together in the Prized Peony Bundle and save 10%.

Now there is a package of Square Vellum Doilies in the Suite, which I bought, but I couldn’t find them! So I substituted a large die-cut Vellum Cardstock circle to put behind the peony. Normally it is difficult to glue down vellum because the adhesive almost always shows in some way behind it, but in this case, I knew I could put some adhesive on the vellum behind where the flower would go and it wouldn’t show at all. The peony is popped up on Stampin’ Dimensionals®.

The greeting is stamped from the Lovely You Stamp Set in the Annual Catalog on page 22 with Melon Mambo ink. I lined one end up with the edge of the card layer on the right and punched the other end with the Lovely Labels Pick a Punch. (This punch on backorder but coming next week). You can purchase the Lovely You Stamp Set and Lovely Labels Pick a Punch in a Bundle for a 10% savings (but backordered as I write this). This greeting is popped up also with Stampin’ Dimensionals right over the stem of the peony. For a little bling I added a Clear Epoxy Droplet to the tag.

You can change the colors, the paper, and the greeting to make a similar card for another occasion. Sometimes it is fun to make a square card instead of our usual design just for a something a little different!

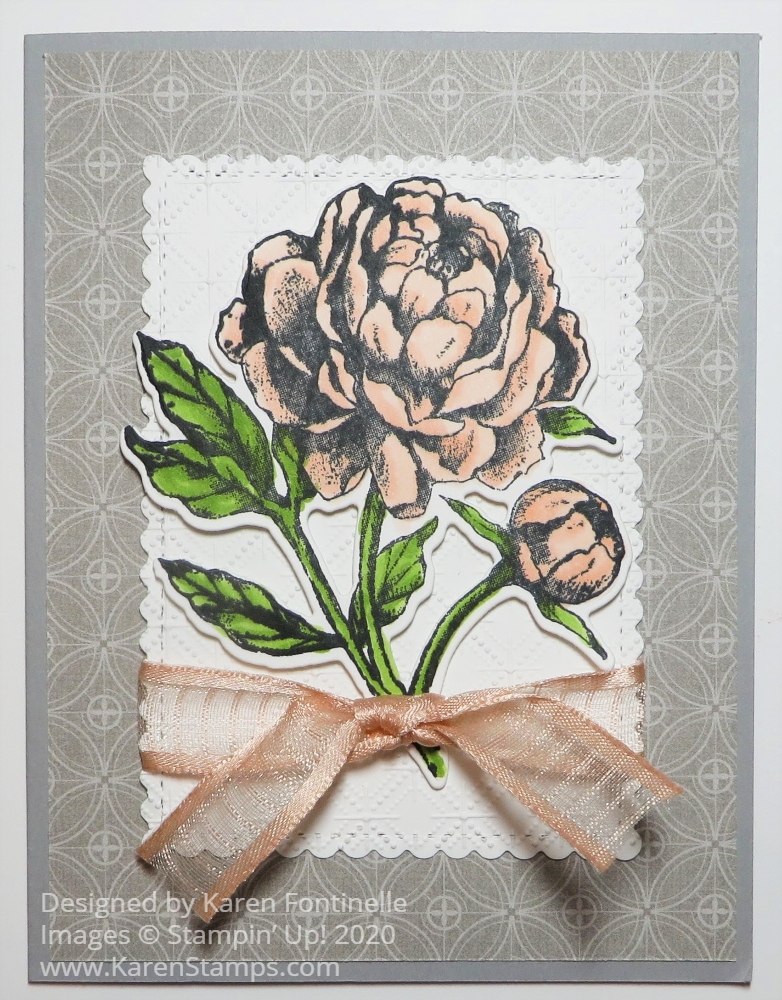
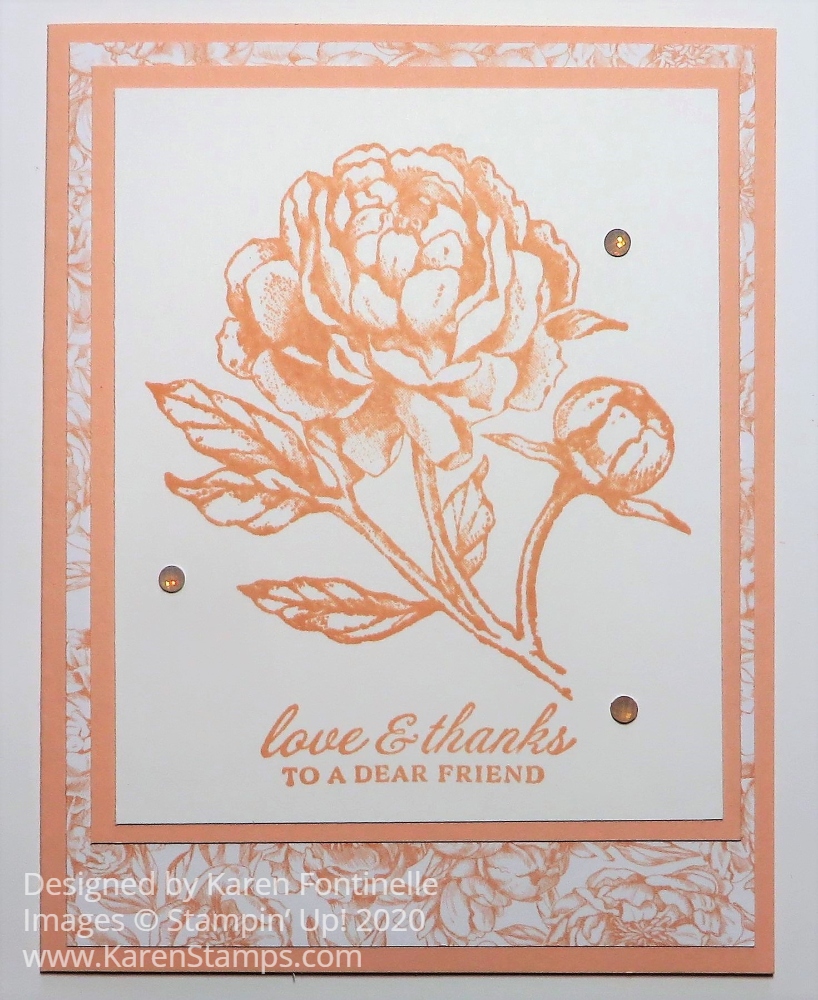
Here is another card I made with the Prized Peony Stamp Set and die using a different pattern of the Peony Garden Paper and using different colors.

There are so many possibilities with this Peony Garden Suite for cards and other projects that you will enjoy making like this Prized Peony All-Occasion Square Card.

Prized Peony Die-Cut Flower Card

Prized Peony Die-Cut Flower

If you get some or all of this Peony Garden Suite, you will have so many ways to create that you will come up with many kinds of cards and projects like this simple Prized Peony Die-Cut Flower Card.

For this card, I wanted to stamp the flower, color in, and then die cut it! I stamped the flower from the Prized Peony Stamp Set in Memento Ink and colored in the flower and bud with Petal Pink Stampin’ Blend Markers plus Granny Apple Green Stampin’ Blend Markers for the leaves. Then I cut it out with the Peony Dies.

My original idea was to use the Peony Garden Designer Series Paper just in a basic card design way using one side of a pattern of designer paper on half the card and the other side of paper on the lower half (or so), with maybe a ribbon across the seam where the papers join or overlap a little. I thought I would use this gray pattern plus the pink floral design on the other side – but then I decided I liked using just the gray pattern for the card layer! You never know what you will really come up with once you start making a card!

The card base is Gray Granite with the designer paper adhered to the front. I had already colored and die cut the peony flower, but I thought maybe it needed some background to help it stand out. I looked through my dies and choose the largest rectangle in the Stitched So Sweetly Dies. That would have been fine as is, but I wanted to try out the Dainty Diamonds Embossing Folder so I embossed the die cut. It was very pretty!

Before adhering the embossed piece to the card, I wrapped a piece of the pretty Petal Pink 5/8″ Organdy Striped Ribbon around near the bottom. Then I adhered the peony using Stampin’ Dimensionals® and placed it underneath the ribbon. For the final touch, I tied on a small piece of ribbon just in a knot in the center. I didn’t even want to add a greeting.

Inside, since the cardstock was gray, I added a Whisper White layer inside the card, stamping and coloring one of the small flowers in the stamp set in the bottom corner. It has such a pretty vintage floral look! Now I can stamp a greeting inside the card or write my own note or personal message when I want to use the card. Be sure to check out my first card using the Prized Peony Stamp Set in this post yesterday.

Stamping and coloring the peony is another step to take but is easy enough, even the coloring, and certainly the die-cutting. Then I just used a piece behind the flower to help showcase the peony and added a ribbon to my Prized Peony Die-Cut Flower Card.

SHOP STAMPIN’ UP! ONLINE HERE!

Prized Peony Monochromatic Petal Pink Card

Prized Peony Monochromatic Petal Pink Card

This Prized Peony Monochromatic Petal Pink Card is hot off the press! Just opened my order with this stamp set and paper in it and got to work, amid a few other interruptions!

The card base is Petal Pink to match the ink. It is actually lighter in color than in this photograph although the ink is fairly dark. Maybe I just have a juicy ink pad at the moment. I simply stamped the peony in the Prized Peony Stamp Set and the greeting in the same stamp set and cut down the cardstock a little to make it smaller. Then it was layered on a piece of Petal Pink Cardstock.

I looked through the pretty patterns of the Peony Garden Designer Series Paper and choose this one with a small Petal Pink floral print. It provides some interest and is good for the small amount of design that is actually going to show around the stamped peony.

I opted not to add any ribbon on the card wrapped around the peony piece, but after I had the card all made, of course, I couldn’t resist adding some of the new Elegant Faceted Gems. You can feel the facets on them. They are very pretty.

That’s how easy it is to make a monochromatic card with this stamp set, cardstock, and designer paper. You can also purchase the Prized Peony Bundle which includes the stamp set and Peony Dies and you save 10% on the price! Even if you purchase the entire Suite, you will still be getting the discounted price on the Bundle.

If I would have chosen to use the dies, I could have die cut this entire stamped flower and mounted it maybe with Stampin’ Dimensionals on the card to pop it up. This is going to be a beautiful stamp set to play with! If you order it or order the dies, look up some videos online of how to use the “pieces” of the flower to make it layered. You will wonder at first what on earth to do with the pieces that don’t look like anything, but they simply layer together to make something that looks like a 3D flower if you kind of shade the edges of the petals or pop them up with Dimensionals underneath or just have the pieces layered flat on the card which will still be impressive!

Start out with something easy like this Prized Peony Monochromatic Petal Pink Card. Just stamp the large peony in a colored ink or in black and then color in or sponge on some color. I think this stamp set will make beautiful cards with some basic simple stamping or you can make something extremely impressive to the recipient with easy steps for you to make it! Just play and have fun with this peony!

SHOP STAMPIN’ UP! ONLINE HERE!

(Remember Bonus Days! Spend $50, get a $5 coupon for August!)

Stampin' Up! Bonus Days 2020 Banner