Tag Archives: Medium Daisy Punch

Sunshine & Rainbows Daisy Card

Sunshine & Rainbows Daisy Card

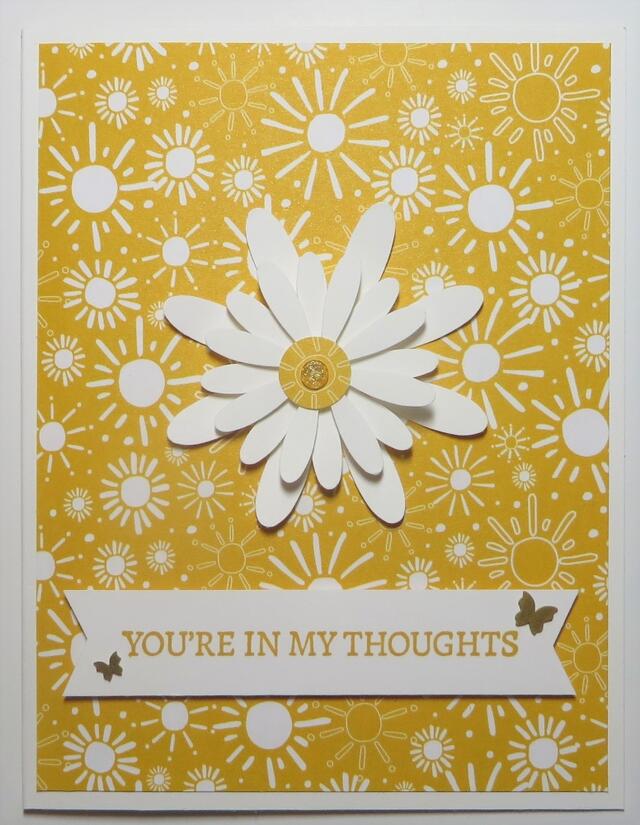
The other side of this paper is the pattern I used the other day on a card with the bright and cheerful sunshine and rainbows. But when I happened to look at this other side, the sunshine images made me think of daisies! I hadn’t used my Daisy Punch in a long time!

This card has a Basic White card base, not really visible in this photo. I layered the Sunshine & Rainbows Designer Paper on the card base. Remember, you can earn this paper FREE during Sale-A-Bration with a $50 Stampin’ Up! purchase!

The daisy is made with both daisy punches, the Daisy Punch and the smaller Medium Daisy Punch. I punched one large daisy and two of the smaller and layered them in a staggered fashion. The largest daisy is adhered directly to the card, the smaller two are popped up with Stampin’ Dimensionals®. I used my retired 1/2″ Circle Punch to punch out a piece of the same designer paper for the flower center and also added one of the small Elegant Faceted Gems to the center.

The greeting is from the Encircled in Friendship Stamp Set. I simply stamped it on a scrap strip of Basic White I already had in Bumblebee Ink. Then I punched the banner ends using the point of the Tailored Tag Punch. This greeting is popped up on Stampin’ Dimensionals also. For a finishing touch, I added two of the Brushed Brass Butterflies. I love these because they are so dainty and delicate and FLAT so no problem mailing them!

That’s the story of this card that I never dreamed I was going to make! You never know what kind of inspiration might strike! Even if you don’t know exactly what to make, just get out your supplies and see what pops up!

SHOP STAMPIN’ UP! ONLINE HERE!

Rainbow Glimmer Daisies Thinking of You Card

Rainbow Glimmer Daisies Thinking of You Card

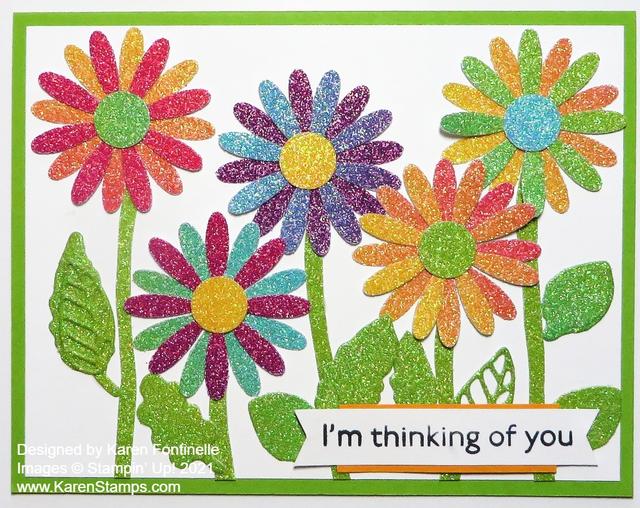
The other day when I was playing with the beautiful, fun Rainbow Glimmer Paper to make my little leprechaun hat and shamrocks for St. Patrick’s Day, I couldn’t put it away! This Rainbow Glimmer Daisies Thinking of You Card is the result of playing some more with it!

The card base is Granny Apple Green Cardstock with a layer of Basic White. I thought I would try punching out some flowers in all the colors! I used the Medium Daisy Punch, punching out two daisies for each flower. I tried to cover all the color shades I could on the Rainbow Glimmer Paper. For the flower centers, I used my retired 1/2″ Circle Punch.

The flower stems I just cut by hand and purposely made them a little curvy so it didn’t matter if I got them straight or not! The leaves are all die-cut with various dies. I just looked through my dies for small leaf dies. Not sure it’s a good look to have all these different looking leaves on Rainbow Glimmer daisies, but it’s a fun card so it’s okay!

On this busy card, I didn’t have much room for a greeting and probably could have left it off. I used one from the Art Gallery Stamp Set. I wanted something that wasn’t too big but big enough to show up on the busy card. I experimented with layering it on another color or even leaving the greeting un-layered, but I settled on just adding a slim piece of Mango Melody on the top and bottom of the greeting but not going all the way across. I like it. Just a little pop of color but doesn’t interfere with all the flowers.

I don’t think I have the Rainbow Glimmer Paper out of my system yet so a little more playing might be in order. Here is a card I made a while back using the Banner Blooms Die. I tried to get as many shades of the glimmer paper into the bouquet as I could. You just don’t know exactly what look you will get when you use this paper! That’s the fun of the rainbow glimmer bands on the paper!

Remember, the Stampin’ Up! retirement list will be coming out very soon, so if there is anything you think “might” be retiring from the Annual Catalog, you might want to grab it early so you don’t miss out when the list actually hits. No one but Stampin’ Up! know what is on it yet!

SHOP STAMPIN’ UP! ONLINE HERE!

Jar of Flowers Daisies Card

Jar of Flowers Daisies

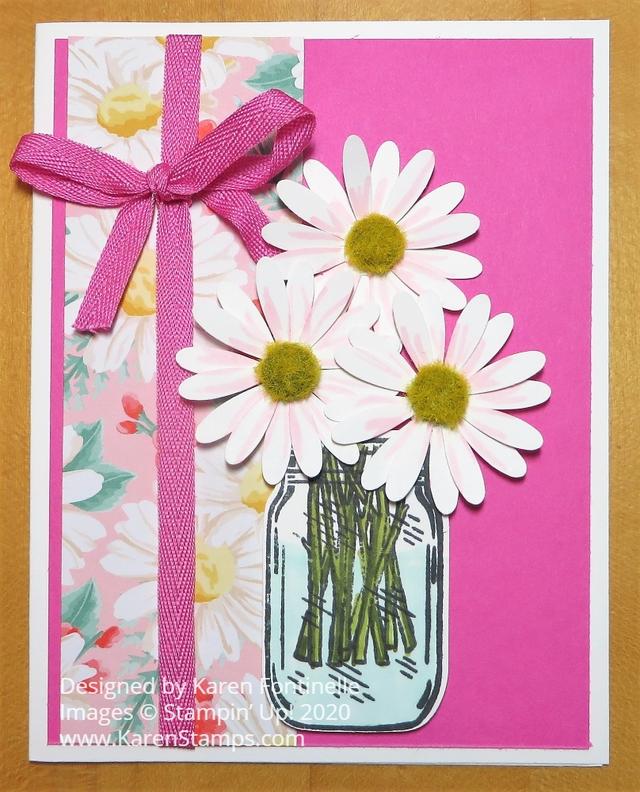
This Jar of Flowers Daisies Card was fun and easy to make, especially when it matched so nicely with the designer paper I already had on an unfinished card. Sometimes your creative card ideas can just come from the pile of stuff on your table!!

The card base is Whisper White Cardstock with a layer of the new In Color, Magenta Madness, which I am loving! It’s a little shocking when you first see it in person but it grows on you! Then I had added a strip of daisies in the Flowers For Every Season 6″ x 6″ Designer Series Paper and adhered a piece of Magenta Madness 1/4″ Ribbon, plus tied on a bow. I already had this card made to this point except for the bow when I found it on my desk and thought I should just finish it off!

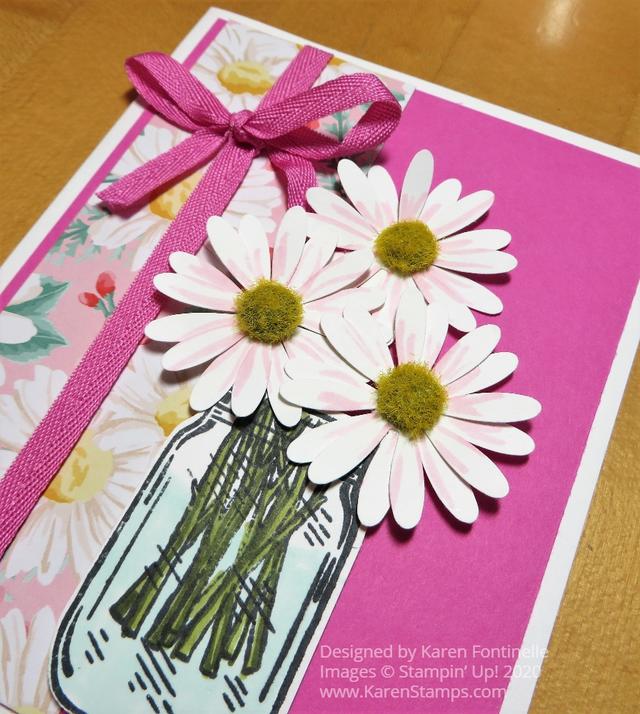
I stamped the jar in the Jar of Flowers Stamp Set in Memento Ink and colored in some water with the Light Pool Party Stampin’ Blend. I also stamped the flower stems and colored those with the Old Olive Stampin’ Blend with some shading of Mossy Meadow. Then the jar was punched out with the Jar Punch. I always forget there aren’t dies with this stamp set for the flowers!

For the flowers, since the designer paper had daisies on it, I used the Medium Daisy Punch to punch out six daisies so I would have two daisies layered for each flower. I glued these two layers together with Multipurpose Liquid Glue but then popped them up (the two front daisies) with Stampin’ Dimensionals® on the card. I decided to add some little lines in pink on each petal to copy the designer paper. I just used one of my Stampin’ Blends but you could also use a Stampin’ Write Marker or not do it at all! I also used my Perennial Essence Floral Centers (retired) in the center.

The jar is popped up on Stampin’ Dimensionals with the two front flowers, as I mentioned. the third daisy in the back , at the top, is just glued right onto the card front.

Besides not having much room, I liked the card as is and decided to even try to add a greeting. You don’t have to on every card although we usually do. But we don’t have to!

It’s flower season in the heat of summer so try out that Flowers For Every Season DSP and flower stamps or the flower dies and daisy punches! Soon we will be starting on holiday projects! Yikes!

Here is another card I made with both sizes of daisy punches and you can see another choice to use for the flower center, also retired, but you can substitute the Gold Glitter Enamel Dots.

This Jar of Flowers Daisies Card would make a bright and happy card to send to someone or give with a gift.

Shop Stampin’ Up! Online HERE!

Jar of Flowers Daisies Closeup

Garden Lane Daisy Card

Garden Lane Daisy Card

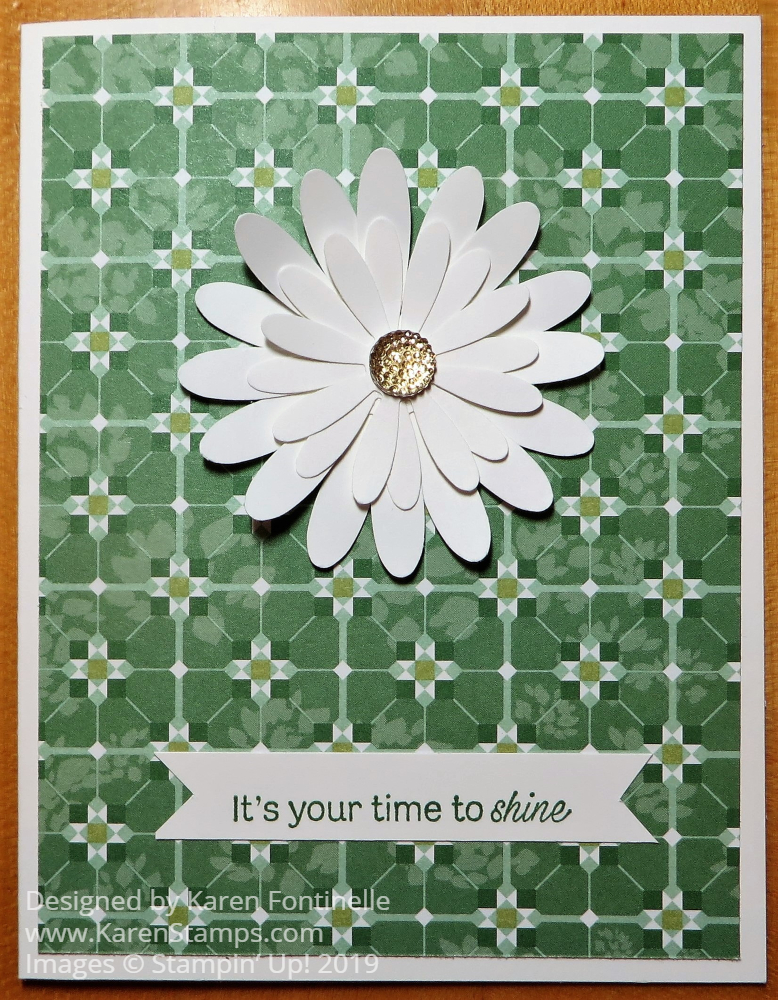
Sometimes all you have to do is look at a package of designer paper and a certain pattern jumps out at you and demands you make a card with it such as this Garden Lane Daisy Card. This is a very easy card to make if you have the two daisy punches and would be a wonderful way to encourage a friend or loved one with this greeting.

You may already have the Daisy Punch from a previous catalog that coordinates with the Daisy Delight Stamp Set. Did you know there is a new, smaller Medium Daisy Punch in the new Stampin’ Up! Catalog? You can use this punch on its own or stack with the larger Daisy Punch. And it has a new stamp set that coordinates with it, Daisy Lane. That gives you two punches and two stamp sets, all involving daisies, with which you can make beautiful cards and projects!

The card base for this card is the Whisper White THICK Cardstock. While not absolutely necessary, if you would like a little more sturdiness to your card, using the Thick cardstock is a little better than the regular Whisper White. As I said, I chose a pattern from the Garden Lane Designer Series Paper. There is something about this paper, to me, that looks so fresh and calming. Maybe it is the greenery look to it. Back to nature!

First I was going to just use the Medium Daisy Punch, with two flowers together on this card, but then I decided to use it with the larger daisy punch in the center of this card. I just punched two daisies of each size and glued them all together with the Multipurpose Liquid Glue. Then the one large flower was adhered to the card front. If you like, you can curl the ends of the petals a little with a Bone Folder to make the flower stand off the card a little bit. In the center, I placed a Gold Faceted Gem.

The greeting is stamped with Garden Green Ink from the Daisy Lane Stamp Set. You can purchase the Medium Daisy Punch with this stamp set in the Daisy Lane Bundle and save 10% if you like!

Daisy Lane Floral Friend Card

Daisy Lane Floral Friend Card

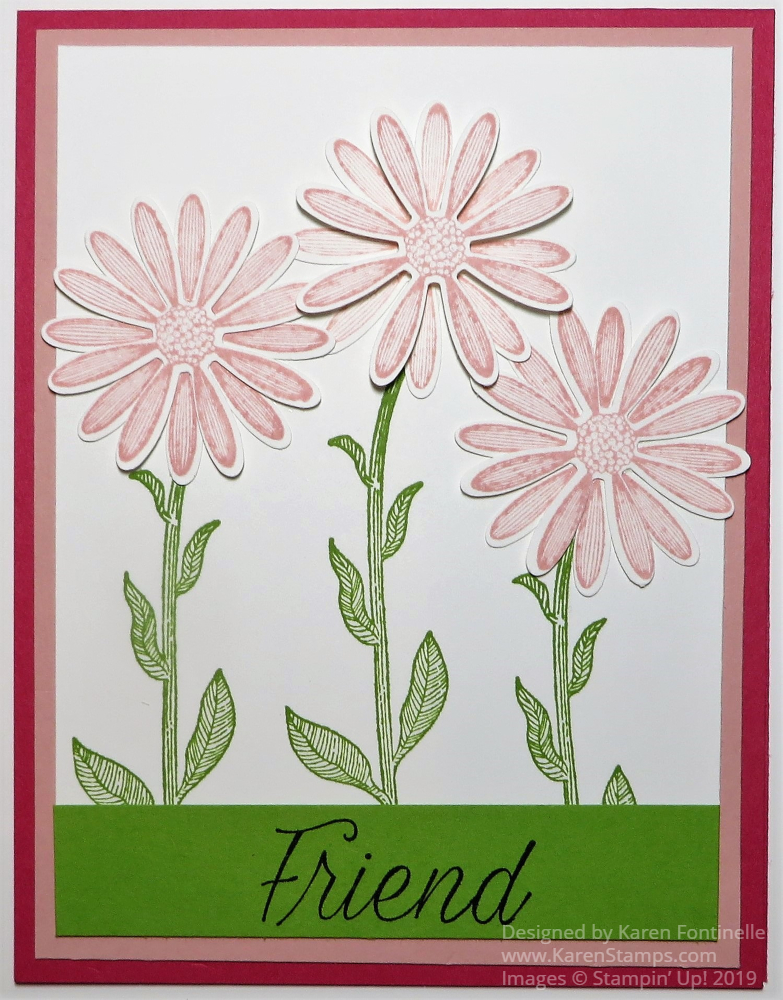
This new Daisy Lane Stamp Set is easy and fun to use to make a card, like this Daisy Lane Floral Friend Card. I kept forgetting to order this new stamp set and smaller Medium Daisy Punch. As you can imagine it pairs with the Daisy Punch we have already had that has been quite popular.

Since this was my first card with this stamp set and punch, I wasn’t too sure what I was going to make. I chose Melon Mambo for the card base since I thought about it but didn’t choose it the other day for a card! For a layer I used Blushing Bride. The top layer is Whisper White.

First I stamped the flower stems with Granny Apple Green Ink. I just stamped them and thought what else I would do. Then I stamped six daisies with Blushing Bride Ink and punched them out so I could have a double layer of daisies to make a fuller flower. It seemed like those three daisies were going to look fine on the card. Two of them I glued together in the center with my Multipurpose Liquid Glue and the center one I popped up the top daisy on a Mini Stampin’ Dimensional. All three daisies are glued to the card with the Multipurpose Liquid Glue.

Now the question was where to put the greeting! I wanted to use one in the Daisy Lane Stamp Set so I just cut a strip of Granny Apple Green Cardstock to match the ink and just stamped the word “Friend” on it and adhered to the bottom of the Whisper White. This covered up my uneven placement of the stems and provided a place for the greeting! At this point, I thought the card looked fine and I stopped! Sometimes you have to know when to stop!

For the inside of the card, I cut a layer of Whisper White and stamped a Blushing Bride daisy in the corner since the Melon Mambo would be a little dark to write on.

 You can purchase the stamp set or punch separately or you can save 10% by buying them in the Daisy Lane Bundle. And if you really like daisies, you will also want the Daisy Delight Stamp Set and Daisy Punch that we have had in a catalog before.  This Daisy Lane Floral Friend Card is an easy one to make with just stamping and some daisy punching!