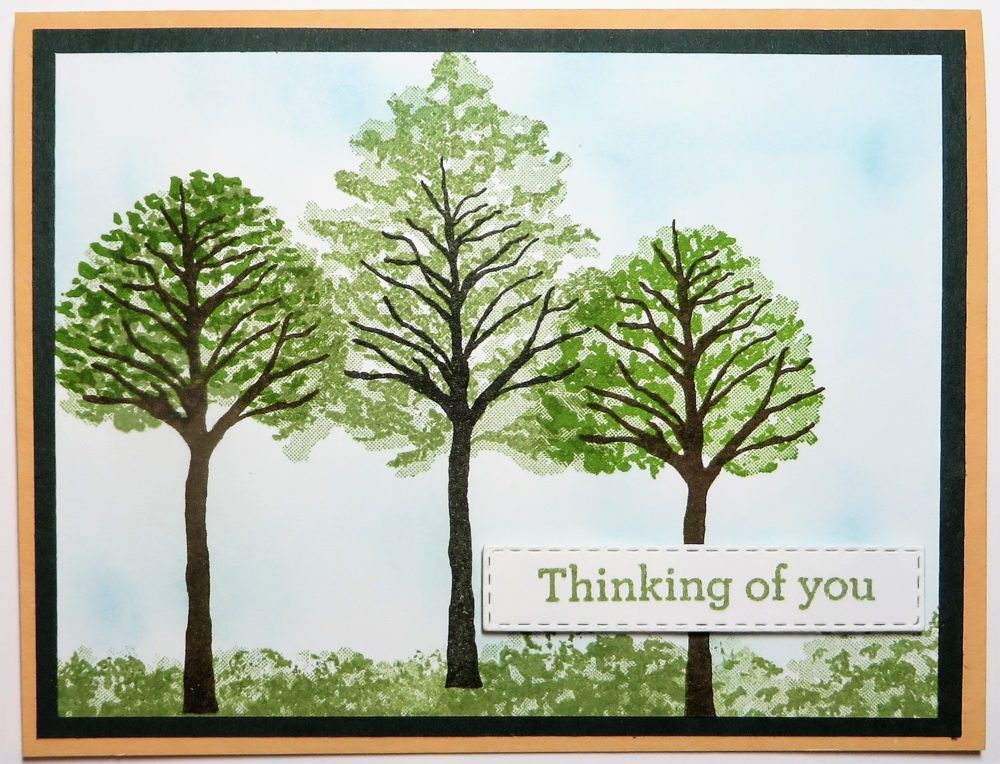
This is a sneak peek of one of the new stamp sets coming in the next Stampin’ Up! Annual Catalog in May. I made it a simple card because I was really just experimenting with the stamps. I think this set has tremendous potential as we get ideas for stamping the different style trees with different colors of ink for many seasons, occasions, and different looks.
This is the new Beauty of Friendship Stamp Set that will come in a Suite called the Beauty of the Earth. It includes the stamp set of trees and greetings, a set of dies, beautiful watercolor-look designer paper with which to create trees and enhance our cards and projects, and an embossing folder.
For my card, I used two of the new In Colors, Evening Evergreen for the layer and Pale Papaya for the card base. The trees were stamped on Basic White Cardstock using Early Espresso Ink on one tree trunk and Soft Suede on the other two. Then I just chose the leaf stamps for the tree tops, stamping in Granny Apple Green since it is spring. On one I overstamped with a different tree top stamp in Pear Pizzazz. I think you will find the look of these stamps very interesting and fun to experiment with to see what looks you can get. And when fall comes and you want colored leaves, oh my! You will be able to use various techniques for all those fall colors!
The three trees looked a little barren just stamped there so I added some grass for them to be growing in. I simply used one of the tree tops to stamp little blobs of green ink along the bottom edge of the card. Being as they are irregular in shape, I thought this technique worked fine to represent grass without looking like tree tops.
To fill in the background a little to look like sky, I used my new Blending Brush and Balmy Blue Ink to very lightly and softly add some blue color to the background. I love the feel of the Blending Brush. Our Stamping Sponges are retiring so grab some of those if you like (at a little discount!) and/or pick up some of the Blending Brushes (which are currently unavailable until they are back in stock as I write this). These are washable so you can use them over and over again with different colors. After you purchase the first three you can see if you are going to use them so much that you want more to be able to use them without waiting for them to dry between washings. If you begin with lighter colors you may be able to go on with darker colors without washing in between.
The greeting is in the stamp set and actually would fit in one of the dies included in the Suite. I didn’t have my new dies for this set out yet so I just used one of the Rectangle Stitched Dies to cut out the greeting.
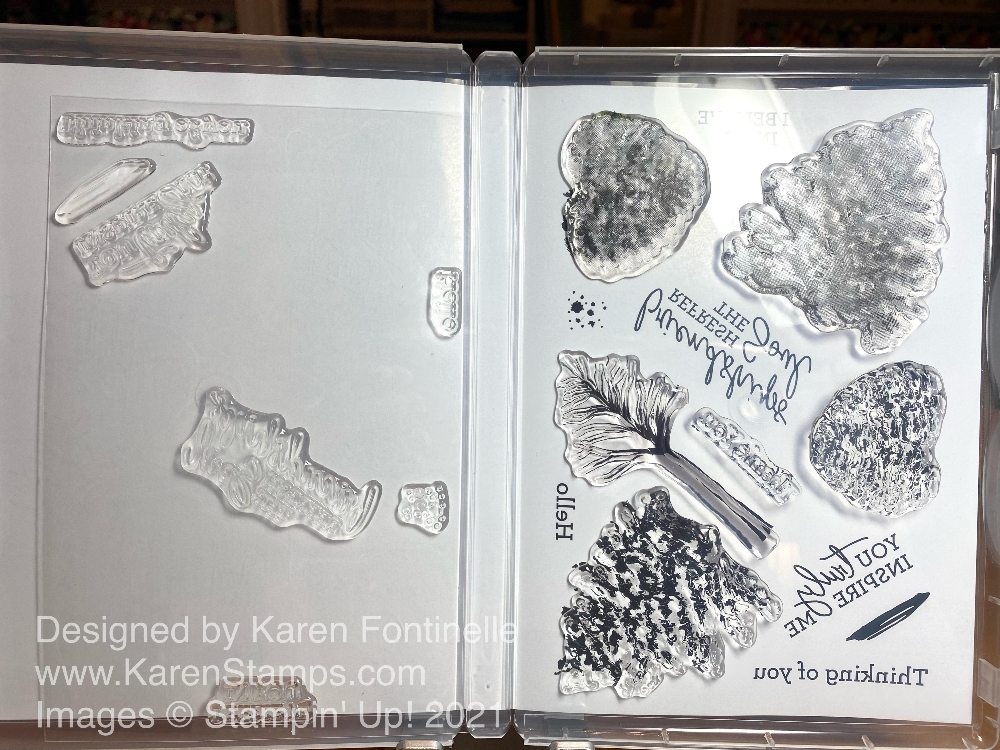
Here is a photo of the new style of stamp case you will see. The cover of the stamp set, which is slipped inside the plastic cover over the stamp case now has, on the inside, the images of the stamps printed on it. So when you open the stamp case, you will find the photopolymer stamps still encased in two pieces of plastic as we are used to now, but you will also see all the stamp images over on the right side of the case. Therefore, you can take the stamps off the plastic pieces (as you see on the left of my photo) and place them right over the images printed on the right (as you see I have done with some of the stamps).
Those of us who have been around Stampin’ Up! for more than a few years recall the love we have had for the Lovely As a Tree Stamp Set. See THIS CARD for an example. When it retired, we thought nothing could replace it. This Beauty of Friendship Stamp Set just might come close, maybe a little more dramatic with its designer paper, but I am guessing this will become a popular stamp set and Suite in the new catalog.
This Suite and its components will be available May 4th in the new Stampin’ Up! Annual Catalog so you will be able to play with the trees and stamping as I did on this Beauty of Friendship Trees Thinking of You Card.