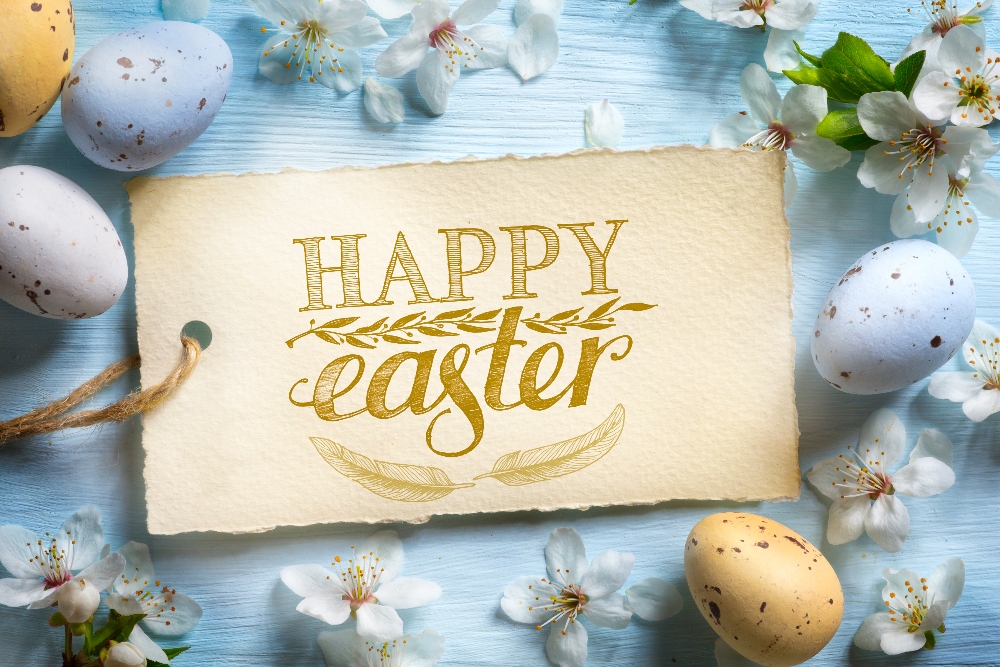
Happy Easter Sunday!
I hope you have a beautiful day with your family!


Happy Easter Sunday!
I hope you have a beautiful day with your family!
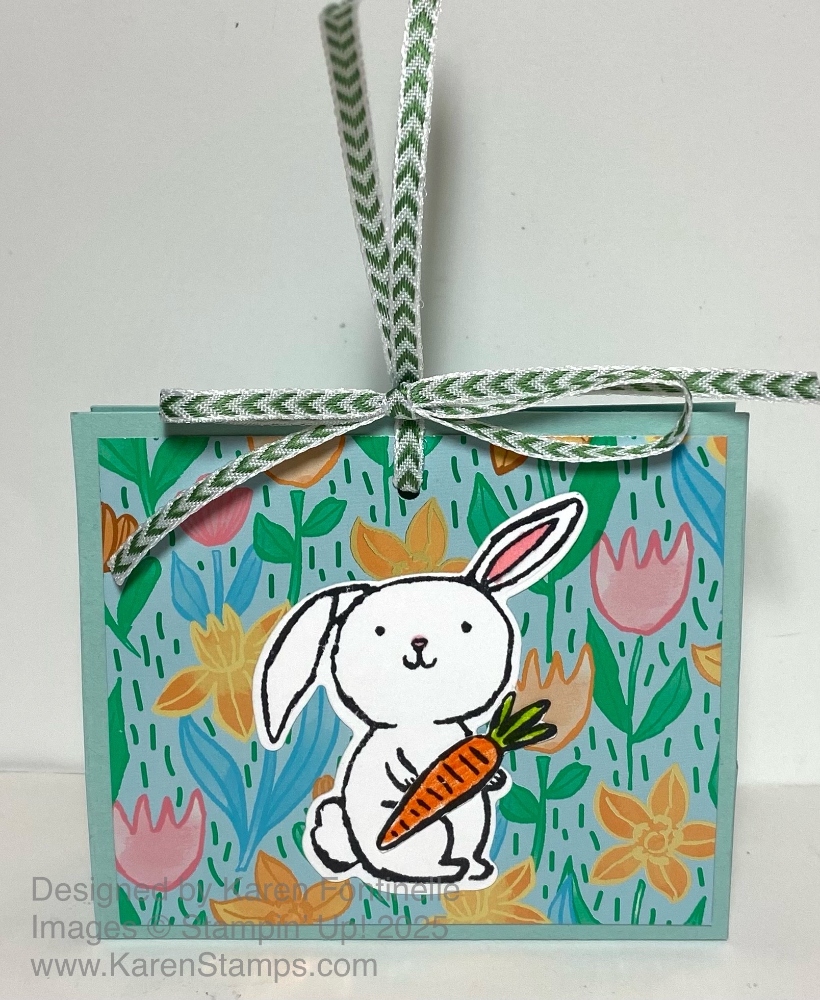
It’s time to make some candy treats for Easter, like this Easter Joy Candy Treat With Bunny. This is an easy little treat to make, and you can change it up for any occasion or celebration. For Easter, you can’t make a project any easier than to use the Easter Joy Specialty Designer Series Paper! Not every paper pattern is exclusively for Easter, but some are. Even the ones that are not “Easter” are just so pretty with bright colors with a bit of a shiny look to the paper. You can use this paper even after Easter.
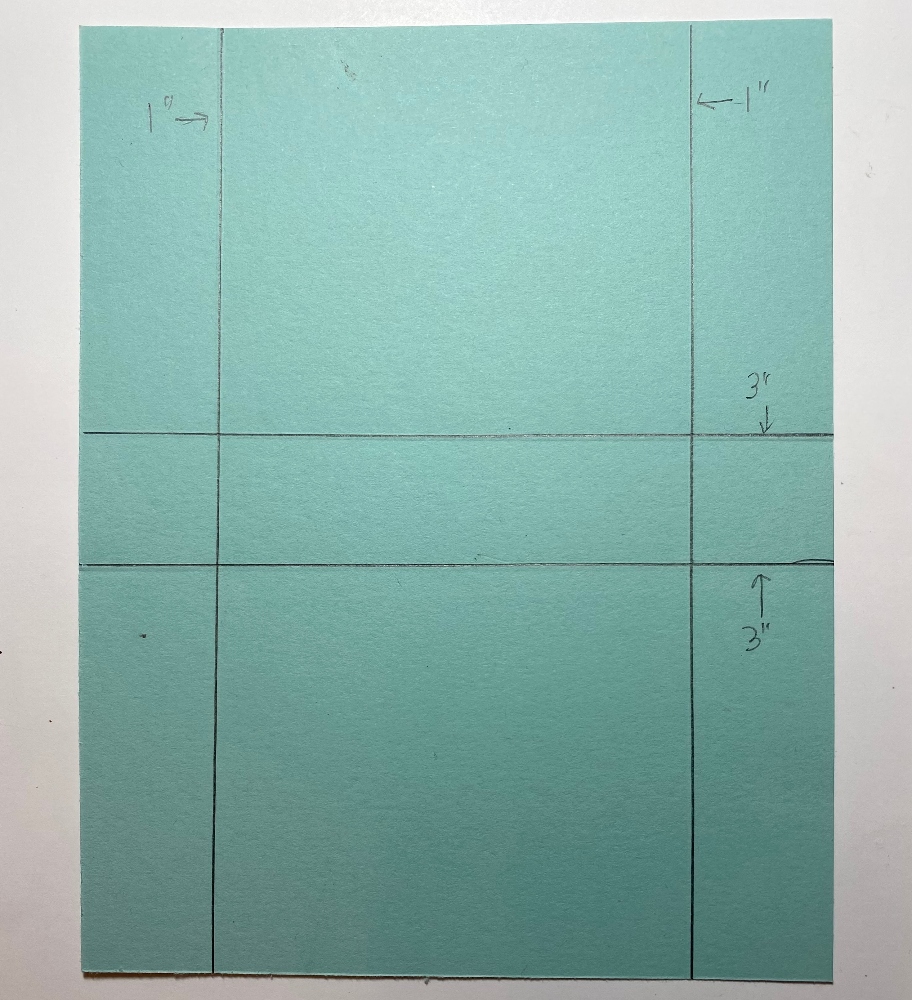
To make this little treat box, start with a piece of cardstock 5 1/2″ x 7″. Once you know how to make it, I’m sure you could modify the size. Putting the 7″ top of the paper at the top of the Paper Trimmer or Scoring Tool, score at 3″, turn and score at 3″ on the other side. Or you could say, score at 3″ and 4″, giving you a 1″ space in the center for the box that will hold the candy. Turn the paper to the 5 1/2″ side and score at 1″ on both sides in the same way. Crease and fold on all the score lines. From the top and from the bottom, cut on the 1″ score lines up to the center 3″ score lines. This will make the flaps that will form the candy box inside.
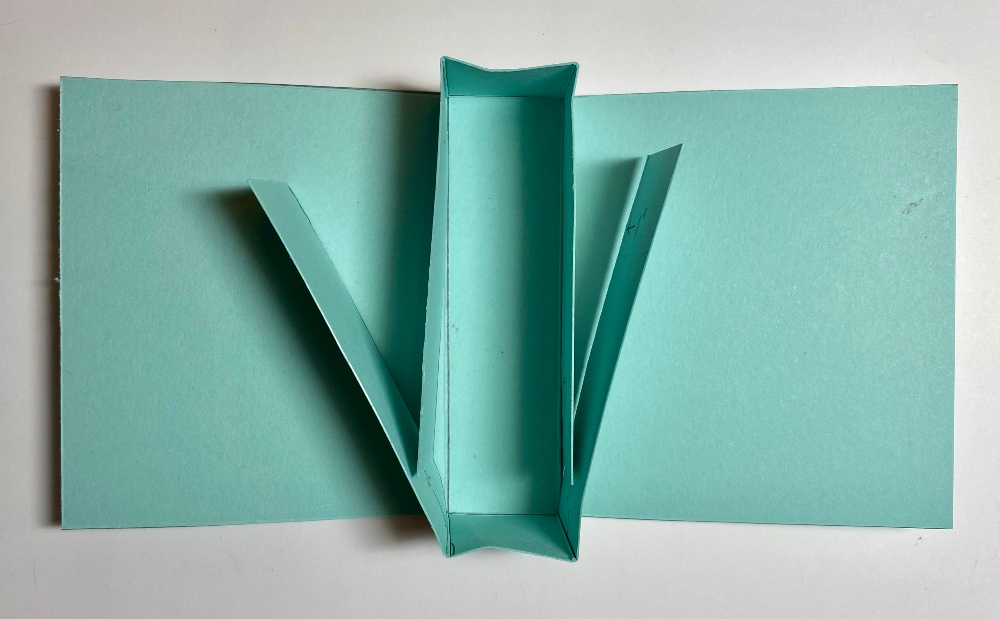
In the photo above, you can see how those side flaps fold inward and make the little inside box to hold the candy. I adhered the flaps together to make the box, being careful where one side was shorter than the other, not to get glue past where it will be exposed. OR you can glue these flaps to the front and back sides of the treat box. I did it the way I did it, but realized I could have done it the other way, too. You will see when you assemble it!

Then decorate the front at least, maybe the back, too, if you like. I added a piece of the Easter Joy DSP with tulips and daffodils. The sides are 3 1/2″ wide x 3″ tall, so I cut the DSP at 3 1/4″ x 2 3/4″. The bunny is stamped with Memento ink on Basic White using the Easter Basket Stamp Set. The carrot is also stamped and colored with Watercolor Pencils (simply because my husband was in the way of my Stampin’ Blends!). I cut it out and had the bunny hold it in his paws!
At the top, I punched a small hole through both the front and back and ran a ribbon through. It’s the Garden Green 1/8″ Chevron Ribbon. Instead of tying it in a bow right there, I left the ends loose, and tied another piece of ribbon around in a box to hold those loose ends. I don’t very often think about doing ribbon like this, but I think it is a cute way to do it. Before you tie it up, though, remember to put your candy treat inside! Or a small gift! Have fun making your treat box!

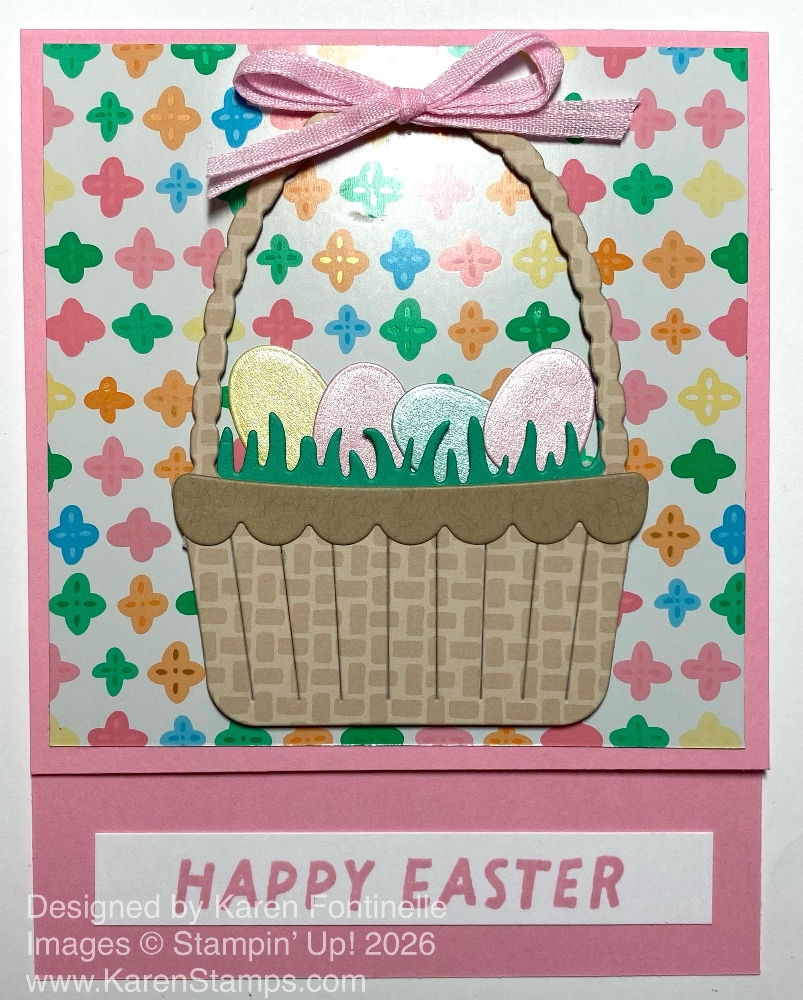
This Easter Card With Basket of Eggs was fun to make and has a slightly different design just to make life interesting! You may notice that the top flap of the card does not come all the way to the bottom of the card. That just makes it a little more fun to open up this card for Easter!
The card base is Pretty In Pink (although in the photo it almost looks like Melon Mambo or some darker pink). Cut the full sheet of cardstock in half vertically at 4 1/4″, then score at 5 1/2″. That will give you either a side fold or a top fold. This card design will have the fold at the top, although you could really do the same type of design with a side fold.
On the front flap of the card, cut off whatever measurement you would like to shorten it. I cut off 1 1/4″ from the bottom of just the front of the card. That leaves space showing from the inside of the card on the outside on which you can add decorative paper, stamping, or a greeting. Stamp the greeting either right in that empty space or stamp it on another paper and adhere it, as I did.
The background layer for the card front is just a whimsical design in the Easter Joy Specialty Designer Series Paper. It has many colors, so you can choose any for your card base. I chose Pretty In Pink. This is a retiring In Color soon, so if you need more, perhaps you should stock up! This piece of DSP is cut at 4″ x 4″.
The Easter basket is cut from one of the papers with a basket weave look and color to it. Then I added a Crumb Cake scalloped edge to the basket. The Shy Shamrock green grass in the basket is also diecut. All of these dies are part of the Easter Basket Dies, which are currently unavailable. Hopefully, you have these dies already. I also diecut some Easter eggs out of the Pastels Shimmer Paper and put those in the Easter basket! At the top of the basket handle, I added a double bow tied with the Bubble Bath 1/8″ Faux Linen Ribbon. I love this ribbon even though it is not an exact color match. It is often just the right size to use when you don’t have space for wider ribbon.
On the inside of the card, I added a 4″ x 4″ Basic White cardstock piece. To the bottom of that, I added a piece of the Easter Joy designer paper in green, added a stamped, diecut, and colored tulip plus stamped a bunny right on the paper. He has a little color and shading with Stampin’ Blends.

At the bottom of the card, I added a “Happy Easter” greeting on a scrap strip of Basic White, which is adhered in that space. This is stamped with the Easter Basket Stamp Set in Pretty In Pink ink. It would also be pretty to stamp the greeting directly on the Pretty In Pink with Pretty In Pink ink plus some little image, too.
This is an example of how just one simple thing, making the front flap of the card shorter, makes for an unexpected, extra-special card design!
It’s time for a new Paper Pumpkin Kit! The January Kits are being sent out now for those people who subscribed by January 10th, so now we have the February Paper Pumpkin Kit! It’s early, but if you’d like to receive this card kit in your mailbox mid-February, go ahead and sign up now! Paper Pumpkin is a monthly subscription from Stampin’ Up! and I say is a treat you give yourself….or even someone special! It is a kit with all the supplies included that you will need, including an exclusive stamp set, ink spot, and even adhesive. There is no risk or obligation. Skip a month or cancel your subscription any time before the 10th of any month.
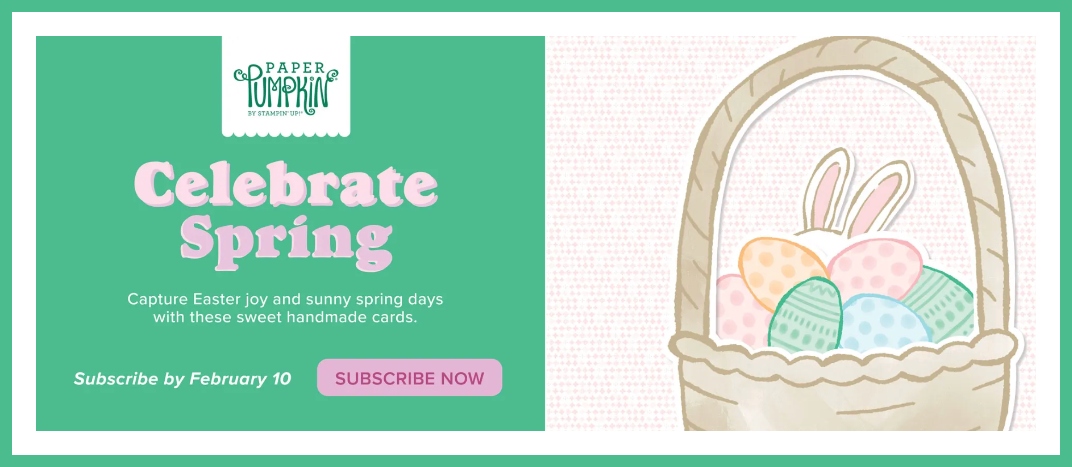
Here are the details about the February Paper Pumpkin Kit!
FEBRUARY: Celebrate Spring
Subscribe January 11–February 10
Craft whimsical handmade cards that celebrate Easter and sweet spring days.
• Makes 9 cards: 3 each of 3 designs with 9 coordinating envelopes
• Precut paper pieces and pink baker’s twine
• Iridescent pink and yellow sequins
• Coordinating colors: Balmy Blue, Crumb Cake, Lemon Lolly, Peach Pie, Pretty in Pink,
Shy Shamrock (Classic Stampin’ Spot)
Coordinates with the Easter Joy Suite Collection (item 166954) in the Spring Mini Catalog!
Paper Pumpkin is for anyone, even non-crafters or beginning crafters. Directions are included, of course, and there is always a video online, too. And if you are an experienced, avid crafter, maybe once in a while you’d like to not have to design a project on your own – just open the Paper Pumpkin box and start creating! You can even create different designs than are presented in the kit. They are your supplies and you can cut things differently, make different designs. Just have fun with your kit!
If you like, Paper Pumpkin also offers a few Add-On Dies that you can use with the three Paper Pumpkin Kits for that quarter. Right now, you can “add-on” these little dies to go with the January, February, and March Paper Pumpkin Kits. Of course, you can also use these dies with your other Stampin’ Up! projects, too.
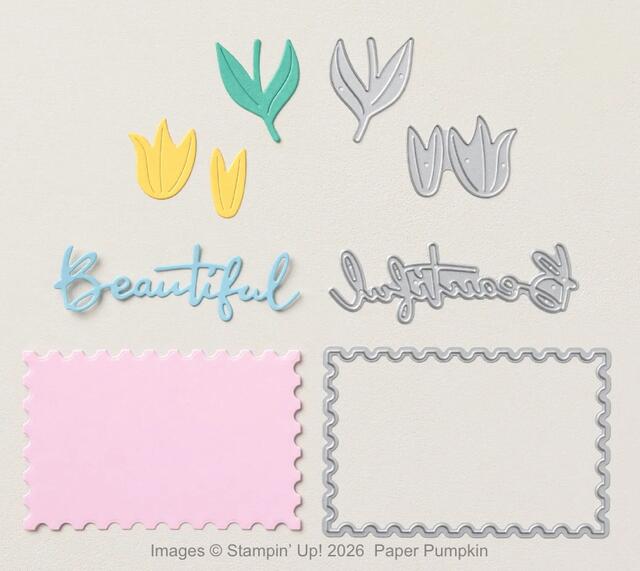
These are the Beautiful Blooms Dies (168666) that you can purchase in the Paper Pumpkin menu in the Online Store. Or just click the link!
Find out all about a Paper Pumpkin monthly subscription HERE!
Go to that link, read about Paper Pumpkin, and scroll all the way to the bottom to see some videos of past kits. Also, once you are a subscriber, you can purchase any past kits or refills (no stamp set or ink spot), and add-on dies that are available.
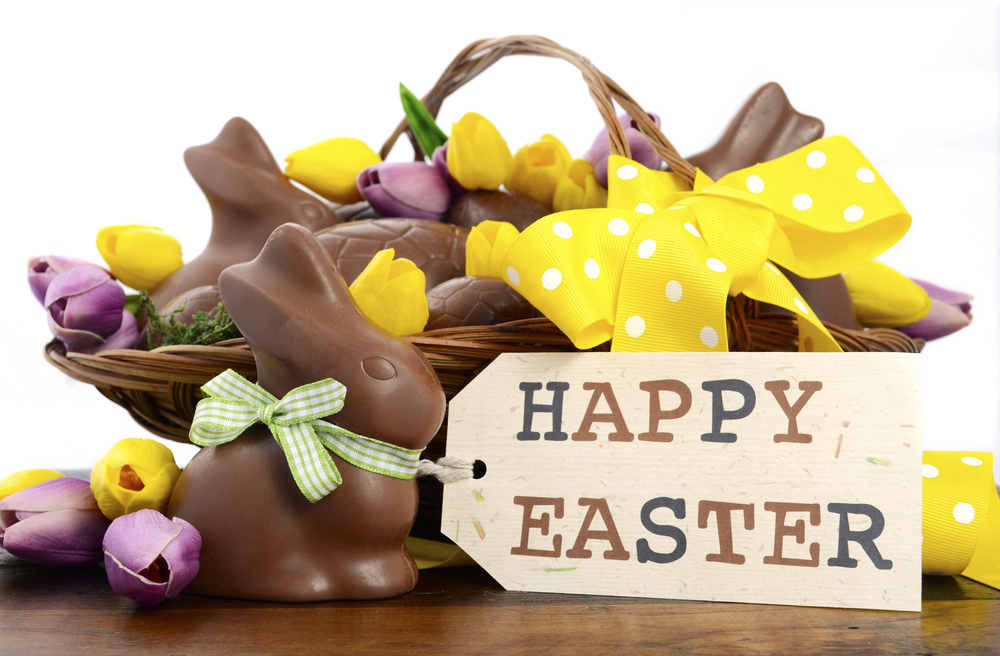
Happy Easter Everyone!
Enjoy this special day (and I hope the Easter Rabbit brought you some chocolate bunnies and eggs in your basket!)!

Easter is less than two weeks away now! This Storybook Moments Diorama Easter Card is one you can give or send to someone, but you could also keep it for yourself for some Easter decor in your home! I have one from a previous year on display as part of my Easter decorations and I enjoy it every year! These diorama cards are relatively easy to make and still fold flat for mailing.
This card begins with two pieces of Boho Blue cardstock. The front piece has an opening cut out and the back piece has a scene adhered to it to view through the front opening. All you really have to do is score the two front and back pieces, cut out an opening in whatever shape you want, and adhere a scene to the inside of the back piece, either right on that back piece or on a separate piece of cardstock so that maybe you can pop it up on Dimensionals. It all turns out to be a pretty cute showcase!
It is easy to make a diorama card! Cut two pieces of cardstock at 5 1/2″ x 4 1/4″. You can vary your measurements if you want a similar card in a larger or smaller size. Score each end of each piece of cardstock at 1/2″ and 1″. See the photo below for the side score lines and then whatever type of opening you want in the center.
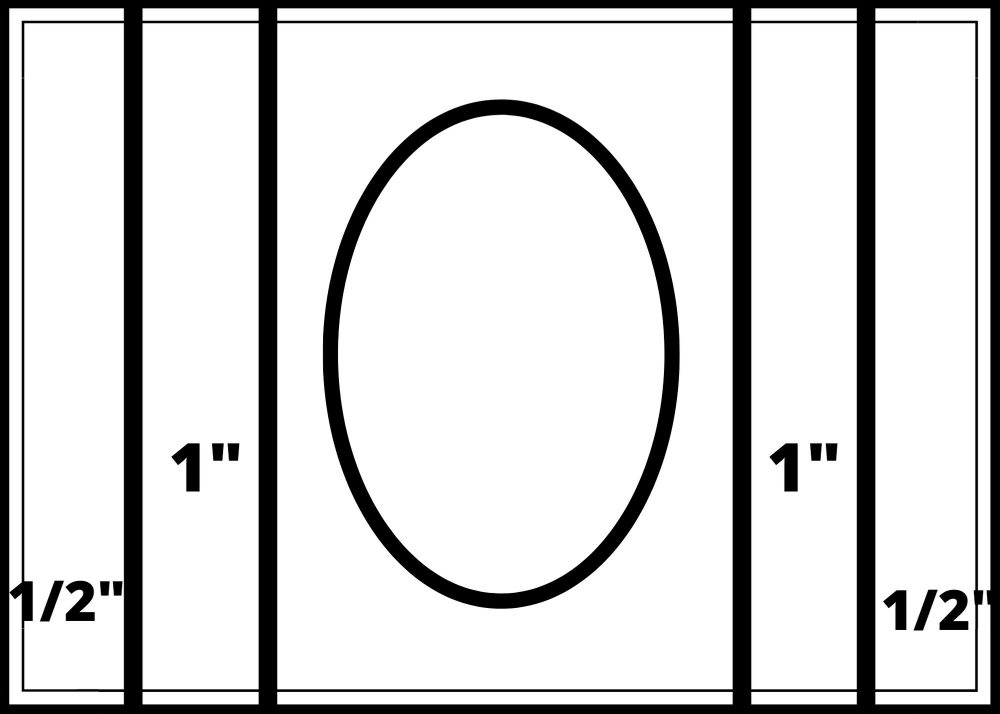
Score those ends first and then you can more easily place the opening on just the top piece of cardstock so that it is centered. Crease and fold those score lines back and forth so that when you hold them together they will make the card into the diorama shape. You can see from the top view on this photo below. Don’t glue them together yet so you can more easily make the scene in the center of the back piece. Only those 1/2″ ends are going to be glued together. The next score line is what makes the card pop out in the front and the back to pop out in the back. You will see one you score and crease. Just fold it together until you see how it goes together.
Here is a photo from the top view. You can see that I popped up the scene on the back so it would be a little closer to the window on the front. I happened to use an Adhesive Sheet covering most of the back of the scene but usually I would use Stampin’ Dimensionals.

Create your little scene or whatever you want to show through the opening in the front of the card. I used diecuts in the Storybook Moments Specialty Designer Series Paper. Just play around with all the pieces until you are happy with your scene. I took a photo with my phone of what I laid out so I could disassemble it and remember how to adhere everything.
If you make a separate piece for the inside of your card, measure the exact inside of that area because it will be a tiny bit smaller than you think on the sides because of the score lines. Mine is cut at 3 3/8″ x 4 1/4″. I used Balmy Blue for the inside piece. As I said, you could also make your scene just on the inside of that back piece.
On the front you can cut out a circle, oval, square, whatever you want. I used one of the square shapes in the Stylish Shapes Dies. Be sure to cut that out in the beginning, before you adhere the front and back! You might want to see what your inside is going to look like before you cut out the front, but probably you will want to be able to see as much of the inside as possible.
Here is another example of a diorama Easter card, this one using Easter eggs inside.
You don’t have to use diecuts. You can stamp something inside, you can make whatever you want and for whatever occasion! Just play and enjoy creating something different!

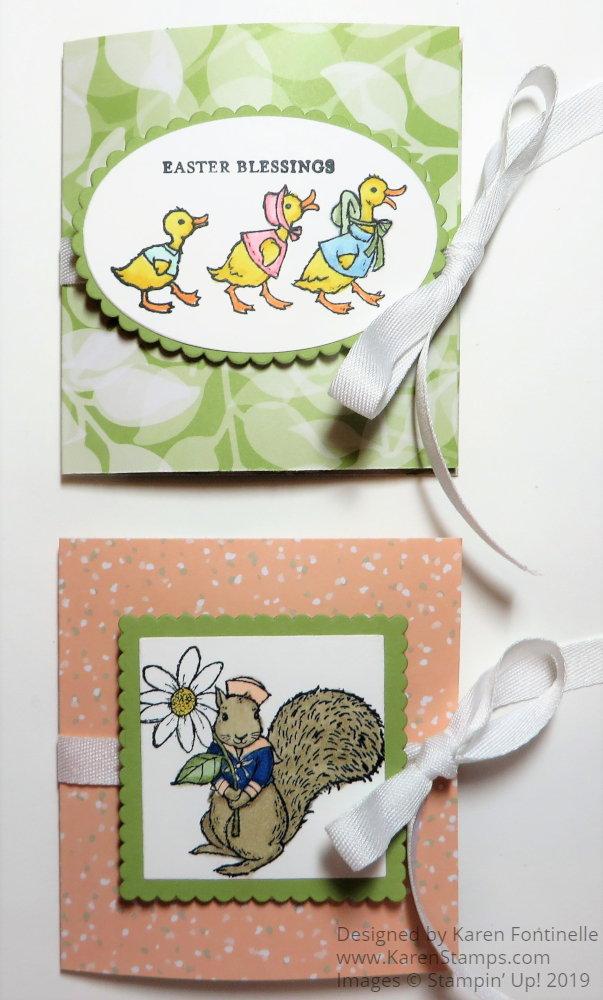
Valentine’s Day is over so I guess we are off to Easter…and/or Spring! I didn’t necessarily plan to make an Easter card for today, but this Storybook Moments Ducks Happy Easter Card came about after cutting apart these different little panels on the two sheets of designer paper.
This card features the Storybook Moments Specialty Designer Series Paper. You will find it on page 25 in the Stampin’ Up! Spring Mini Catalog (January-April Mini). It is part of the whole Storybook Moments Suite Collection if you want it ALL! Two stamp sets, two sets of dies, two designer papers, embellishments, and ribbon! It’s an understatement to say it’s an adorable suite! The designer paper has images of cottages, neighborly critters, gardening accessories, and garden grown produce! Don’t think it is only for Easter because it will make darling cards and scrapbook pages for babies, children, springtime, and any time you want to send a special card. The designer paper package also comes with two sheets of diecut images that you can adhere to your projects, cards, and scrapbook pages.
This card starts with a base of Lost Lagoon cardstock. This color is so pretty yet I don’t use this cardstock as much as some others. Besides the diecuts in the Storybook Moments DSP, the other special thing are the two sheets of smaller panels of different images from frames to flowers, to critters and produce. Just cut them apart easily with your Paper Trimmer and then use individually. The one that stood out to me the most was this one with the mother duck and two baby ducks, I assume.
I layered the ducks (panel is 3″ x 4″) on a 3 1/4″ x 4 1/4″ piece of Lemon Lolly Cardstock and another layer of Basic Beige at 3 1/2″ x 4 1/2″. This leaves a nice margin of the Lost Lagoon cardstock to show around the edge of the duck panel picking up the colors of the sky and the duck clothing.
The greeting is in the Greetings For All Mix & Match Ephemera Pack. Just punch out the diecut greeting that you want. This greeting had a white background which I didn’t like because I didn’t have white on the card. So I watercolored the greeting! I thought the Stampin’ Blend marker would be a little too dark so I used a Water Painter and tiny amounts of Lost Lagoon ink. I really mostly picked up the ink off the edges of my ink pad and maybe a bit more by just touching the corner of the actual ink pad. It sort of turned out to be an ombre shading on the greeting! I like the size and shape of the diecut greeting and I like, with my watercoloring, how it blends in a little with the sky in the background. Try it!
That’s how easy this card was, as easy as it looks! I loved it! I thought it was a stunning panel with the ducks, so cute and colorful, yet soft and subtle. I liked how the Lemon Lolly cardstock layer lightened it all up a bit.
As I write this, this paper is “Low Inventory” so if you want it I would order it very soon! Easter, this year, is April 20, 2025 so we have time to make things, but get your supplies while you can!
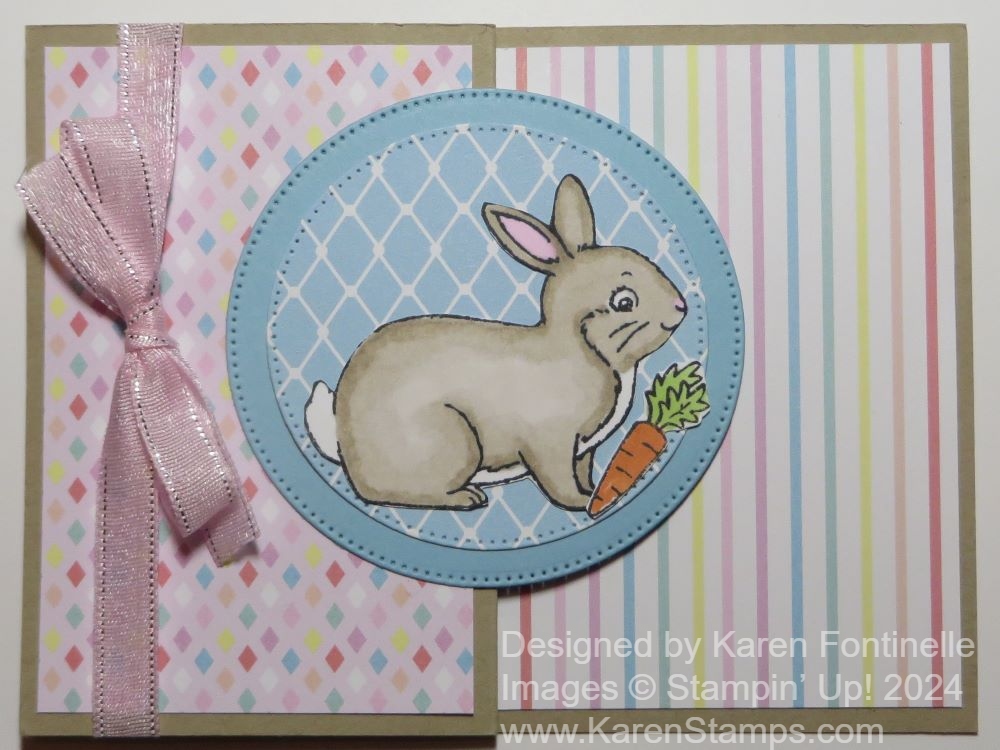
I often say Z-Fold cards are so easy to make yet look exceptional and special to the recipient! This Easter Bunny Z-Fold Easter Card was fun and easy to make with the Easter Bunny Stamp Set and Lighter Than Air 6″ x 6″ Designer Series Paper. My package of paper had gotten lost, and pushed to the back, and I often forget to use the 6″ x 6″ paper. However, when I found it and looked at it, I saw that the colors and patterns were perfect for Easter and spring cards! This paper will retire April 30 along with other Spring Mini Catalog products.
The card base is Crumb Cake and was cut at 4 1/4″ x 11″. Instead of cutting horizontally across a sheet of cardstock, it was cut vertically. I decided to put the fold on the side of the card and make it into a Z-Fold card. To make a Z-Fold card just fold the front of the card back on itself. Score the front of the card in the center vertically, then fold the right half back, essentially making a Z shape if you look down on the upright card.
To decorate the card I used the Lighter Than Air Designer Paper. The panel on the left is 4 1/4″ x 5 1/2″so I cut the designer paper at 4″ x 2 3/4″. The striped paper was also cute, so I cut that for the inside of the card at 4″ x 5 1/4″. I also added to the inside left panel the same designer paper that you see on the circle under the bunny.

For the focal point of the card, I stamped a bunny from the Easter Bunny Stamp Set. This stamp set is so cute and useful for springtime cards, Easter, baby, and maybe animal cards for little children. It will be retiring from the Stampin’ Up! Annual Catalog by the end of April and beginning April 9th will be discounted 50%! There is also a coordinating Easter Bunny Punch, also retiring and will be discounted by 20%. The bunny was colored with Stampin’ Blends alcohol markers (Light and Dark Crumb Cake plus Bubble Bath pink for the ear) as well as the little carrot in the stamp set.
The diecut circles are the largest and the next smaller circle dies in the Stylish Shapes Dies. The smaller one is the Lighter Than Air DSP and the background circle is Balmy Blue cardstock. When you adhere a shape to the front of a Z-Fold card, be sure to only put adhesive on the half that attaches to the card front on the fold and not to the inside of the card.
On the inside, I diecut a Basic White circle with the largest Stylish Shapes circle die so that it would fit perfectly underneath the front Balmy Blue circle. You want it hidden underneath the front of the card so it is a little tricky to get it positioned perfectly. To do this, put adhesive on the back of the inside piece, and with the card open, place it face down over that front piece. Then carefully close the card so the inside piece will adhere to the inside of the card, lined up with the front of the card so it will not be seen.
The inside of the card is stamped with “Happy Easter” in Memento ink. I had already stamped and cut out the three Easter eggs to possibly use on the front of the card, but instead, I used them inside the card. It would have been easier to stamp them on the inside rather than cut them out!
For an embellishment, I tied a Bubble Bath pink ribbon and bow just around the front folded panel. This ribbon is part of the 3/8″ Sheer Ribbon Combo Pack. The other two colors are Azure Afternoon and Lemon Lolly. This ribbon will be retiring and will be discounted at 30%. I could have added a greeting on the front of the card also, but there wasn’t very much room for one and I had the main one on the inside. You could also add some sequins or gems to the card.
Check out this Easter Bunny Stamp Set, Easter Bunny Punch, and ribbon when they go on sale on April 9th plus the other retiring products from the Annual Catalog and the Spring Mini. Here are the lists of Last Chance Products. Also, if you need any Stampin’ Blend markers (check yours for any brush tips that don’t work very well anymore if you use them a lot and you might want to replace them) the price will be going up $1.00 per Combo in the new Annual Catalog.
If you need some last-minute Easter ideas for this weekend, here are some from the past. Maybe you have these older supplies to use! Of course, you can always substitute papers, colors embellishments, etc. Use what you have! Just click on the link below the photo to go to my blog post with information and directions.
Someone asked me to make two Easter treats for her nephews, so I copied a bunny treat box I had made earlier! If you don’t have this old die to form the box, just make an ordinary box (or maybe you have a small gift box around the house you could cover or decorate with designer paper).

Make an Easy Paper Easter Basket
You’ve likely made these little baskets before. Use cardstock or designer paper and just decorate!
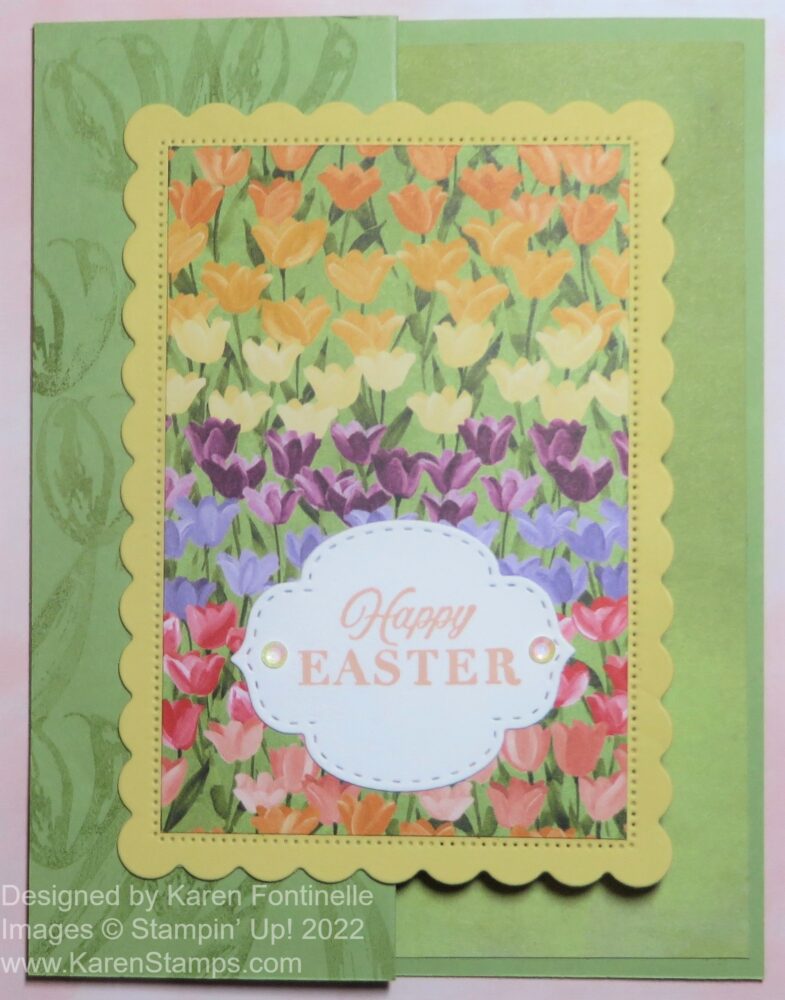
Flowering Fields Z-Fold Tulips Easter Card
Use the retired Flowering Fields Designer Paper if you have some in your stash or ANY pretty paper, layered on a rectangle of some sort. Make it a Z-Fold card for extra pizzazz. Add a greeting or write “Happy Easter” by hand if you don’t have a stamp. “Just For You” always works, too!
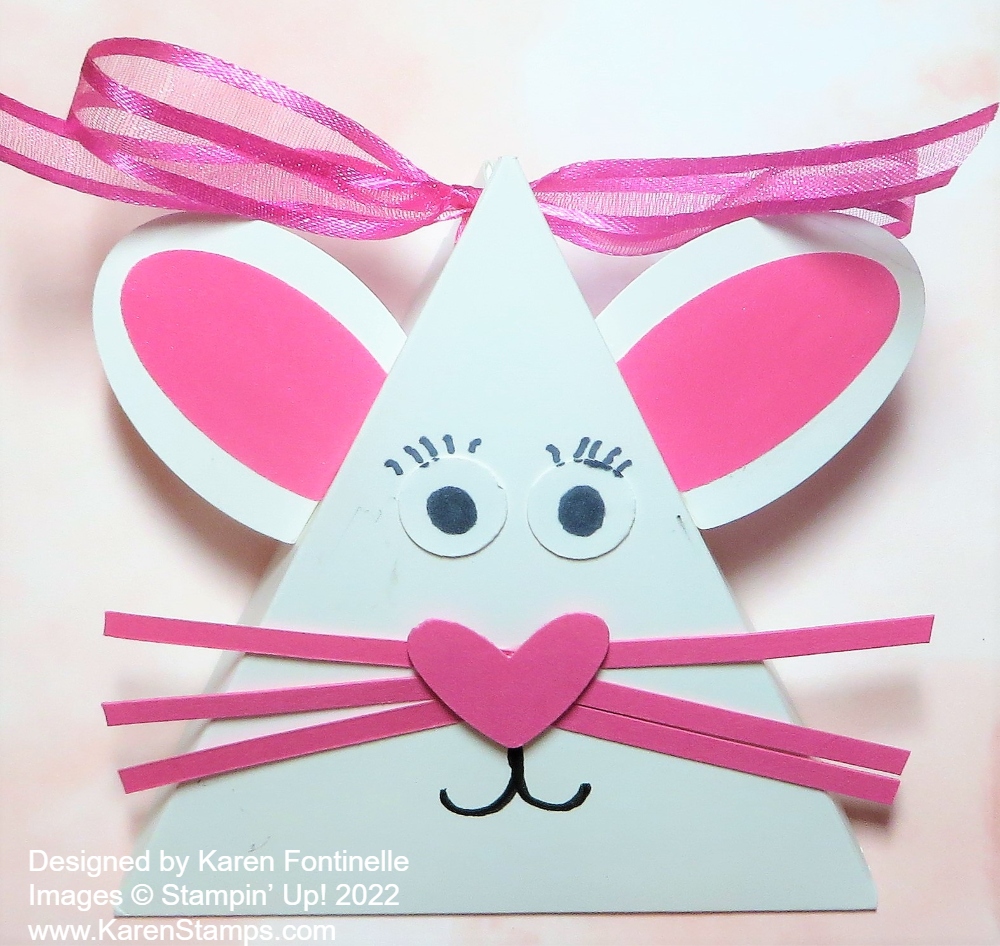
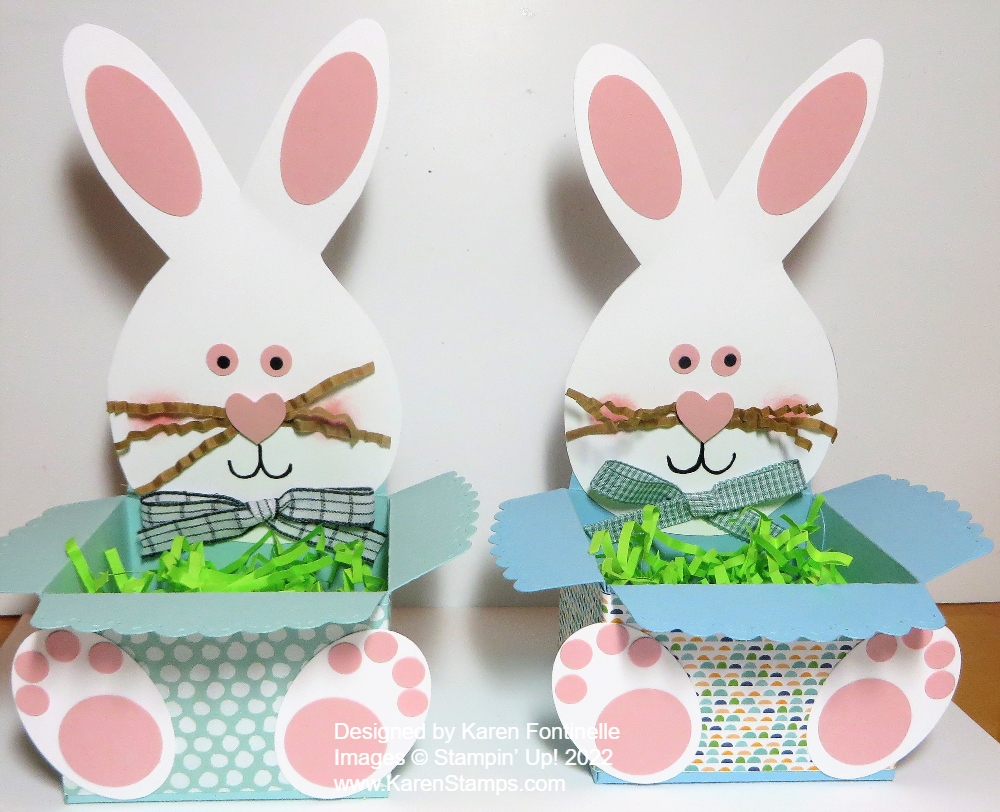
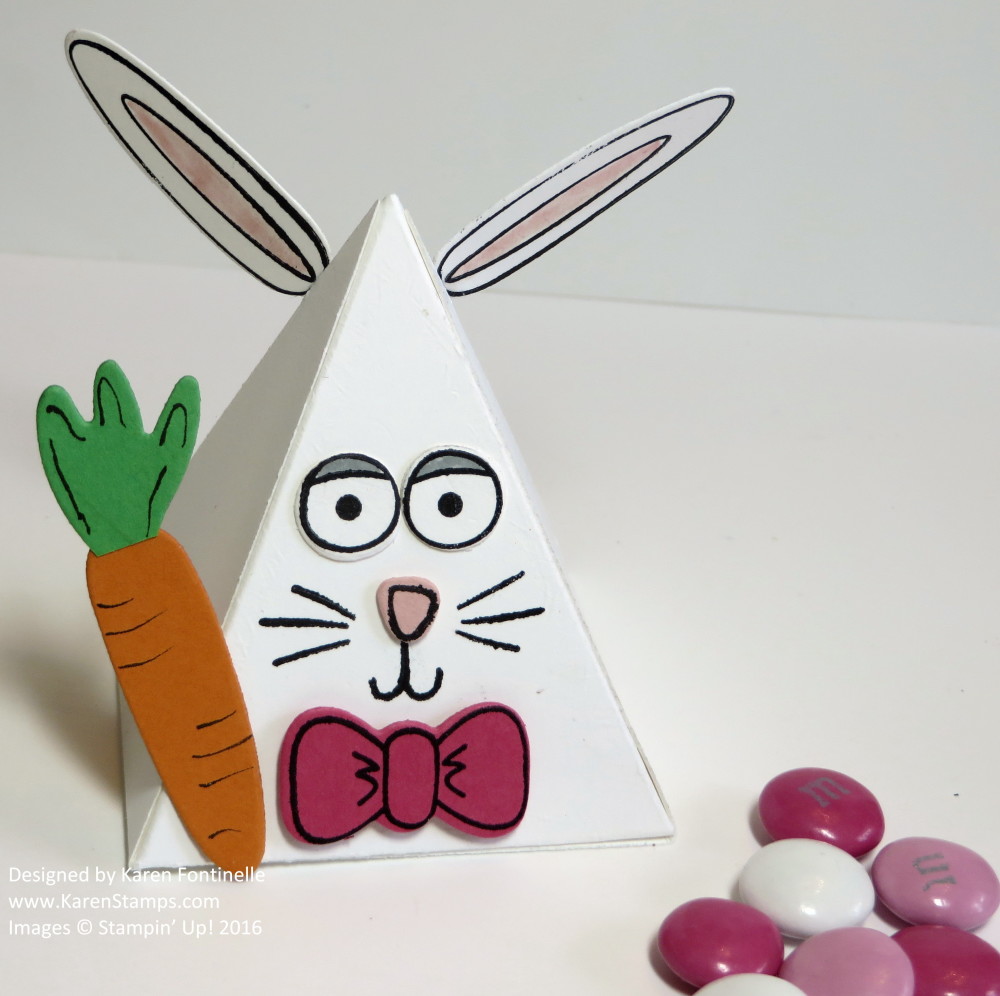
Triangle Box Easter Bunny Treat
Here’s one of those easy Triangle Boxes that I like so much. This one is decorated to look like an Easter Bunny, of course! You just need some ovals for ears and maybe a little heart or circle for the nose plus some whiskers! Draw on a face. Fill with treats and tie at the top.
You can find even more ideas if you click on the “Easter” in my Categories drop-down box. It probably goes back MANY years!
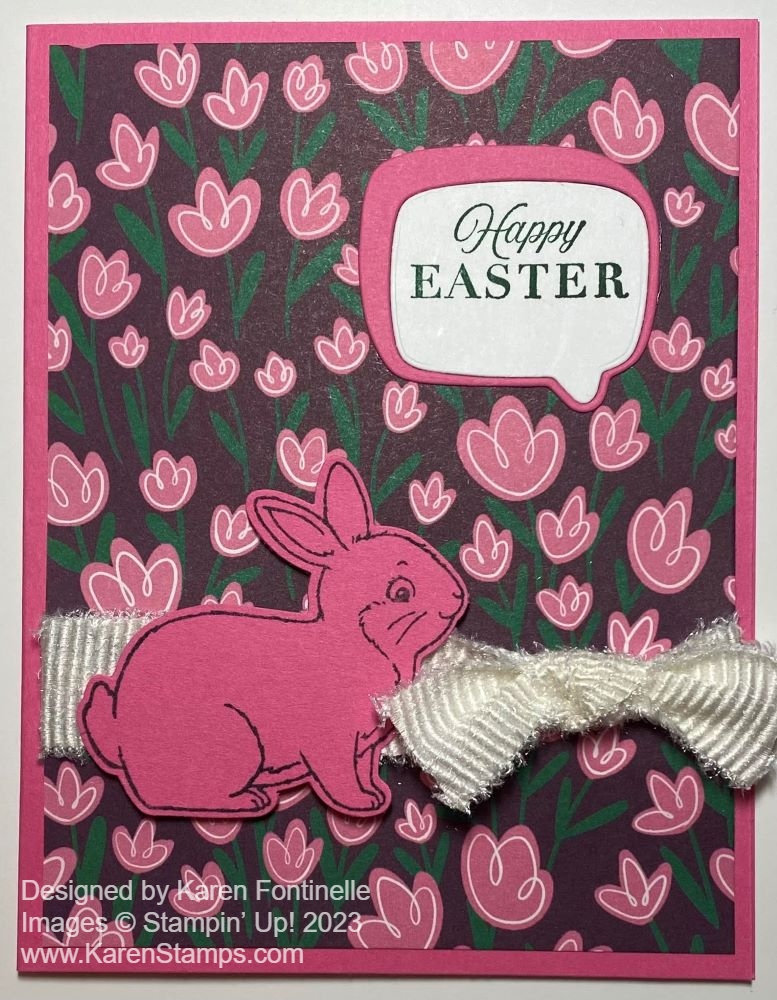
How about a hot pink Easter card? Well, this Polished Pink Easter Bunny Card probably fits the bill! As long as I already had the Polished Pink cardstock out and as long as this piece of designer paper had already grabbed me, I decided to go ahead and make this card! It’s quick and easy if nothing else!
You still have time to get a few Easter or Spring cards in the mail if you want to and hopefully, they will arrive in time! Easter is Sunday, April 9, 2023.
This card uses the Flowers & More Designer Series Paper that I have really enjoyed from the Spring Mini Catalog. I didn’t even pay attention to it at first, but once I got it as a Host Reward (p. 90) I loved using it. Before adhering the designer paper to the card base of Polished Pink, I wrapped around some ribbon. I pulled out several white ribbons but I liked my first try, the White 3/4″ Frayed Ribbon. Even though it is quite wide, I think it works okay. Instead of trying to tie ribbon all the way around a card layer, just cut it long enough for a small amount to wrap around to the back and adhere those ends. Then you can add a bow or knot or whatever you want separately.
The bunny is stamped in Memento ink from the Easter Bunny Stamp Set. I really have gotten a lot of use out of that stamp set for Easter and it will be good for baby cards, too, with those cute bunnies! I punched out the bunny with the Easter Bunny Punch. As I’ve mentioned before, it is backordered and hopefully will be back in stock around May 15. I popped the bunny up with just two Stampin’ Dimensionals, one to be over the top of the ribbon and one below. It might not be exact but get it as close as you can since the ribbon is a little thick.
For the greeting, I stamped “Happy Easter” in the Celebrating You Stamp Set in Shady Spruce ink. Next, I use the Conversation Bubbles Dies to cut out the greeting. It actually cuts out the two separate pieces, so then I diecut a piece of Polished Pink cardstock to get the border piece I wanted. I first tried Shady Spruce for the border but I liked the pink better!
I did tie a small piece of the Frayed Ribbon around in a knot, which is a little thick, but I liked it fine! If you would like you could add a few rhinestones to the bottom of the greeting.
Remember, the Last Chance Sales for both the Annual Catalog and the Spring Mini begin on Tuesday, April 4th. If you are interested in the Conversation Bubbles Stamp Set and/or Dies which are retiring, do NOT buy the Bundle! The stamp set will be discounted 60% and the Dies 20%. The Bundle itself is still full price! So do the math if there are discounts on the things you want to buy when the sale begins! The Celebrating You Stamp Set is also retiring but not discounted. It is one I have used a lot for greetings! I’m sad to see it go!
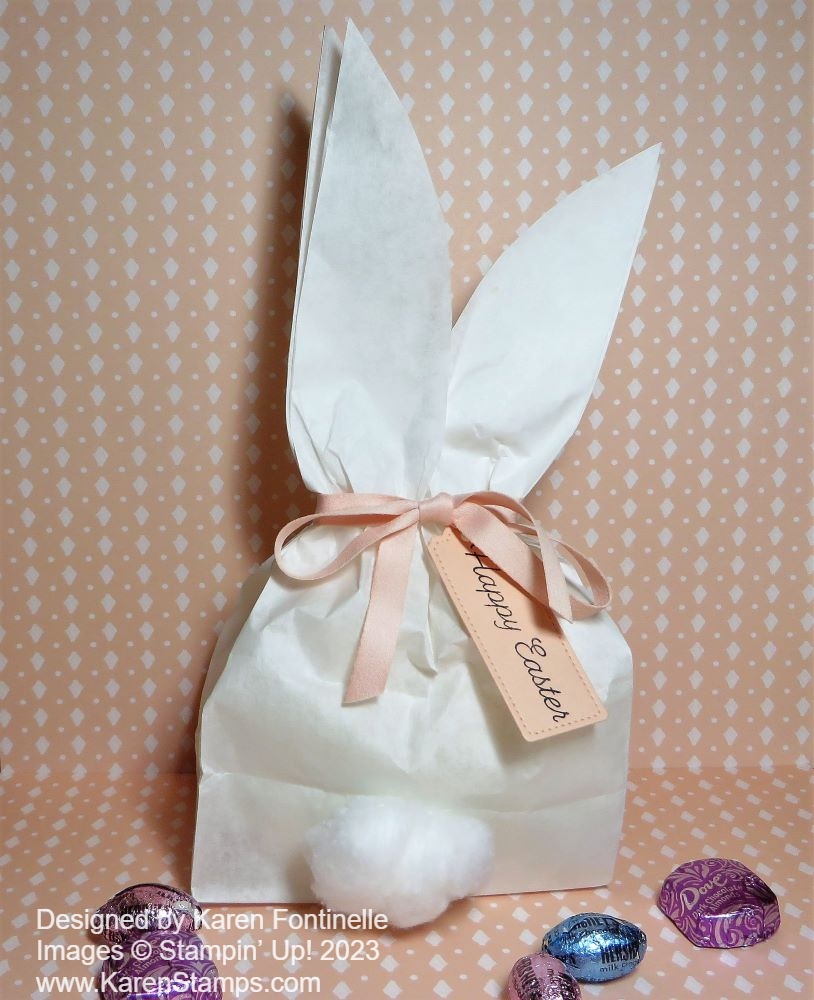
Here’s a cute Easter treat bag or even an Easter decoration for your home….or both! Make this super easy Easter Bunny Treat Sack in minutes!
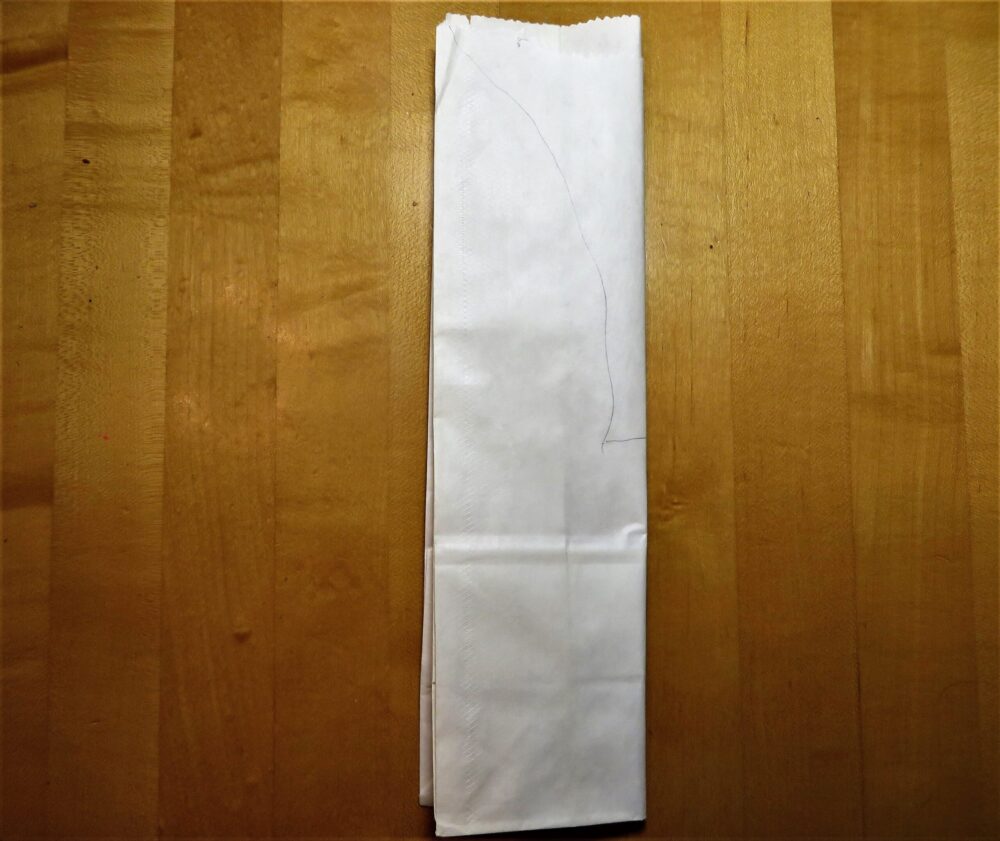
Use a lunch sack, either kraft or white. I would have used kraft but I couldn’t find any in my house! But I did have white and there are white bunnies, too!
To begin, fold the lunch sack in half lengthwise and simply draw the bunny ear from the top down a little way or as far as you like it. Then cut with scissors, keeping the bag folded and flat so it will cut both sides the same, just like when you cut a heart for a valentine.
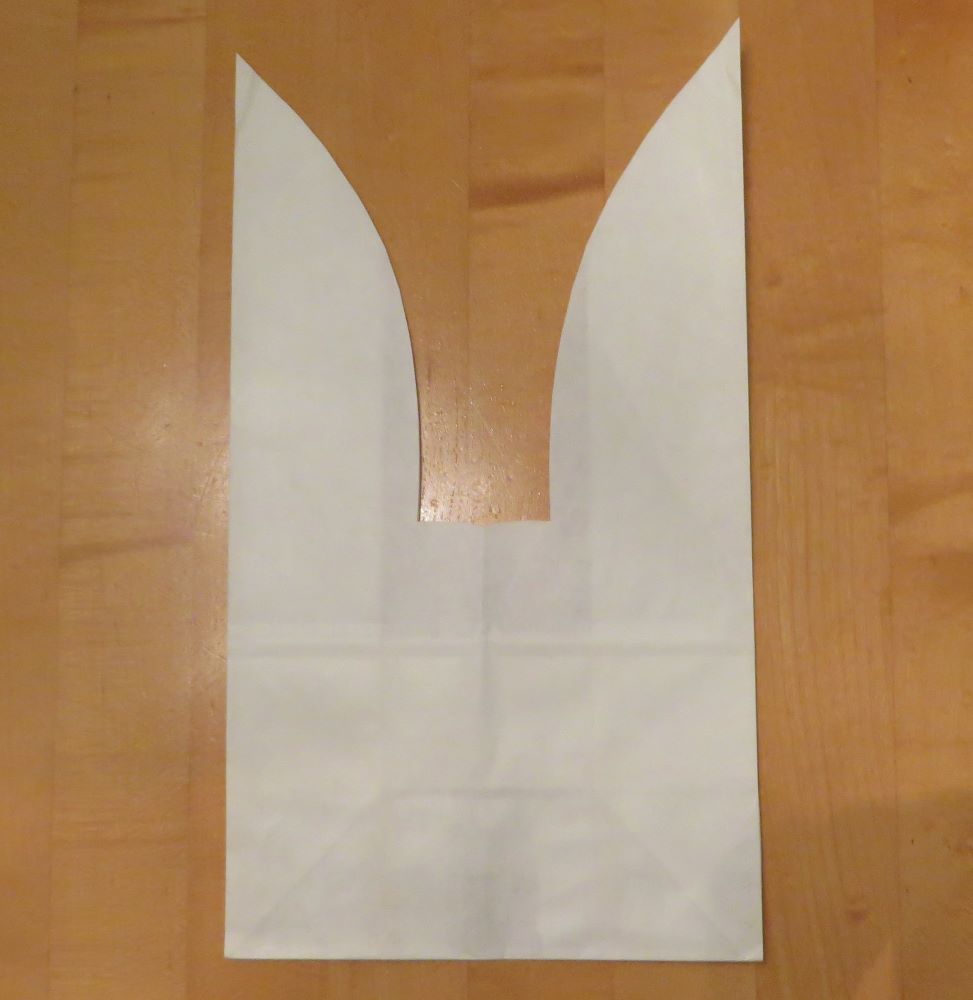
If you are giving it as an Easter treat, put the candy or gift inside, maybe adding some shred or tissue paper to fill up the space to shape the bag. If you are just using it as an Easter decoration for your house, stuff the bag with tissue paper or newspaper or whatever you have. Then tie a ribbon around the sack below the ears to make it look like a bunny. Add a cotton ball or pompom to the sack for the bunny’s cottontail. Add a Happy Easter tag if you wish or the name of the person you are giving the treat to.
This style shows the back of the bunny with his cute cottontail, but if you prefer you could draw on the bunny face and have it be the front of the bunny. Either way is cute!
Just a fun little Easter thing to make that is so simple you may as well make one!
In case you are looking for some last-minute Easter ideas, here are a few I made in the past! Maybe it’s something different than what we’re all seeing right now or maybe you have these older stamp sets and products. Just pull them out and start creating! Or update with your current products! It’s all fun! Just click on the title to go to the blog post.
Springtime Joy Lamb Easter Card
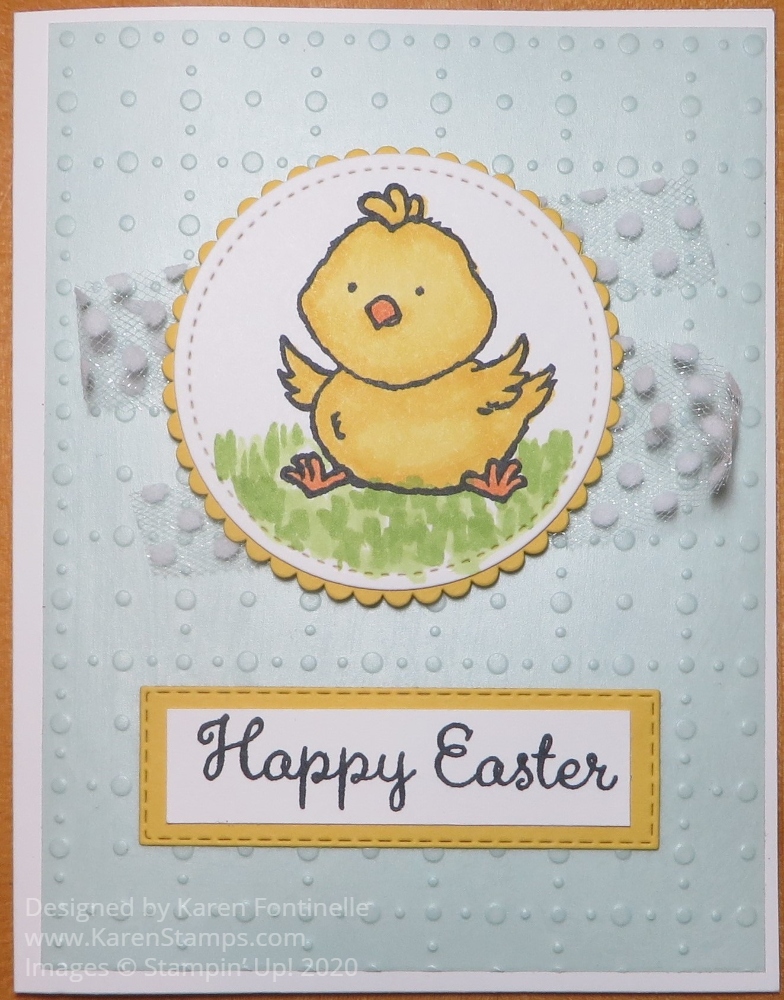
Welcome Easter Yellow Chick Card
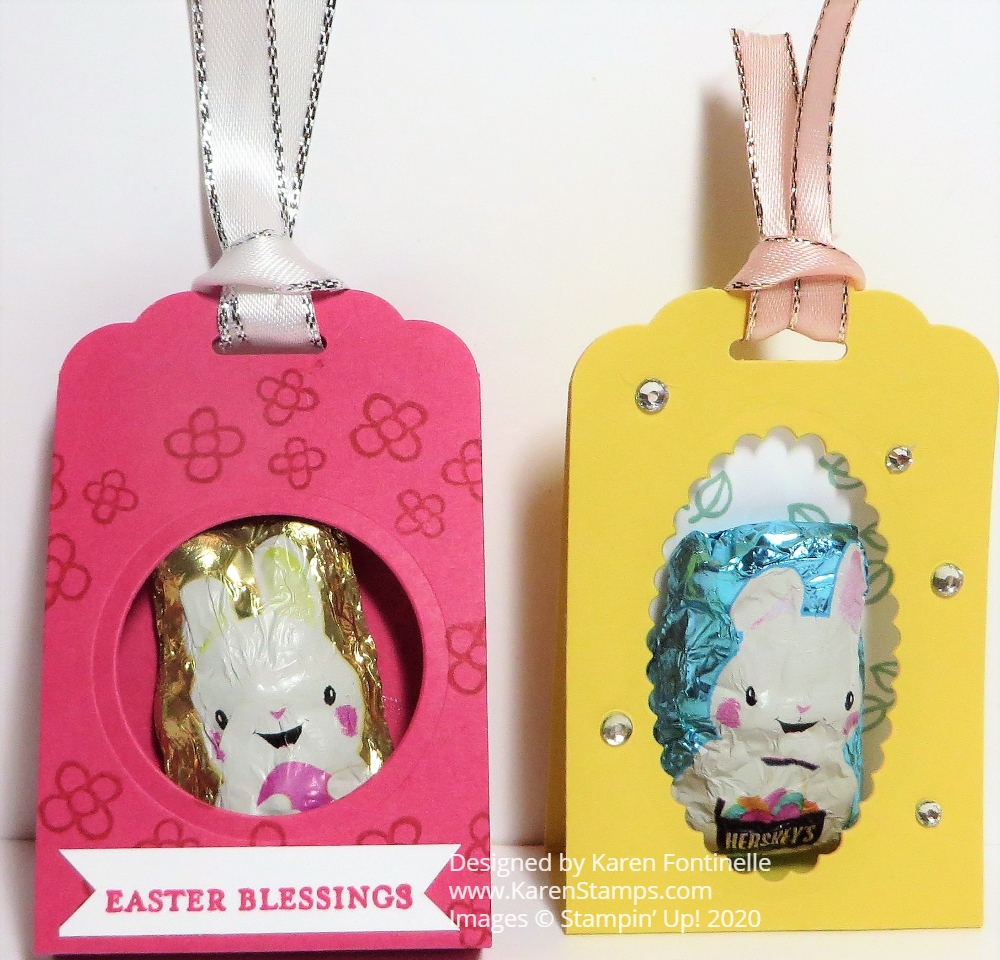
Easy Easter Folded Candy Holders
Make an Easy Paper Easter Basket
Easter Basket of Flowers Card on a Basket Weave Background
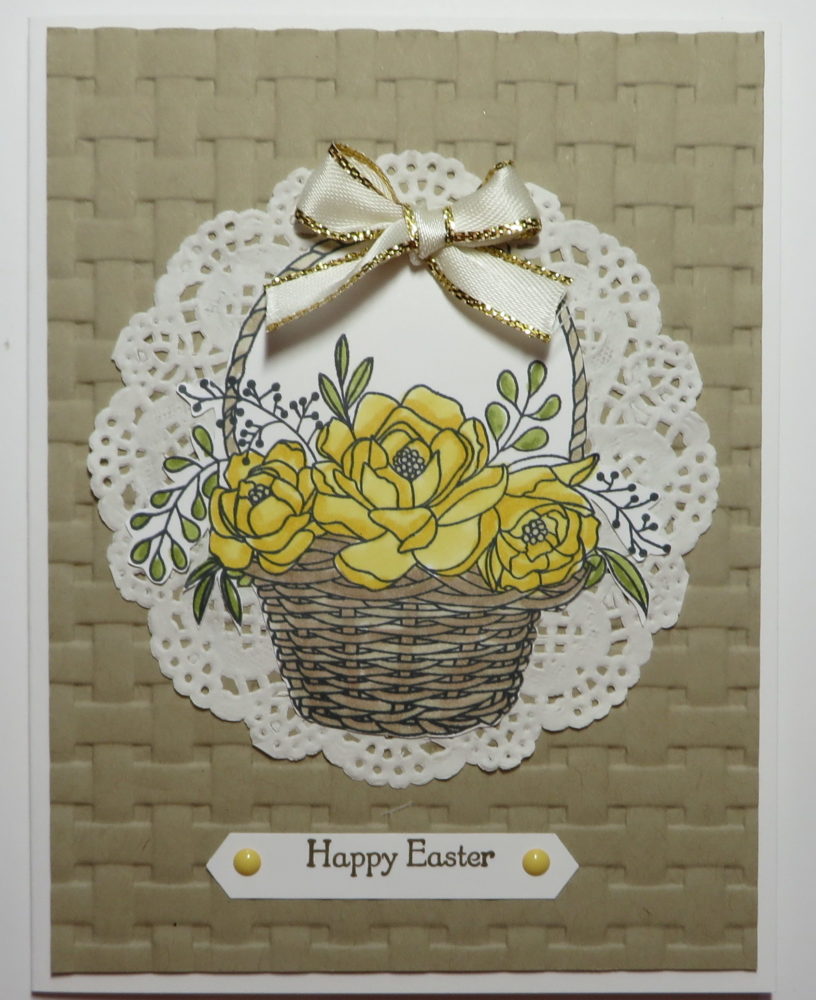
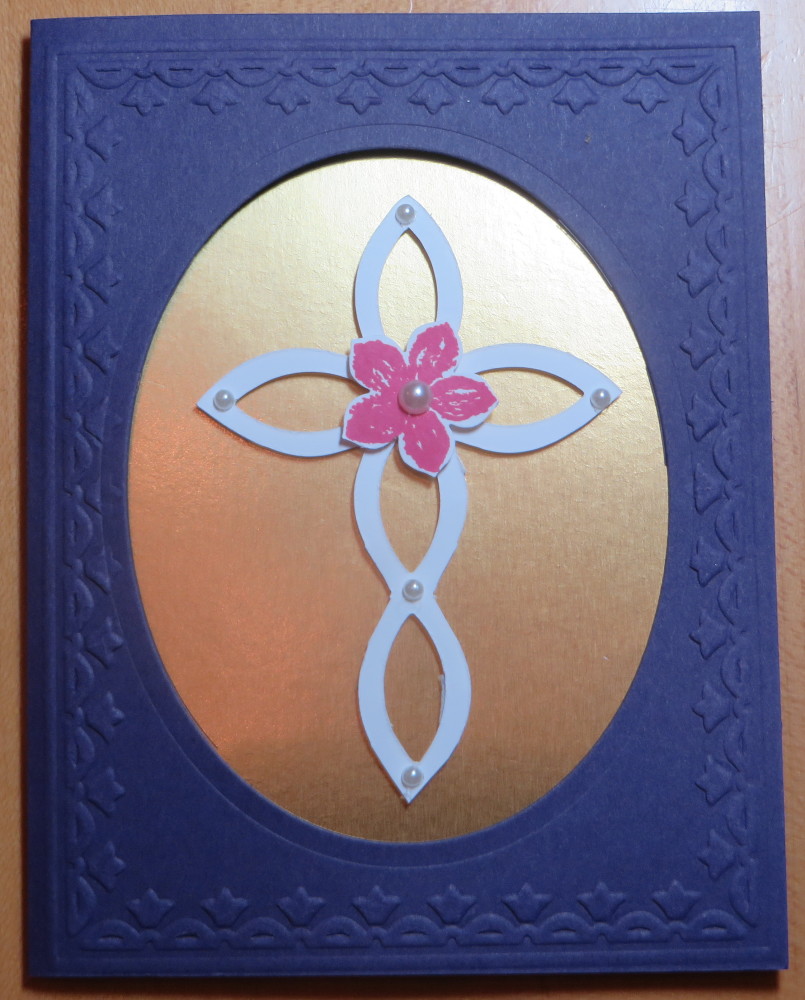
Happy Easter! Lattice Easter Cross Card
Playful Pals Easter Bunny Pyramid Treat Box
Well, that’s probably more ideas than you need but it was fun for me going down Easter Memory Lane! So many cards and treats over many years and seeing them always brings back wonderful memories because stamping is always so much fun! If you need more or different ideas, just select Easter in the Categories drop-down box under the catalogs.
HAPPY EASTER!
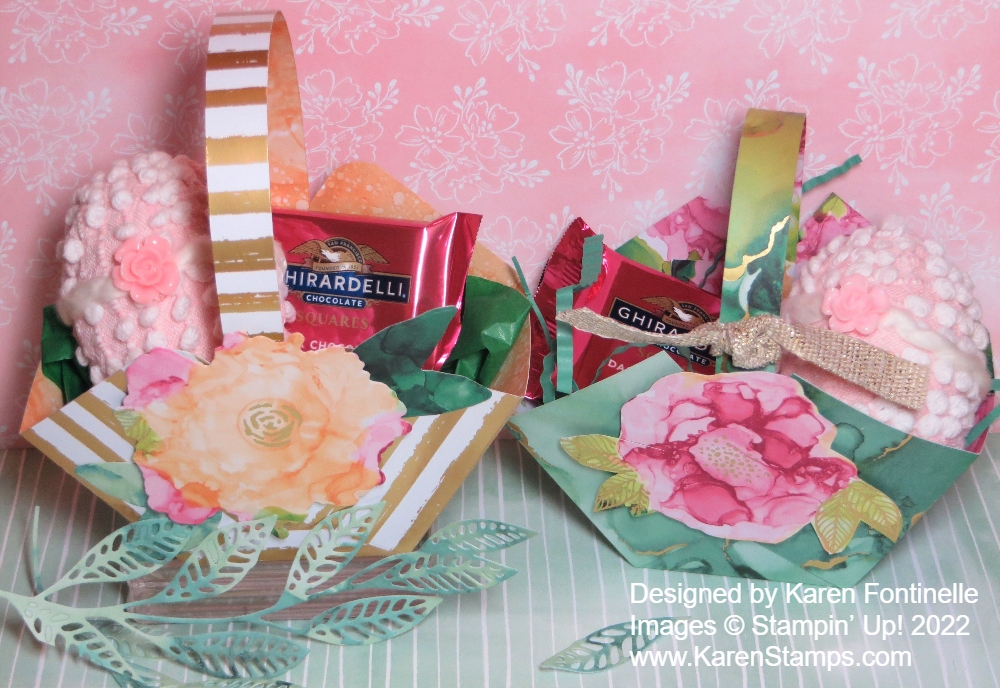
Easter will be here soon, less than a month now, so you might be thinking about making some little Easter decorations such as these Expressions in Ink Easter Baskets. These little baskets are super easy, you have probably made them before. After you make them with designer paper or cardstock, just decorate and embellish however you like.
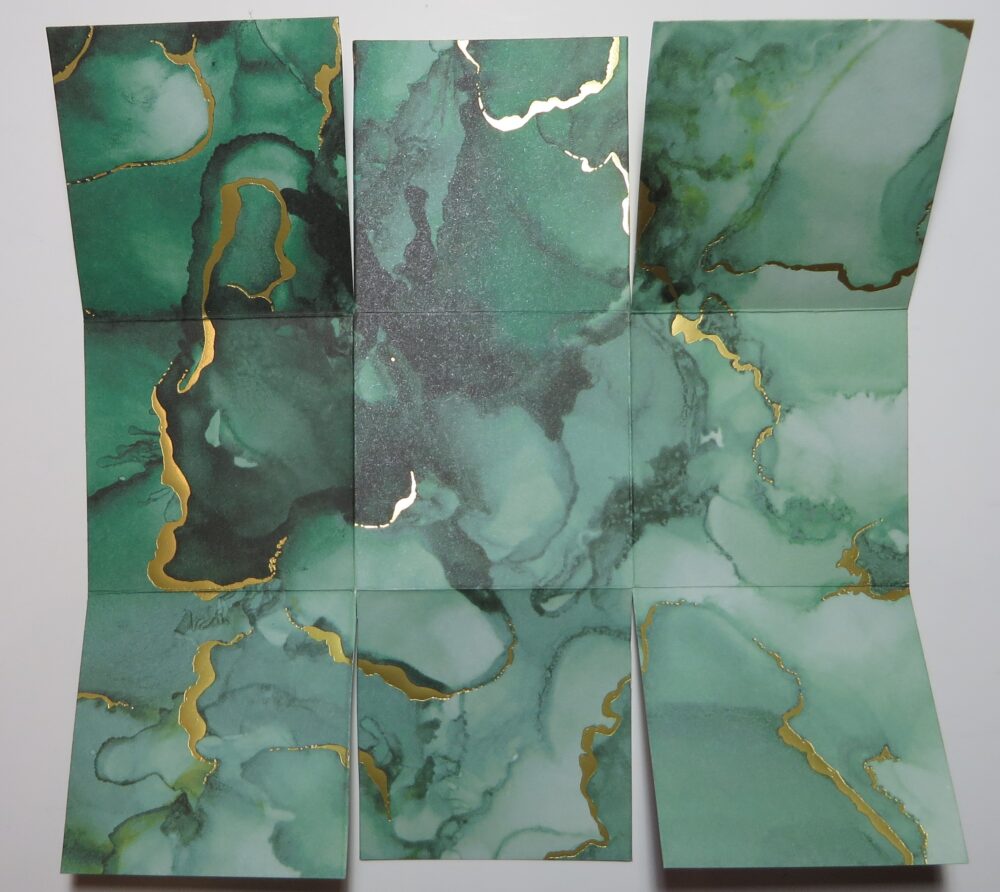
I had the idea to make these Easter baskets a little “fancy” by using the Expressions in Ink Specialty Designer Series Paper. I love the watercolored look of all the designs on the paper plus the gold foil accents on some of the papers. It is incredibly beautiful paper! If you want a sturdier basket I would suggest making the basket with cardstock, maybe even the Basic White Thick Cardstock, and then adhering designer paper on the cardstock to decorate. My baskets are just made with designer paper and then the inside is also gorgeous!
To make the basket, cut a piece of paper at 6″ x 6″ and score like a tic-tac-toe board. Score at 2″ and 4″, then turn the paper and score again at 2″ and 4″. Cut up on the two vertical score lines up to the horizontal score line. Do the same on the opposite side. See the photo below. Cut a handle of about 8 1/2″ x 1/2″.
Here’s how to fold the sides in and how to overlap them. If you want to round the corners, you can do that with and corner rounder punch you have or the current Detailed Trio Punch. The photo below from a couple of years ago shows how I folded the sides. You can mostly eyeball where they go or make a pencil mark on the inside of the basket at the 1″ mark since each section is 2″ wide and you can use that mark as a guide to see how far in the sides should go to be even. Use a brad on each side or just some decent glue to hold the basket together.
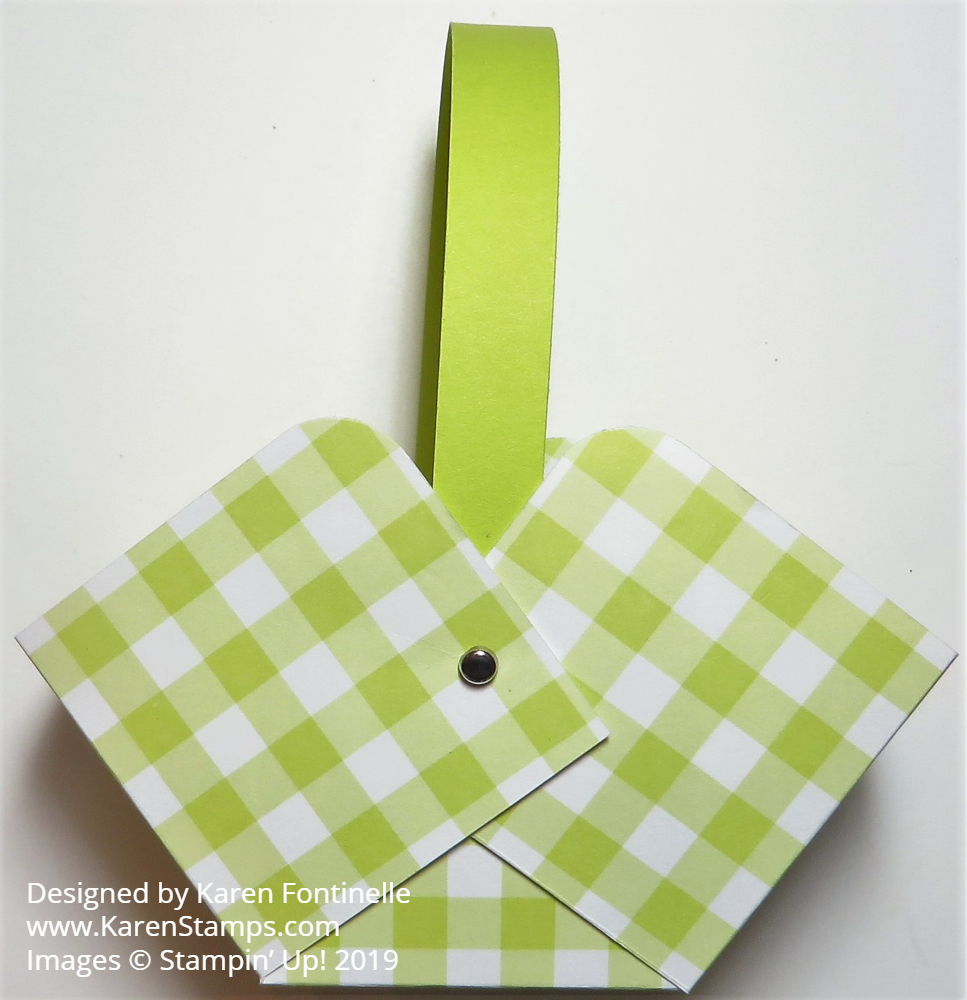
On the basket I made on the left side with gold stripes, I die cut the flower out of a piece of the designer paper using the Artistic Dies. It didn’t match exactly but it was pretty close and looked fine. Then I also cut out some leaves with the greenish portions of the designer paper.
On the green basket, I simply cut out the flower and leaves by hand. It doesn’t have to be exact because the flowers are so “flowy” anyway, there isn’t an exact image line. On both baskets, I popped the flowers up with Stampin’ Dimensionals.
If you don’t have “Easter grass”, you can make some but cutting narrow strips of green cardstock and then running it through a Paper Crimper if you have one (mine is from long ago when I first started stamping) or just crush and crumble it in your own hands and that will work too! In the other basket, I found a piece of green tissue paper and just wadded that up in the bottom of the basket.
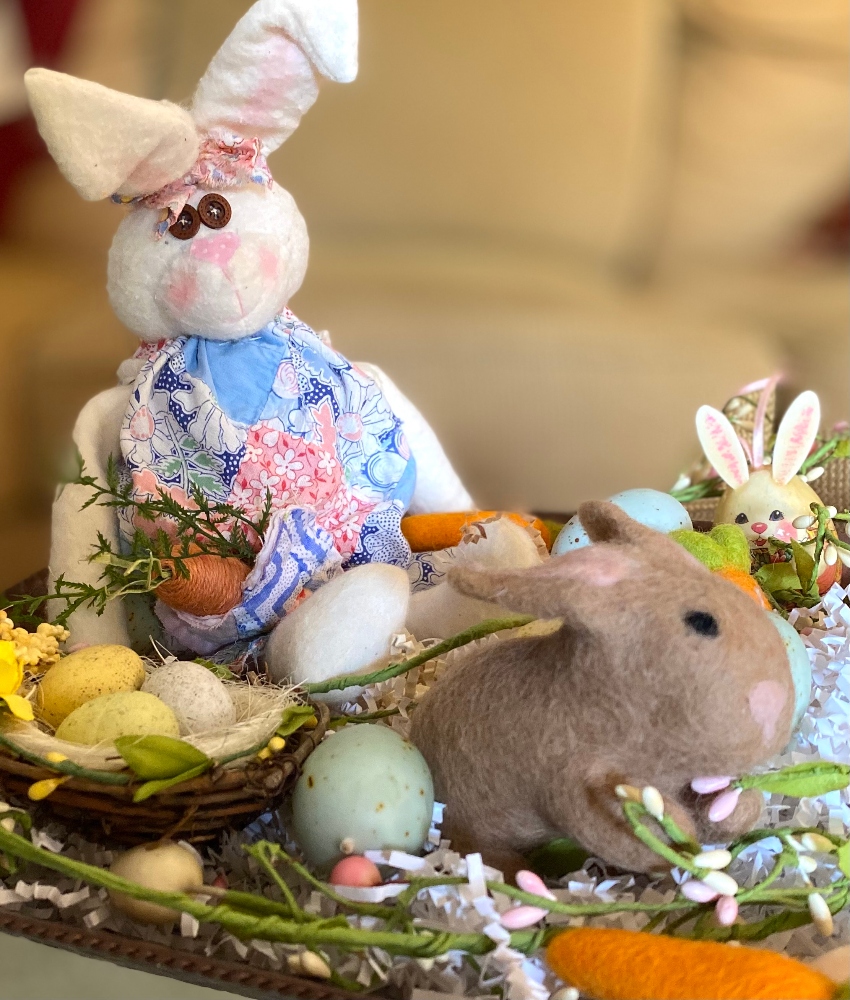
The fabric-covered egg in each basket is handmade from @sewafineseam on Instagram that I purchased last year!
Here are some other Easter baskets made three years ago if you need more ideas!
It’s time to start making Easter cards, treats, decorations, and these little Easter baskets would serve as a treat or a decoration for your home or your Easter dinner table. Have fun making some! Bet you can’t make just one!
Have a very Happy Easter! I hope the Bunny brought you lots of eggs…and chocolate!
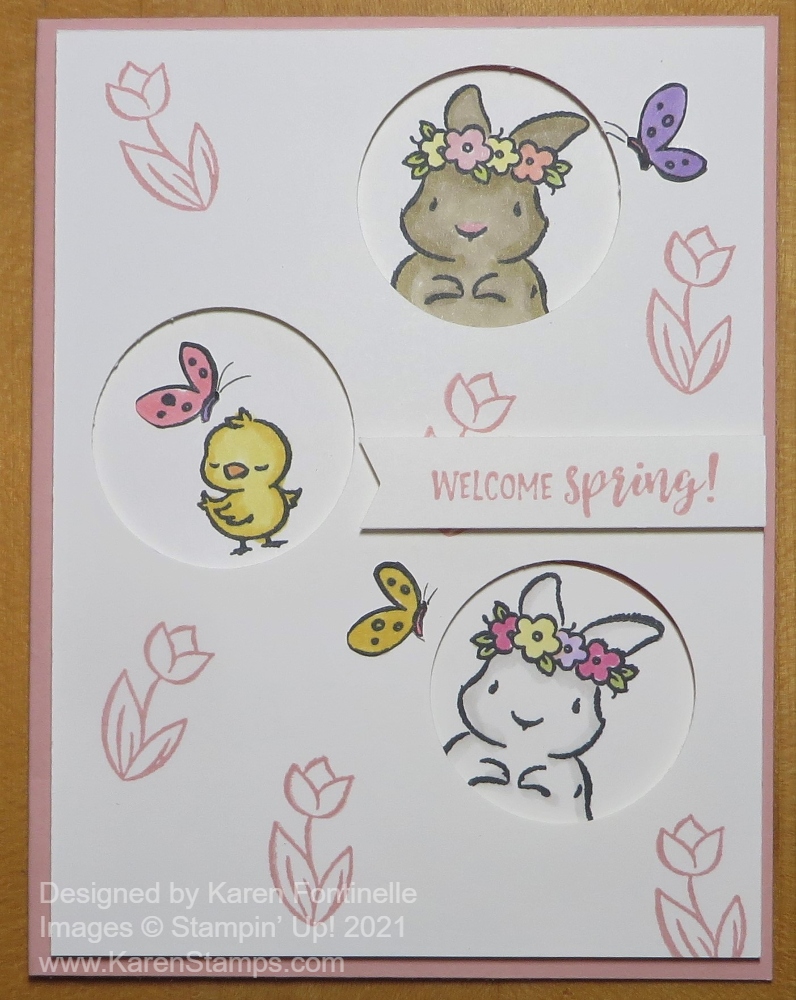
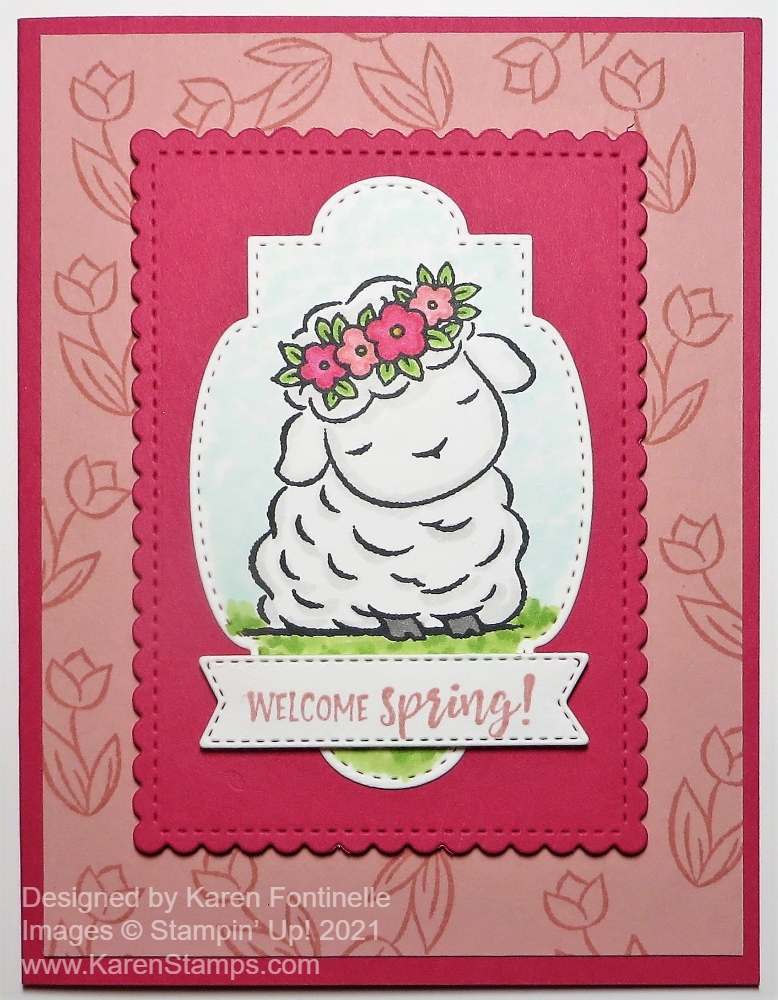
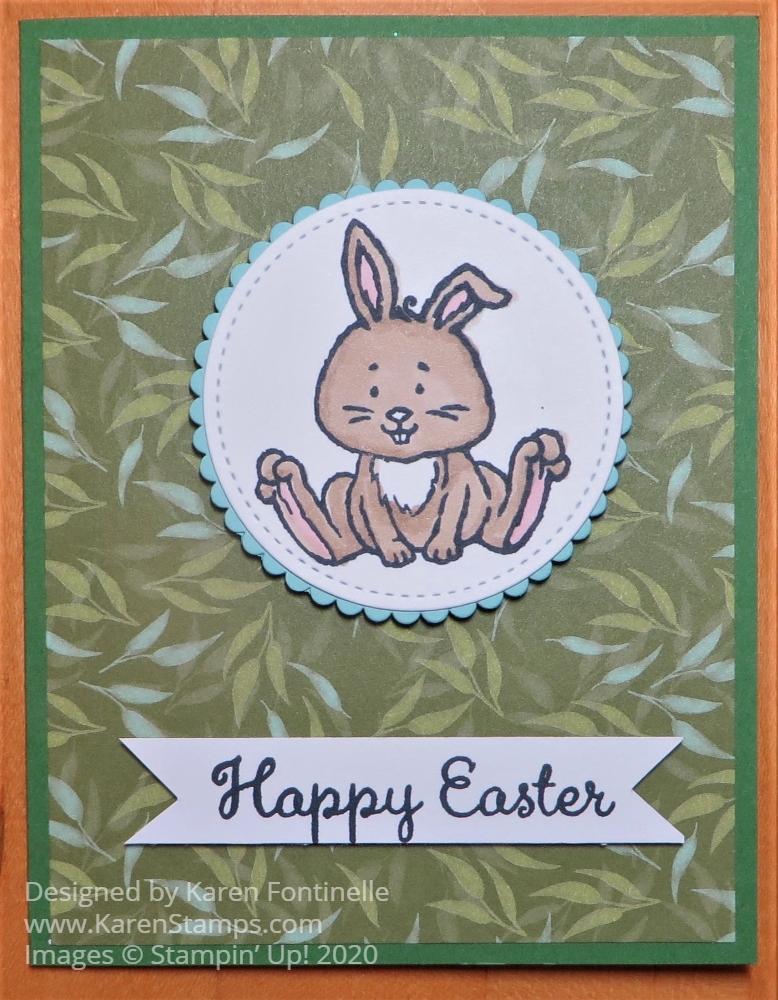
I can’t resist playing with this bunny and other cute stamps in this set so the result is this Springtime Joy Spring Card. This card has a “Welcome Spring!” greeting, but it could also be an Easter card, of course, or it could be a “Welcome Baby!” card! Bunnies and little chicks are perfect for baby cards as well.
This card uses the Springtime Joy Stamp Set in the January-June 2021 Mini Catalog (Spring Mini). This Spring Mini Catalog goes through June, but eventually it will end and many products in it will retire so you might want to get this stamp set and any others before the rush sets in during June! Just in case!
To make this card a little different and a little more fun, I punched three holes for the bunnies and chick to peek out of! I made the card base of Blushing Bride Cardstock with a layer of Basic White. I randomly used the 1 1/2″ Circle Punch (retiring!). (I had a hard time finding this punch by searching for the name, so just look under “Punches” under Products and scroll through until you find it.) I just punched three holes in the card for the two bunnies and the chick.
On scrap paper I had stamped the bunnies and chick and colored them in with Stampin’ Blends. Then you can punch or cut out the images with plenty of space around them and see how you can place them on the card base with the punched white layer over the top. It is just a matter of a little fiddling to get them placed correctly. I lifted up the white layer leaving the stamped images in place. While holding those in place, I carefully lifted up one side and then the other, sneaking some adhesive underneath so I wasn’t moving the images out of place. I got lucky and it went well!
Before adhering the white layer, I stamped some tulips from the same Spring Joy Stamp Set in Blushing Bride Ink. I wish I would have also stamped the butterflies, but that was an afterthought! I stamped the butterflies later on scraps, colored them in and cut out. I could have popped those up but just adhered them flat t the card and drew in their antennae with a black pen.
The Basic White layer is popped up on Stampin’ Dimensionals®. I used pretty many on the underside of the white since I had the punched holes and wanted the card front to be sturdy. The greeting is in the stamp set and I just stamped it on a scrap strip of Basic White, made one end flat against the right side since there wasn’t a lot of space for a greeting on this card and made a flagged end on the other side.
If you aren’t convinced at how adorable the Springtime Joy Stamp Set is, take a look at the cute lamb, also in this set, as you see on THIS CARD.
This Springtime Joy Spring Card is sweet for this Easter weekend or just as a spring card or add another greeting for birthday or thinking of you!