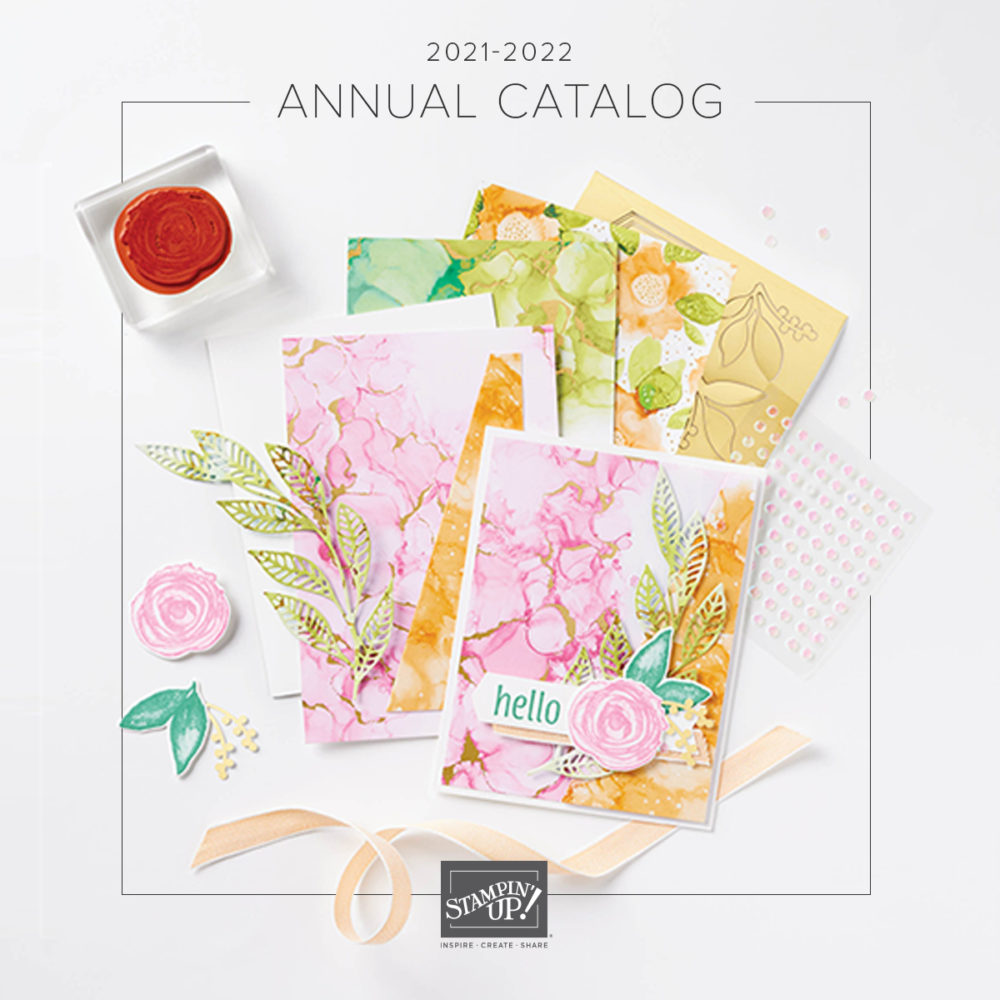
THIS PAPER!!! Expressions in Ink Specialty Designer Series Paper (155464) Order it!
Okay, that’s really all that needs to be said for this blog post! But since you probably want to know more about the card and the paper, I’ll continue.
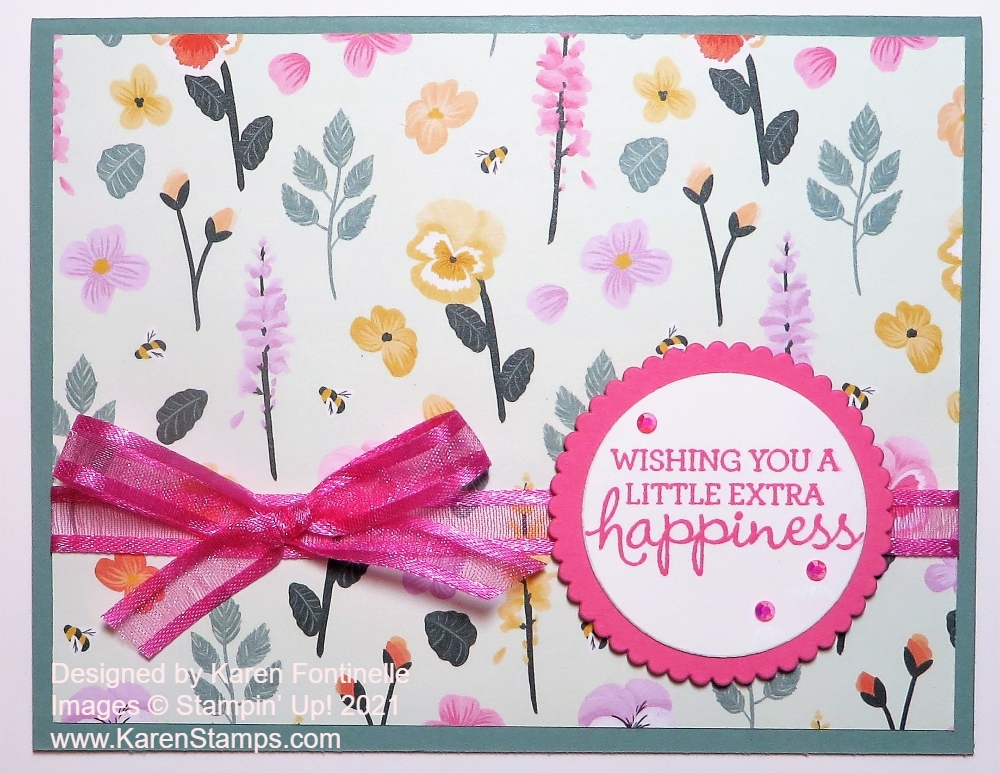
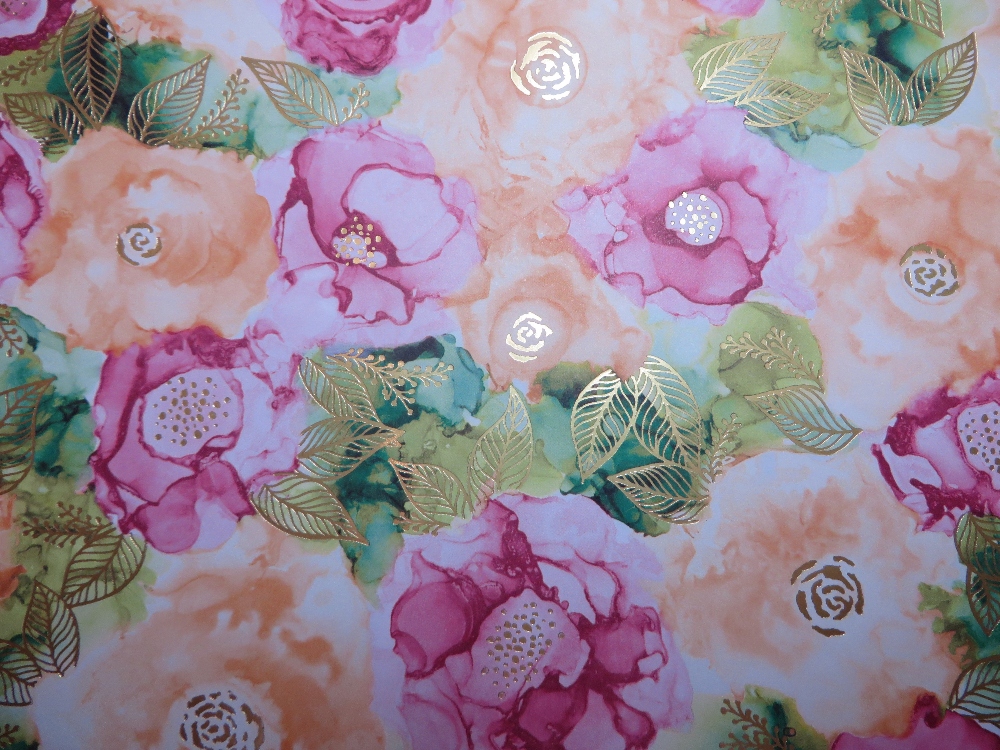
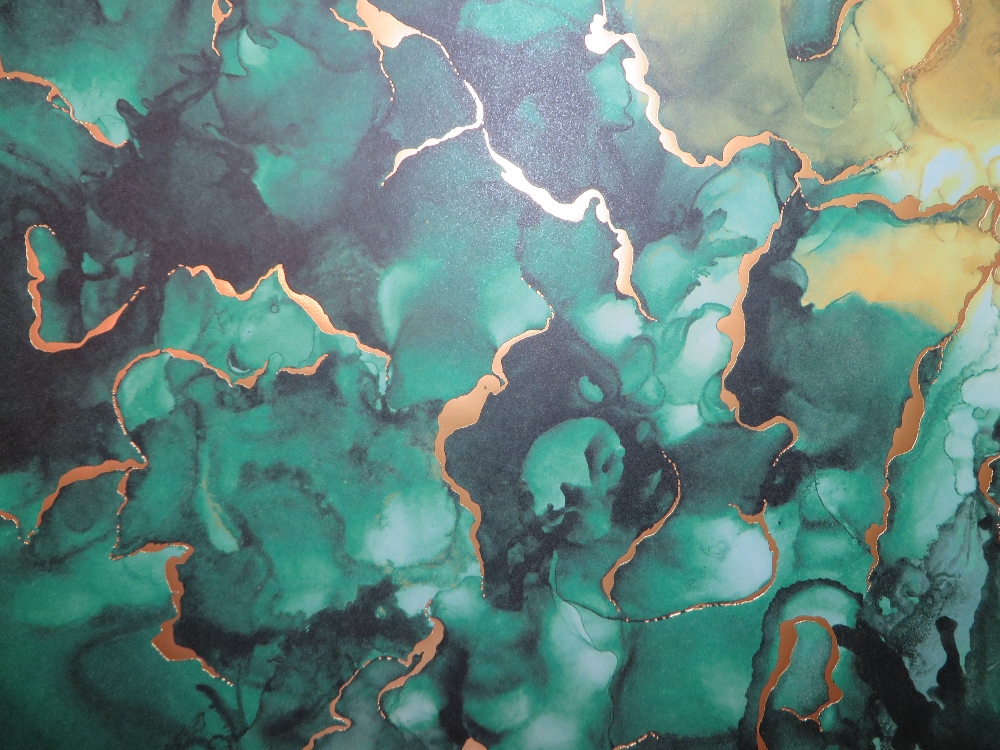
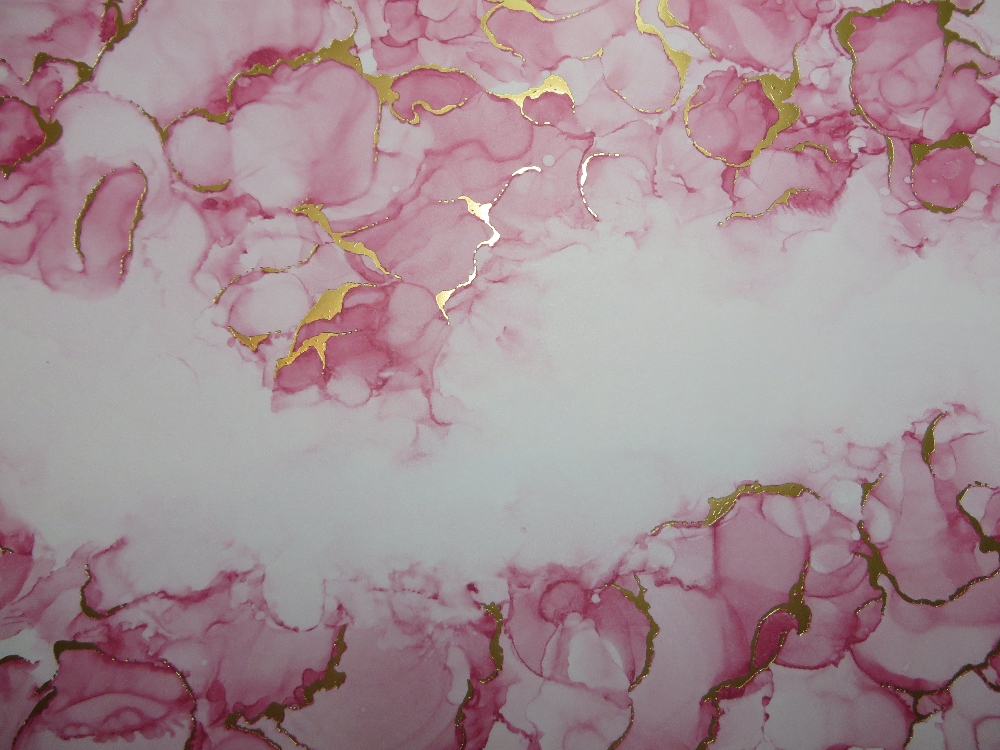
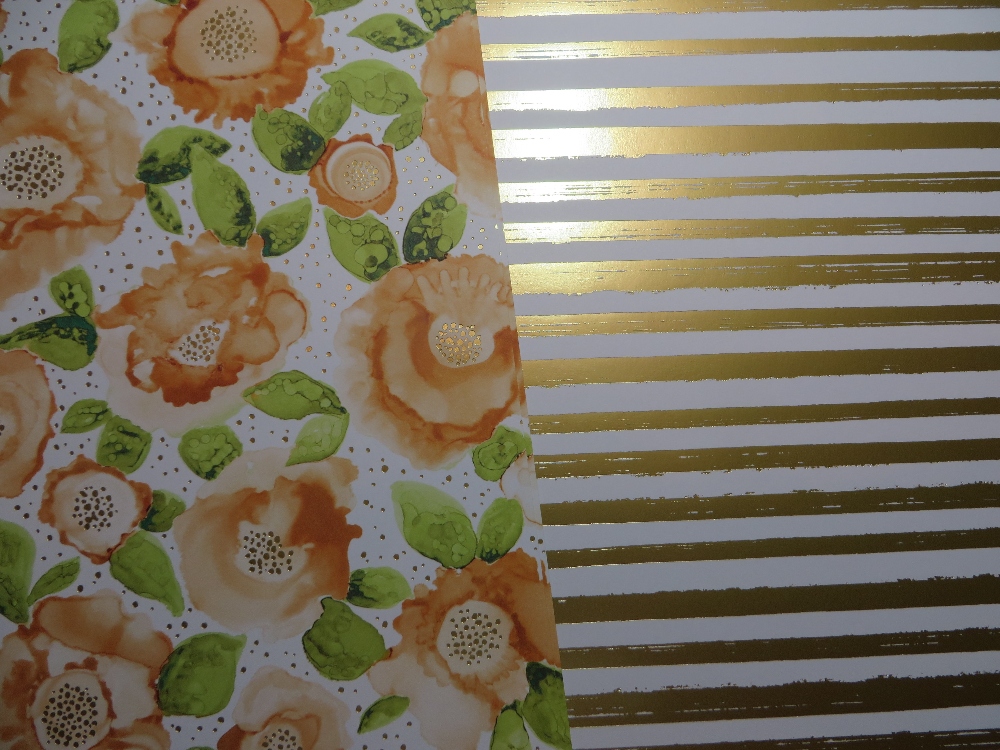
When I first saw a Stampin’ Up! video giving us Demonstrators a sneak peek at some of the new Annual Catalog products, I fell in love with this Expressions in Ink Suite! And when I saw it online in the catalog I wanted to order it right away. But it was not on our Demonstrator pre-order so I had to wait just like everyone else. My order just came and I have to say, when I opened this package of paper and looked at the sheets, I just gasped! It is beautiful and striking with the gold foil accents on one side of the sheets. You must have it!
Here are closeups of some of the sheets of paper, but even these do not do it justice!
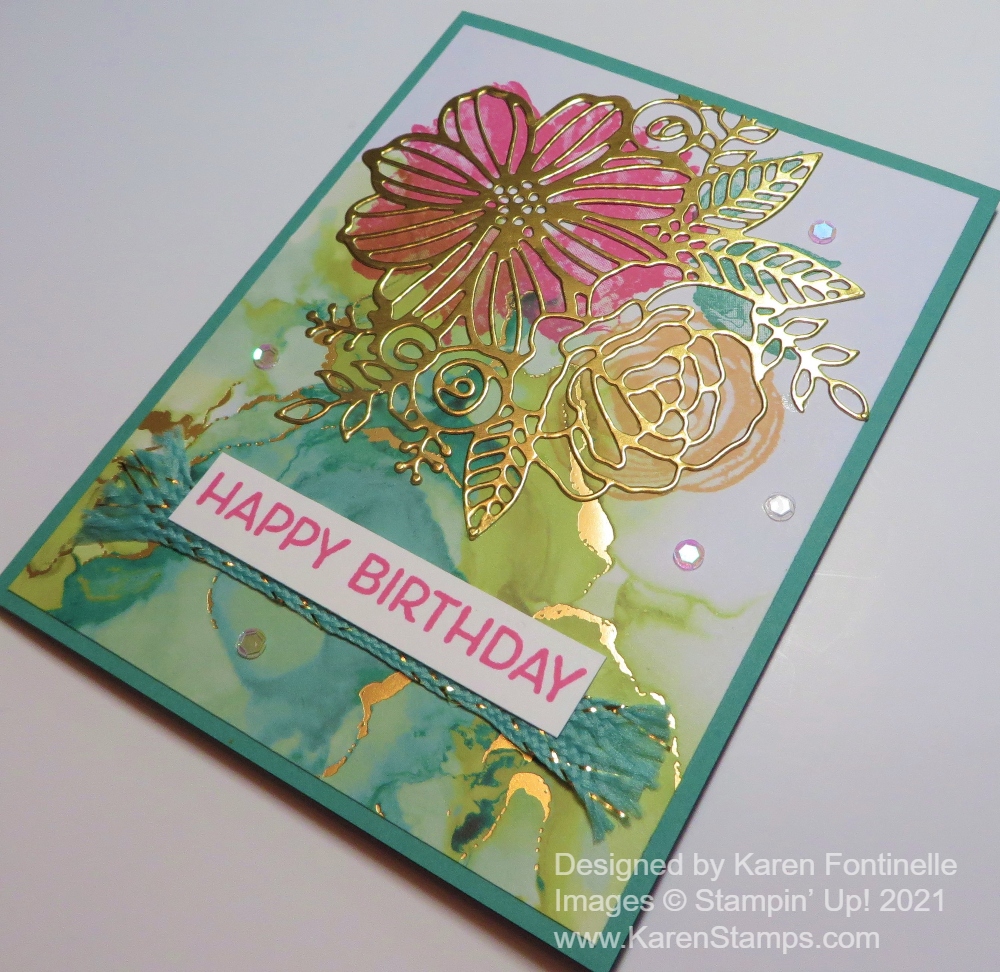
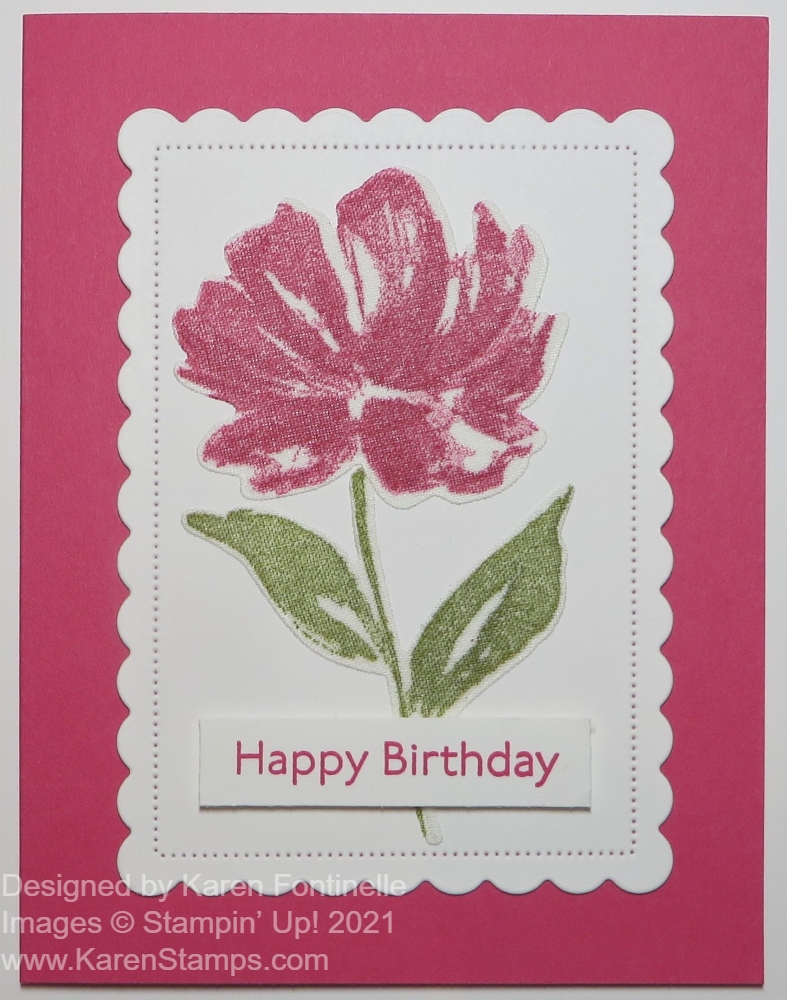
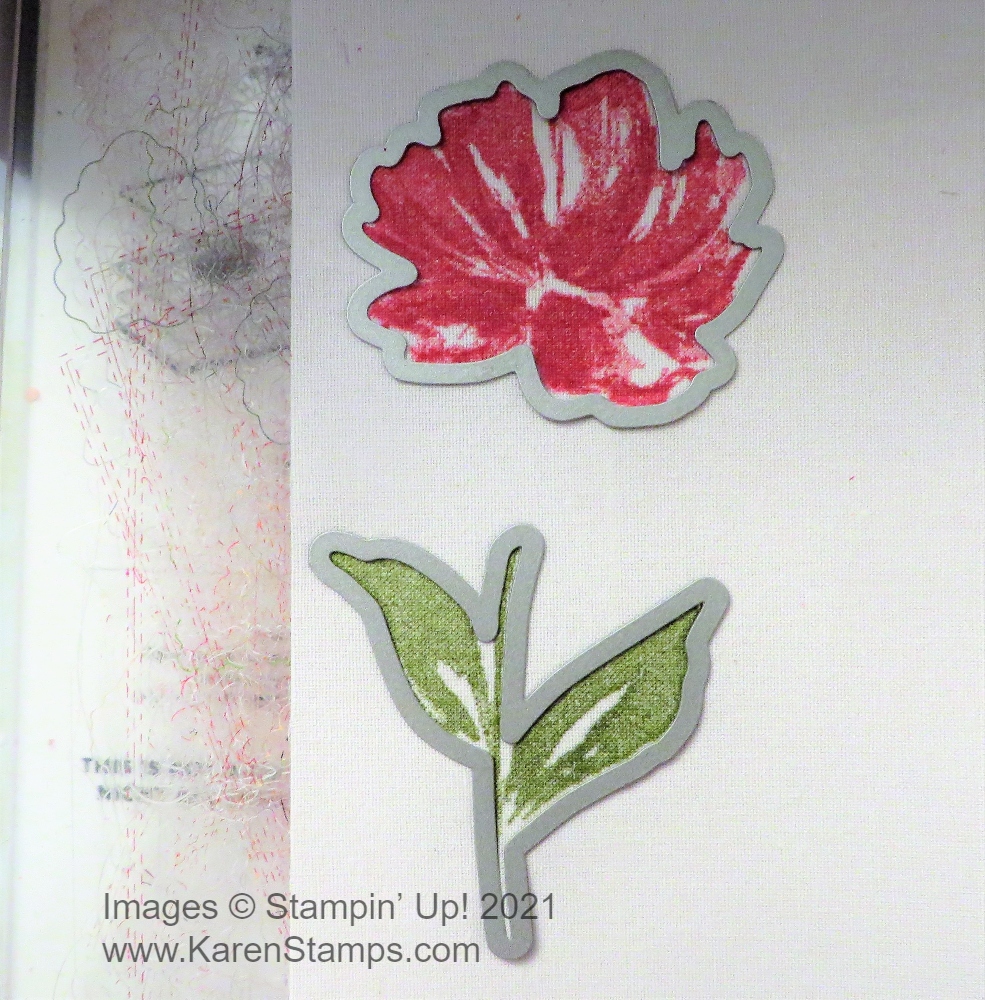
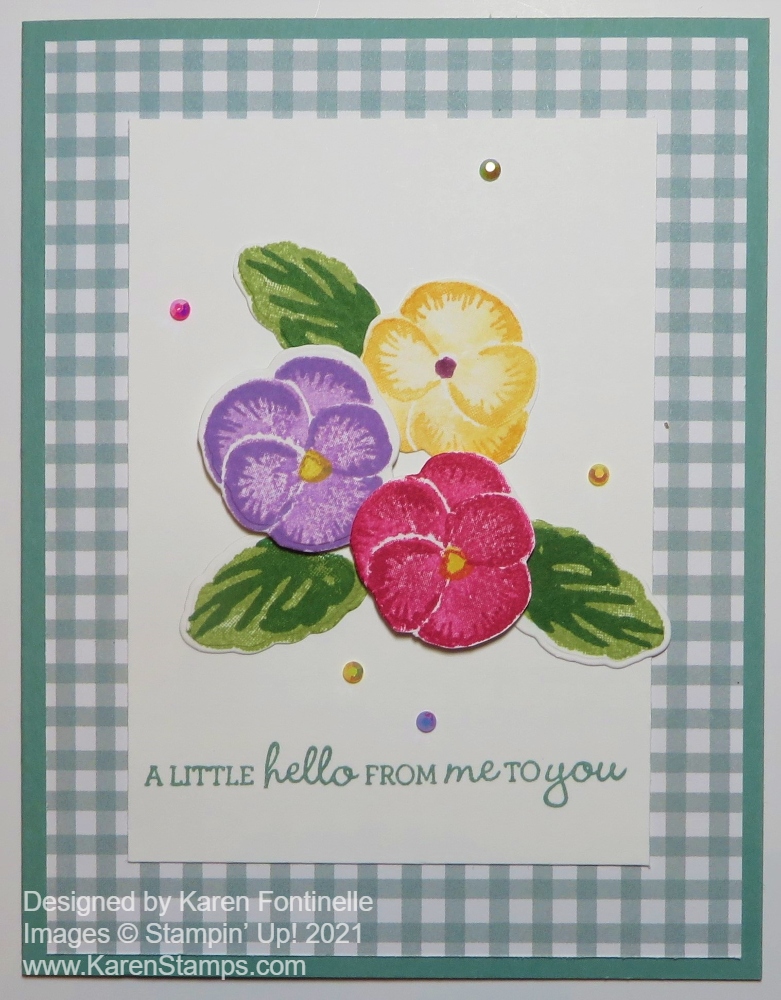
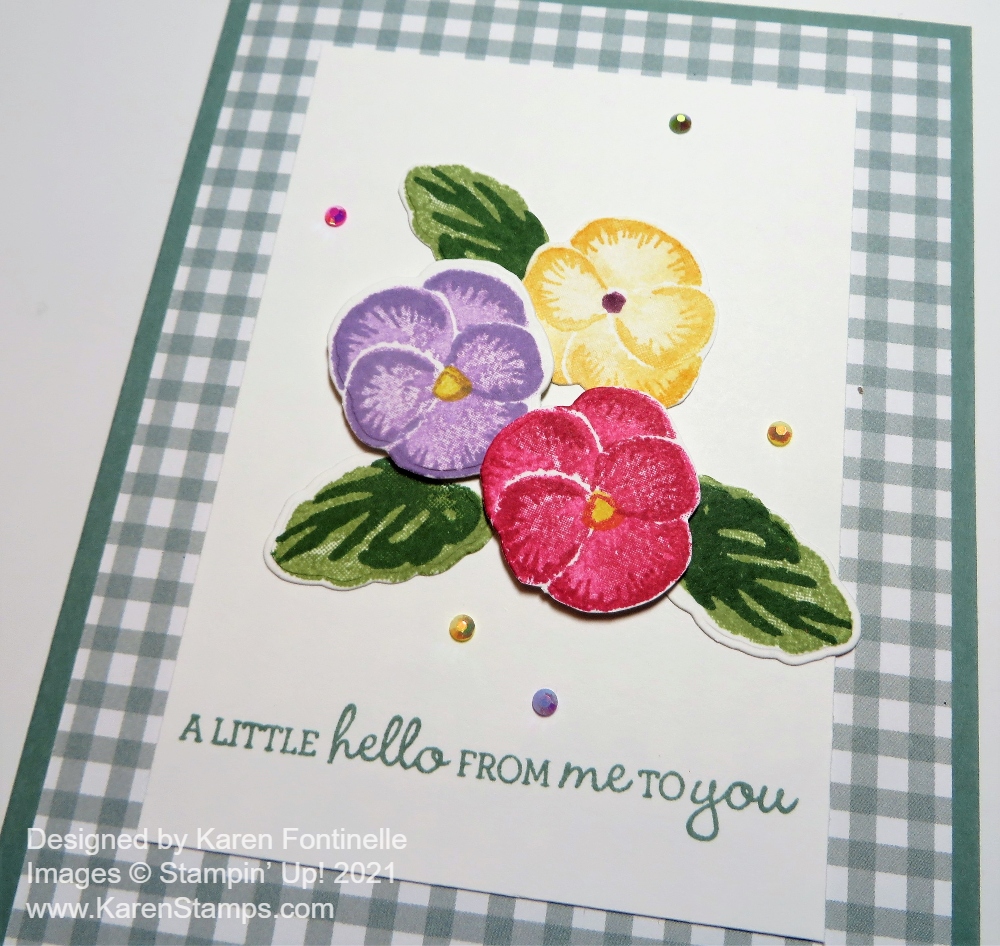
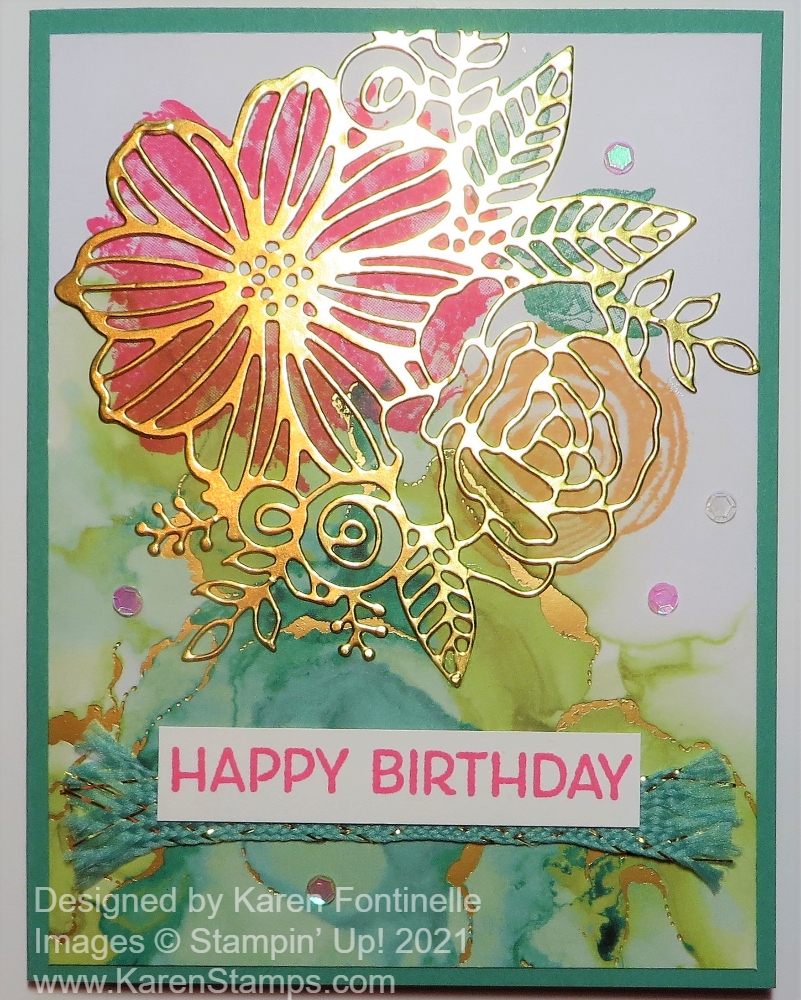
For the card, I started out copying the catalog sample on page 96 in the upper right of the samples. It turned out not exactly the same. I dared to cut into one of the papers, trying to match the pattern I could see on the catalog page. Then I stamped the large and small flowers from the Artistically Inked Stamp Set plus the small individual leaves. The large flower is stamped in Polished Pink Ink and the small flower in Pale Papaya. The leaves are stamped in Just Jade Ink since the card base will be Just Jade. You can choose from lots of coordinating colors!
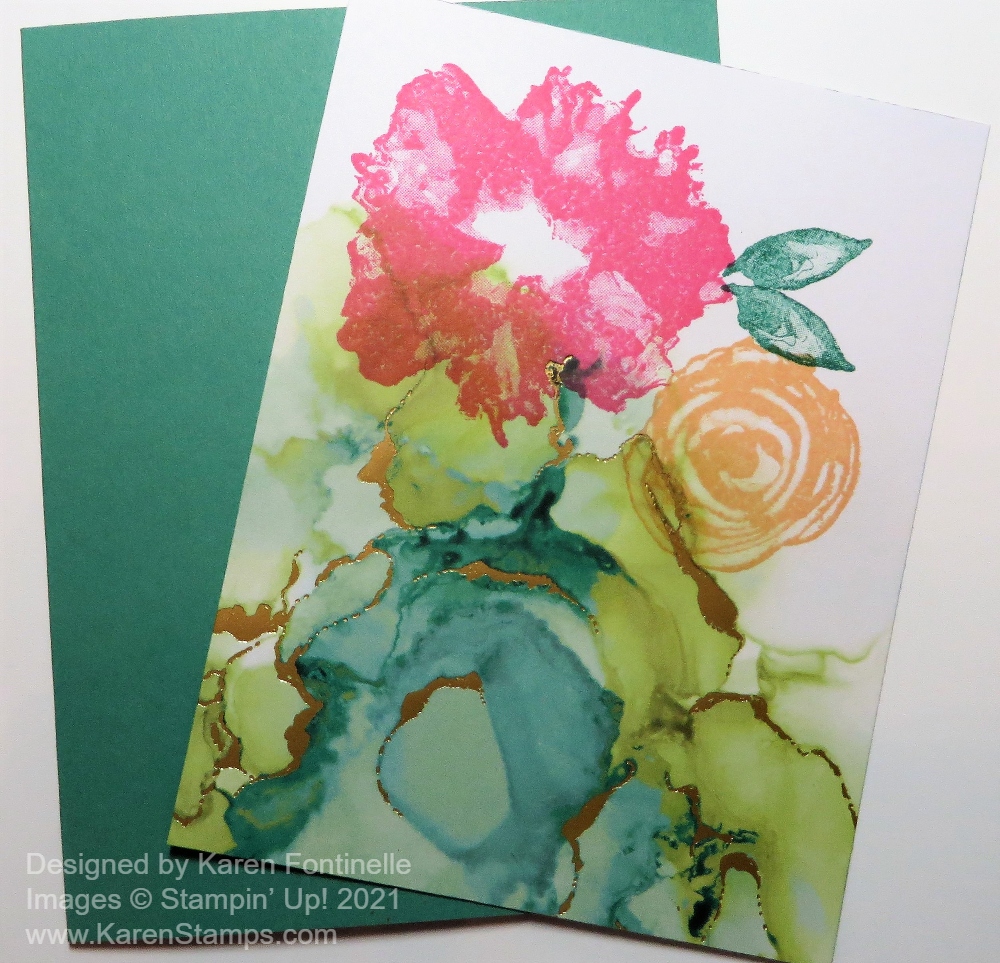
Now when I stamped these flowers and leaves, I didn’t give a lot of thought ahead of time to that gold foil piece placed over the top on the sample. In the Ephemera Pack, I was thinking that there would be individual foil cutout flowers, leaves, etc. to place over my stamped images, but there were not! The pack will still be fun to play with, it just didn’t have what I was expecting. Then I realized, I just needed to die-cut a gold foil piece from the Artistic Dies. While my flowers and leaves lined up pretty well with the die-cut, and while it doesn’t and shouldn’t be perfect because this is a watercolor look, I did add another stamped leaf and then got my foil to line up pretty well.
I highly recommend using Adhesive Sheets on the back of the Gold Foil Sheets before die-cutting this intricate design, which I always forget, but I did manage to use teeny tiny dots of the Multipurpose Liquid Glue on the back. The greeting comes in the stamp set and I stamped that in Polished Pink Ink and placed it in a lower position than on the catalog sample. For a little extra, I used a strip of the Just Jade & Gold 3/8″ Braided Ribbon, a little frayed on the ends, and adhered just below the greeting a tiny bit. And for a little more bling, I wanted to try out the little adhesive-backed iridescent sequins in the Ephemera Pack. You can see about five of those placed around the card.
This is a relatively easy card to make, using both stamping and designer paper, or rather stamping ON the designer paper, plus the die-cut Gold Foil accent and other embellishments. I suggest you order this paper, or the whole Suite of products sooner rather than later because once word gets out about how beautiful this Suite is, it could be backordered by the time you decide to get it. Hopefully, Stampin’ Up! anticipated how popular this Suite would be and ordered plenty!
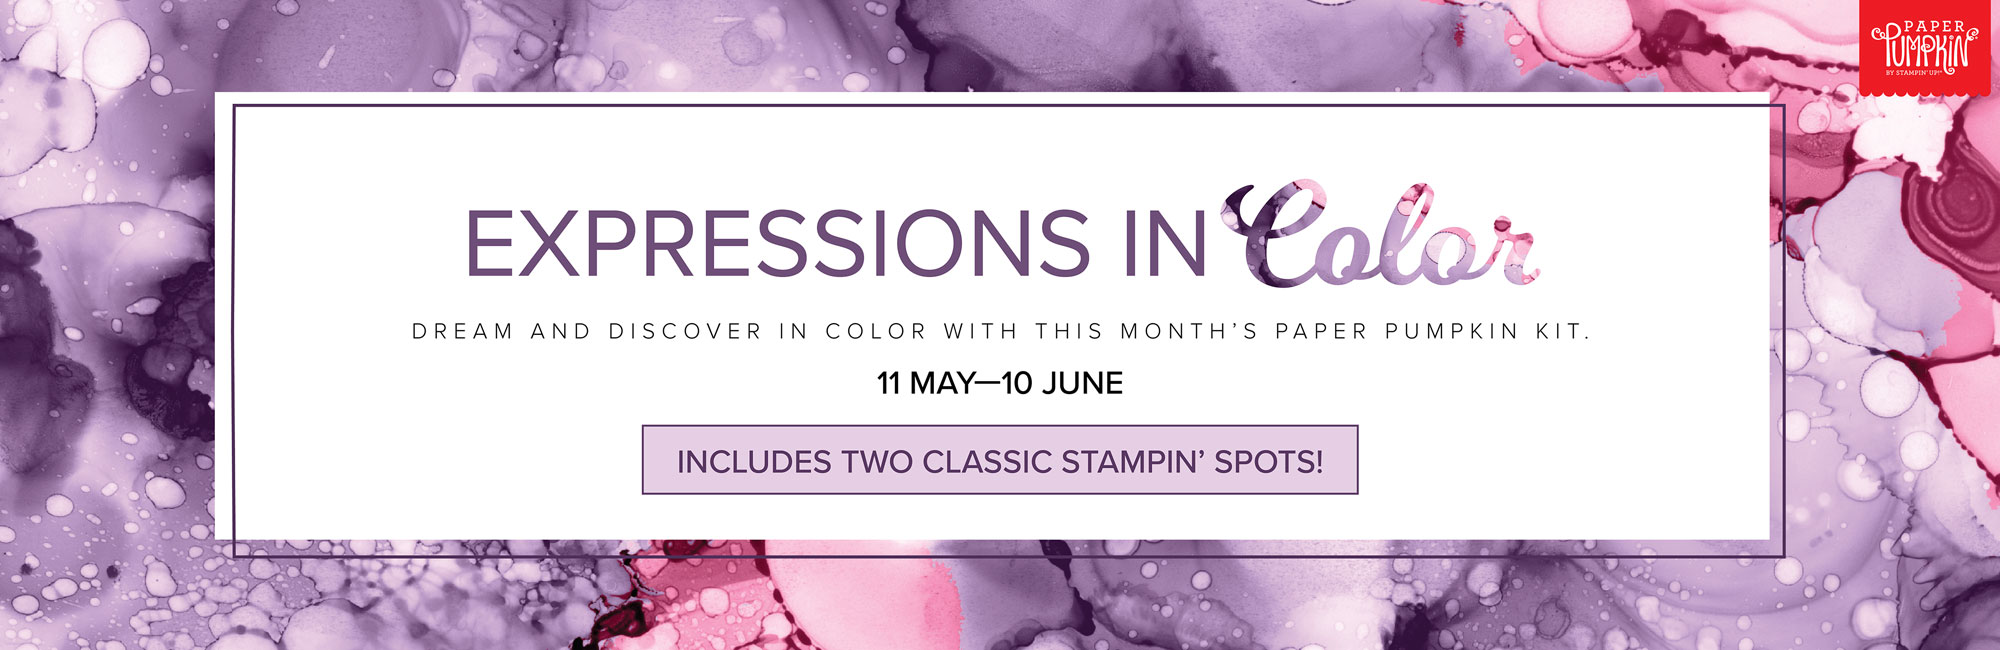
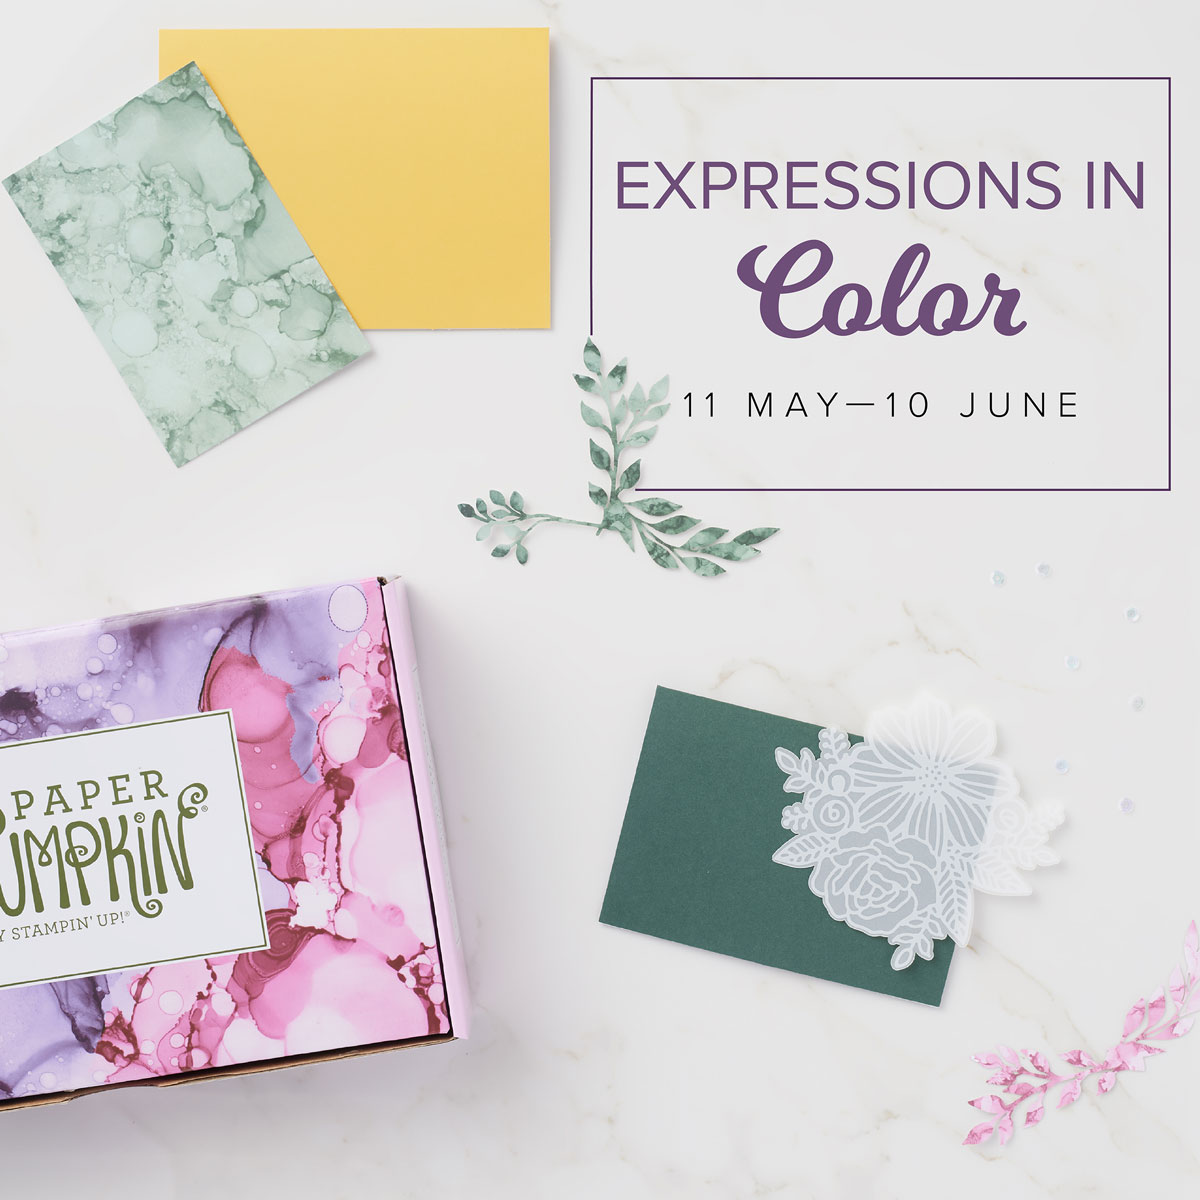
You might also consider the June Paper Pumpkin Kit which will coordinate with this Suite! Even if you subscribed before and dropped, you may want to come back just for this kit at least if you like the style of the Expressions In Ink Suite of products!
Here’s another view of my card without so much glare from the foil! I hope you are as attracted to this Suite as I am!