
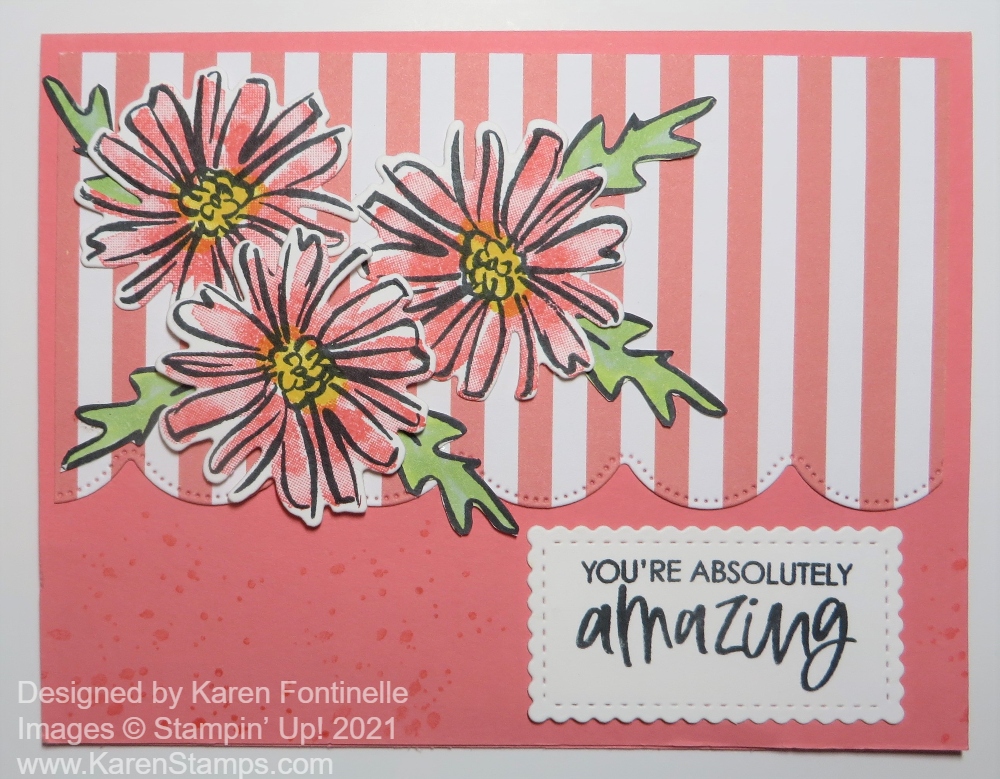
Once again, as I looked through the Pattern Party package of designer papers, this Flirty Flamingo stripe jumped out at me and screamed to be made into a card which resulted in this Color & Contour Pattern Party Card. I had almost forgotten this set of dies has this scalloped edge die in it which just helps to make this card! I love how this card turned out!
The card base is Flirty Flamingo Cardstock. The striped paper is from the Host Product in the new Stampin’ Up! Annual Catalog. This means that with an order of $150 or more, instead of choosing some other free merchandise in the catalog, you can go to the back of the catalog where there is this designer paper option (48 sheets!) and some other stamp sets, all that you can choose as your Stampin’ Rewards at a discounted price. I think this package of paper is going to be a hit because it’s something different (just stamp sets have been offered as Host Rewards) and you will love the paper patterns! Look for the Pattern Party Designer Series Paper on page 171.
The striped paper is die cut with a die in the Scalloped Contours Dies. You can purchase the Color & Contour Stamp Set and the dies in a Bundle and save 10%. I love the stitched look along the scalloped edge. Whether you purchase the stamp set or not, I would buy the Scalloped Contours Dies by themselves. They are that good!
I do have the Color & Contour Stamp Set and I do like the flowers in the set! You can do two-step stamping to color in rather abstractly the flowers, or you can color in the open design yourself with whatever coloring technique you like. Then you can cut them out with the dies. You can set on the set that the individual leaf has a very open design, but I just stamped it in Memento Ink, colored in with two colors of green Stampin’ Blends, and cut out the leaf itself, not the extra squiggle! The lower flower is popped up on Stampin’ Dimensionals and the other two and the leaves adhered right to the card. The flower center is stamped with Daffodil Delight Ink.
It IS a little tricky to line up the two-step stamp with the first stamped impression and then to line up the die with the flower. You could spend some time lining them up and then put a black mark on the stamp and on the die to remind you of how to line them up. But since the design is rather abstract anyway, it kind of doesn’t have to be perfect. For some of us, though, who like things “perfectly lined up”, well, we can fiddle with it and we can get it lined up!
The greeting is in the stamp set but I did use another set of dies to cut out the greeting. I used the Stitched So Sweetly Dies to get a smaller rectangle to fit at the bottom of my card. This is another set of dies that I have used a lot and recommend you have in your supplies!
Not one to leave well enough alone, I saw the “speckle” stamp in the set and thought maybe it would look interesting in the bottom portion of the card. Usually it is not a good idea to stamp something more on a card that is nearly finished and could potentially be ruined if you mess up, but I took a chance and it worked out! I inked the stamp with Flirty Flamingo Ink but stamped off before stamping on the bottom of the card.
On the inside of the card, I put a piece of Basic White for a layer and stamped one of the flowers, just the outline, in Flirty Flamingo Ink down in the right-hand corner. Later I can stamp a message on the inside of the card or write a personal note.
If you have a large order of $150 or more, remember that you can choose Stampin’ Rewards of 10% or more and remember that there are special Host choices in the back of the catalog, one being this year the Pattern Party Designer Series Paper. This is 48 sheets, 4 sheets each of 12 different designs. This card, the Color & Contour Pattern Party Card, shows off one of the pretty patterns in this package of paper! You will enjoy it I’m sure!
Love the colour, scalloped edge, florals and stripes! Vibrant card Karen!
Thank you, Kylie! I love that paper! So happy!
Thanks so much Kylie!