Tag Archives: Expressions In Ink Specialty Designer Series Paper

Expressions in Ink Thanks Card

Expressions in Ink Thanks Card

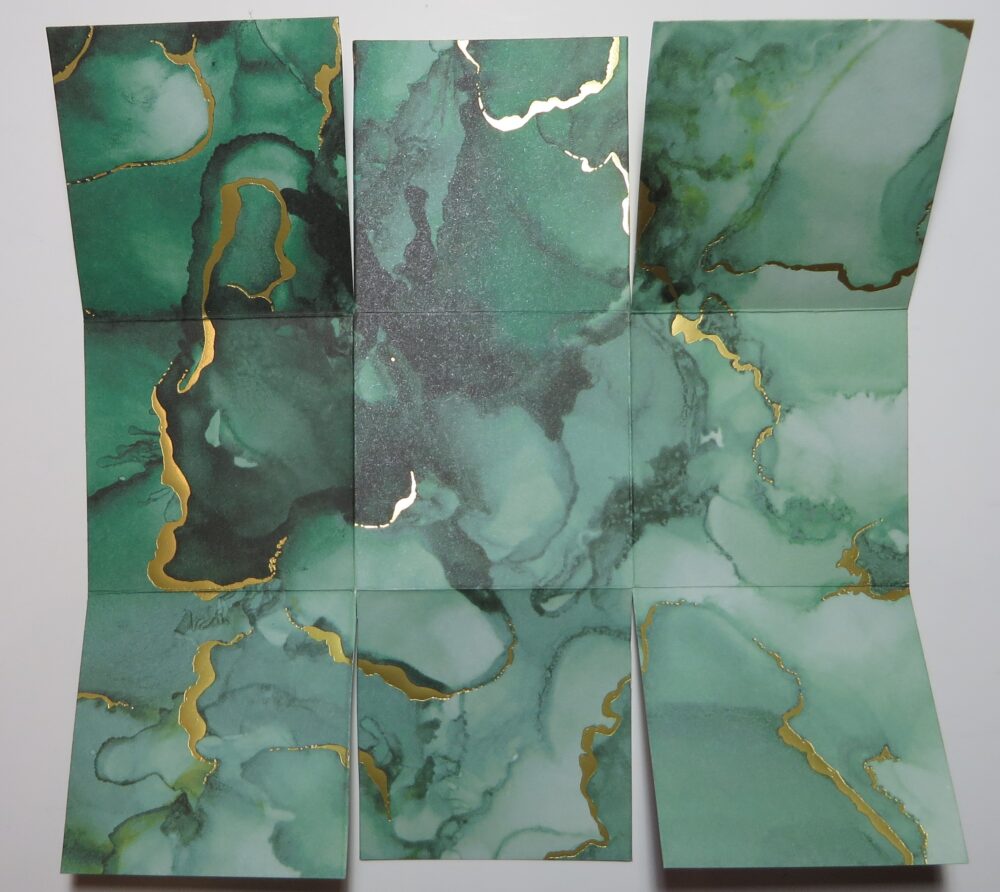
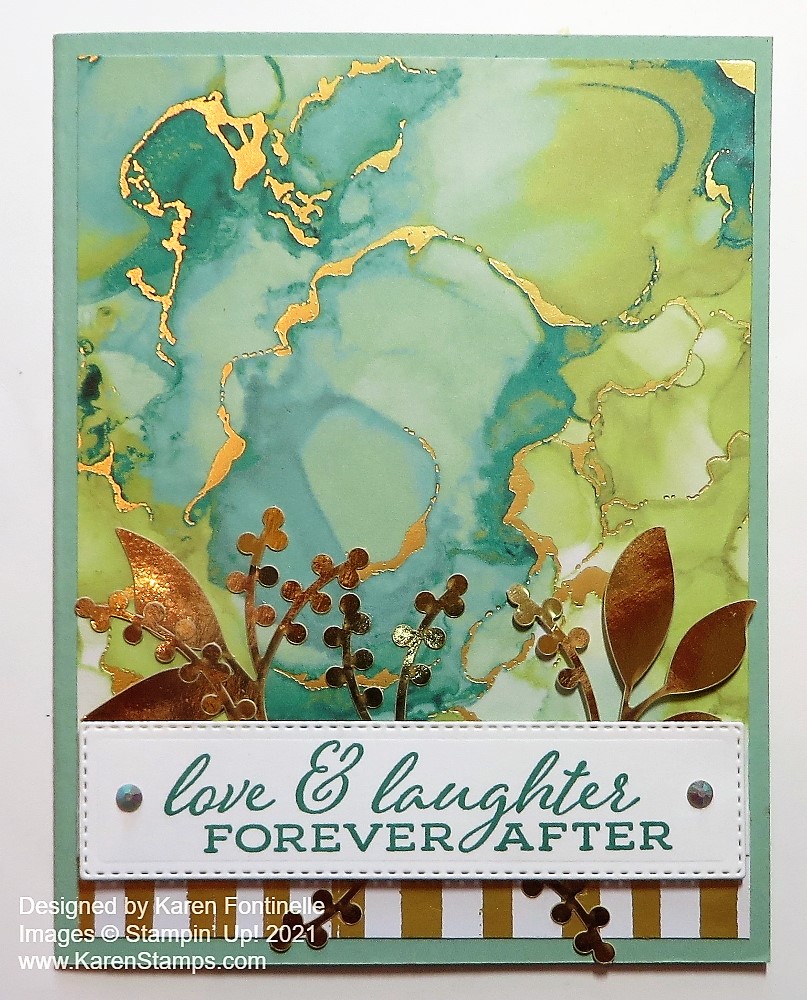
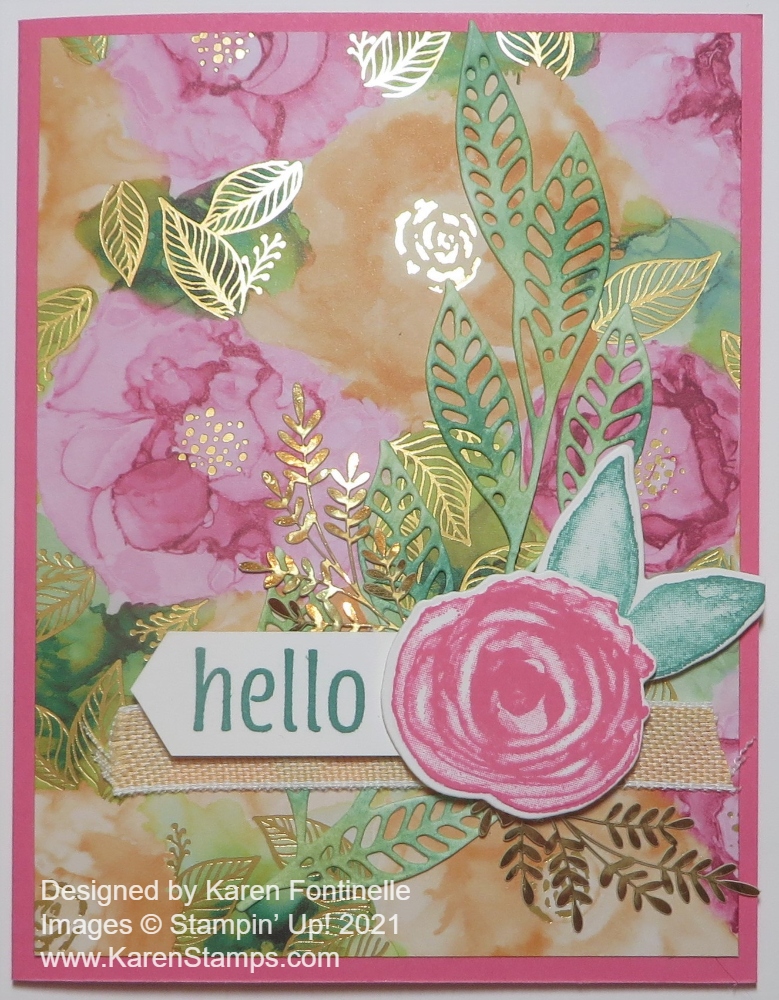
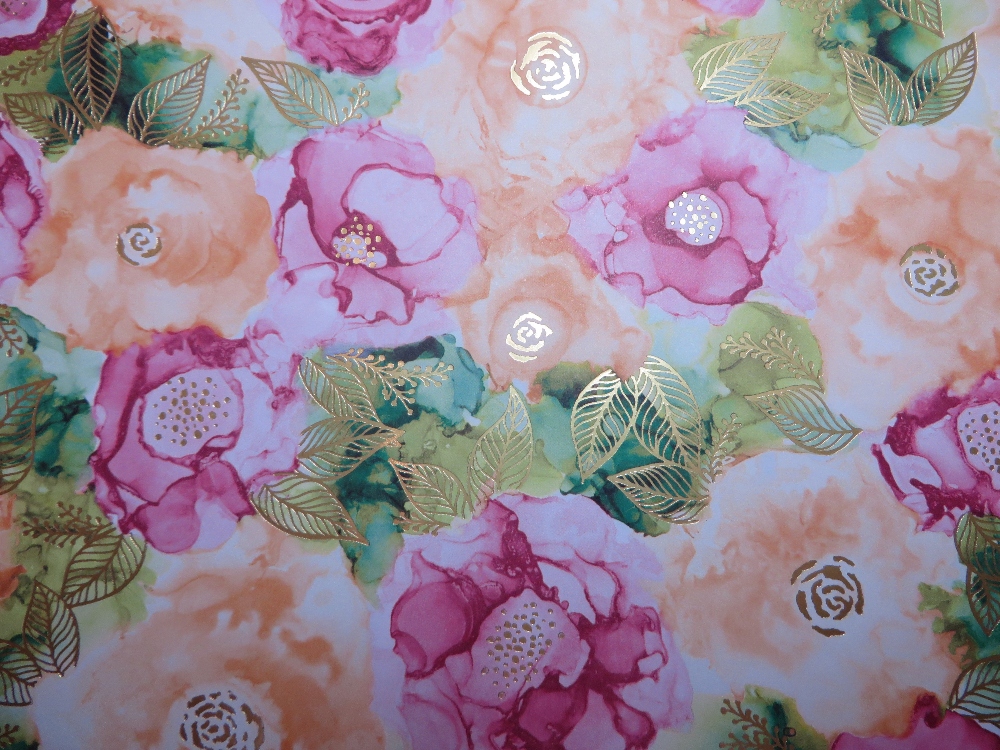
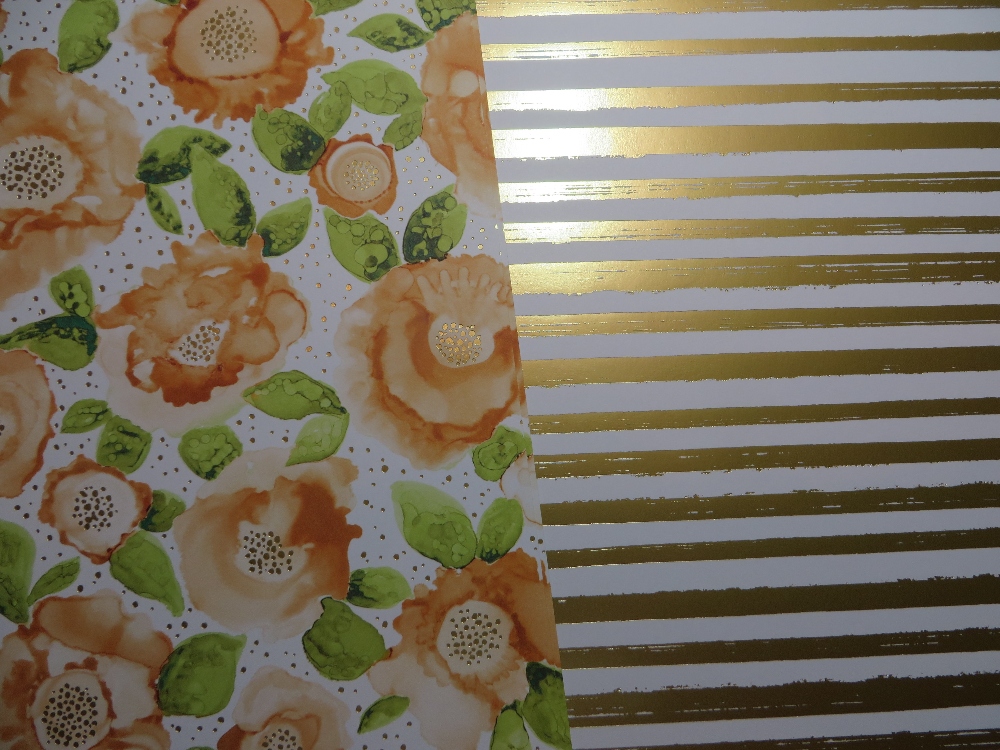
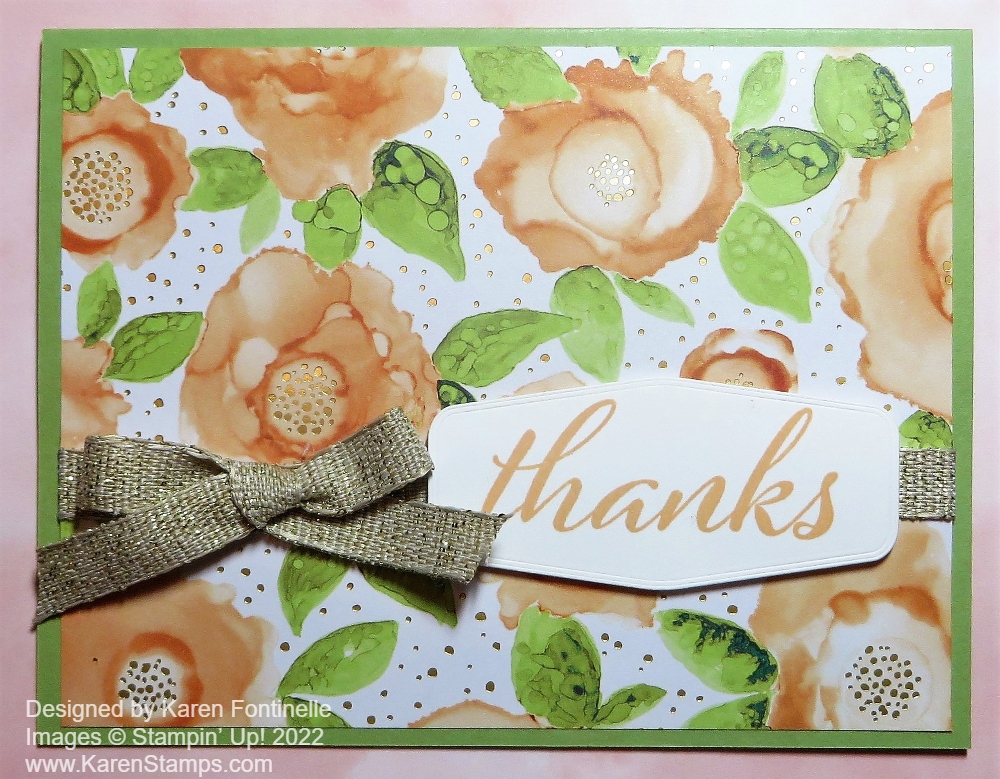
I have loved this Expressions In Ink Designer Series Paper and thought I would just make a simple card with it to enjoy the paper some more before it retires. Yes, it is on the Last Chance List but is still available as I write this so grab some if you want to stock up or finally get it. I made this basic Expressions In Ink Thanks Card because it is easy and it really shows off the gorgeous paper with gold foil accents.

The card base is Mint Macaron to match the leaves on the designer paper. There are several greens in the whole package of paper, actually quite a long list of coordinating colors that go with the paper. I intended to use the opposite side of the paper for the bottom portion of the card, but the papaya-colored florals on the front were too pretty to cover up even a small area!

I adhered a piece of the 3/8″ Fine Art Ribbon across the front of the card. This is a beautiful soft, natural ribbon with shiny gold threads in it. It is easy to tie and use since it is soft. I tied a separate bow and adhered it to the card using Mini Glue Dots. This ribbon is on sale right now on the Last Chance List so get some before it retires!

The greeting is in the Artistically Inked Stamp Set which may no longer be available. You can use any greeting you would like for the occasion. It is stamped in Pale Papaya Ink and die cut with one of the Tasteful Labels Dies. These dies are another thing on the Last Chance List, retiring soon, while supplies last. I hate to see these go! The greeting is adhered with Stampin’ Dimensionals®.

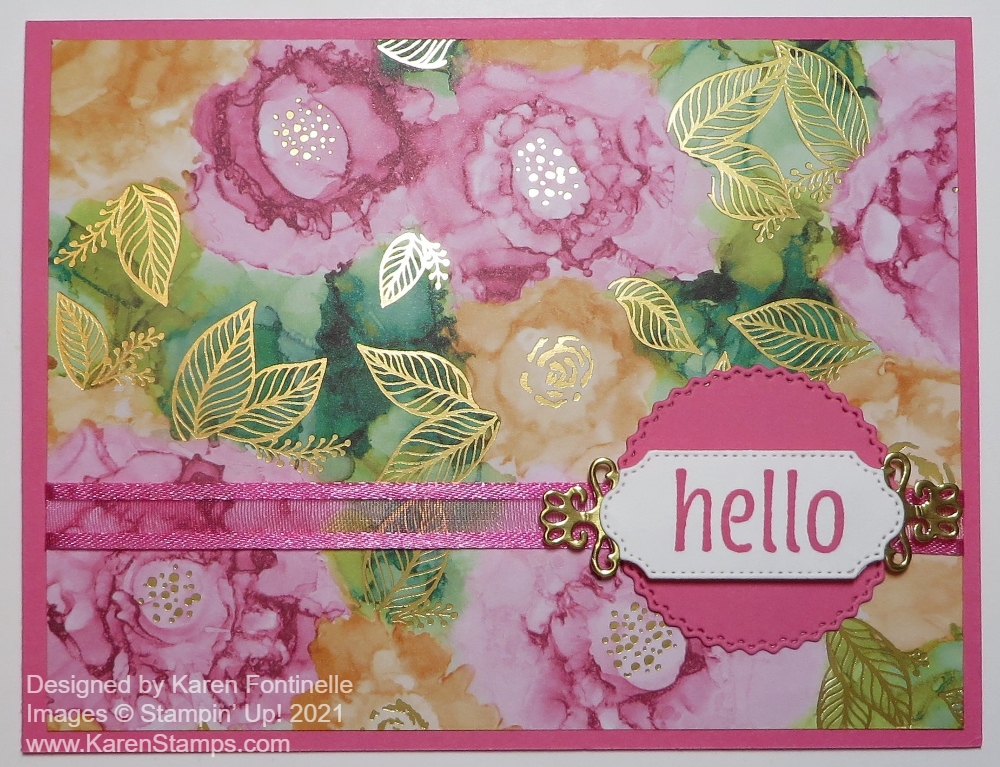
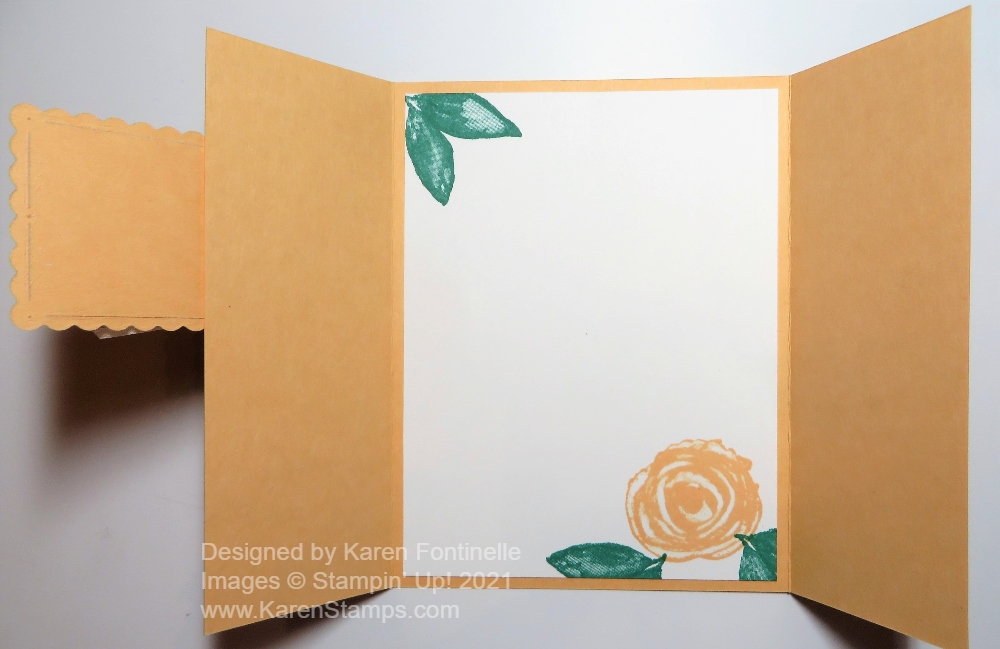
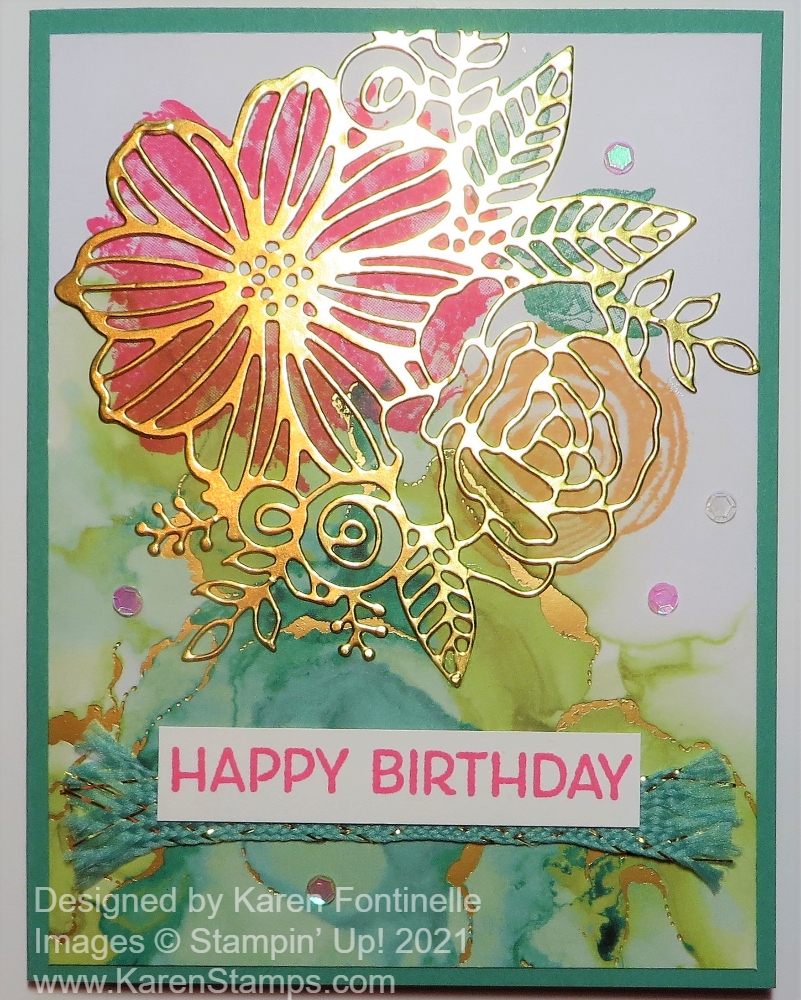
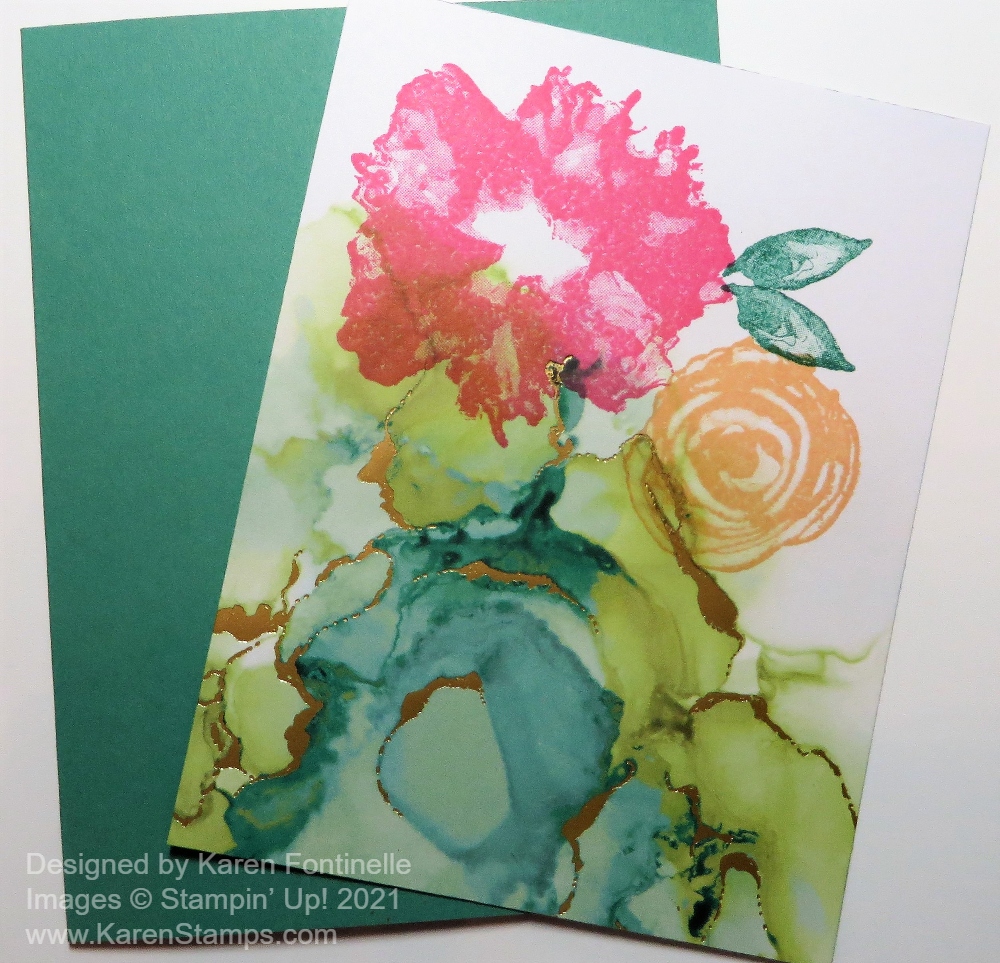
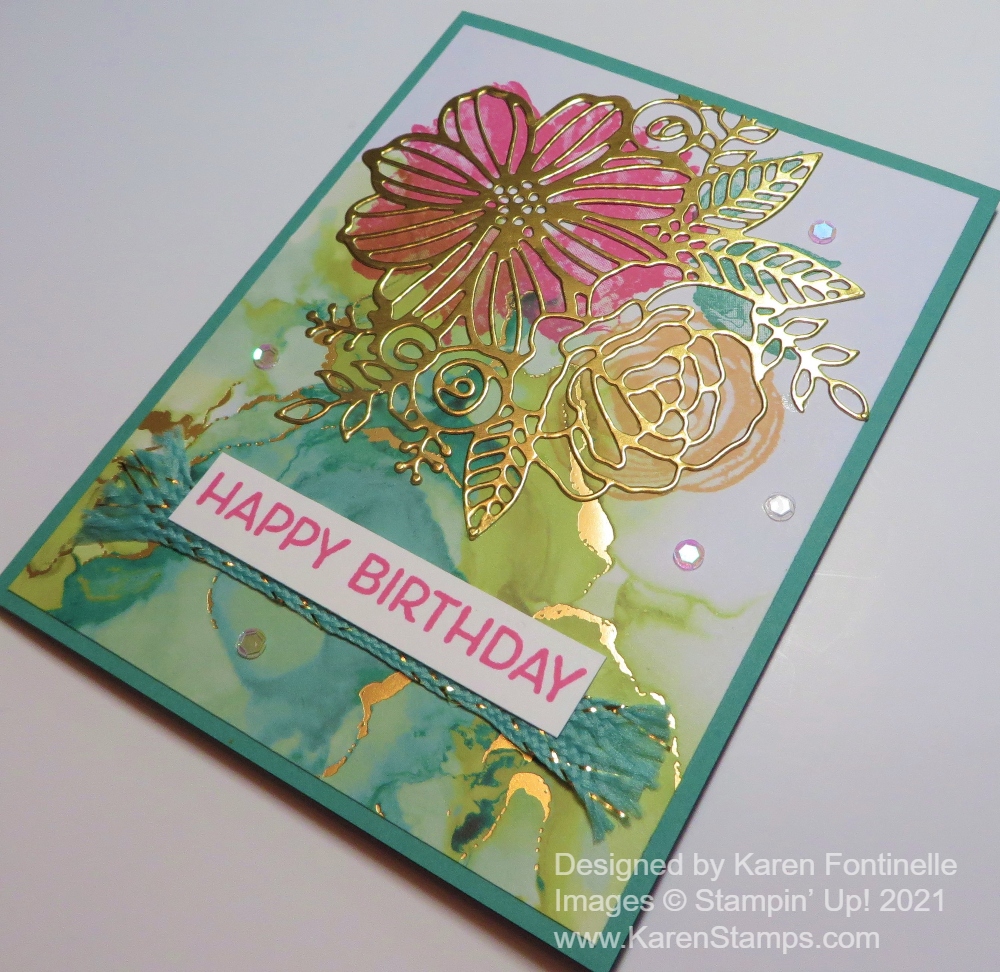
The photo of this card really doesn’t do it justice! If you could see it in person it is so pretty! It’s all about the paper! Here is another card I made with this same paper design but with a lot more embellishment.

Be sure to check the Last Chance Sale and list of retiring products from the current Annual Stampin’ Up! Catalog because, as you can see, some products are selling out already. Not everything is on sale but some things are. You can also check the Clearance Rack any time you are ordering to see if any bargains there are for you!

SHOP STAMPIN’ UP! ONLINE TODAY!

Expressions in Ink Easter Baskets

Expressions in Ink Easter Baskets

Easter will be here soon, less than a month now, so you might be thinking about making some little Easter decorations such as these Expressions in Ink Easter Baskets. These little baskets are super easy, you have probably made them before. After you make them with designer paper or cardstock, just decorate and embellish however you like.

I had the idea to make these Easter baskets a little “fancy” by using the Expressions in Ink Specialty Designer Series Paper. I love the watercolored look of all the designs on the paper plus the gold foil accents on some of the papers. It is incredibly beautiful paper! If you want a sturdier basket I would suggest making the basket with cardstock, maybe even the Basic White Thick Cardstock, and then adhering designer paper on the cardstock to decorate. My baskets are just made with designer paper and then the inside is also gorgeous!

To make the basket, cut a piece of paper at 6″ x 6″ and score like a tic-tac-toe board. Score at 2″ and 4″, then turn the paper and score again at 2″ and 4″. Cut up on the two vertical score lines up to the horizontal score line. Do the same on the opposite side. See the photo below. Cut a handle of about 8 1/2″ x 1/2″.

Score and Cutting on Easter Basket

Here’s how to fold the sides in and how to overlap them. If you want to round the corners, you can do that with and corner rounder punch you have or the current Detailed Trio Punch. The photo below from a couple of years ago shows how I folded the sides. You can mostly eyeball where they go or make a pencil mark on the inside of the basket at the 1″ mark since each section is 2″ wide and you can use that mark as a guide to see how far in the sides should go to be even. Use a brad on each side or just some decent glue to hold the basket together.

Easy Paper Easter Basket Assembled

On the basket I made on the left side with gold stripes, I die cut the flower out of a piece of the designer paper using the Artistic Dies. It didn’t match exactly but it was pretty close and looked fine. Then I also cut out some leaves with the greenish portions of the designer paper.

On the green basket, I simply cut out the flower and leaves by hand. It doesn’t have to be exact because the flowers are so “flowy” anyway, there isn’t an exact image line. On both baskets, I popped the flowers up with Stampin’ Dimensionals.

If you don’t have “Easter grass”, you can make some but cutting narrow strips of green cardstock and then running it through a Paper Crimper if you have one (mine is from long ago when I first started stamping) or just crush and crumble it in your own hands and that will work too! In the other basket, I found a piece of green tissue paper and just wadded that up in the bottom of the basket.

The fabric-covered egg in each basket is handmade from @sewafineseam on Instagram that I purchased last year!

Here are some other Easter baskets made three years ago if you need more ideas!

It’s time to start making Easter cards, treats, decorations, and these little Easter baskets would serve as a treat or a decoration for your home or your Easter dinner table. Have fun making some! Bet you can’t make just one!

Expressions In Ink Wedding Anniversary Card

Expressions In Ink Wedding Anniversary Card

If you want to make a truly beautiful card, just start with the Expressions In Ink Specialty Designer Series Paper, as I did with this Expressions In Ink Wedding Anniversary Card. I use the word “beautiful” not to brag about my card and not to just toss the term out there as an adjective describing a card. I think this designer paper is some of the most beautiful we have ever had.

The floral patterns and colors in this Expressions In Ink Paper are pretty enough themselves, then add the kind of alcohol ink look or watercolor look to the patterns, plus the gold foiling, and it is over the top! If you want to make a really simple card, just adhere a layer of this designer paper to the front of the card base, add a greeting, maybe a bit of ribbon if you like, and you are done!

This anniversary card was specially made for my daughter and son-in-law for their wedding anniversary. The card base is Mint Macaron (I think!). You can test which color you would like to use with this paper! Now this paper has a lot of white space throughout the 12″ x 12″ paper. I particularly wanted a lot of the blues and greens on this card and not so much the white, so I had to cut into the paper at the right portion to get the look I wanted.

The greeting is stamped in Just Jade Ink and is in the Forever Fern Stamp Set. I thought it was a good sentiment for an anniversary card and especially for this couple! Then the greeting was diecut with one of the Stitched Rectangle Dies.

Just for a little interest, there is a strip of a gold striped pattern in this designer paper at the bottom of the card. It just adds a little “something” to catch your eye.

I also added some gold foil leaves and foliage in the Expressions In Ink Ephemera Pack. Some I cut apart to get everything where I wanted it! I just tucked those in above and below the greeting. I didn’t want anything to interfere with the colors of the paper in the top area of the card. And of course, I added a little bling to the sides of the greeting. You can use whatever gems or jewels you like! Or place some around on the card. Whatever makes you happy!

Even in the midst of the beginning of the holiday season, don’t forget this beautiful Expressions in Ink Designer Paper! You still will need some “regular” cards like this Expressions In Ink Wedding Anniversary Card so make some cards using this pretty paper for birthdays, anniversaries, sympathy, thinking of you, any occasion you want.

SHOP STAMPIN’ UP! ONLINE HERE!

Expressions In Ink Floral Hello Card

Expressions In Ink Floral Hello Card

As I was cleaning up my stamping supplies from making another card, I spied this paper that just looked beautiful (because it IS beautiful!!) and I got everything out again and made this Expressions In Ink Floral Hello Card! I knew I could just make a very simple card because the paper is so pretty and you really don’t need too much else.

I have loved this Expressions in Ink Specialty Designer Series Paper since it came out in the Stampin’ Up! Annual Catalog. The artistic designs on the paper plus the gold foiling make it exceptionally beautiful. I started with a card base of Polished Pink, one of the new In Colors this year. You could choose from several other colors for this same card since there are so many colors in the designer paper, like Pale Papaya or one of the many greens we have. Before adhering the designer paper to the card base, I wrapped a piece of Polished Pink 3/8″ Open Weave Ribbon around. I love this ribbon in all the In Colors.

The greeting is in the Artistically Inked Stamp Set. It is stamped in Polished Pink on Basic White and die-cut with a small die in the Ornate Frames Dies. I adhered it to a die-cut Gold Foil piece with the fancy ends, also a die in the Ornate Frames Dies. And to help all that to stand out, I die cut a fancy circle in the Tasteful Labels Dies in Polished Pink. The pink die-cut circle is adhered right to the card and then the greeting is popped up on Stampin’ Dimensionals. You could add a jewel or two to the greeting if you wanted to.

This is an easy card with a simple card design, maybe only the greeting is a little fancier. It’s all about the fancy paper! Here is a similar card I made back in July with some added die-cut leaves and the Expressions in Ink Ephemera Pack. Get out your Expressions Ink Designer Paper and make a card like my Expressions In Ink Floral Hello Card.

SHOP STAMPIN’ UP! ONLINE HERE!

Expressions In Ink Hello Card

One day I made another card similar to this Expressions In Ink Hello Card and thought I might as well make another one while I had all this pretty paper out! I decided to pretty much copy the card on the front of the new Stampin’ Up! Annual Catalog except I changed the paper out to this gorgeous one with the gold foil accents!

This card starts with a base of Polished Pink Cardstock. Then I added a layer of the Expressions In Ink Specialty Designer Series Paper, one with lots of pink and Pale Papaya flowers on it with some leaves, flower centers, and small blossoms in gold foil. It’s just beautiful paper!

I die cut the long leafy piece from the Artistic Dies and colored it with different shades of green ink applied with Blending Brushes. This die-cut piece went down first on the card to go underneath all the other extra pieces. As I have said before if only I had remembered to use Adhesive Sheets when I die cut this piece so I could just pull off the backing and I’d be all set with adhesive! I never think of it ahead of time, though, so I had to use teeny tiny drops of Multipurpose Liquid Glue.

I stamped the flower in the Artistically Inked Stamp Set and die-cut it, as well as the solid leaves. Also stamped is the word “hello” and popped up over a strip of the Pale Papaya & White 1/2″ Ribbon. After that, the flower and leaves are popped up over the end of the greeting. I added extra little gold pieces from some retired product, but when it is available again, you could use something in the Expressions In Ink Ephemera Pack.

This Expressions In Ink Designer Paper is so gorgeous you almost don’t need very much else on the card. Here’s another card I made with one of the other sheets of the paper. I hope you feel very artistic when you use this lovely paper making cards of your own possibly similar to my Expressions In Ink Hello Card.

SHOP STAMPIN’ UP! ONLINE HERE!

Expressions in Ink Pale Papaya Thank You Card

Expressions in Ink Pale Papaya Thank You Card

I came across this photo of this Expressions in Ink Pale Papaya Thank You Card on my phone and I don’t think I ever posted it. I may have copied it from someone but since it was back in May, I don’t really remember! If I find it, I will add it.

This whole Expressions In Ink Suite Collection has been one of the prettiest groups of products ever, in my opinion. And proof of that is that various components have been out of stock, but the Expressions In Ink Designer Series Paper should be back in stock this week, as I write this.

There’s a lot going on with this card, but it starts with a Pale Papaya card base. Then the layer of designer paper with Pale Papaya flowers is cut into three strips and adhered to the card base. Next comes the floral die-cut in the Artistic Dies. The tiny little pink flowers are also stamped and die-cut.

The word “thanks” is stamped on Basic White and then die cut with a die in the Tasteful Labels Dies. It overlays a piece of gold foil striped designer paper in the Expressions In Ink Designer Paper. Underneath the whole greeting is a piece of Gold 1/4″ Shimmer Ribbon. There’s even a couple of pieces of gold foil leaves, found in the Expressions In Ink Ephemera Pack. And no fancy card would be finished without a few sequins, right?!

Just watch the Stampin’ Up! Online Store. If any of these products are “Unorderable” because of a long backorder, they won’t come up until they are available again, but just check back or ask me if there is a date. Right now the Expressions in Ink Specialty Designer Series Paper should be back in stock this week but the entire Suite will not be available until mid-July. But it’s almost July!

SHOP STAMPIN’ UP! ONLINE!

Expressions In Ink Gatefold Thank You Card

Expressions In Ink Gatefold Thank You Card

The photo of this Expressions In Ink Gatefold Thank You Card doesn’t do this Specialty Designer Series Paper justice! Once you open the package, you cannot stop “oohing and aahing” over the beauty of it! The gold foil accents and the watercolor/alcohol ink images are just stunning.

This paper is the Expressions In Ink Specialty Designer Series Paper and I think it is some of the most striking papers we have ever had! Nothing can compare to having the paper in your hands to see how beautiful it is. No photos can come close. My post yesterday has photos of some of the sheets of paper and a card but even then, the paper is even better in person.

This card was fun to make and easy. It’s called a gatefold card because instead of the 8 1/2″ x 5 1/2″ paper that we usually start our cards with, folded in half, this card is folded in from each side which makes the “gatefold”. Start with your card base of 8 1/2″ x 5 1/2″ and score 2 1/8″ from each end (or 2 1/8″ and 6 3/8″). This gives you a standard card width of of 4 1/4″ in the center, with the two ends folding over like doors (gates) over that area.

Decorate each “gate” with a piece of designer paper cut at 5 3/8″ x 2″. This leaves just a very narrow margin of cardstock showing so you can cut it smaller at 5 1/4″ x 1 7/8″ if you like. The cardstock I used on this card is Pale Papaya, one of the new In Colors.

For a gatefold card, make a center piece with the greeting or some other image to be adhered only on the left side flap so the card can be opened. Or you can make a bellyband that goes around the card to hold it closed. On this card, I die-cut a piece of Pale Papaya with one of the Scalloped Contours Dies (the second from the smallest die). After you cut out this piece, you will notice something different about it. There are actually slits around the edges that you can use for other creative opportunities, like inserting cardstock strips or ribbons through those. But otherwise, you can just use this die-cut piece as a layer or a focal point. For the greeting, I simply cut a piece of Basic White that would fit inside the Pale Papaya piece and stamped the “thanks” on it in Pale Papaya Ink. This was adhered to the left side of the card by figuring out where the middle of that piece was (count the scallops at the bottom!) and making sure I only put glue on the left side. The greeting is from the Artistically Inked Stamp Set. You can purchase the stamp set and dies that go with the stamp set, the Artistic Dies, together in a Bundle and save 10%.

To embellish, I tied a little Pale Papaya 3/8″ Open Weave Ribbon into a bow and adhered it to the greeting. Then I also added a few of the adhesive-backed iridescent sequins that come in the Expressions in Ink Ephemera Pack.

On the inside of the card, I added a layer of Basic White, stamped with a flower and leaves from the Artistically Inked Stamp Set in Pale Papaya and Just Jade Ink. You can also see in the photo below how the greeting looks from the inside of the card.

Expressions In Ink Gatefold Thank You Card Inside

Be sure to check out the Expressions in Ink Suite or at the very least the designer paper, the Expressions In Ink Specialty Designer Series Paper! You will easily make beautiful cards and projects using this paper at a minimum, like this Expressions In Ink Gatefold Thank You Card.

SHOP STAMPIN’ UP! ONLINE HERE!

Expressions in Ink Birthday Card With Gold Foil

Expressions In Ink Birthday Card With Gold Foil

THIS PAPER!!! Expressions in Ink Specialty Designer Series Paper (155464) Order it!

Okay, that’s really all that needs to be said for this blog post! But since you probably want to know more about the card and the paper, I’ll continue.

When I first saw a Stampin’ Up! video giving us Demonstrators a sneak peek at some of the new Annual Catalog products, I fell in love with this Expressions in Ink Suite! And when I saw it online in the catalog I wanted to order it right away. But it was not on our Demonstrator pre-order so I had to wait just like everyone else. My order just came and I have to say, when I opened this package of paper and looked at the sheets, I just gasped! It is beautiful and striking with the gold foil accents on one side of the sheets. You must have it!

Here are closeups of some of the sheets of paper, but even these do not do it justice!

Expressions in Ink Specialty Paper1
Expressions in Ink Specialty Paper2
Expressions in Ink Specialty Paper3
Expressions in Ink Specialty Paper4

For the card, I started out copying the catalog sample on page 96 in the upper right of the samples. It turned out not exactly the same. I dared to cut into one of the papers, trying to match the pattern I could see on the catalog page. Then I stamped the large and small flowers from the Artistically Inked Stamp Set plus the small individual leaves. The large flower is stamped in Polished Pink Ink and the small flower in Pale Papaya. The leaves are stamped in Just Jade Ink since the card base will be Just Jade. You can choose from lots of coordinating colors!

Expressions In Ink Card Beginning

Now when I stamped these flowers and leaves, I didn’t give a lot of thought ahead of time to that gold foil piece placed over the top on the sample. In the Ephemera Pack, I was thinking that there would be individual foil cutout flowers, leaves, etc. to place over my stamped images, but there were not! The pack will still be fun to play with, it just didn’t have what I was expecting. Then I realized, I just needed to die-cut a gold foil piece from the Artistic Dies. While my flowers and leaves lined up pretty well with the die-cut, and while it doesn’t and shouldn’t be perfect because this is a watercolor look, I did add another stamped leaf and then got my foil to line up pretty well.

Expressions In Ink Birthday Card With Gold Foil

I highly recommend using Adhesive Sheets on the back of the Gold Foil Sheets before die-cutting this intricate design, which I always forget, but I did manage to use teeny tiny dots of the Multipurpose Liquid Glue on the back. The greeting comes in the stamp set and I stamped that in Polished Pink Ink and placed it in a lower position than on the catalog sample. For a little extra, I used a strip of the Just Jade & Gold 3/8″ Braided Ribbon, a little frayed on the ends, and adhered just below the greeting a tiny bit. And for a little more bling, I wanted to try out the little adhesive-backed iridescent sequins in the Ephemera Pack. You can see about five of those placed around the card.

This is a relatively easy card to make, using both stamping and designer paper, or rather stamping ON the designer paper, plus the die-cut Gold Foil accent and other embellishments. I suggest you order this paper, or the whole Suite of products sooner rather than later because once word gets out about how beautiful this Suite is, it could be backordered by the time you decide to get it. Hopefully, Stampin’ Up! anticipated how popular this Suite would be and ordered plenty!

You might also consider the June Paper Pumpkin Kit which will coordinate with this Suite! Even if you subscribed before and dropped, you may want to come back just for this kit at least if you like the style of the Expressions In Ink Suite of products!

Here’s another view of my card without so much glare from the foil! I hope you are as attracted to this Suite as I am!

Expressions In Ink Birthday Card With Gold Foil Closeup

SHOP STAMPIN’ UP! ONLINE THIS WEEKEND!