Sometimes it is crazy how a card comes to be created! No way did I have this Love Notes You’re Amazing Card in mind! I hadn’t even thought of this paper since Valentine’s Day! And maybe my 6″ x 6″ designer paper gets short shrift, not getting the attention it deserves, since I typically look through my 12″ x 12″ designer series papers first, if not all the time, when I go to make a card.
The way this happened is this:
- I thought maybe I should make a Mother’s Day card since that is coming up.
- For an idea, I thought maybe I would look in the Stampin’ Up! catalog at the templates they have been supplying to help plan a card design.
- It was easier for me to grab the Spring Mini Catalog so I did.
- I opened it, paged through a few pages to find the templates on page 17.
- These were right next to the Love Notes 6″ x 6″ Designer Series Paper with card samples on top of the page. This DSP is on the Last Chance List so it will be retired from future catalogs in May, but still available while supplies last.
- My thought was I could use this paper for Mother’s Day or other occasions, not only for Valentines.
- And voila! Just played around with the paper until I came up with this card!
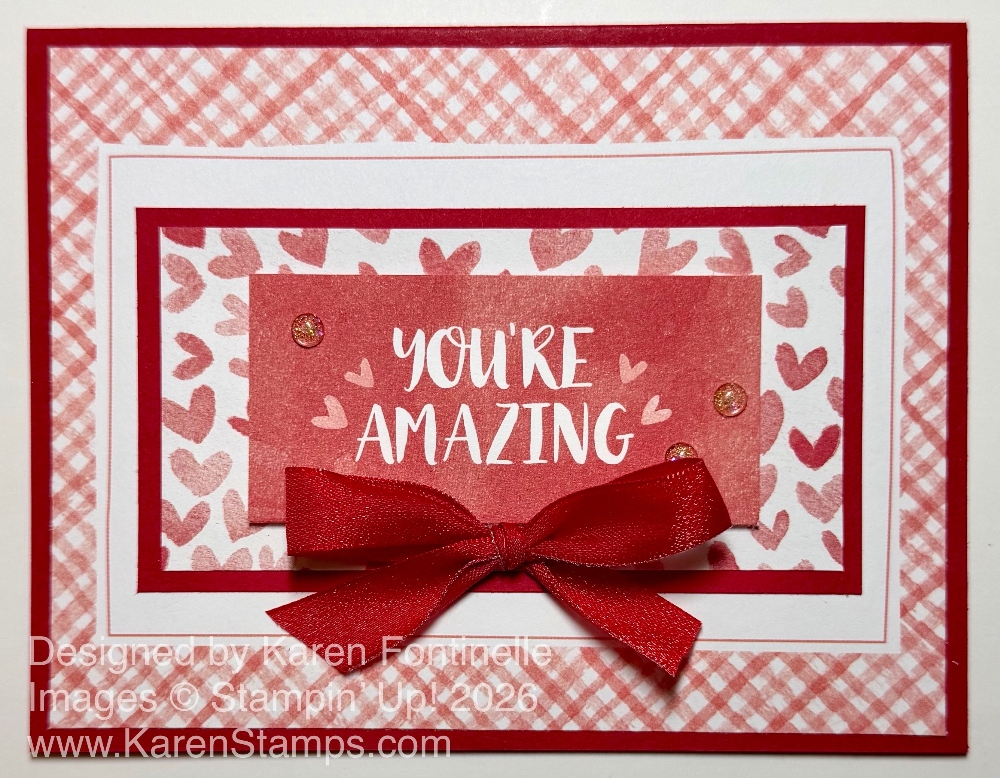
The card base is Real Red, one of the coordinating colors with this Love Notes DSP. The background layer is one of the panels on the 6″ x 6″ paper, which looks like a frame. I trimmed it down to fit on the card base, 4″ x 5 1/4″. That left a big white space in the center of the designer paper on that panel. I thought if it were a Mother’s Day card, the paper with lots of little red hearts would be appropriate! I cut that down to fit, leaving a white margin, at 4″ x 2″. I layered it on a piece of Real Rec cut at 4 1/4″ x 2 1/4″.
For the greeting, whether for a Mother’s Day card or another occasion, I chose the panel on one of the DSP sheets that said “You’re Amazing” and cut that apart from the rest of the paper. It is popped up on Stampin’ Dimensionals in the center of the hearts.
The card needed some embellishment so I added a Real Red bow. I think this particular ribbon is no longer available, but you likely have some red ribbon in your stash, or you could use white or gold ribbon. Use whatever you like. I also added a few Iridescent Foil Gems, also in the Last Chance Products, at a discount, for a little sparkle. I think from the time these gems came out, I used them a lot on many projects, so if you can get them on sale, check them out!
If you are like me and forget about some of the older designer series paper, especially the 6″ x 6″ paper, maybe you should take a peek and refresh your memory and give it a little love!