It’s a rainy day here in Houston (finally!) but this Trio of Pansy Patch Pansies Hello Card brightens up the day for sure! I will say, this whole Pansy Patch Bundle has a lot to offer and for me, a little bit of a learning curve. As I learn more tips about using the stamps and dies I will be passing them on to you. My first large stamped pansy turned out to not be so much of a pansy! I think I stamped one of the layers upside down….what should have been at the top was at the bottom! My pansy was twice as big as it was supposed to be! But these smaller ones are easier!
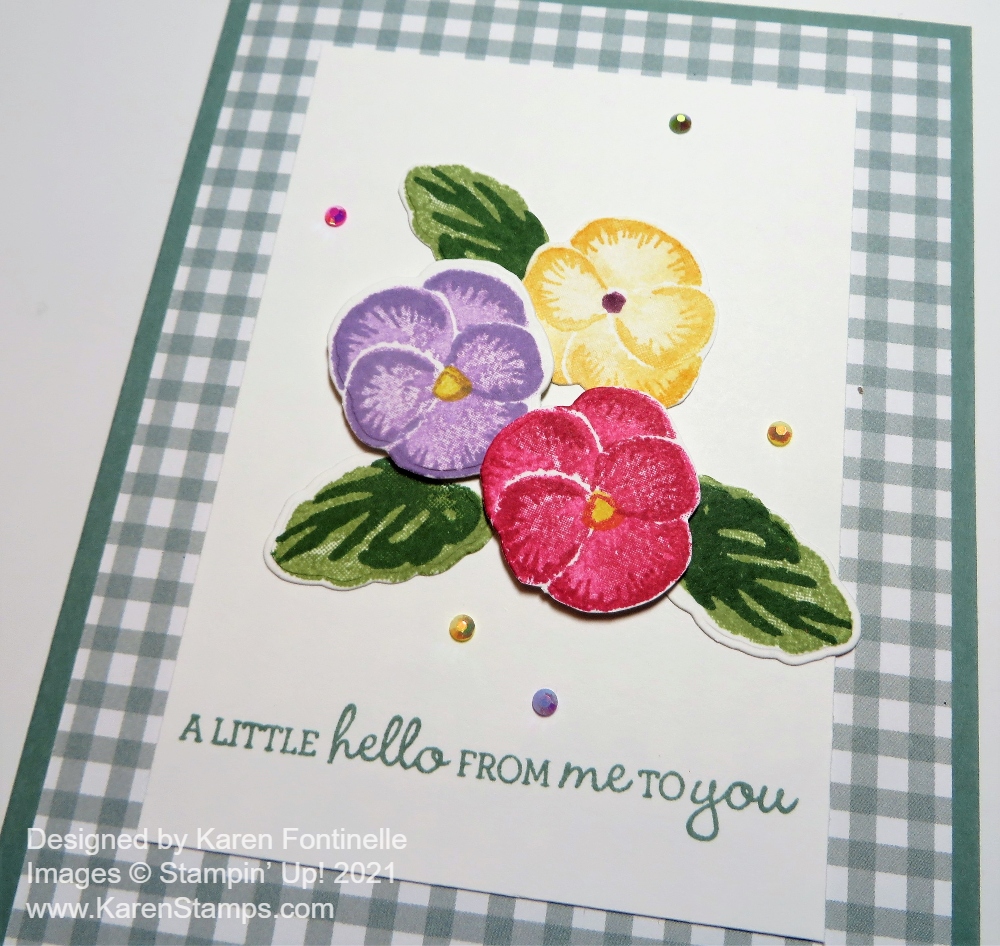
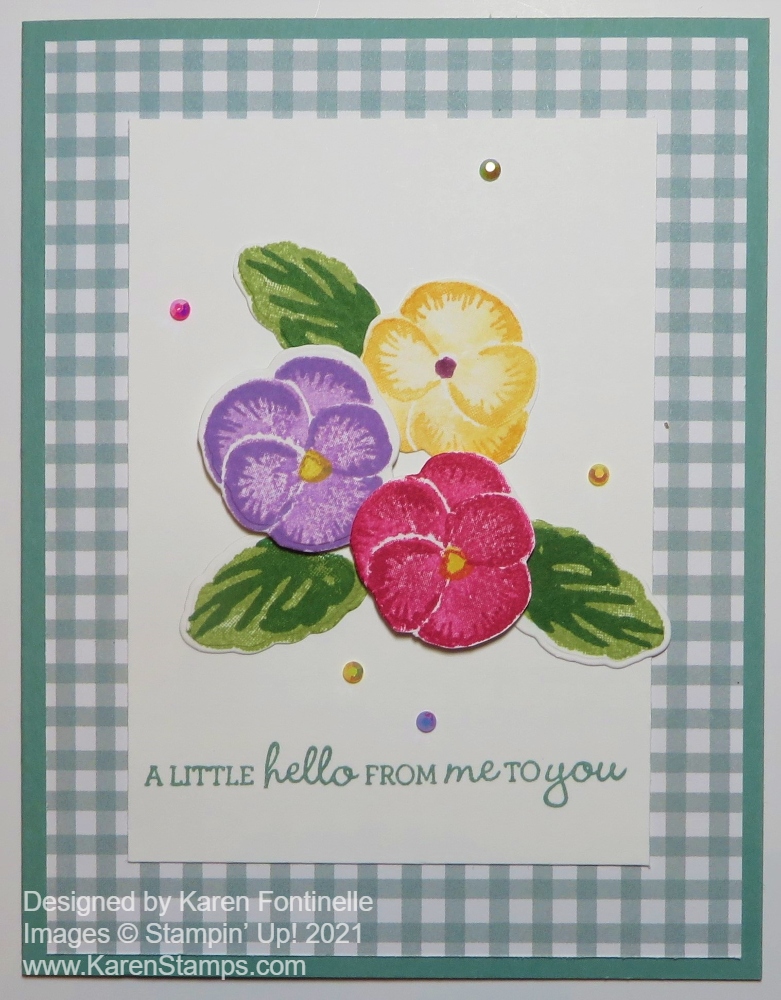
The card base is one of the new In Colors, Soft Succulent. It matches the gingham designer paper, which is one of the patterns in the Pansy Petals Designer Series Paper, the opposite side of the floral side. I really like these gingham patterns!
These small pansies are really just two-step stamping. There is a solid color stamp and an outline stamp. You can practice and decide on both the small and large pansy stamps which way is easier for you to stamp….to stamp the solid and then add the outline over it or vice versa. The three colors I used were Melon Mambo, Highland Heather, and Daffodil Delight. But when I stamped the solid image, I stamped off first to make it a little lighter, then stamped the outline image full-strength. The leaves are stamped with Pear Pizzazz and Garden Green. I also stamped some stems but didn’t end up using them.
After stamping the pansies, leaves, and stems I used the Pansy Dies to cut them out. I actually lost my stem die for a couple of minutes until I discovered it had slipped down between the roller and the machine platform, but fortunately I was able to pull it out and it hadn’t gotten bent or damaged! So if you can’t find a die and you think you heard a “jingle” sound as you die cut something else, be sure to check your machine before you go to much further!
This Bundle is great because you can stamp the individual pieces of the flowers and die cut those, then assemble into a flower, or you can do what I did and stamp the whole thing then use the outline die to cut out the whole stamped flower. Lots of options with this stamp set and dies! Not to mention the infinite number of color combinations you can make with your pansies.
To assemble my cards, I glued the yellow pansy directly onto the Basic White layer and popped up the other two flowers with Stampin’ Dimensionals. The leaves are glued right onto the Basic White. Since I had a lot of white space around the flowers, even after stamping the greeting from the Pansy Patch Stamp Set in Soft Succulent, I added some of the In Color Jewels, coming in the new catalog. I can’t stay out of that package making cards! I used the smallest jewels but there is an assortment of sizes in all the In Colors in the package.
I know a lot of people are looking forward to getting the Pansy Petals Suite when the new catalog goes live on May 4th! If you like pansies, or just any flowers, you will find a lot of creative opportunities with the Pansy Patch Stamp Set and Pansy Petals Designer Paper. The dies even cut out some of the designer paper images! I’d highly recommend getting all the In Color Open Weave Ribbons, too. They are beautiful!
Enjoy your New Stampin’ Up! Catalog Shopping List Weekend getting ready for Tuesday!