Tag Archives: Artistically Inked Stamp Set

Softly Stippled Thanks Card

Softly Stippled Thanks Card

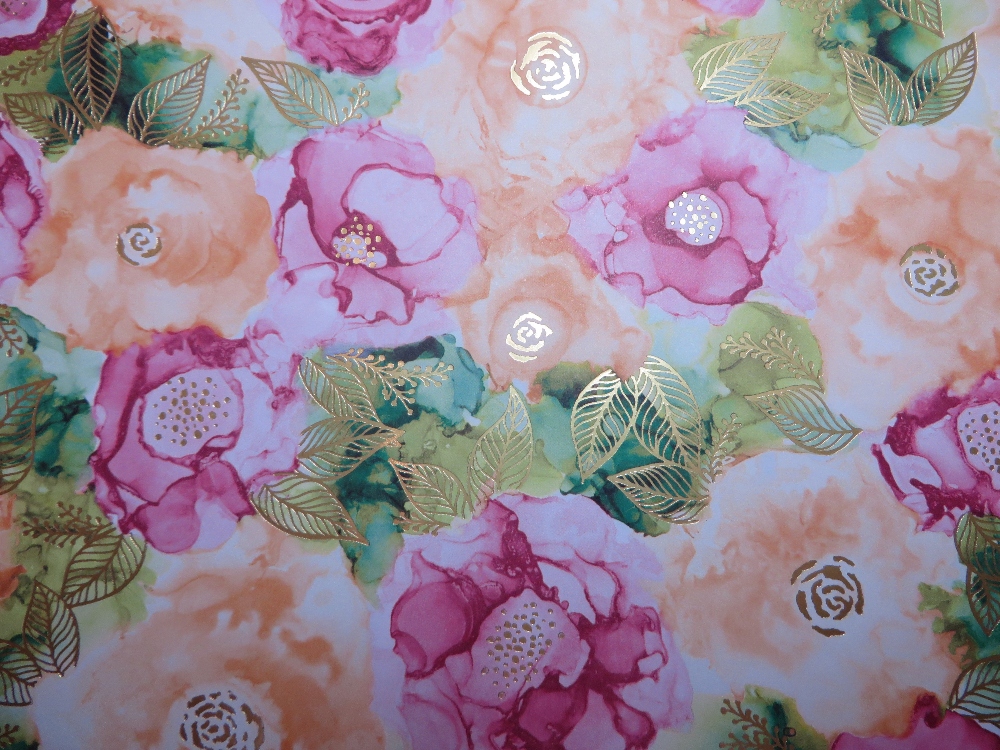
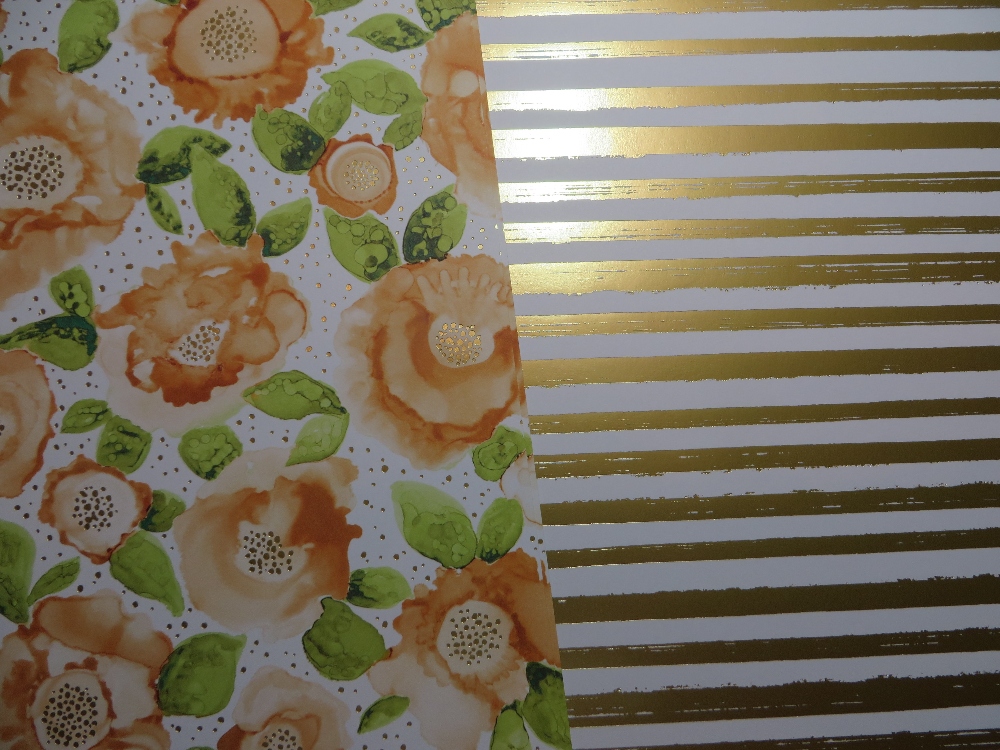
Remember, Sale-A-Bration is going on at Stampin’ Up! this month and next month! With a $50 purchase, you can choose this Softly Stippled 12″ x 12″ Designer Series Paper FREE! This paper is very versatile with stippled florals, earthy colors, and textured-looking designs. You will be able to use this paper for many cards and projects.

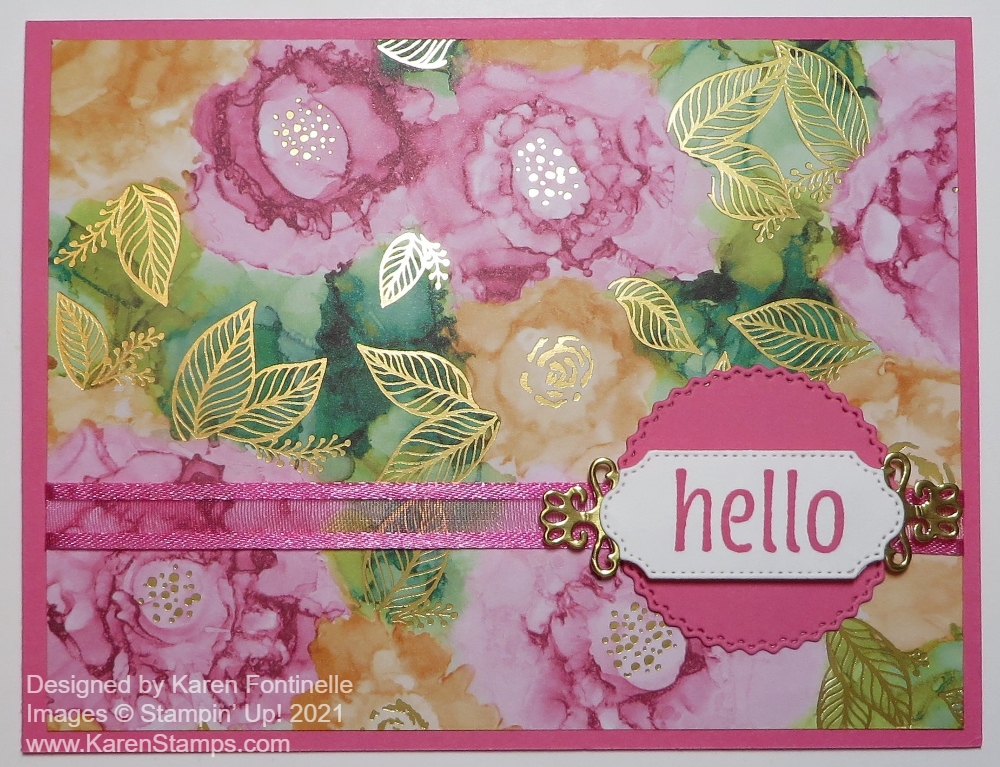
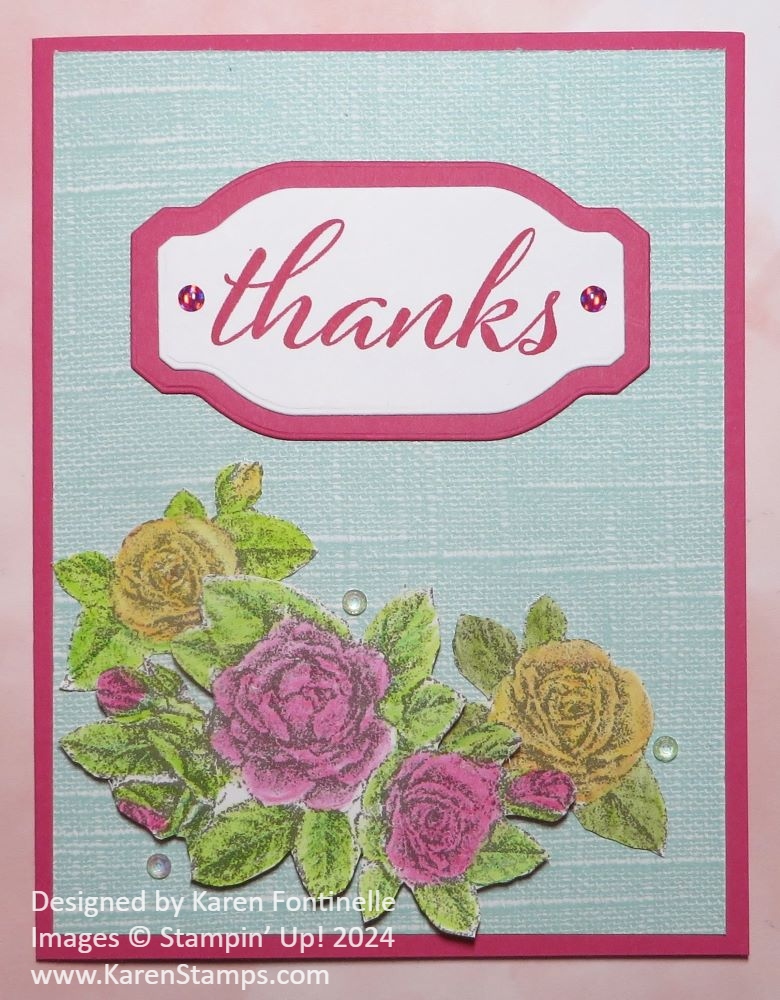
The card base is Melon Mambo with a layer of the Softly Stippled paper. This pattern is a Pool Party pastel-colored texture that looks like a woven fabric! Just looking at the card, you would think the paper is embossed or has a physical texture on it, but it’s just the look of the paper.

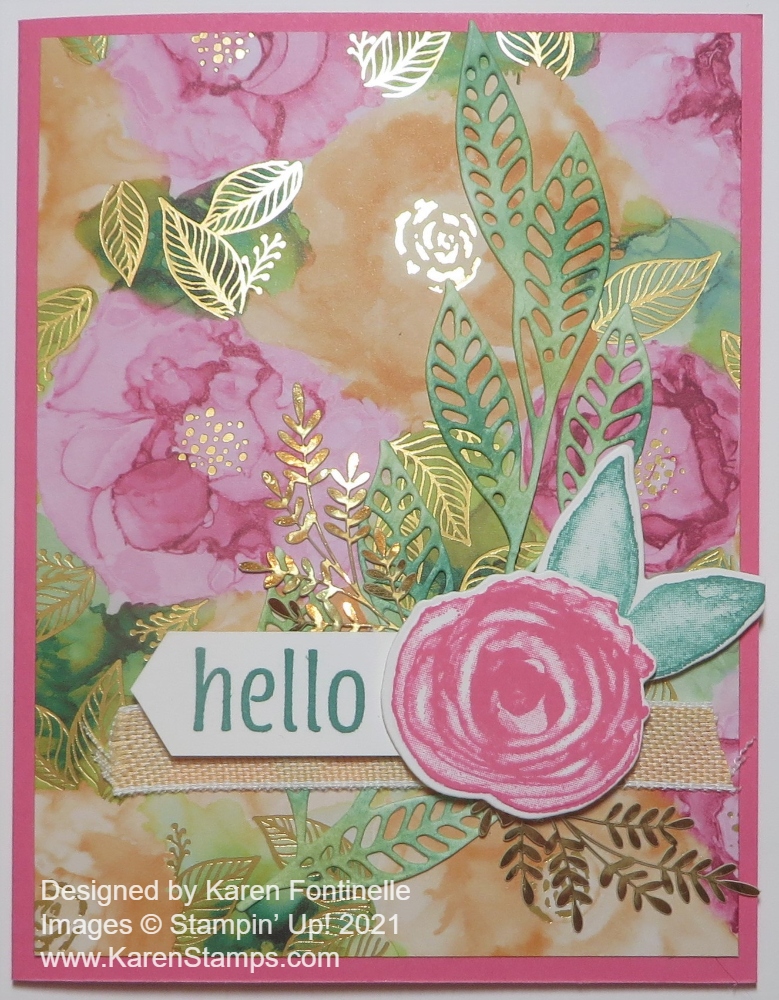
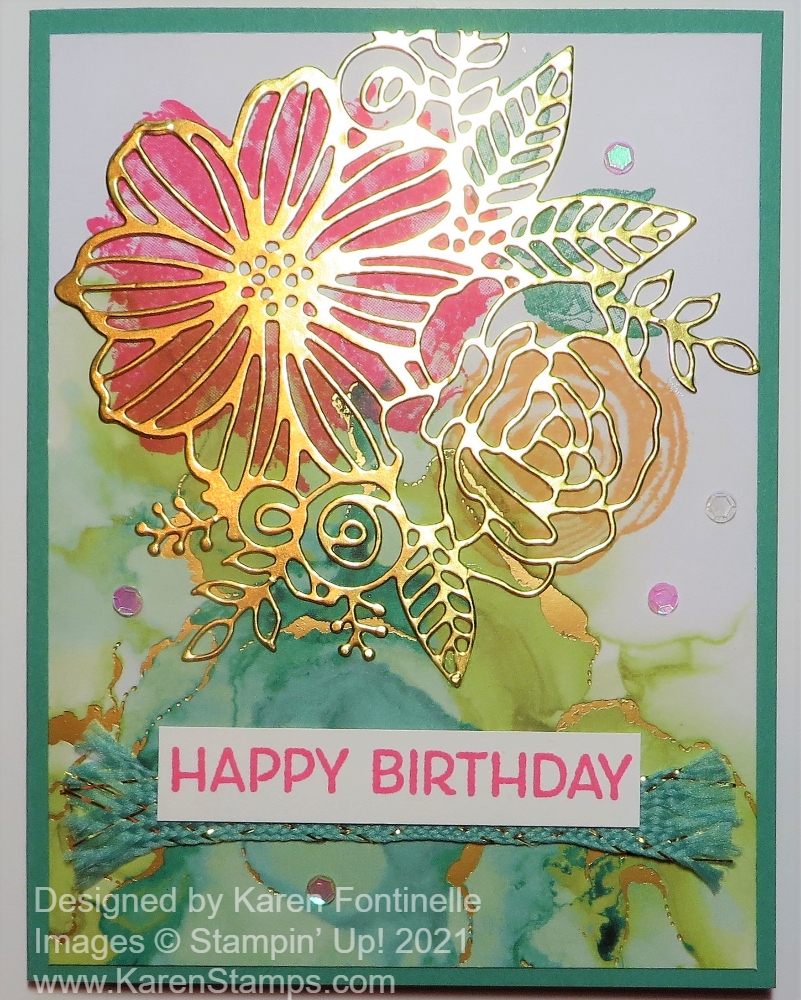
Another sheet of the Softly Stippled paper has black and white flowers all over. They can be left as is or they can be colored. I chose a few of the flowers to color and then fussy cut with my Paper Snips out of the sheet of paper. For this card, I used Watercolor Pencils and then softened the coloring with a Blender Pen. Stampin’ Up! sells two different boxes of Watercolor Pencils, Assortment 1 and Assortment 2. Back when I became a Demonstrator, coloring with Watercolor Pencils and a Blender Pen was my favorite way to color! I used Melon Mambo for the pink flowers and Daffodil Delight for the yellow ones. The leaves are Granny Apple Green and Mossy Meadow and also some Old Olive. On the yellow flowers, I added a tiny bit of Calypso Coral too. You can combine colors and then blend them with the Blender Pen. The yellow flowers are adhered directly to the card. The pink flowers are popped up on Stampin’ Dimensionals.

The greeting is in the Artistically Inked Stamp Set. It is stamped in Melon Mambo ink and die cut with one of the label dies in the Something Fancy Dies. There is even a matching larger die that you can use for a layer in Melon Mambo.

To finish off the card, I added two Melon Mambo Glossy Dots to the greeting. But I couldn’t stop there! It just seemed like I should also add some Iridescent Rhinestone Jewels down by the flowers. Sometimes you have to know when to stop…but I went ahead anyway on this card! I don’t think it’s too overdone!

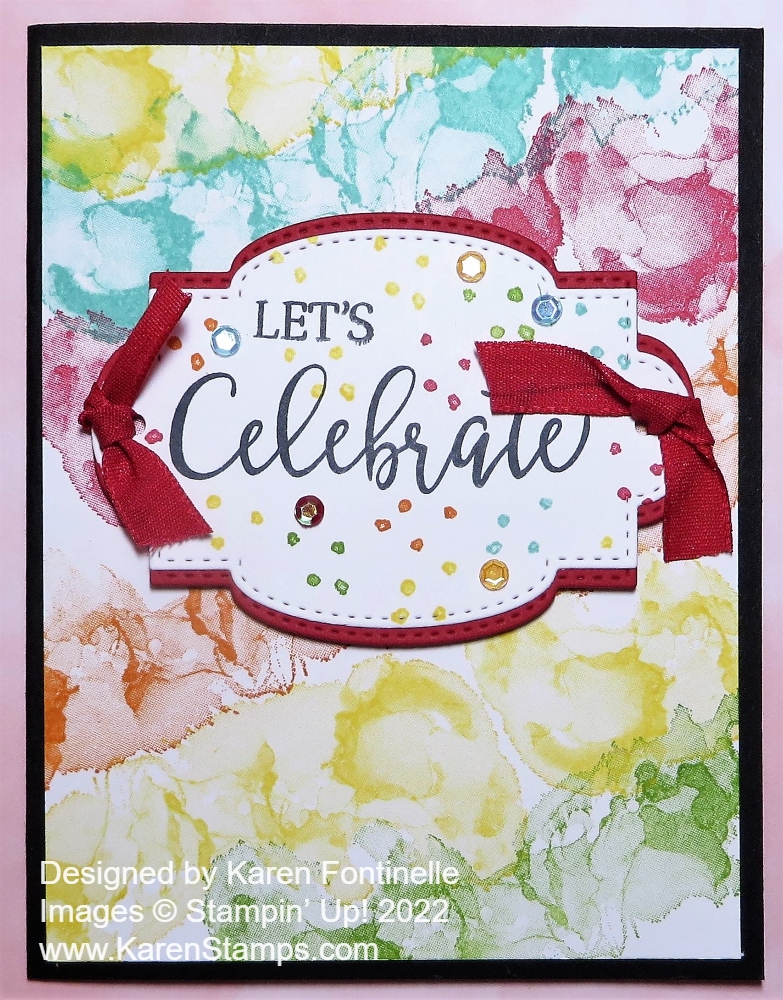
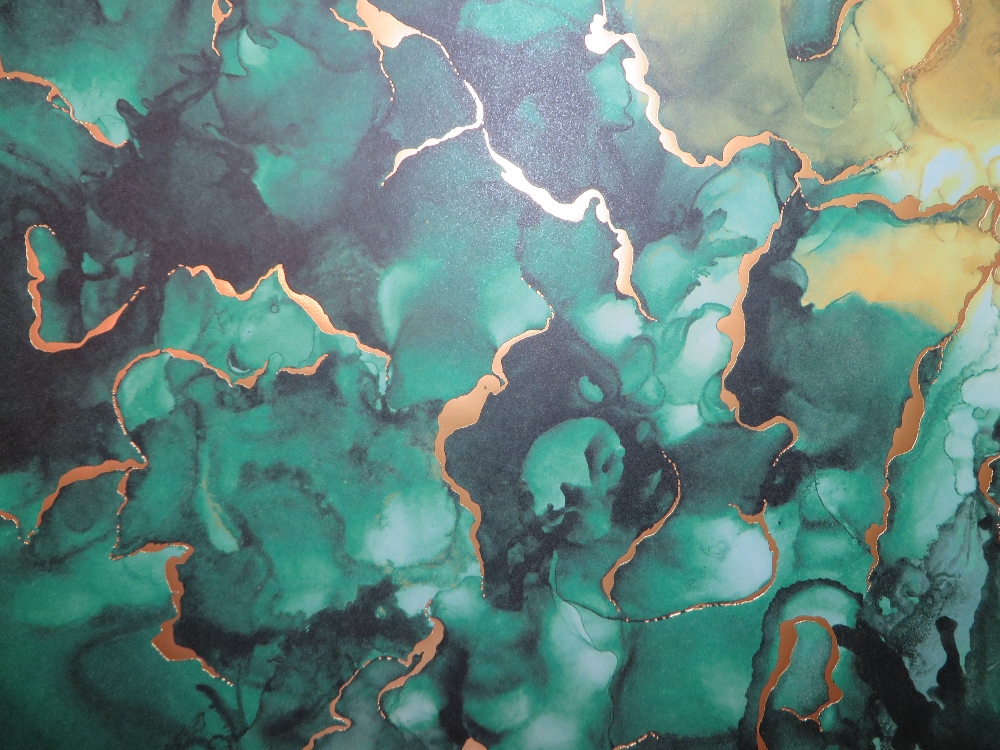
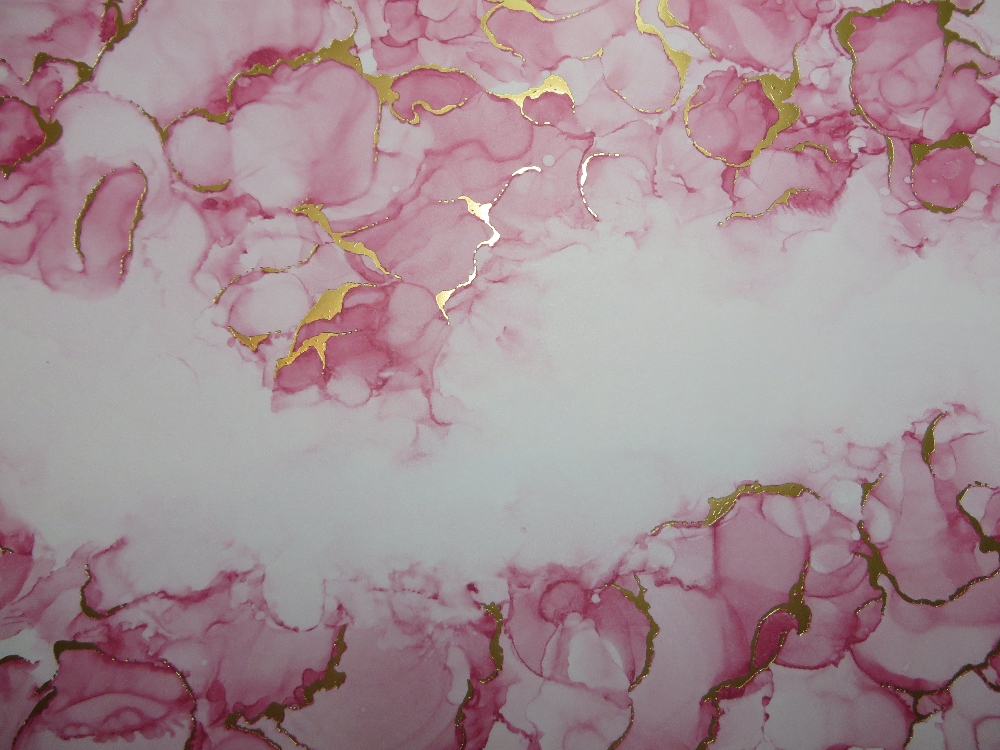
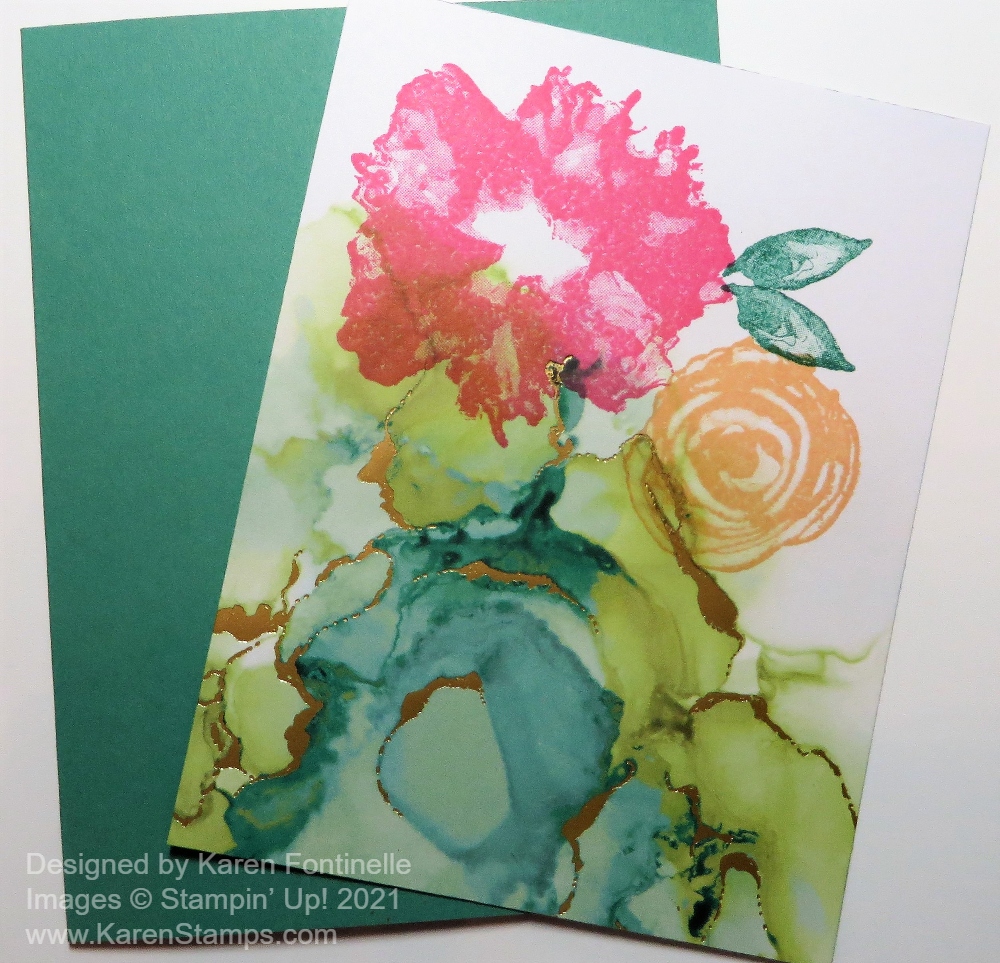
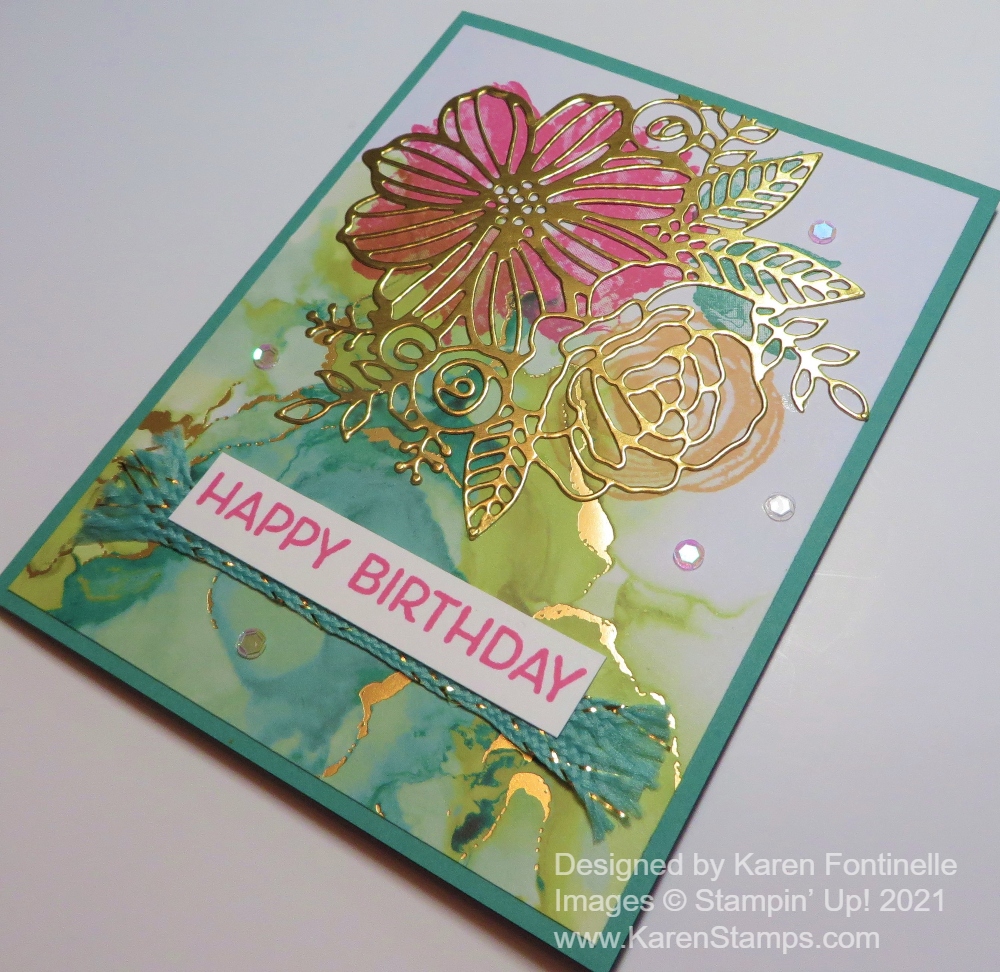
Here is another card I made with two other patterns of the Softly Stippled Designer Series Paper.

Go shop at Stampin’ Up! and put in an order of $50 or more so you can choose a FREE Sale-A-Bration product!

Create With Friends Celebrate Card

Create With Friends Celebrate Card

Here’s a fun, colorful card that I made just to use the Create With Friends Stamp Set that I’ve had but hadn’t used much. Unfortunately, after making this card, the stamp set is already sold out and retired. But you can still use this card design and just substitute the greeting with something else you have.

After making the multicolor front of the card, I used Basic Black for the card base. Black really makes those colors stand out but you can use whatever goes with the colors that you choose. I made this interesting background using the stamp in the Artistically Inked Stamp Set. This stamp set is the Distinktive design which adds texture right to the stamp. I just chose several colors to use on the front of the card and stamped on a slight diagonal. I used Daffodil Delight, Pumpkin Pie, Granny Apple Green, and Real Red. A group of Subtles would be good too!.

The greeting was stamped on Basic White and die cut with one of the Stitched So Sweetly Dies. This set of dies is retiring soon. I also used the same die to cut out a Real Red piece of cardstock and cut that in half horizontally to layer underneath the white greeting. I also punched a hole on each side of the die cut so I could tie on some Real Red Faux Linen Ribbon. Before tying on ribbon I decided to stamp the dots in the Artistically Inked Stamp Set in all the colors I used in the background. Plus I had to add a few little Artistry Blooms Self-Adhesive Sequins. The greeting is popped up with Stampin’ Dimensionals.

Even though you can no longer purchase the greeting stamp set, you can still get the Artistically Inked Stamp Set and will continue to be able to buy it in the next annual catalog! That is great news to still have that stamp set available to us! So many artistic things you can do with the “Artistically Inked” stamp set!

Shop the Last Chance Sale and all the Stampin’ Up! products HERE!

Expressions In Ink Floral Hello Card

Expressions In Ink Floral Hello Card

As I was cleaning up my stamping supplies from making another card, I spied this paper that just looked beautiful (because it IS beautiful!!) and I got everything out again and made this Expressions In Ink Floral Hello Card! I knew I could just make a very simple card because the paper is so pretty and you really don’t need too much else.

I have loved this Expressions in Ink Specialty Designer Series Paper since it came out in the Stampin’ Up! Annual Catalog. The artistic designs on the paper plus the gold foiling make it exceptionally beautiful. I started with a card base of Polished Pink, one of the new In Colors this year. You could choose from several other colors for this same card since there are so many colors in the designer paper, like Pale Papaya or one of the many greens we have. Before adhering the designer paper to the card base, I wrapped a piece of Polished Pink 3/8″ Open Weave Ribbon around. I love this ribbon in all the In Colors.

The greeting is in the Artistically Inked Stamp Set. It is stamped in Polished Pink on Basic White and die-cut with a small die in the Ornate Frames Dies. I adhered it to a die-cut Gold Foil piece with the fancy ends, also a die in the Ornate Frames Dies. And to help all that to stand out, I die cut a fancy circle in the Tasteful Labels Dies in Polished Pink. The pink die-cut circle is adhered right to the card and then the greeting is popped up on Stampin’ Dimensionals. You could add a jewel or two to the greeting if you wanted to.

This is an easy card with a simple card design, maybe only the greeting is a little fancier. It’s all about the fancy paper! Here is a similar card I made back in July with some added die-cut leaves and the Expressions in Ink Ephemera Pack. Get out your Expressions Ink Designer Paper and make a card like my Expressions In Ink Floral Hello Card.

SHOP STAMPIN’ UP! ONLINE HERE!

Expressions In Ink Hello Card

One day I made another card similar to this Expressions In Ink Hello Card and thought I might as well make another one while I had all this pretty paper out! I decided to pretty much copy the card on the front of the new Stampin’ Up! Annual Catalog except I changed the paper out to this gorgeous one with the gold foil accents!

This card starts with a base of Polished Pink Cardstock. Then I added a layer of the Expressions In Ink Specialty Designer Series Paper, one with lots of pink and Pale Papaya flowers on it with some leaves, flower centers, and small blossoms in gold foil. It’s just beautiful paper!

I die cut the long leafy piece from the Artistic Dies and colored it with different shades of green ink applied with Blending Brushes. This die-cut piece went down first on the card to go underneath all the other extra pieces. As I have said before if only I had remembered to use Adhesive Sheets when I die cut this piece so I could just pull off the backing and I’d be all set with adhesive! I never think of it ahead of time, though, so I had to use teeny tiny drops of Multipurpose Liquid Glue.

I stamped the flower in the Artistically Inked Stamp Set and die-cut it, as well as the solid leaves. Also stamped is the word “hello” and popped up over a strip of the Pale Papaya & White 1/2″ Ribbon. After that, the flower and leaves are popped up over the end of the greeting. I added extra little gold pieces from some retired product, but when it is available again, you could use something in the Expressions In Ink Ephemera Pack.

This Expressions In Ink Designer Paper is so gorgeous you almost don’t need very much else on the card. Here’s another card I made with one of the other sheets of the paper. I hope you feel very artistic when you use this lovely paper making cards of your own possibly similar to my Expressions In Ink Hello Card.

SHOP STAMPIN’ UP! ONLINE HERE!

Expressions In Ink Gatefold Thank You Card

Expressions In Ink Gatefold Thank You Card

The photo of this Expressions In Ink Gatefold Thank You Card doesn’t do this Specialty Designer Series Paper justice! Once you open the package, you cannot stop “oohing and aahing” over the beauty of it! The gold foil accents and the watercolor/alcohol ink images are just stunning.

This paper is the Expressions In Ink Specialty Designer Series Paper and I think it is some of the most striking papers we have ever had! Nothing can compare to having the paper in your hands to see how beautiful it is. No photos can come close. My post yesterday has photos of some of the sheets of paper and a card but even then, the paper is even better in person.

This card was fun to make and easy. It’s called a gatefold card because instead of the 8 1/2″ x 5 1/2″ paper that we usually start our cards with, folded in half, this card is folded in from each side which makes the “gatefold”. Start with your card base of 8 1/2″ x 5 1/2″ and score 2 1/8″ from each end (or 2 1/8″ and 6 3/8″). This gives you a standard card width of of 4 1/4″ in the center, with the two ends folding over like doors (gates) over that area.

Decorate each “gate” with a piece of designer paper cut at 5 3/8″ x 2″. This leaves just a very narrow margin of cardstock showing so you can cut it smaller at 5 1/4″ x 1 7/8″ if you like. The cardstock I used on this card is Pale Papaya, one of the new In Colors.

For a gatefold card, make a center piece with the greeting or some other image to be adhered only on the left side flap so the card can be opened. Or you can make a bellyband that goes around the card to hold it closed. On this card, I die-cut a piece of Pale Papaya with one of the Scalloped Contours Dies (the second from the smallest die). After you cut out this piece, you will notice something different about it. There are actually slits around the edges that you can use for other creative opportunities, like inserting cardstock strips or ribbons through those. But otherwise, you can just use this die-cut piece as a layer or a focal point. For the greeting, I simply cut a piece of Basic White that would fit inside the Pale Papaya piece and stamped the “thanks” on it in Pale Papaya Ink. This was adhered to the left side of the card by figuring out where the middle of that piece was (count the scallops at the bottom!) and making sure I only put glue on the left side. The greeting is from the Artistically Inked Stamp Set. You can purchase the stamp set and dies that go with the stamp set, the Artistic Dies, together in a Bundle and save 10%.

To embellish, I tied a little Pale Papaya 3/8″ Open Weave Ribbon into a bow and adhered it to the greeting. Then I also added a few of the adhesive-backed iridescent sequins that come in the Expressions in Ink Ephemera Pack.

On the inside of the card, I added a layer of Basic White, stamped with a flower and leaves from the Artistically Inked Stamp Set in Pale Papaya and Just Jade Ink. You can also see in the photo below how the greeting looks from the inside of the card.

Expressions In Ink Gatefold Thank You Card Inside

Be sure to check out the Expressions in Ink Suite or at the very least the designer paper, the Expressions In Ink Specialty Designer Series Paper! You will easily make beautiful cards and projects using this paper at a minimum, like this Expressions In Ink Gatefold Thank You Card.

SHOP STAMPIN’ UP! ONLINE HERE!

Expressions in Ink Birthday Card With Gold Foil

Expressions In Ink Birthday Card With Gold Foil

THIS PAPER!!! Expressions in Ink Specialty Designer Series Paper (155464) Order it!

Okay, that’s really all that needs to be said for this blog post! But since you probably want to know more about the card and the paper, I’ll continue.

When I first saw a Stampin’ Up! video giving us Demonstrators a sneak peek at some of the new Annual Catalog products, I fell in love with this Expressions in Ink Suite! And when I saw it online in the catalog I wanted to order it right away. But it was not on our Demonstrator pre-order so I had to wait just like everyone else. My order just came and I have to say, when I opened this package of paper and looked at the sheets, I just gasped! It is beautiful and striking with the gold foil accents on one side of the sheets. You must have it!

Here are closeups of some of the sheets of paper, but even these do not do it justice!

Expressions in Ink Specialty Paper1
Expressions in Ink Specialty Paper2
Expressions in Ink Specialty Paper3
Expressions in Ink Specialty Paper4

For the card, I started out copying the catalog sample on page 96 in the upper right of the samples. It turned out not exactly the same. I dared to cut into one of the papers, trying to match the pattern I could see on the catalog page. Then I stamped the large and small flowers from the Artistically Inked Stamp Set plus the small individual leaves. The large flower is stamped in Polished Pink Ink and the small flower in Pale Papaya. The leaves are stamped in Just Jade Ink since the card base will be Just Jade. You can choose from lots of coordinating colors!

Expressions In Ink Card Beginning

Now when I stamped these flowers and leaves, I didn’t give a lot of thought ahead of time to that gold foil piece placed over the top on the sample. In the Ephemera Pack, I was thinking that there would be individual foil cutout flowers, leaves, etc. to place over my stamped images, but there were not! The pack will still be fun to play with, it just didn’t have what I was expecting. Then I realized, I just needed to die-cut a gold foil piece from the Artistic Dies. While my flowers and leaves lined up pretty well with the die-cut, and while it doesn’t and shouldn’t be perfect because this is a watercolor look, I did add another stamped leaf and then got my foil to line up pretty well.

Expressions In Ink Birthday Card With Gold Foil

I highly recommend using Adhesive Sheets on the back of the Gold Foil Sheets before die-cutting this intricate design, which I always forget, but I did manage to use teeny tiny dots of the Multipurpose Liquid Glue on the back. The greeting comes in the stamp set and I stamped that in Polished Pink Ink and placed it in a lower position than on the catalog sample. For a little extra, I used a strip of the Just Jade & Gold 3/8″ Braided Ribbon, a little frayed on the ends, and adhered just below the greeting a tiny bit. And for a little more bling, I wanted to try out the little adhesive-backed iridescent sequins in the Ephemera Pack. You can see about five of those placed around the card.

This is a relatively easy card to make, using both stamping and designer paper, or rather stamping ON the designer paper, plus the die-cut Gold Foil accent and other embellishments. I suggest you order this paper, or the whole Suite of products sooner rather than later because once word gets out about how beautiful this Suite is, it could be backordered by the time you decide to get it. Hopefully, Stampin’ Up! anticipated how popular this Suite would be and ordered plenty!

You might also consider the June Paper Pumpkin Kit which will coordinate with this Suite! Even if you subscribed before and dropped, you may want to come back just for this kit at least if you like the style of the Expressions In Ink Suite of products!

Here’s another view of my card without so much glare from the foil! I hope you are as attracted to this Suite as I am!

Expressions In Ink Birthday Card With Gold Foil Closeup

SHOP STAMPIN’ UP! ONLINE THIS WEEKEND!