Tag Archives: gift bag

Springtime Joy Gift Bag

Springtime Joy Gift Bag

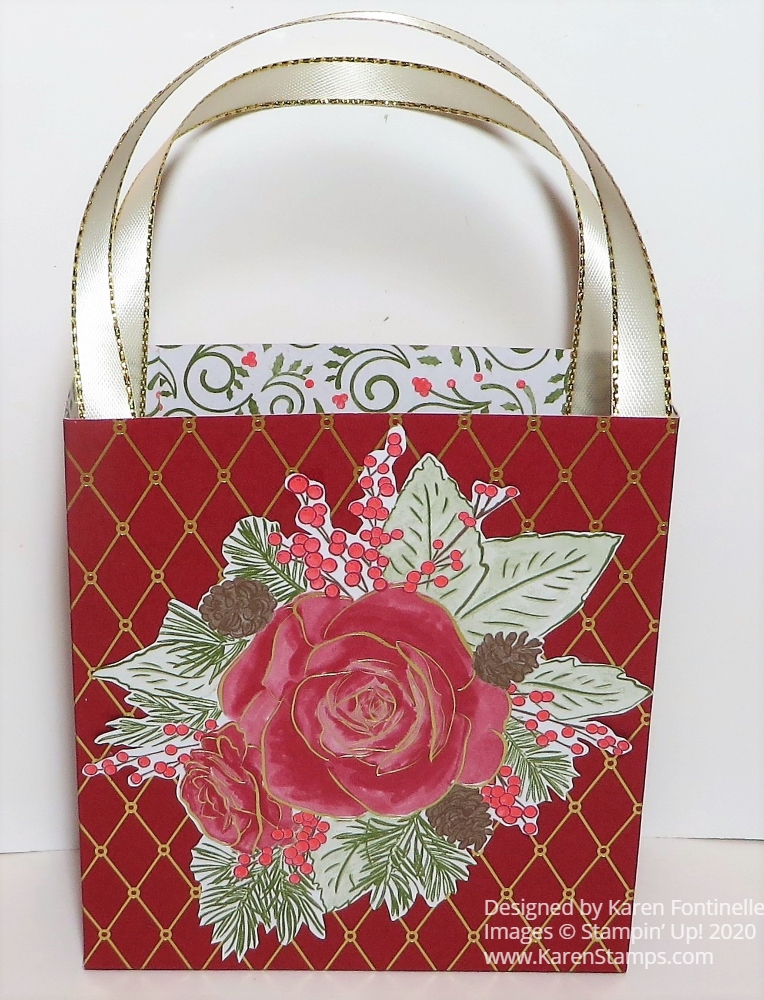
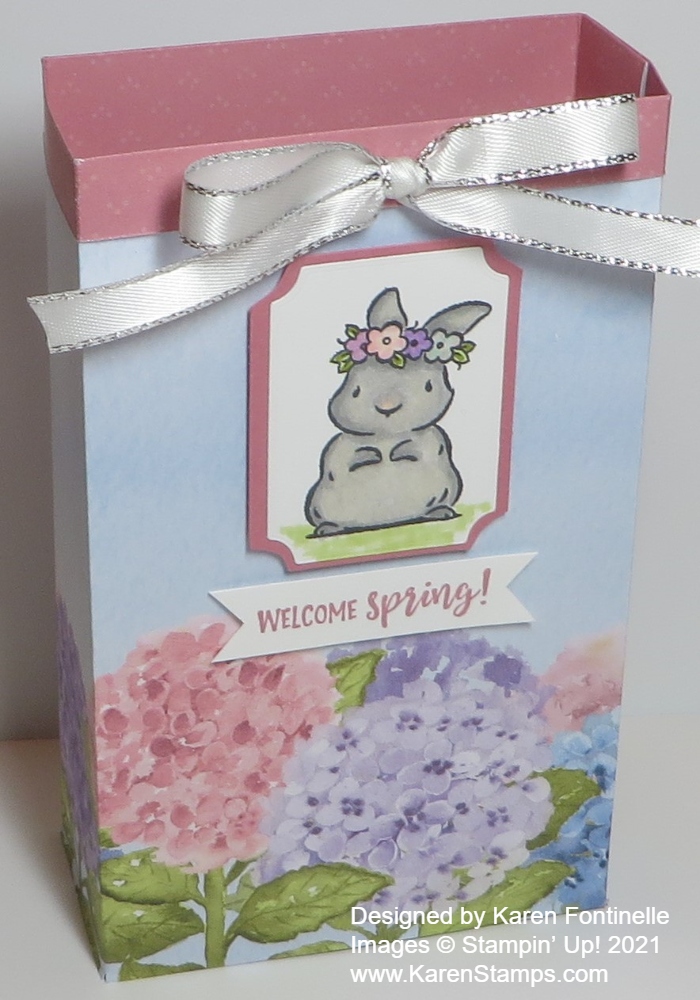
Spring will be coming even though many places are in the midst of a very cold winter right now, so I combined hydrangeas and a bunny for spring in this Springtime Joy Gift Bag. This would be cute for Easter treats or a gift or for Mother’s Day in May or any other time!

I started off wanting to make this gift bag with the Hydrangea Hill Designer Series Paper just as you see, with the border of hydrangeas at the bottom of the bag with room in the plain area for a greeting or whatever I would come up with. I wanted to use that sheet that has the borders of hydrangeas at the top and bottom. Shortly, I realized that if i scored the paper like normal, most of the hydrangea images would end up at flaps at the bottom of the gift bag! So I had to engineer an extra piece of cardstock at the bottom to make the bottom flaps without cutting into the hydrangeas!

I did a little math and added on a 12″ strip of Old Olive cardstock to the bottom of the hydrangea piece.

Springtime Joy Gift Bag Inside Scoring

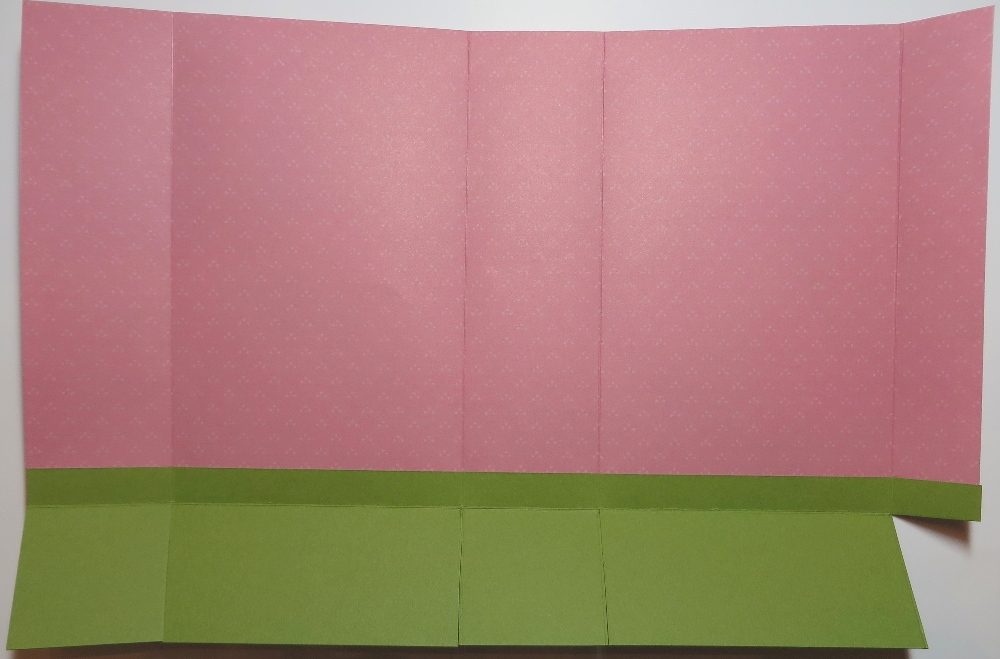
To make this gift bag, I cut the designer paper at 6 3/4″ x 12″. Make sure your hydrangeas are where you want them before you cut! The Old Olive piece is 2 1/4″ x 12″. I adhered just 1/2″ of the Old Olive to the designer paper because I wanted 1 3/4″ to be the bottom of the gift bag.

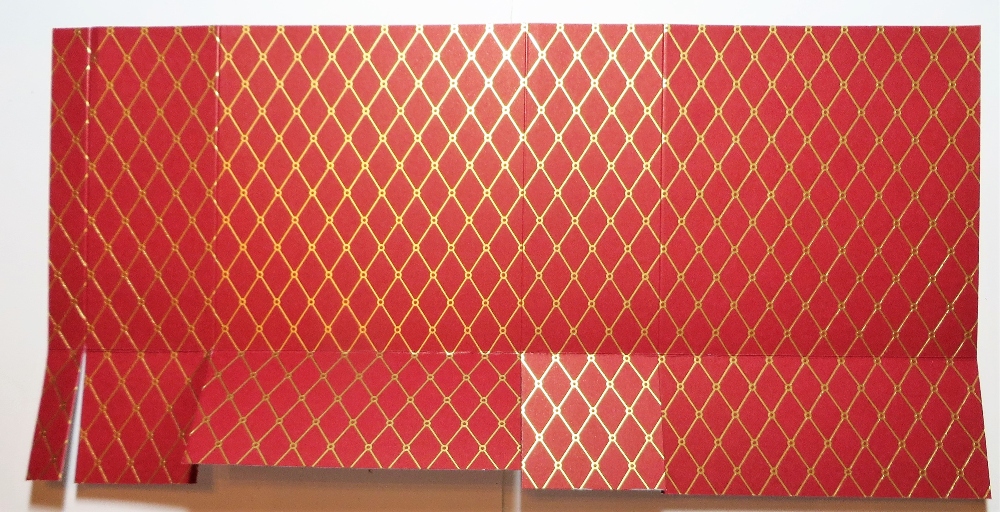
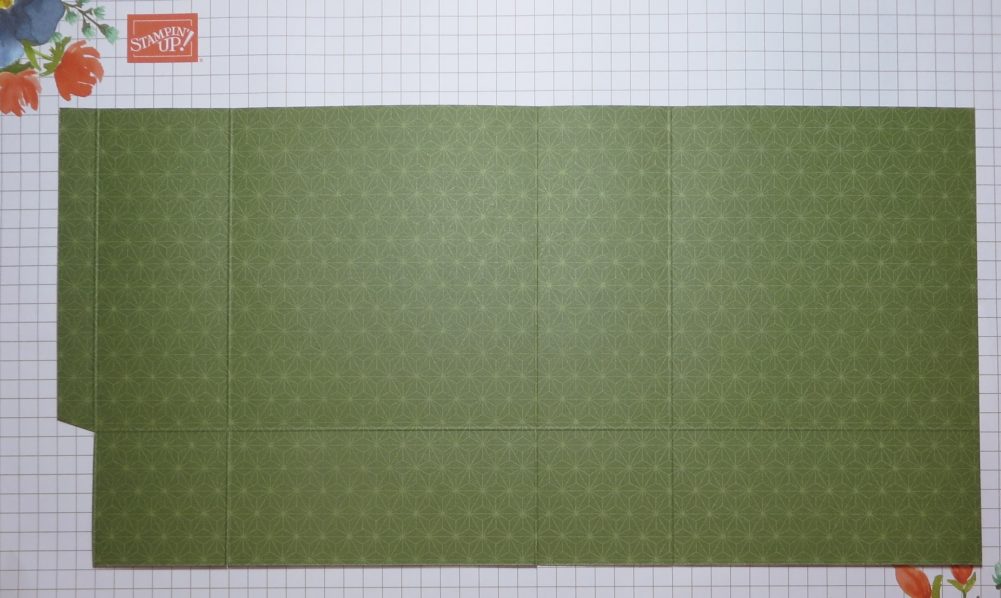
Score the bag and Old Olive piece at 1 3/4″, 5 1/2″, 7 1/4″, and 11″. Then turn the paper and score the Old Olive portion at 1 3/4″ and 8″. This gives a 1/2″ lip at the top of the bag I folded over to show the inside color of the bag for contrast.

Springtime Joy Gift Bag Outside Scoring

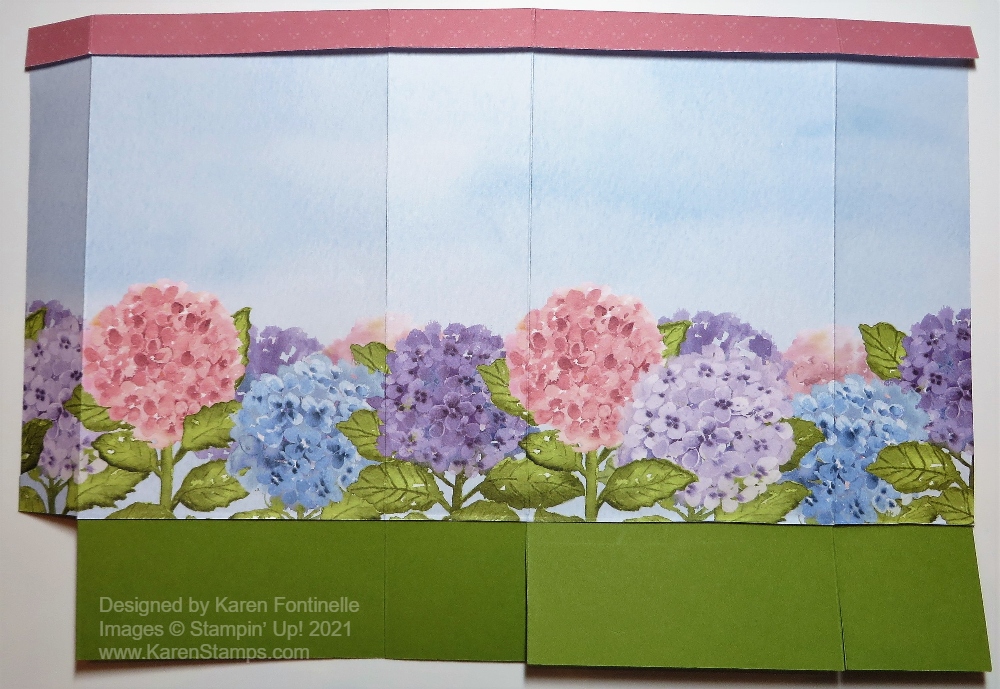
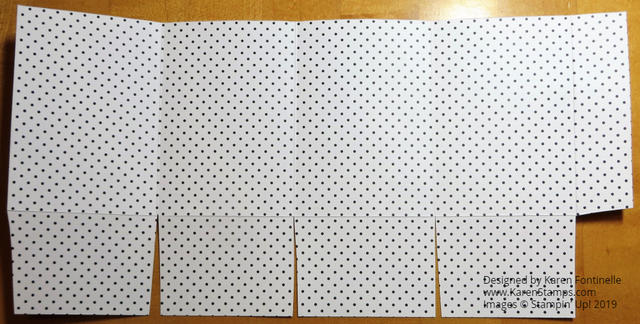
Cut up from the bottom on all the scored lines up to the edge of the designer paper. Normally this would all be the same paper, of course! Then cut off just the little narrow piece of the Old Olive as shown in the photos above.

Next, crease all the score lines, fold and assemble. Put some adhesive on that narrow side about the cut-off piece and fold the other side over to make the seam. Form into a box shape and fold in the flaps at the bottom, applying as much adhesive as you think necessary to close the bottom of the bag. Reach in from the top of the bag with a ruler or bone folder to press down from the inside on those bottom tabs to make sure everything is stuck together well.

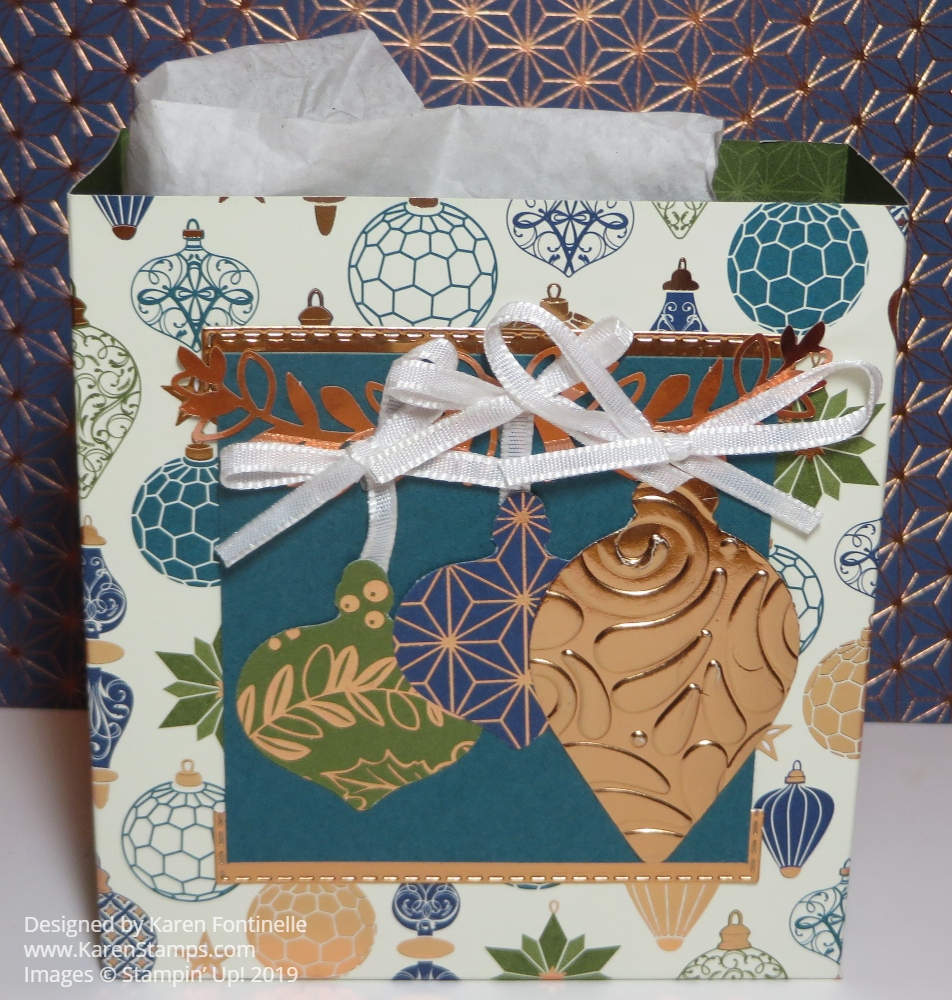
Once you have the bag made, you can embellish however you like. You can even punch some holes in the top and tie ribbon through to hold the bag closed. Just pinch in the sides a little to get the top to close. But on my bag, I just tied a separate bow and adhered it with a couple of Mini Glue Dots.

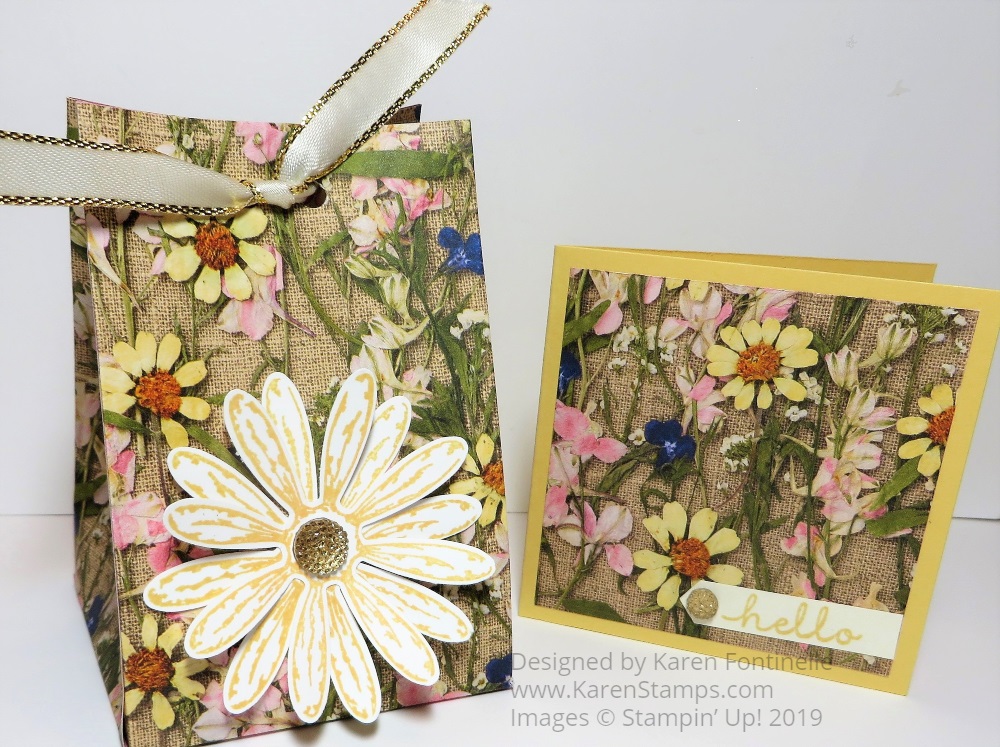
The little bunny is from the cute spring stamp set, Springtime Joy. You’ll find it in the Spring Mini Catalog on page 22. I stamped the little bunny (the lamb was too big!) in Memento Ink and colored in with several Stampin’ Blends markers. For the bunny, I just used the light and dark Smokey Slate plus a little Crumb Cake and then pink and purple flowers for the little crown. I die cut the bunny with a die in the Tasteful Labels Dies. I wanted a layer underneath it so I just cut a Rococo Rose rectangle to fit underneath and with my Paper Snips, cut those curved corners after I adhered the two pieces together. I popped up the bunny with Stampin’ Dimensionals. The greeting is from the same Springtime Joy Stamp Set and stamped in Rococo Rose Ink to match the paper.

I think it’s a cute little bag, a relatively easy gift bag to make. You’ve probably made one just the same way. With the rest of that same sheet of hydrangea paper, check out the cards I made in this post. It would have been nice if the cards fit in the bag, and I could have made them smaller, but I just made regular size cards as a separate project! I can use this little bag as a decoration around Easter time or as a gift! Just think of this Springtime Joy Gift Bag filled with chocolate Easter eggs or a chocolate bunny!

SHOP STAMPIN’ UP! ONLINE!

Christmastime Is Here Designer Paper Gift Bag

Christmastime Is Here Designer Paper Gift Bag

It’s so easy to make a small gift bag for the holidays like this Christmastime Is Here Designer Paper Gift Bag. You would be surprised! I didn’t realize this designer paper was still available in the Stampin’ Up! Online Store from last year! It’s so beautiful with rich colors so you might want to see if you still have some that you purchased last year and stock up with some more or pick up some for the first time.

This gift bag is made with the Christmastime Is Here Specialty Designer Series Paper. Last year it was a special release or something and I used most of my paper but I had placed it in with my retired paper. Something told me to check, and I found it still in the Online Store! It certainly is beautiful paper to use for Christmas! I’m glad it is still around!

All you need to make a gift bag like this one is a 6″ x 12″ piece of designer paper or cardstock. Score at 4″, 5 3/4″, 9 3/4″, and 11 1/2″. Turn the paper so the short edge is at the top and score at 1 3/4″. This will make the bottom flaps of the bag. Cut those short bottom tabs up to the 1 3/4″ score line. Cut off the little 1/2″ tab on the bottom. Fold on all the score lines and crease well with the Bone Folder.

Christmastime Is Here Designer Paper Gift Bag Scoring

Adhere the tab on the end to the other side to assemble the bag. The adhere the flaps on the bottom. You can use whichever adhesive you like. I used Stampin’ Seal+, but you could also use Multipurpose Liquid Glue if you like a little “wiggle room” to get things lined up. You will be able to see how the bag goes together as you start to assemble it.

After you have the bag made, you can decorate it however you like. I chose to cut out by hand the pretty roses and leaves from another sheet of the designer paper. I was going to add a greeting but I liked just the flowers on the front of the gift bag.

I added handles made with two pieces of ribbon. The ribbon is the Gold 3/8″ Metallic Edge Ribbon, one of my favorites. I just attached them with a Mini Glue Dot on the ends and adhered inside the bag.

All you need to do is add a small gift or treat and your gift is ready to go!

Check out the Christmastime Is Here Designer Paper in the Online Store and add it to your Christmas papers to use!

Shop Stampin’ Up! Online HERE!

Peaceful Poppies Gift Bag With Poppies

Peaceful Poppies Gift Bag With Poppies

As I was looking through what is left of my Peaceful Poppies Designer Series Paper, I had a full sheet of this poppy floral pattern and thought it looked so pretty and that it would make a lovely Peaceful Poppies Gift Bag With Poppies. You could use this gift bag for a small gift for Mother’s Day or a birthday or any special occasion. There will be graduations coming up even, perhaps, without graduation ceremonies this year. Making your own gift bag out of pretty Stampin’ Up! designer paper would make a very special gift presentation!

You can make this gift bag with just half a sheet of designer paper, whichever one you choose to use. I used the Peaceful Poppies Designer Series Paper to make the bag. Start with the paper cut to 6″ x 11 3/4″. Using the Paper Trimmer or the Simply Scored scoring tool, score along the long side at 1 1/4″, 5 1/4″ 6 1/2″ and 10 1/2″. Turn the paper so the short end is at the top of the board and score at 1/4″ on one side, then at 1 1/4″ on the other side. Pay attention to the pattern on the designer paper so the bag will have the design going the correct way. The narrow 1/4″ scored area will be the part you will fold over to make a smooth top edge. The other long scored 1 1/4″ area will be the flaps at the bottom of the bag.

Peaceful Poppies Gift Bag Diagram

Crease all the score lines and fold over the narrow 1/4″ piece at the top of the bag. If you prefer you could fold it to the outside if you’d like that side to show as a contrast. OR don’t score that 1/4″ line and have your bag be 1/4″ taller. Use some adhesive of choice to adhere that to the inside of the bag.

Use the Classic Label Punch to punch a handle at the top of the bag. You can squish the front and back sides together and try to center the punch to make the handle opening or you can do one side at a time.

Assemble the bag folding on all the scored lines and flaps. Then decorate for the occasion.

Peaceful Poppies Gift Bag Top View

To decorate my gift bag, I die cut two large poppies using Poppy Parade for the body of the flower and Flirty Flamingo for the outline, plus Basic Black for the center. The leaves are Old Olive and Pear Pizzazz. I tied a bow of Poppy Parade 1/2″ Textured Weave Ribbon separately (after trying to tie it onto the handle unsuccessfully!) and adhered it to the handle with Mini Glue Dots.

In this photo you can see the actual designer paper better from the back of the bag and how pretty it is:

Peaceful Poppies Gift Bag Back View

While the Peaceful Poppies Designer Series Paper is going away (get it while it lasts in the Last-Chance List!), the two sets of dies that go with the Suite, the Poppy Moments Dies and Painted Labels Dies, will carry over to the new catalog!

Add some tissue paper and a gift inside, maybe make a matching gift card and you’ll have a charming gift to give someone special! Here’s a matching card idea you could even use to go with the bag! Just cut half a sheet of designer paper and make a gift bag with the basics of this Peaceful Poppies Gift Bag With Poppies.

A Recycled & Decorated Shopping Bag For Valentine’s Day

A Recycled & Decorated Shopping Bag For Valentine's Day

Now and then good things come from cleaning and organizing like this Recycled & Decorated Shopping Bag For Valentine’s Day. As I went through my overflowing “bag of bags” the other day, I found this cute black and white striped shopping bag from Sephora. It has the printed name on the front and the back so I needed to decorate both sides. I love to do this with any decent small shopping bags that I get at a store, but you can also buy kraft or colored bags at any craft store. I think it is fun to decorate and embellish a shopping bag and turn it into a personalized gift bag!

Here is a bag I changed into a birthday gift bag with some stamping and die cuts! The possibilities are endless!

Since Valentine’s Day is coming up, you might have a gift you need a gift bag for so perhaps this will give you some ideas. You, too, can look through your stash of bags and see what you find! Remember, hearts can be for any time so you can use this idea past Valentine’s Day!

To decorate this bag, I simply used a piece of Gold Glimmer Paper for the background and die cut a Real Red heart with one of the hearts in the Stitched Be Mine Dies in the Stampin’ Up! Annual Catalog.

The two center hearts are punched with the Heart Punch Pack. I stamped a greeting from the Heartfelt Stamp Set on Whisper White and punched with the plain-edge heart, then layered it on a Gold Glimmer scalloped-edge heart. You get both punches in the Heart Punch Pack. I usually find it’s best to use the Multipurpose Liquid Glue when adhering something to the glimmer paper.

A Recycled & Decorated Shopping Bag For Valentine's Day on Back

For the back of the bag, I just die-cut three different sized hearts using the same Stitched Be Mine Dies. I just adhered them together and then adhered them to the bag.

It’s so easy to make your own gift bags by recycling bags you probably already have in your home! Go find one and make a gift bag out of it! Make the gift extra-special by doing something creative with the bag!

Easy Rudolph the Red-Nose Reindeer Gift Bag

Easy Rudolph the Red-Nose Reindeer Gift Bag

Almost every year I have been making one variation or another of a Rudolph gift bag so here is my Easy Rudolph the Red-Nose Reindeer Gift Bag! Usually, I have decorated a kraft shopping bag like in this popular post HERE. Another year I made a smaller 2-4-6-8 bag to look like Rudolph HERE.

This is a similar bag, but a little larger that you make with half a sheet of 12″ x 12″ paper. It’s good to have at least the assortments of each color family of 12″ x 12″ paper on hand because even if we don’t use this size paper real often, sometimes you need a large piece for a project.

Start with a 6″ x 12″ piece of Soft Suede Cardstock or whatever color of brown that you like. Score at 4″, 5 3/4″, 9 3/4″, and 11 1/2″. Turn the paper so the short edge is at the top and score at 1 3/4″. This will make the bottom flaps of the bag. Cut those short bottom tabs up to the 1 3/4″ score line. Cut off the little 1/2″ tab on the bottom. Fold on all the score lines and crease well with the Bone Folder. Adhere the tab on the end to the other side to assemble the bag. Then adhere the flaps on the bottom. I used the Tear & Tape Adhesive. (There’s a piece of white cardstock underneath just for the photo.)

Gift Bag Diagram

Before you completely assemble the box, fold on all the score lines and SEE how it is going to go together. See which area will be the front. I found it was easier to glue on the pieces while the bag was still flat, but either way works since it is so simple!

I used a 2″ Circle Punch for the Red Glimmer Nose, a 1″ Circle Punch for the white part of the eyes and a 3/4″ Circle Punch (retired) for the black. You can use whatever punches or dies you have according to what sizes and look you want your Rudolph to have! Just glue them on to make your reindeer’s face.

For the antlers I used the Sprig Punch. I punched out 3 of the sprigs out of the Whisper White Thick Cardstock since I wanted them sticking up over the top of the bag and thought the Thick Cardstock would be a little stronger. One of the sprigs I cut apart and added one piece to each sprig. I colored all the sprigs with my Stampin’ Blends, two of them with the Light Crumb Cake and one with Soft Suede just to make it a little interesting and adhered the darker piece to the full sprig.

Just fill a cello bag with treats and tie with a ribbon! Put it inside the Easy Rudolph the Red-Nose Reindeer Gift Bag and you’ve got a fun gift for someone!

Brightly Gleaming Ornament Gift Bag

Brightly Gleaming Ornament Gift Bag

This Brightly Gleaming Ornament Gift Bag is perfect for a small gift and looks prettier than anything you would buy in a store! And instead of driving to a store for a little bag, use the time and stay home and make your own! It’s much more fun! Even better, sit down and make more than one bag and you’ll have a collection ready to go!

This gift bag is much like the 2-4-6-8 bag we often make but has a wider dimension. I used the beautiful Brightly Gleaming Specialty Designer Series Paper to make the bag.

Start with a 6″ x 12″ piece of paper. Score at 4″, 5 3/4″, 9 3/4″, and 11 1/2″. Turn the paper so the short edge is at the top and score at 1 3/4″. This will make the bottom flaps of the bag. Cut those short bottom tabs up to the 1 3/4″ score line. Cut off the little 1/2″ tab on the bottom

Fold on all the score lines and crease well with the Bone Folder.  Adhere the tab on the end to the other side to assemble the bag.  Then adhere the flaps on the bottom. The Tear & Tape Adhesive works great as far as strength but does not allow for any “wiggle room” like the Multipurpose Liquid Glue. So use whichever works best for you. You will be able to see how the bag goes together as you start to assemble it.

This little Brightly Gleaming gift bag doesn’t need too much in the way of decoration, but of course, I had to put a little more into it than I needed to! I punched the three ornaments with the Gleaming Ornaments Punch Pack. The copper foil ornament is embossed first with the Swirls & Curls Embossing Folder and then punched, but you could punch it out first.

I thought the ornaments needed a little bit of a background and I happened to have a scrap piece of Pretty Peacock Cardstock handy so I just used that, cutting it down as small as I could. Then I also saw a die cut Copper Foil piece and cut that in half lengthwise to be a top and bottom layer under the Pretty Peacock.

I used some copper foil branches in the Brightly Gleaming Foil Elements to look like the branches the ornaments were hanging from. I used some scrap white ribbon to “hang” the ornaments and then tied small bows.

That’s more embellishing than I needed to do on a little gift bag but it was fun! You could even put a cookie or two inside, tea bags, some jewelry, even a gift card. Make this basic gift bag with half a sheet of 12″ x 12″ paper for any occasion!

SHOP STAMPIN’ UP! ONLINE!

Pressed Petals Gift Bag and Gift Card

Pressed Petals Gift Bag and Gift Card

The Pressed Petals Specialty Designer Series Paper is so pretty and I thought I would make something other than a regular card with it. Here is my Pressed Petals Gift Bag and Gift Card that you could also make for just a small gift. The bag is just 6″ high and the paper is very lightweight so you could put some pieces of candy inside, a piece of jewelry, a gift card, or a diamond ring! (Might as well aim high!)

The Pressed Petals Paper is designed with photographic images of real pressed flower petals. One side of the paper has the flower images, the other side has subtle vintage designs like old sheet music, lines of script, wood grain, and vintage plant descriptions. One design has portions you can cut apart and use on cards, much like the Petal Promenade Paper we previously had.

This bag is one of those easy things to make, as I have done many times before. Start with a 12″ x 6″ piece of designer paper (or cardstock). Score at 1″, 3 3/4″, 6 1/2″ and 9 1/4″. Then turn long ways and score at 2″ to make the bottom flaps. Cut off the smallest little section and cut up on the botton flap score lines to the horizontal score line. Then crease and fold to form the bag. Leave it open at the top or punch two holes and tie it closed with ribbon. Here’s a similar example.

Easy Botanical Butterfly Mini Gift Bag Cutting Diagram

You can see the little bag I made previously HERE with the Botanical Butterfly Paper.

I stamped two daisies with the Daisy Delight Stamp Set and punched out with the Daisy Punch. I like putting one of the Gold Faceted Gems in the daisy center. A new item we have now in the new Stampin’ Up! Catalog is the Perennial Essence Floral Centers, actual fuzzy embellishments to look like the center of real flowers, that you could use.

The ribbon I used is the Gold 3/8″ Metallic Edge Ribbon. Just push the sides of the bag in a little bit and pull the top edges of the bag together to close the top. If you don’t want to get punched holes on all four sides of the bag, punch the front and back holes first before you pull the bag together! You could also hold the top of the bag together with a Mini Library Clip or check the Clearance Rack for two other styles (and bargains!). Don’t forget! Some stamp sets were added to the Clearance Rack the other day you might want to check out!

And while I had the paper out, I decided to make just a cute little matching card, 3″ x 6″ folded in half with a 2 3/4″ x 2 3/4″ piece of designer paper on top. The little “hello” is found in the Bloom & Grown Stamp Set. I thought it was cute for that card and is punched out with the Classic Label Punch to make it easy. Just for a little something, I added the smallest size Gold Faceted Gem on to the greeting to match the bag. I wish it was even smaller but I think it is fine.

Use your Pressed Petals Specialty Designer Series Paper to make simple gift bags like this one plus a gift card to match!