Tag Archives: Painted Labels Dies

Sunshine & Rainbows Brighten Your Day Card

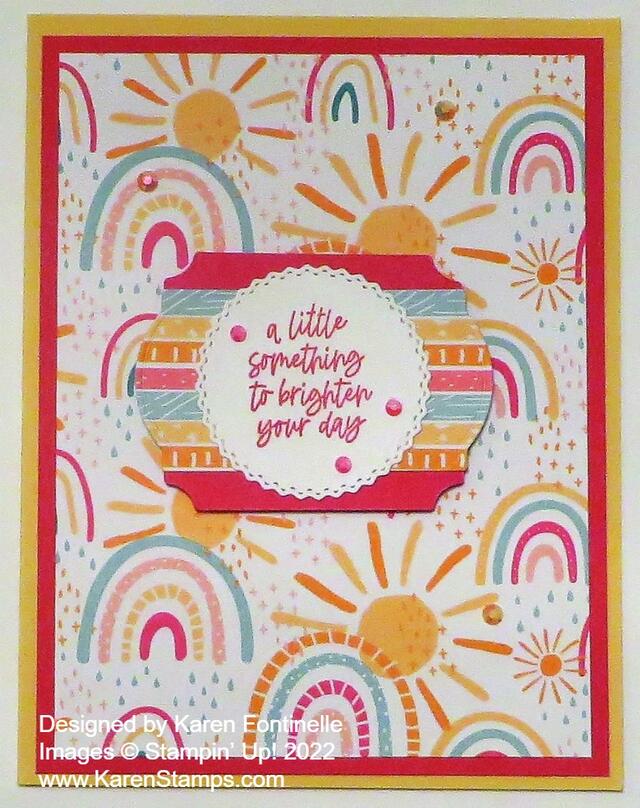
I thought I would make just a simple, bright, and happy card using this cute designer paper available during Sale-A-Bration, and here is my Sunshine & Rainbows Brighten Your Day Card! Now I did make it a little more complicated than it needed to be by layering the greeting the way I did, but I often make things more complicated!

Today I wanted to showcase something you can get FREE during Sale-A-Bration which is one of Stampin’ Up!’s biggest promotions of the year! (And now we even have two Sale-A-Brations each year!) It’s the Sunshine and Rainbows 6″ x 6″ Designer Series Paper on page 8 of the Sale-A-Bration Brochure. It coordinates with the Rainbow of Happiness Bundle in the Spring Mini Catalog on page 18. Buy the Bundle and save 10% over buying the Rainbow of Happiness Stamp Set and the Brilliant Rainbow Dies separately. Even if you don’t have the stamp set and dies, you can use this very cheery rainbow paper to make lovely cards and projects!

As I said, I wanted this card to be bright and happy so I checked the colors that coordinate with the paper. I chose So Saffron cardstock for the card base and layered it with Melon Mambo for a little extra pizzazz in color on which to layer the designer paper. I love this sheet with the sunshine and the rainbows just jumping right out at you! How could you not feel good making this card for someone and think about how happy they will be to find it in their mailbox! Especially these days, we know we could all use some extra pick-me-ups, and certainly, a card in the mail is one of the best!

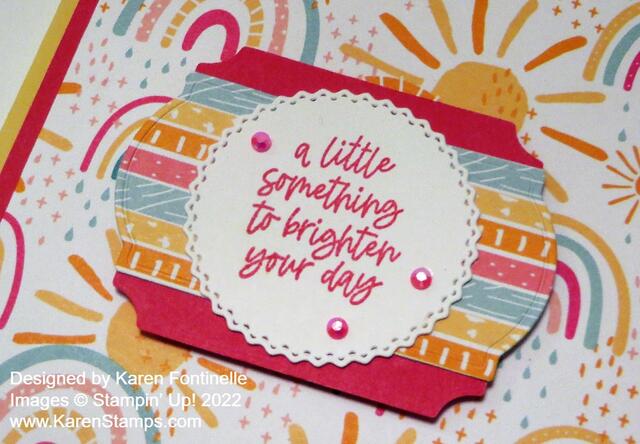
The greeting is in the Rainbow of Happiness Stamp Set and I stamped that in Melon Mambo ink. Then I die cut it with that cute frilly circle in the Tasteful Labels Dies. Then came my dilemma that made this more complicated! What did I want to layer the greeting on to make it stand out better from the bold background? I made several different die cuts and wasn’t totally happy with any one of them. Plus I felt a little adventurous, wanting to use the striped side of one of the papers in the pack. But then would that stand out from the background or add more busy-ness? Finally, I die cut a piece of Melon Mambo cardstock, cut it in half, and then adhered it so it would just peek out at the top and bottom of the layer under the greeting. This is the die in the Painted Labels Dies. But the striped paper is also cut with a different die in the same Painted Labels Dies set!

Of course, since this was to be a bright and happy card, I had to add some sparkle to the card. I added three pink jewels to the greeting from the 2021-2023 In Color Jewels. Even if the colors are not an exact match, these jewels seem to suit the purpose many times because the colors still seem to match or coordinate with even different colors! And I couldn’t stop, I had to add some of the yellow ones to the background of the card!

In the photo below you can see a closeup of the greeting and see how the pieces are layered. As I always say, just keep playing and you will come up with a combination that works!

Enjoy these two months of Sale-A-Bration! With every $50 you spend, you get to choose a FREE Sale-A-Bration product in the brochure! No limits! Spend $100 and have the choice of a special $100 Level product or go ahead and get two $50 Level products! Your choice! Happy Shopping!

SHOP STAMPIN’ UP! HERE!

Peaceful Poppies Gift Bag With Poppies

Peaceful Poppies Gift Bag With Poppies

As I was looking through what is left of my Peaceful Poppies Designer Series Paper, I had a full sheet of this poppy floral pattern and thought it looked so pretty and that it would make a lovely Peaceful Poppies Gift Bag With Poppies. You could use this gift bag for a small gift for Mother’s Day or a birthday or any special occasion. There will be graduations coming up even, perhaps, without graduation ceremonies this year. Making your own gift bag out of pretty Stampin’ Up! designer paper would make a very special gift presentation!

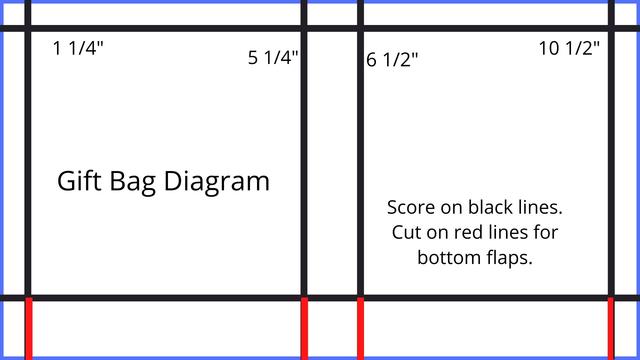
You can make this gift bag with just half a sheet of designer paper, whichever one you choose to use. I used the Peaceful Poppies Designer Series Paper to make the bag. Start with the paper cut to 6″ x 11 3/4″. Using the Paper Trimmer or the Simply Scored scoring tool, score along the long side at 1 1/4″, 5 1/4″ 6 1/2″ and 10 1/2″. Turn the paper so the short end is at the top of the board and score at 1/4″ on one side, then at 1 1/4″ on the other side. Pay attention to the pattern on the designer paper so the bag will have the design going the correct way. The narrow 1/4″ scored area will be the part you will fold over to make a smooth top edge. The other long scored 1 1/4″ area will be the flaps at the bottom of the bag.

Peaceful Poppies Gift Bag Diagram

Crease all the score lines and fold over the narrow 1/4″ piece at the top of the bag. If you prefer you could fold it to the outside if you’d like that side to show as a contrast. OR don’t score that 1/4″ line and have your bag be 1/4″ taller. Use some adhesive of choice to adhere that to the inside of the bag.

Use the Classic Label Punch to punch a handle at the top of the bag. You can squish the front and back sides together and try to center the punch to make the handle opening or you can do one side at a time.

Assemble the bag folding on all the scored lines and flaps. Then decorate for the occasion.

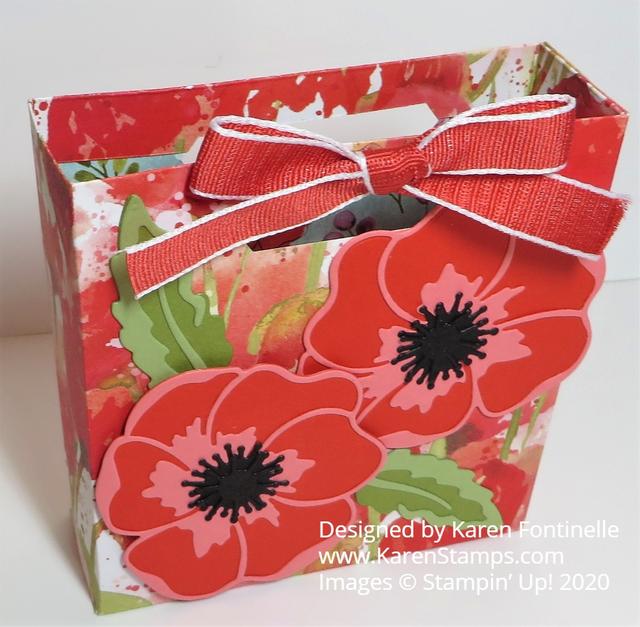
Peaceful Poppies Gift Bag Top View

To decorate my gift bag, I die cut two large poppies using Poppy Parade for the body of the flower and Flirty Flamingo for the outline, plus Basic Black for the center. The leaves are Old Olive and Pear Pizzazz. I tied a bow of Poppy Parade 1/2″ Textured Weave Ribbon separately (after trying to tie it onto the handle unsuccessfully!) and adhered it to the handle with Mini Glue Dots.

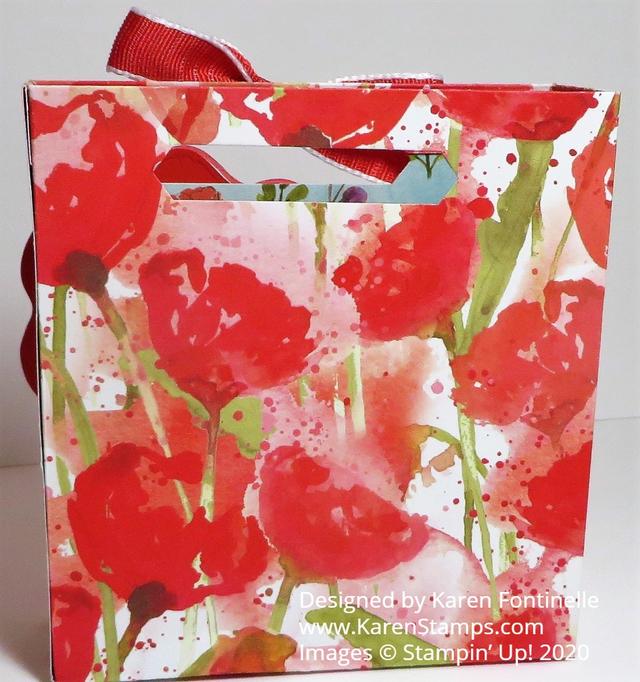
In this photo you can see the actual designer paper better from the back of the bag and how pretty it is:

Peaceful Poppies Gift Bag Back View

While the Peaceful Poppies Designer Series Paper is going away (get it while it lasts in the Last-Chance List!), the two sets of dies that go with the Suite, the Poppy Moments Dies and Painted Labels Dies, will carry over to the new catalog!

Add some tissue paper and a gift inside, maybe make a matching gift card and you’ll have a charming gift to give someone special! Here’s a matching card idea you could even use to go with the bag! Just cut half a sheet of designer paper and make a gift bag with the basics of this Peaceful Poppies Gift Bag With Poppies.

Peaceful Poppies Pizza Box

Peaceful Poppies Pizza Box

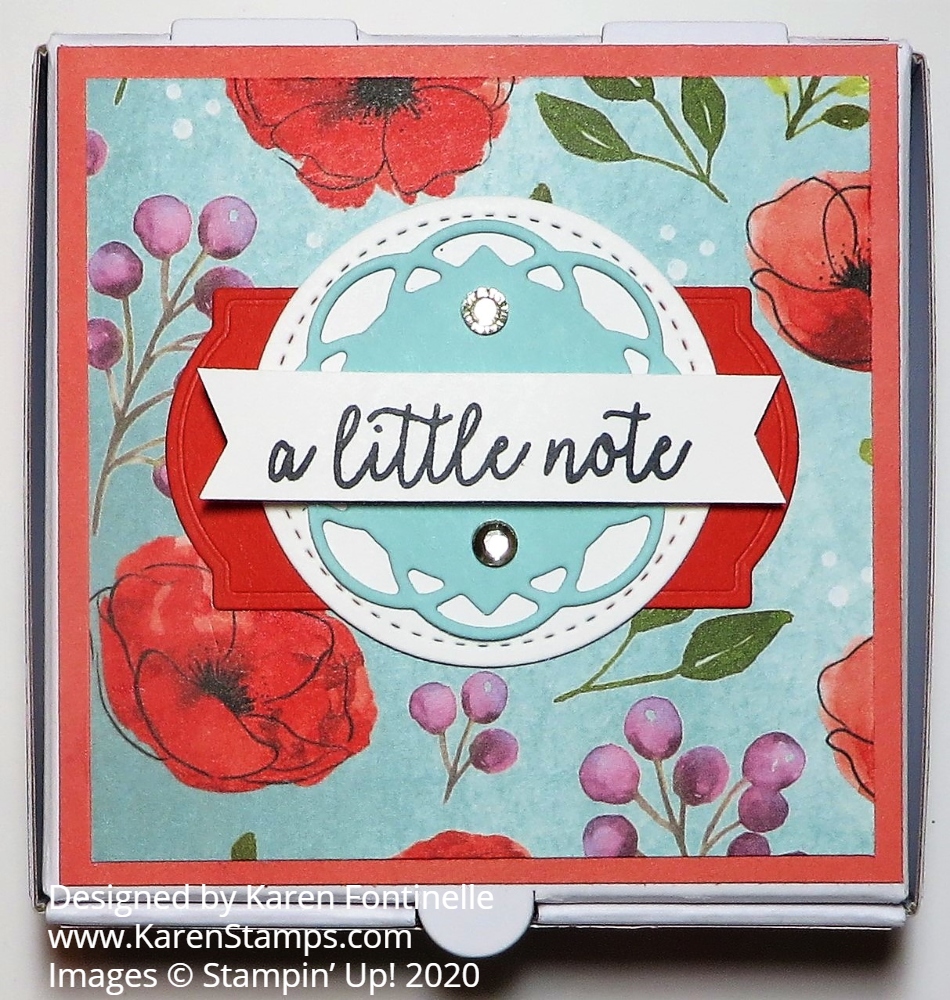
Peaceful Poppies Pizza Box! Say that ten times fast! If you are looking for a little gift idea, look no further than the Stampin’ Up! Mini Pizza Boxes! These boxes will be so cute for you to decorate, whether you are putting a set of 3″ x 3″ notecards inside, a small gift, or a cookie! They are even food safe so no worries there!

These boxes come to you flat, 8 in a package, so you don’t have to worry about a pile of boxes to store! Just take one out when you need one and fold on the scored lines and assemble it into a pizza box shape. Then the fun begins! Decorate for whatever occasion you have or personalize for the recipient of your gift.

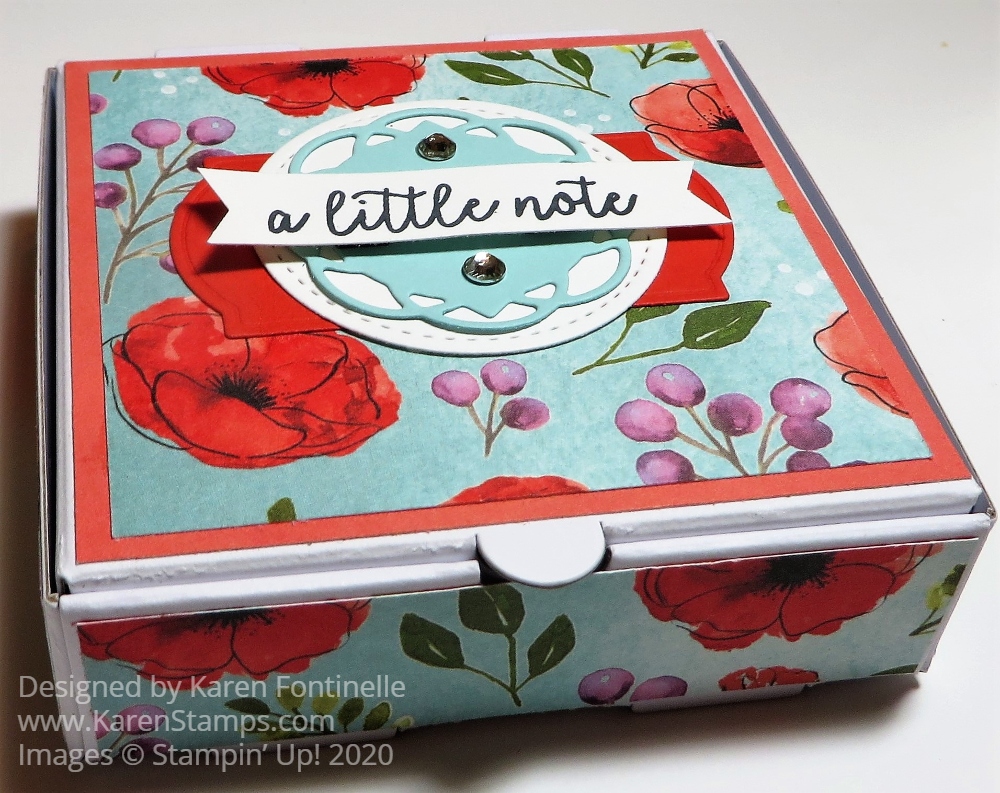
For this pizza box, I decided to use the beautiful Peaceful Poppies Designer Paper. I absolutely love the pattern that I chose on top with the poppies against that Pool Party blue color. As a layer underneath this designer paper, I used another piece of designer paper, the solid watercolor Poppy Parade color. I cut a piece 3 3/8″ square to fit the top of the box and then 3 1/8″ square of the layering designer paper.

For all four sides of the box, I used strips of the Peaceful Poppies DSP, cut 7/8″ wide and just under 3 1/2″ long. You may need to trim your papers slightly differently than mine depending on your box. You could also wrap a ribbon around the box or use a solid color of cardstock. Whatever you like!

I tried several ideas for the top of the box before settling on what you see that I came up with! I used dies from the Painted Labels Dies, the Poppy Parade Cardstock bottom layer and the Pool Party circular diecut. The Whisper White circle I felt was needed to help everything stand out. It is die cut with one of the Stitched Shapes Dies. The greeting is from the Butterfly Gala Stamp Set. It’s a small box and I didn’t want to cover up too much of the lid because I wanted the designer paper to show as much as possible. Since I am putting small notecards inside the box, I thought the greeting was perfect! You wouldn’t have to have it though or you could change it for a birthday or congratulations. The greeting is popped up on Stampin’ Dimensionals and little Basic Rhinestone Jewels added for some bling!

Here is another example using one of the Gold Mini Pizza Boxes from the Holiday Catalog with the Christmastime Is Here Designer Paper. And here is one I decorated for Valentine’s Day two years ago.

Peaceful Poppies Pizza Box Side

Put some Mini Pizza Boxes on your next order so you have them handy for a last-minute or just an extra little gift that you can quickly decorate for someone, like this Peaceful Poppies Pizza Box!

Make Six Cards Out of One Sheet of Designer Paper

Poppy Designer Paper Cutting

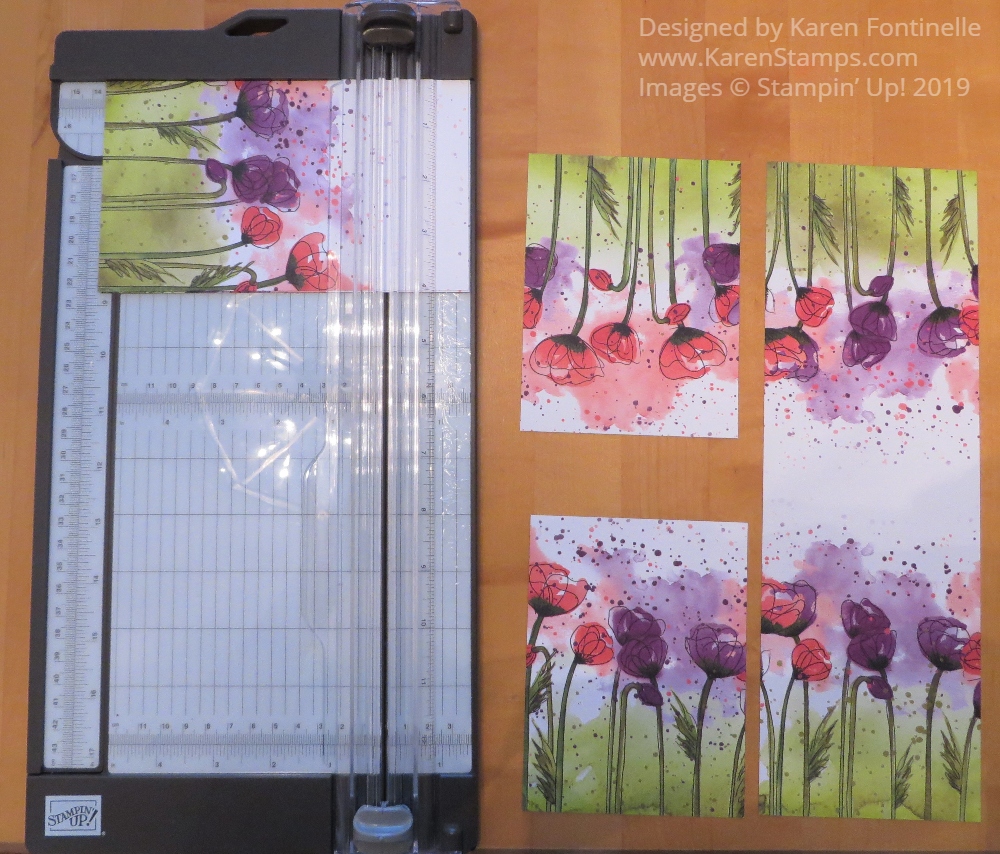
I’ve seen posts by other Demonstrators showing ways to use your designer paper to make lots of cards at one time so I thought I would try to make six cards out of one sheet of designer paper. I decided to use just this one design in the Peaceful Poppies Designer Series Paper. It is the sheet that has poppies on each side with a rather plain area running through the center of the paper.

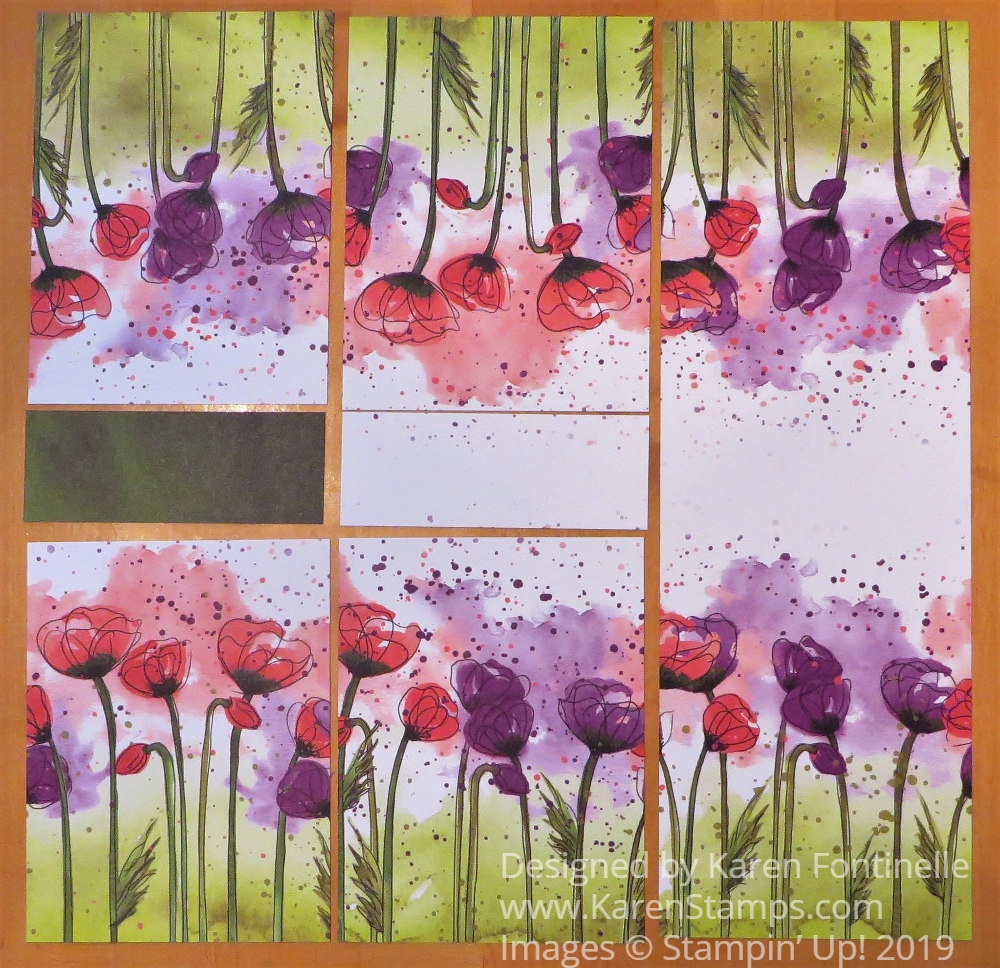
With this, or any, 12″ x 12″ paper, you can cut three 4″ wide strips out of the paper. Then turn each strip and cut at 5 1/4″, the perfect size for a layer on a card. If you do the math, that will use up 10 1/2″ of the paper and you will have pieces left that are 1 1/2″ wide. If you plan ahead, you could cut off a strip 12″ x 1 1/2″ wide and then cut the strips. It probably all depends on the pattern of your paper and how you intend to use it, whether you want longer or shorter scraps of paper leftover.

This particular sheet of paper is different, with the plainer area in the middle. If you cut it as I show in the photos, you can basically cut out the plain area and just get maximum use out of the poppies! Then you can either use the center area for the colored side on the opposite side of the paper or the white side.

I might say that if you are not happy with your paper trimmer, the new Stampin’ Up! Paper Trimmer is really nice! I believe it makes much closer to perfect cuts than the previous one did. I am enjoying mine and do recommend it!

Poppy Designer Paper Cut Up

Another alternative would be to cut some or all strips at 3″ wide and get 4 strips out of the designer paper. In this way, you will not completely cover the card base, which is fine, too. I did some cards like this and added a little accent strip of cardstock along the side of the designer paper. This Peaceful Poppies paper is so pretty, no matter what you do with it, you will make a beautiful card!

Peaceful Poppies Designer Paper Easy Cards

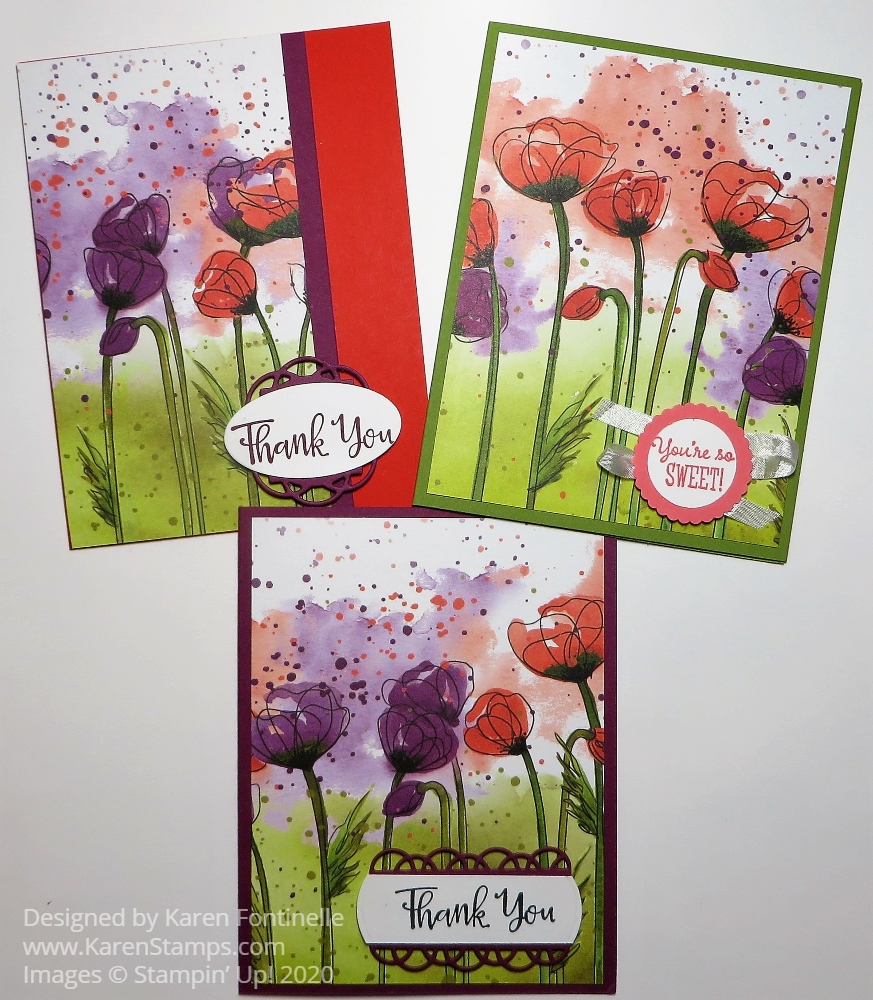
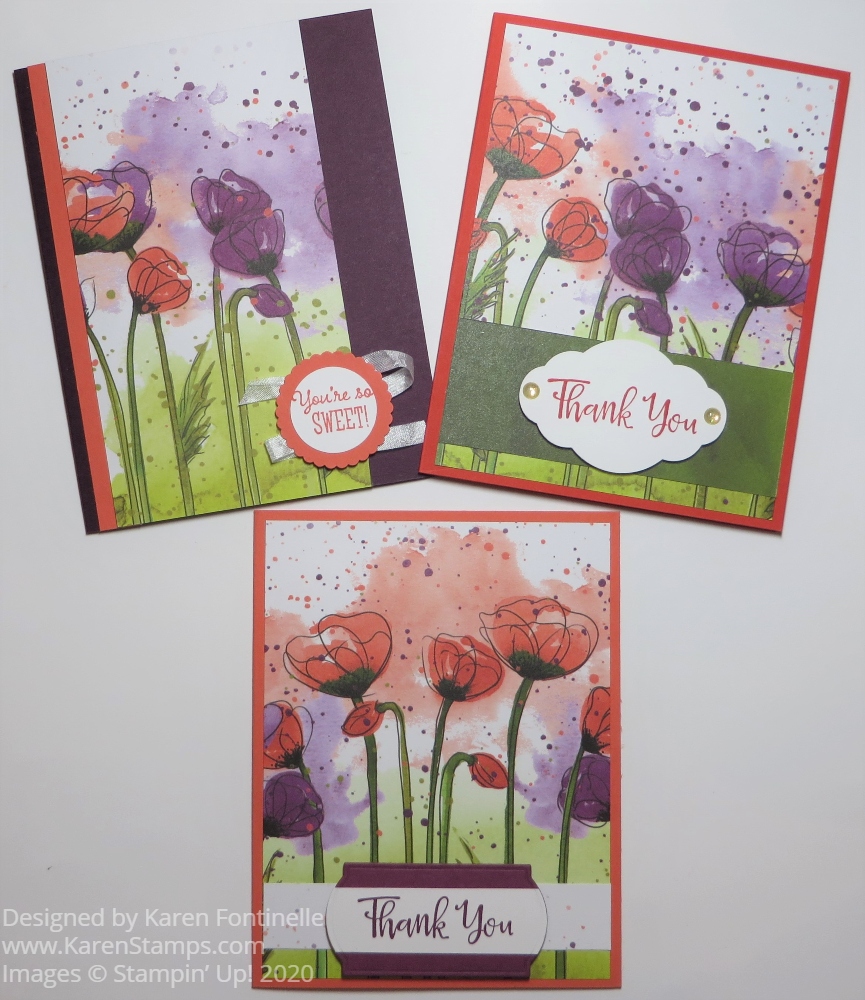
I used several different colors of cardstock that coordinate with the designer paper – Rich Razzleberry, Flirty Flamingo, Old Olive, Calypso Coral, and Poppy Parade. Then just add a greeting, maybe layered on something else and maybe with some embellishments. You can make the card as fancy or as simple as you like at this point.

On the cards above, I used the “Thank You” from the Peaceful Moments Stamp Set and the other greeting from the Little Ladybug Host Stamp Set. On the thank you cards I used die-cuts from the Painted Labels Dies. (I love that little scallop die-cut!) On the other card, I used the 1 3/8″ Scallop Circle Punch for the layer.

Peaceful Poppies Designer More Easy Cards

On these cards, I used another die in the Painted Labels Dies and the Pretty Label Punch. You can see I used two of the excess strips, one green and one the white side behind the greetings, plus some embellishments. You will notice two of the cards in the two photos have the narrower strip of designer paper, cut at 3″x 5 1/2″ with a narrow accent strip of cardstock.

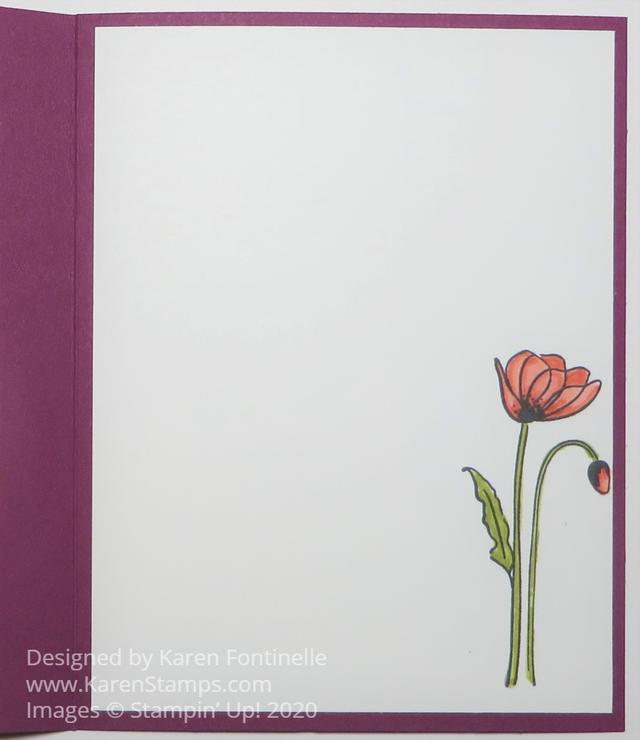
If you want to see what you can do with the inside of the card, I added Whisper White layers to all and stamped a flower from the Painted Poppies Stamp Set in Memento Black Ink. Then I colored in the flower with some Stampin’ Blends markers.

Peaceful Poppies Designer Easy Cards Inside

And there you have it! Ideas for six cards from one sheet of the Peaceful Poppies Designer Series Paper!

SHOP STAMPIN’ UP! DURING SALE-A-BRATION AND EARN FREE PRODUCTS WITH EVERY $50 PURCHASE!

Peaceful Poppies Happiness Card

Peaceful Poppies Happiness Card

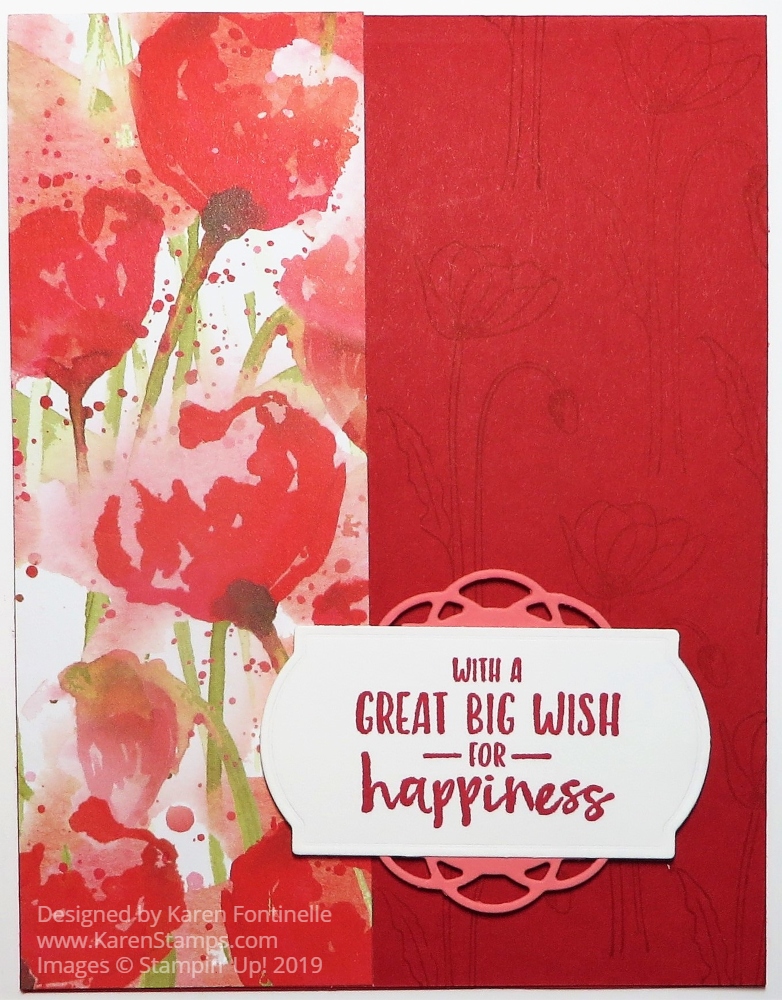
This Peaceful Poppies Happiness Card is another fairly simple card to make! This card opens at the top instead of the side just for something different. It uses a strip of the beautiful Peaceful Poppies Designer Series Paper. Just wait until you get your hands on this beautiful designer paper!

To make this card, the card base is 11 1/2″ x 4 1/2″, folded in half with the fold at the top. I chose Real Red Cardstockalthough I don’t think that’s actually a coordinating color with the designer paper, but I think it looks fine together.

For a little extra interest, I stamped a poppy and stem from the Painted Poppies Stamp Set on the Real Red cardstock that isn’t covered by the designer paper. I inked it up and stamped off before stamping on the card. I could also have used Versamark Ink for that watermark look. If you had ribbon, you could wrap some ribbon around the designer paper before adhering it to the front of the card.

The greeting is from the Sending You Thoughts Stamp Set, one you can get FREE during Sale-A-Bration with a $50 purchase. I stamped it on Whisper White with Real Red ink and then die cut it with a label die in the Painted Labels Dies. Then I used Flirty Flamingo Cardstock and die cut another label in the same set, cut it in half and used it under the top and bottom of the greeting. It just adds a little something although just the greeting die cut with that label die with a little embossed border around the edge was just fine by itself.

You will probably want to get the Painted Poppies Stamp Set and the Painted Labels Dies together in the Painted Poppies Bundle and save 10%!

Check out the whole Peaceful Poppies Suite and see what you’ve GOT to put on your next Stampin’ Up! order! Remember about Sale-A-Bration and getting a free SAB item with every $50 you spend!

SHOP STAMPIN’ UP! ONLINE!