
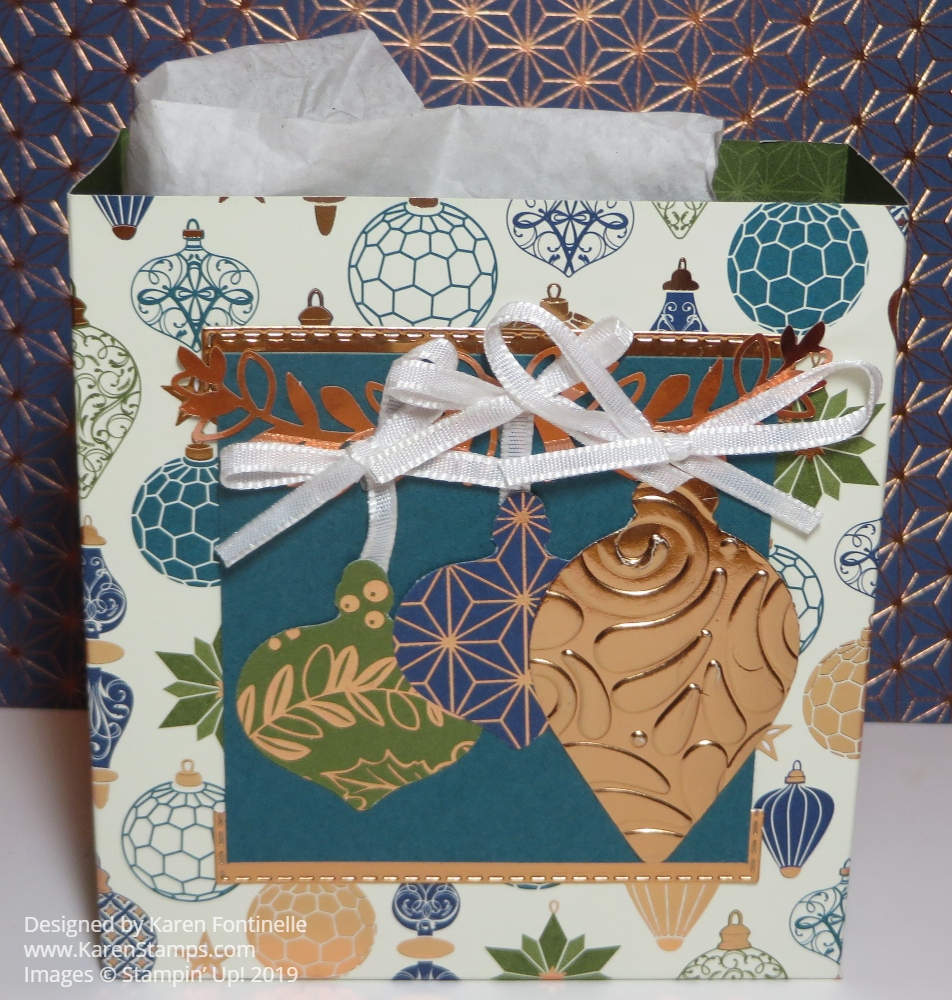
This Brightly Gleaming Ornament Gift Bag is perfect for a small gift and looks prettier than anything you would buy in a store! And instead of driving to a store for a little bag, use the time and stay home and make your own! It’s much more fun! Even better, sit down and make more than one bag and you’ll have a collection ready to go!
This gift bag is much like the 2-4-6-8 bag we often make but has a wider dimension. I used the beautiful Brightly Gleaming Specialty Designer Series Paper to make the bag.
Start with a 6″ x 12″ piece of paper. Score at 4″, 5 3/4″, 9 3/4″, and 11 1/2″. Turn the paper so the short edge is at the top and score at 1 3/4″. This will make the bottom flaps of the bag. Cut those short bottom tabs up to the 1 3/4″ score line. Cut off the little 1/2″ tab on the bottom.
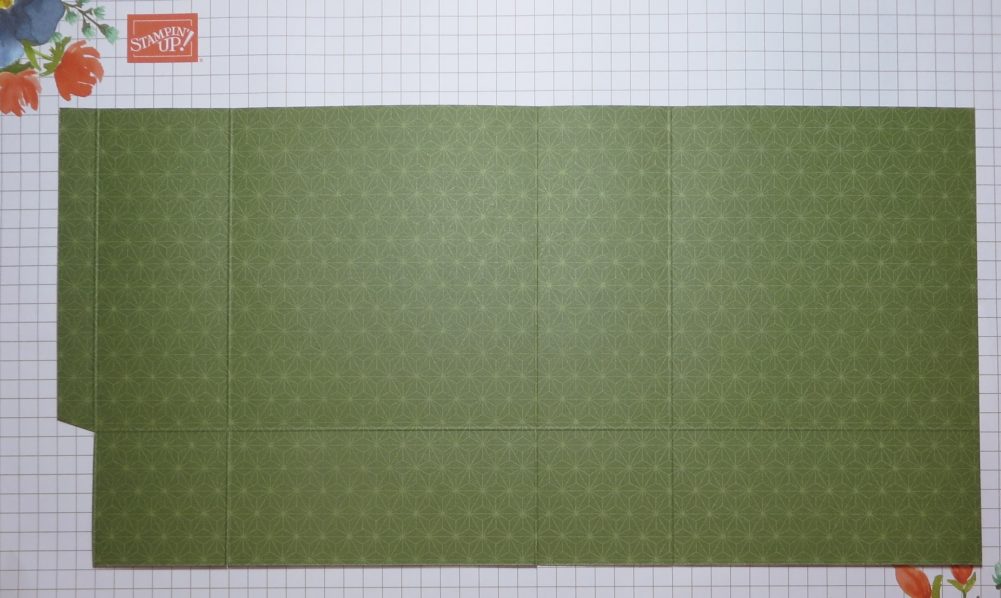
Fold on all the score lines and crease well with the Bone Folder. Adhere the tab on the end to the other side to assemble the bag. Then adhere the flaps on the bottom. The Tear & Tape Adhesive works great as far as strength but does not allow for any “wiggle room” like the Multipurpose Liquid Glue. So use whichever works best for you. You will be able to see how the bag goes together as you start to assemble it.
This little Brightly Gleaming gift bag doesn’t need too much in the way of decoration, but of course, I had to put a little more into it than I needed to! I punched the three ornaments with the Gleaming Ornaments Punch Pack. The copper foil ornament is embossed first with the Swirls & Curls Embossing Folder and then punched, but you could punch it out first.
I thought the ornaments needed a little bit of a background and I happened to have a scrap piece of Pretty Peacock Cardstock handy so I just used that, cutting it down as small as I could. Then I also saw a die cut Copper Foil piece and cut that in half lengthwise to be a top and bottom layer under the Pretty Peacock.
I used some copper foil branches in the Brightly Gleaming Foil Elements to look like the branches the ornaments were hanging from. I used some scrap white ribbon to “hang” the ornaments and then tied small bows.
That’s more embellishing than I needed to do on a little gift bag but it was fun! You could even put a cookie or two inside, tea bags, some jewelry, even a gift card. Make this basic gift bag with half a sheet of 12″ x 12″ paper for any occasion!